WEEK 5
3D Scanning and Printing
Group Assignment:
- Test the design rules for your 3D printer(s).
Individual Assignment:
- Design and 3D print an object (small, few cm3, limited by printer time) that could not be made subtractively.
- 3D scan an object (and optionally print it).
3D Printing
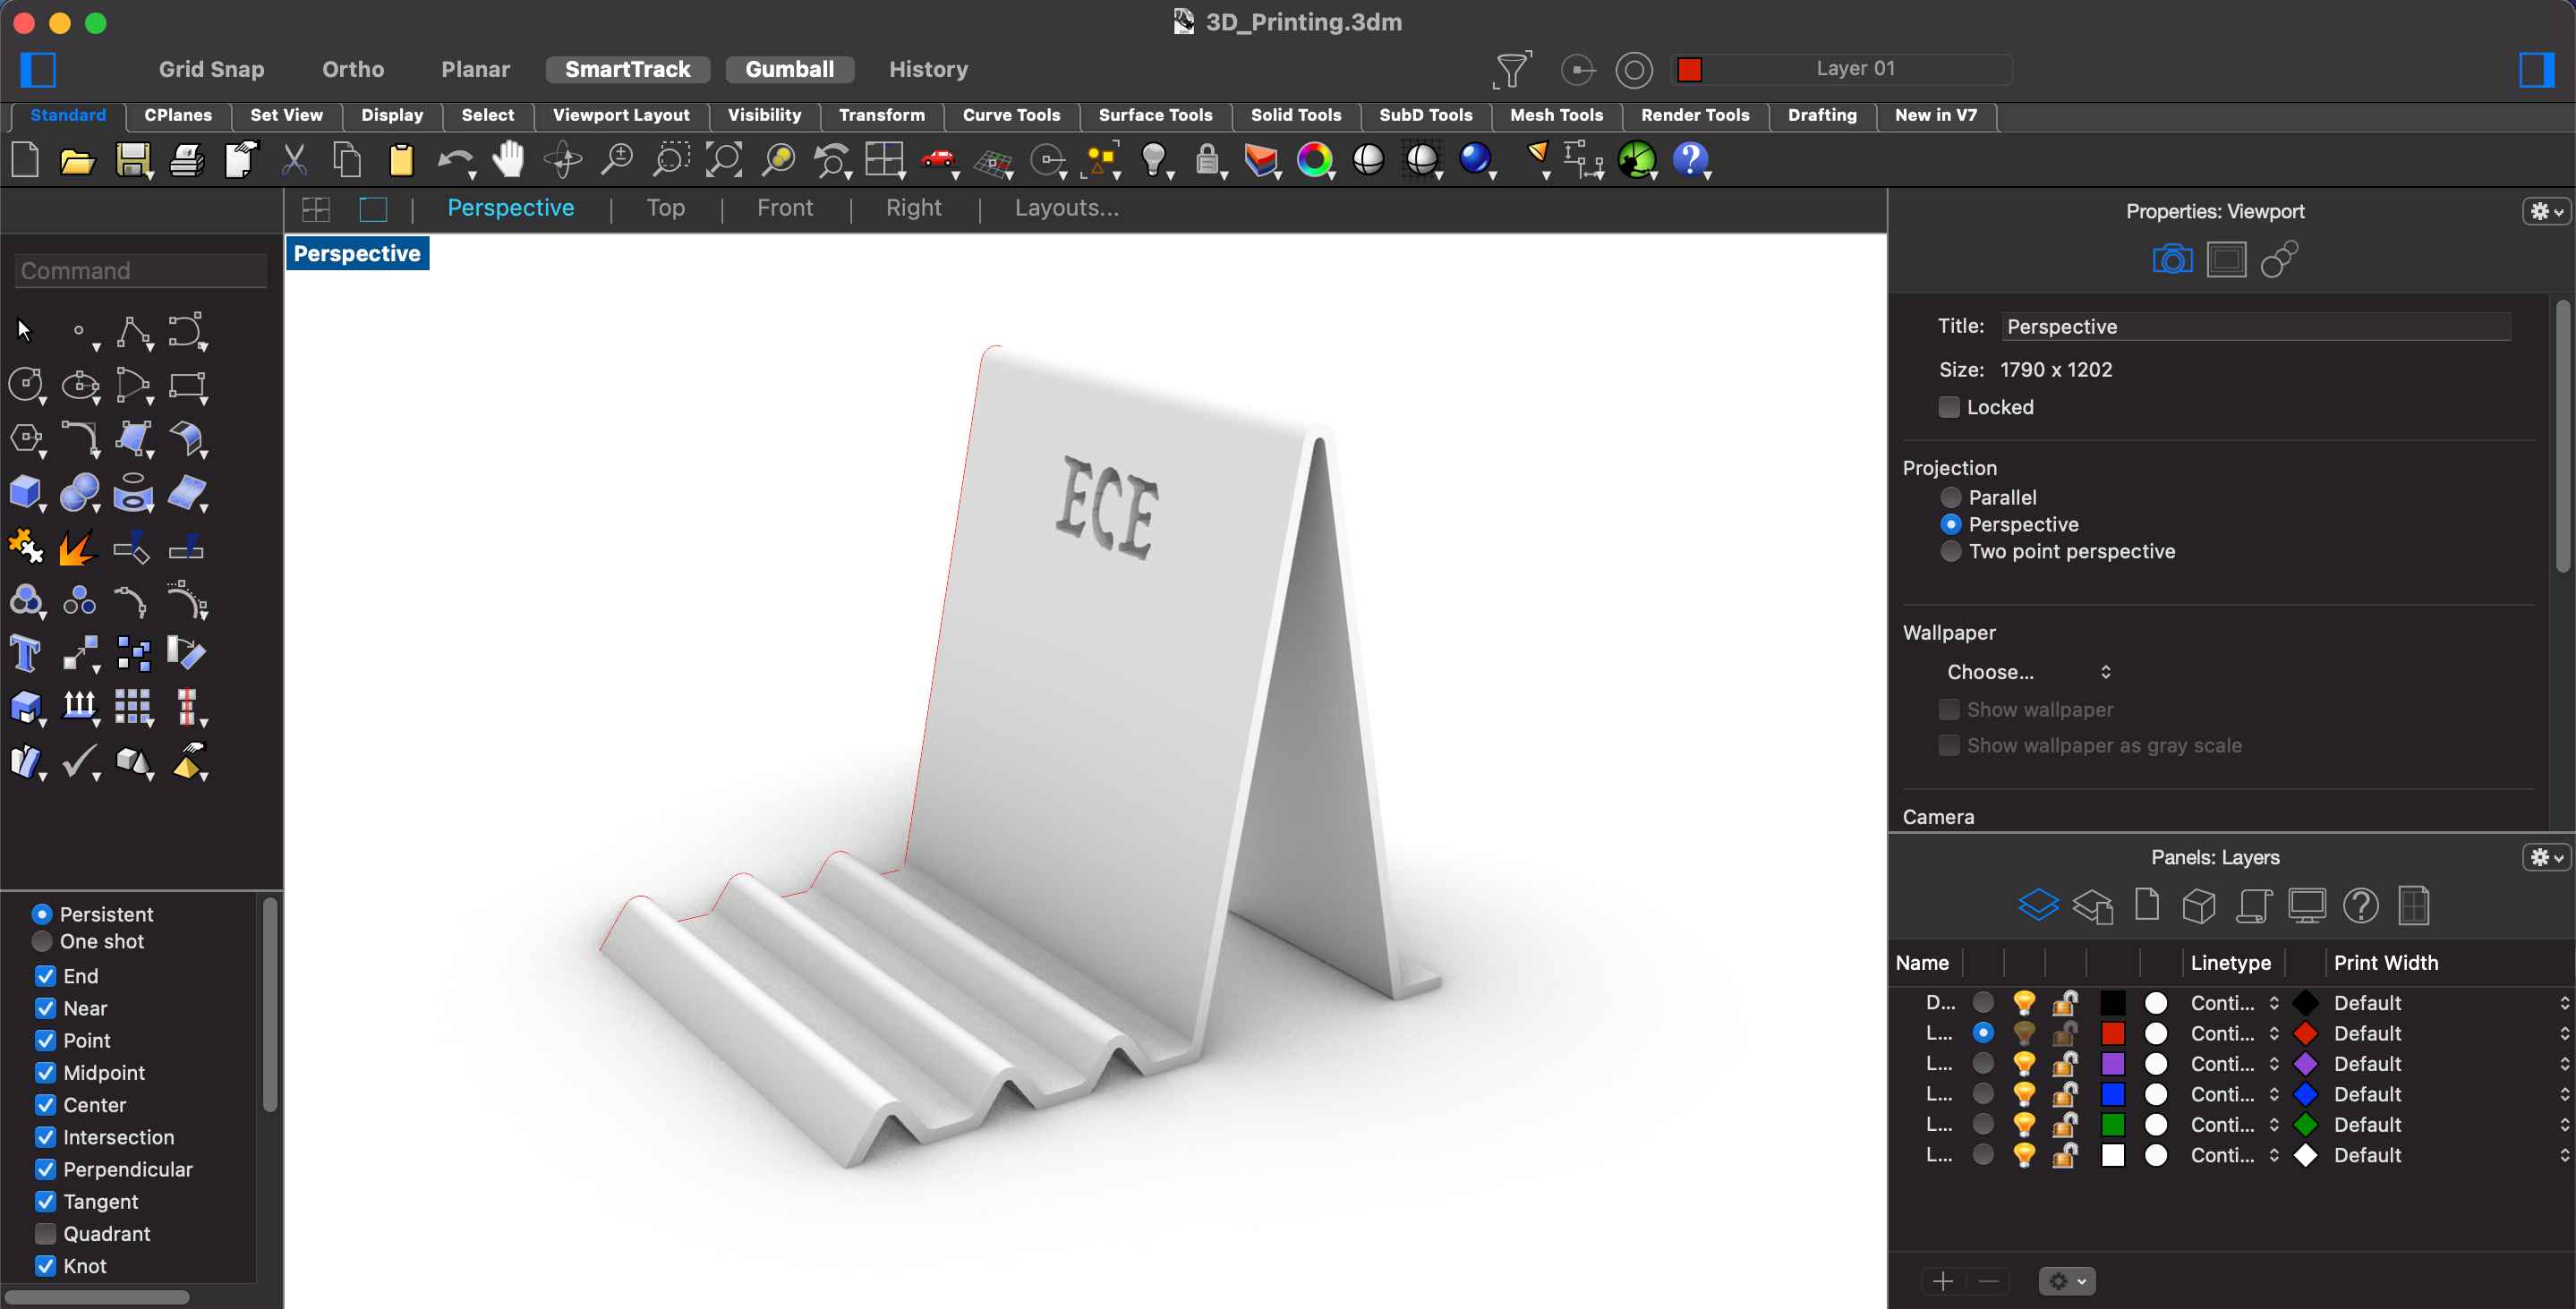
For the 3D printing assignment, I decided to design a phone holder. To achieve this aim, I designed my object on Rhino! According to my smartphone measurements, I drew my object. Also, to customize it I put my name on it. When I finished my drawing, I exported it as stl. format. That way helps me to open my document on Ultimaker Cura and print it.
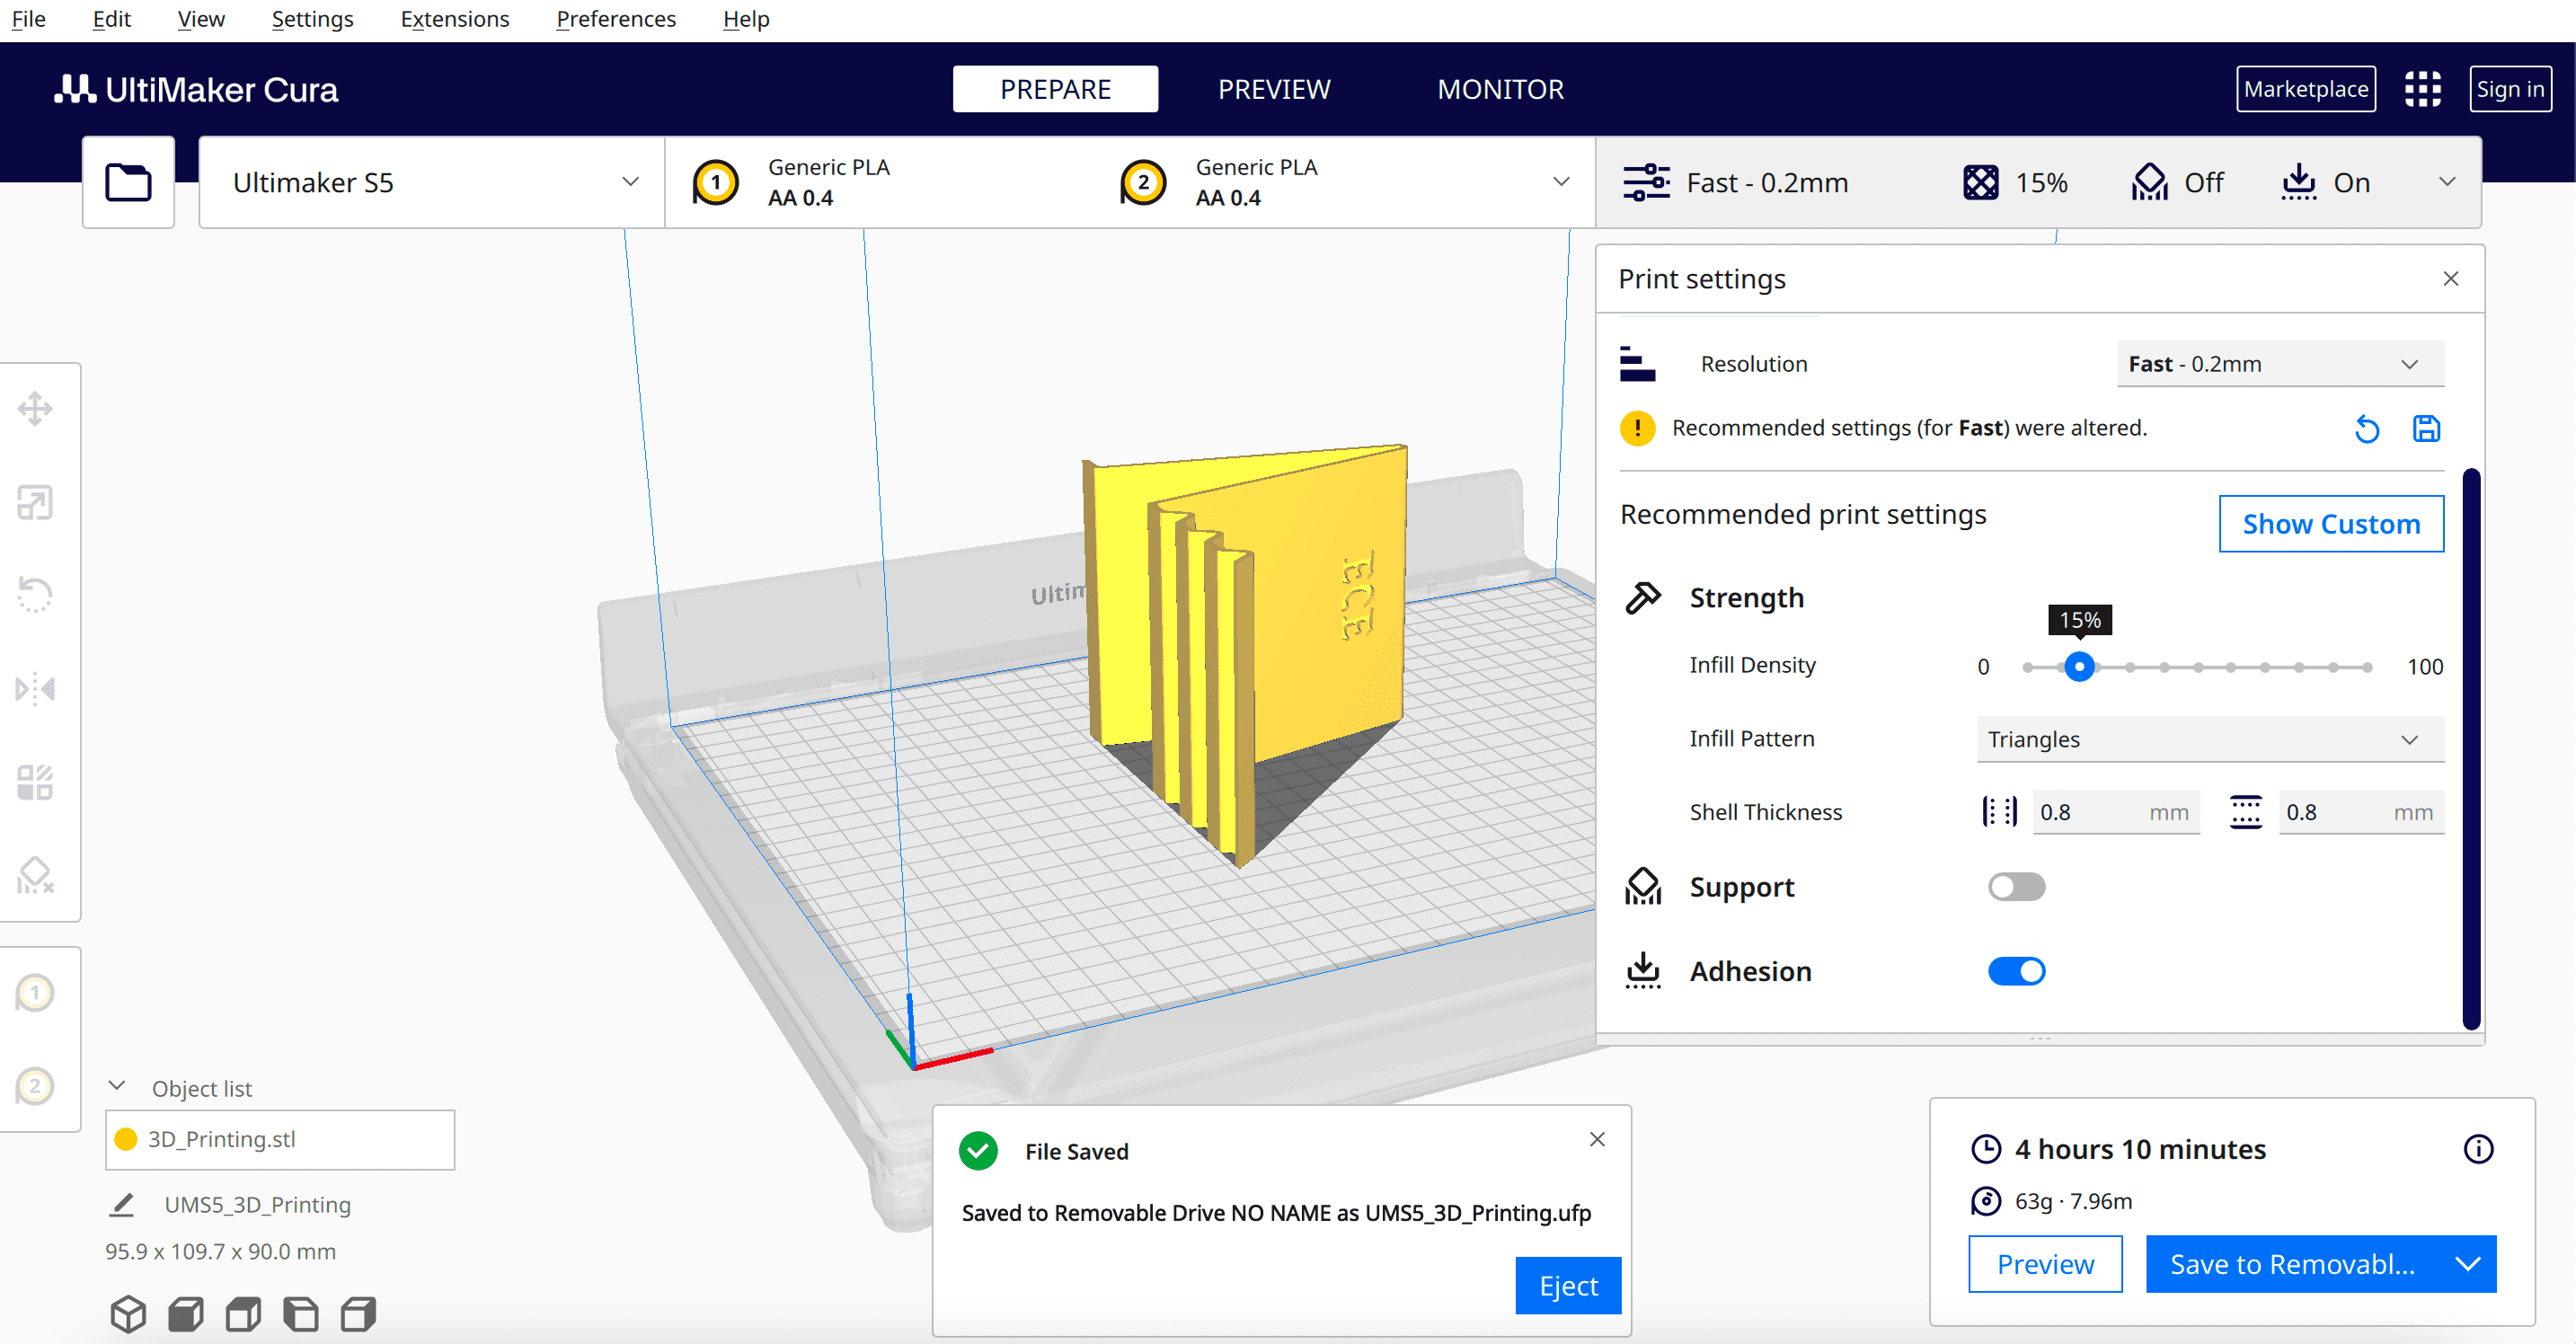
On the Ultimaker Cura, I chose the default setting that the software suggest. Then I pressed the "Slice" to save my disk.
However end of the 5 hours, I reached an unpleasant result. There were several problems with my print;
- The phone holder was unstable.
- Under the highest part of the holder, there was a support which is very thick and quite hard to remove. While trying to remove it I damaged my phone holder.
- Behind the label, there was support more than enough. Therefore I couldn't take out them.
To solve these issues, I decided to print my design again without any support and in the horizontal position. I used default settings and without a support option on the settings panel.
And I am quite happ with my final product. It is stable!
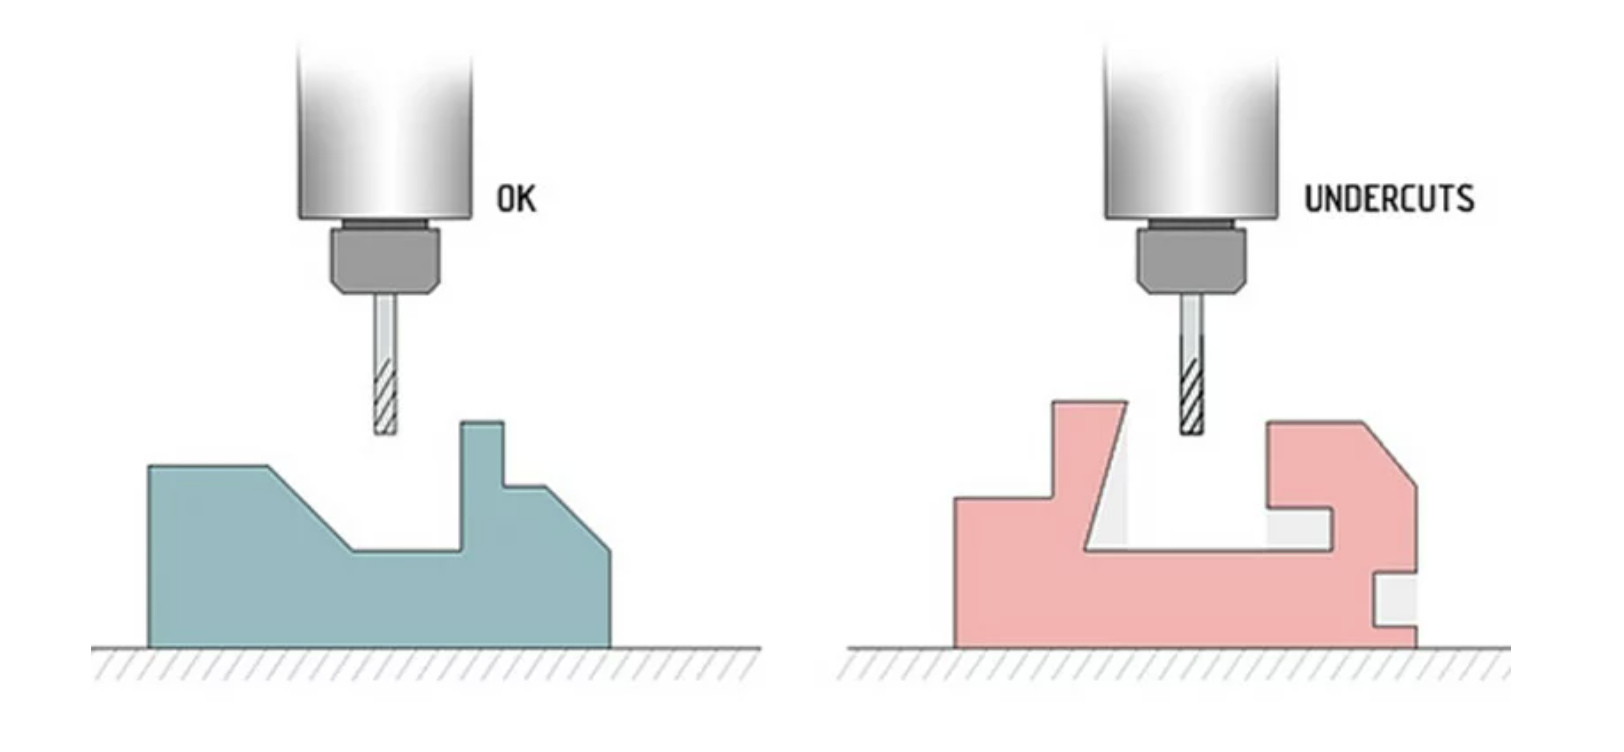
After I finished my assignment, my instructor told me that my design might be produced easily by traditional subtractive methods. Thus, I searched about "traditional subtractive methods". Such as machining, milling, turning, drilling, grinding, and sawing. So my design needs more features like undercuts, overhangs, print-in-place or nested parts (that can’t be disassembled). Then I redesign my 3d model.
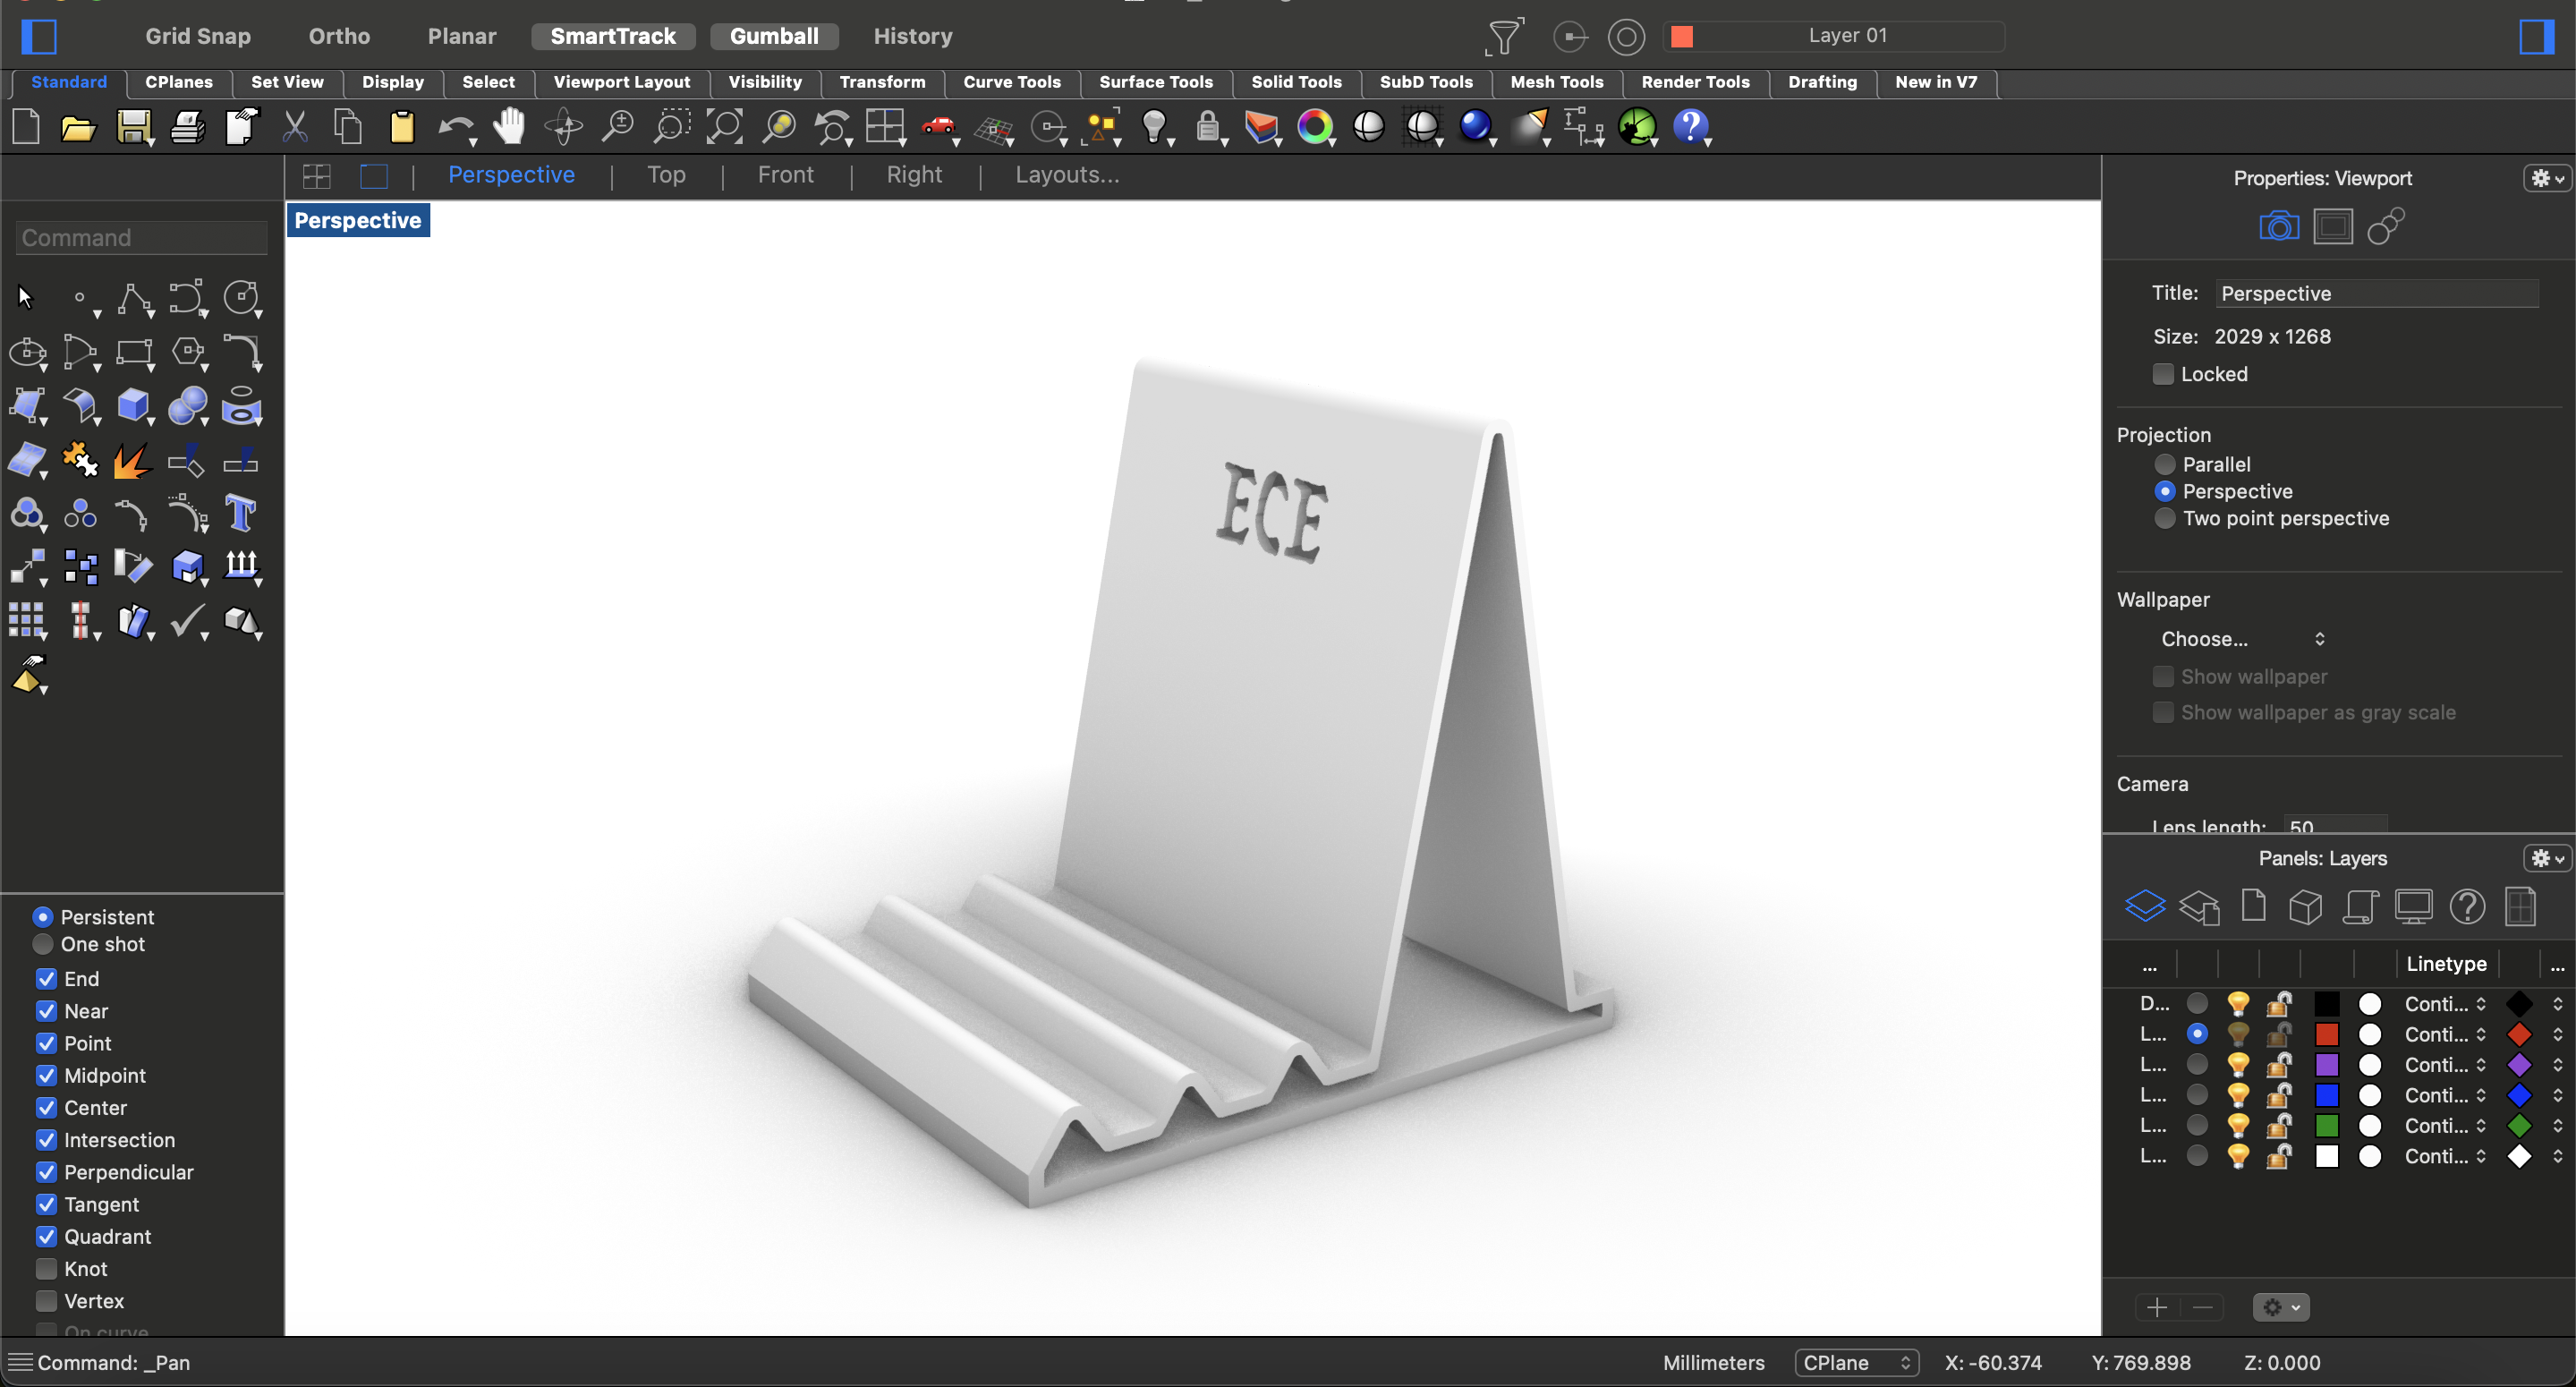
The redesign version of the product can not be easily made by the traditional subtractive method because it has undercuts. Also, on the first step I placed my name in the front view of the product which makes it time-consuming to produce subtractively.
For the printing of my new design, I followed these steps;
- After drawing my design in Rhino, I exported it in stl format.
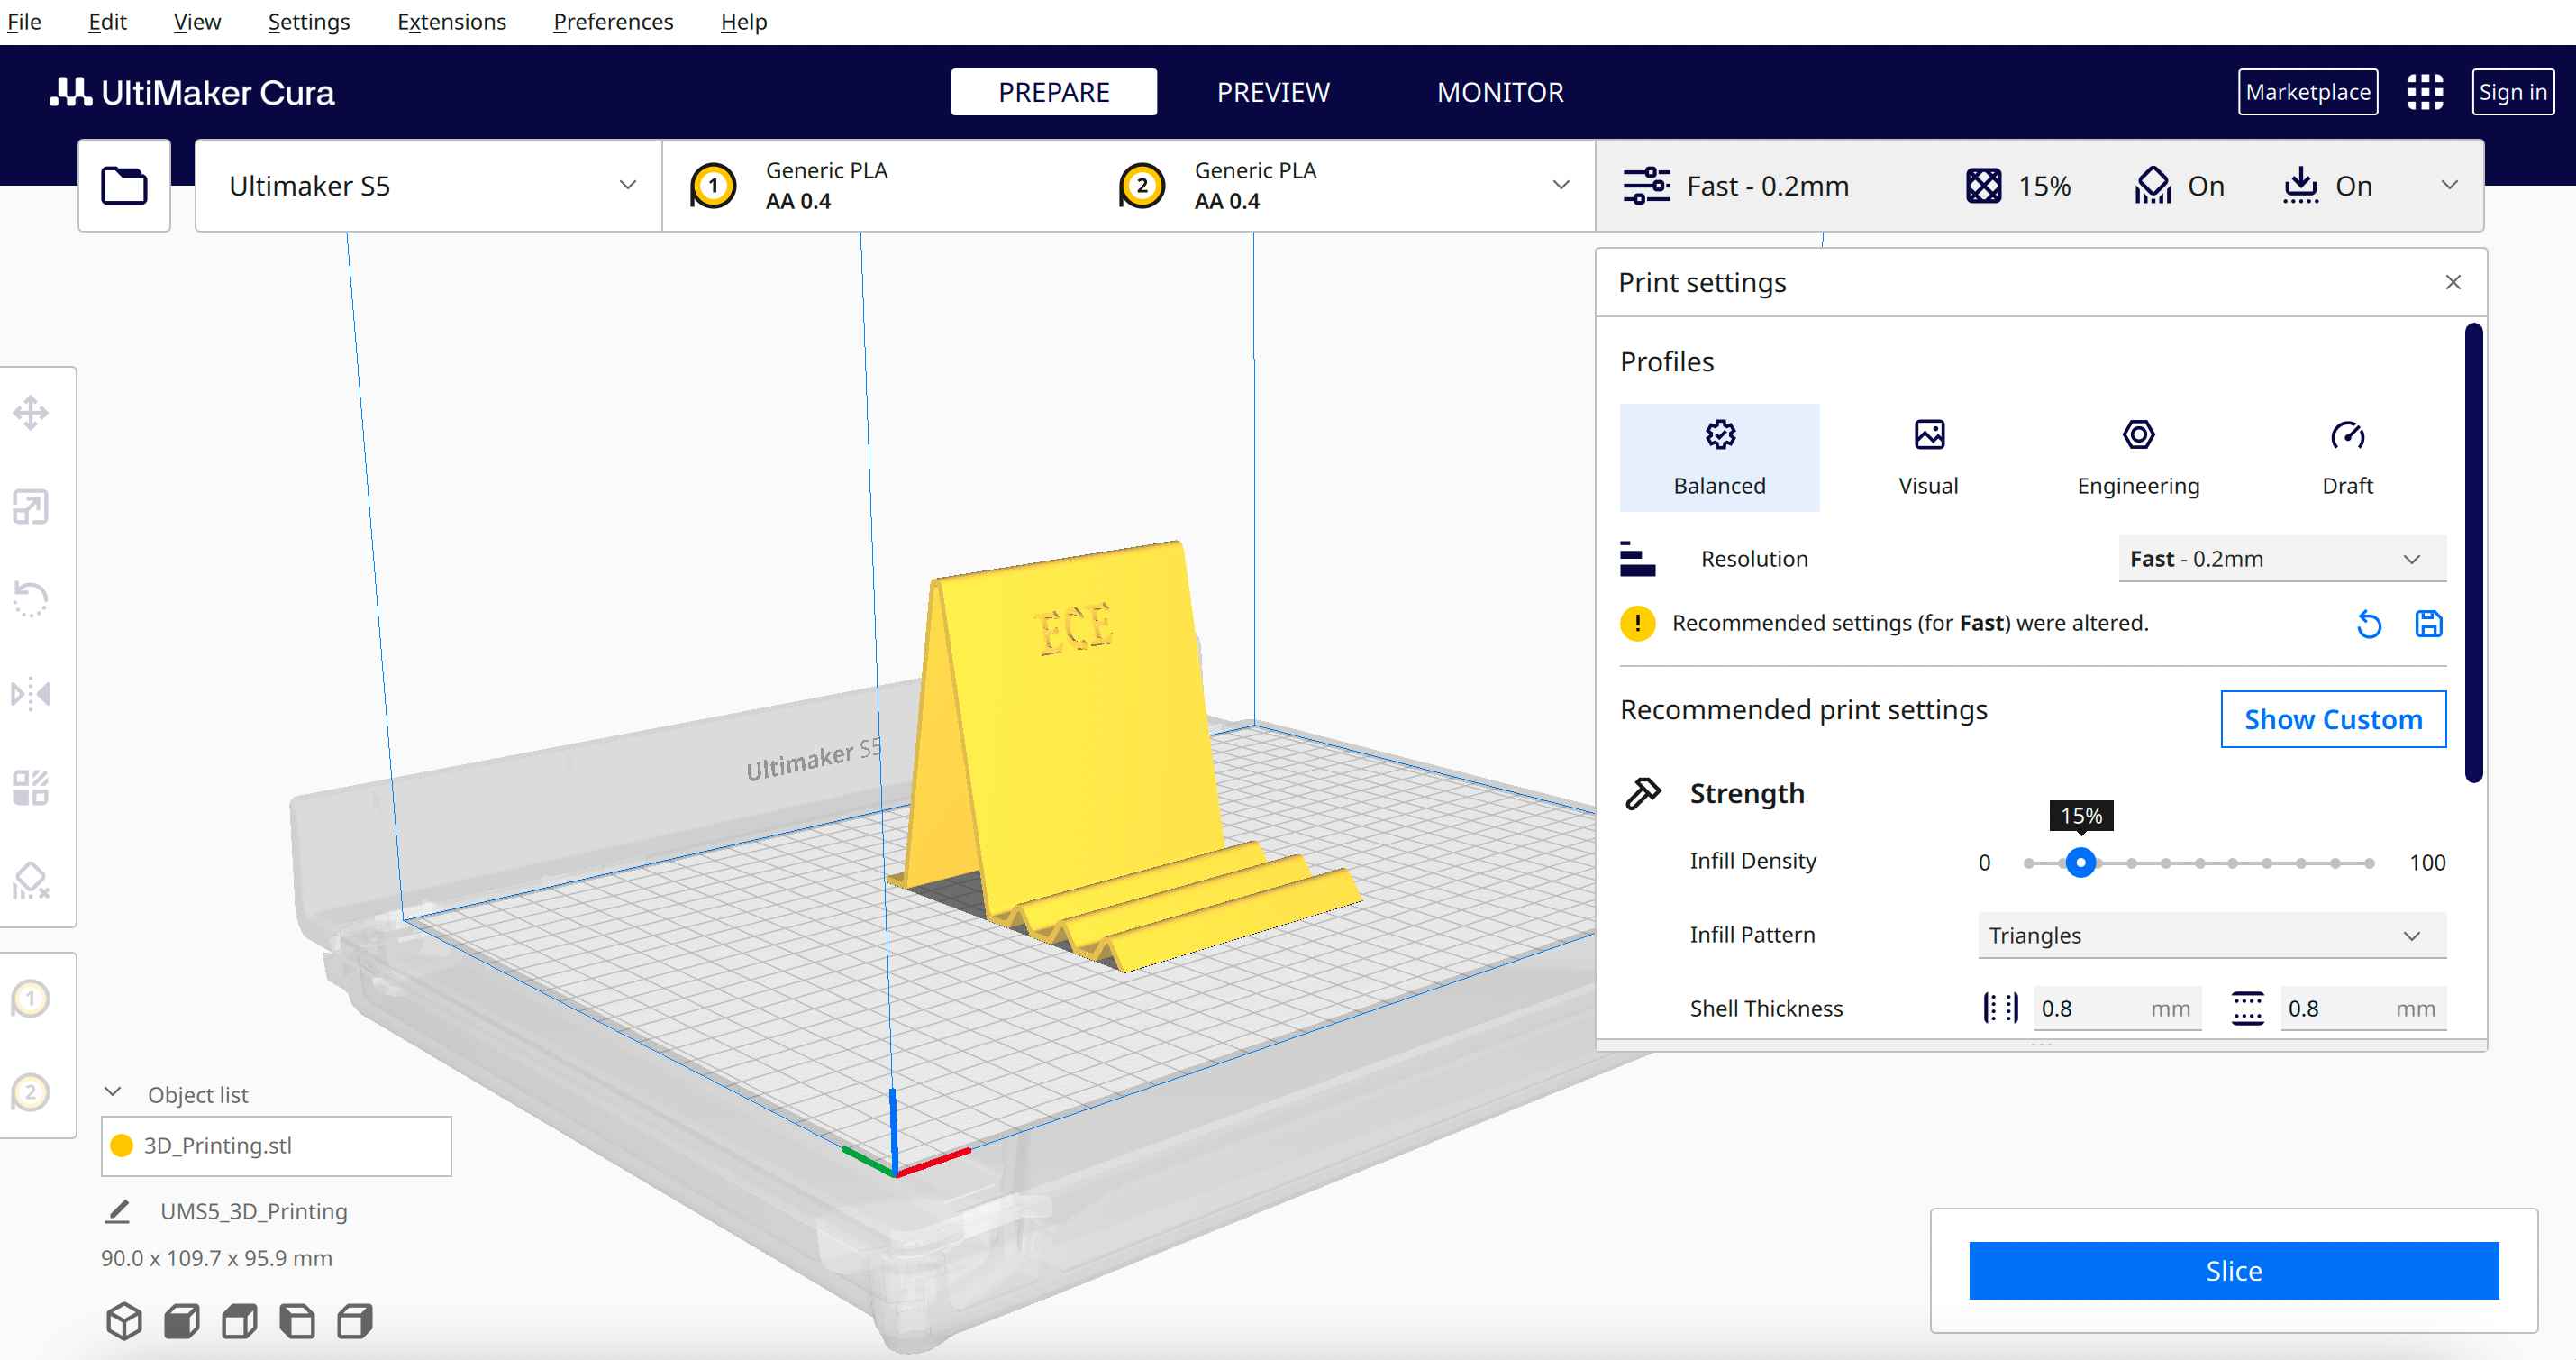
- I decided to print my design again in Ultimkaer S5. For this reason, I transferred the stl file I created to Ultimaker Cura, Ultimaker's slicer software.
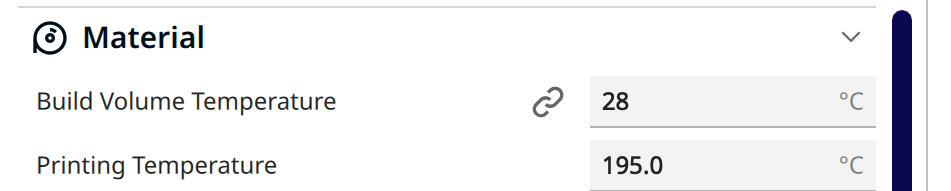
- I did it with the settings in Cura. In addition, I chose presets for PLA. I made sure that the "Adhesion" feature was turned on so that the design could hold the printer bed. In addition, there were distortions where my name was in the previous print, so I decided to use support.
- I kept layer height 0.6
- As a support type, I used the "touching build plate support" version.
- The support density is 20.
- Printing temperature is 195 degree.
- After completing the settings, I transferred the gcode I created to my usb stick by clicking the save to disc button at the bottom right of the screen.
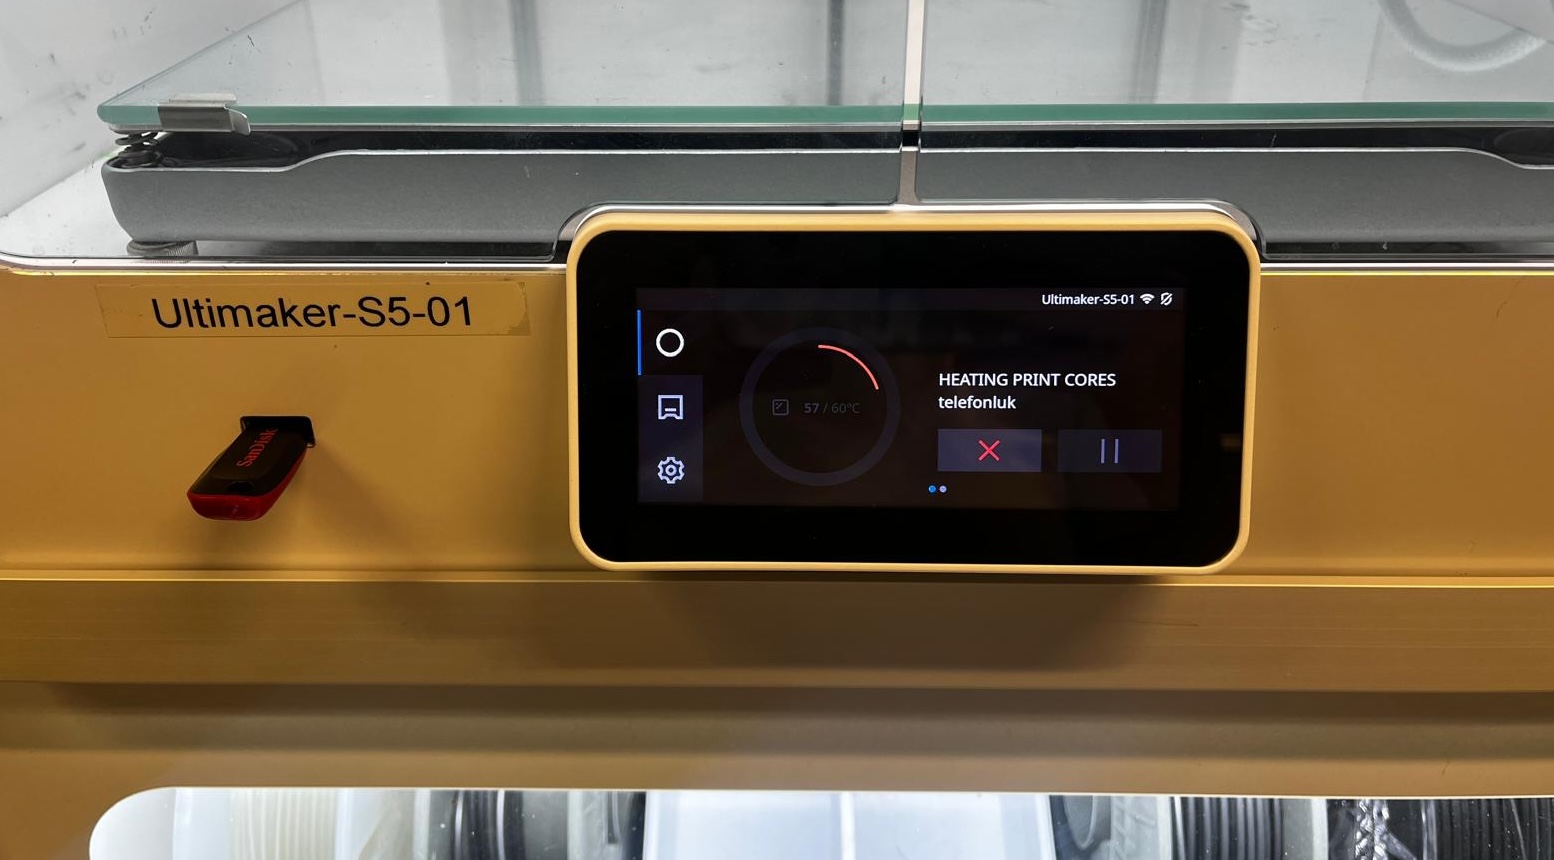
- I placed the stick on one of the Ultimaker s5s in the Lab. I found the file I wanted to print on the screen and selected it. After this stage, the machine started to make its own adjustments.
- The printer began to heat the surface. After this process was completed, it adjusted the bed height. The user does not need to interact with the machine in this process. All operations are done by the machine.
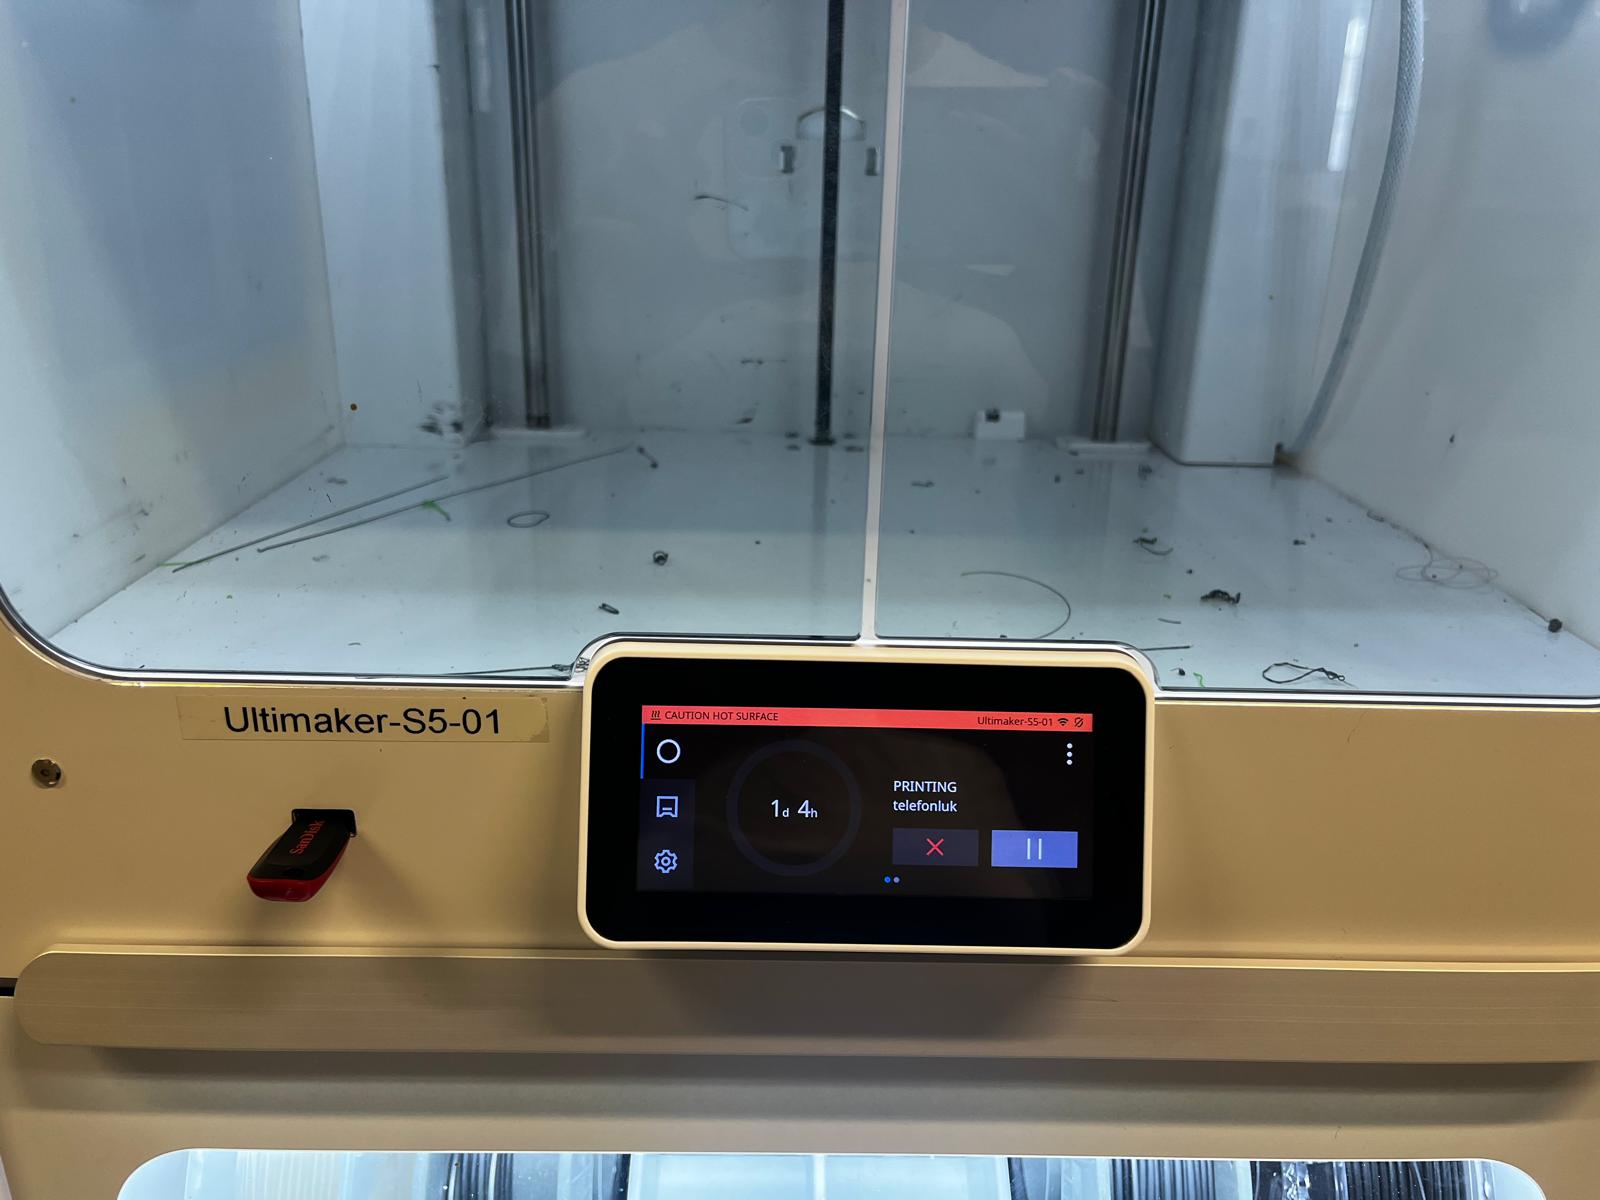
- After these adjustments were completed, the printing process started. On the printer's display you can see how long the printing will take and how much time is left until the printing is complete.
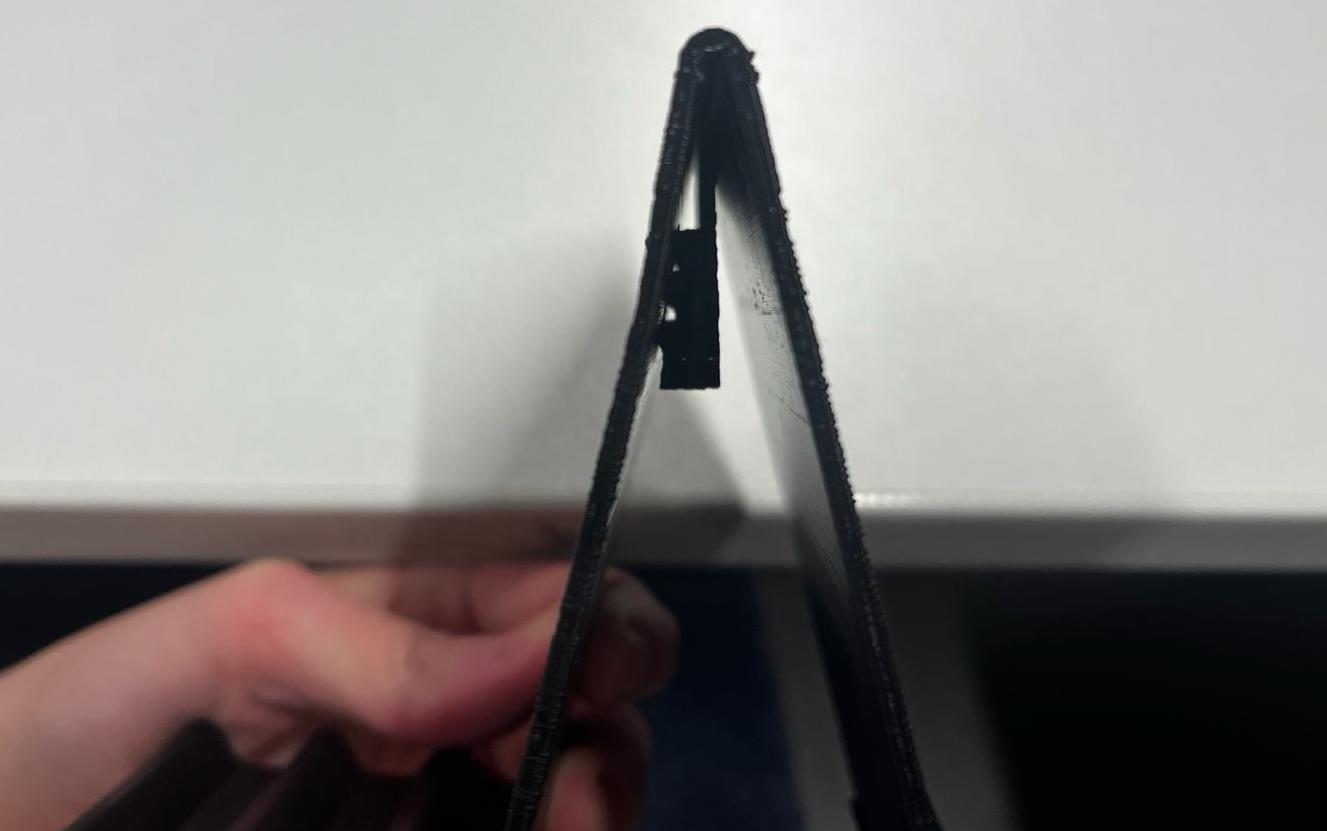
- After about 1 day, the printing process was completed. Unfortunately, the Ultimaker printer is slower and has a lower print quality compared to printers such as Bamboo and Prusa.
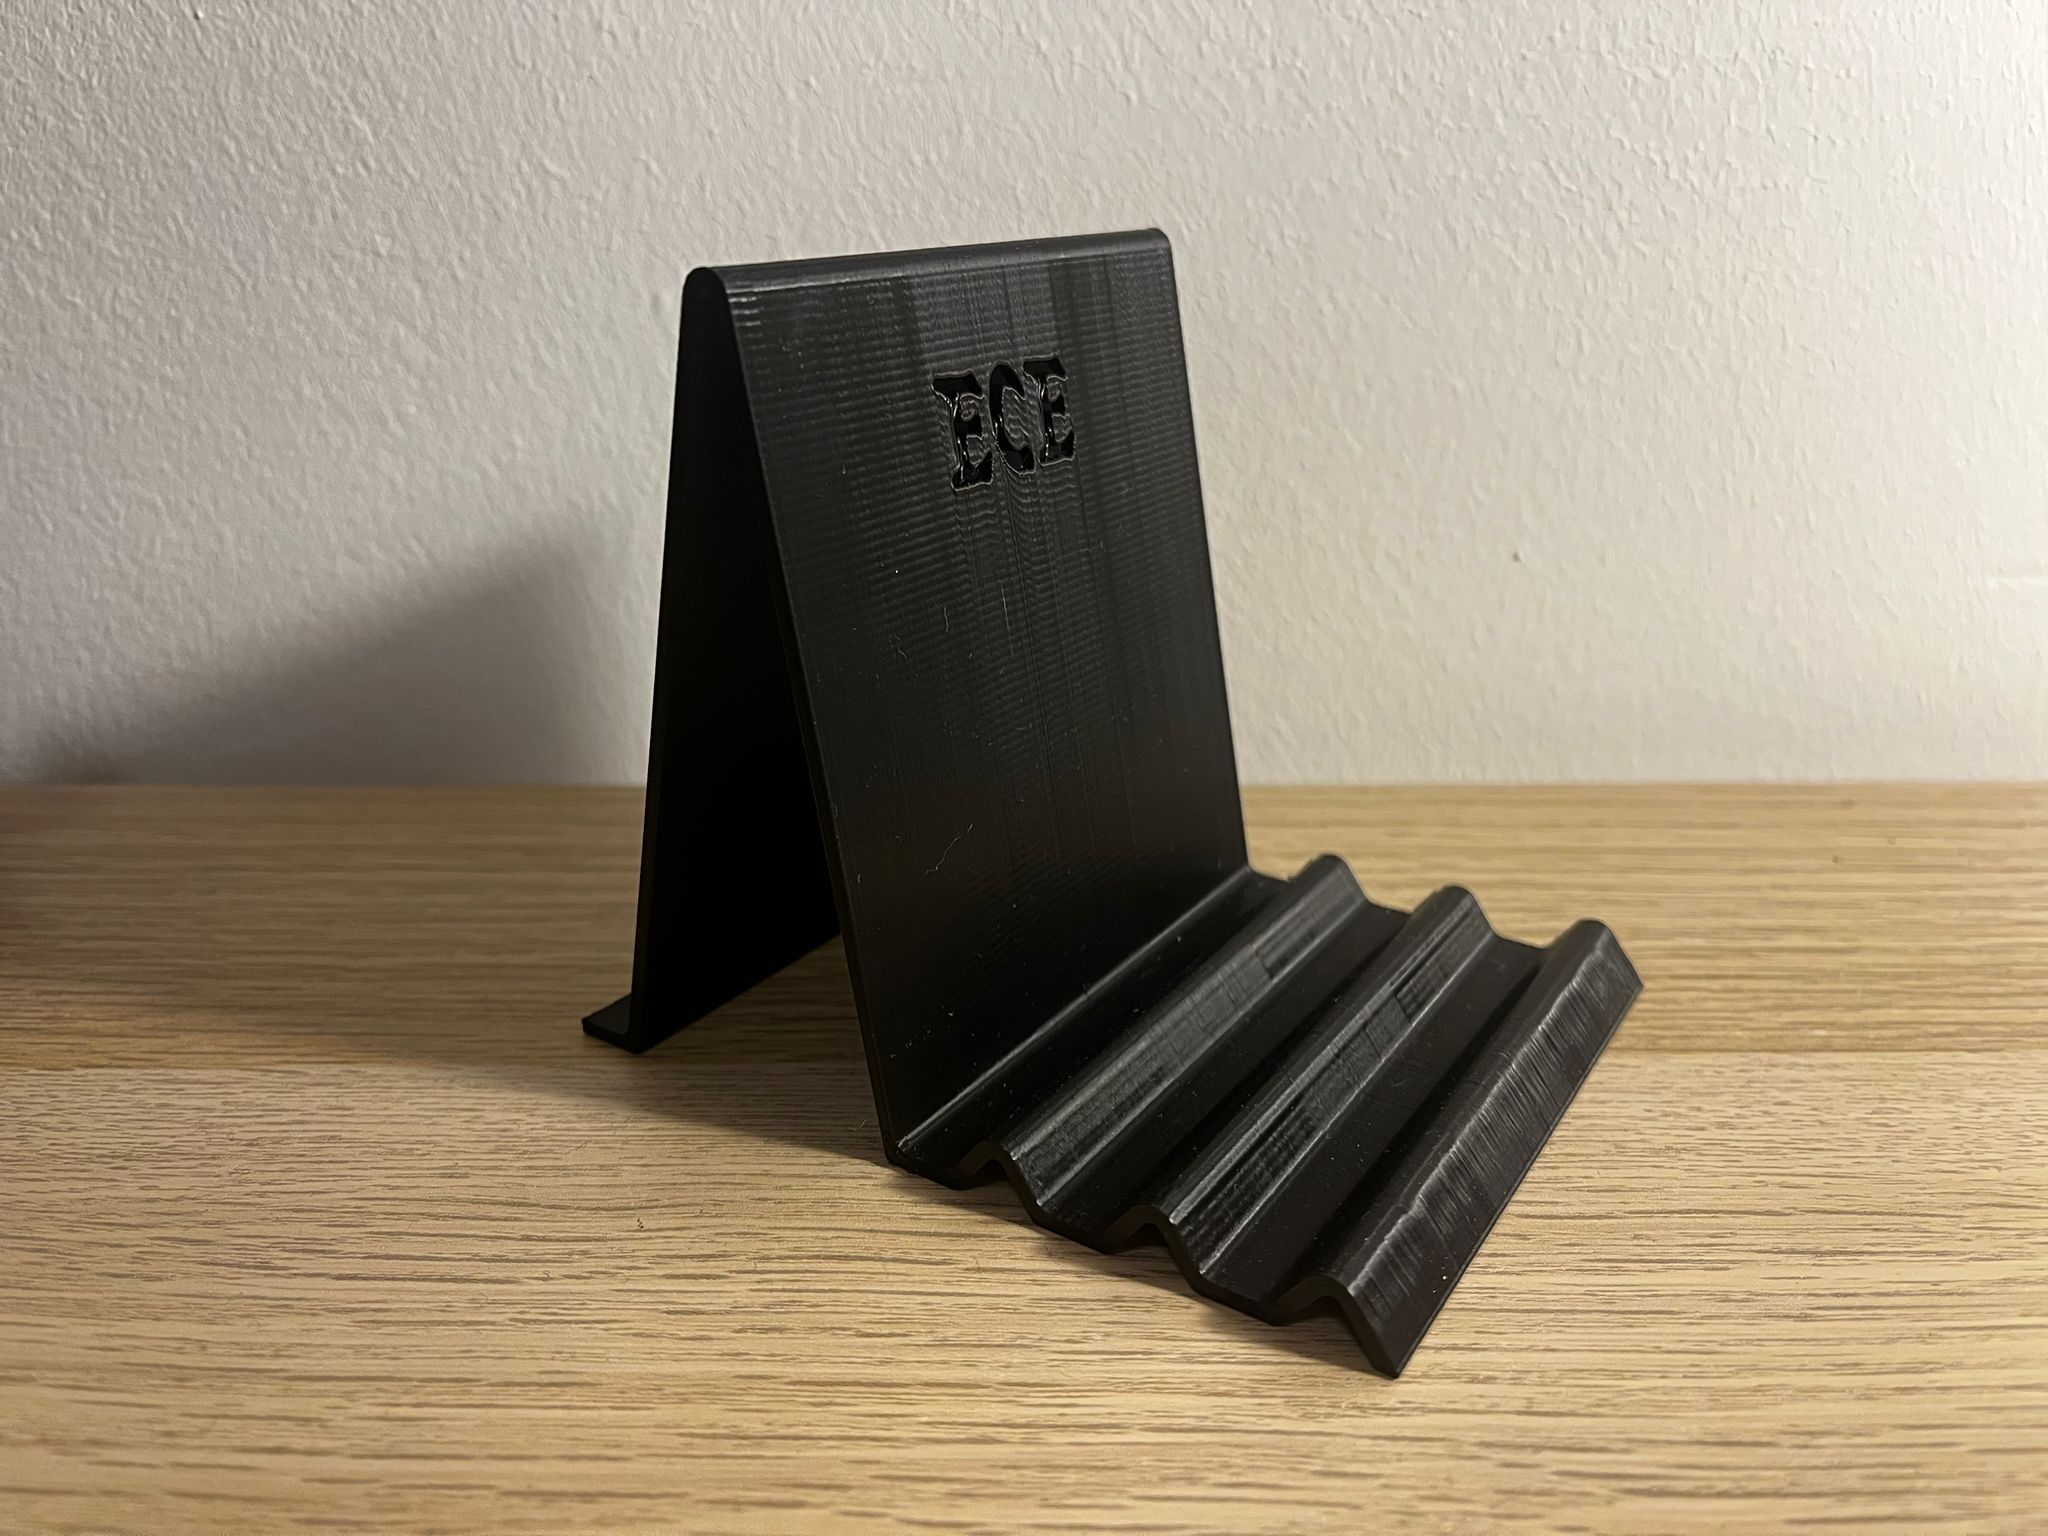
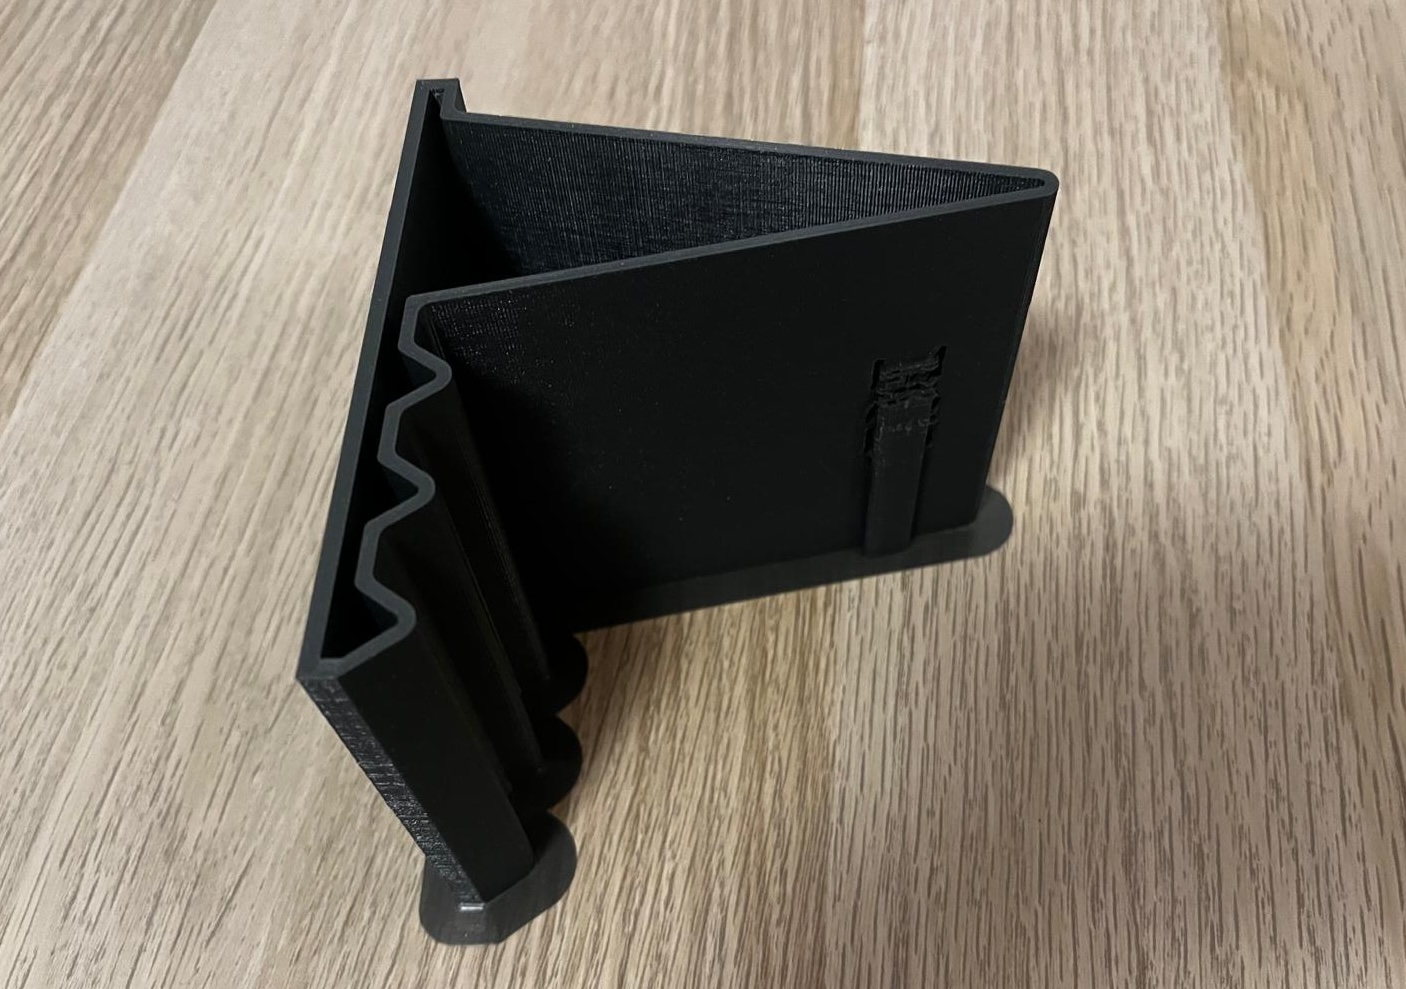
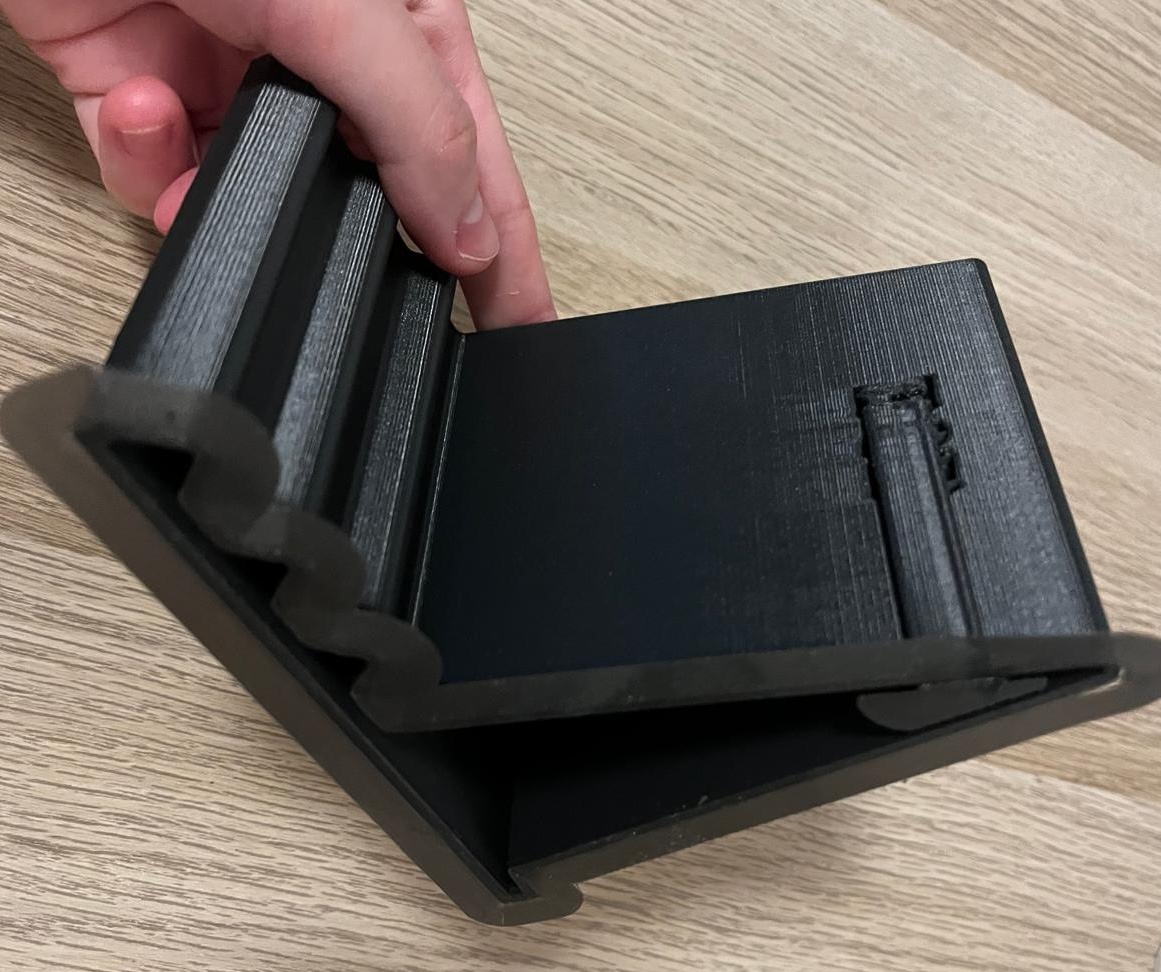
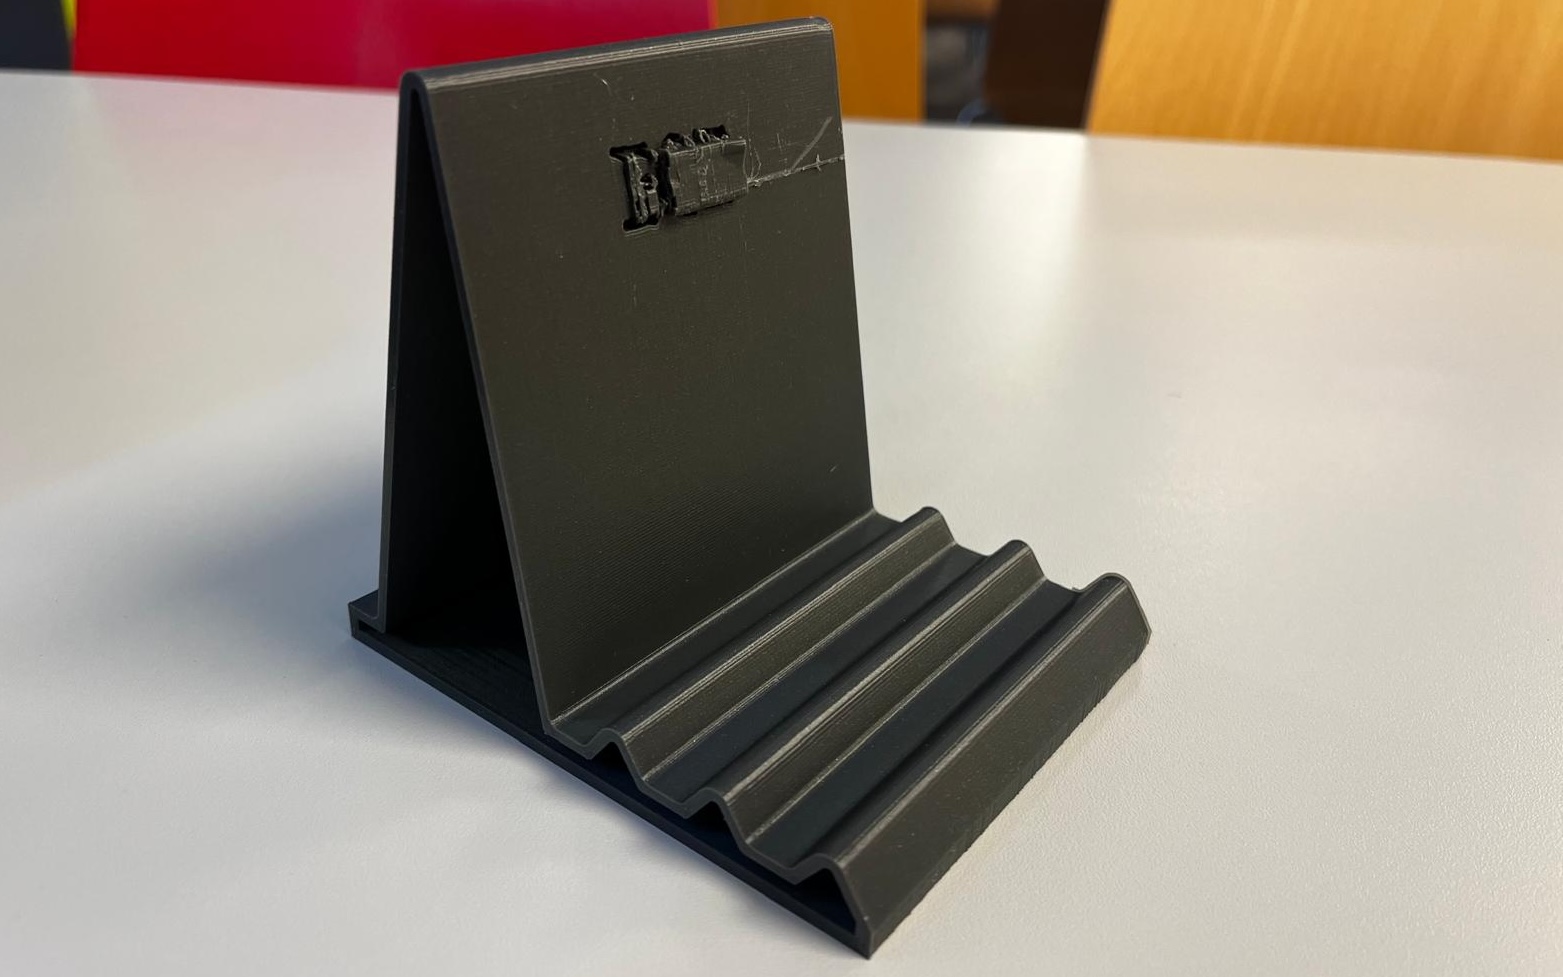
- In this image you can see the finished print. I am quite satisfied with the body of the product. The surface I added to the base made the phone holder more robust and stable.
- But the support I used in the area where my name was written was quite provided and I had a very difficult time removing it.
- This is the final version of my design, unfortunately I could not remove the support completely. As far as I understand, I should not use support for the space in the name field as I did in my previous attempt.
Settings for the printing;


3D Scanning
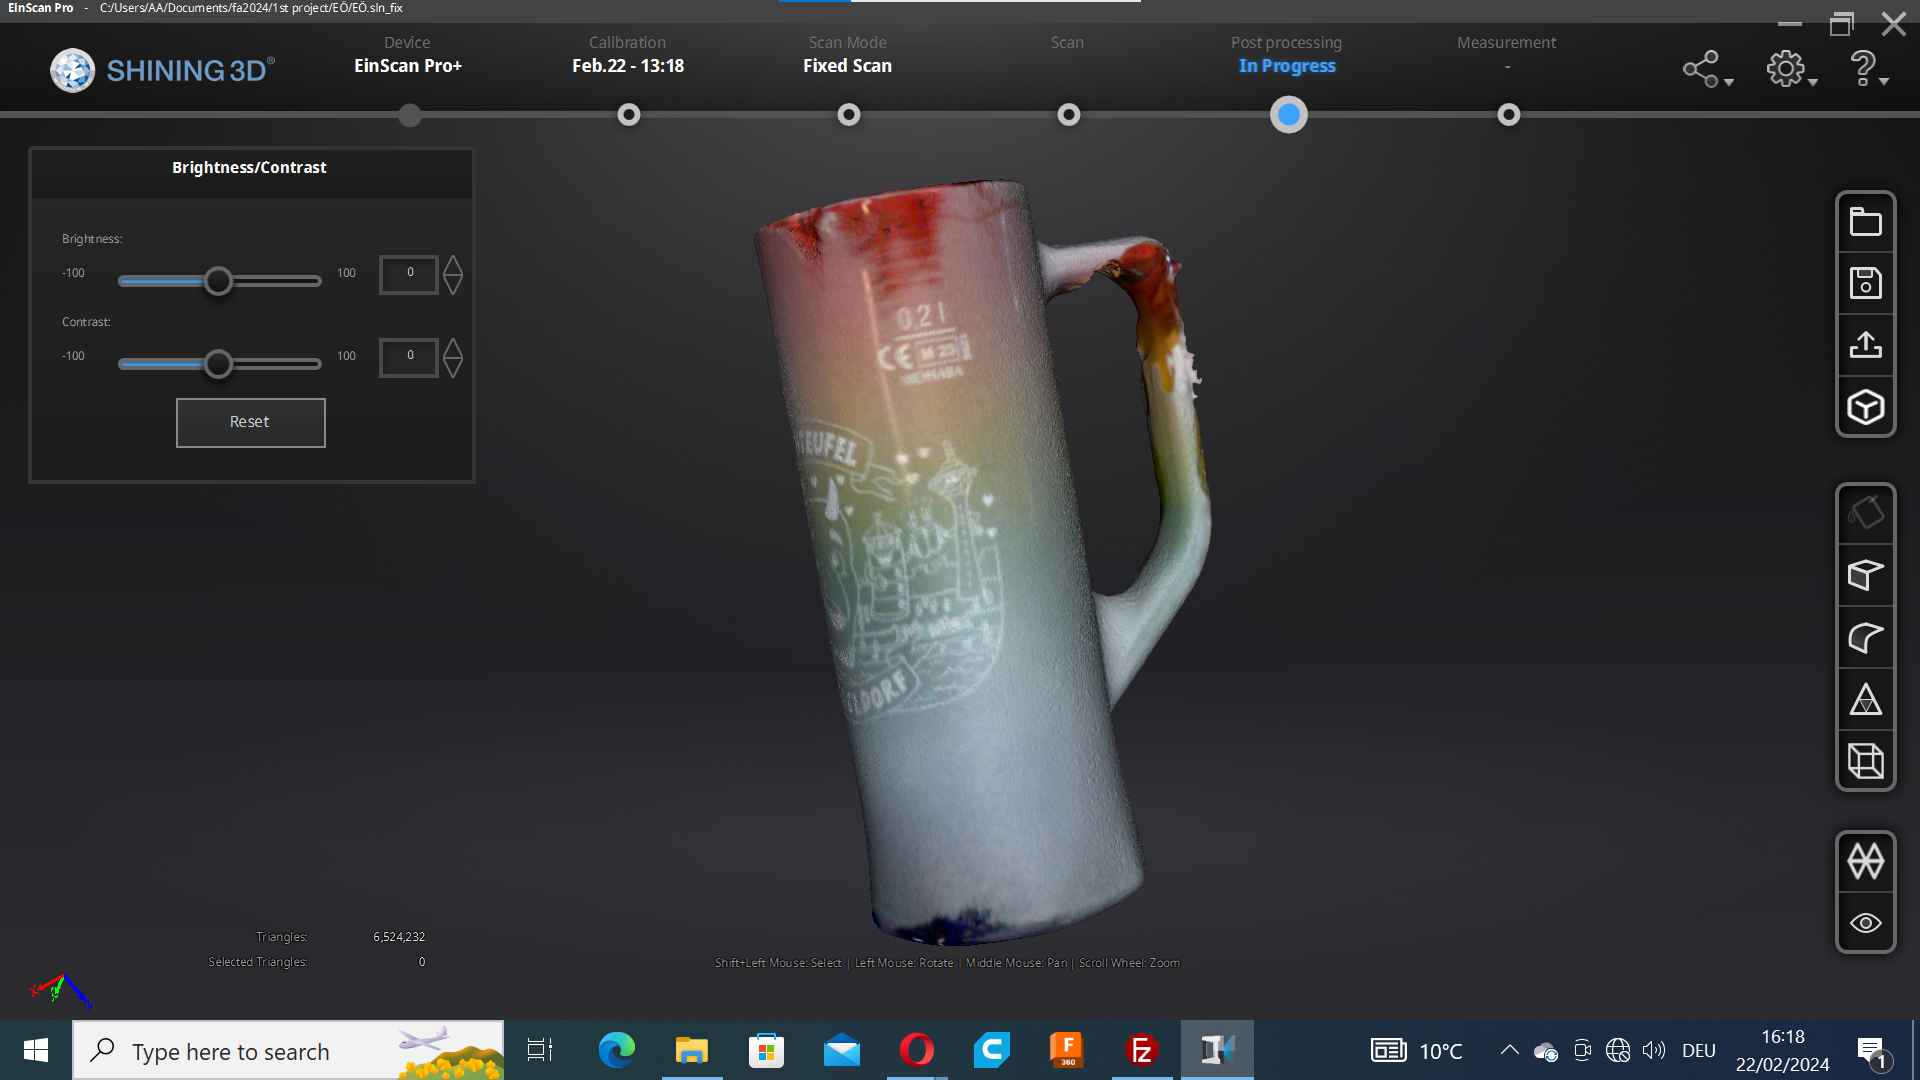
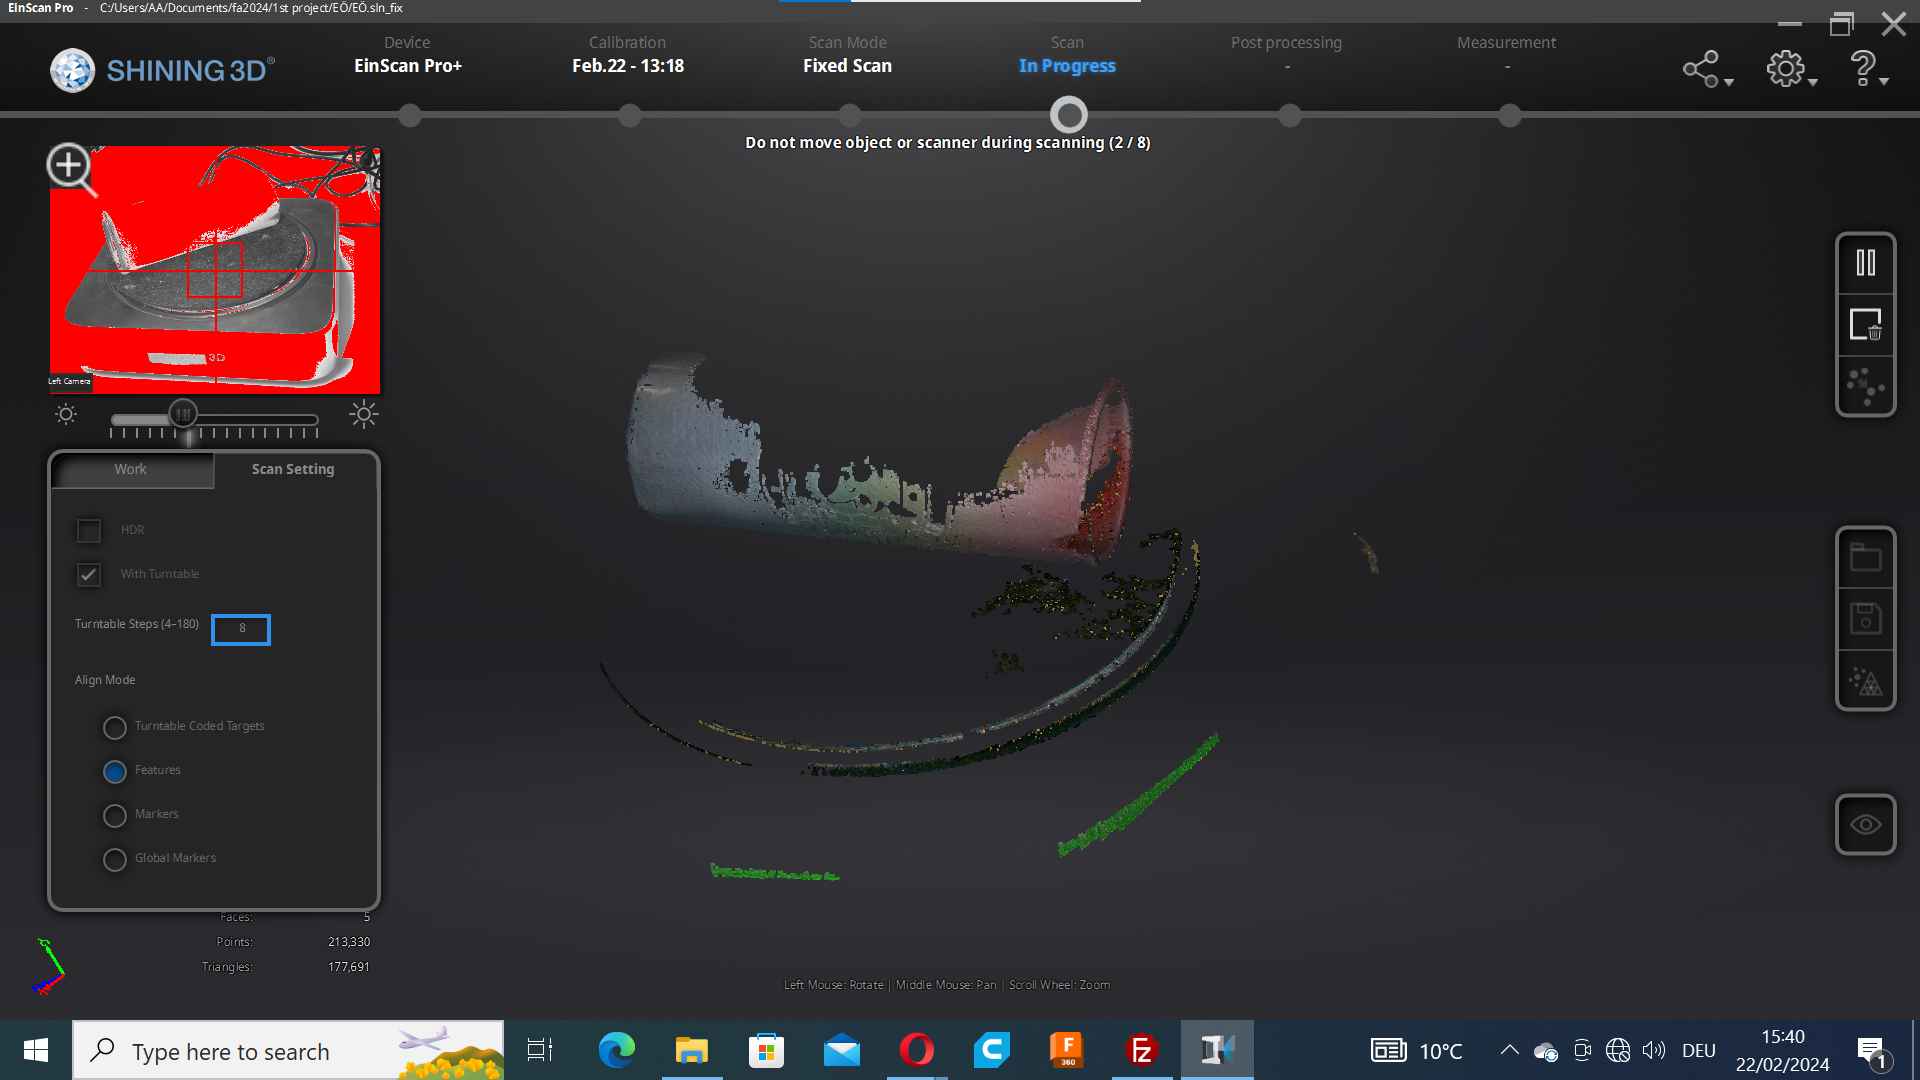
We used an application called Einscan Pro to scan a product. To set up the device, we first assembled the camera with the body and connected it to the computer. We placed the body and the camera that we already assembled on the tripod. And we are all set!
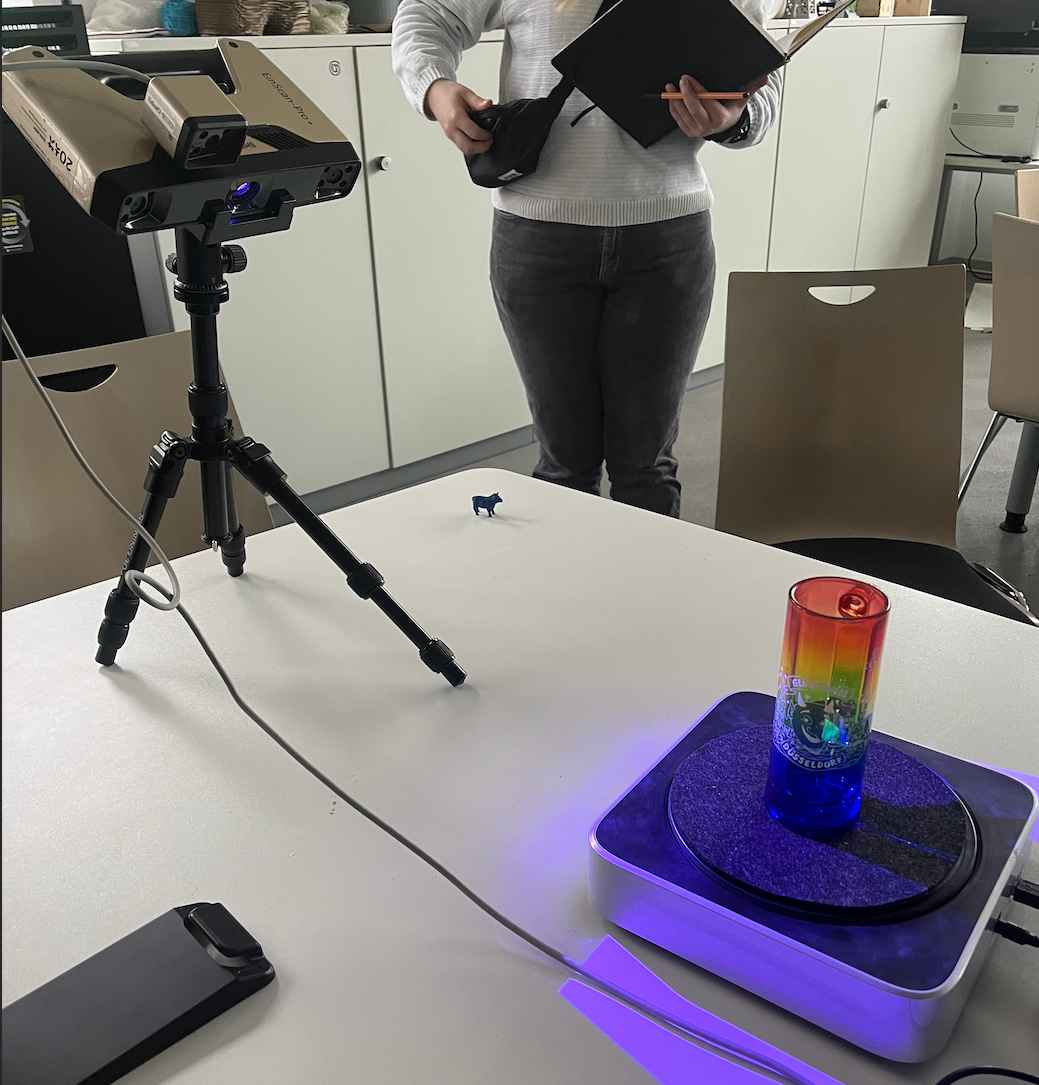
To scan an object, this sequence of instructions must be followed. New Object---> Texture Scan---> Apply. Then interface shows you an object that you will scan with the camera. To scan the object properly, we set the camera angle. Also, it is important to keep the light intensity of the room to achieve a high-resolution scanned object.
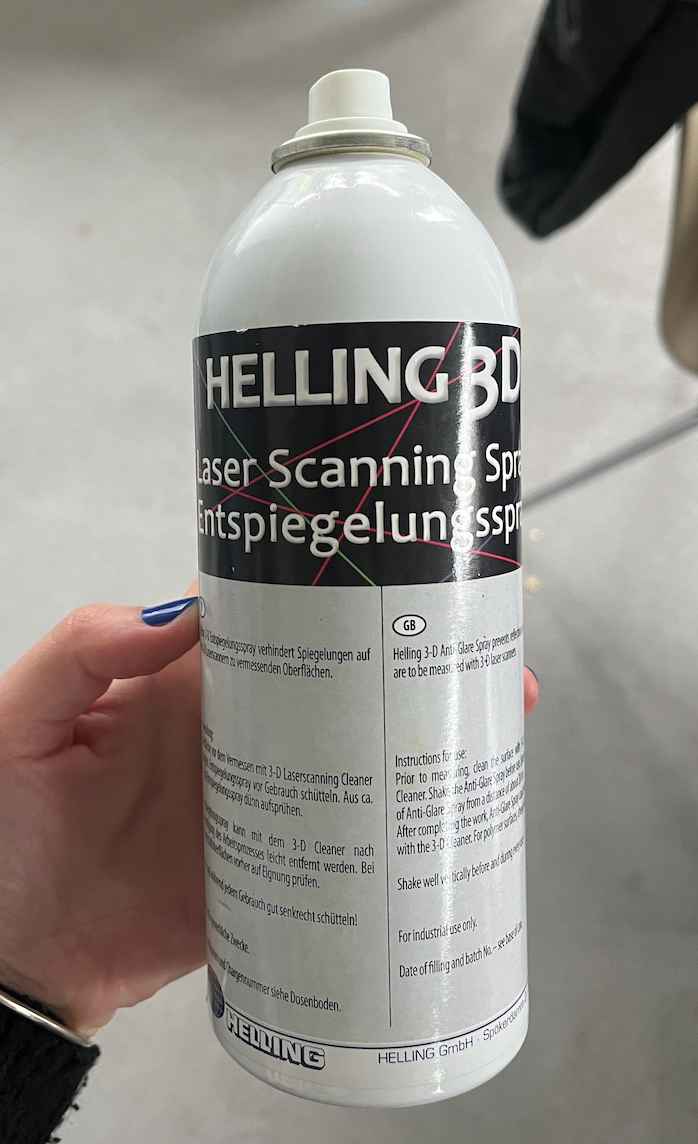
I chose a glass cup to scan it which is quite hard to capture. Because of the shiny and transparent material, it is quite time-consuming. To scan the object better, I sprayed it with Helling 3D Laser Scanning Spray. Then we start to scan, if the camera detects the object, the turning table starts to turn. End of the movement, on the interface you see the result and by clicking "Shift" and selecting you can delete unnecessary meshes.
To scan the entire object, in each step, you can put the object at a different angle. This helps to show the object's different features to the camera. Also on the left side of the interface, you can increase or decrease the intensity of the brightness which is helping the capture the object.
Again, on the left side of the interface, there is a camera display that allows to show what the camera sees to the user. In that section, red areas indicate the part of the object that is able to scan.
Because of the transparency of the object we failed, unfortunately. The amount of spray was not enough to make it opaque. Therefore, I sprayed the glass cup until I was sure that every single point of the glass was covered by the Helling 3D Laser Scanning Spray.
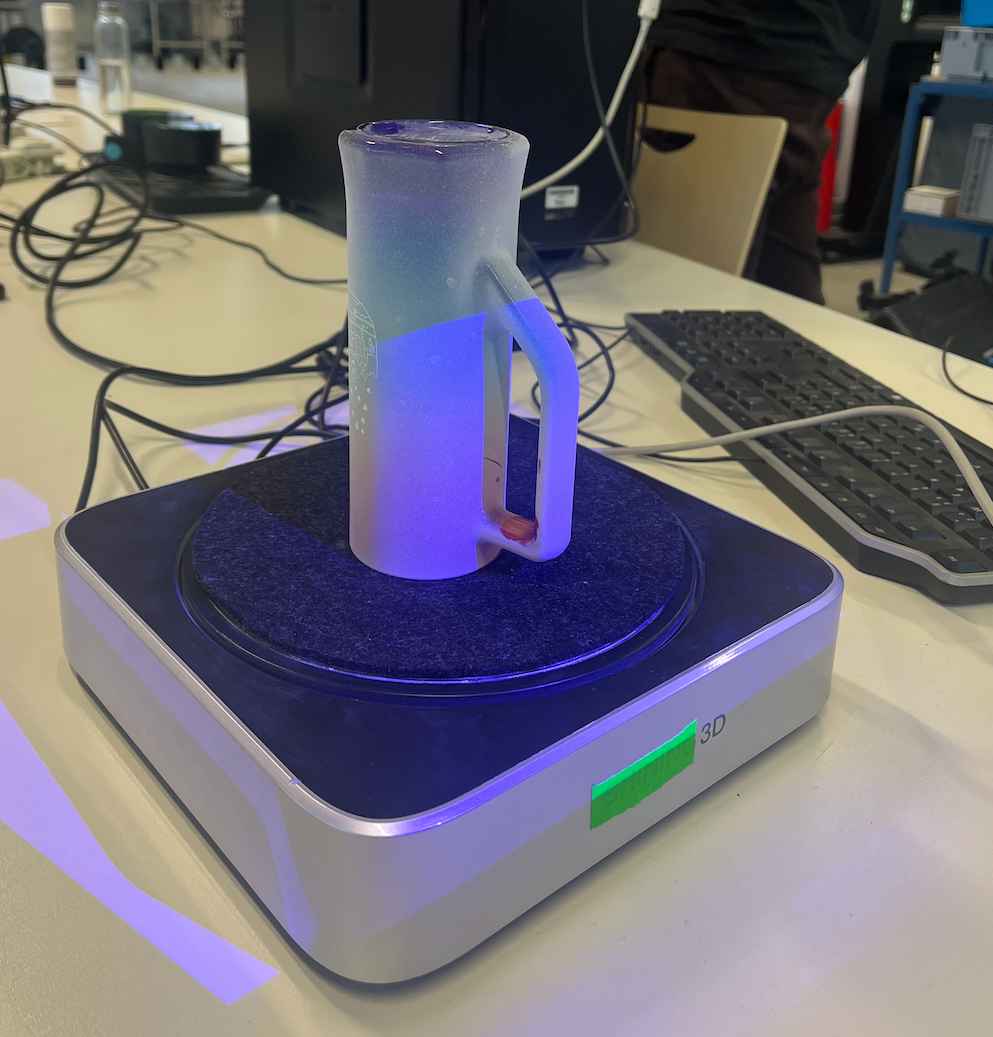
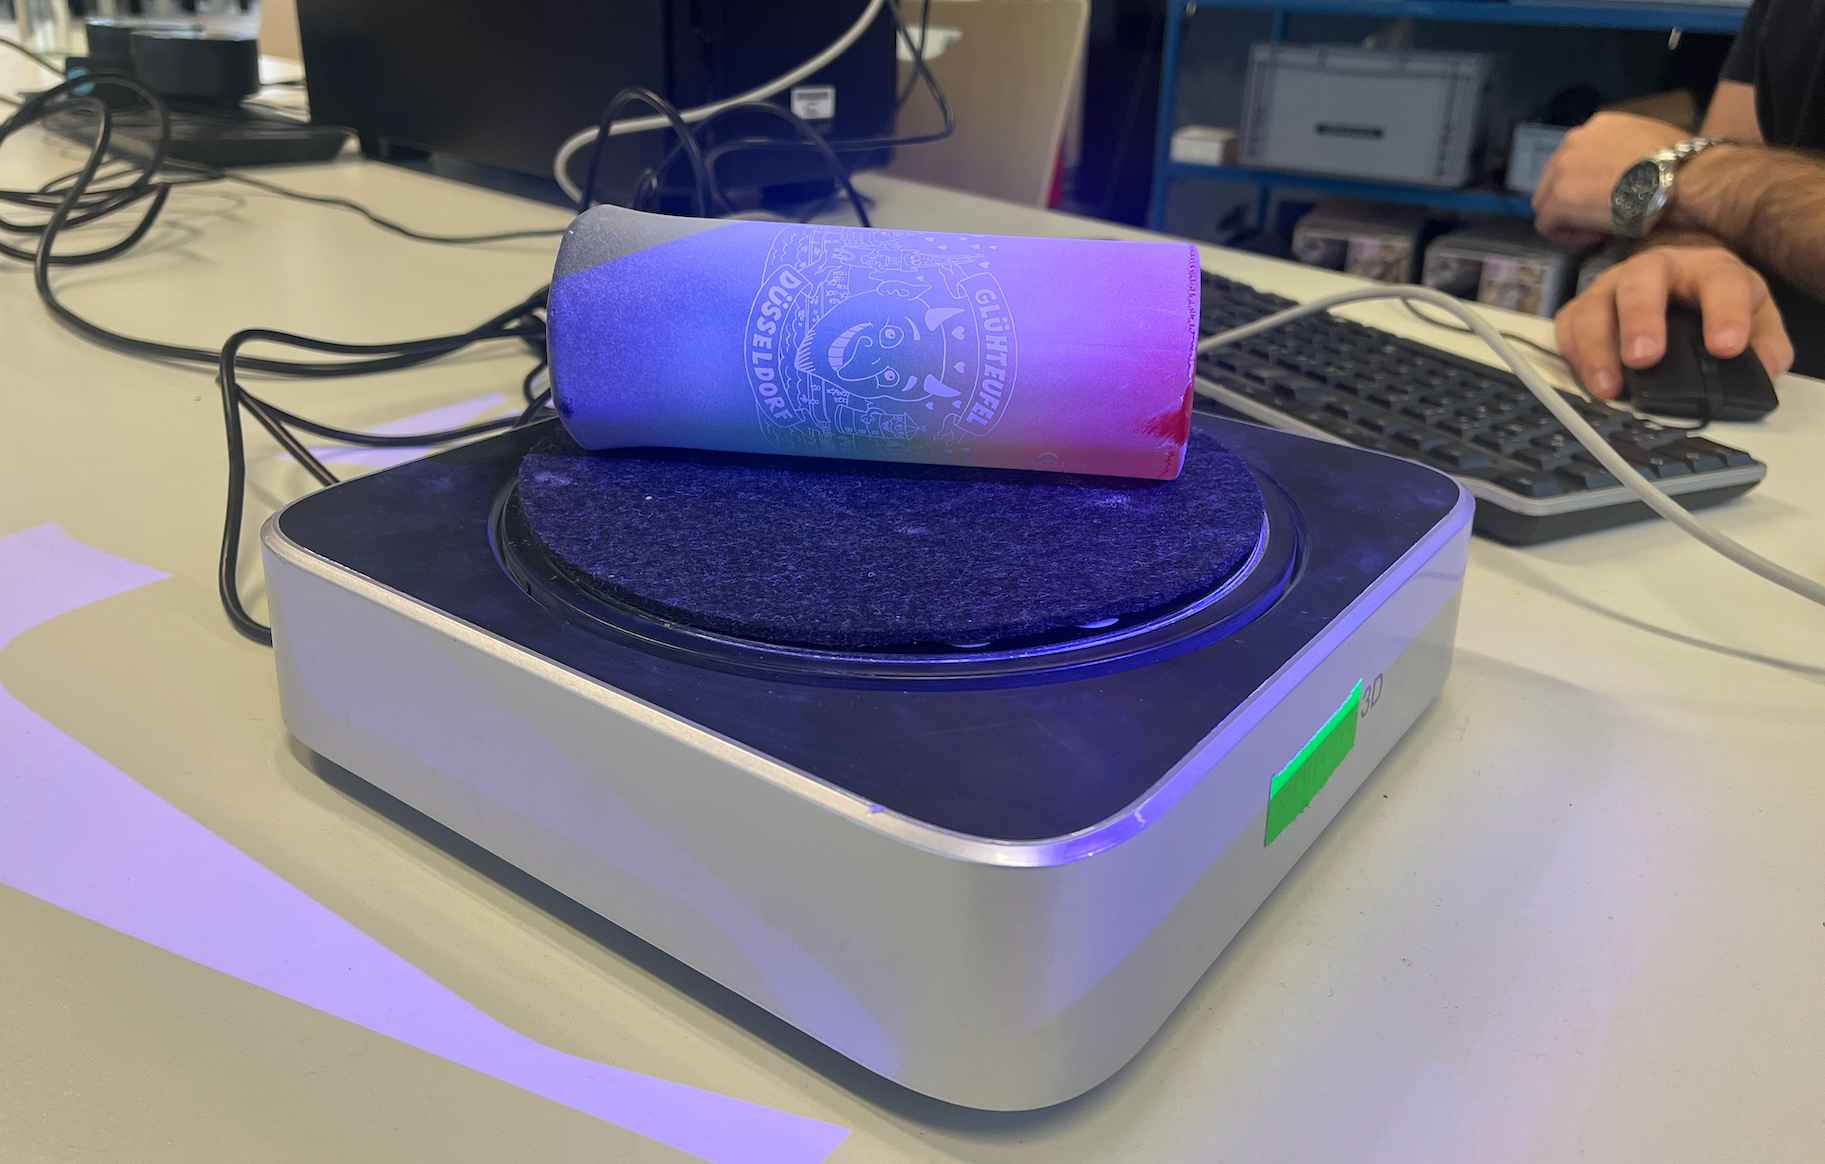
We chose the "texture scan" option again. After each scanning process, we deleted the unnecessary meshes. Also, we scan the glass cup in different positions. After that, we combined the groups by selecting one specific point of each object and turning them in the same position. For that you should press the “Shift” and leave a point for desired locations. Scanning from different angles does not require a realignment process for every instance. The software can recognize the direction and realign automatically sometimes. To end the scanning process, you should select waterlight model---> High detail. Then I did it! As a result, a high amount of spraying process gave a satisfactory solution.