WEEK 2
Computer-aided design
Assignment:
- Model (raster, vector, 2D, 3D, render, animate, simulate, ...) a possible final project, compress your images and videos, and post it on your class page.
Downloadable Design Files Links
- 2D Design: You can download my originial file 2D design here.
- 3D Design: You can download my originial file 3D design here.
2D
Illustrator
I decided to use Illustrator for the 2D project. Illustrator is not free software, but since I studied industrial design in my bachelor, I already have it on my computer. Illustrator gives a lot of freedom to the designer because of its features, but I cannot use it professionally because I do not have a graphic design background. This assignment is an advantage for me to learn new features in Illustrator.
I am a fan of the Harry Potter movie series the reason why, I decided to make a 2d drawing of the main character. For this reason, firstly I found the reference image for my 2D drawing. As a second step, I created my canvas in Illustrator and uploaded my reference image.
I used the ellipse tool in the side menu to draw the character's head, eyes and glasses. To change the slopes of the circles I drew, I used the direct selection tool to change the position of the anchor points. I used the pencil tool to draw the character's hair and eyeglass stems and again edited the drawing with the direct selection tool.
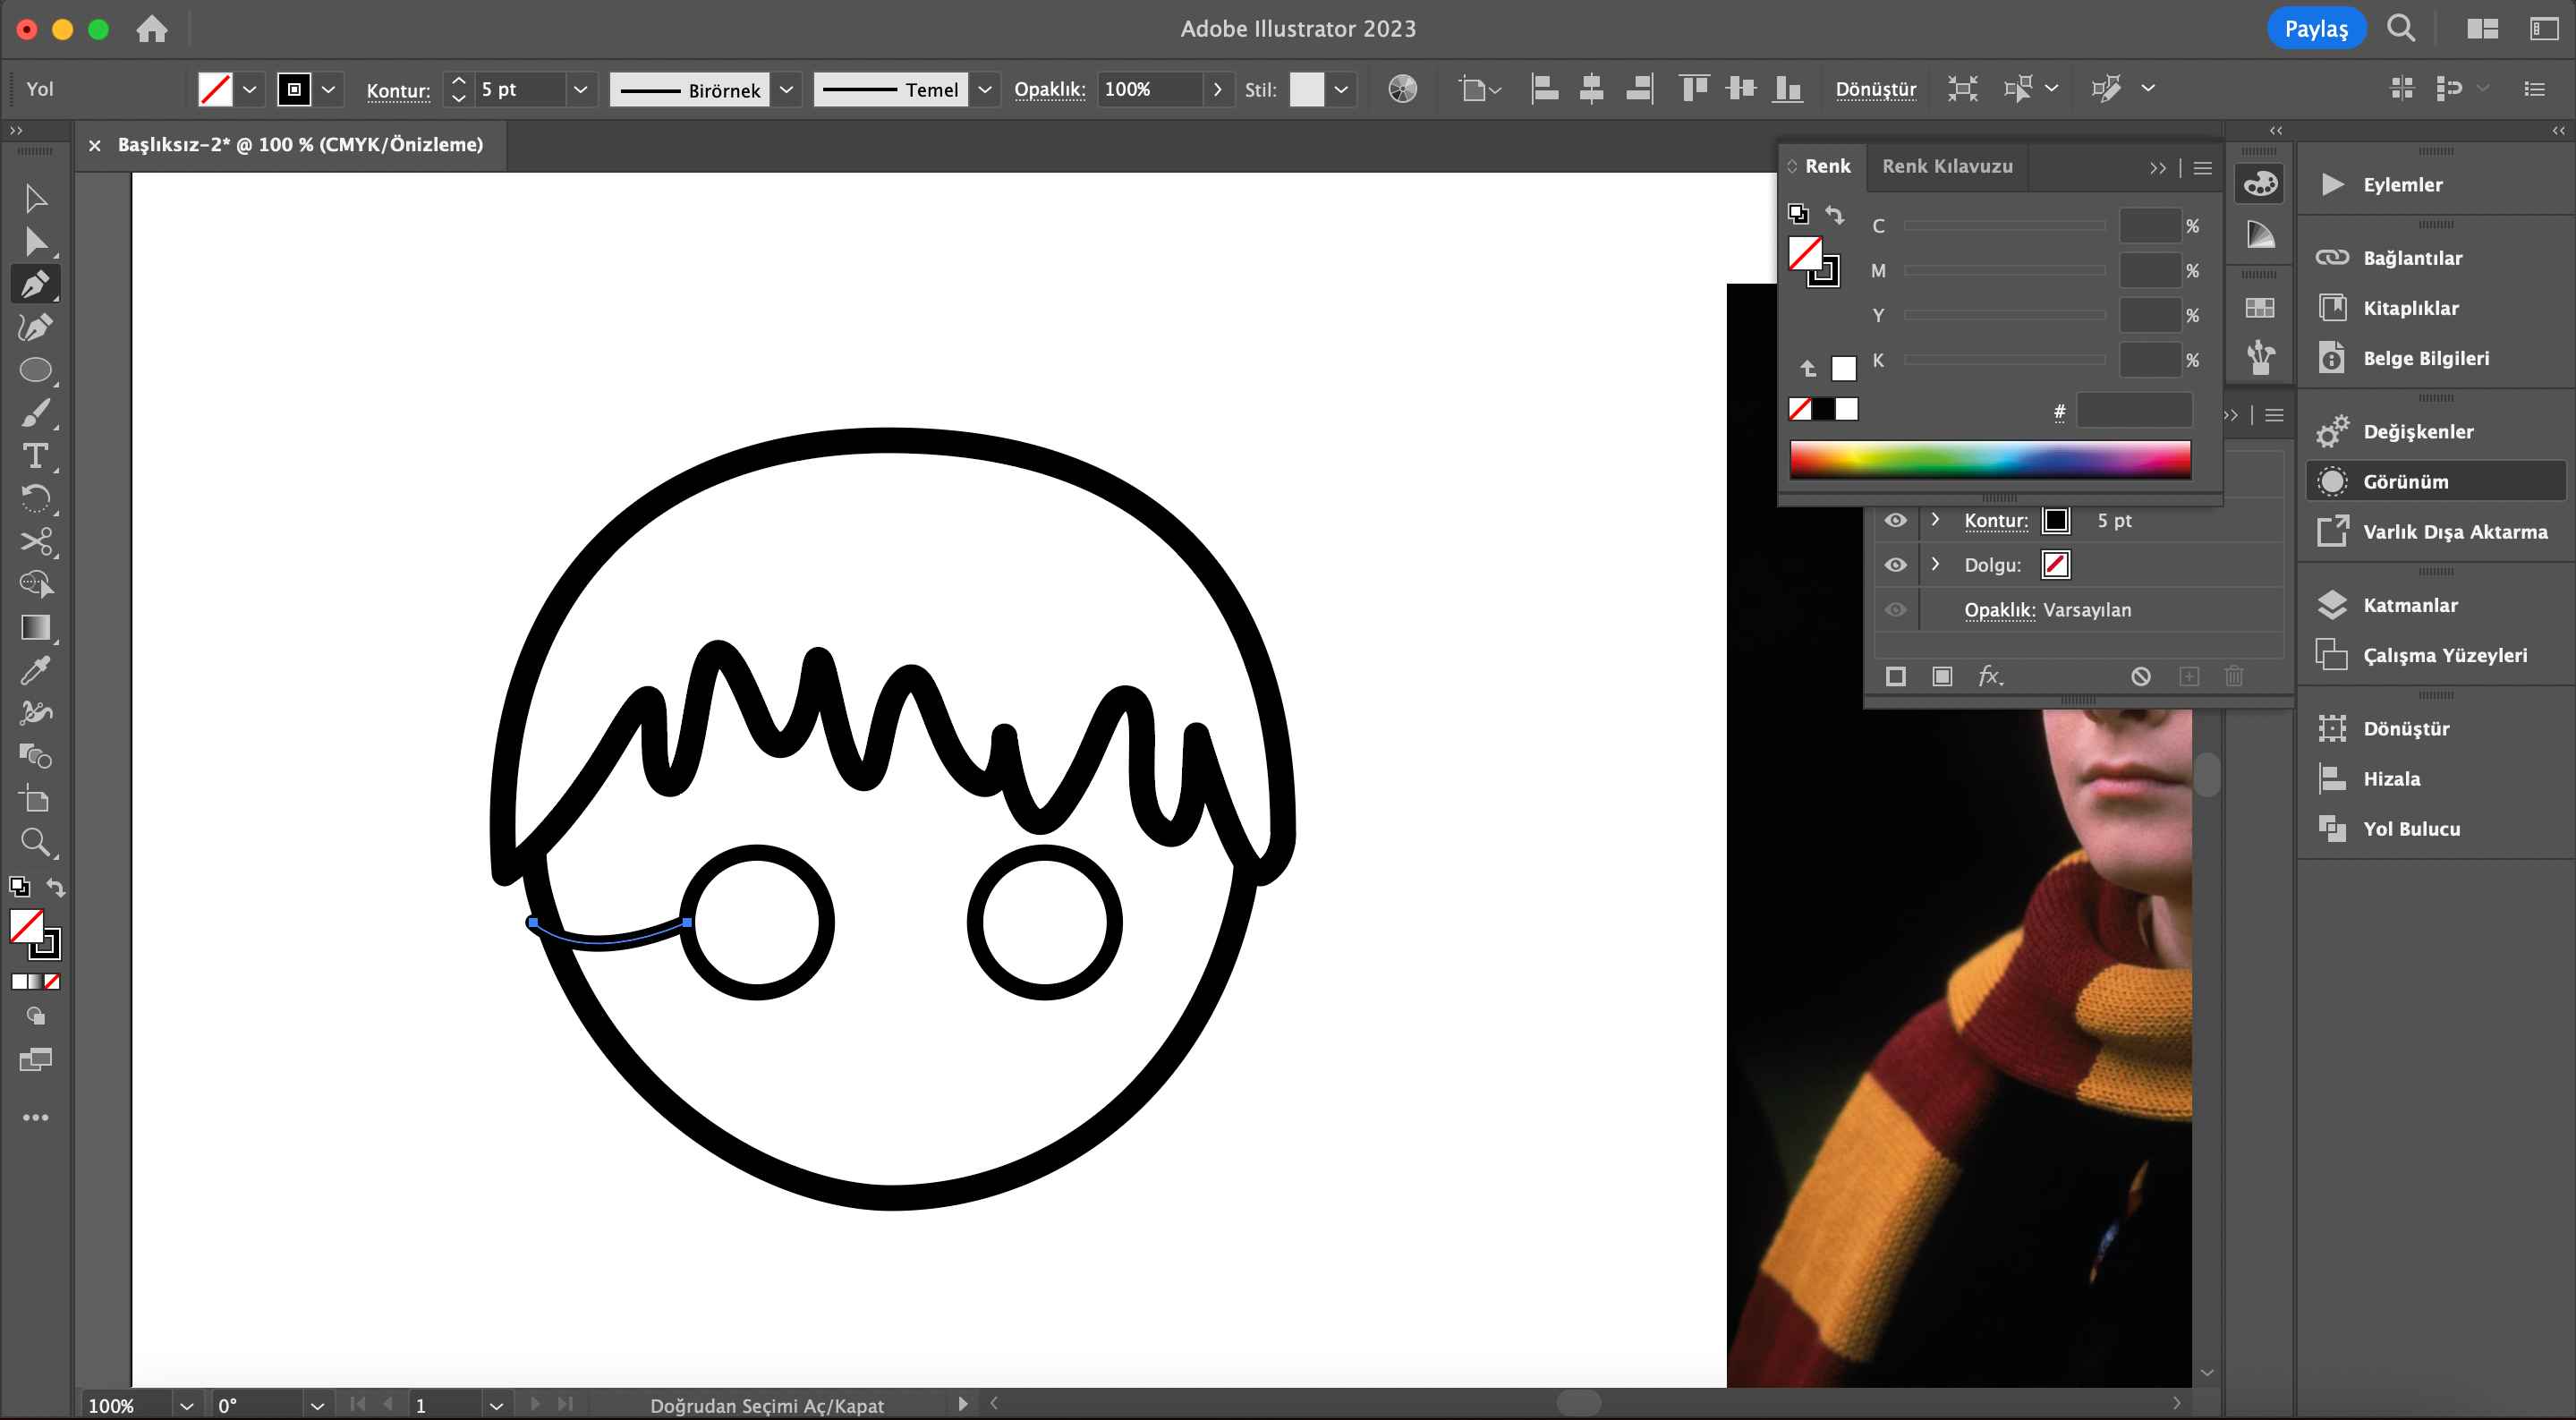
It was challenging for me to draw the character's scarf. For this, I used a tool I had not used before in Illustrator. After drawing the white area of the scarf, I created black rectangles. I used the shape builder tool to cut off the excess parts of the black rectangles.

Lastly, I drew the rest of the scarf in the same way and created the scar with the pencil tool and I exported the drawing as a png.
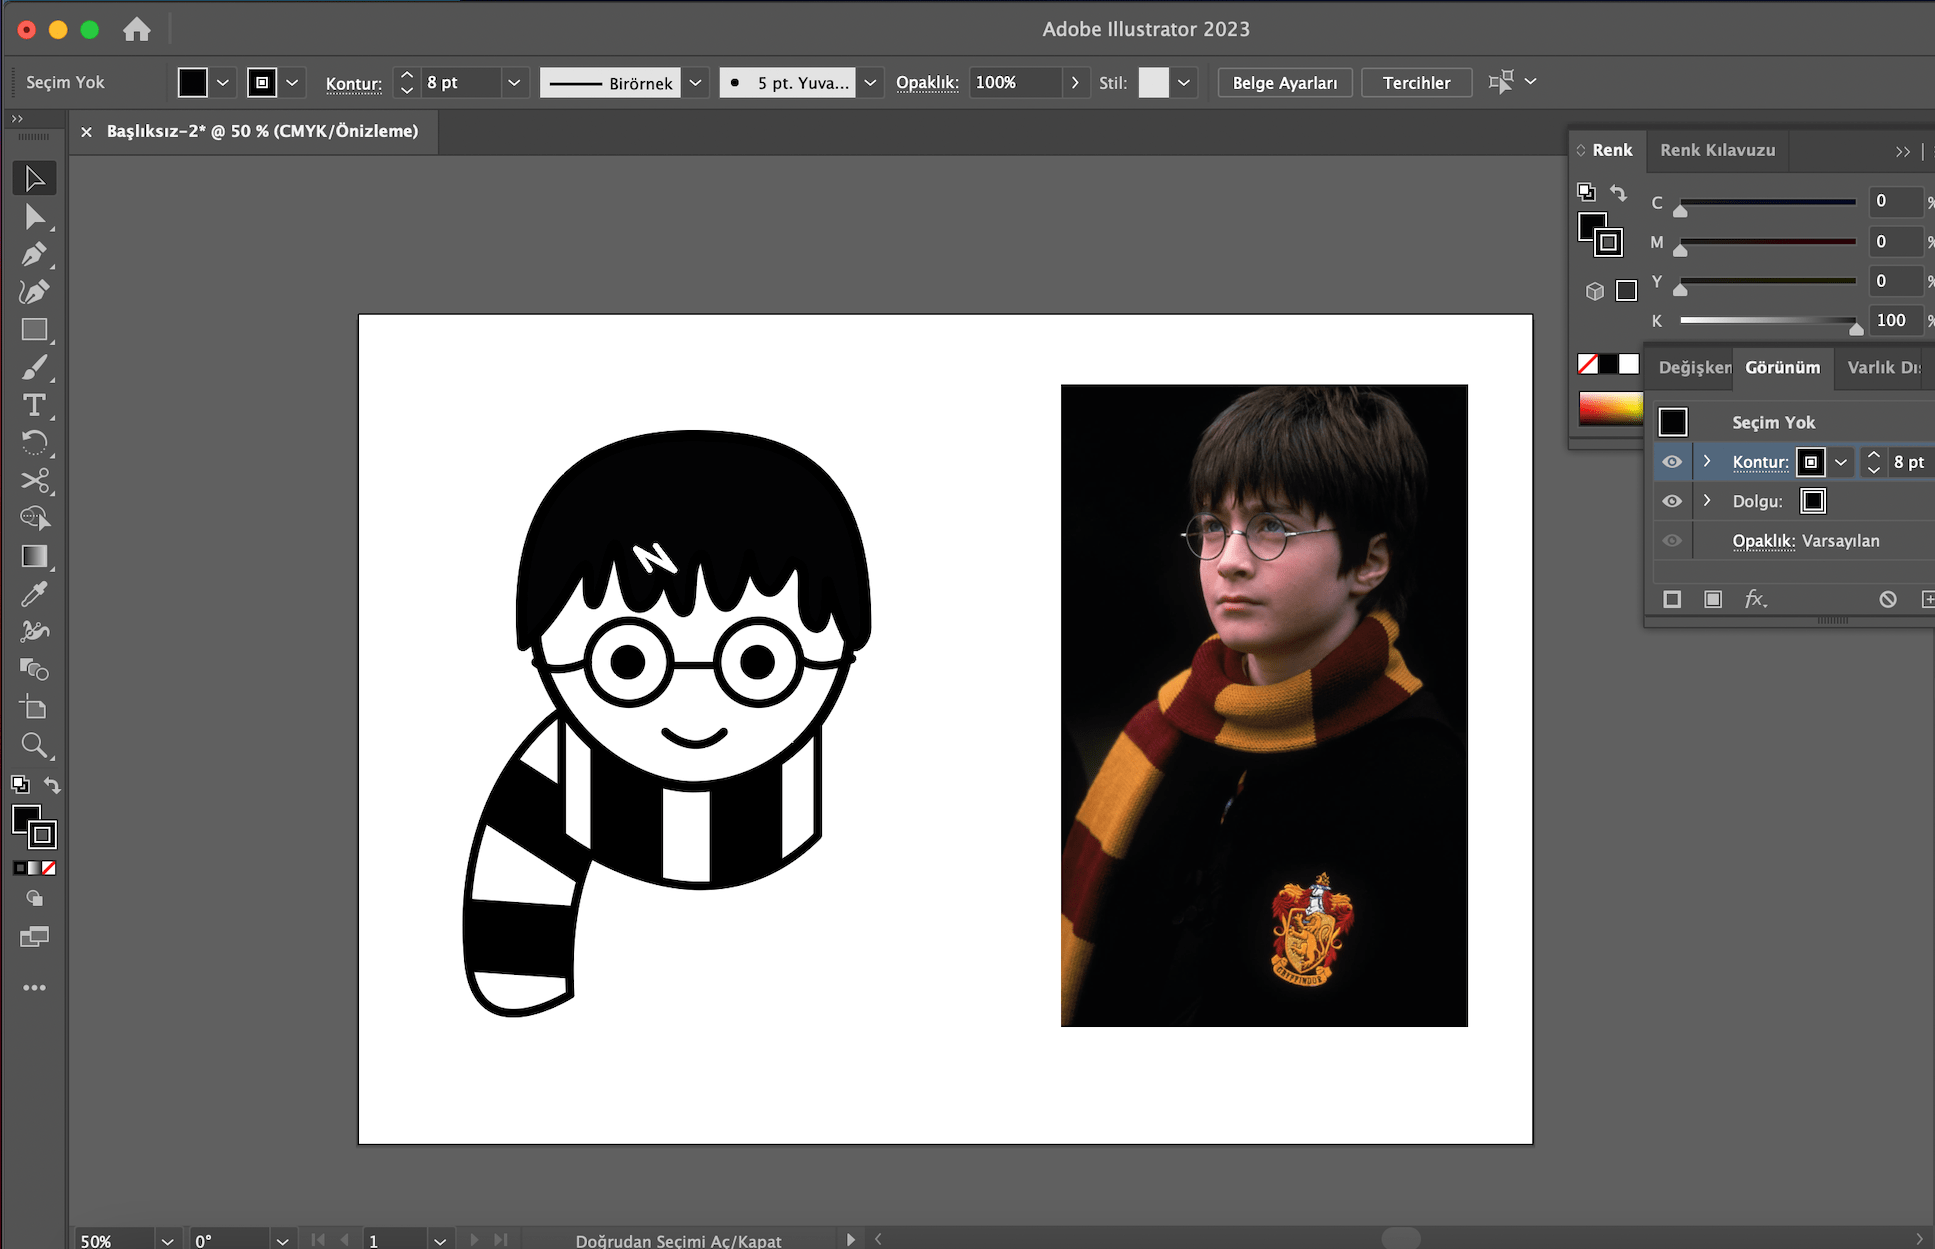
And, Here it is! My final result. I am quite happy with it:)

3D
Fusion 360
During this chapter I will explain how I visualised the idea of my final project in Fusion360. This was not a difficult task for me as I have experience in Fusion 360. To use Fusion 360 easily and effectively, it is important to be familiar with its interface.
Unlike other 3D drawing tools, Fusion360 provides paremetric design. With this feature, it allows you to make changes on the drawing. But I did not use the paremeter feature for this task. I think Fusion360 is easier to learn than other 3D drawing tools. If I compare it with rhino, Fusion360 has an easier to use interface and it is easier to find the required tools.

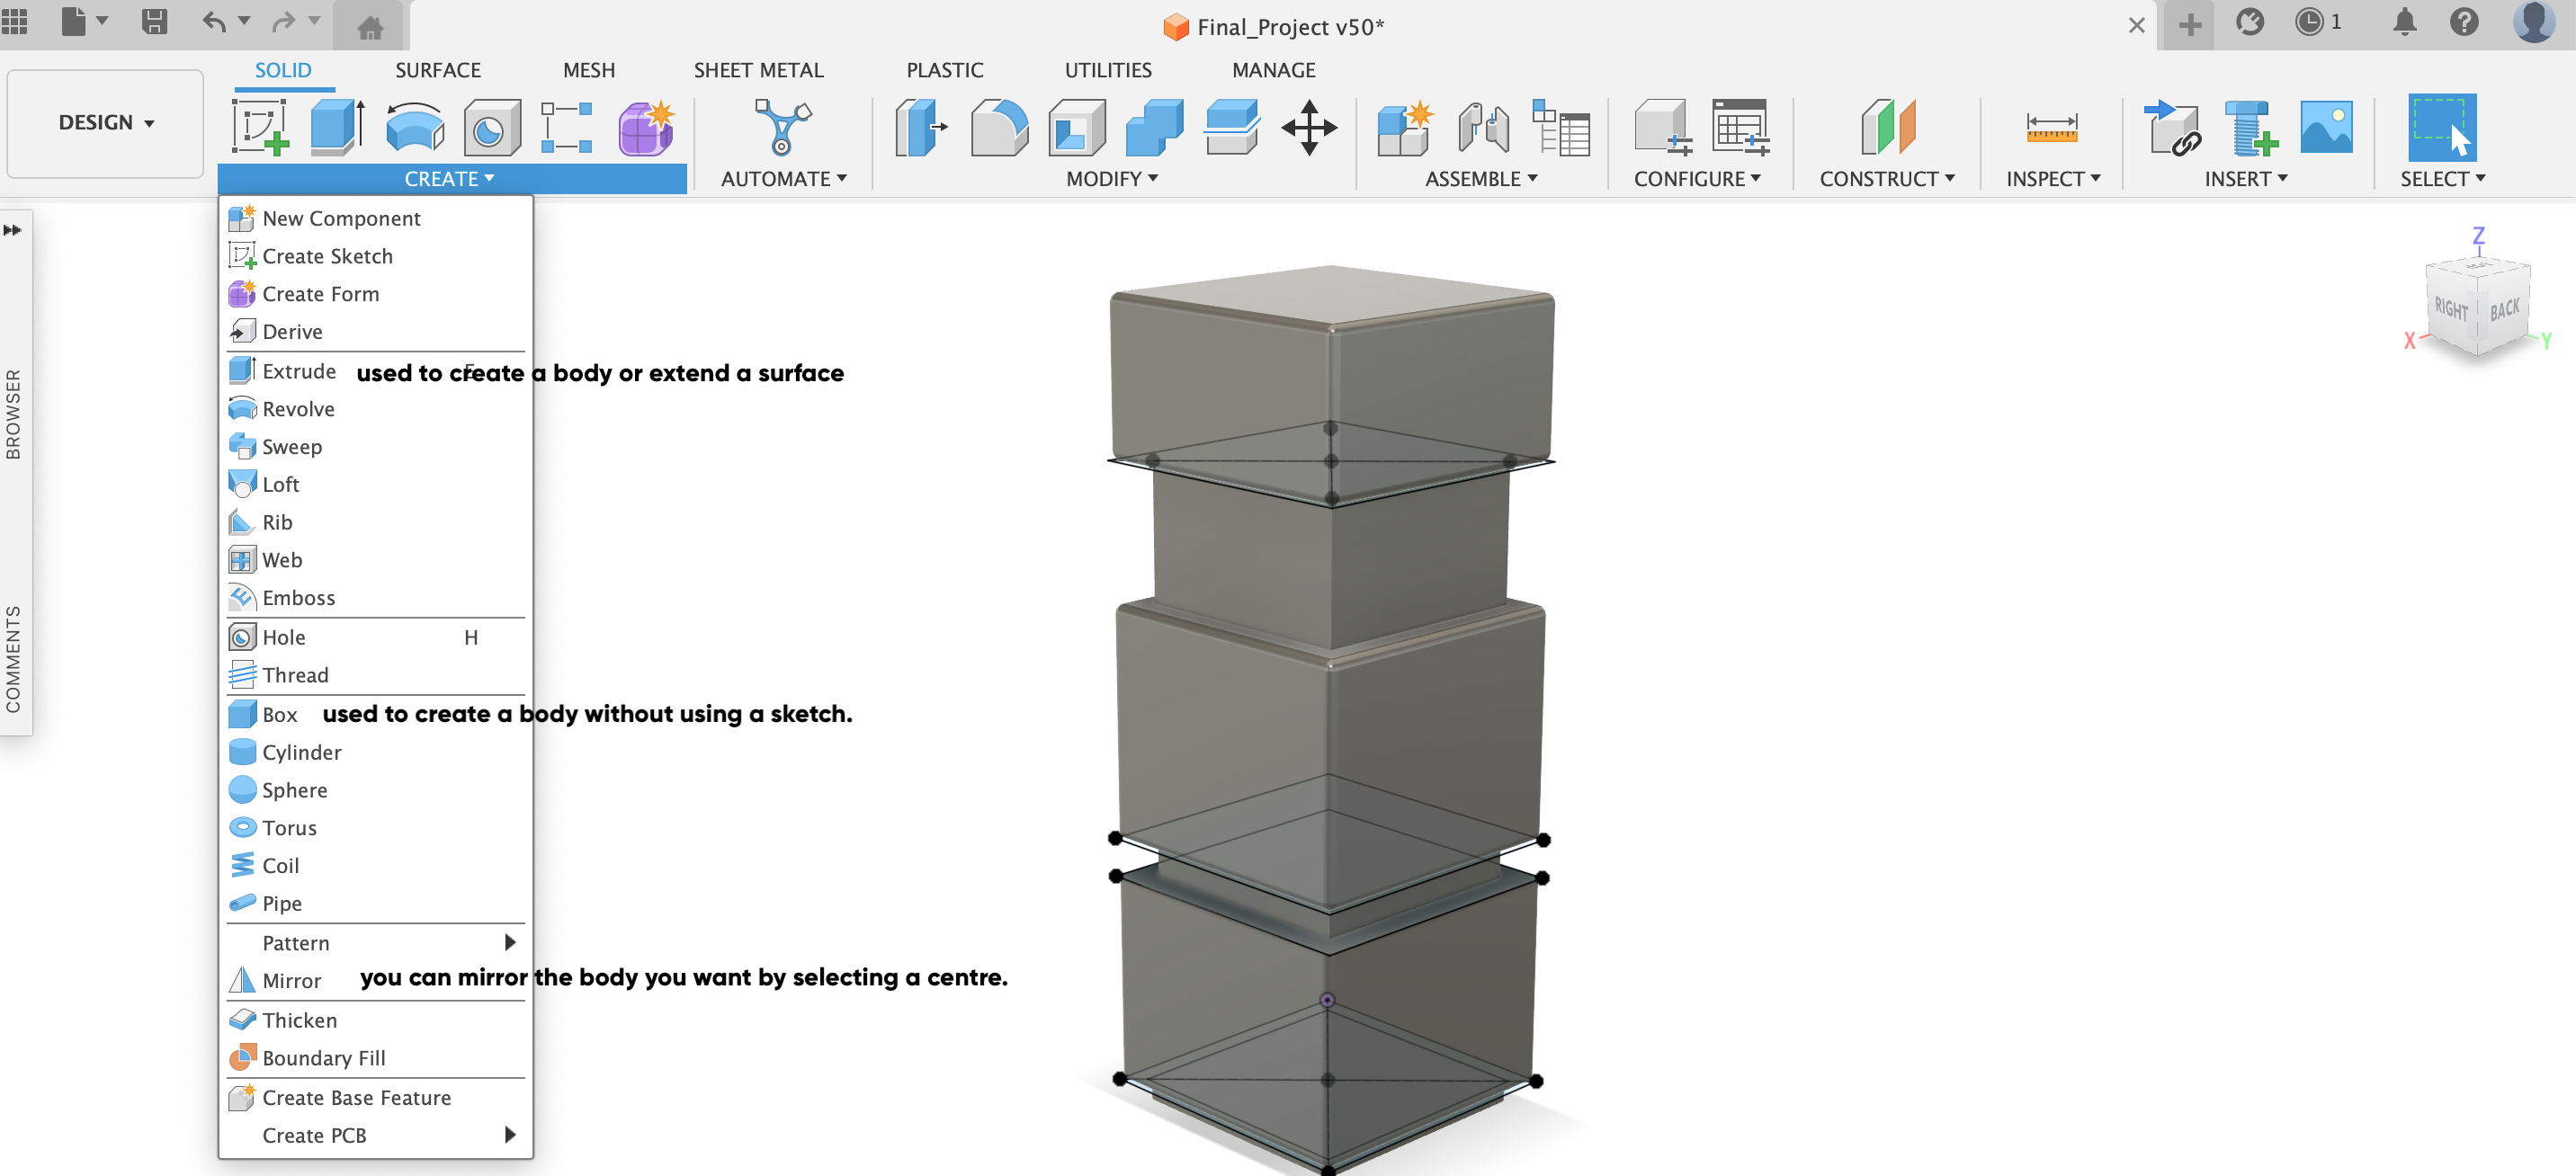
There are drawing tools at the top of the interface. The tool with the green plus on the far left is used to create a sketch. This tool is particularly important because drawing each body using a sketch makes it easier to make changes later in the drawing.

On the left of the screen is a panel where you can adjust the appearance of the drawn bodies and sketches. You can prevent unwanted drawings from appearing. Also, naming each sketch makes it easier to manage all sketches. With the eye mark next to the labels, the desired drawing can be made invisible or visible.

At the bottom of the interface is a chart where you can see the drawing history. It is important to use this effectively because it allows you to make changes by clicking on any step without undoing your progress.
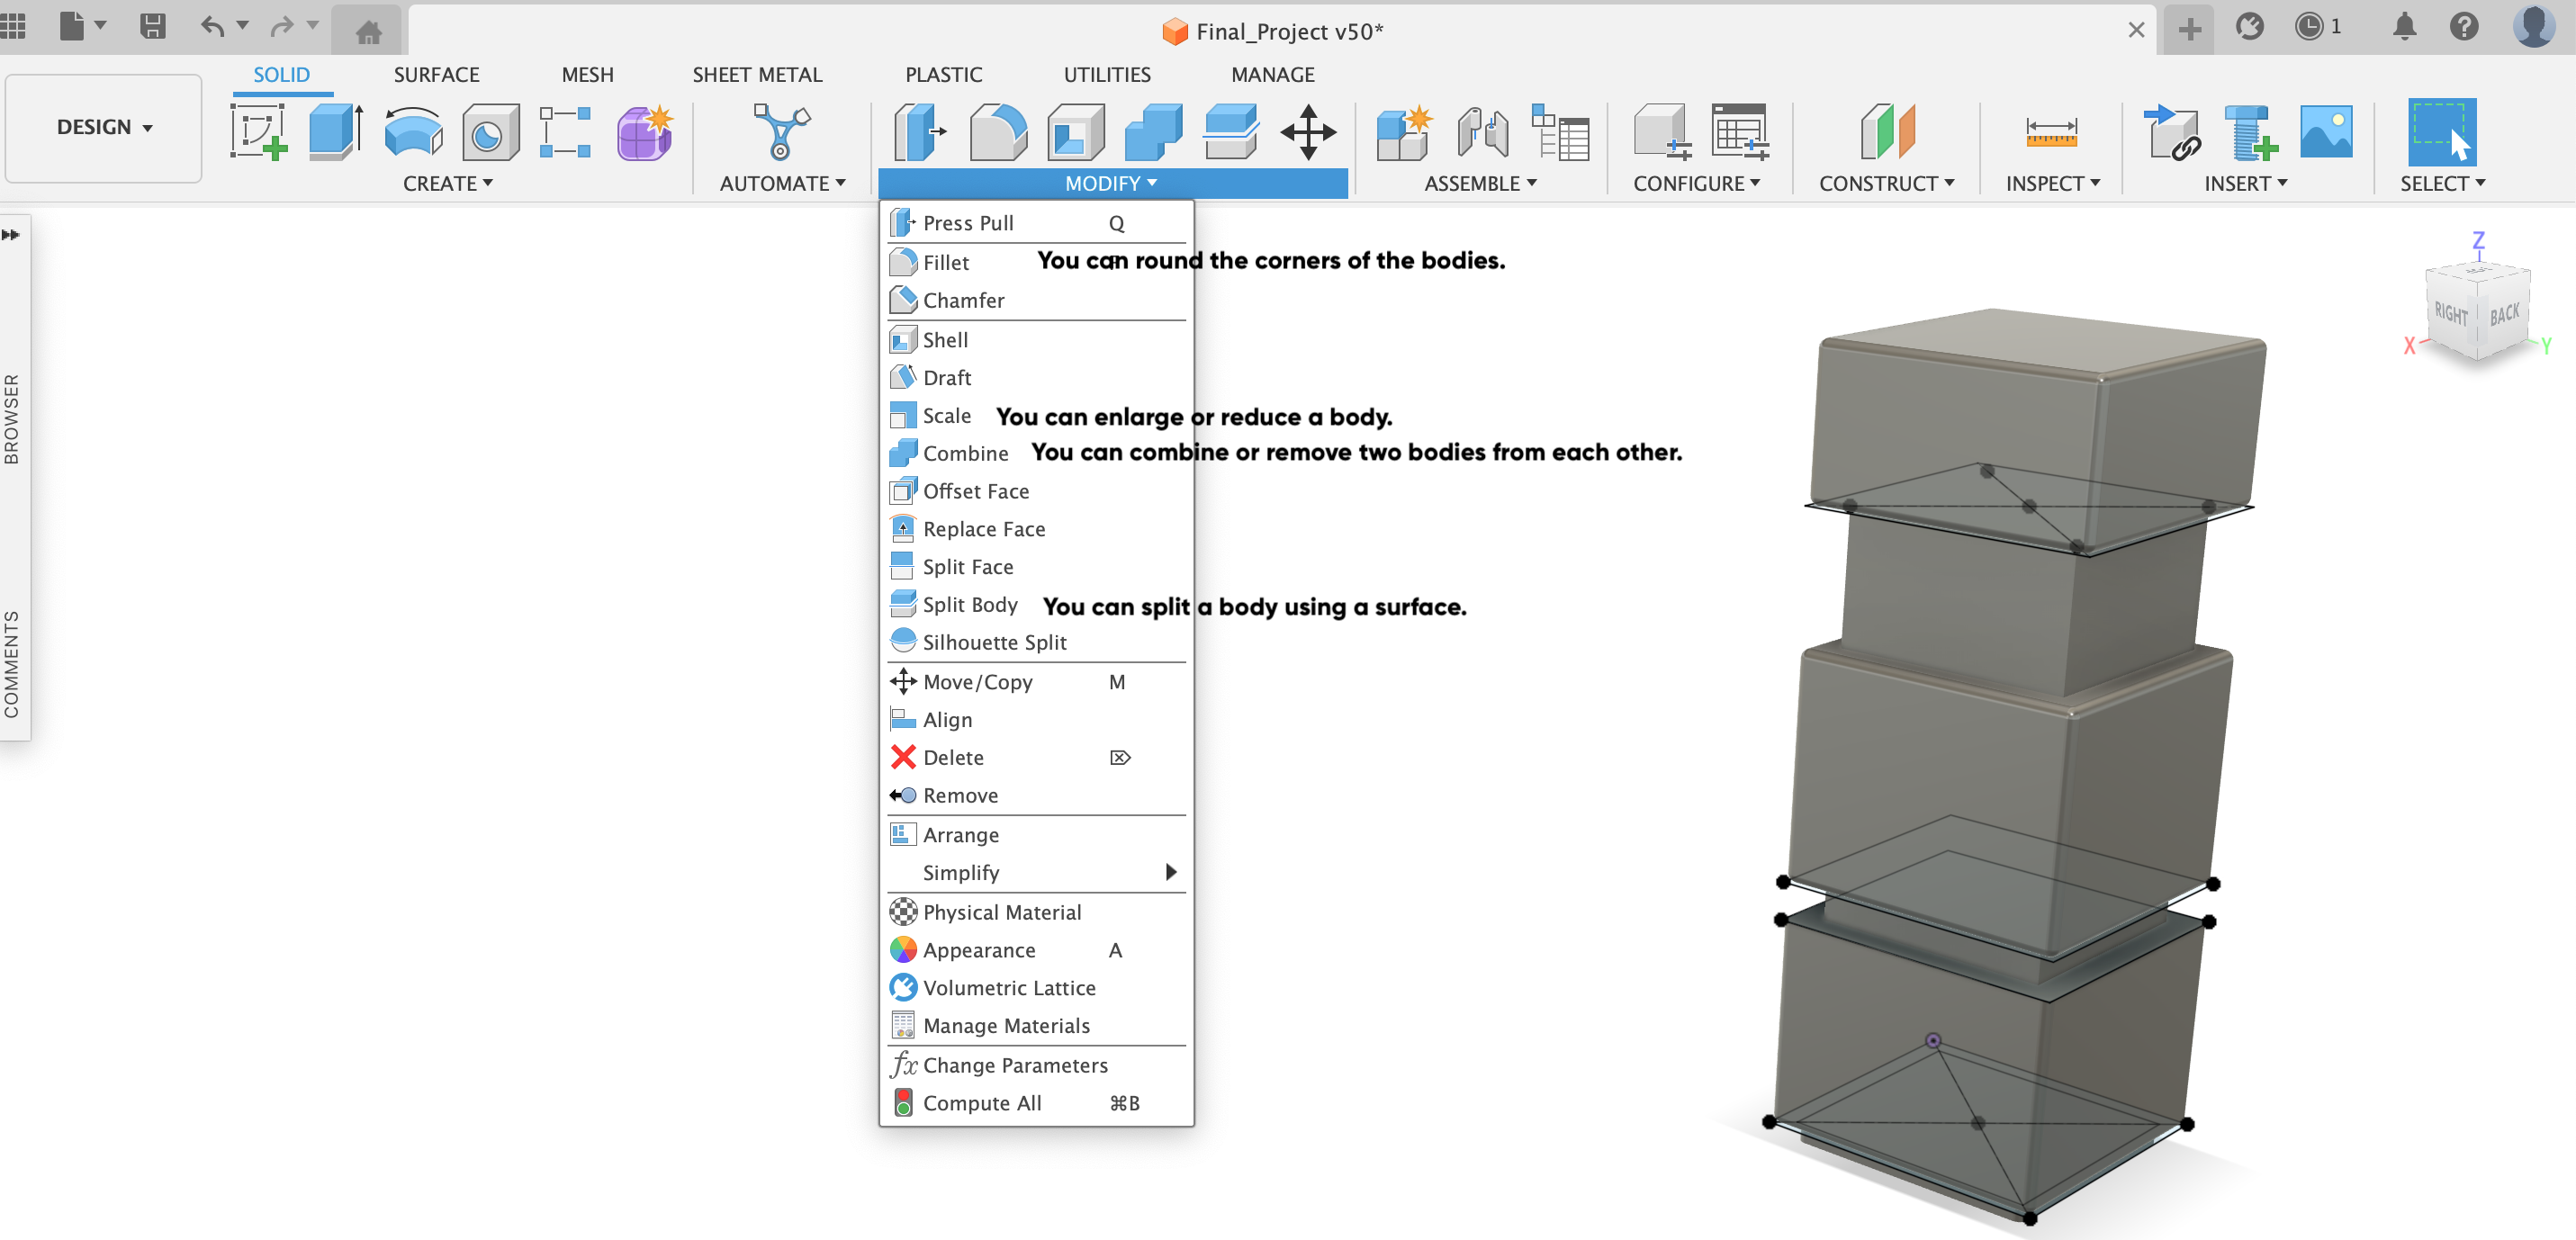
In the first step of the drawing, I opened a new sketch and created a square. Then I created a larger square by determining the centre of the square I created. I used the smaller square to make the floor of the product using the "extrude" tool. This is easily done as follows; I clicked on the "extrude" tool at the top of the interface. Then I selected the face I wanted to use and pulled it down. I wanted to soften the corners of the body I created by adding a radius, so I used the Modifiy--Fillet tool, clicked on the corners of the body and set the fillet value I wanted.
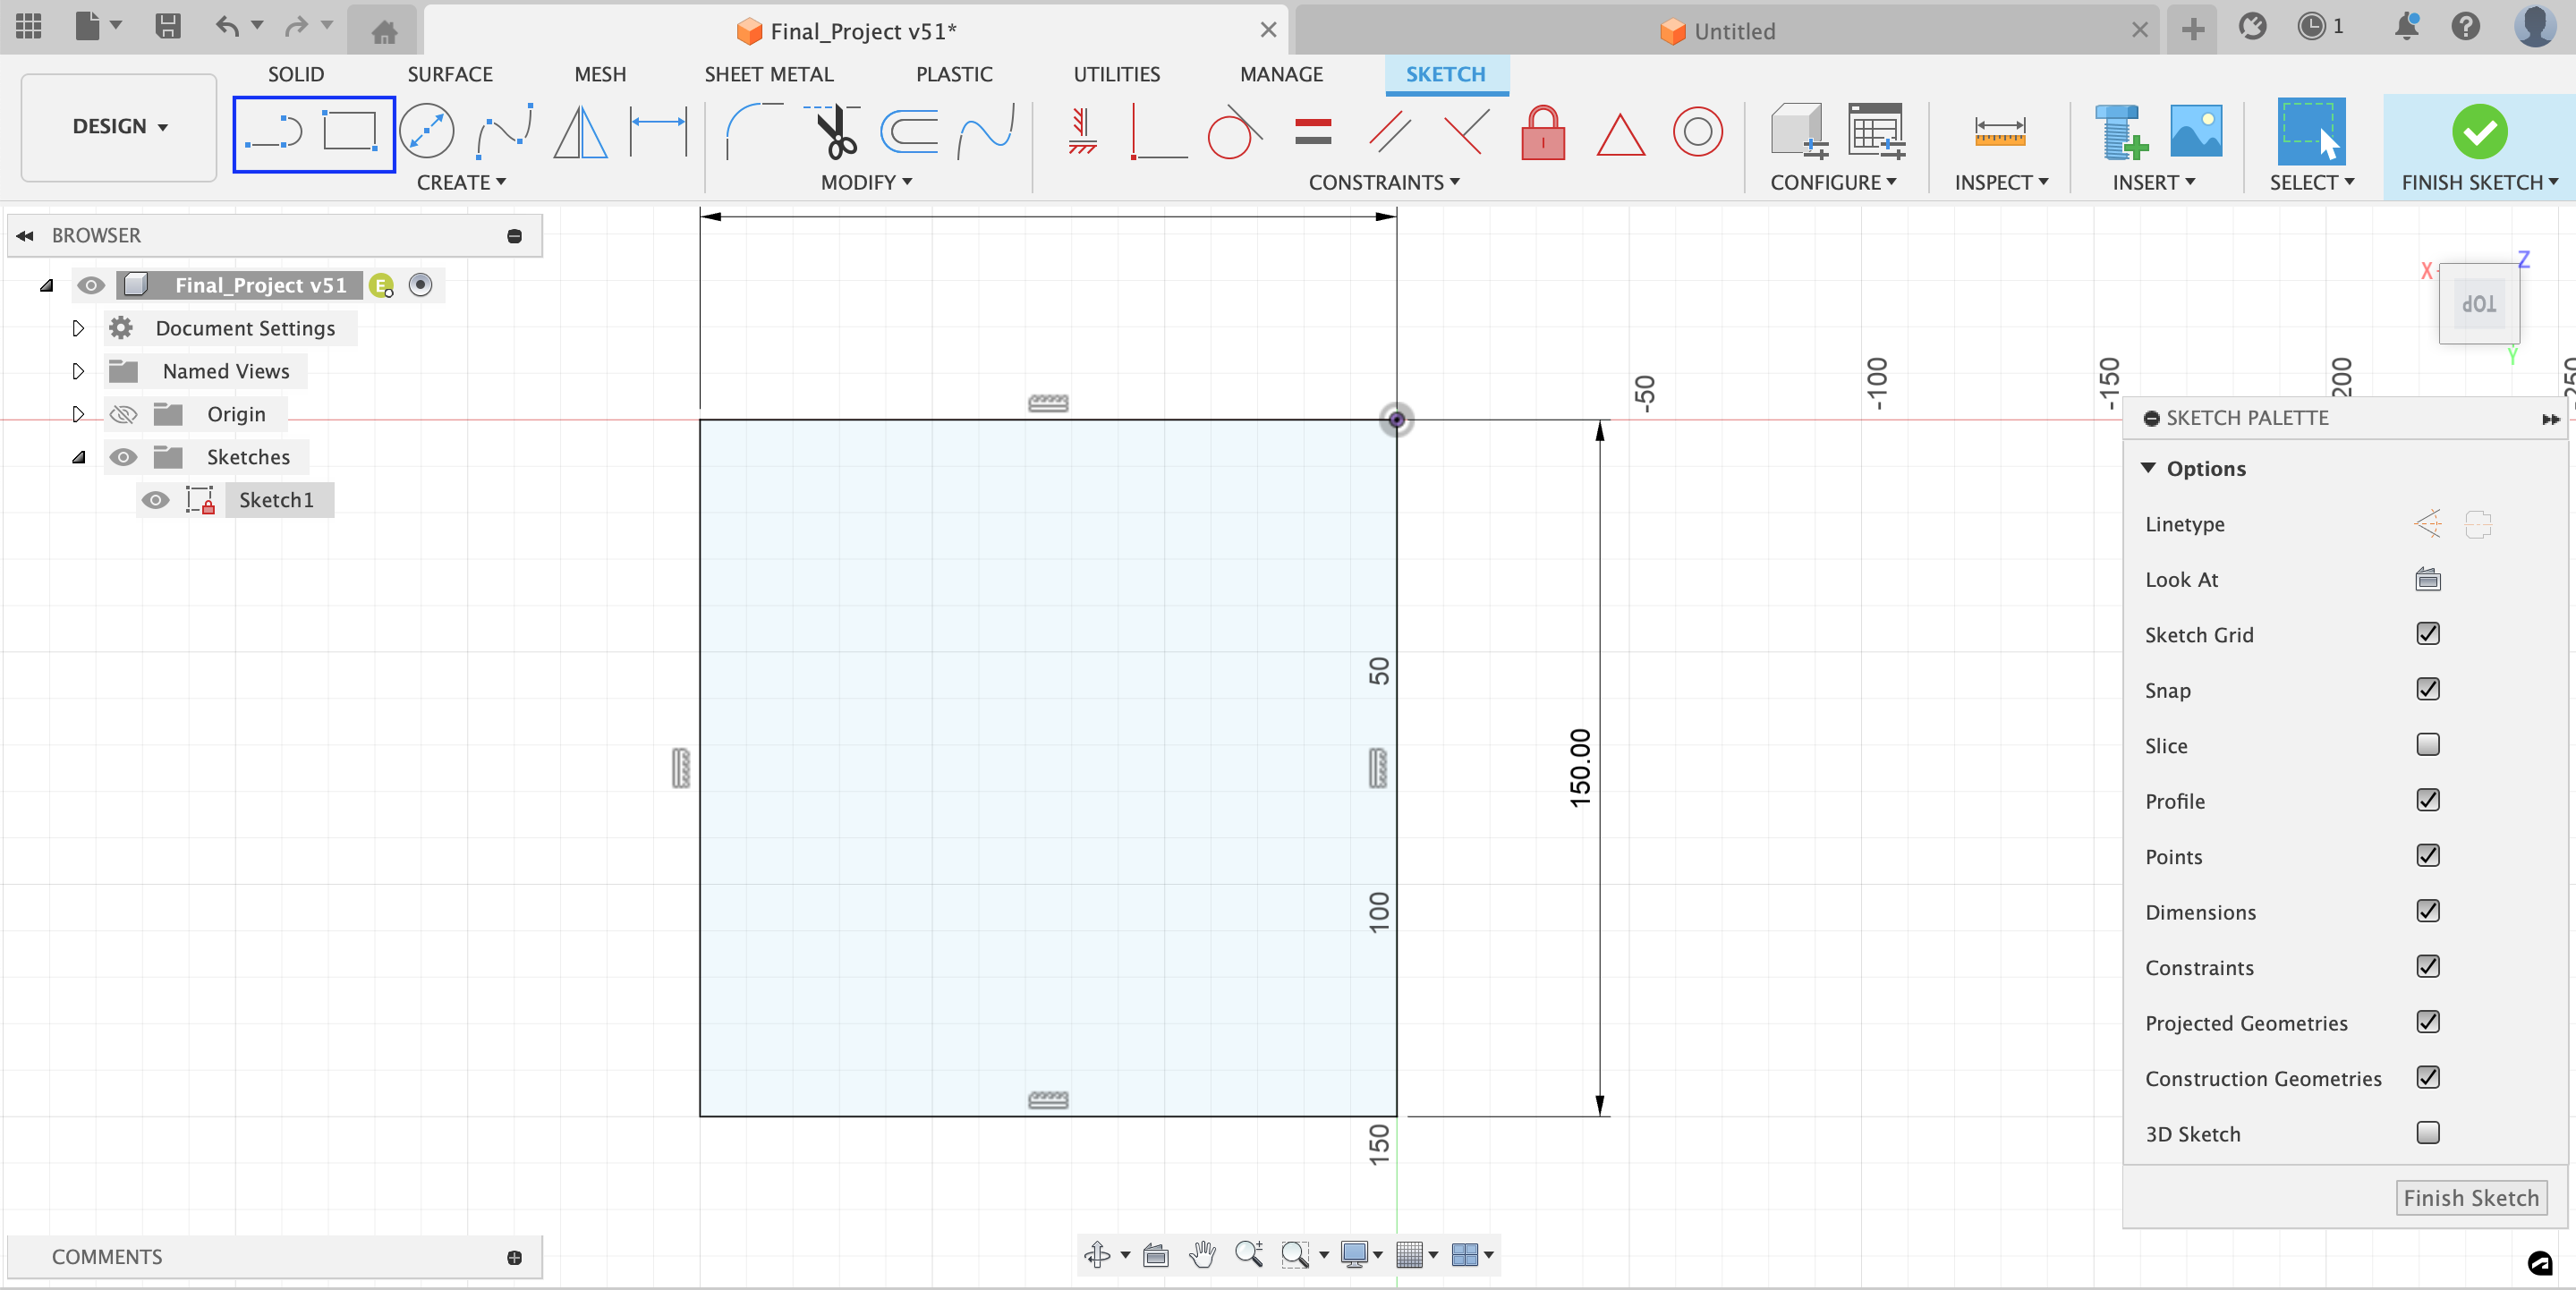
After selecting the sketch creation sign at the top left, the sketch interface opens. Again, I created my sketch using the line and rectangle tools marked with the blue box at the top left. If you want to create a rectangle, there are many ways to do it. I used the "2 point rectangle" tool, which selects a start and an end point to draw a rectangle. To find the desired size, use the boxes next to the edges that give the length information. The "Tab" button can be used to switch between the boxes giving length information and change the edge lengths of the rectangle.
After creating the rectangle, I drew two diagonal lines through the centre of the rectangle for my convenience in the rest of the drawing. For this I took the "line" tool indicated by the blue box. Using this tool is similar to using the rectangle tool. I drew my lines by selecting a start and an end point. When the sketch drawing is finished, press the "Finish sketch" button in the upper right corner and return to the main view.
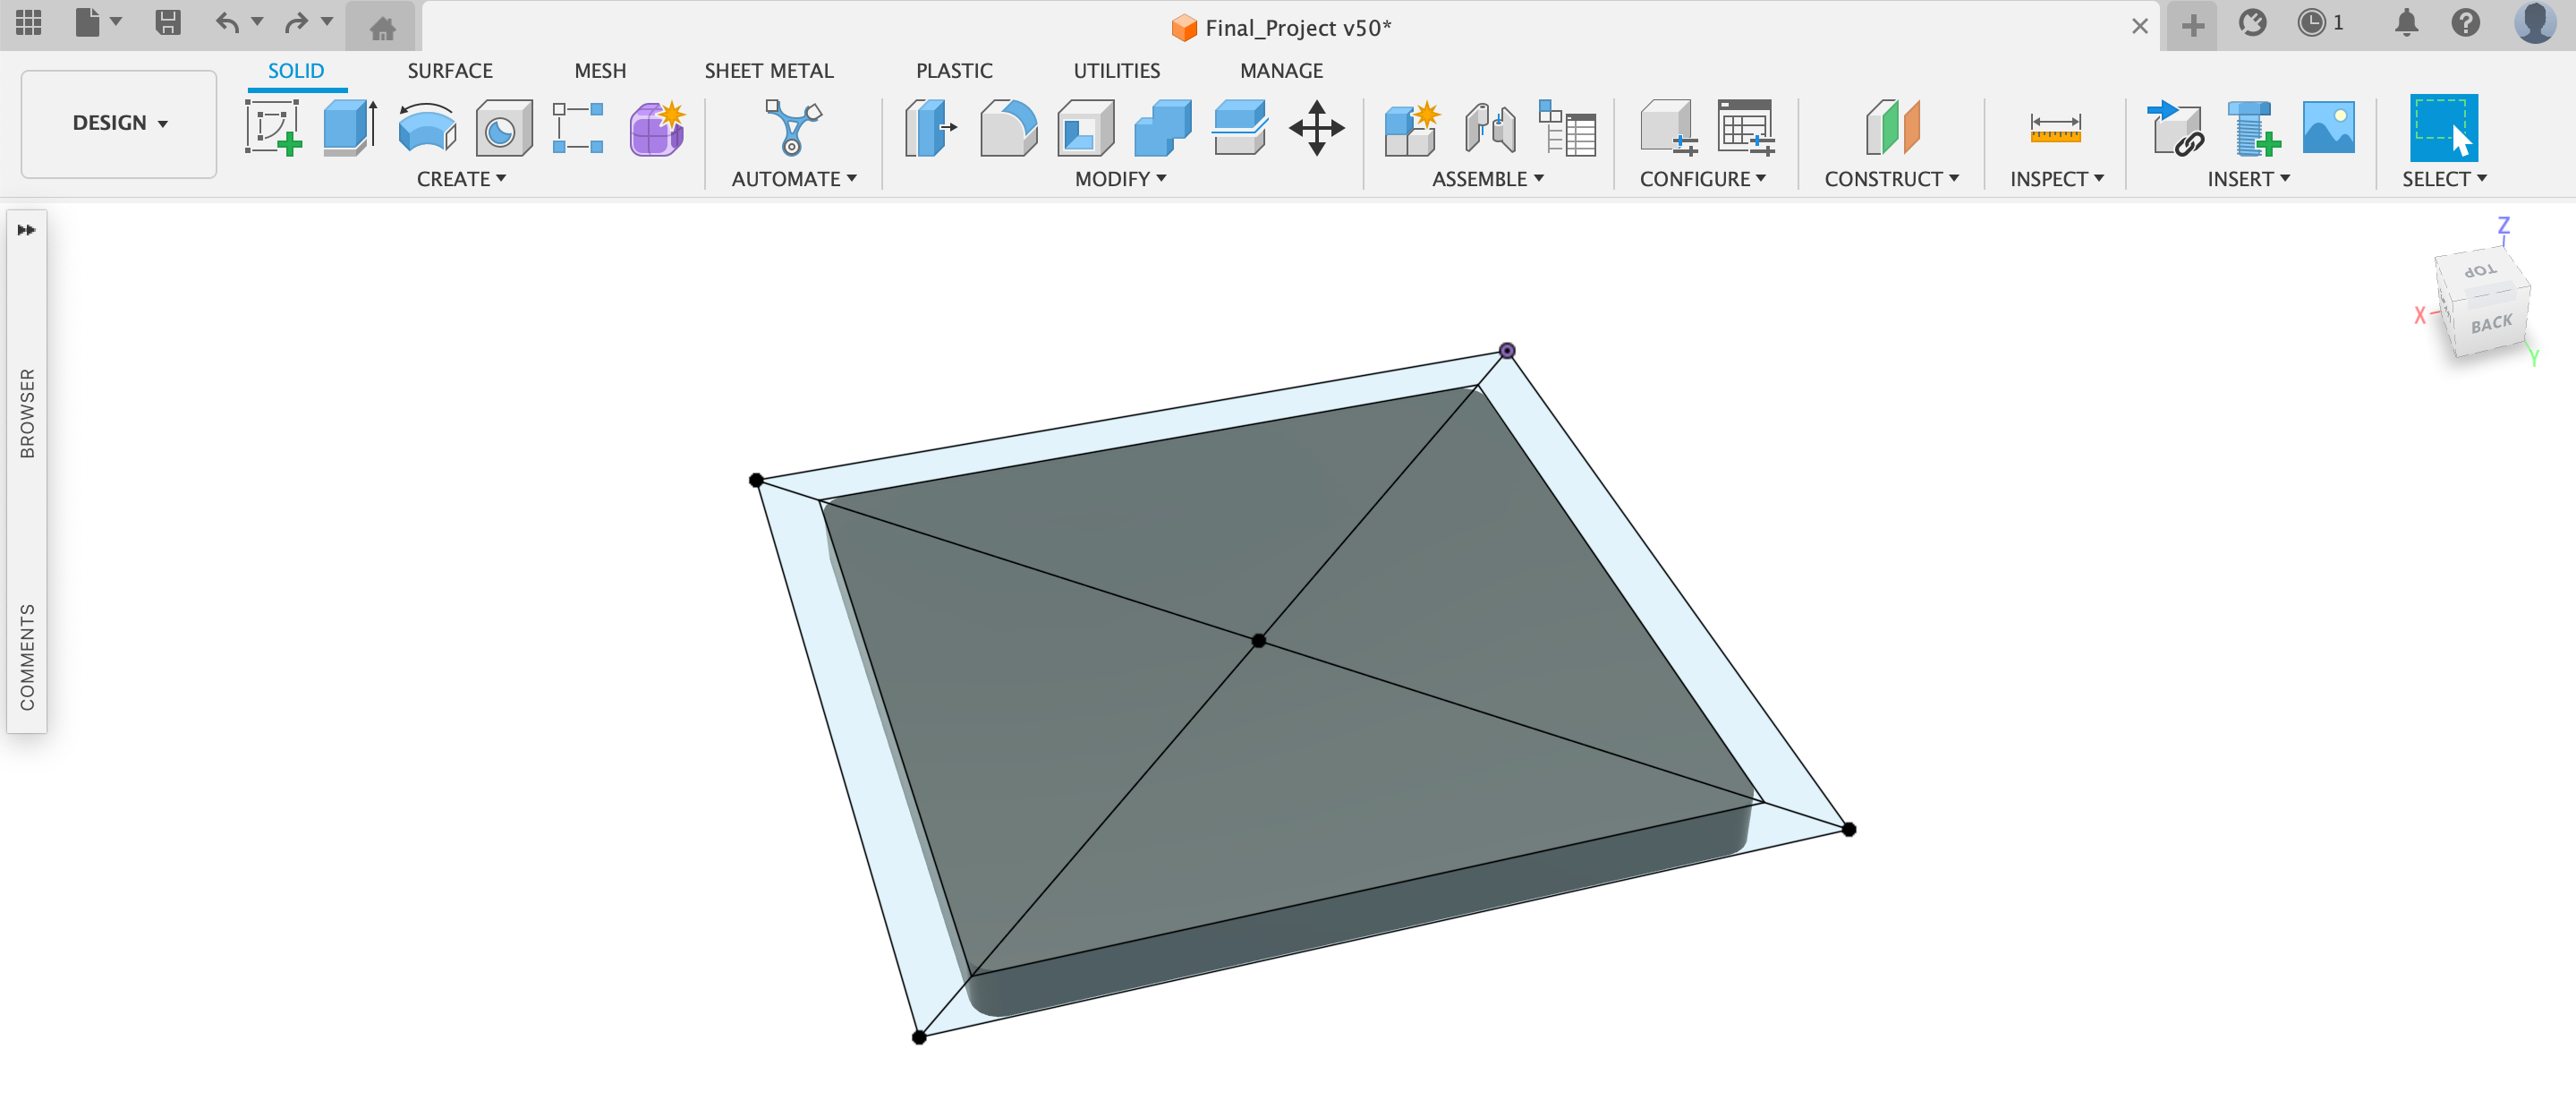
To use the Extrude tool, the tool is selected from the panel above and after clicking on the desired surface, the arrow is pulled upwards or you can create the body by inserting the desired value into the box.

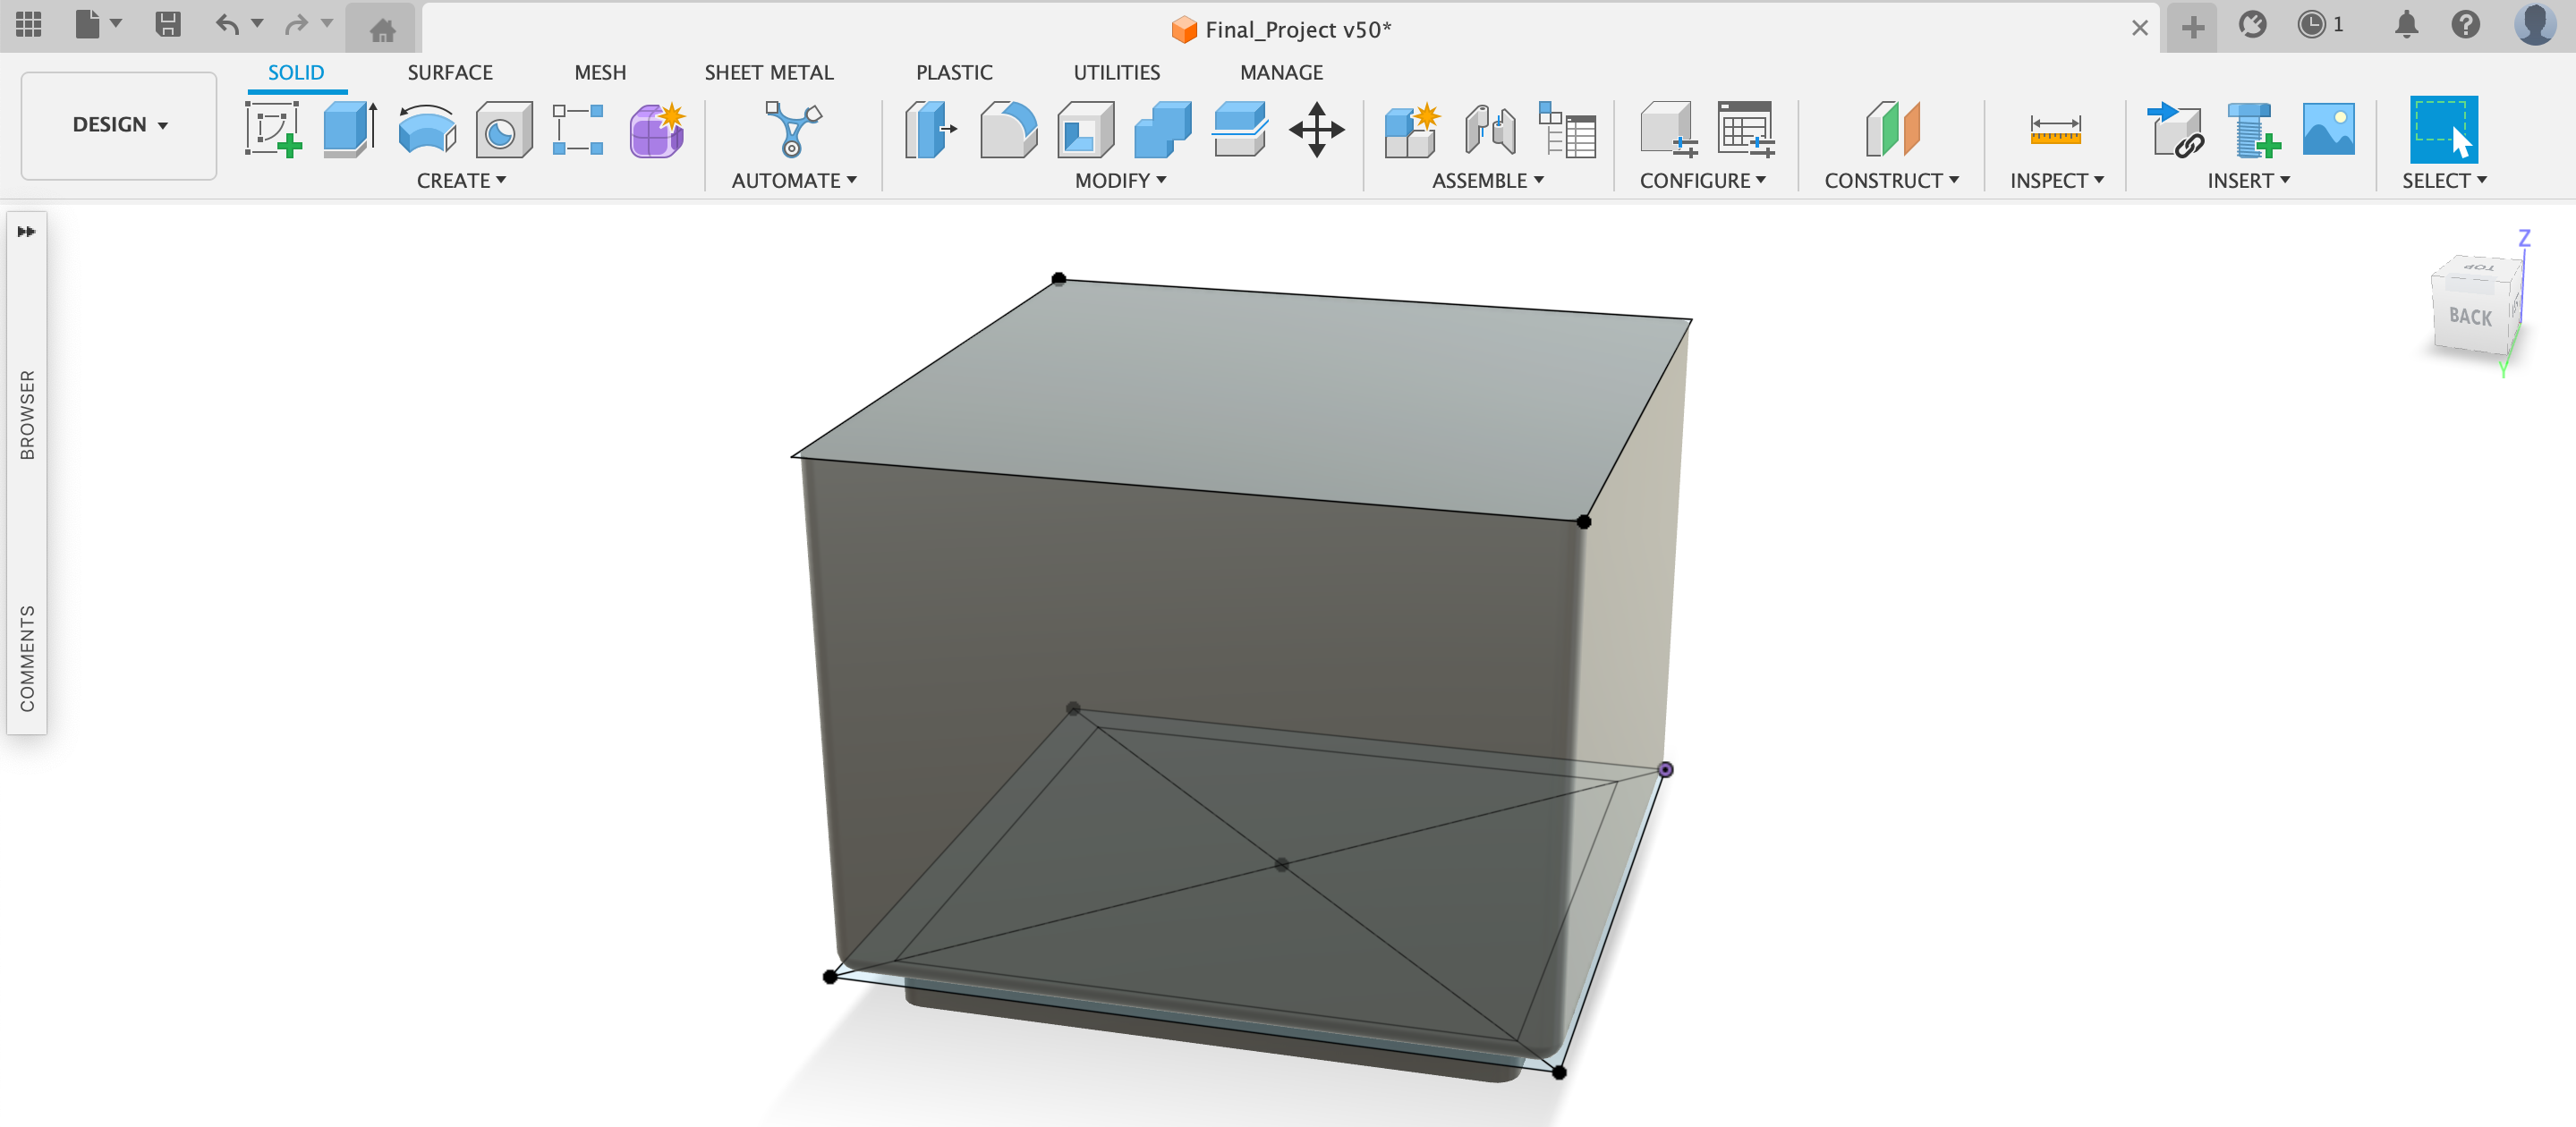
In the second step, I created another body using the large square I drew in the first step and filleted the edges and corners again. Then I clicked on the sketch tool at the top left to create a new sketch and selected the surface I wanted to create the sketch and drew another square on top of the body I created.
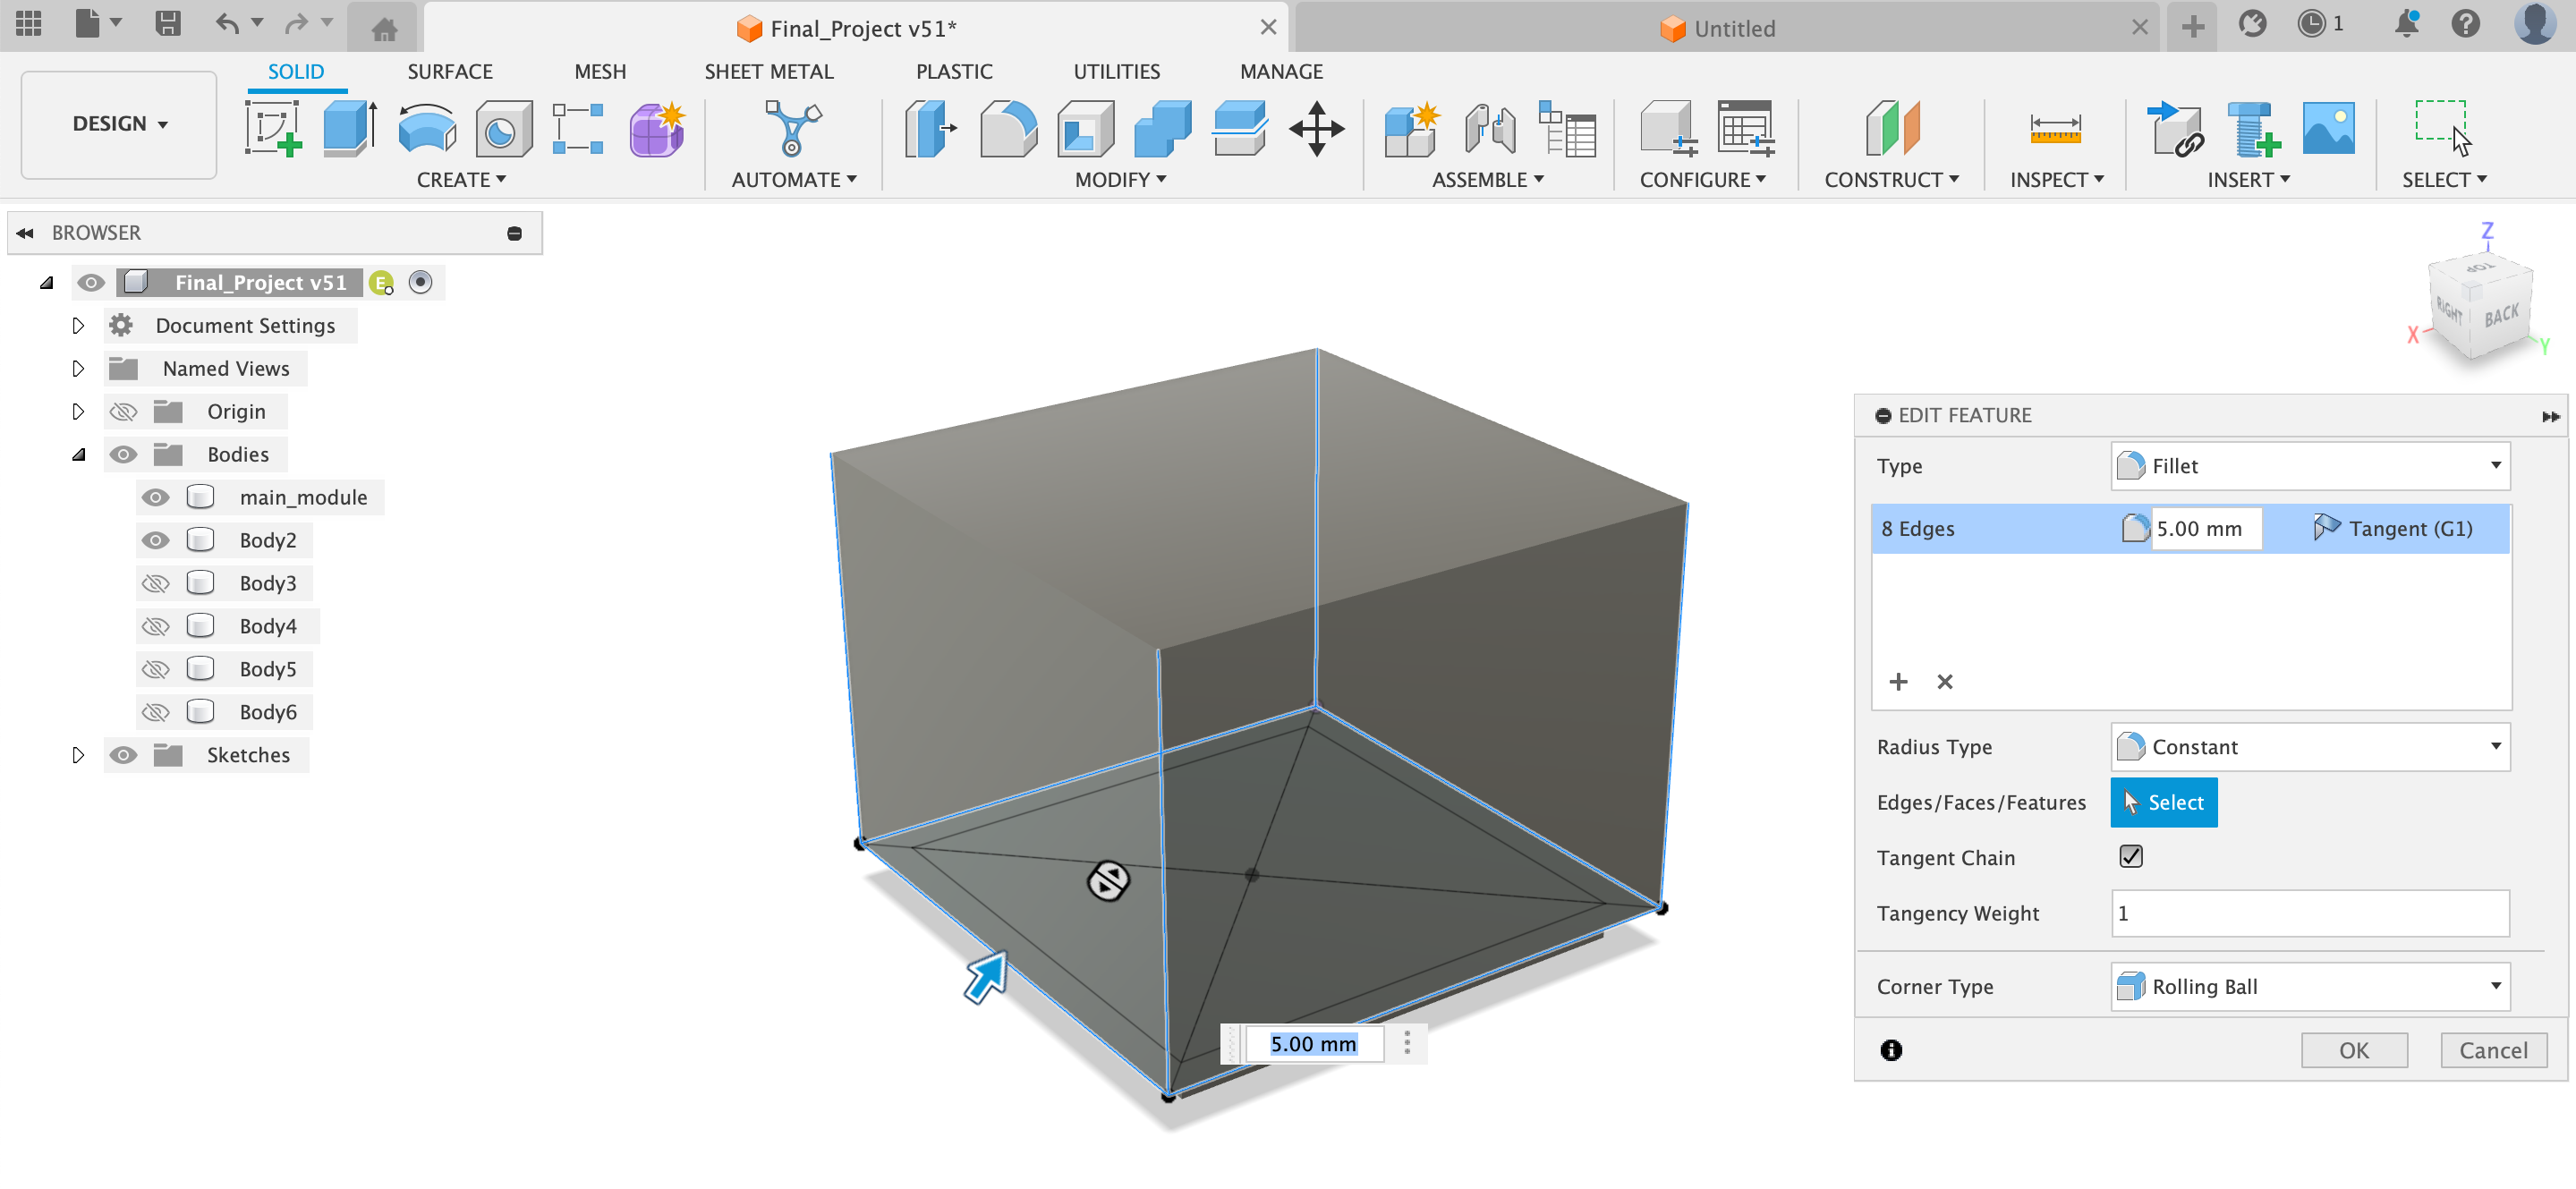
To add fillets to the corners of the body, select the fillet tool in the top panel and then click on the desired corners of the body. To create the fillet, the manual method can be used by moving the arrow or the desired value should be written in the box. Fusion360 has multiple radius styles. At this stage I use the "constant" fillet tool, which means that the same amount of fillet is applied everywhere along an edge.
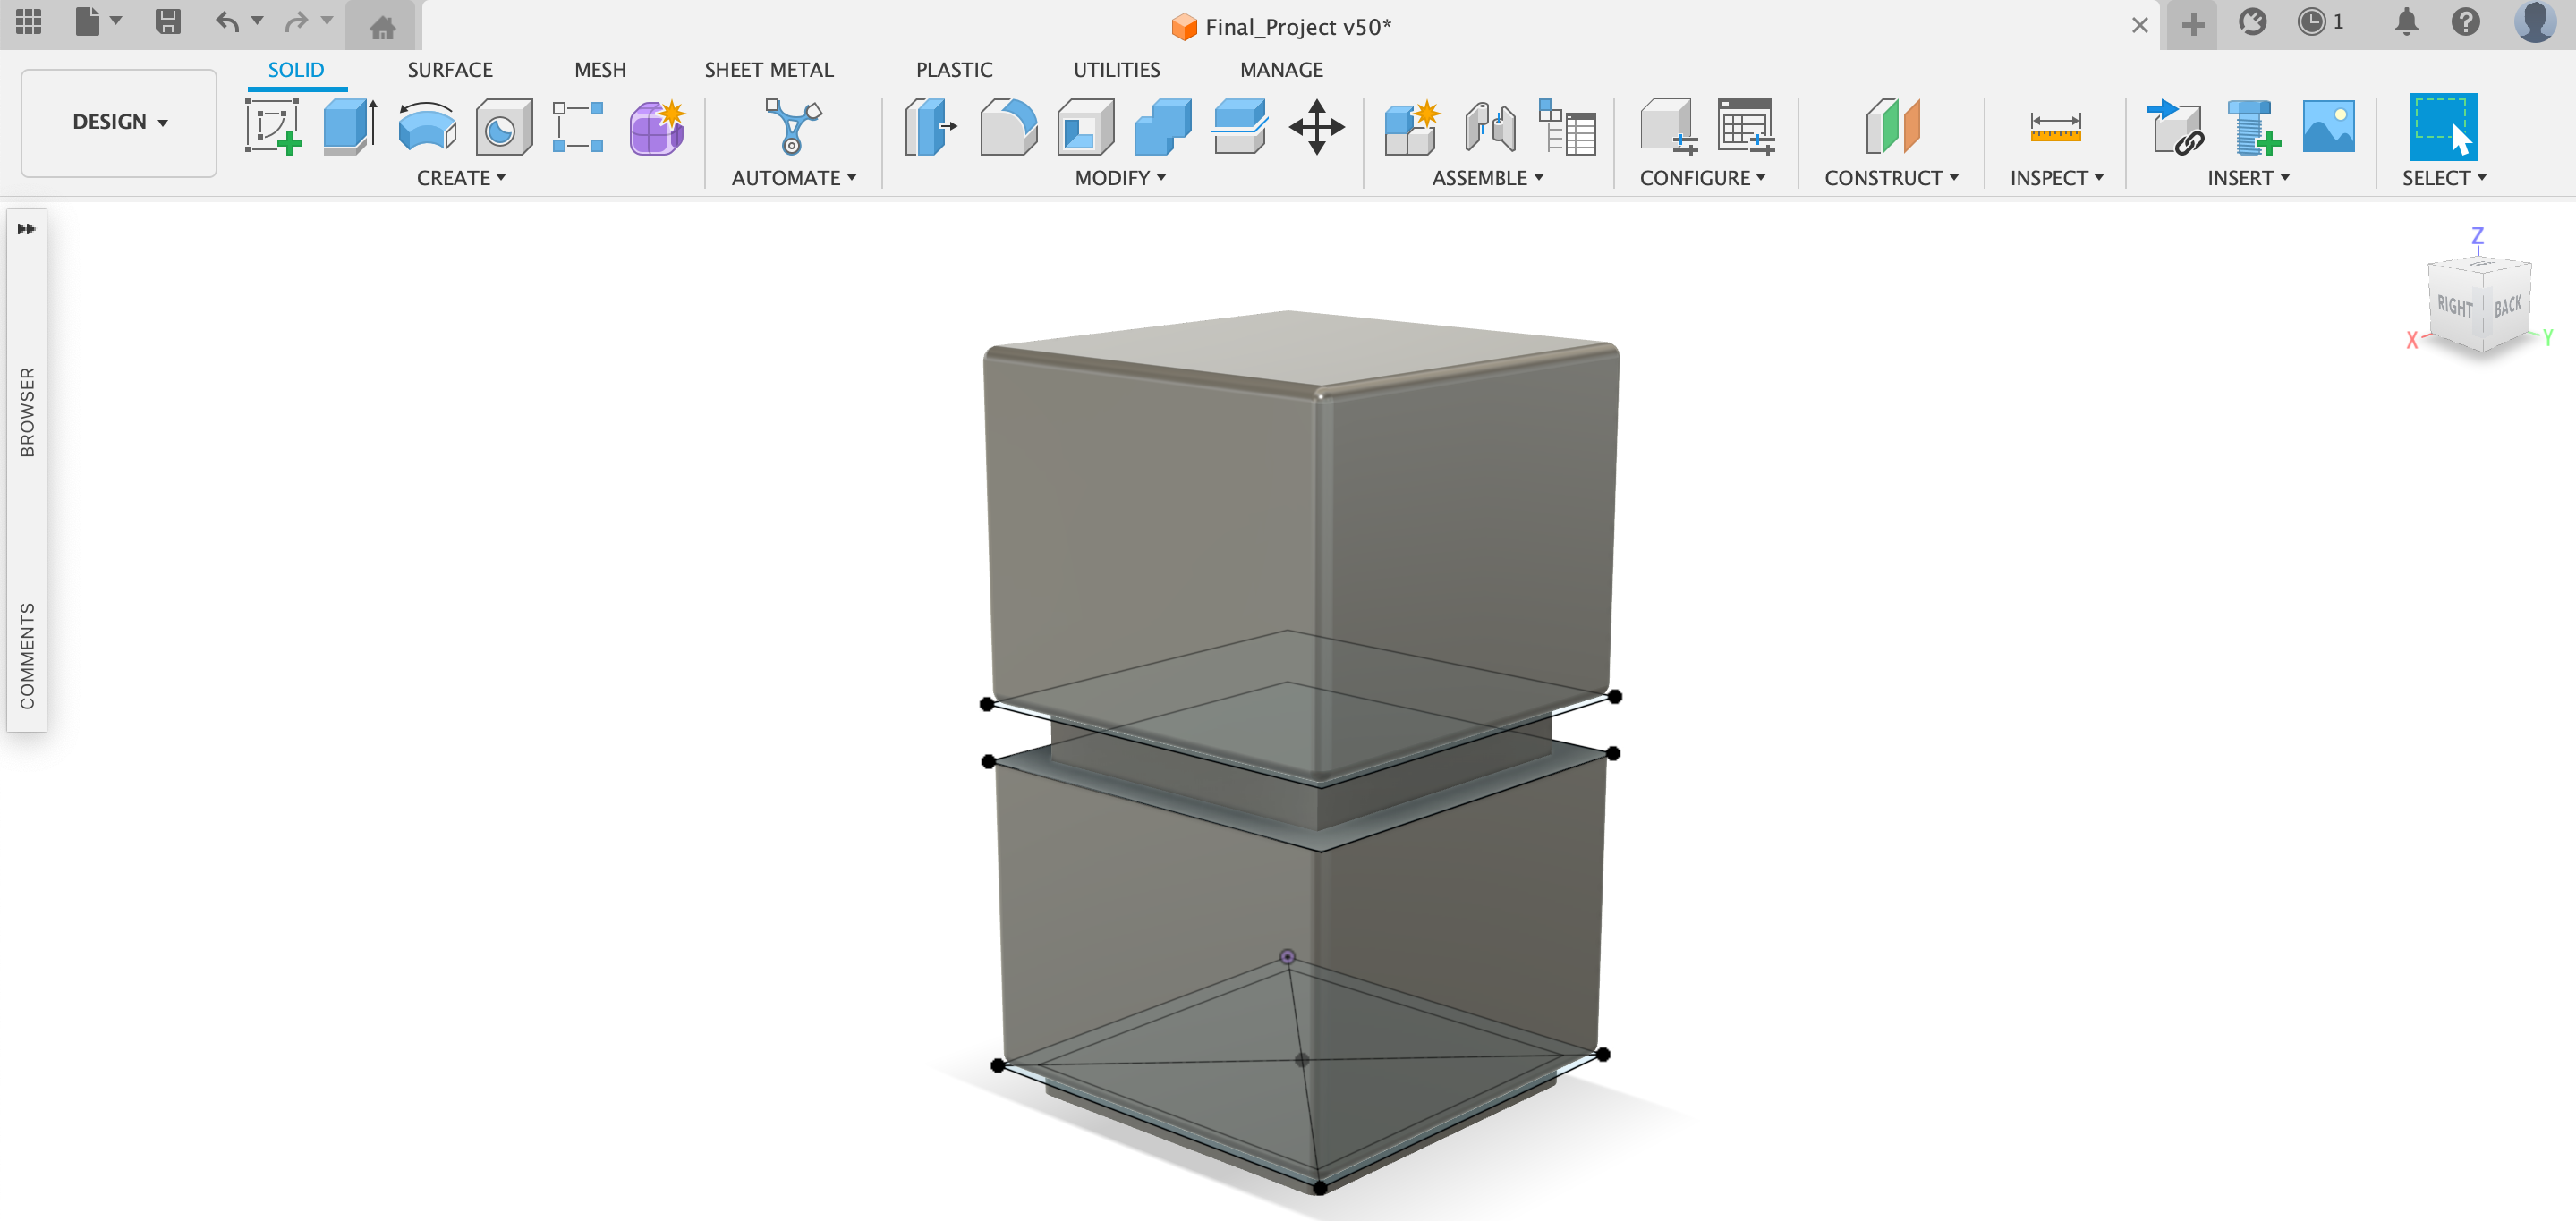
In the next step I created a prism using the creat---box tool. I did not create a new sketch while creating this prism. I then clicked on the sketch tool again and drew a square over the prism, which I used to create a new body and I did this using the exture tool. I took the fillet tool again and selected the places I wanted to fillet on the body. By repeating the processes I did to create the prism and body once again, I completed the rough idea drawing required for my final project.
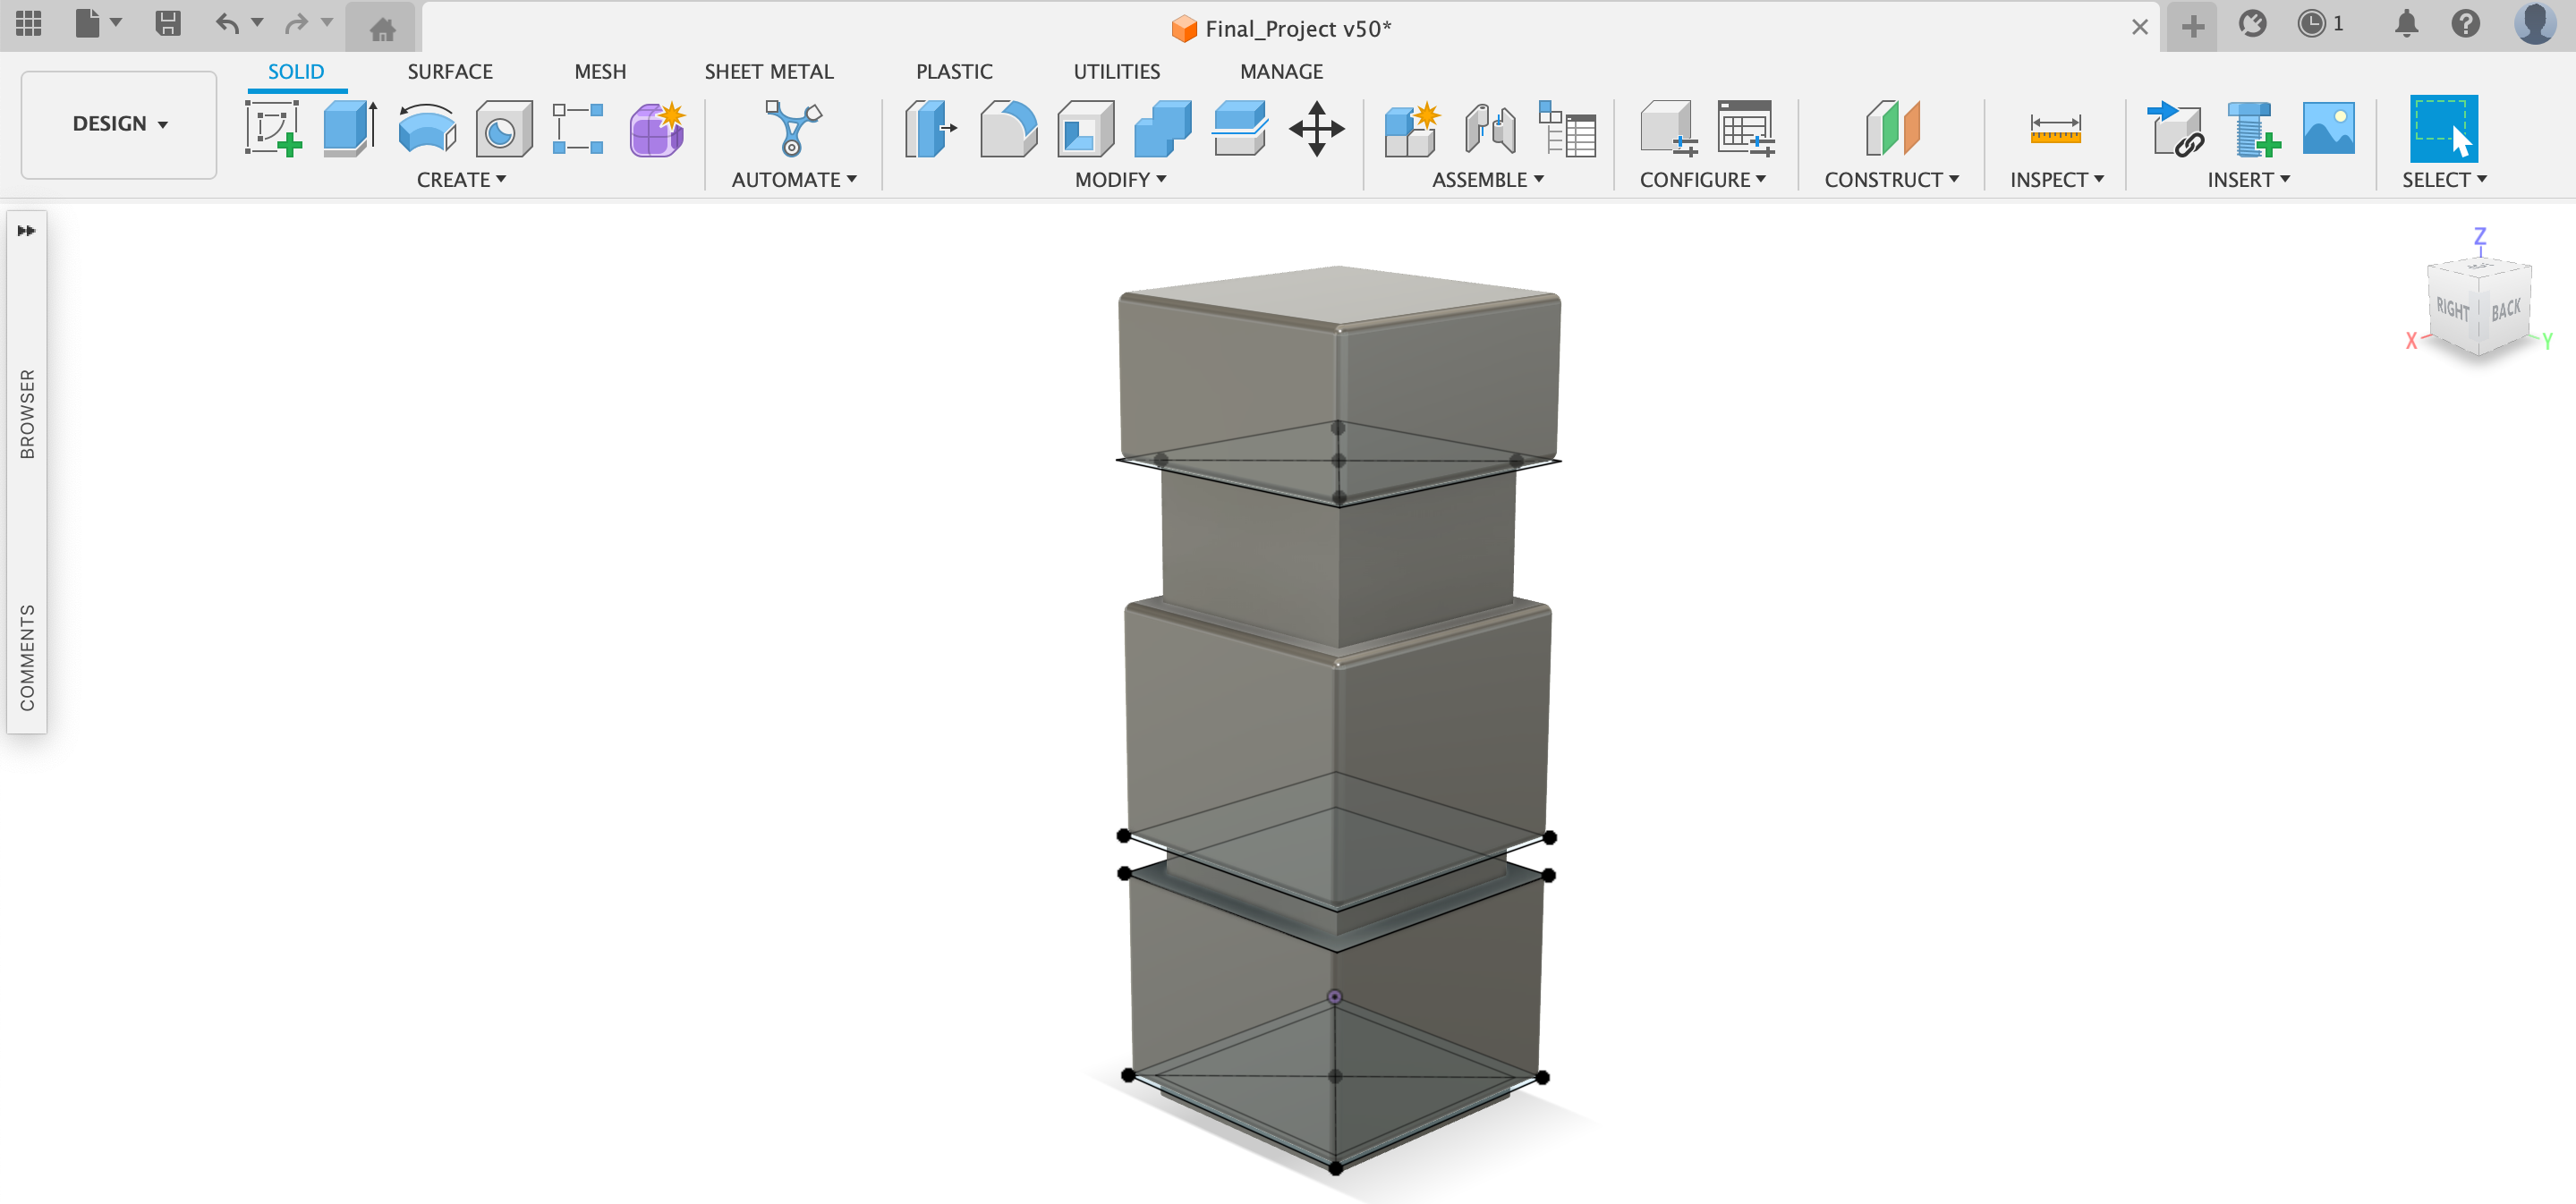
I would also like to show some tools that are important in fusion360;