WEEK 15
Wildcard
Individual Assignment:
- Design and produce something with a digital process.
Downloadable Design Files Links
To complete this week's task, I decided to create a mold of a product I produced in 3D printing using a vacuum machine.
1.Design
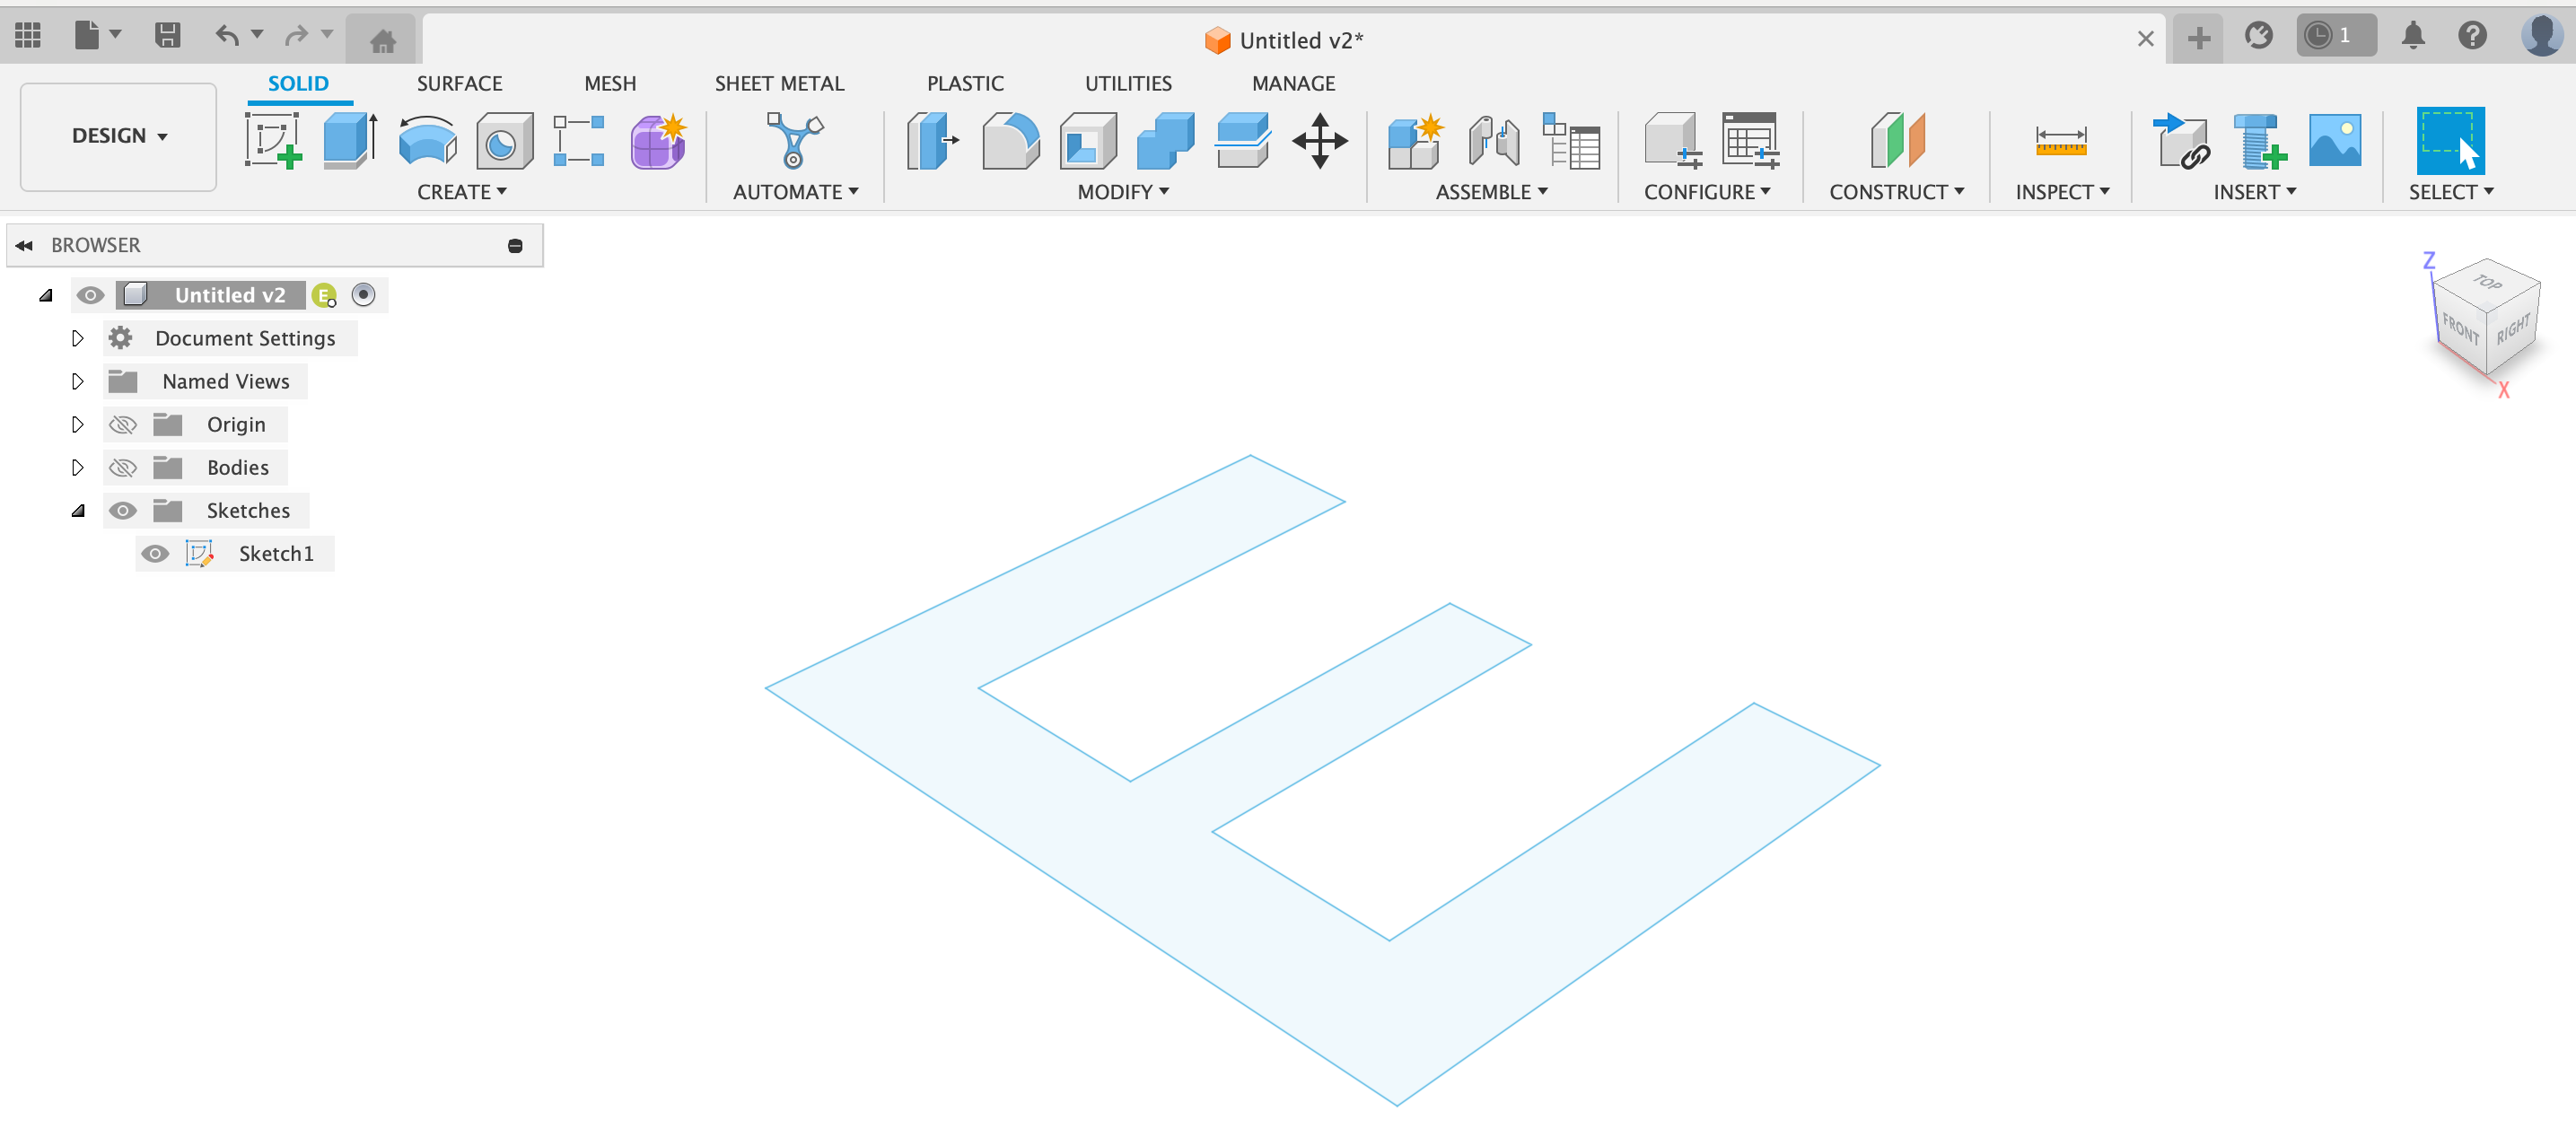
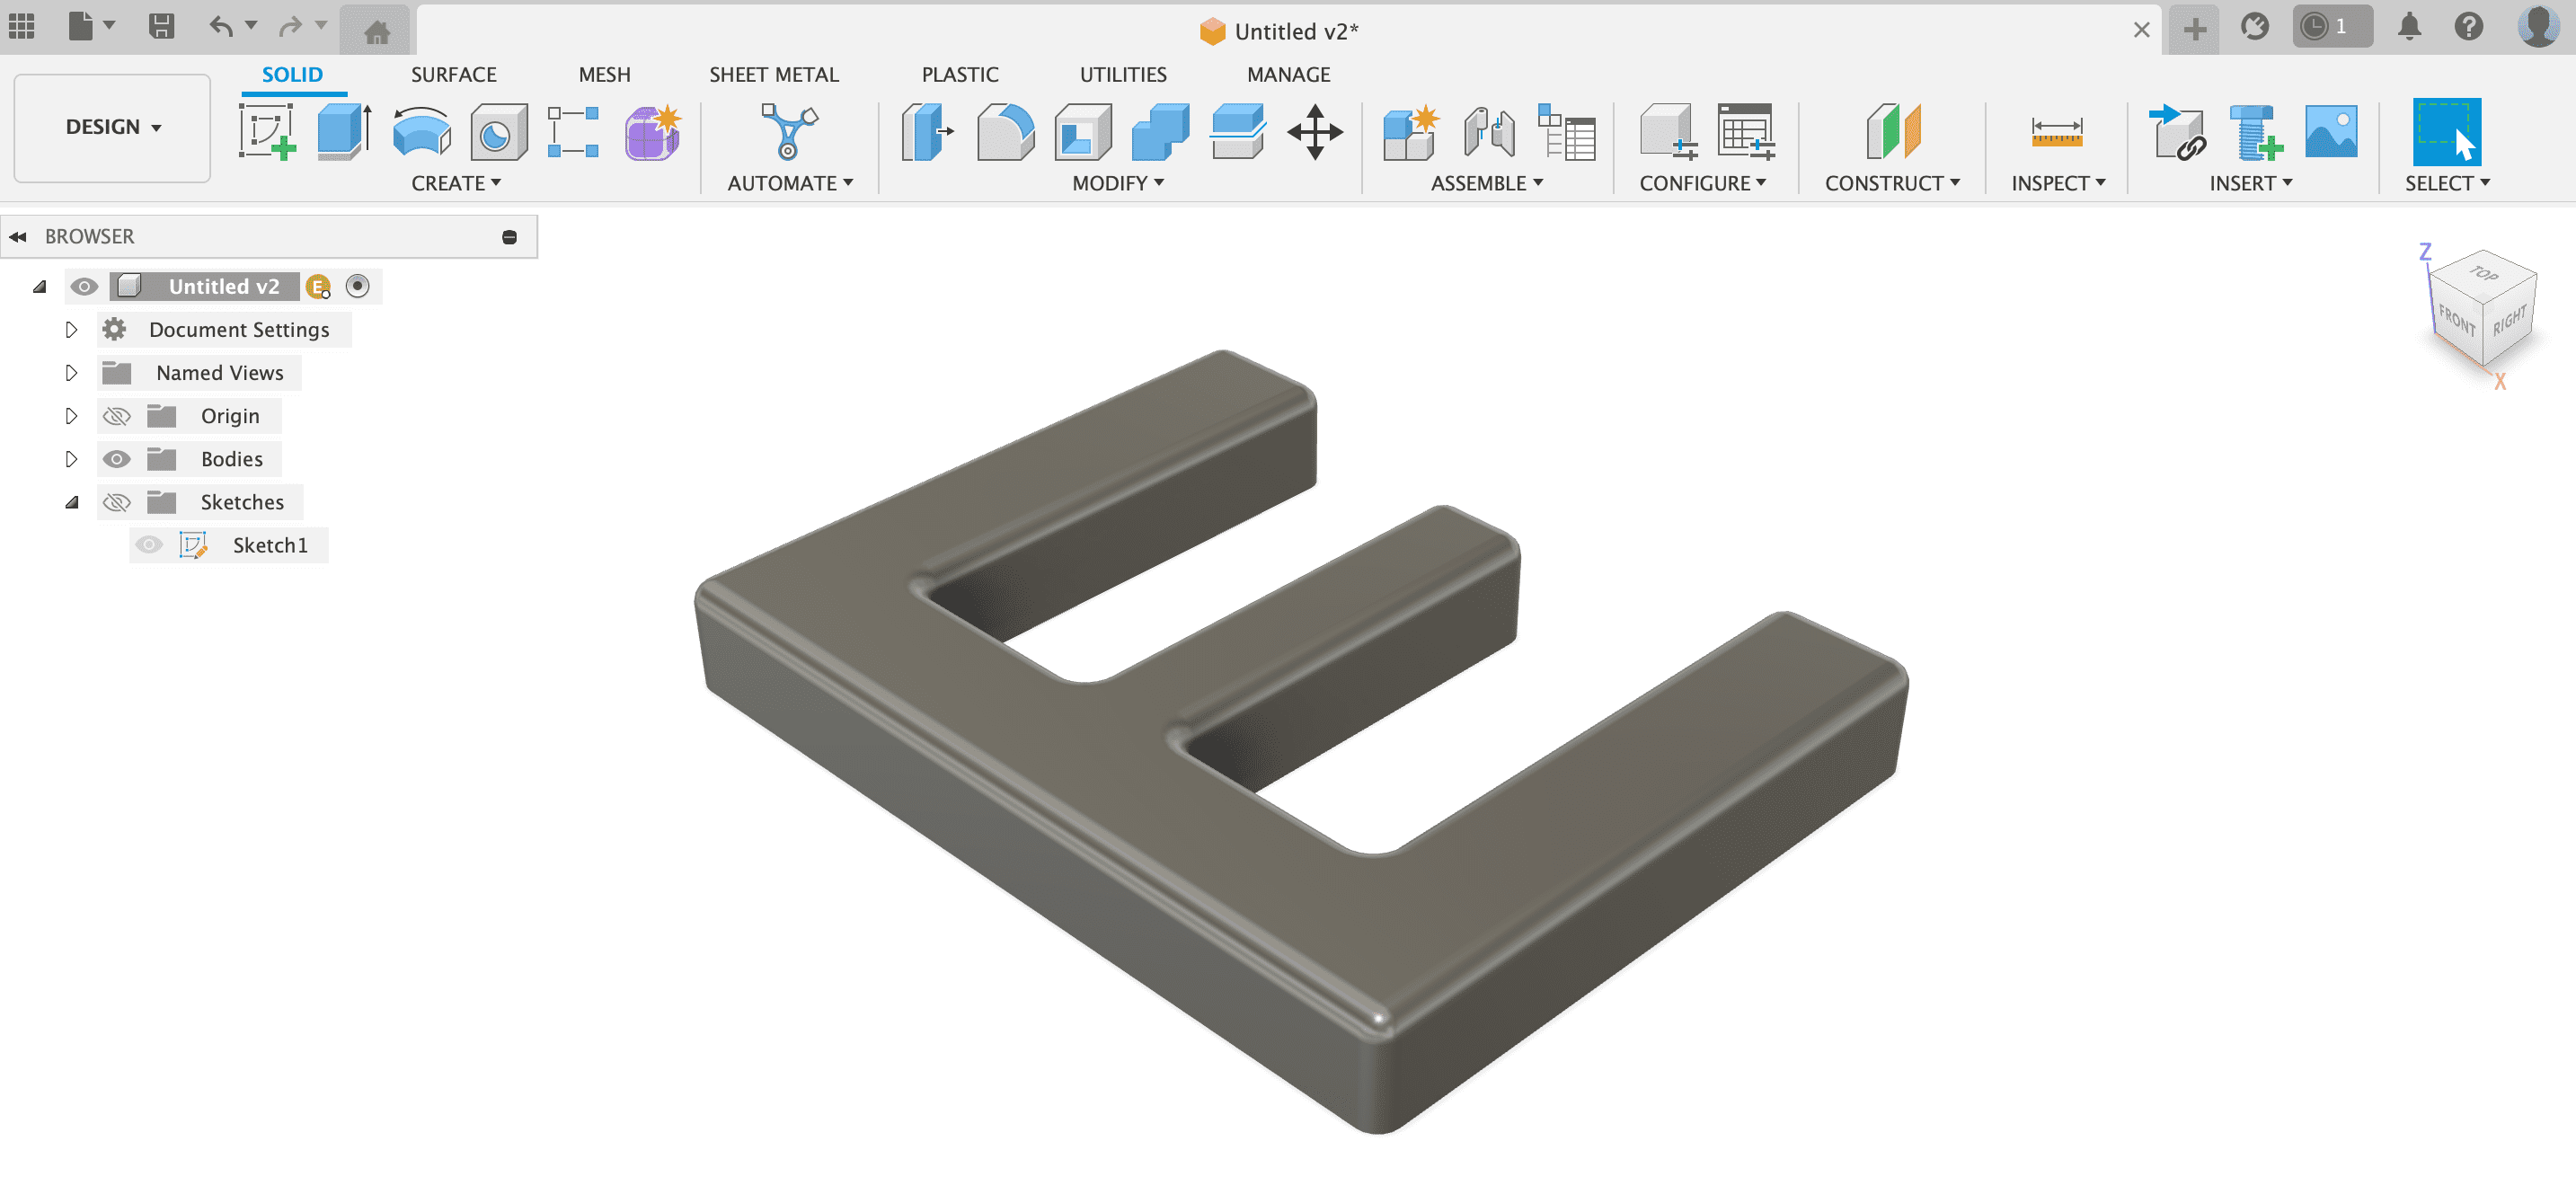
I decided to do the design in Fusion360. For the design, I decided to draw the letter E, which is the initial of my name. The reason for my choice is to speed up the process and because it is a design that I can easily obtain on a 3D printer.
I first started the design by creating a sketch. Since I will be printing in Prusa, I tried to make sure that the design was not too large. After completing my drawing using the "Line" tool in Fusion360, I created a body using the "extrude" tool. Additionally, I softened the edges of the body using the "fillet" tool. After completing the design, I exported my drawing in STL format by following the File-->export path.
2. 3D Printing
I transferred my drawing, which I exported in STL format, to the Prusa Slicer program. Here I created gcode using presets for PLA material. After clicking the "Slice" button at the bottom right of the screen, I clicked on the export field that appeared later at the bottom right of the screen, and thus Gcode was saved to the prusa stick.

I transferred it to a USB Stick, inserted it into the Prusa, and selected the Gcode I created from the Prusa's screen. The screen showed that printing the design would take approximately 1.5 hours.
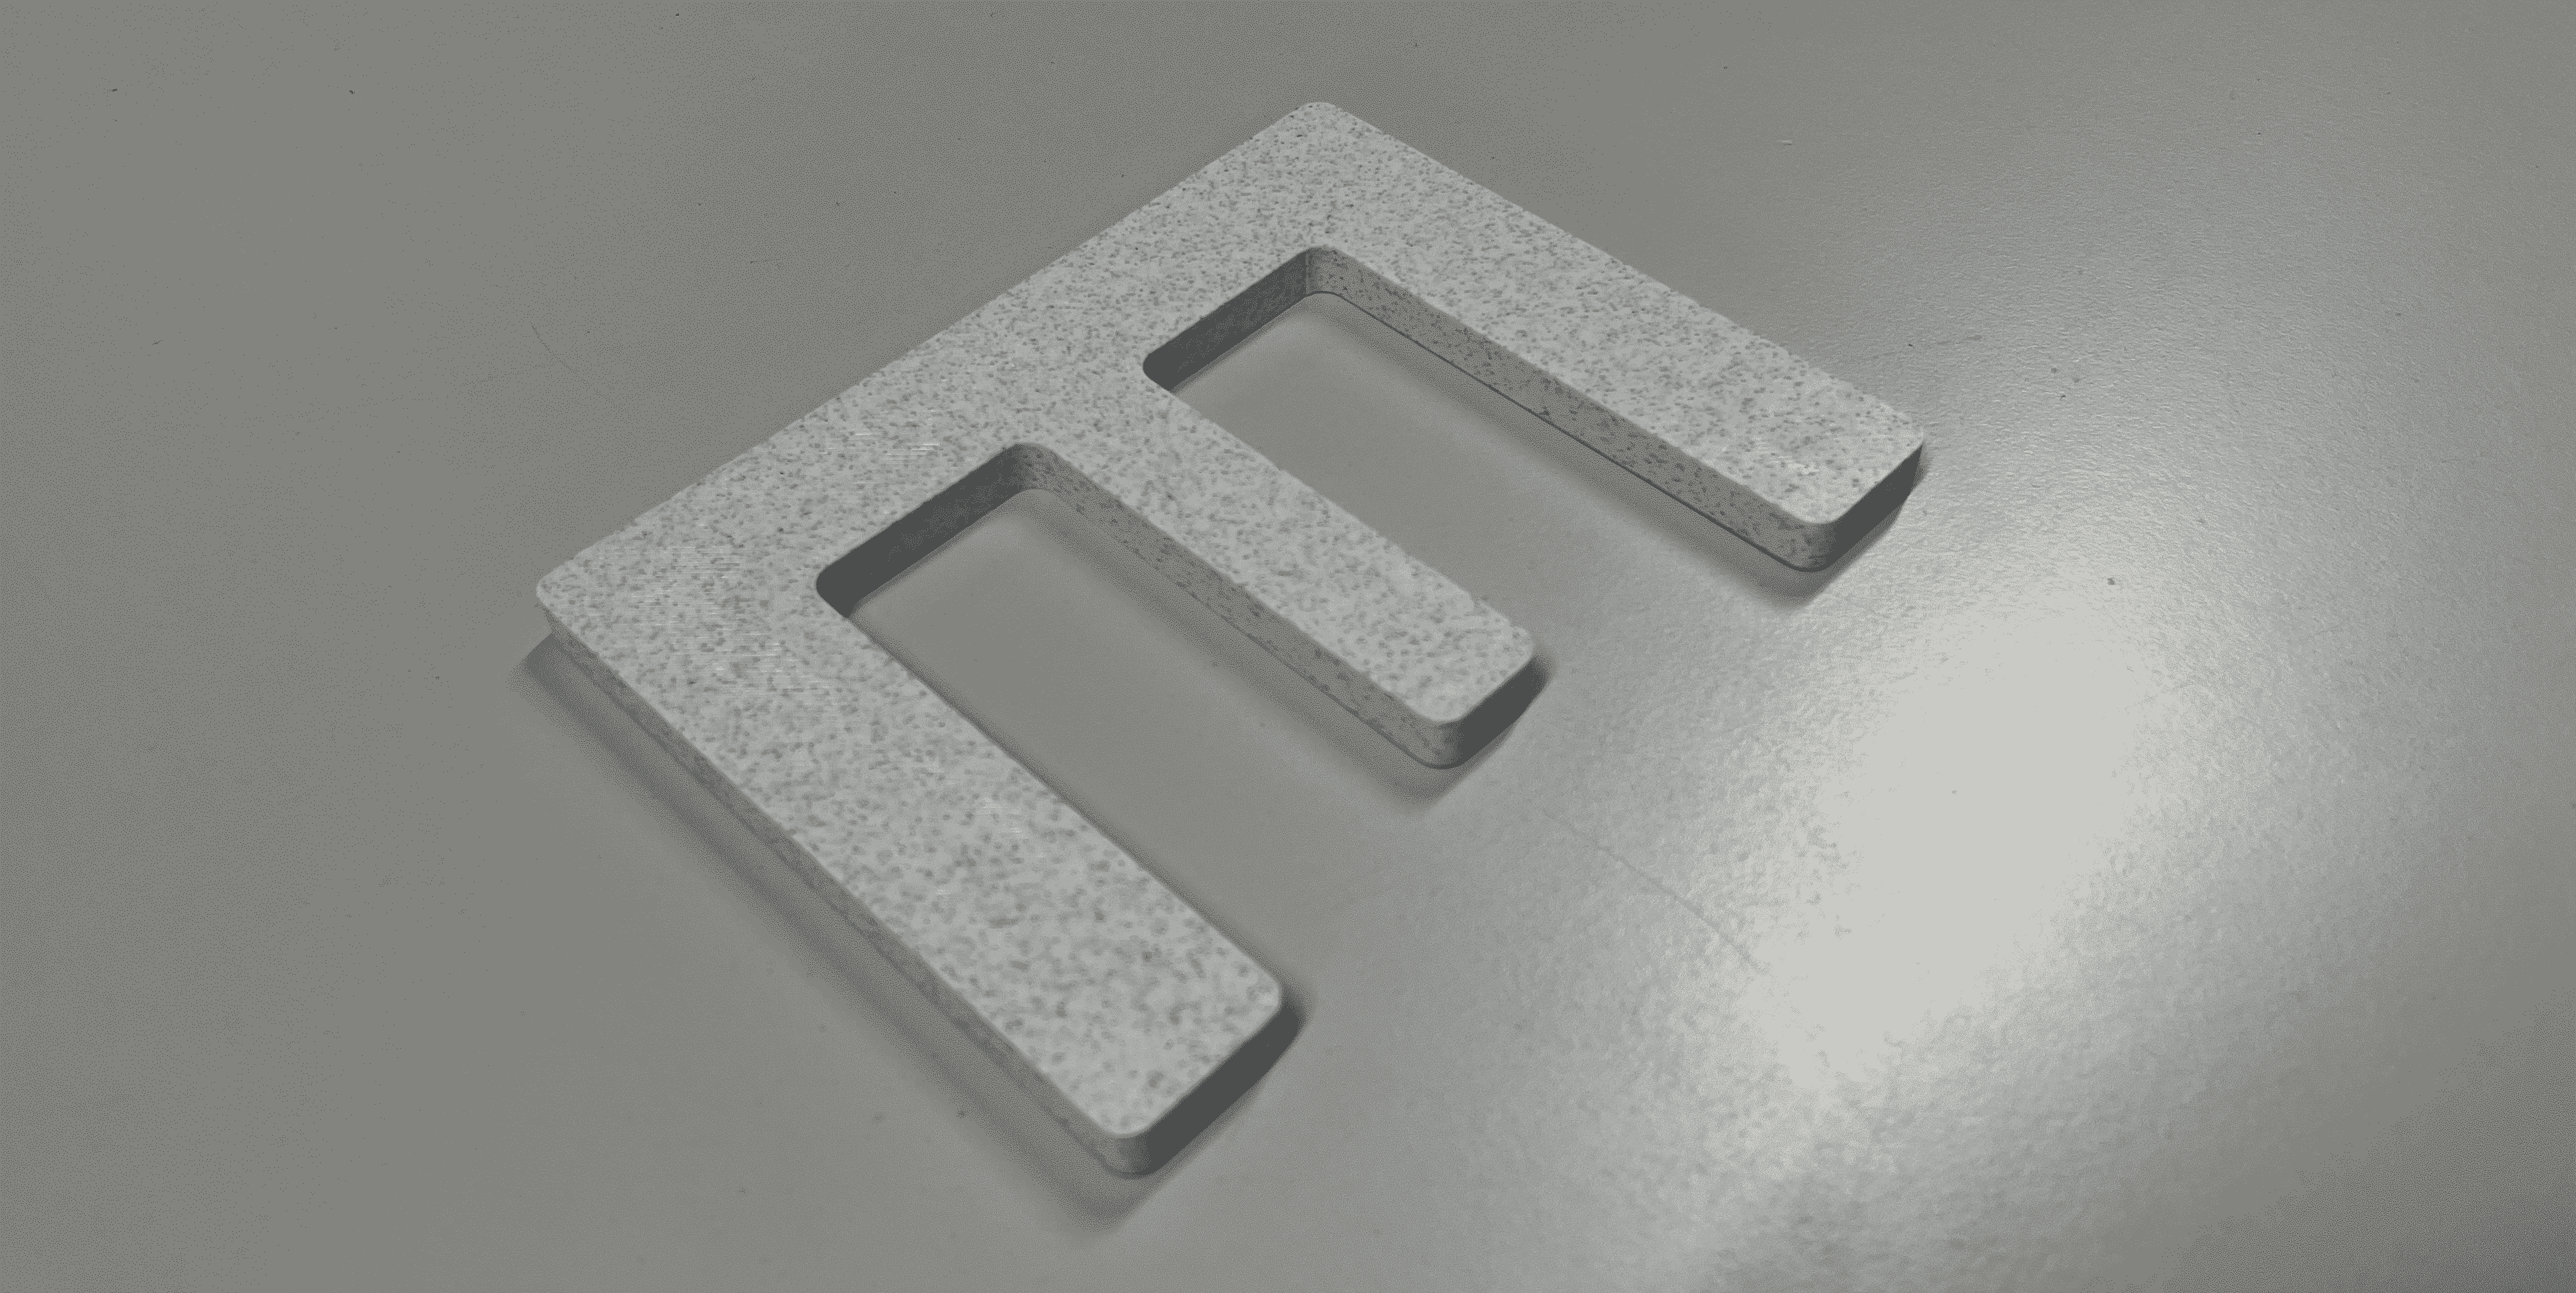
The letter I obtained from Prusa was printed quickly and with high quality. However, since I was going to use it in a vacuum machine, I was concerned about whether the material would withstand the high temperature. But later I learned that PLA is durable up to about 240 degrees.
3. Vacuum Process
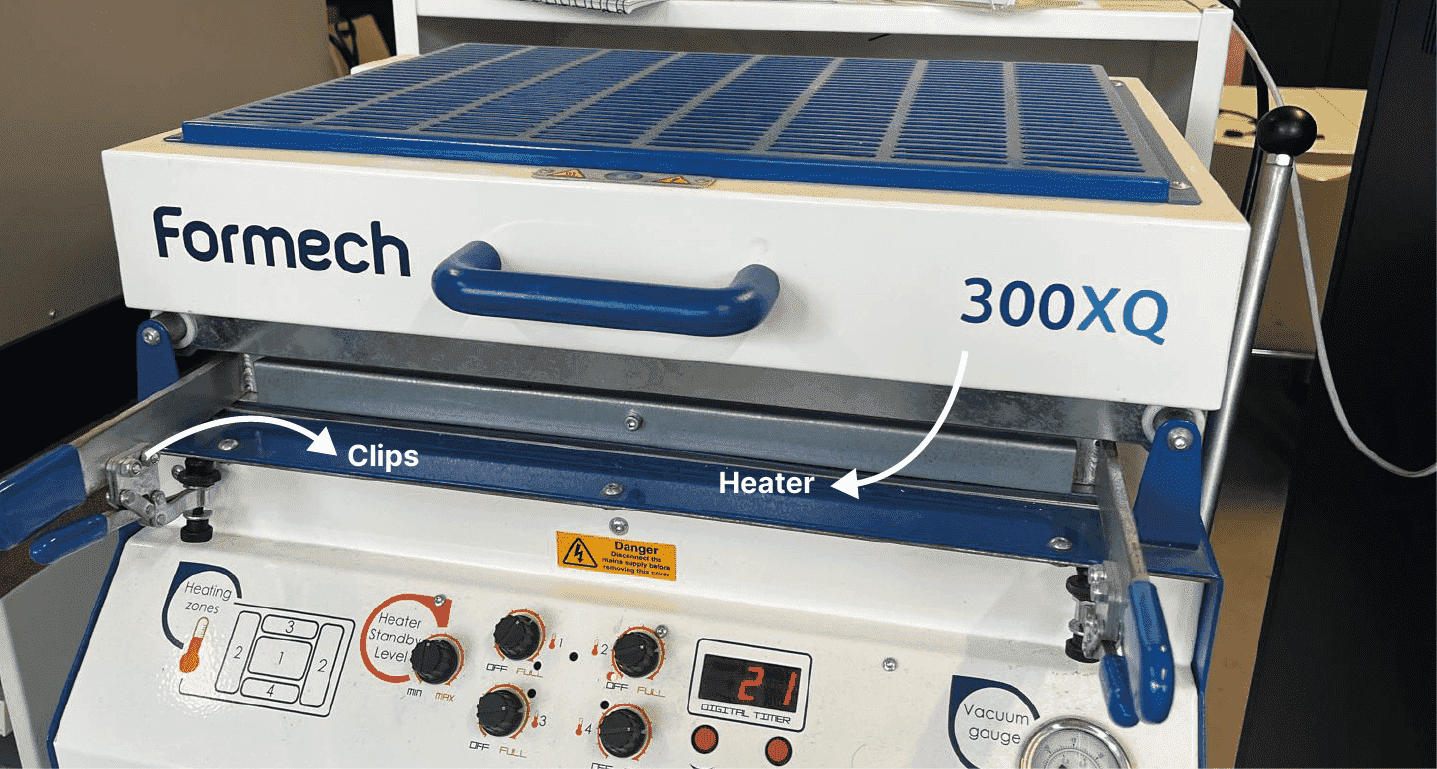
I read the user manual of the vacuum machine to learn how to use it. At KampLintfort FabLab, we use Formech 300XQ as a vacuum machine.
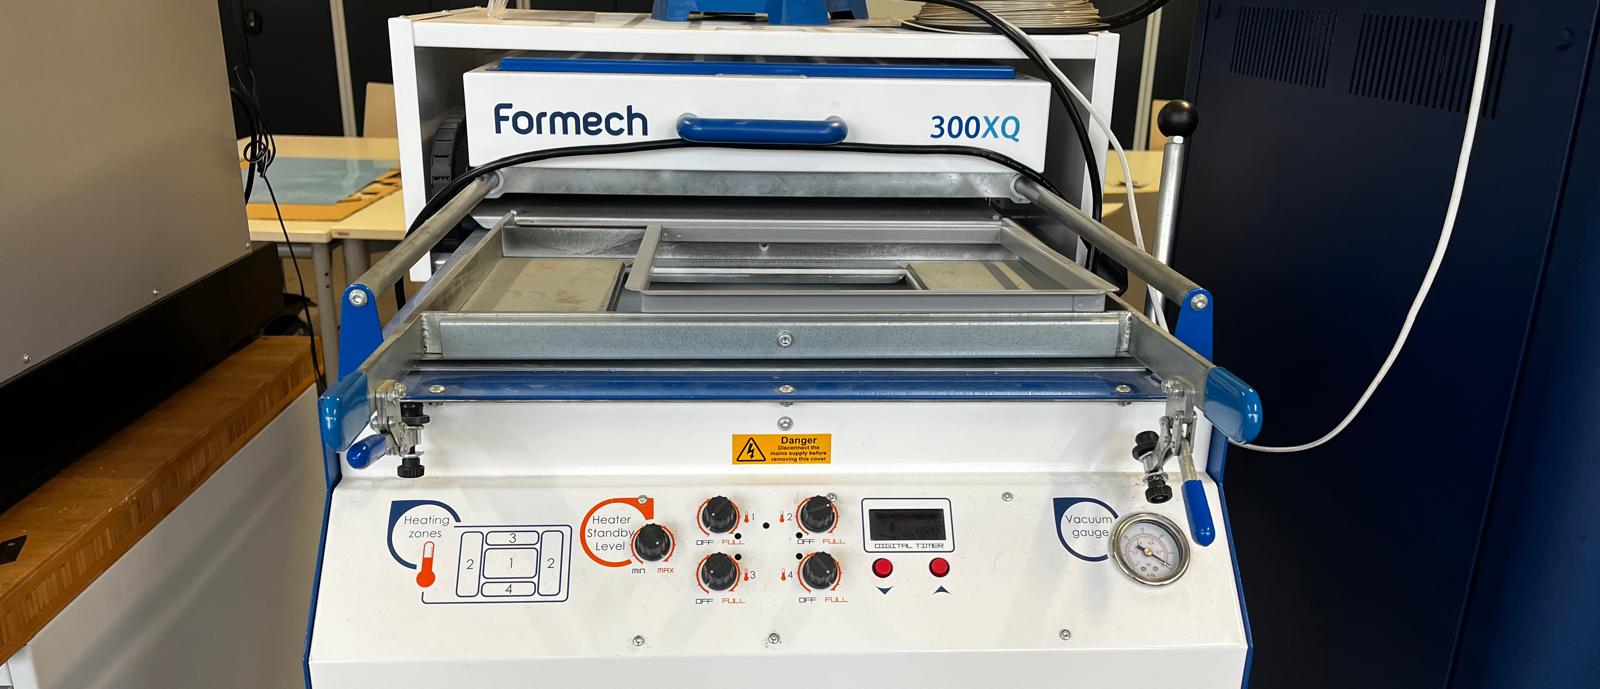
As a first step, I turned on the machine using the power button located on the right side of the machine and adjusted the heater values. For this, I used the radio buttons located on the front surface of the machine. I set 1 to 30, 2,3 and 4 to 75. I obtained these values from the user manual of the machine. Then, I set the digital timer to 0 using the arrows on the screen next to the radio buttons. After placing the material, I lowered the metal surface and tightened the clips to prevent the material from slipping.

As the second step, I placed my 3D printed letter in the middle of the machine and pulled the lever located on the right side of the machine towards me. Then, I placed the plastic sheet that I would use in molding on the machine.
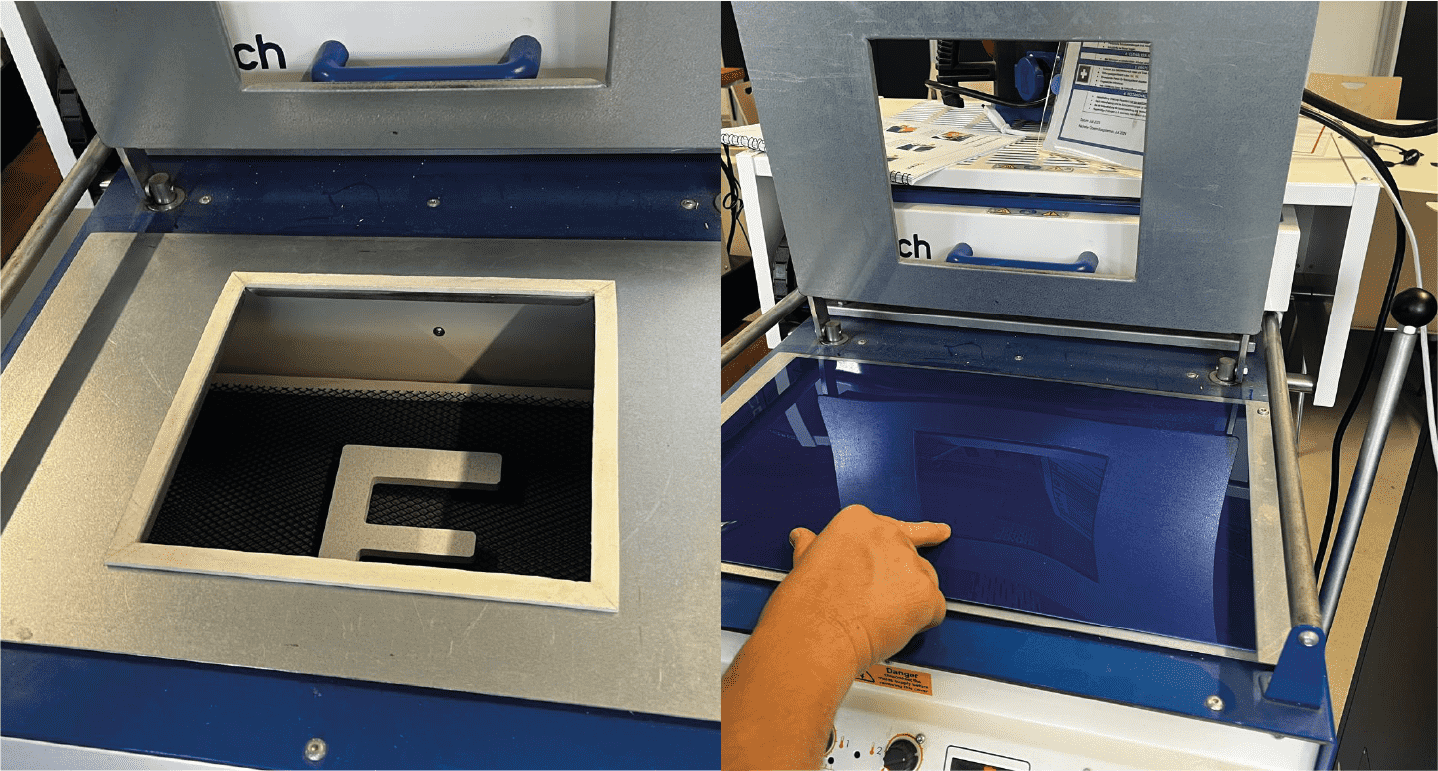
As the third step, I needed to draw the heater towards me, but I could not do this. For this reason, I re-read the user manual of the machine and realized that I could not pull the heater towards me enough because I did not pull the handle on the right side towards me enough. In order to pull the heater forward, you need to pull the right handle completely towards you. Additionally, it is necessary to apply some force when pulling the heater.
After covering the material with the heater, the plastic material began to heat up slowly, but a problem occurred in this part: I had to push the heater back and check the temperature of the material with my hand because I did not know how long I had to wait for the material I was using. But I don't think this is a safe method. After waiting for about 1 minute, I pushed the lever on the right of the machine forward and raised the mechanism inside the machine with the letter. Thus, the softened plastic material slowly grasped the letter.
While trying to figure out how to solve the waiting time problem during this waiting phase, I examined the user manual again and noticed the presence of waiting time information according to material thickness.My material was 1.5 mm. Based on this information, I realized that I had mistakenly waited for the correct time.
- 1.5 mm Thick= 60seconds
- 2mm Thick= 95 seconds
- 4mm Thick= 240 seconds
After the heated material grasped the letter on its own, I pushed up the "vacum pum" button under the machine, allowing the plastic material to grasp the letter better. After waiting for about 10 seconds, I lifted the release arm up and completed the process.
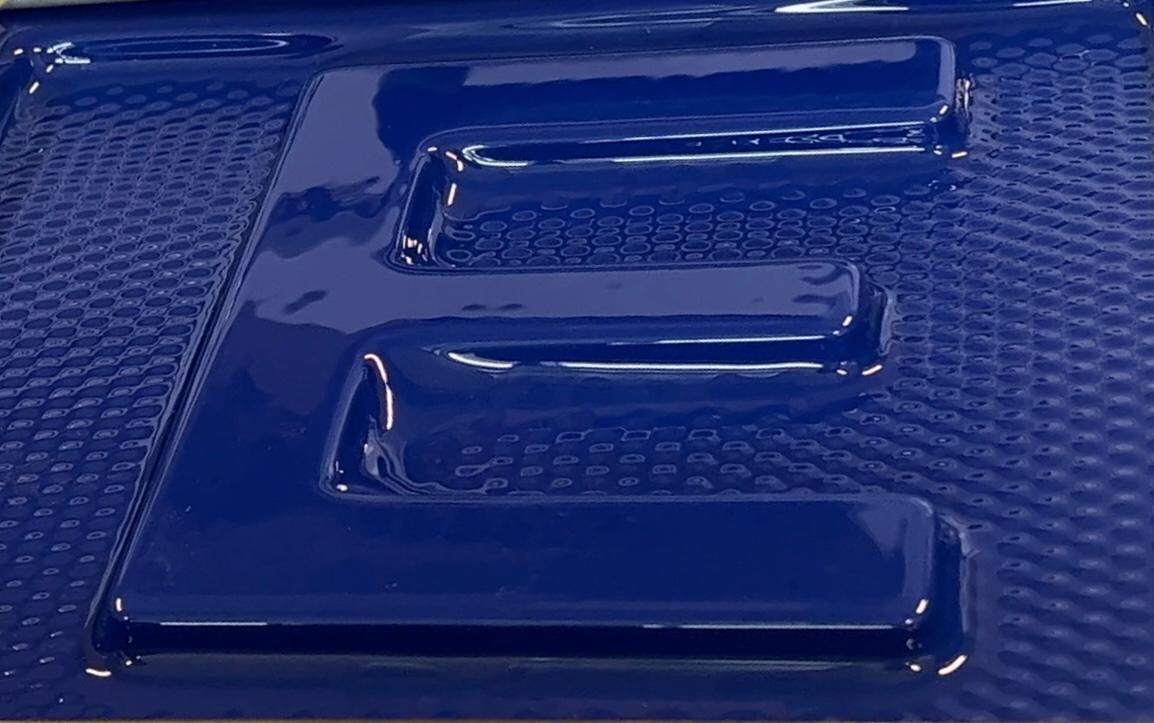
At the end of the process, I realized that the inner parts of the letter were not shaped enough. This was probably because I kept the "vacuum pump" process short.
When I talk with the Supervisor, I understood why there were areas in my mold that were not shaped. The reason for this was my design that I shaped in Fusion360. In order for the material to wrap the letter better, I had to add "chamfer" to the edges of the letter or design the side surfaces of the letter at an angle. Side surfaces positioned at 90 degrees make it difficult for the material to adhere to the product during molding.
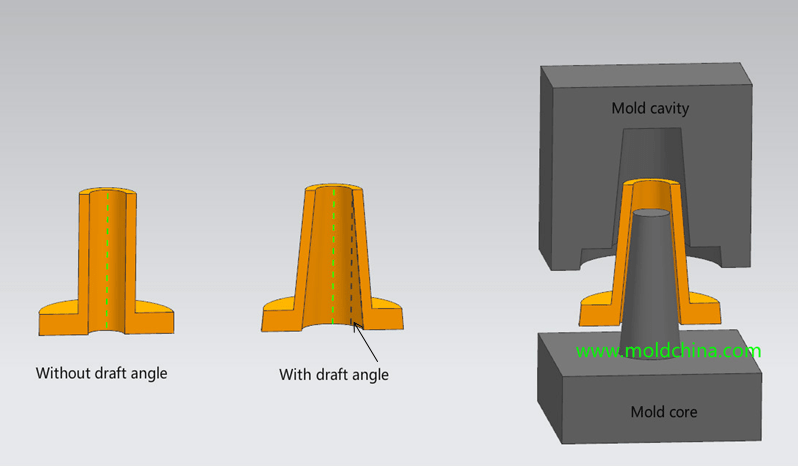
Since I applied the "without draft angle" method in my design, I had problems shaping the mold.