WEEK 14
Interface and Application Programming
Group Assignment:
- Compare as many tool options as possible
Individual Assignment:
- Write an application that interfaces a user with an input &/or output device that you made
To accomplish this week's assignment, I wanted to go through a tutorial given to me by my supervisor. After completing the whole process through the tutorial, I tried to make the assignment more difficult for myself by making some changes that were not in the tutorial. You can find the link to the tutorial here.
If we come to the assignment, I aim to design an interface where the data from the humidity sensor and potentiometer are displayed.
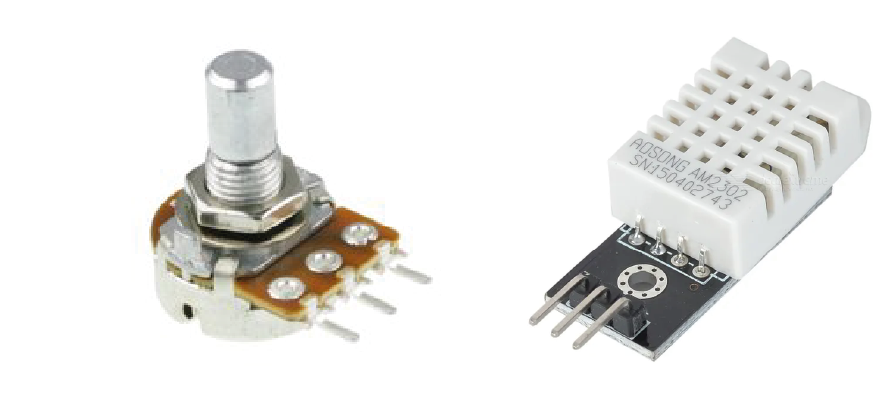
1.Components
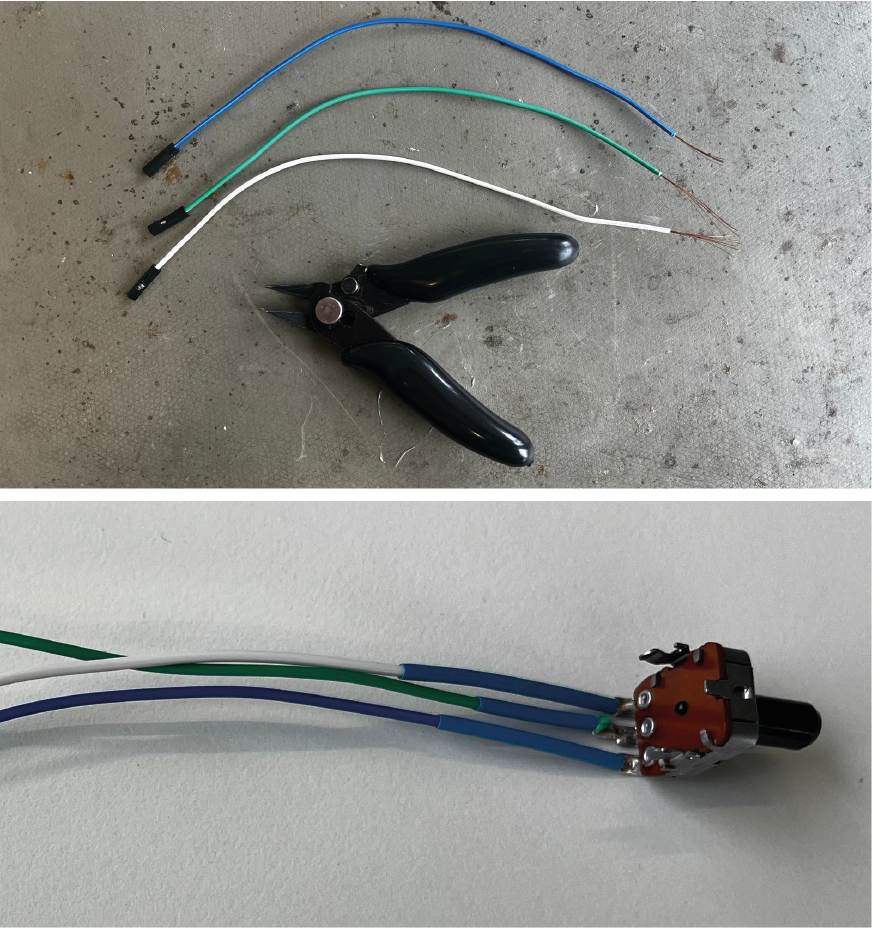
Firstly, I found the required components in our lab. Since I was using these components for the first time, I did not know exactly how I should use them in circuit design. For this reason, I did a pre-research. I have researched how to connect the potentiometer to the circuit and found out that I need to solder the jumper wires and also found the names of the 3 different outputs of the component. Here you can find the information page that I used. How to Wire a Potentiometer How To Use Potentiometers On The Arduino

2. Circuit Design
To connect the jumper wires to the potentiometer, I first cut the end of the jumpers and peeled off their top surface. I then carefully soldered them to the component. After the soldering process was finished, I connected the parts as shown in the image.
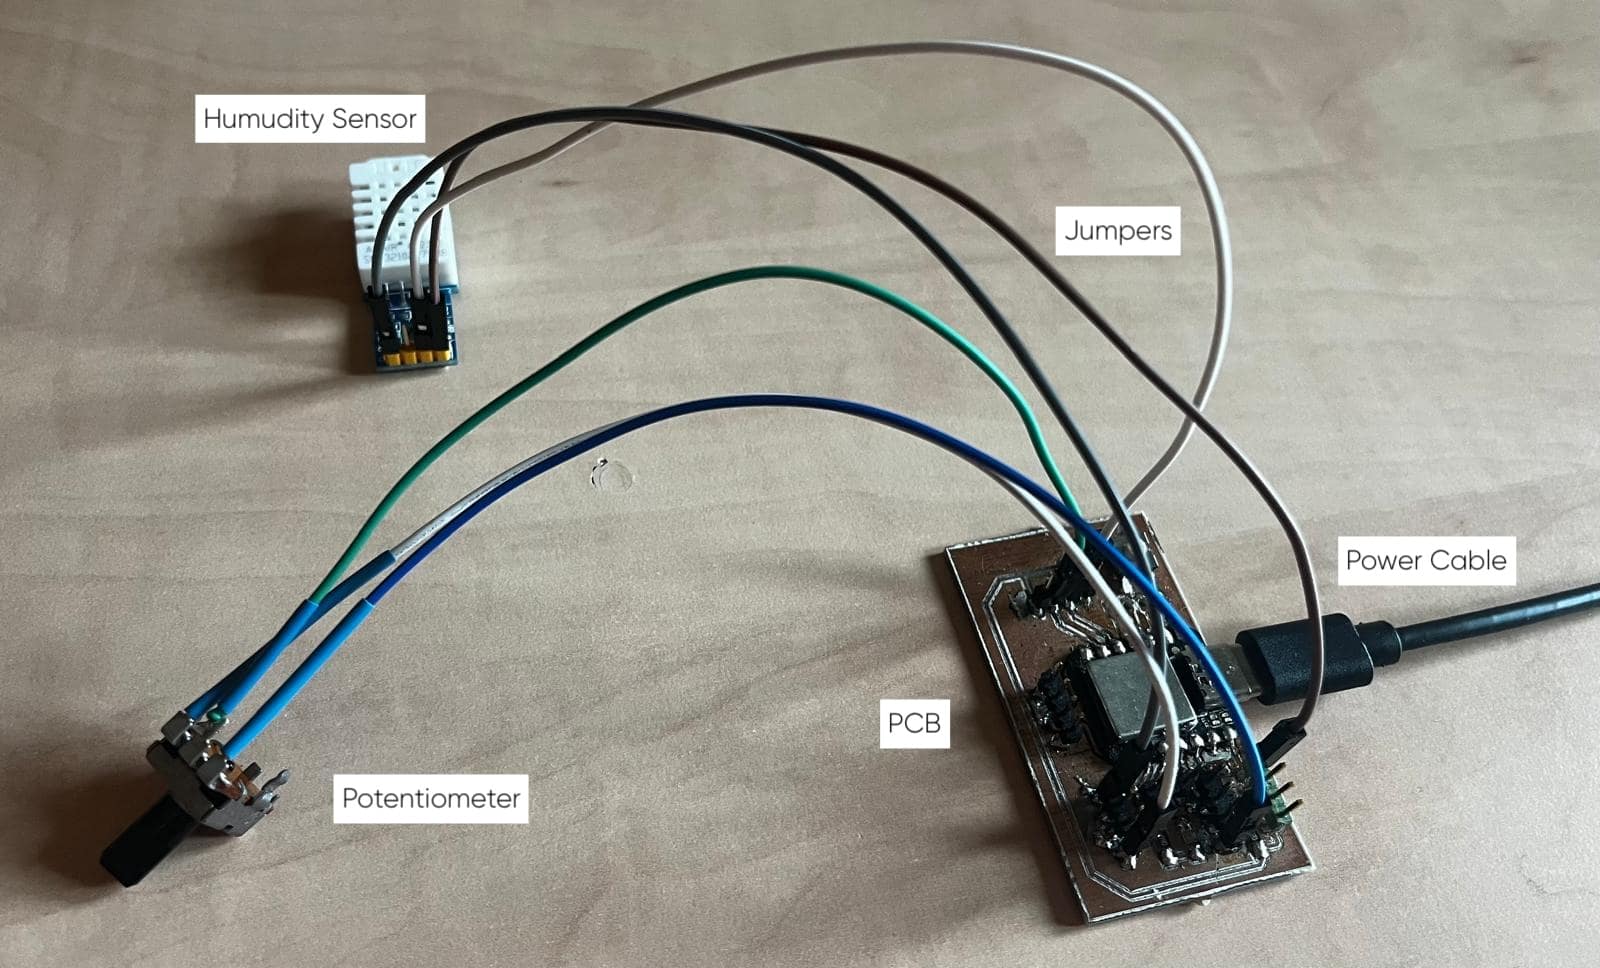
Below, you can see which component output connects to the PCB output.
| Potentiometer | Humidity Sensor |
|---|---|
| Ground | Ground |
| 3.3V | 5V |
| A5 | A4 |
3.Programming
Arduino
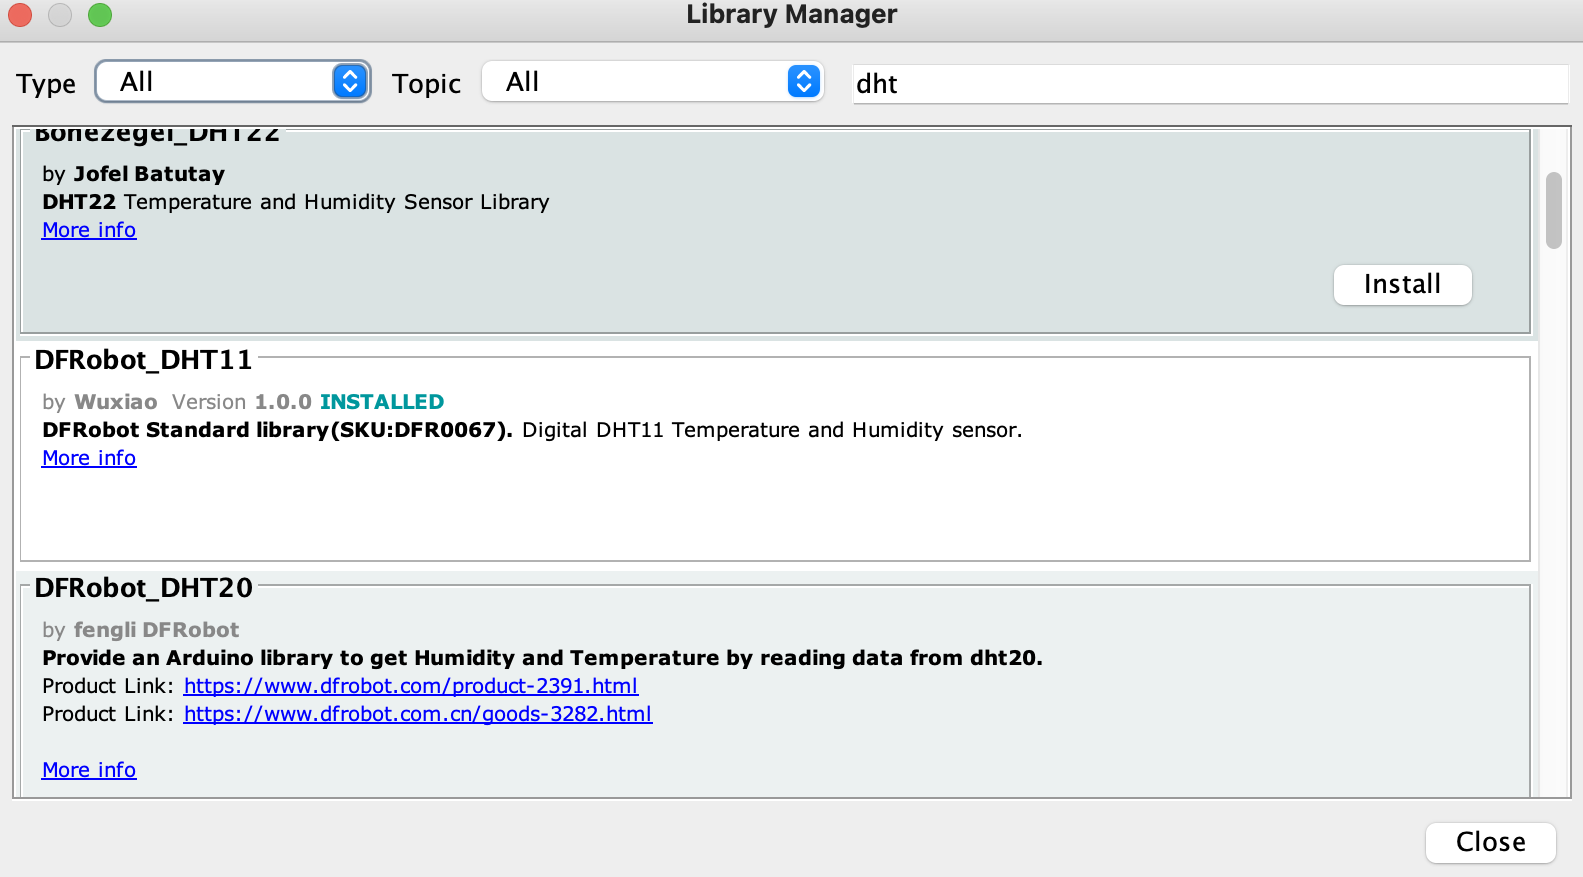
As a first step, I downloaded the DHT11 library for the humidity sensor in the Arduino program and placed the following code sequence in Arduino.Then I connected the pcb to my computer to transfer the codes to the pcb.
#include "DHT.h"
#define DHTPIN 4 //connect DHT data pin to D2
#define DHTTYPE DHT22   // DHT 22
DHT dht(DHTPIN, DHTTYPE);
float temp = 0;
float hum = 0;
int pot=A5;
int potvalue;

void setup() {
Serial.begin(9600);
pinMode(pot,INPUT);
pinMode(DHTPIN, OUTPUT);
dht.begin();          //Begins to receive Temperature and humidity values.

}

void loop() {
temp = dht.readTemperature();

hum = dht.readHumidity();
potvalue=analogRead(pot);
int potvalue1=map(potvalue,0,1023,0,100);
Serial.print(temp);
Serial.print(",");
Serial.print(hum);
Serial.print(",");
Serial.print(potvalue1);

delay(200);
}
I had to make some changes in the codes I got from the tutorial. In the tutorial, DHT11 was used as a humidity sensor, but since we had a DHT22 component in our lab, I used it in the circuit. So I had to change this line of code with this information. In addition, since the potentiometer is connected to the A5 pin, I also changed the line with this information.
Processing
I have used the Processing software before and had experience with it. Therefore, it was already installed on my computer. But first I had to download a meter library so that the interface in processing could display the data from the components. Then I used the following codes to design the interface. To run the code on my computer I press the play button on the left side corner.
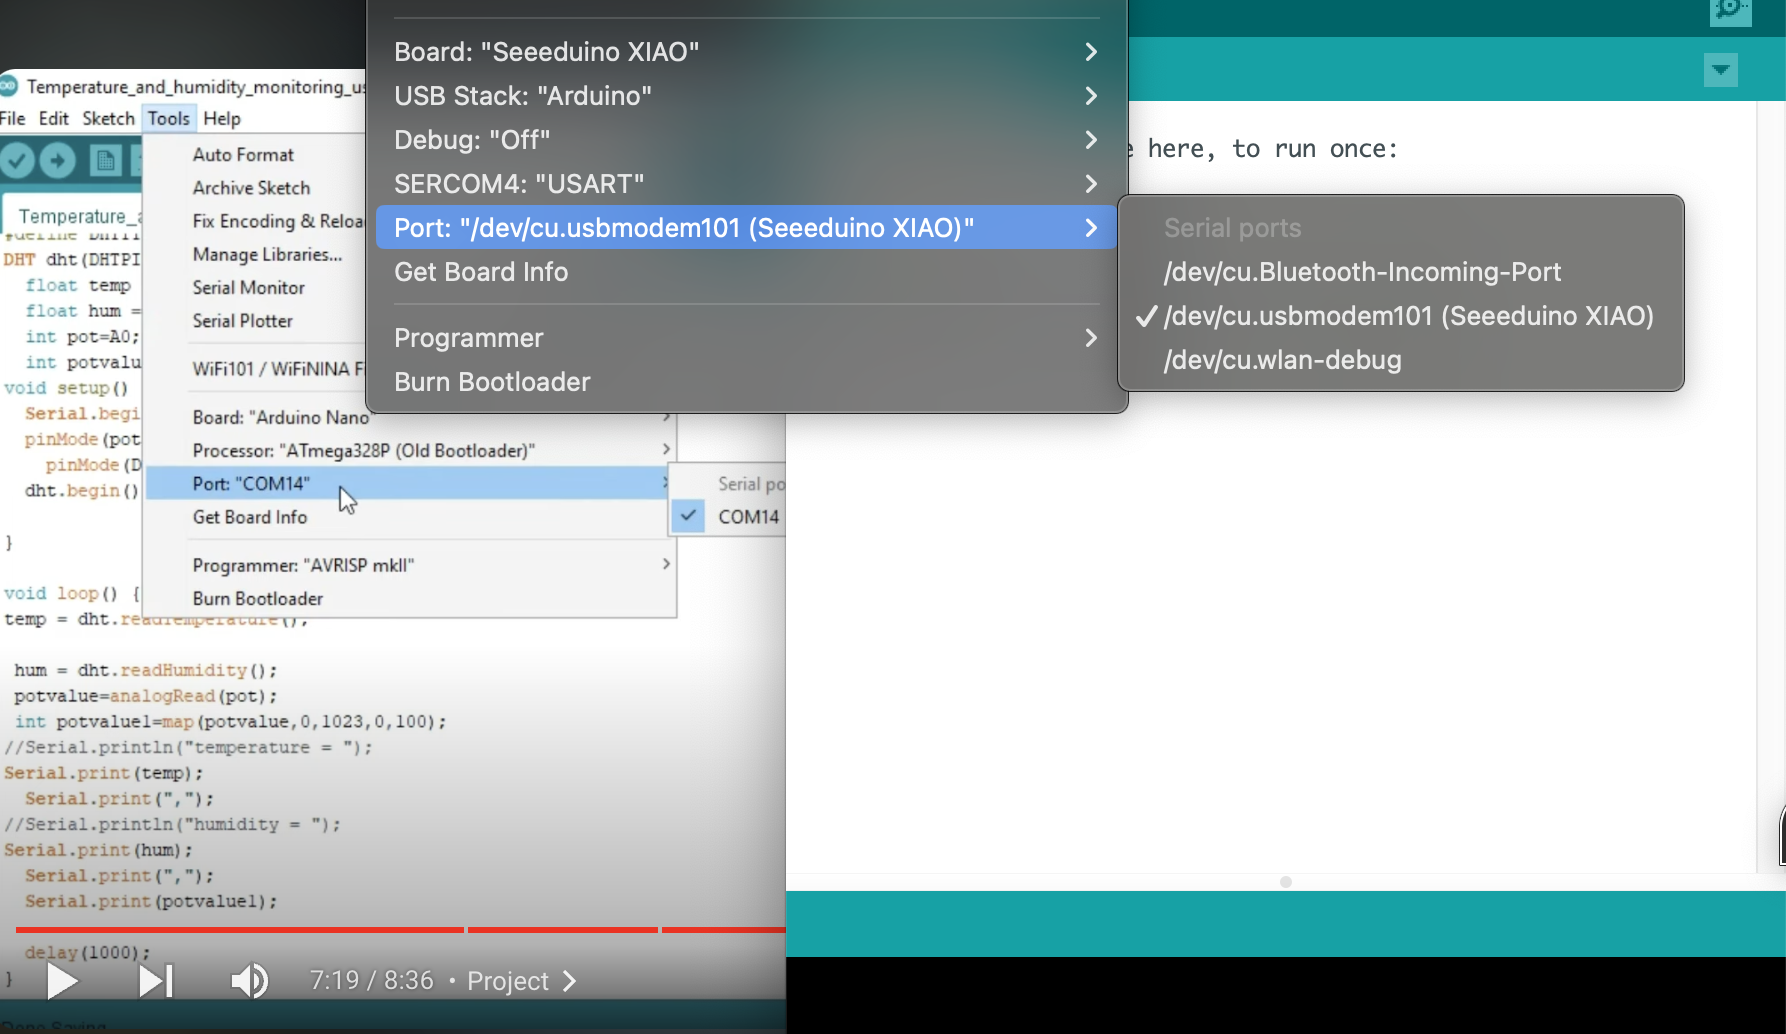
In addition, I needed to find the name of the port for the code I uploaded to processing. For this reason, I opened the tool section in the Arduino application and learned the port name.
// Lets create a simple meter

// Import Meter library
import meter.*;

// Import serial library
import processing.serial.*;

Serial port; // Define a port

Meter m, m2, m3;

void setup(){
// First we need to create a empty window
size(950, 1000); // Size of the window (width, height)
background(255, 255, 255); // Background color of window (R,G,B)

// Create new port
port = new Serial(this, "/dev/cu.usbmodem14101", 9600); //name of the port would be different for linux

// Lets add a default meter to empty window
// TEMPERATURE METER
m = new Meter(this, 250, 80);  // here 25, 10 are x and y coordinates of meter's upper left corner

m.setTitleFontSize(20);
m.setTitleFontName("Arial bold");
m.setTitle("Temperature (C)");

// Change meter scale values
String[] scaleLabels = {"0", "10", "20", "30", "40", "50", "60", "70", "80"};
m.setScaleLabels(scaleLabels);
m.setScaleFontSize(18);
m.setScaleFontName("Times new roman bold");
m.setScaleFontColor(color(200, 30, 70));

// We can also display the value of meter
m.setDisplayDigitalMeterValue(true);

// Lets do some more modifications so our meter looks nice
m.setArcColor(color(100, 150, 200));
m.setArcThickness(15);

m.setMaxScaleValue(80);

m.setMinInputSignal(0);
m.setMaxInputSignal(80);

m.setNeedleThickness(3);

// HUMIDITY METER
// lets take some refference from first meter
int mx = m.getMeterX(); // x coordinate of m
int my = m.getMeterY(); // y coordinate of m
int mw = m.getMeterWidth();

m2 = new Meter(this, mx, my+ 300);

m2.setTitleFontSize(20);
m2.setTitleFontName("Arial bold");
m2.setTitle("Humidity (%)");

// Change meter scale values
String[] scaleLabels2 = {"0", "10", "20", "30", "40", "50", "60", "70", "80", "90", "100"};
m2.setScaleLabels(scaleLabels2);
m2.setScaleFontSize(18);
m2.setScaleFontName("Times new roman bold");
m2.setScaleFontColor(color(200, 30, 70));

// We can also display the value of meter
m2.setDisplayDigitalMeterValue(true);

// Lets do some more modifications so our meter looks nice
m2.setArcColor(color(100, 150, 200));
m2.setArcThickness(15);

m2.setMaxScaleValue(100);

m2.setMinInputSignal(0);
m2.setMaxInputSignal(100);

m2.setNeedleThickness(3);

////Potentiometer

// lets take some refference from first meter
int mx1 = m.getMeterX(); // x coordinate of m
int my1 = m.getMeterY(); // y coordinate of m
int mw1 = m.getMeterWidth();

m3 = new Meter(this, mx , 680);

m3.setTitleFontSize(20);
m3.setTitleFontName("Arial bold");
m3.setTitle("Potentiometer");

// Change meter scale values
String[] scaleLabels3 = {"0", "10", "20", "30", "40", "50", "60", "70", "80", "90", "100"};
m3.setScaleLabels(scaleLabels3);
m3.setScaleFontSize(18);
m3.setScaleFontName("Times new roman bold");
m3.setScaleFontColor(color(96, 164, 38));

// We can also display the value of meter
m3.setDisplayDigitalMeterValue(true);

// Lets do some more modifications so our meter looks nice
m3.setArcColor(color(100, 150, 200));
m3.setArcThickness(20);

m3.setMaxScaleValue(100);

m3.setMinInputSignal(0);
m3.setMaxInputSignal(100);

m3.setNeedleThickness(3);
}

void draw(){
// Lets give title to our window
textSize(30);
fill(58, 239,172); // Font color , (r,g,b)
text("Temperature, Humidity and Potentiometer", 200, 40); // ("text", x, y)

if (port.available() > 0){
String val = port.readString(); // read incoming string on serial port
// First we need to separate temperature and humidity values
String[] list = split(val, ','); // splits value separated by ','
float temp = float(list[0]); // first value is Temperature
float hum = float(list[1]);  // second value is Humidity
int pot = int(list[2]);  // third value potentiometer
m.updateMeter(int(temp)); // int is used due to updateMeter accepts only int values
m2.updateMeter(int(hum));
m3.updateMeter(int(pot));
println("Temperature: " + temp + " C  " + "Humidity: " + hum+ "%"+"Potentiometer: "+pot);
}
}
Explanation;
- First line defines size of the window ---- size(950, 1000)
- Second defines color of the window in RGB color palette ---- background(255, 255, 255)
- To add temperature scale ---- m = new Meter(this, 250, 80);
- To define position of the temperature scale ---- m2 = new Meter(this, mx, my+ 300)
- To add title for the temperature ---- m.setTitleFontSize(20); m.setTitleFontName("Arial bold"); m.setTitle("Temperature (C)");
- To chnage temperature scale values ---- String[] scaleLabels = {"0", "10", "20", "30", "40", "50", "60", "70", "80"};
- To define title and its position ---- text("Temperature, Humidity and Potentiometer", 200, 40); // ("text", x, y)
- To add humidity meter --- m2 = new Meter(this, mx, my+ 300);
- To add humidity meter title ---- m2.setTitleFontSize(20); m2.setTitleFontName("Arial bold"); m2.setTitle("Humidity (%)");
- To change humidity meter scale values ---- String[] scaleLabels2 = {"0", "10", "20", "30", "40", "50", "60", "70", "80", "90", "100"};
- To add potentiometer ---- m3 = new Meter(this, mx , 680);
- To add potentiometer title ---- m3.setTitleFontSize(20); m3.setTitleFontName("Arial bold"); m3.setTitle("Potentiometer");
- To add potentiometer scale value ---- String[] scaleLabels3 = {"0", "10", "20", "30", "40", "50", "60", "70", "80", "90", "100"};
All values above 0 from the humidity sensor and potentiometer are separated by type using the following code.
if (port.available() > 0)
String val = port.readString(); // read incoming string on serial port
// First we need to separate temperature and humidity values
String[] list = split(val, ','); // splits value separated by ','
float temp = float(list[0]); // first value is Temperature
float hum = float(list[1]);  // second value is Humidity
int pot = int(list[2]);  // third value potentiometer
The following code sequence is used to continuously update the values received from the humidity sensor and potentiometer.
m.updateMeter(int(temp)); // int is used due to updateMeter accepts only int values
m2.updateMeter(int(hum));
m3.updateMeter(int(pot));
The following code helps to display all received data on the screen ; println("Temperature: " + temp + " C " + "Humidity: " + hum+ "%"+"Potentiometer: "+pot);
4. Testing
To test the circuit and interface, I first opened the processing interface and played it. Then I slowly started moving the potentiometer.
Secondly, I wanted to test the humidity sensor. So I gently use airgun on the sensor. After doing this, I saw changes in the temperature and humidity display on the interface. However, the change in the humidity indicator was very sudden.