WEEK 12
Molding and Casting
Group Assignment:
- Review the safety data sheets for each of your molding and casting materials, then make and compare test casts with each of them.
- Compare printing vs machining molds.
Individual Assignment:
- design a mold around the process you'll be using, produce it with a smooth surface finish, and use it to cast parts.
1.Research
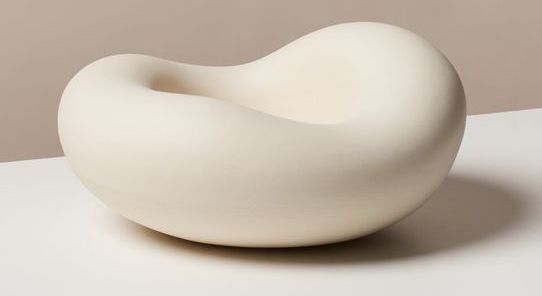
This week started with deciding which product to mold for the casting and molding week. I did some research on pinterest. I came across amorphous decoration objects on Pinterest and it inspired me to design my own.
2.Design in Fusion360
Inspired by this product, I decided to design an amorphous jewelry bowl. I used the Fusion360 program to draw my design.
Since my design will have an amorphous form, instead of creating it using a sketch, I chose the method of creating a solid object by subtracting a solid object from a solid object, so I followed these steps respectively;
- I created a cylinder.
- I created the sphere that I will use to create a space and determined its position on the cylinder.
- I subtracted the sphere from the cylinder.
- I fillet the corners of the shape with the variable fillet command.
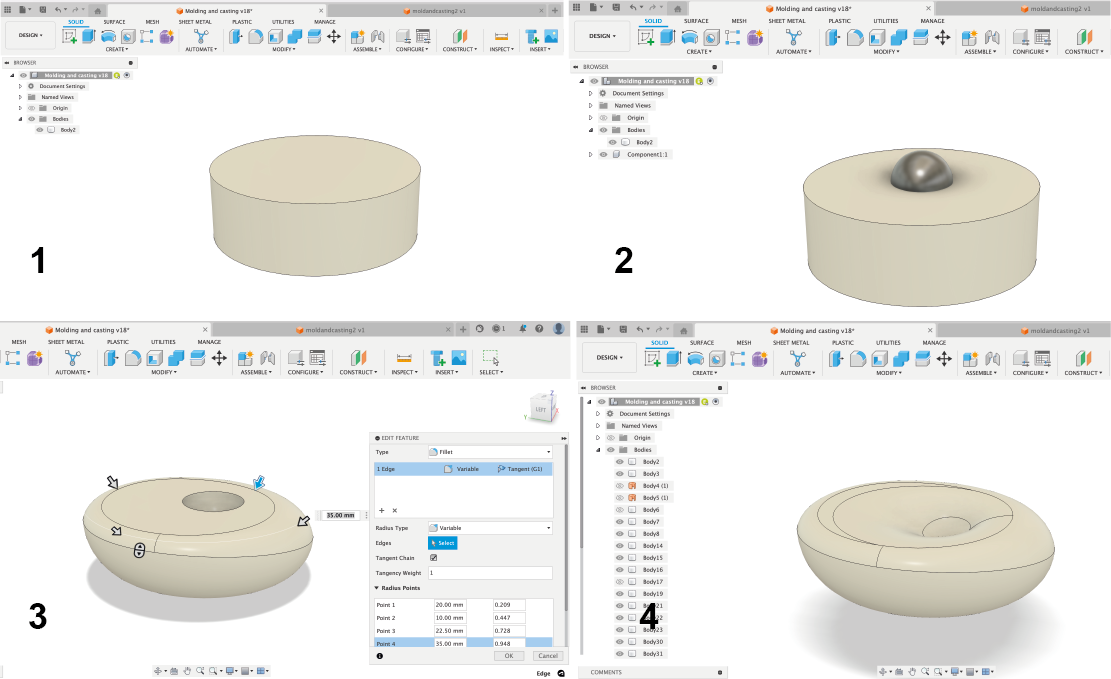
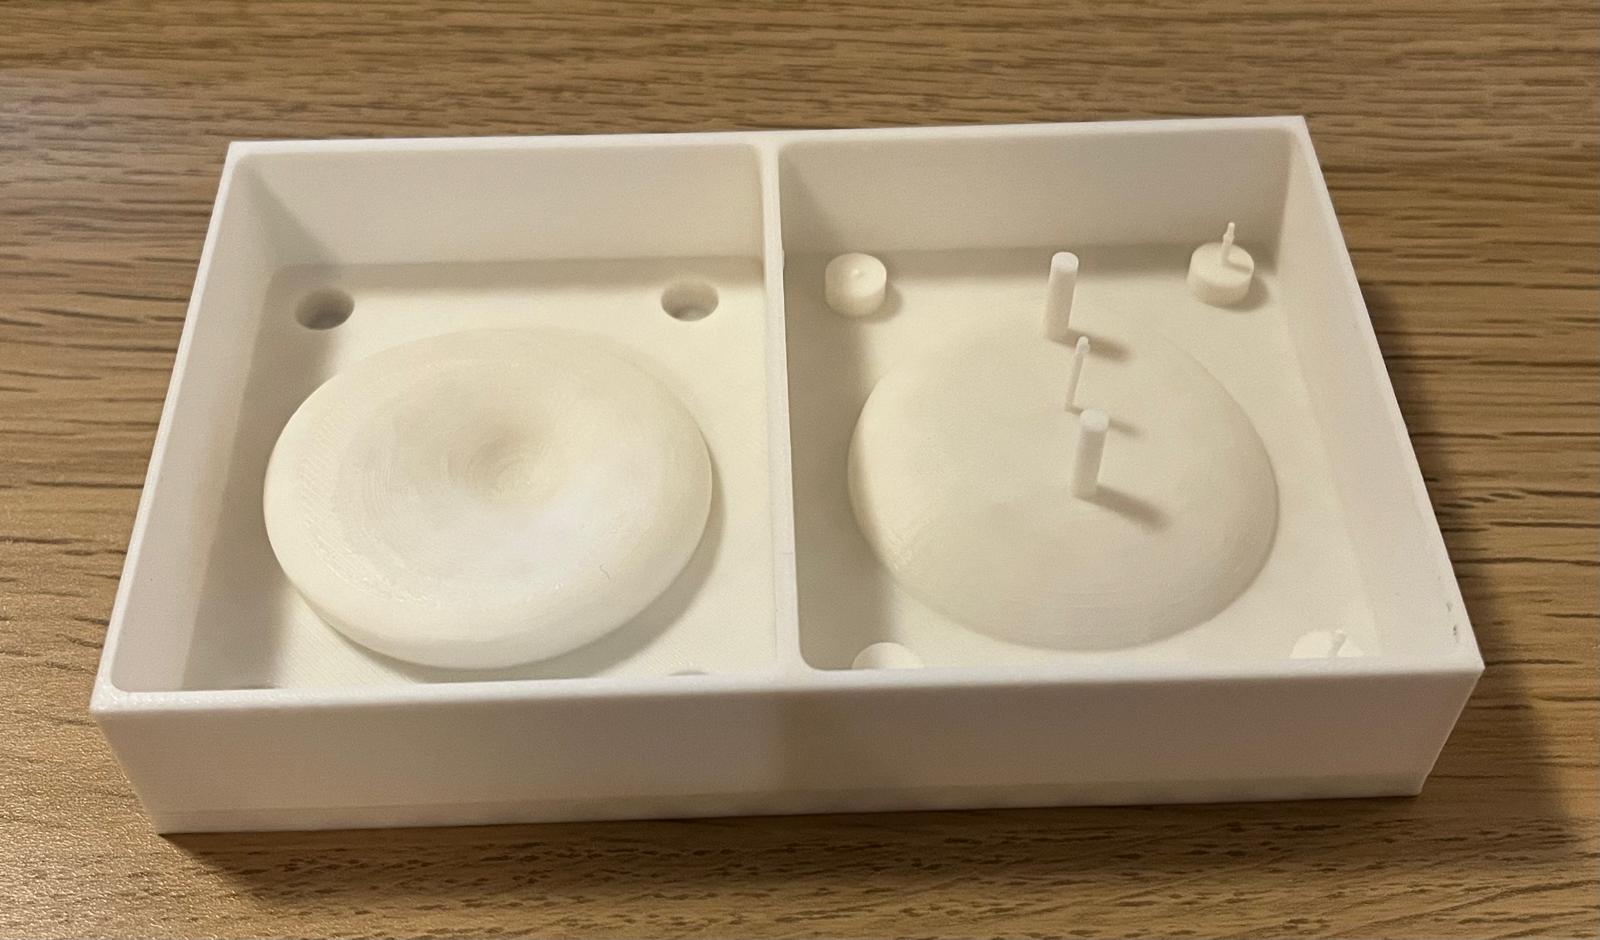
3. Positive Mold
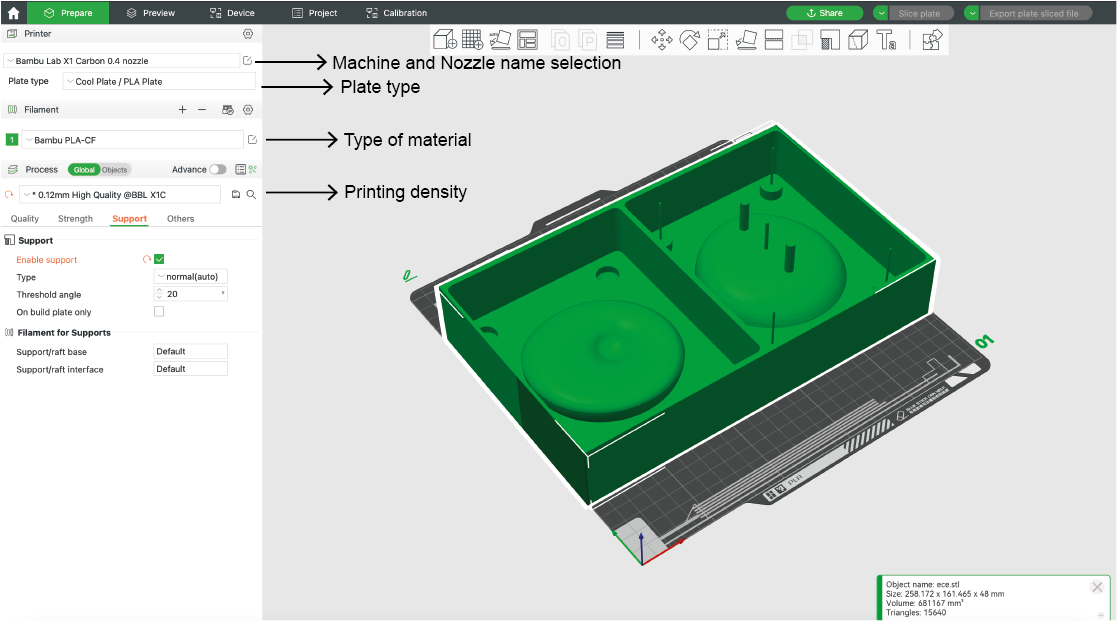
In order to obtain the product I designed with the molding and casting method, I first had to decide which method I should use to create my mold. Due to the form of my design, it was impossible to create the mold with the milling method because there would be an overhang in the mold I would create. For this reason I decided to use the print method.
I followed these steps;
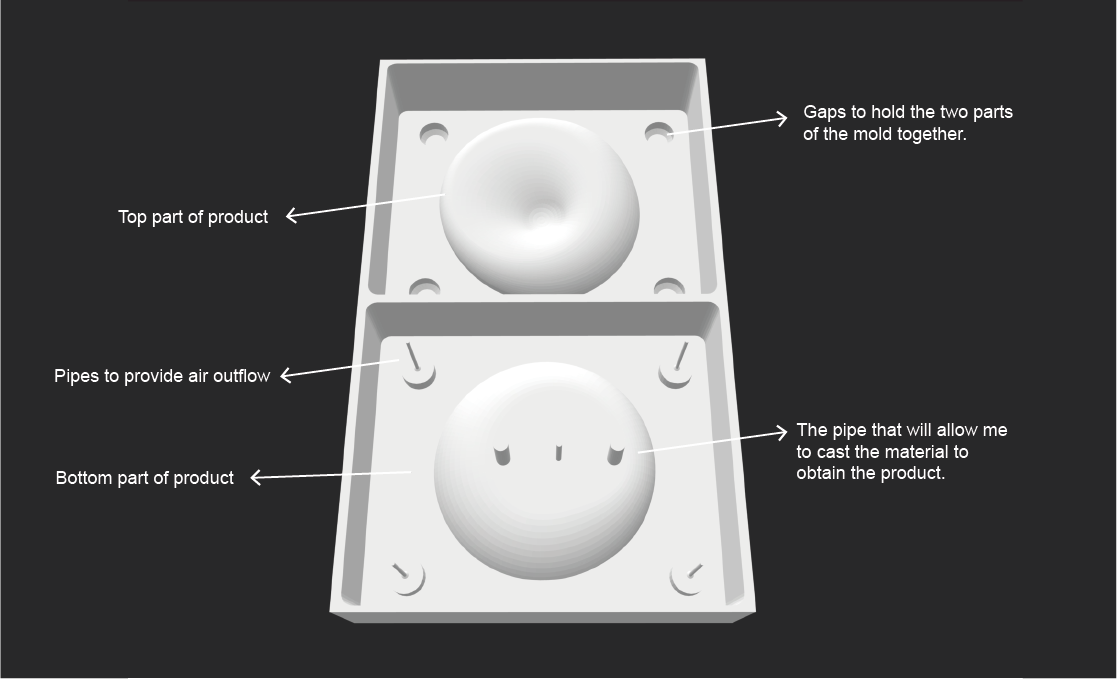
- I divided the product I designed in Fusion360 into two parts.
- I prepared a bed for the mold and placed the pieces I cut in half symmetrically on the bed.
- I created the walls of the mold.
- It was quite challenging to decide on the positioning of the parts. To make sure it was correct, we did the following test: I rotated the bed of the lower part with the product so that it intersected with the bed of the upper part. Then I took a cross-sectional view and saw that the product matched.
- I created the holes and ridges that will allow the mold to fit together. I added a chamfer to the holes to facilitate the entry of the ridge.
- To obtain the product, I had to create holes to pour the resin. I created about 3 mm holes that would fit the base of the product.
- In addition to these, I created holes with a width of about 1 mm to allow the trapped air in the mold to escape.
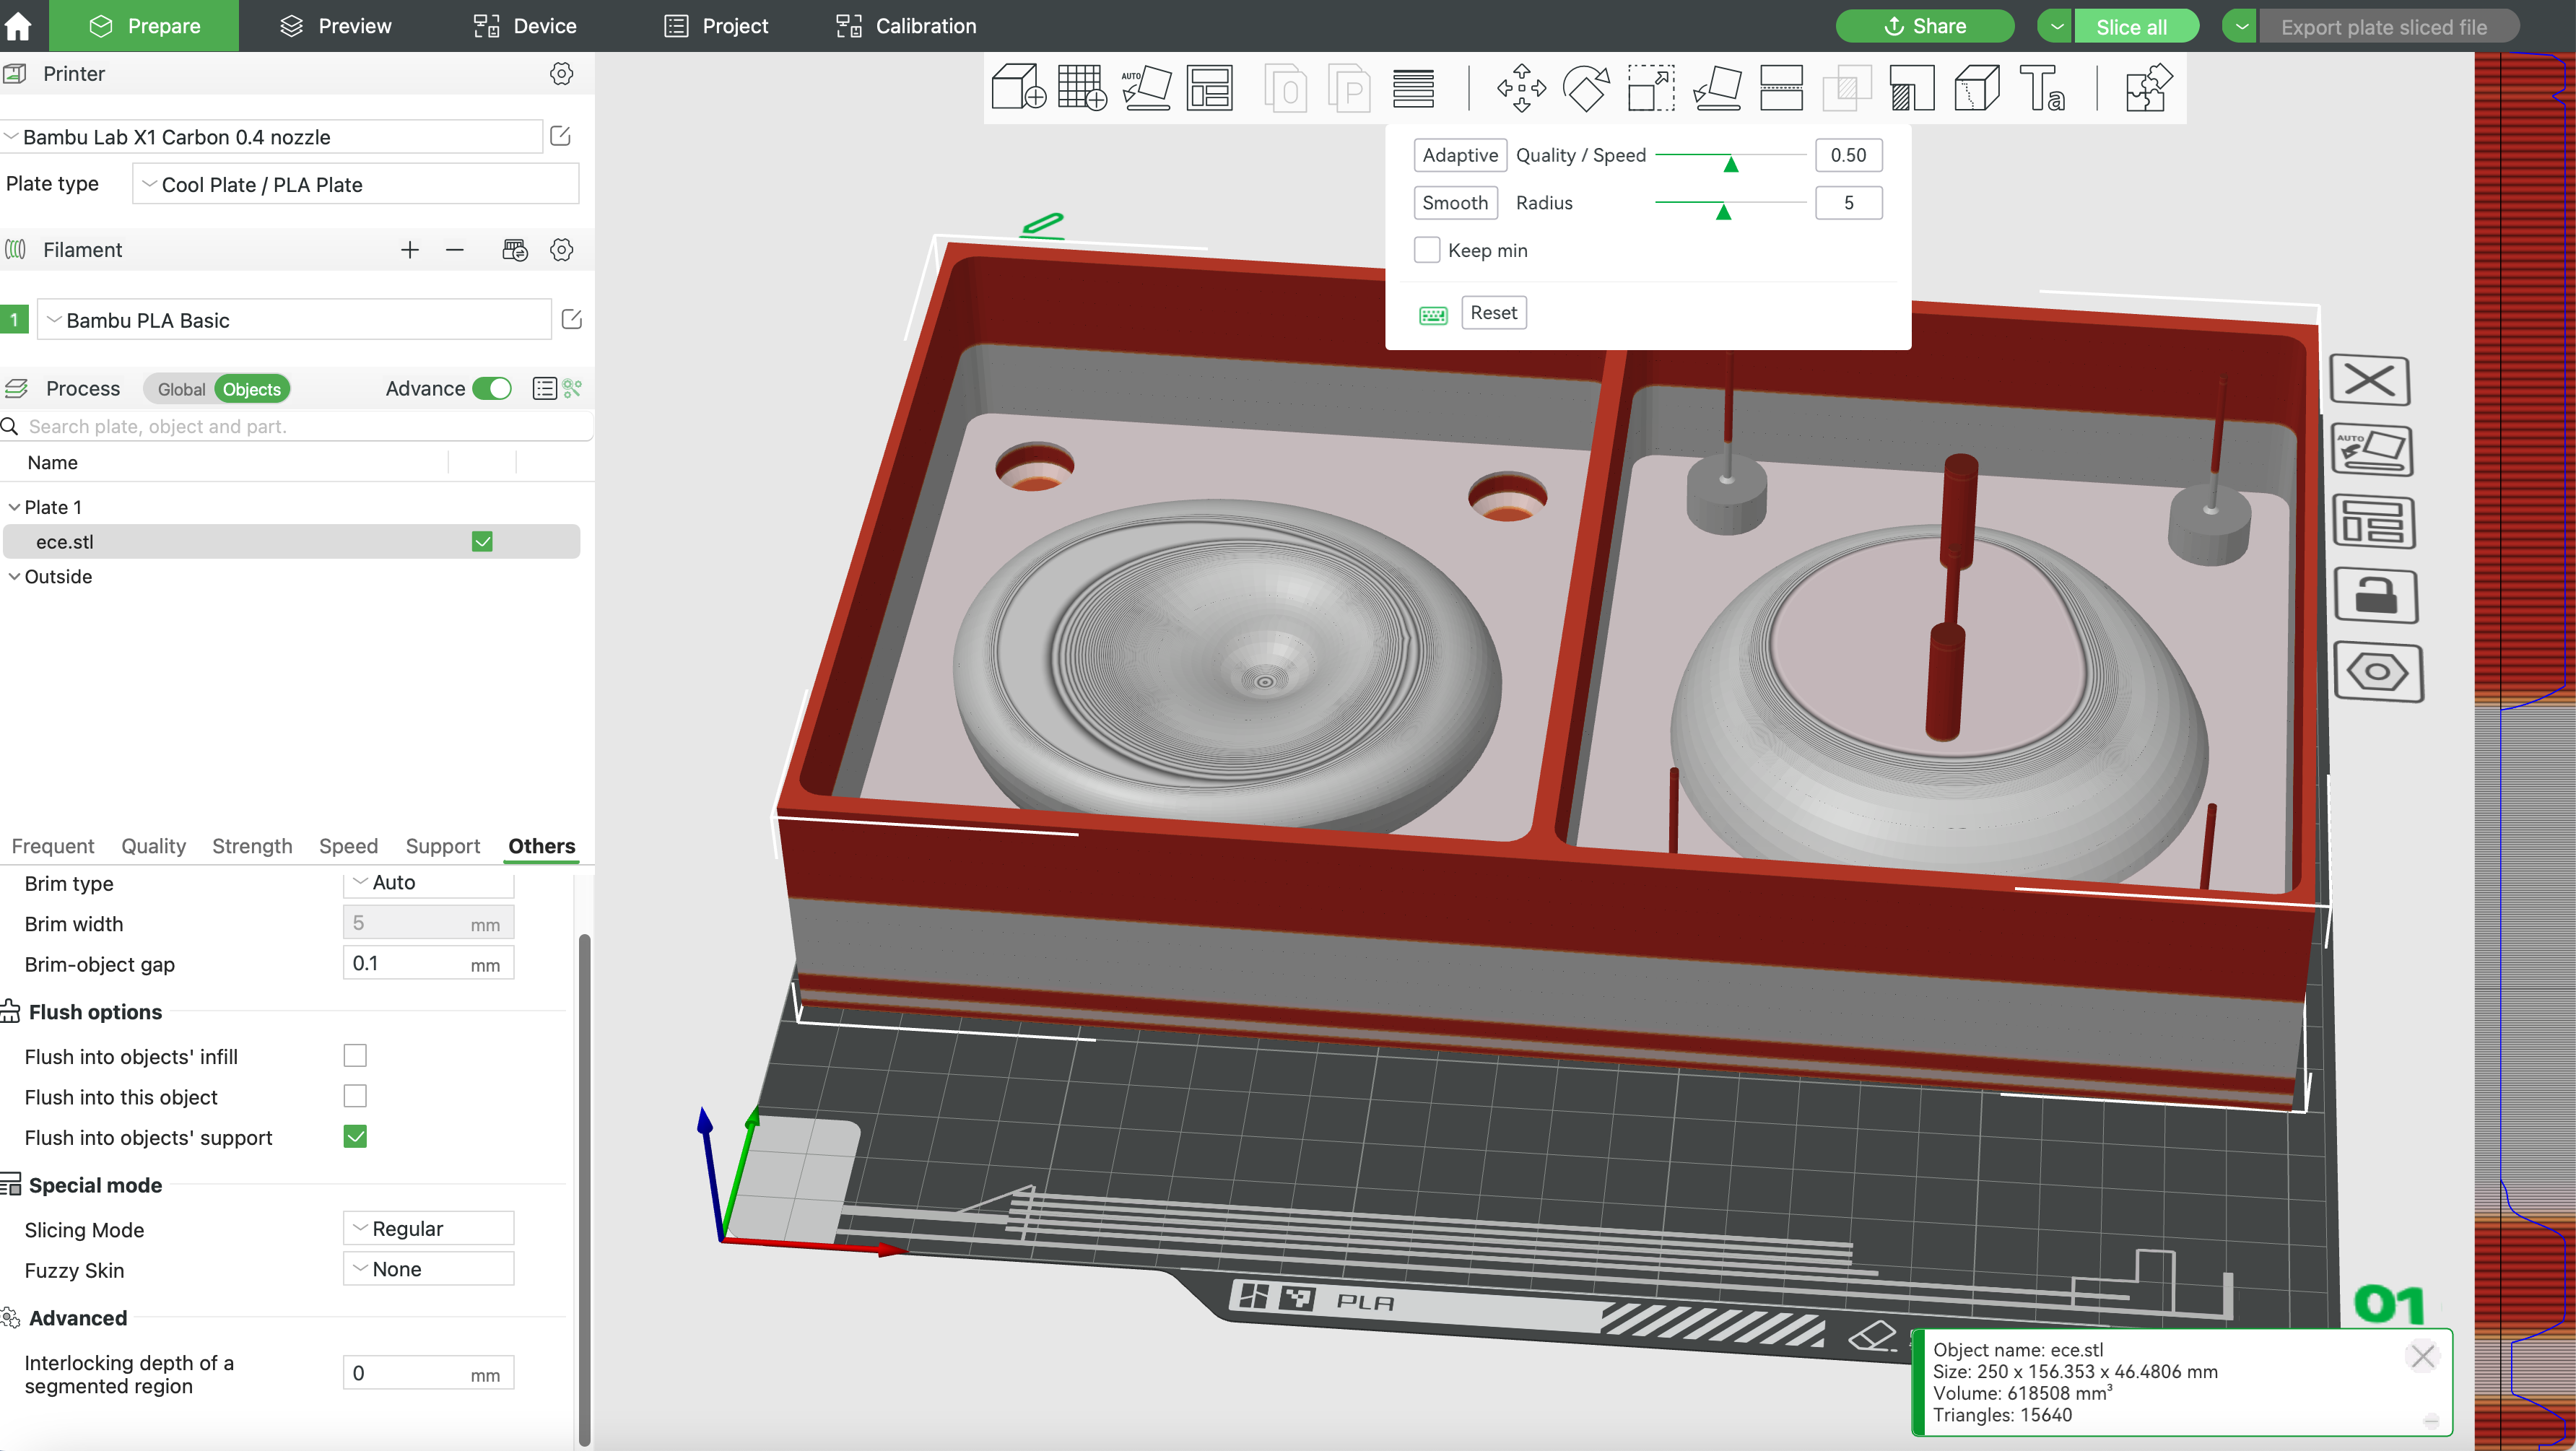
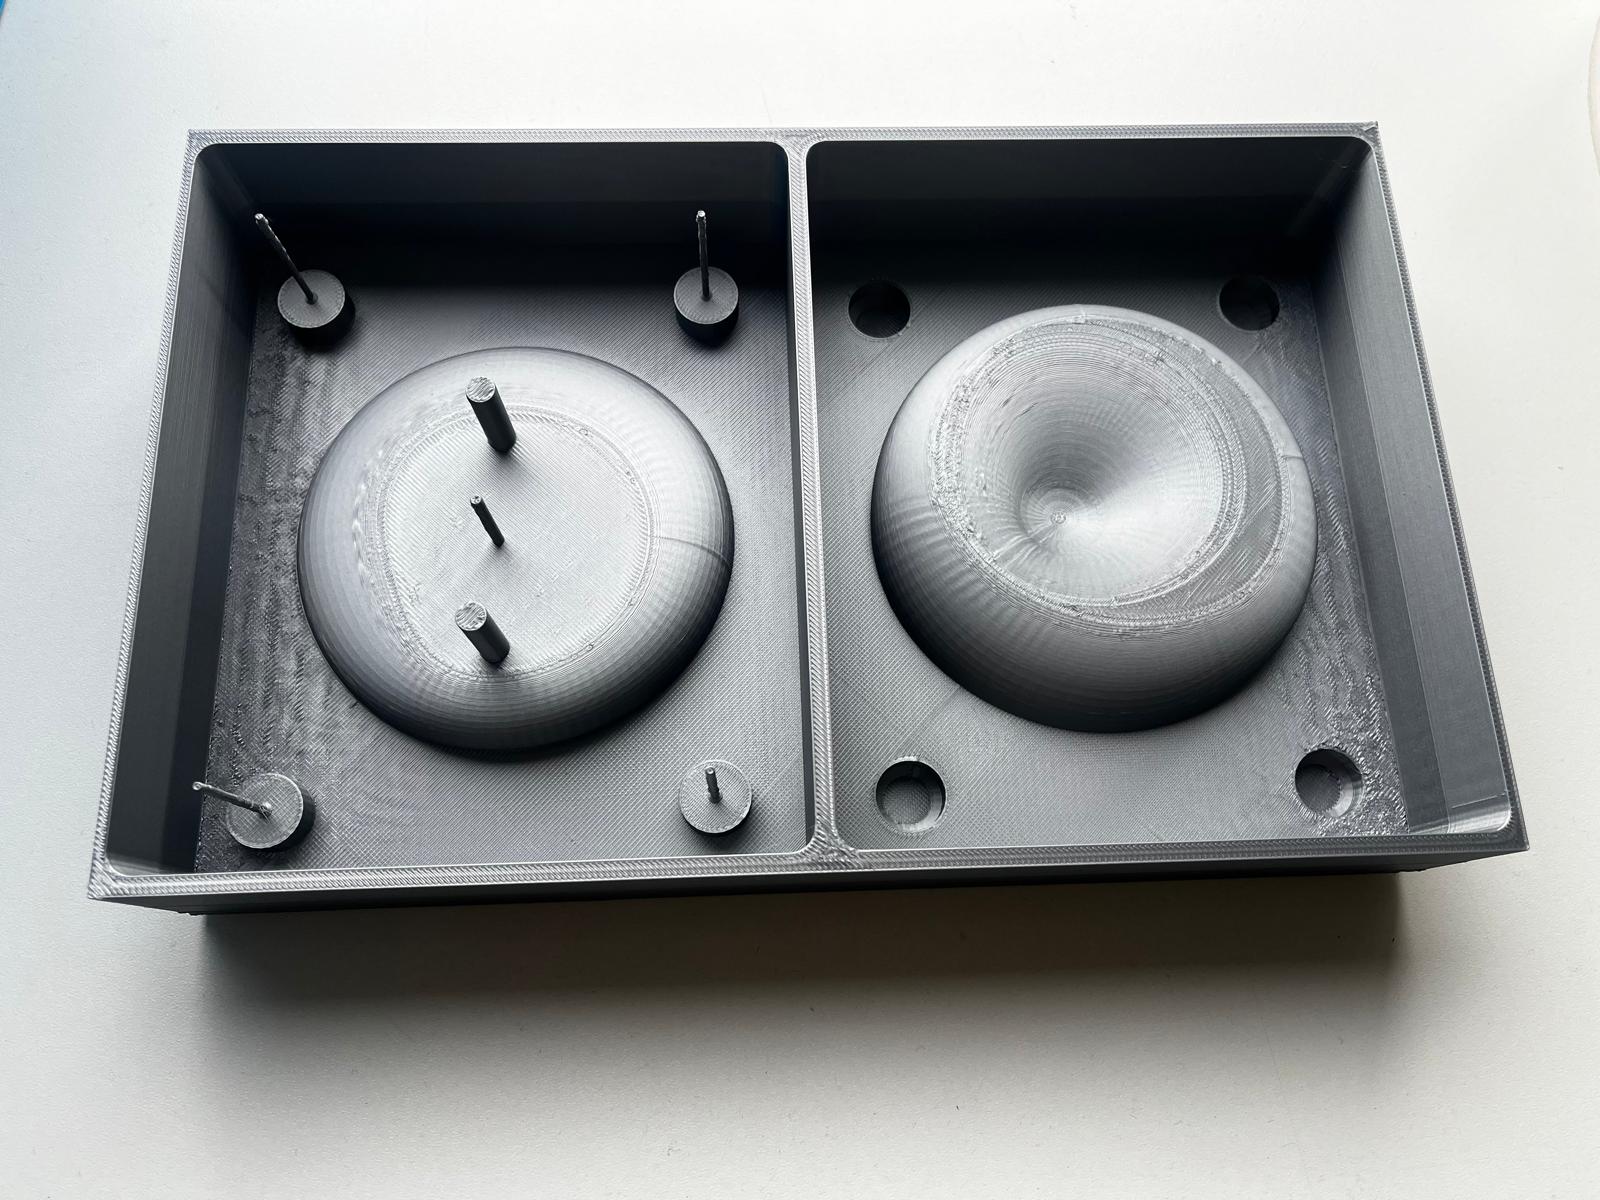
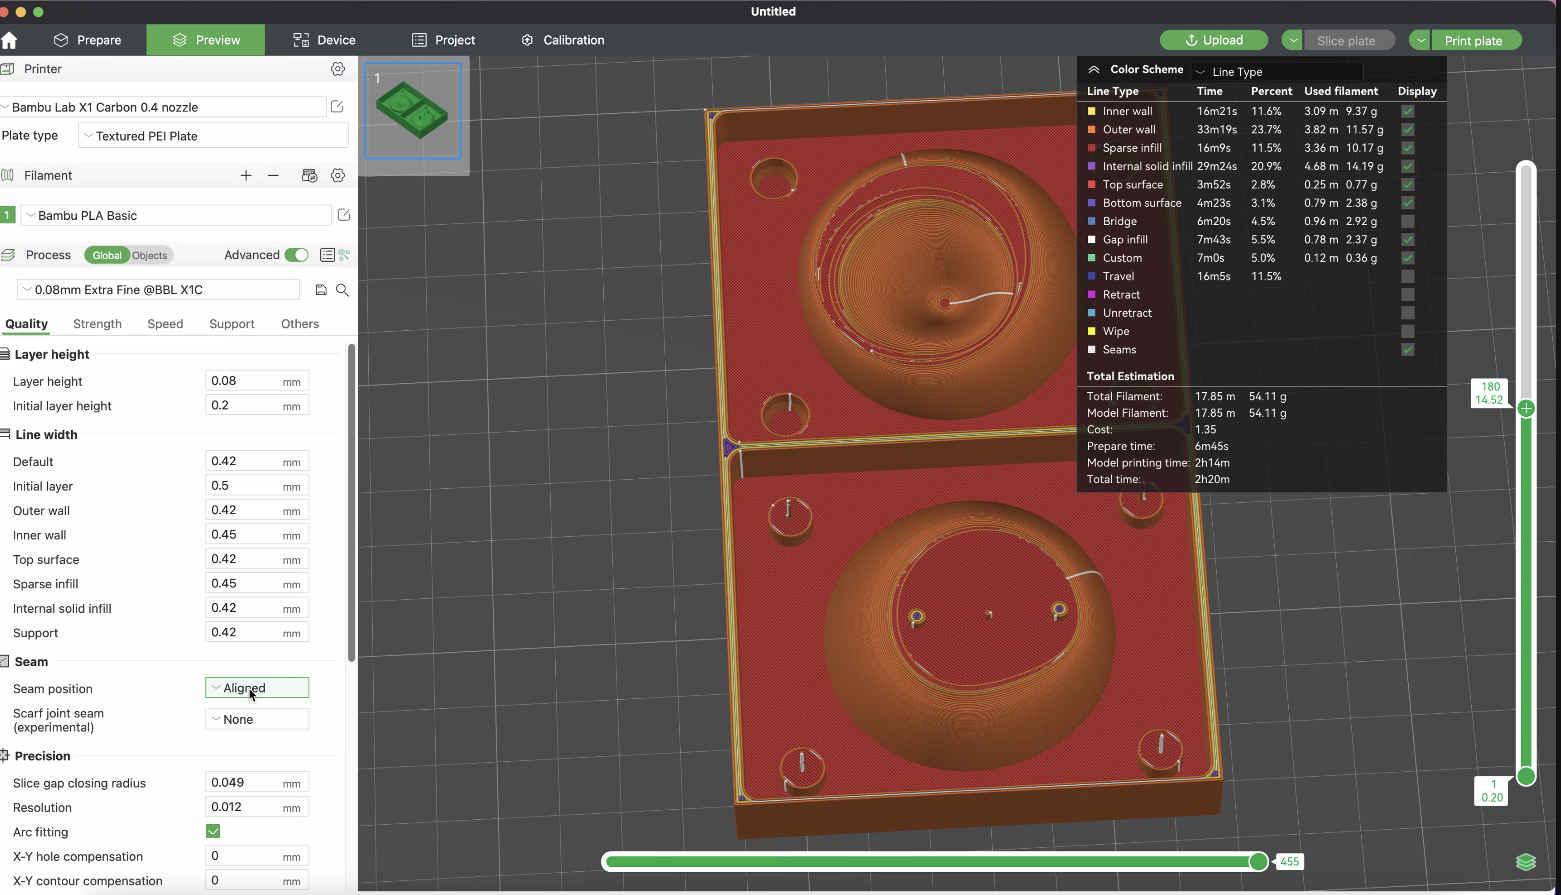
4. Printing
I exported my design as a stl file to open it in the bamboo studio application. I printed my design in Bambu Lab X1. After making adjustments in Bambo studio, I reduced the print quality of unimportant parts of the print to reduce the printing time. Red areas indicate low quality printing.
After 7.5 hours, my print was ready. During printing, some parts of the product were pruned due to poor print quality. I sanded this by wetting 240 grit sandpaper. The negative mold must be smooth to create the positive mold in a quality way. For this reason, I made sure that all roughness was removed when sanding the negative mold.
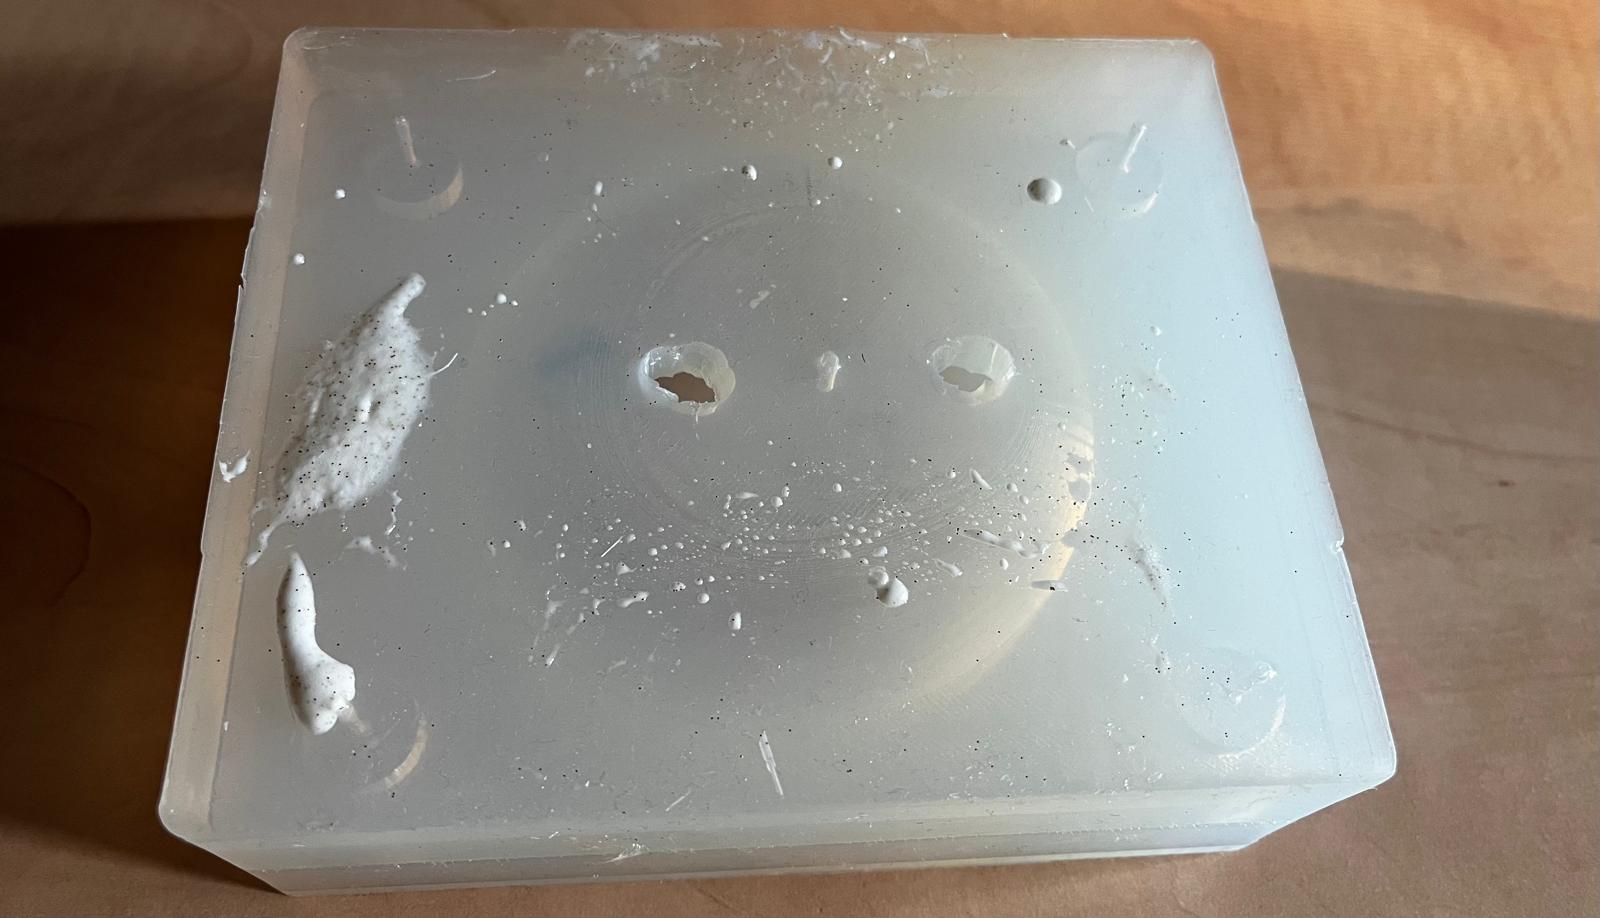
5.Negative Mold
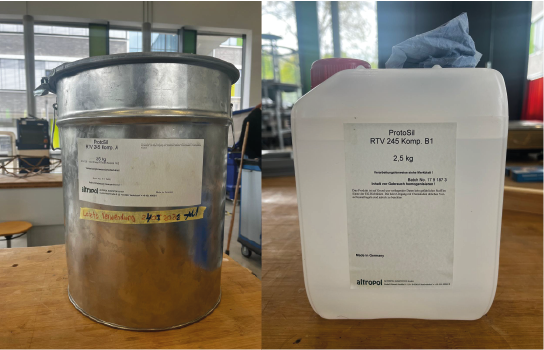
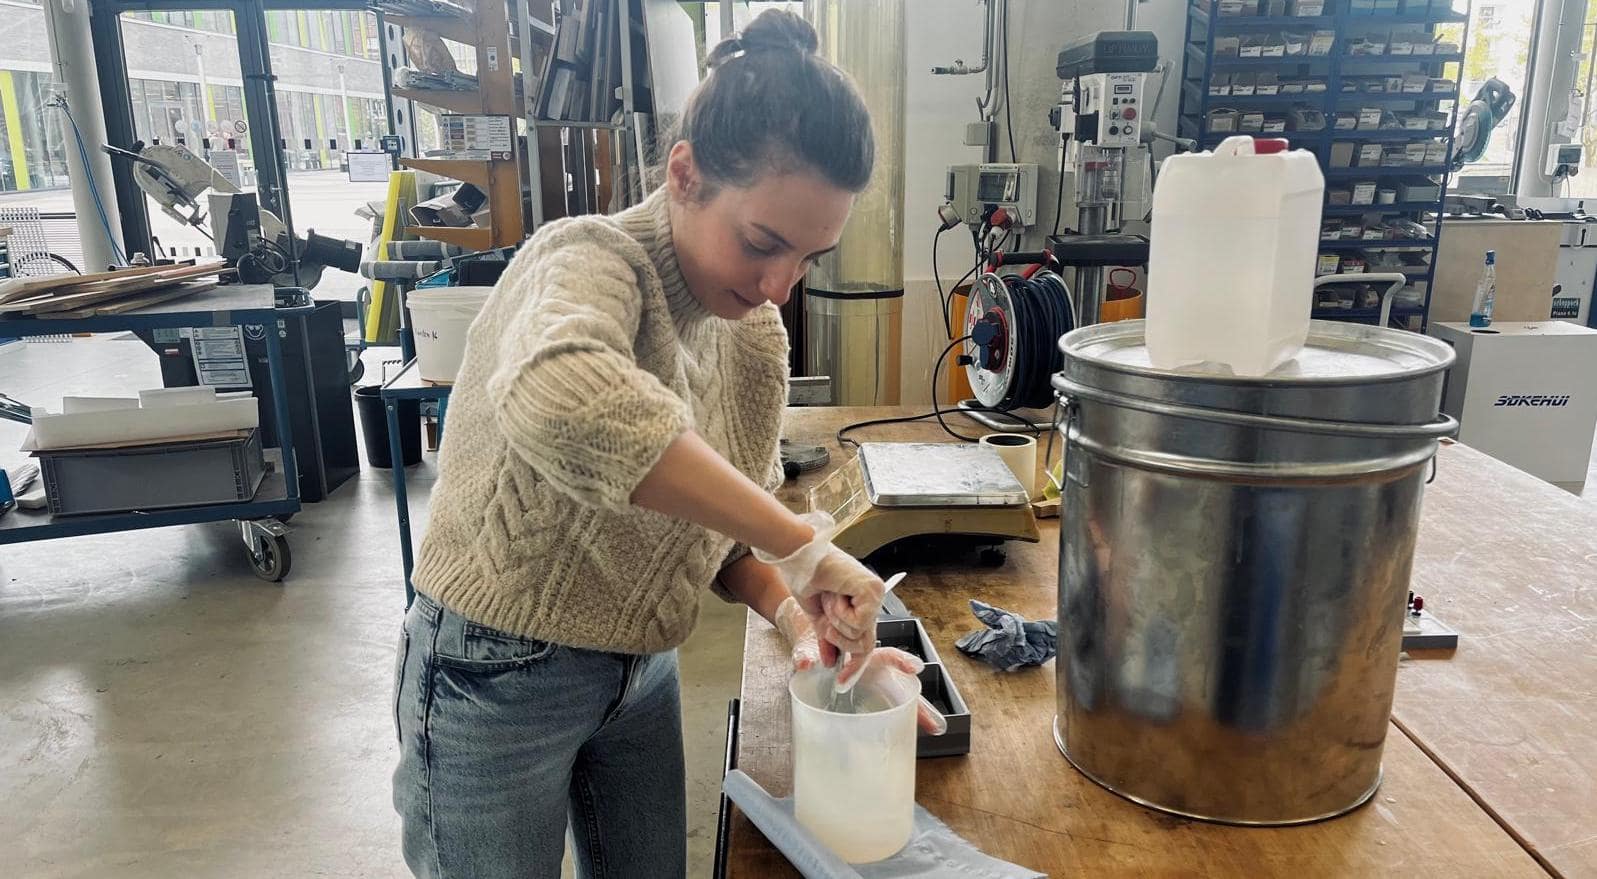
We decided to prepare a silicone mold using the tool we get from the 3D printer, so I had information about the material by reading the datasheet of the material we were going to use. In this information sheet it is clear that the components are colorless and the mixing ratio is 1 to 10.
Here you can check the datasheet.

I measured them on a scale so that I could mix the ingredients together in the right proportions.
- First, I wore gloves because silicone is a very sticky substance.
- Then I opened the scale and placed a napkin to prevent the surface from getting dirty.
- I placed the empty container on the scale. Naturally, the number indicator on the scale has changed. To avoid this and measure the silicone correctly, I reset the number to zero by pressing the "tare" button at the bottom right.
- I added about 520 grams of Component A.
- I added 52 grams of ingredient B to fit the 1 to 10 measurement.
I put it in a vacuum chamber so that I could mix the two components well and get the air out of it.
- I placed the container in the vacuum chamber.
- I closed the machine door and turned it on.
- I turned the switch on the right side of the machine to make the container rotate.
- As the container rotated, the bubbles started to rise. In this case, I stopped the rotation from time to time and continued again.
- After about 1-2 minutes the pressure inside the machine dropped to 2. I continued stirring the container and after about 5 minutes the process was complete.
- I slowly rotated the handle positioned on the right side of the machine to let the air back into the machine. It is important to do this very slowly.
- When all the air was inside, I opened the lid of the machine and took the container.
I started to slowly pour the mixture onto the printout I obtained from 3dprint. It is important to pay attention to the following in this process;
- Slowly pour the compound over the details at first.
- Raise the container higher to slow the flow of the component.
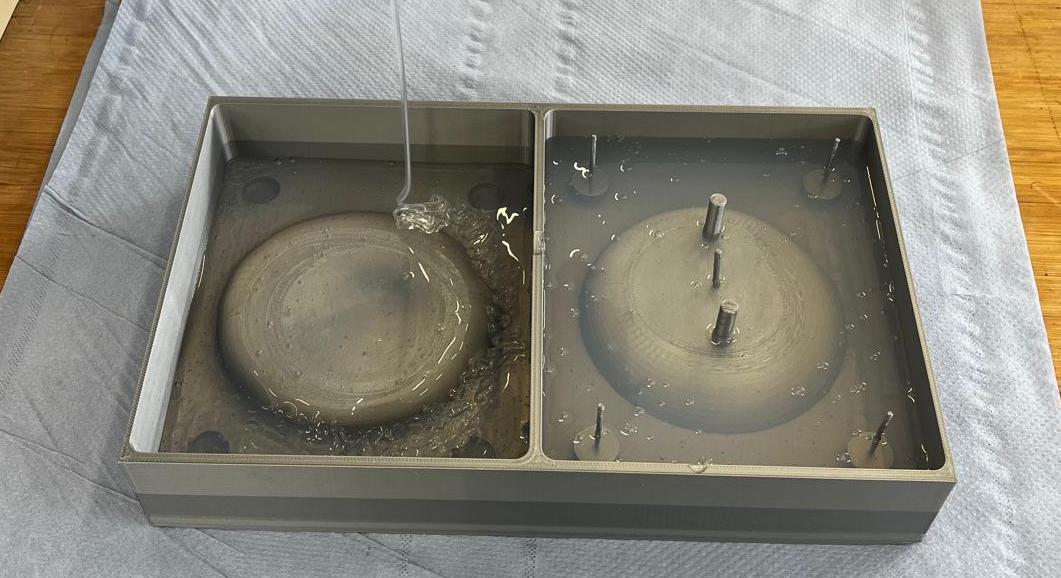
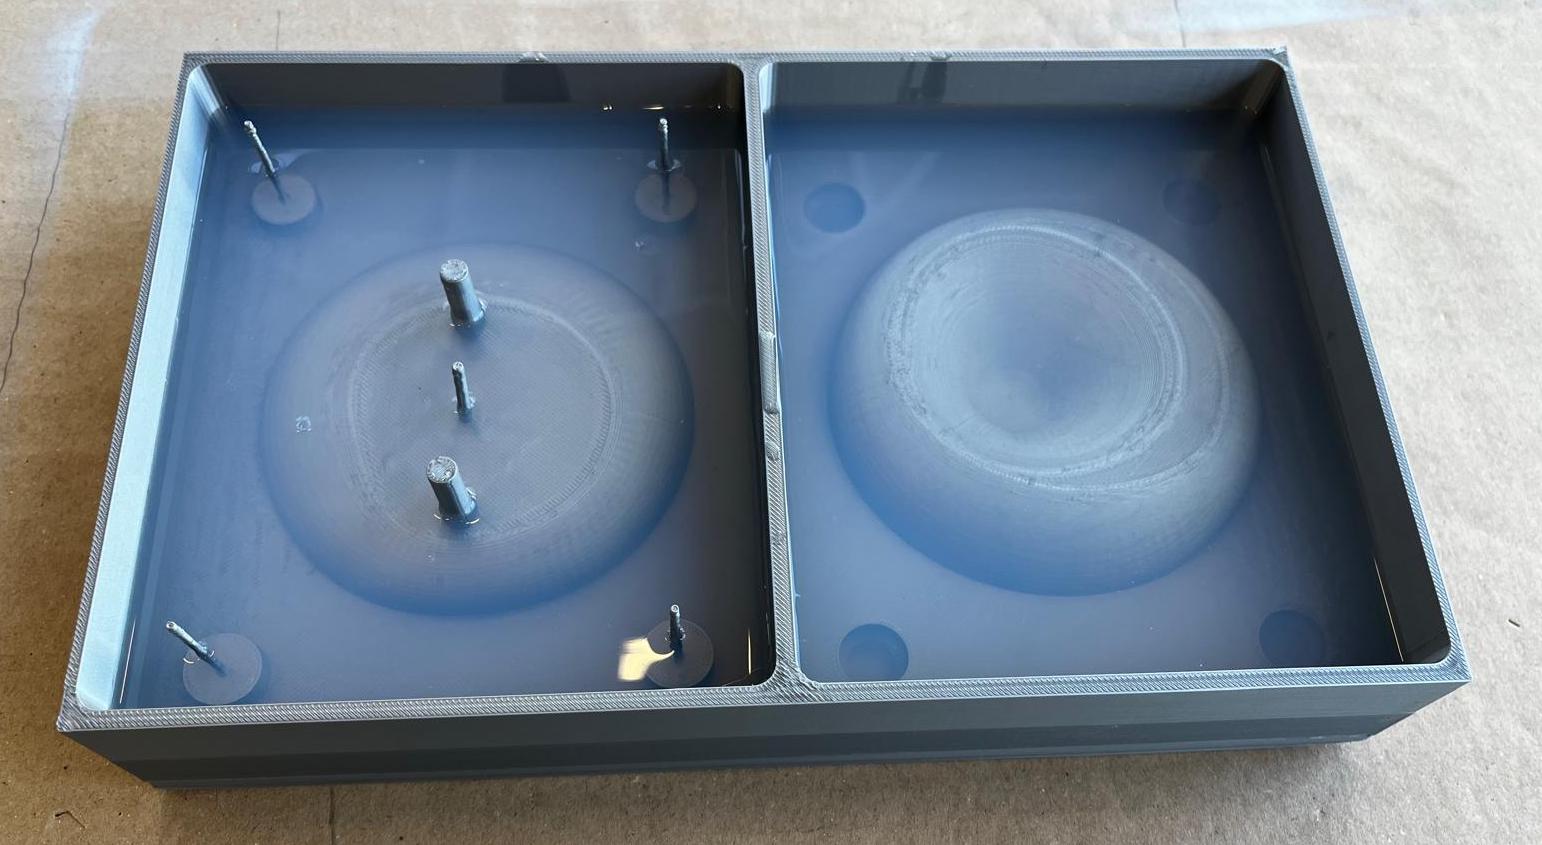
I poured all the ingredients and let it dry. After about 7 hours the whole mold was dry. We used an air gun and screwdriver to remove the mold from the 3d print product.
5. Casting
In this week's assignment, the most challenging part was casting for me because of the problems that I am going to explain in the following parts. To reach the proper result I tried 3 third times.
Before casting to avoid any material leak, I tape the the mold carefully with paper tape. This method helps to keep the mold closer with as much as less gap between the parts.
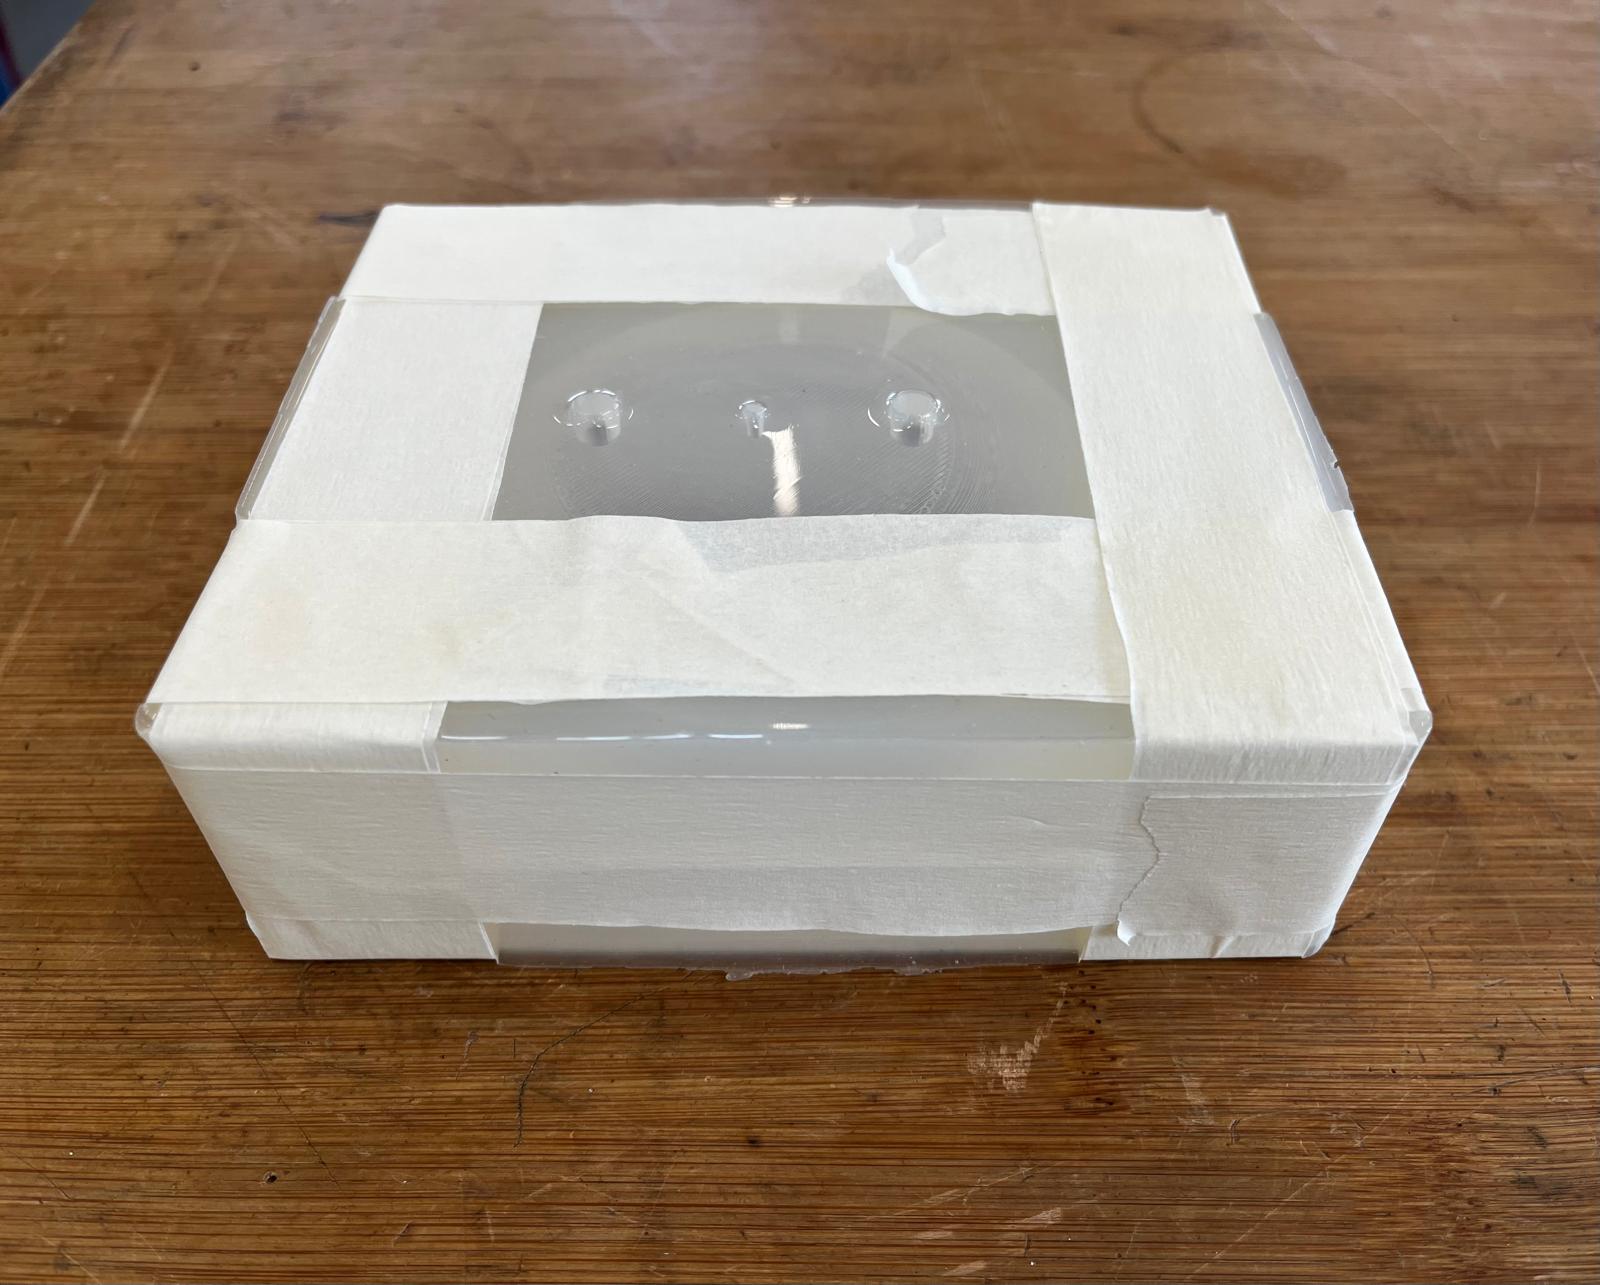
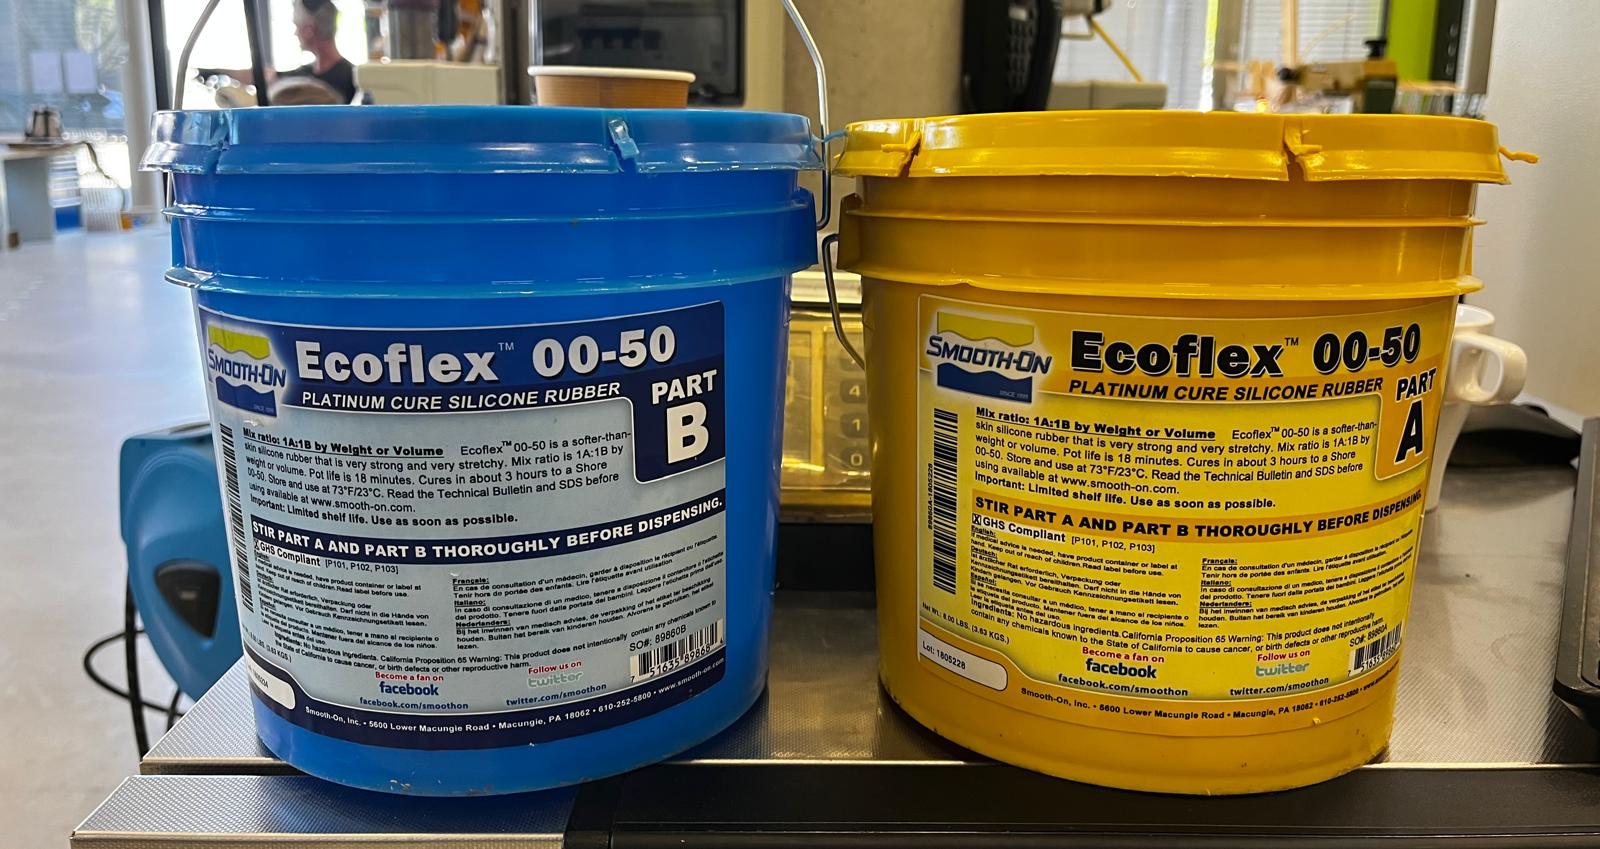
Then I prepared the mixture. Similar to mold composite here I have 2 different liquid materials. However, unlike the mold component, casting composites have different mixture ratios. As you can see in the link mixing ratio is 1:2.

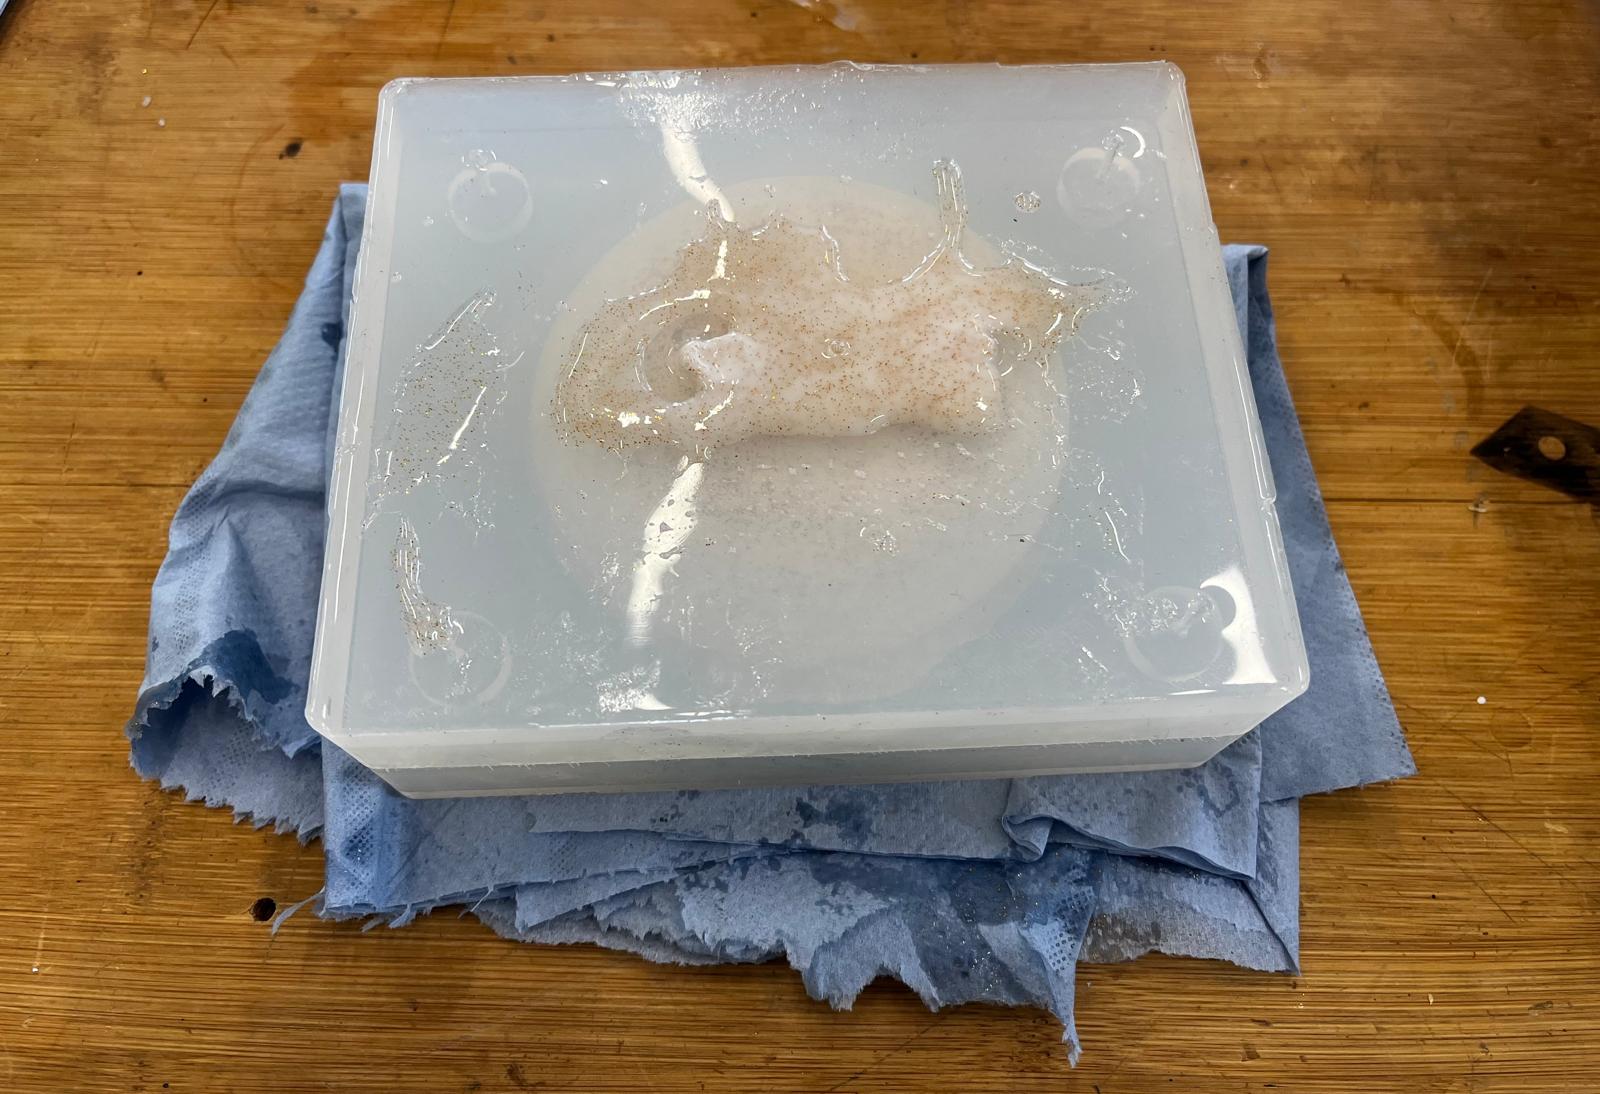
I followed the instructions and I put 41g comp.A. As a following task, I used a vacuum chamber to avoid any air stuck into the material. Approximately 5 min. later, I took it from the machine to mix with the comp. B. As far as I know from my instructor's warnings, I have to be quite quick while mixturing. Thus, I poured the 82g comp.B into another cup then I mixed them. Also, I added some glitter to the experiment. I stirred them very carefully and as fast as possible. I started to pour it into the mold however, several minutes later mixture started to harden. I was too quick, approximately less than 1 minute. So my first attempt was unsuccessful. I put the mold into the oven to cure it fast. After an hour it was fully cured and I could easily remove it from the mold.
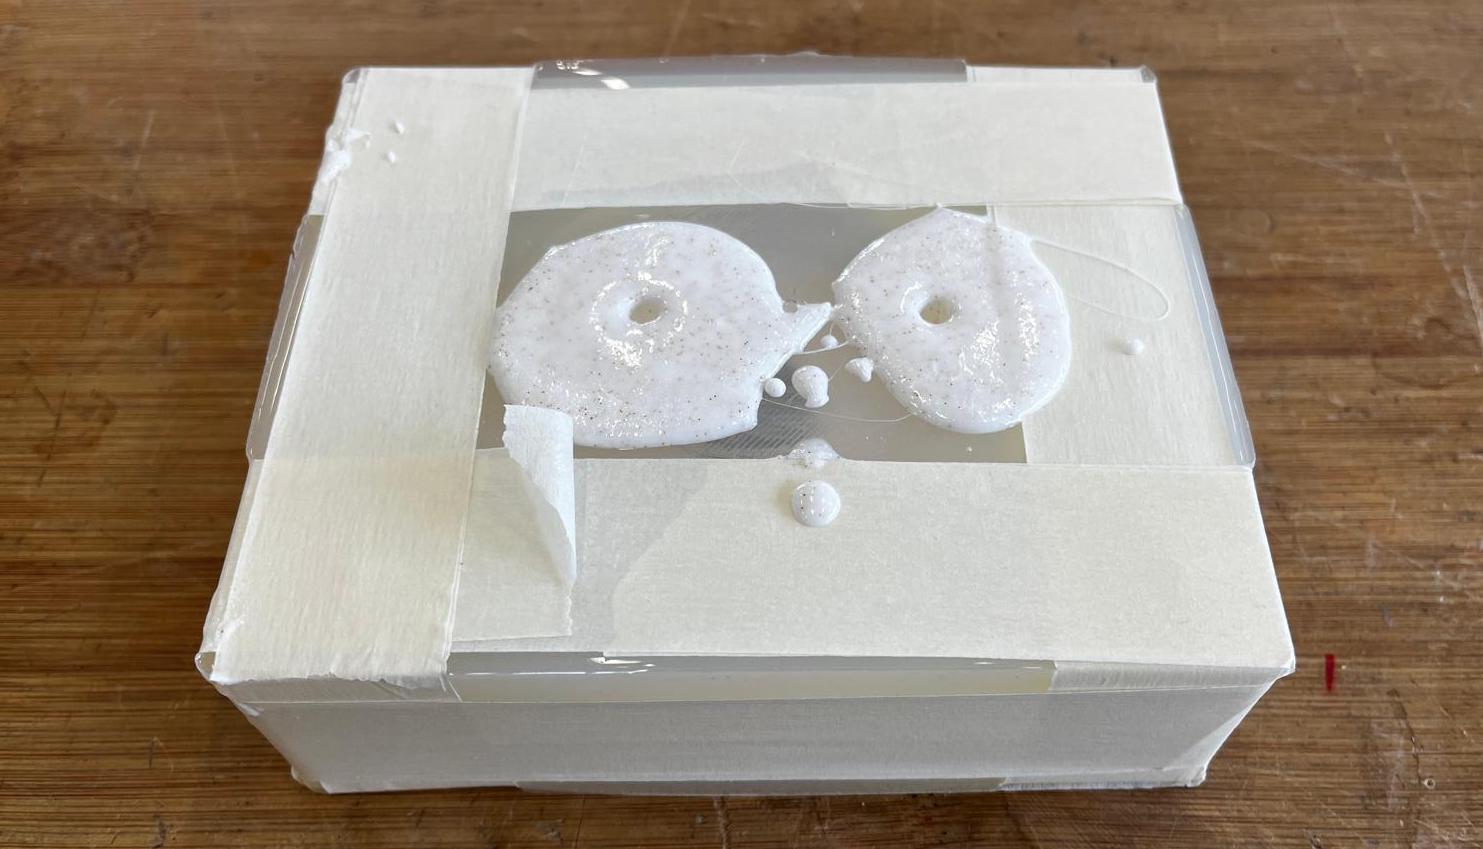
On my second try, I did not put component A into the vacuum chamber and I mixed it directly with component B. This time, I was more careful to mix it properly. Again, I started to pour into mold, I was experienced thus, I could pour faster. However, this progress wasn't enough, and the mixture started to harden.
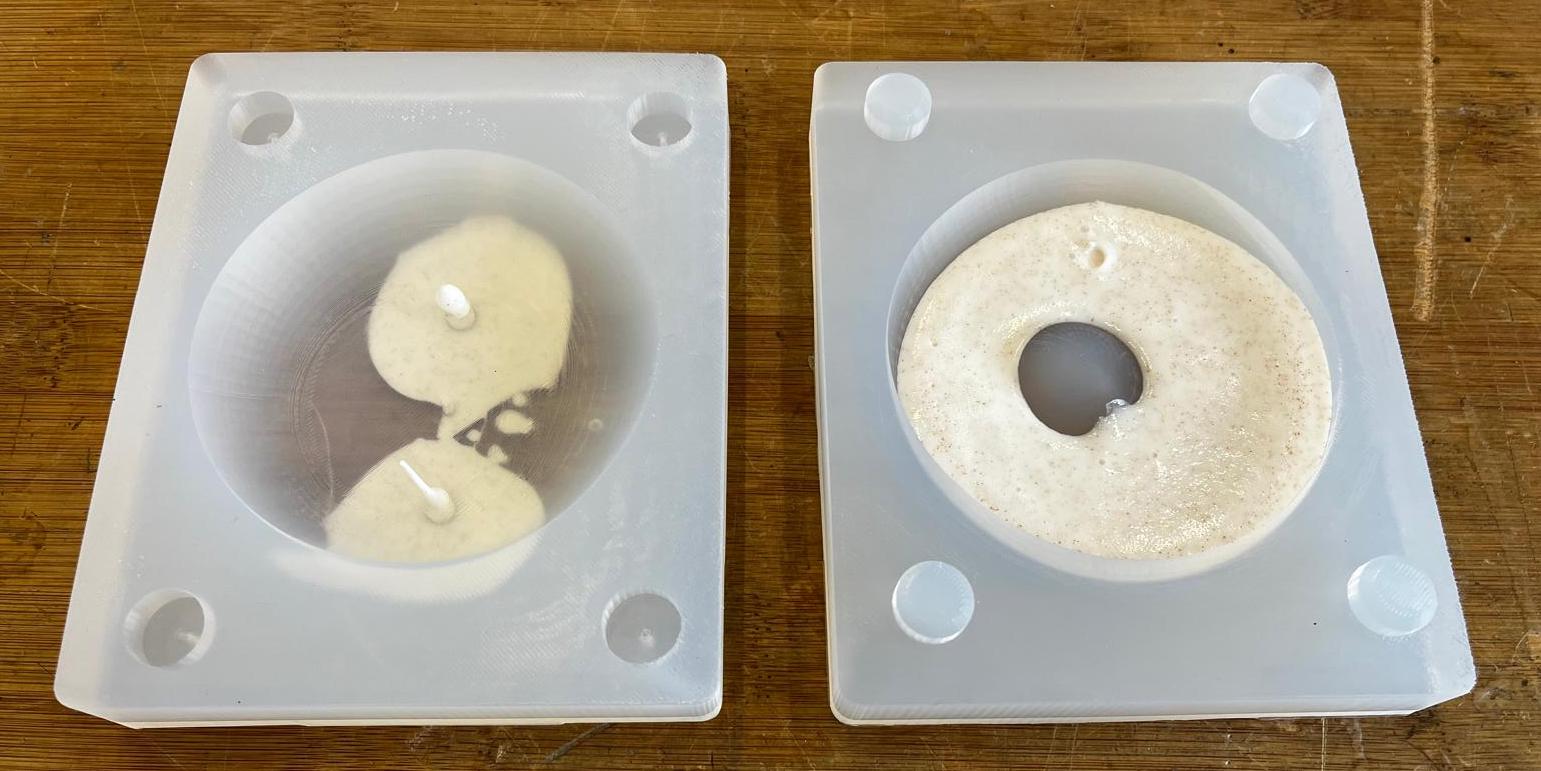
After these two experiments, I understood that I needed to be more fast. However, the gaps in the molds were quite narrow and they were preventing me from pouring fast. Thus, we expanded the gaps. First I put the mold oven again and cured it. This time, I did not remove the casting. I prepared another mixture with the same components and continued the pouring. As a result, I could fill up the mold. I put the mold into the oven one hour later my cast was cured.
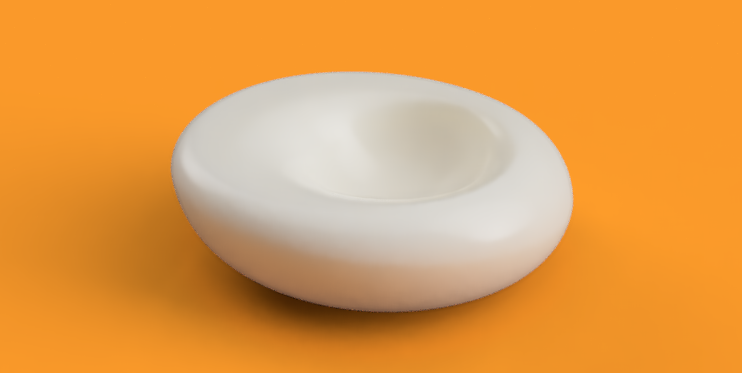
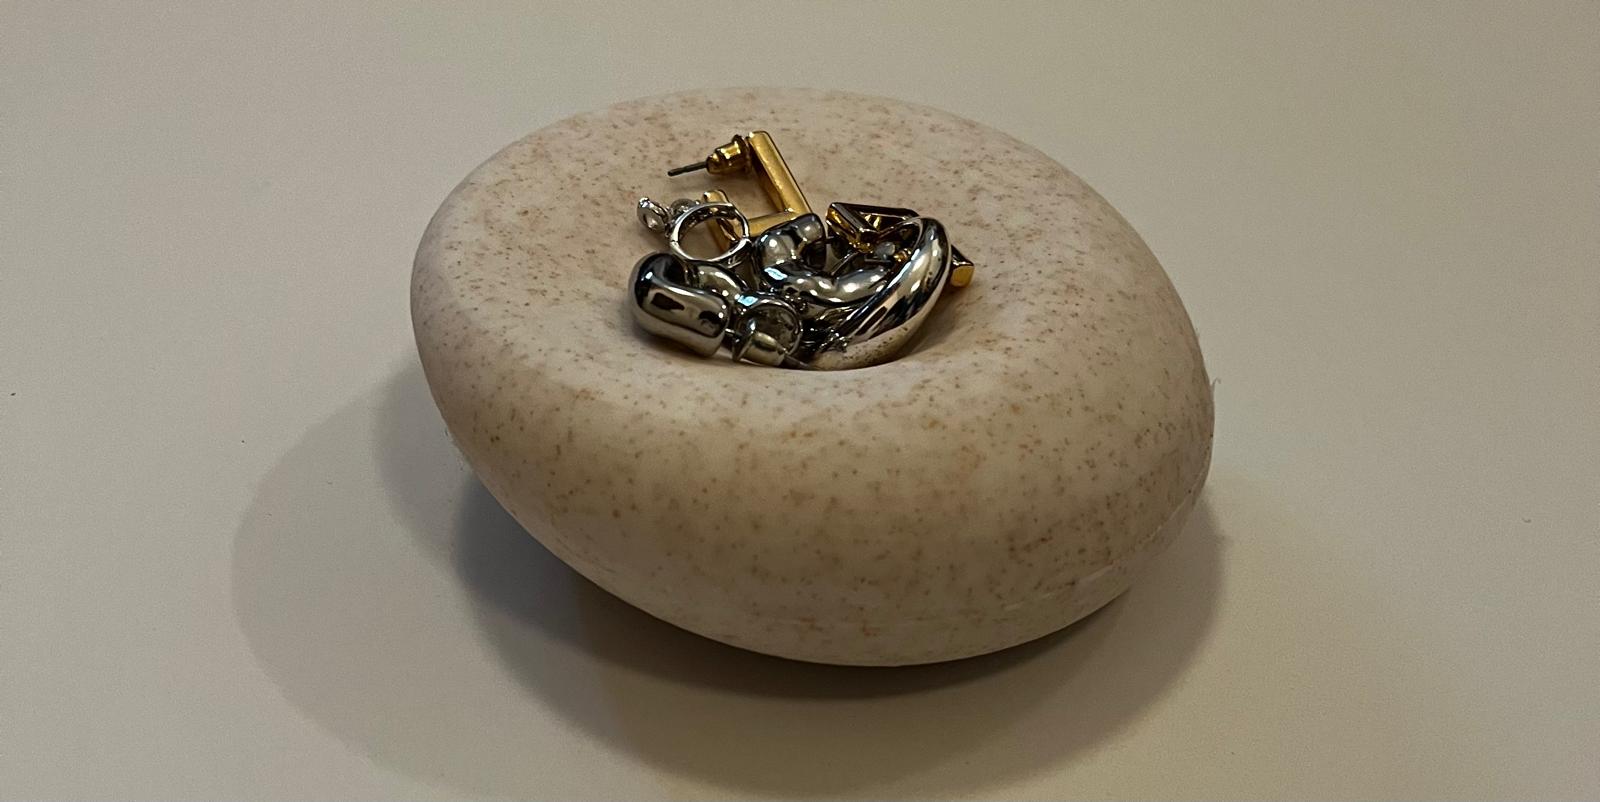
6. Final
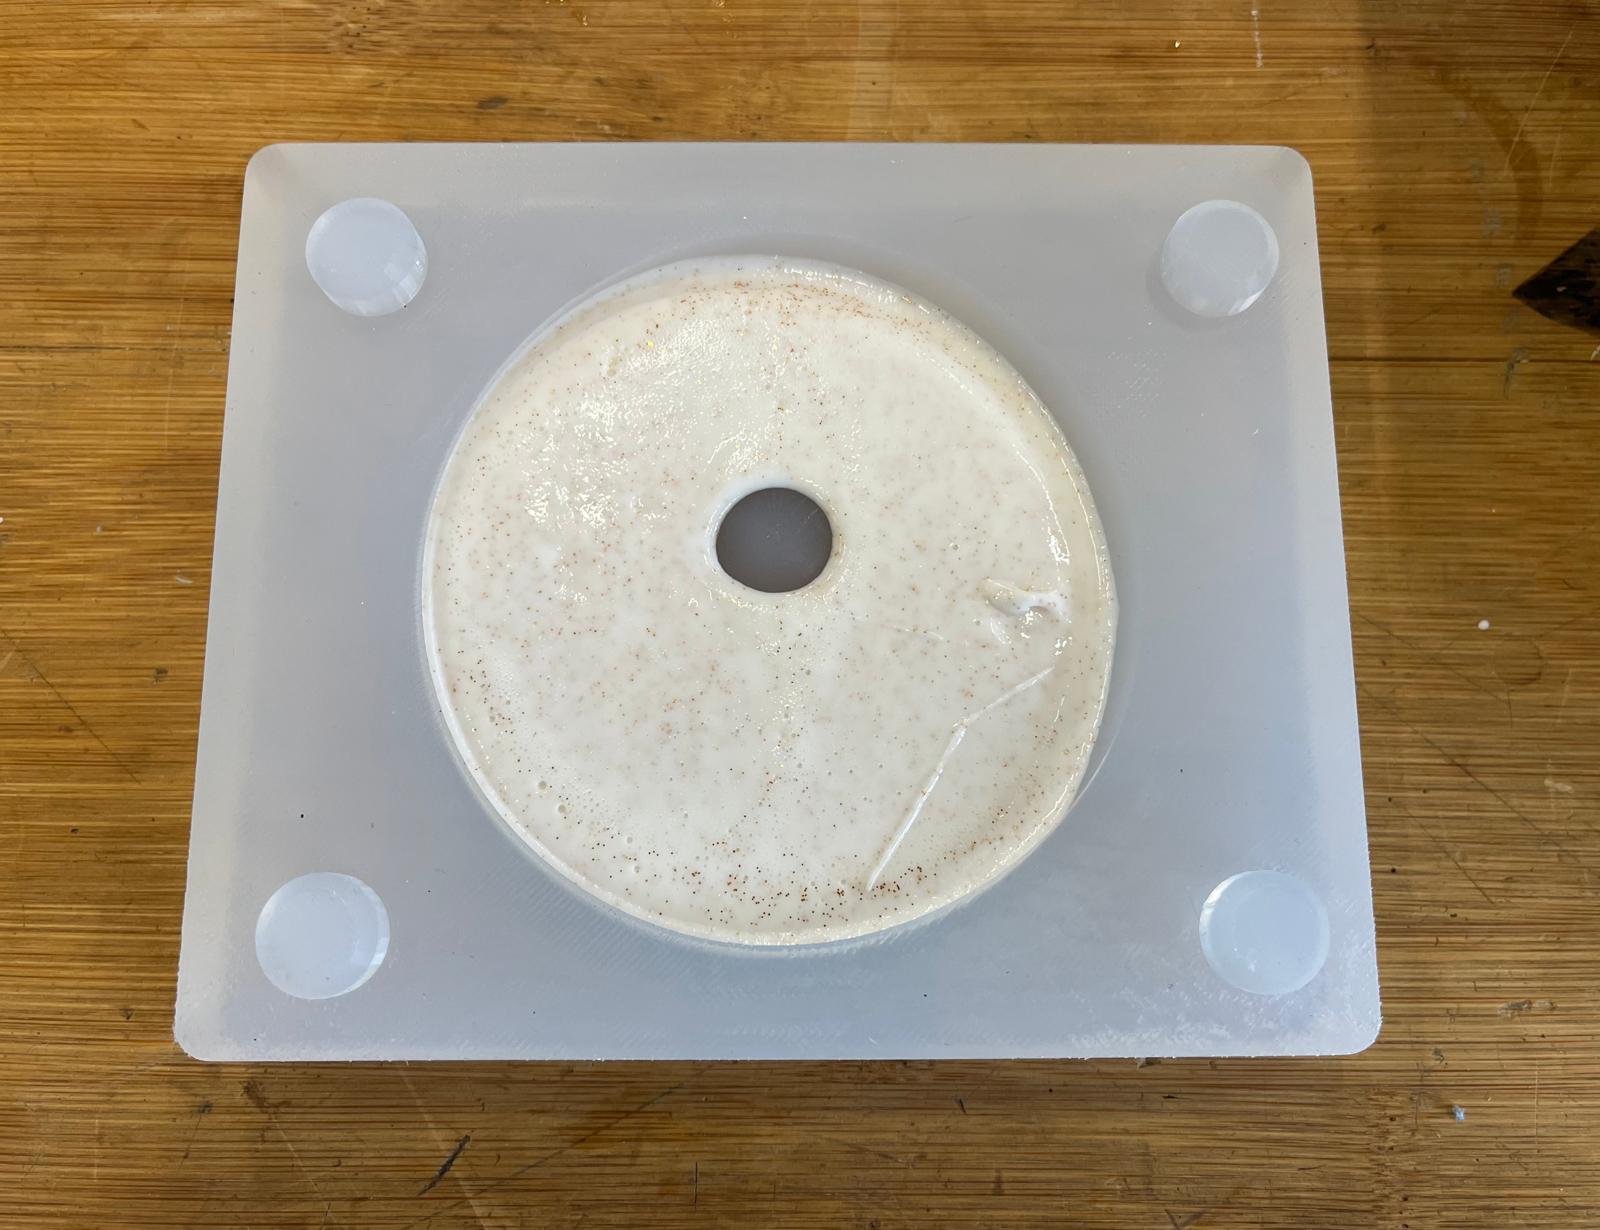
And my design is here!
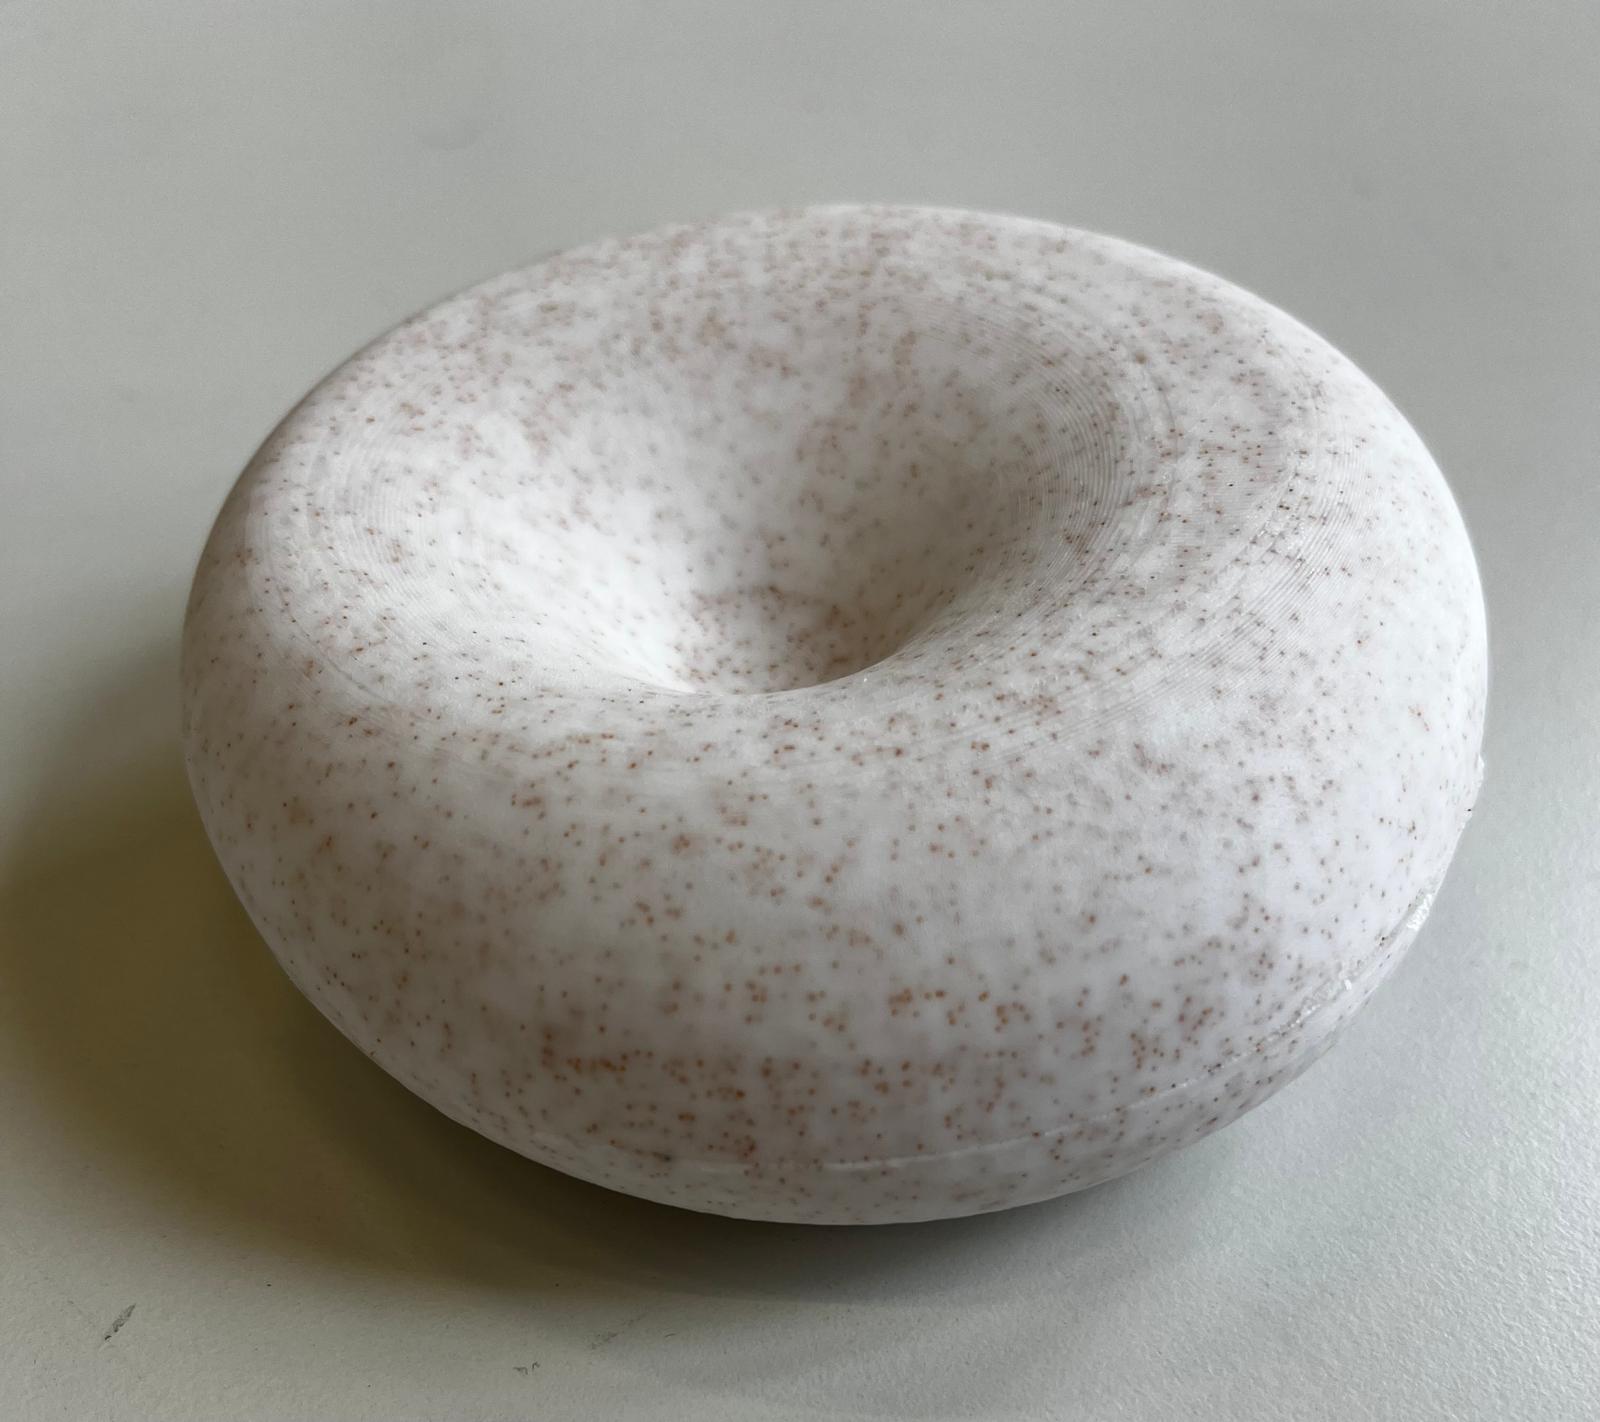
My design was larger than other products made in the lab, the dimensions are approximately as follows; lxwxh - 11x10x3. The design came out of the mold quite smooth. Even though I had to pour it 2 times, this didn't cause too many problems. There was a very small mark at the junction of the molds, which I removed by wetting a small piece of sandpaper and sanding it.
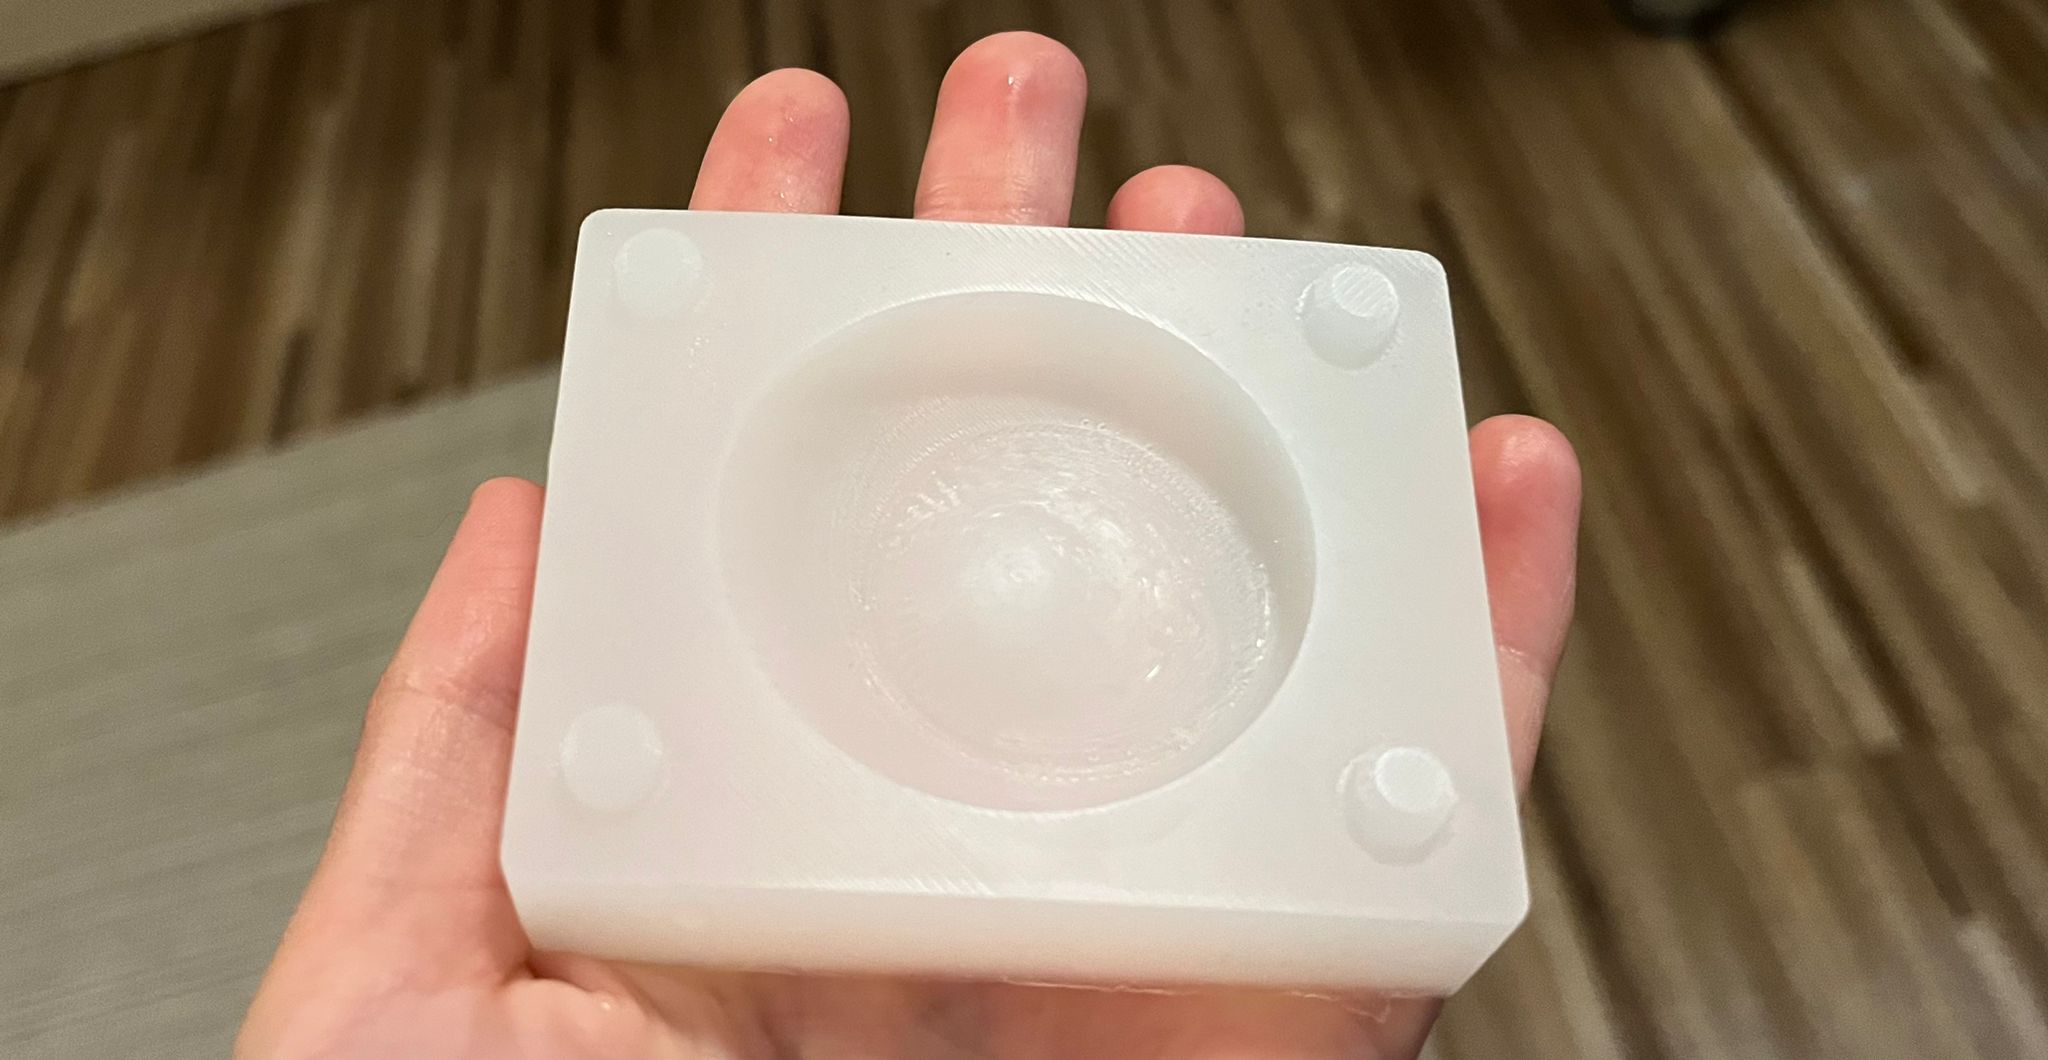
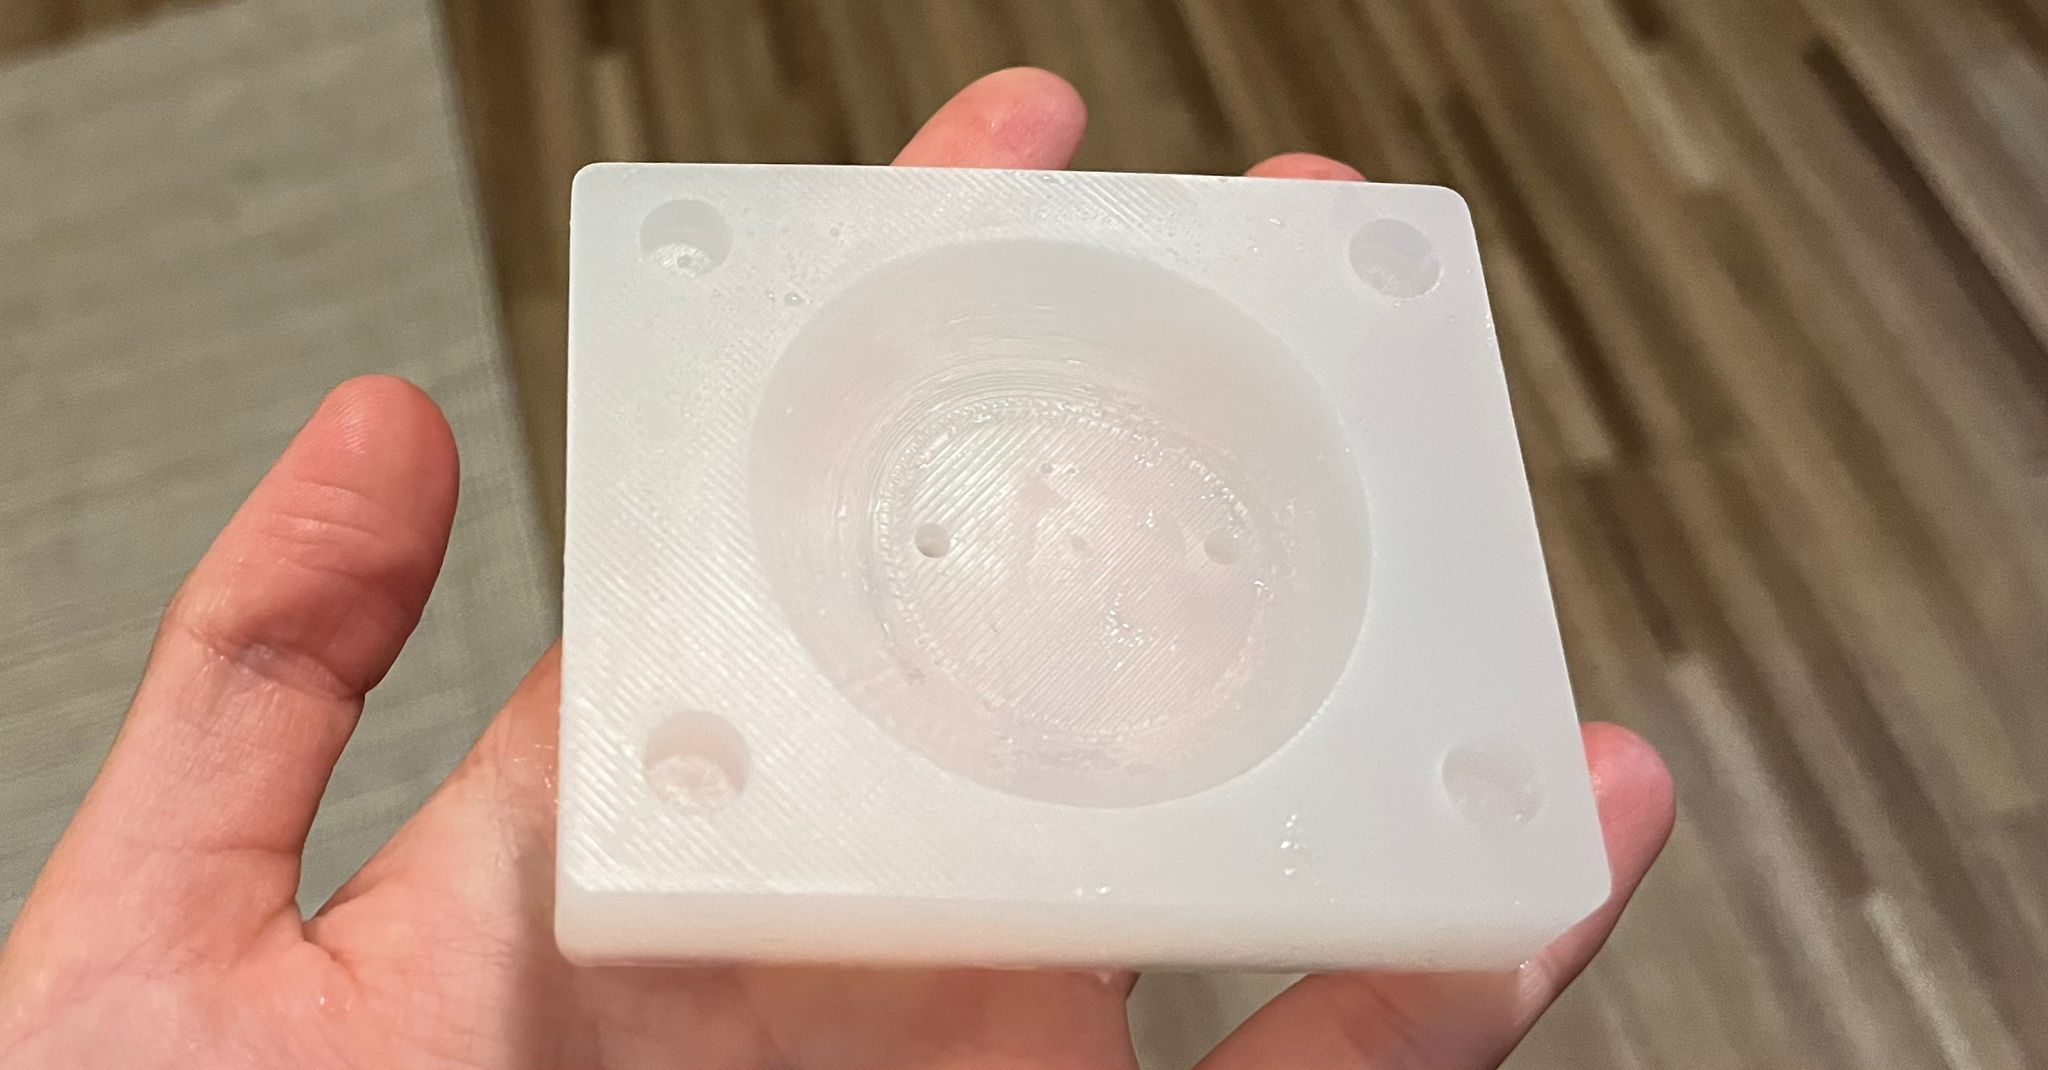
7. Redesigning the Mold
I decided to redo the mould due to the insufficient quality of the mould printing. The most important reason why my mould did not have a smooth finish was that the layer height was too high.
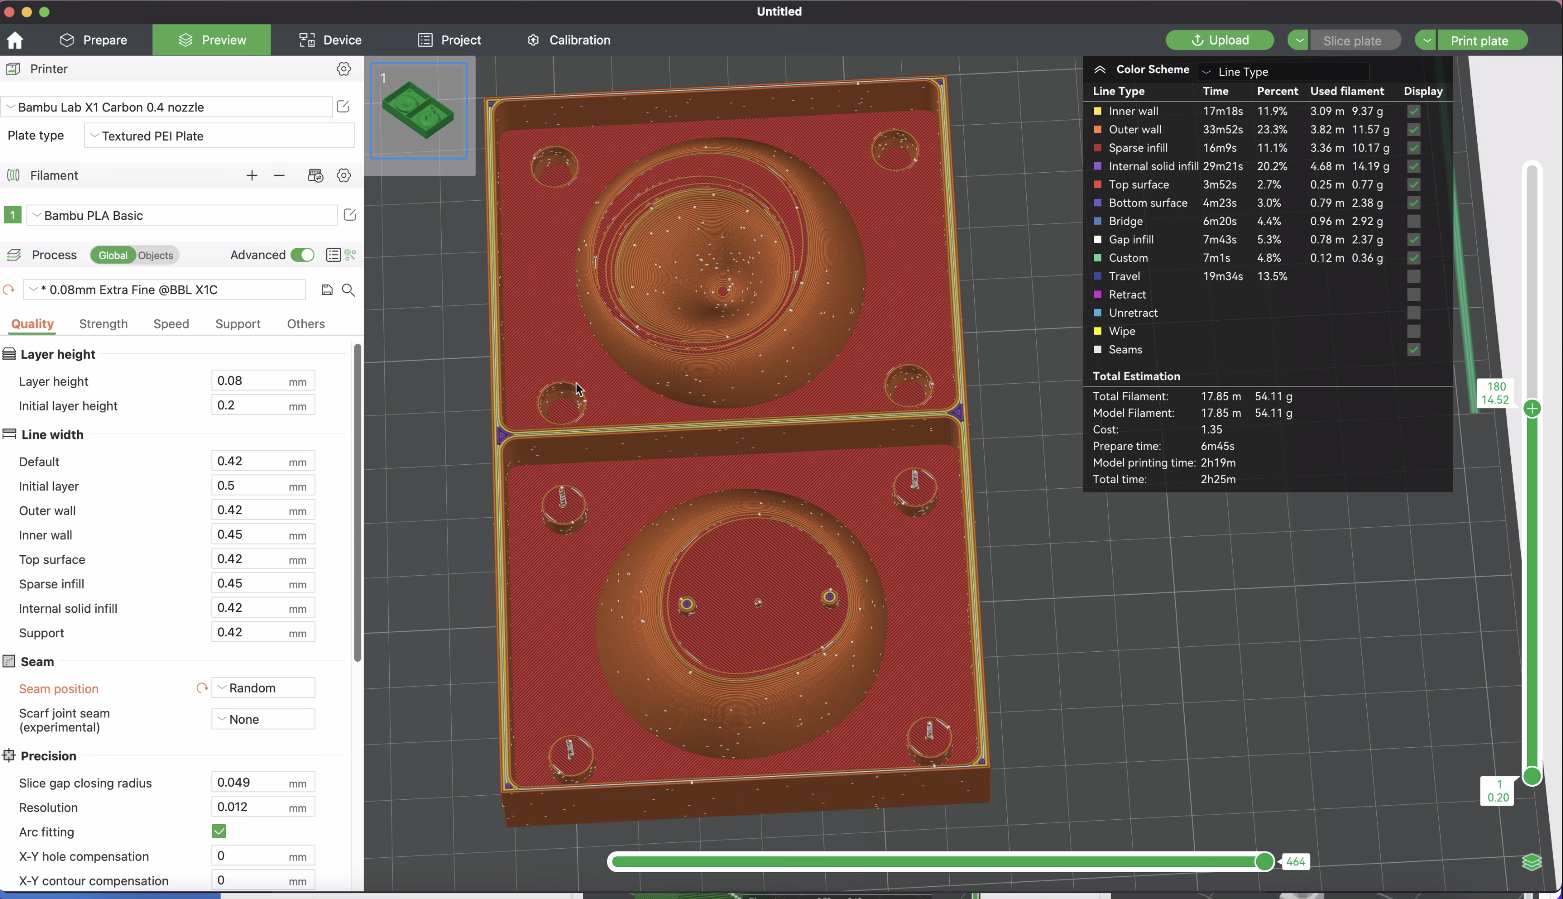
I exported the stl version of my mould to Bambuu slicer. I scaled down the mould to speed up the process. and made the following adjustments;
- Layer height - extra fine 0.08
- Steam position - random
My positive mould is smooth enough and I am satisfied with the result.
I used Ecoflex 00-50 to create my negative mould. This material is different from the first material I used. The reason I used this is that it dries much more quickly. In about 3 hours. I mixed the components in a 1:1 ratio. I took 70 g of both components. This time I did not use the vacuum cleaner. I mixed the two components in a bowl with the help of a spoon. I had to be quite fast at this stage. I mixed the components well with fast movements. I completed this process before the mixture solidified.
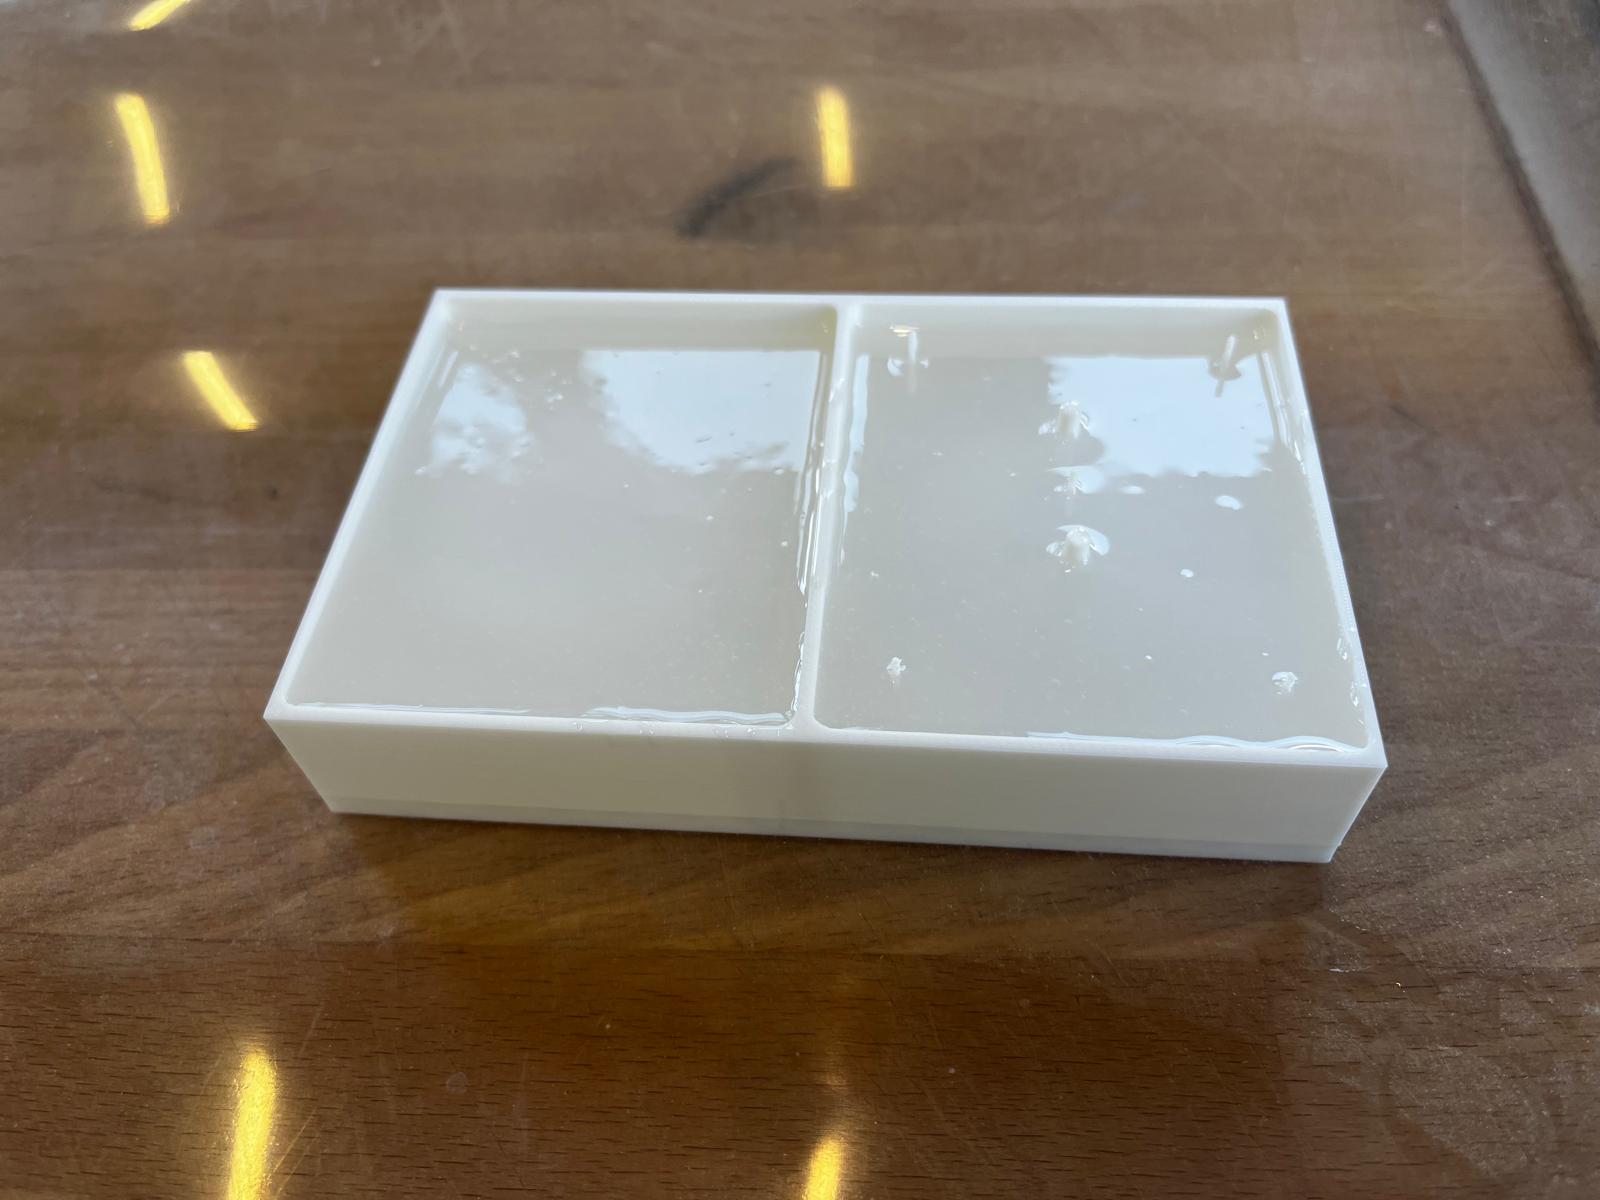
I poured the mixture so that it completely covered both areas and left to cured. After about 4 hours the whole mould was completely cured.
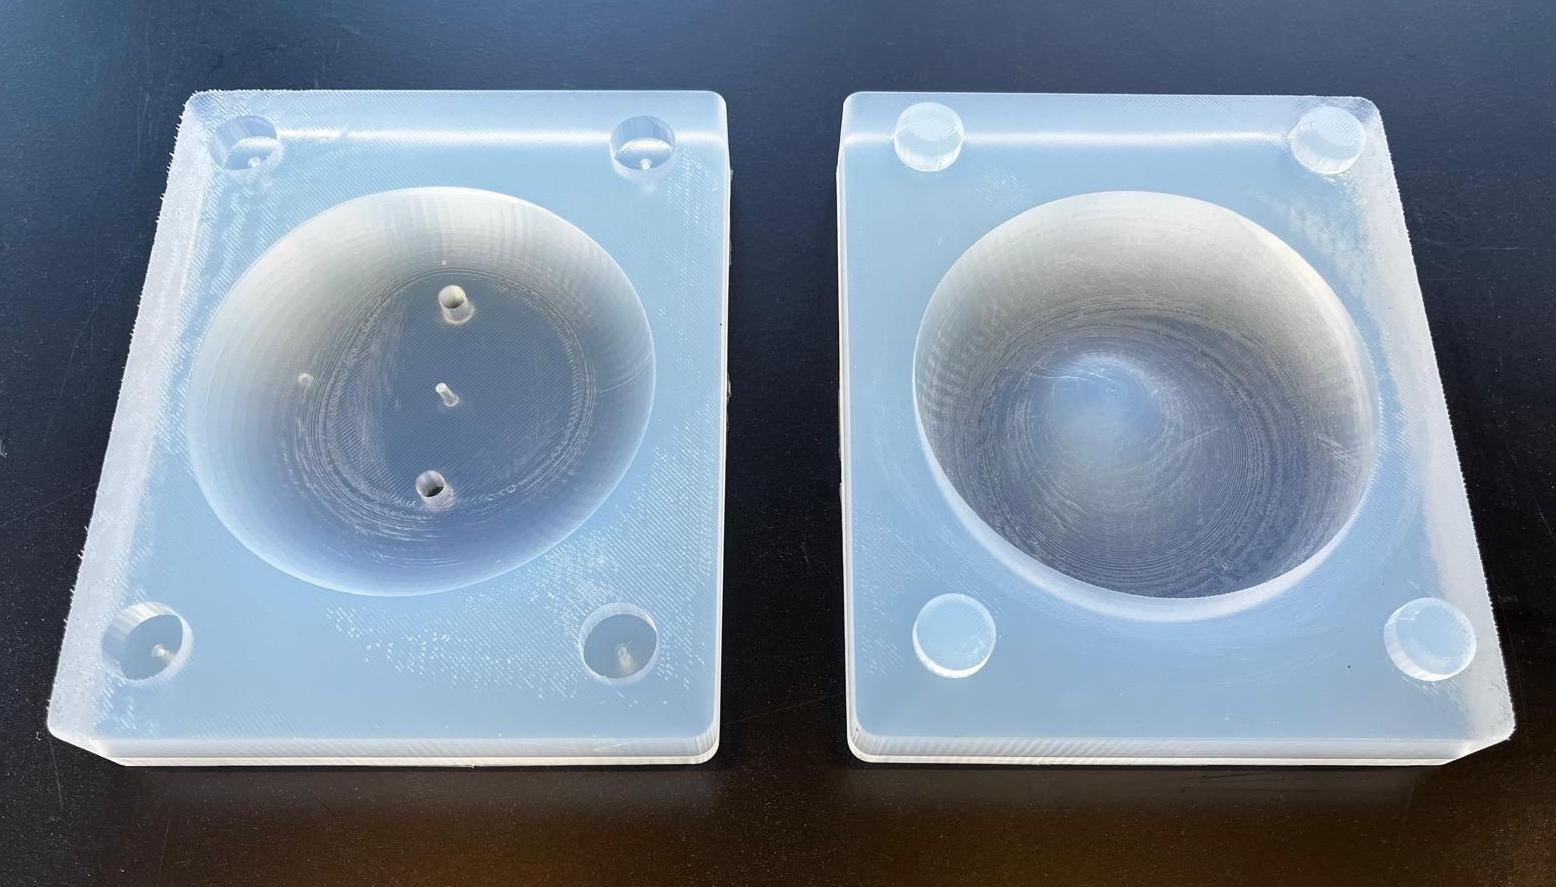
I removed my negative mold from my positive mold using an air gun. The surface was very homogeneous.
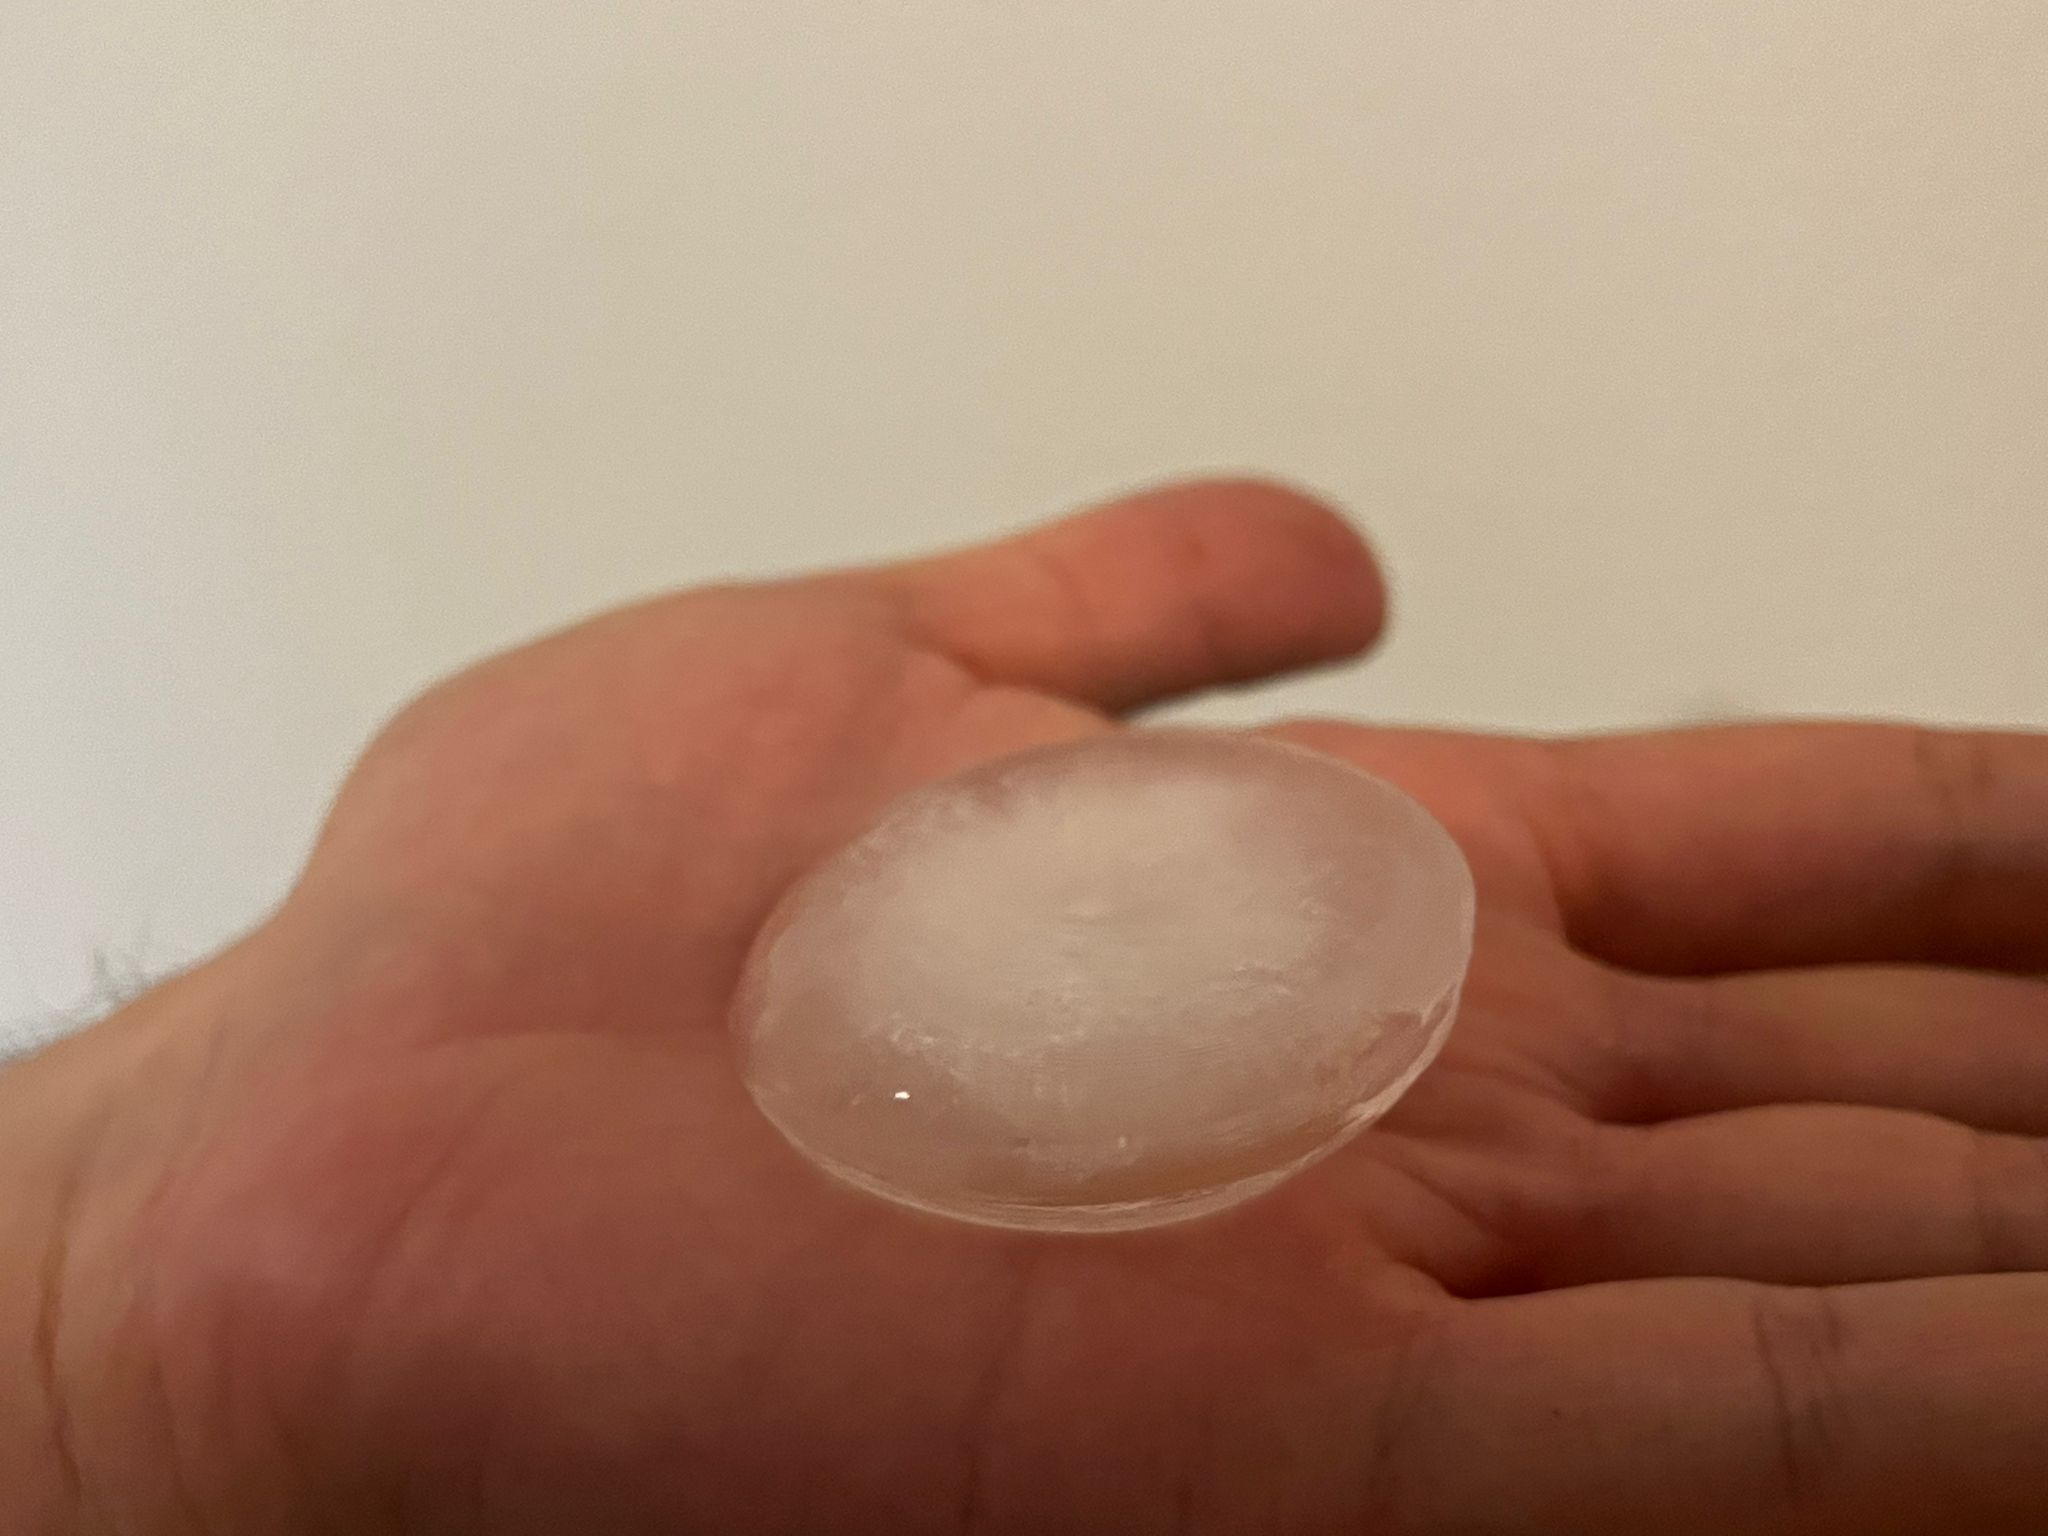
I poured water into my mold and put it in the freezer, resulting in ice with a smooth surface.