3D Scanning and printing
This week is about learning 3D Scanning and printing, it's a lot of fun! I had some basic knowledge of 3D printing before, and I hope to master the design rules for 3D printing this week and create some interesting things!
1.1 Assignments of the Week
- Group assignment:
Test the design rules for your 3D printer(s)
Document your work on the group work page and reflect on your individual page what you learned about characteristics of your printer(s)
- Individual assignment:
Design and 3D print an object (small, few cm3, limited by printer time) that could not be easily made subtractively
3D scan an object (and optionally print it)
1.2 Group Work
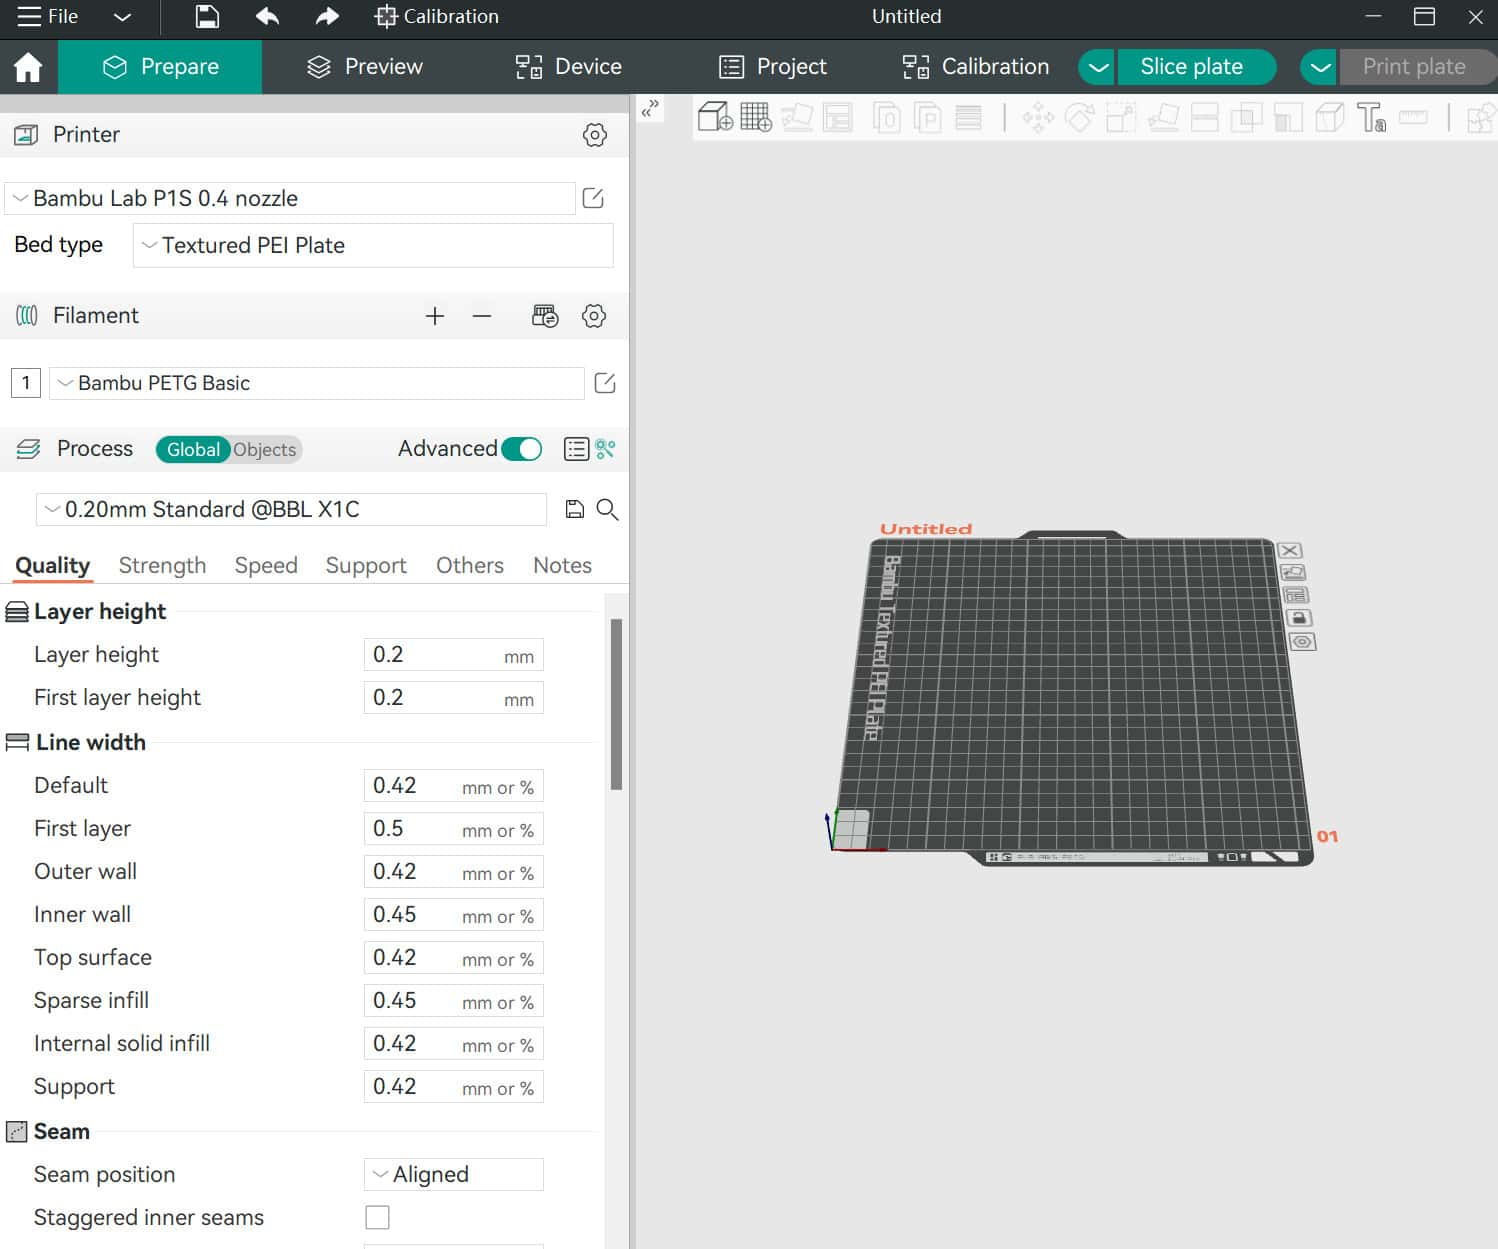
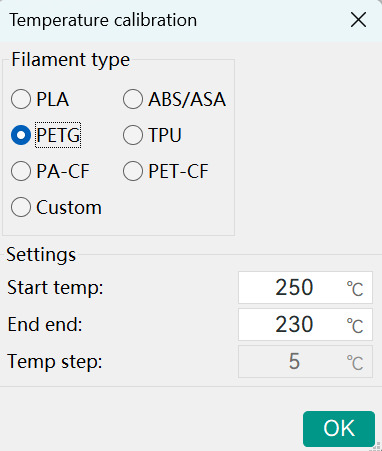
This test uses the Bambu Lab P1S printer, Orca Slicer as the slicing software, and PLA and PTEG as testing materials. We will analyze and compare parameters such as temperature, retraction, flow rate, gap (tolerance), angle, overhang, and bridging.
1.2.1 Printer model ( Bambu Lab P1S)
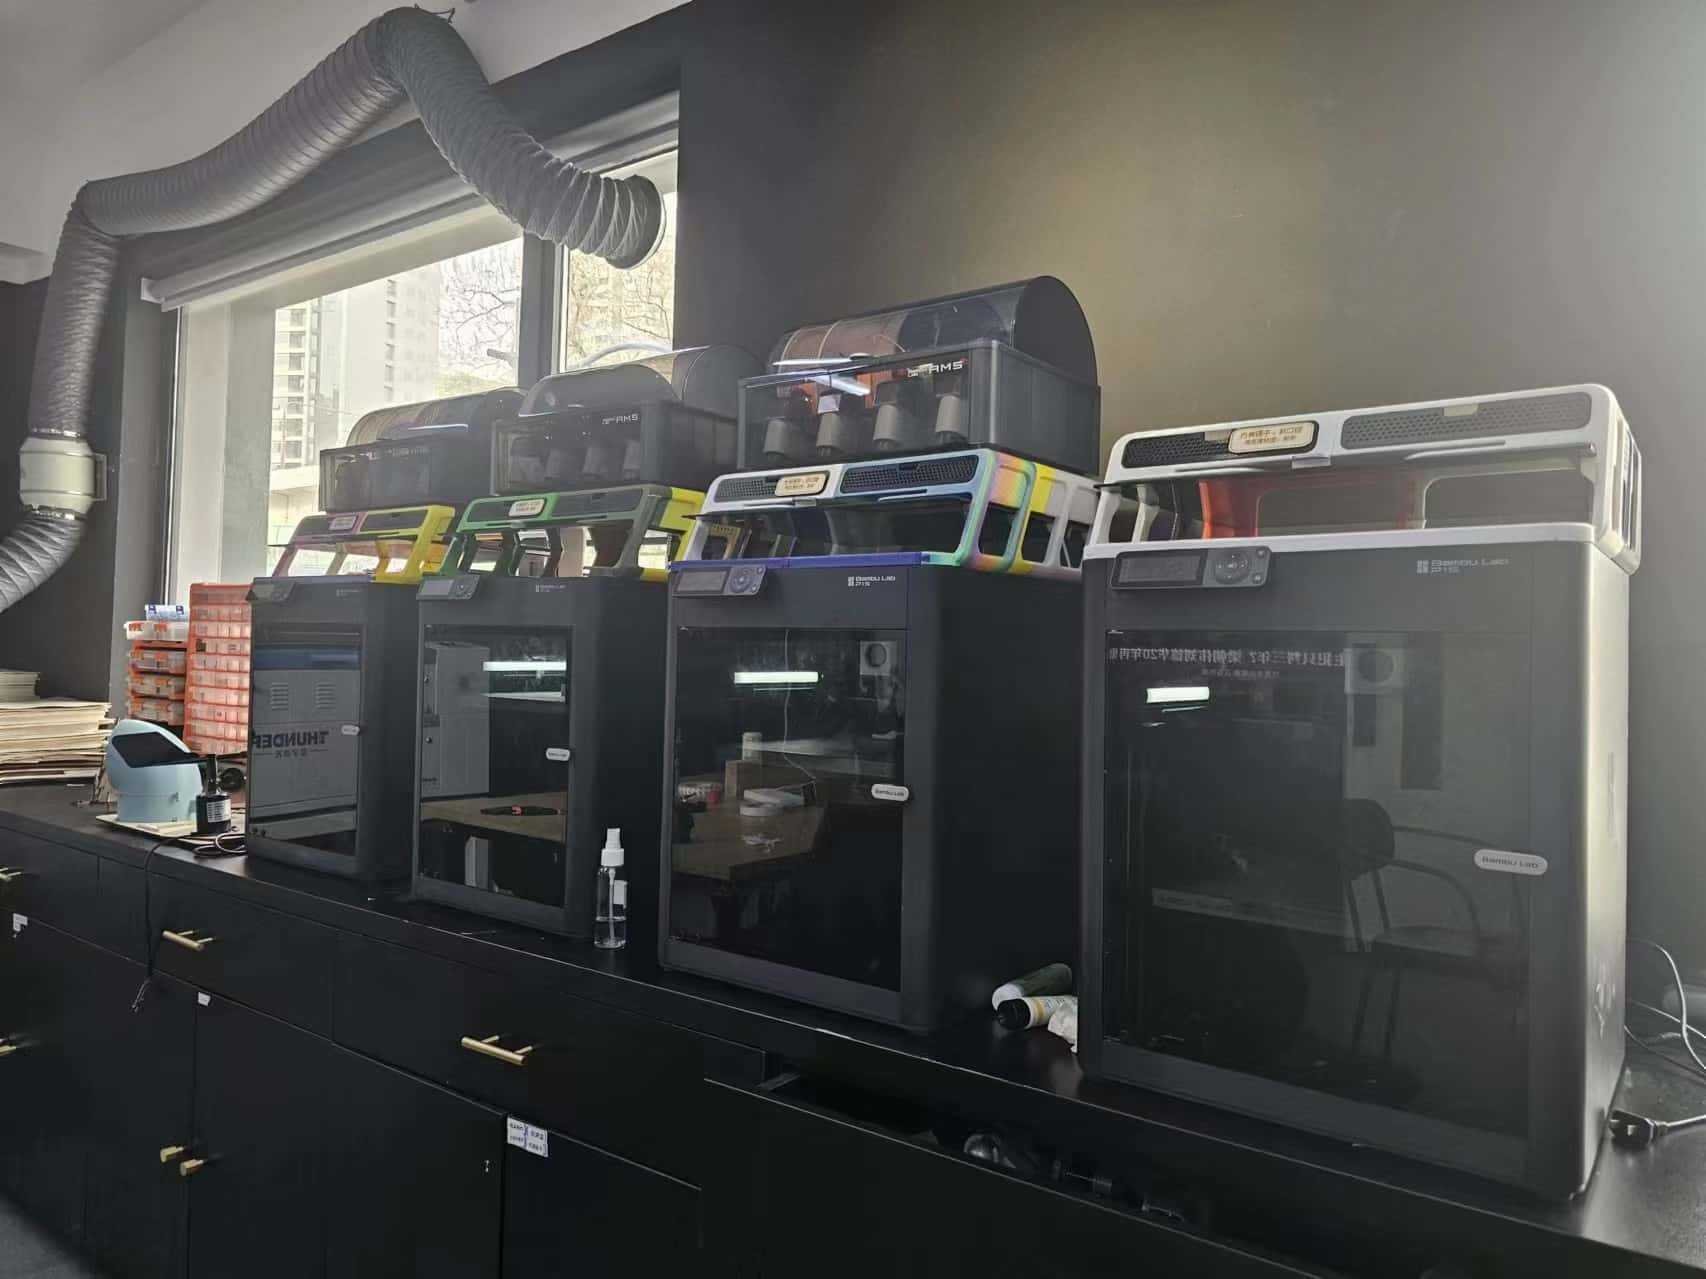
- Device parameters:
Printing technology: Fused Deposition Modeling (FDM/FFF)
Product dimensions: 389 x 389 x 458 mm
Print volume: 256 x 256 x 256 mm
Maximum print speed: 500 mm/s
Print bed: Textured PEI print bed (common), Low-temperature print bed/PLA print bed, High-temperature print bed, Engineering material print bed
Nozzle maximum temperature: 300°C
Heated bed maximum temperature: 100°C
Slicing software: Bambu Studio (supports other third-party software)
Supported materials: PLA, PETG, TPU, PVA, PET, ABS, ASA, PA, PC
-
Advantages: Fast printing speed, good quality among commercial machines, automatic bed leveling, supports multi-color printing.
-
Disadvantages: Noisy, expensive spare parts only available from their store, inconvenient after-sales service, protruding corners in prints due to excessive corner speed.
1.2.2 Slicing Software (Orca Slicer)
All tests were sliced using Orca Slicer. With it, there's no need to download different brand-specific slicing software! It's very user-friendly!
This is an open-source software, a G-code generator for 3D printers (Bambu, Prusa, Voron, VzBot, RatRig, Creality, etc.).
OrcaSlicer is originaly forked from Bambu Studio, it was previously known as BambuStudio-SoftFever. Bambu Studio is forked from PrusaSlicer by Prusa Research, which is from Slic3r by Alessandro Ranellucci and the RepRap community. Orca Slicer incorporates a lot of features from SuperSlicer by @supermerill Orca Slicer's logo is designed by community member Justin Levine(@freejstnalxndr)
Download Link:OrcaSlicer
1.2.3 Test the design rules for your 3D printer(s)
The orange filament :PLA
The white filament :PETG
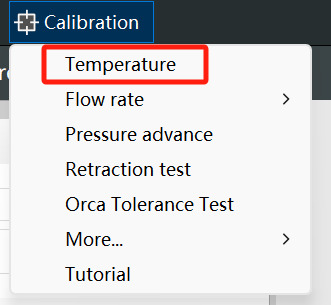
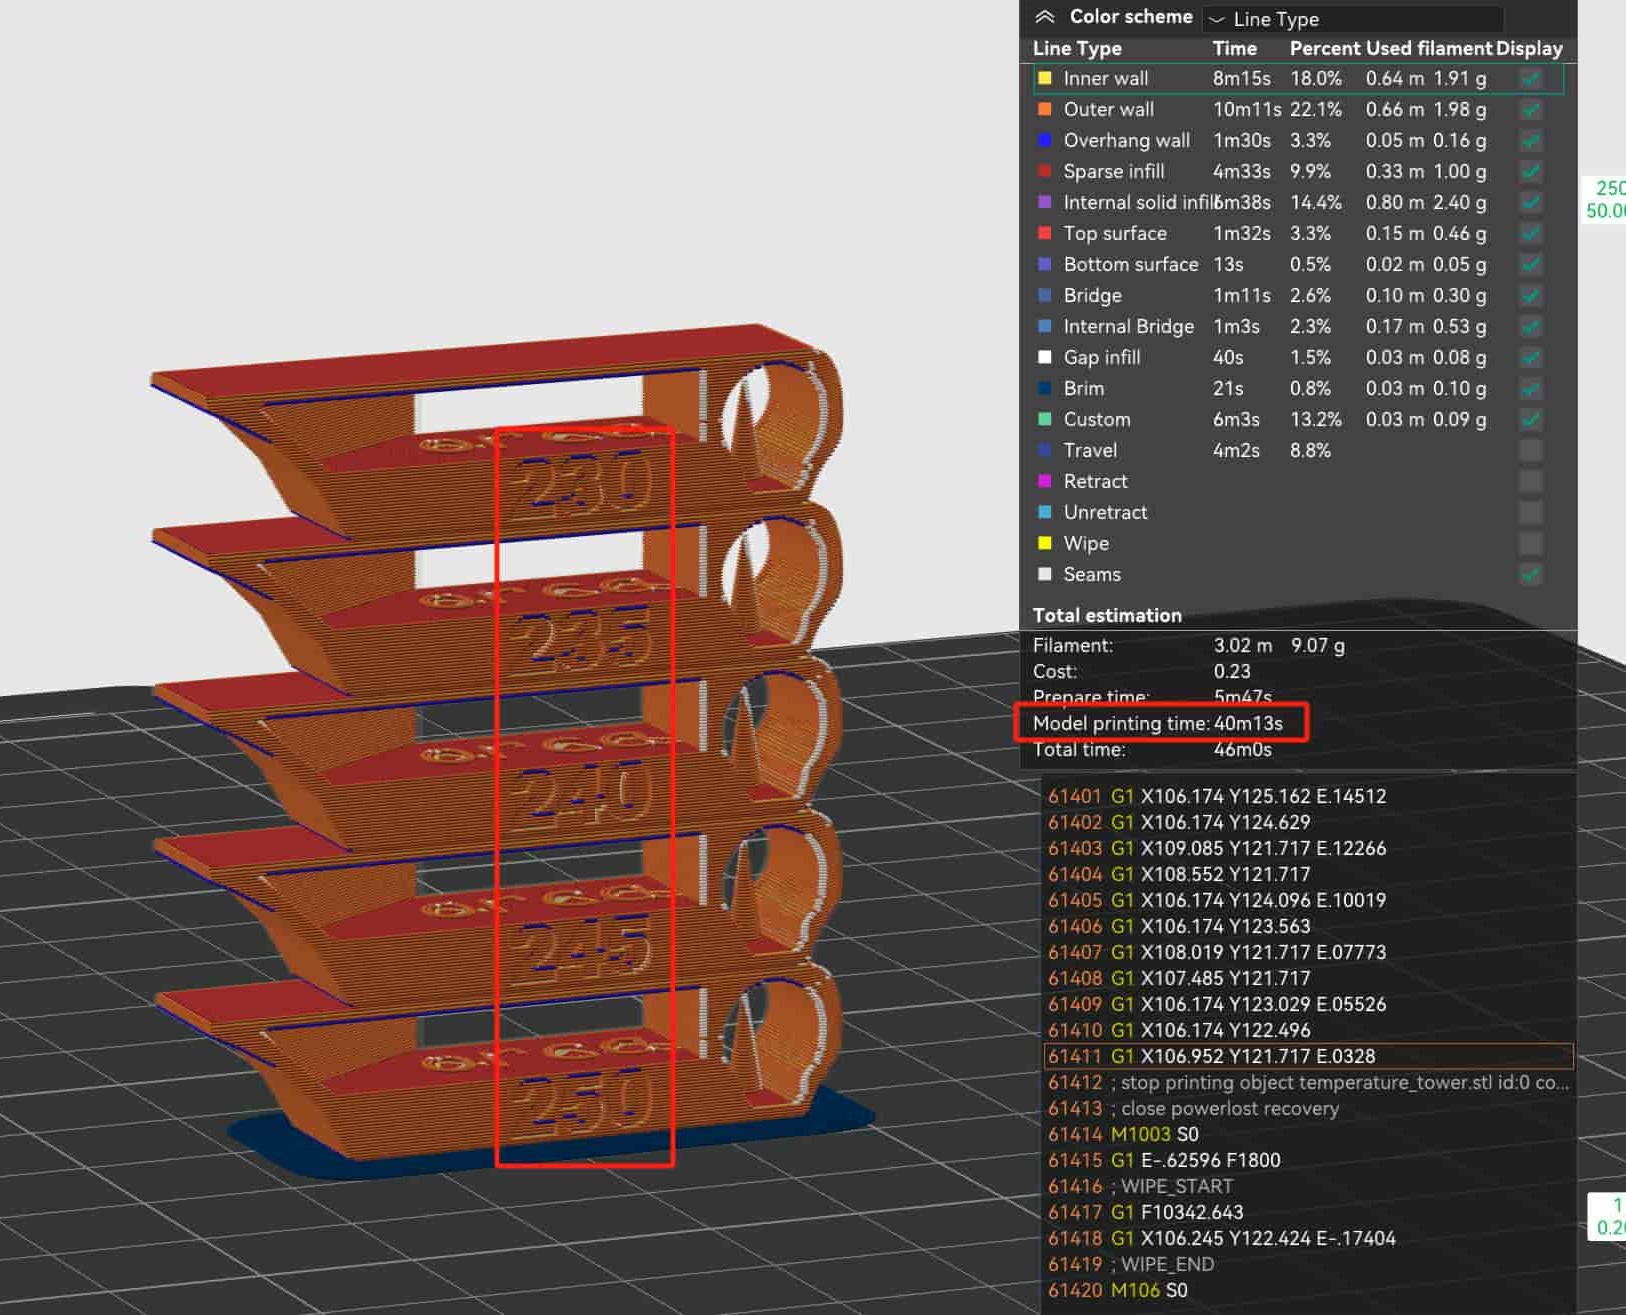
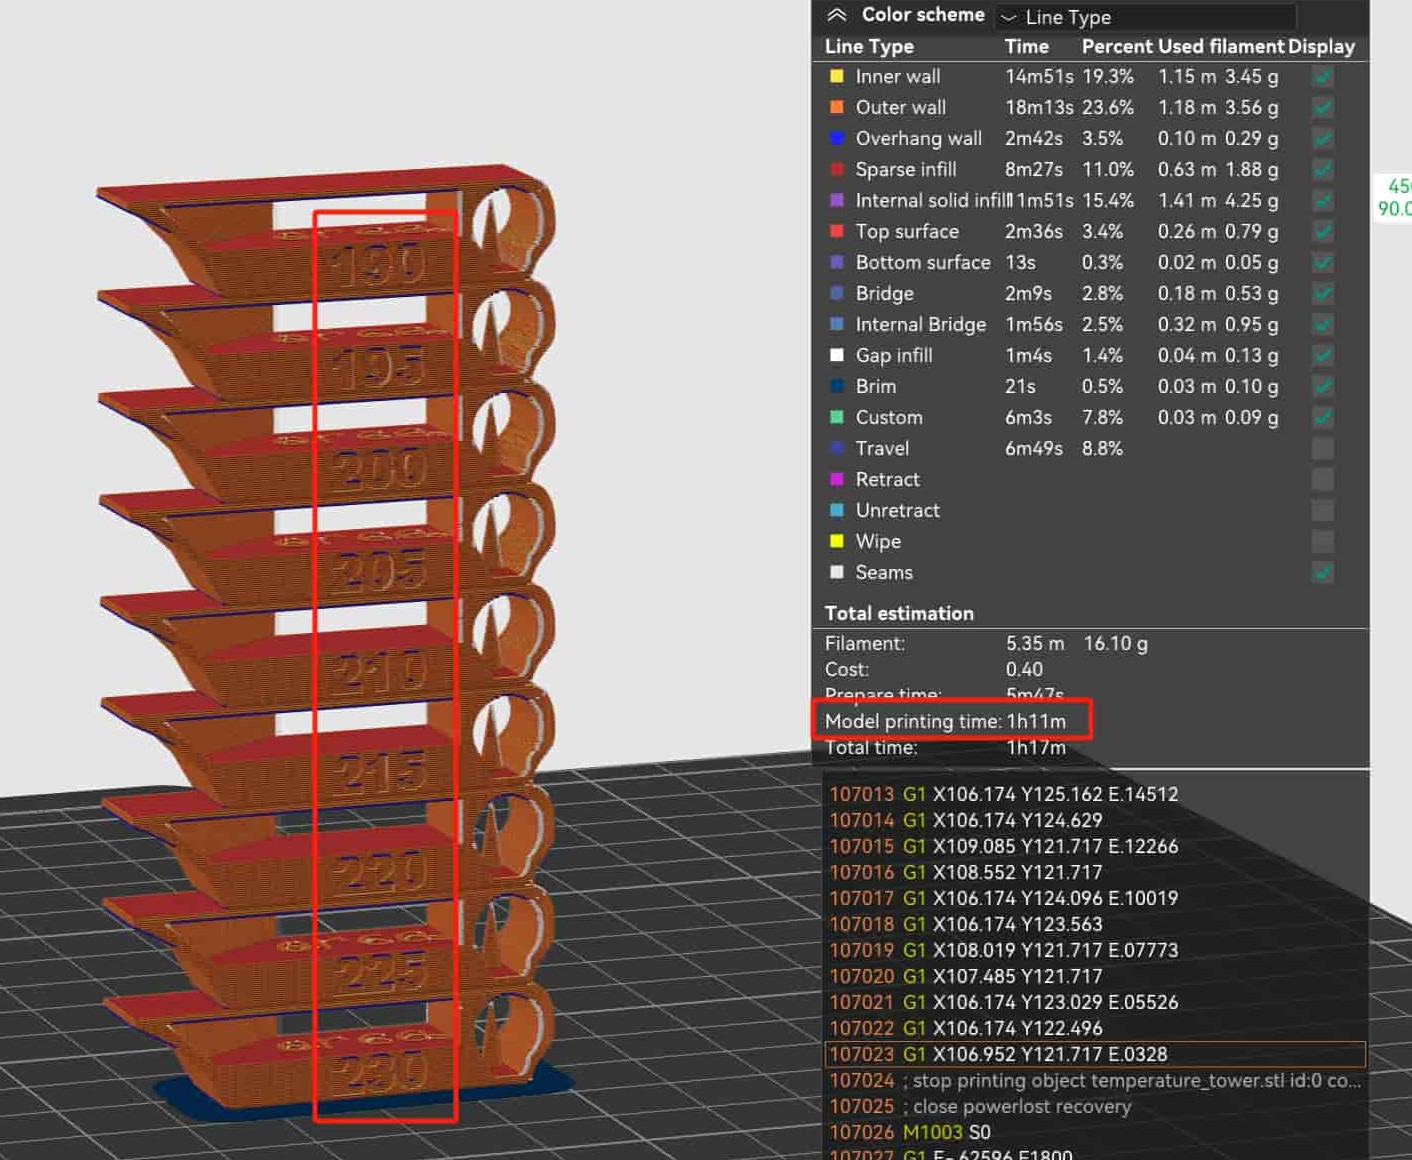
- Temperature Tower Test Result:
| Temperature range | Test result | Print time | |
|---|---|---|---|
| PLA | 190°C-230°C | 220°C | 47m3s |
| PETG | 230°C-250°C | 240°C | 40m13s |
Each temperature step in the tower is 5 degrees, and the temperature tower is divided into multiple layers in the vertical direction. We determine the optimal printing temperature based on the printing conditions of each layer. Typically, the layers printed at the optimal temperature exhibit fewer stringing issues, better layer adhesion, lower warping, and better quality in terms of overhangs and bridging. (Note: The model used is Bambu Lab P1S, which is a high-speed printer, so material temperatures are relatively high.)
Analysis: From the printed models below, it can be observed that overall, PLA has less stringing, with the optimal quality at 220°C. PETG, due to the characteristics of the material, has more severe stringing. However, comparing warping, overhangs, and bridging, the quality at 240°C is better.

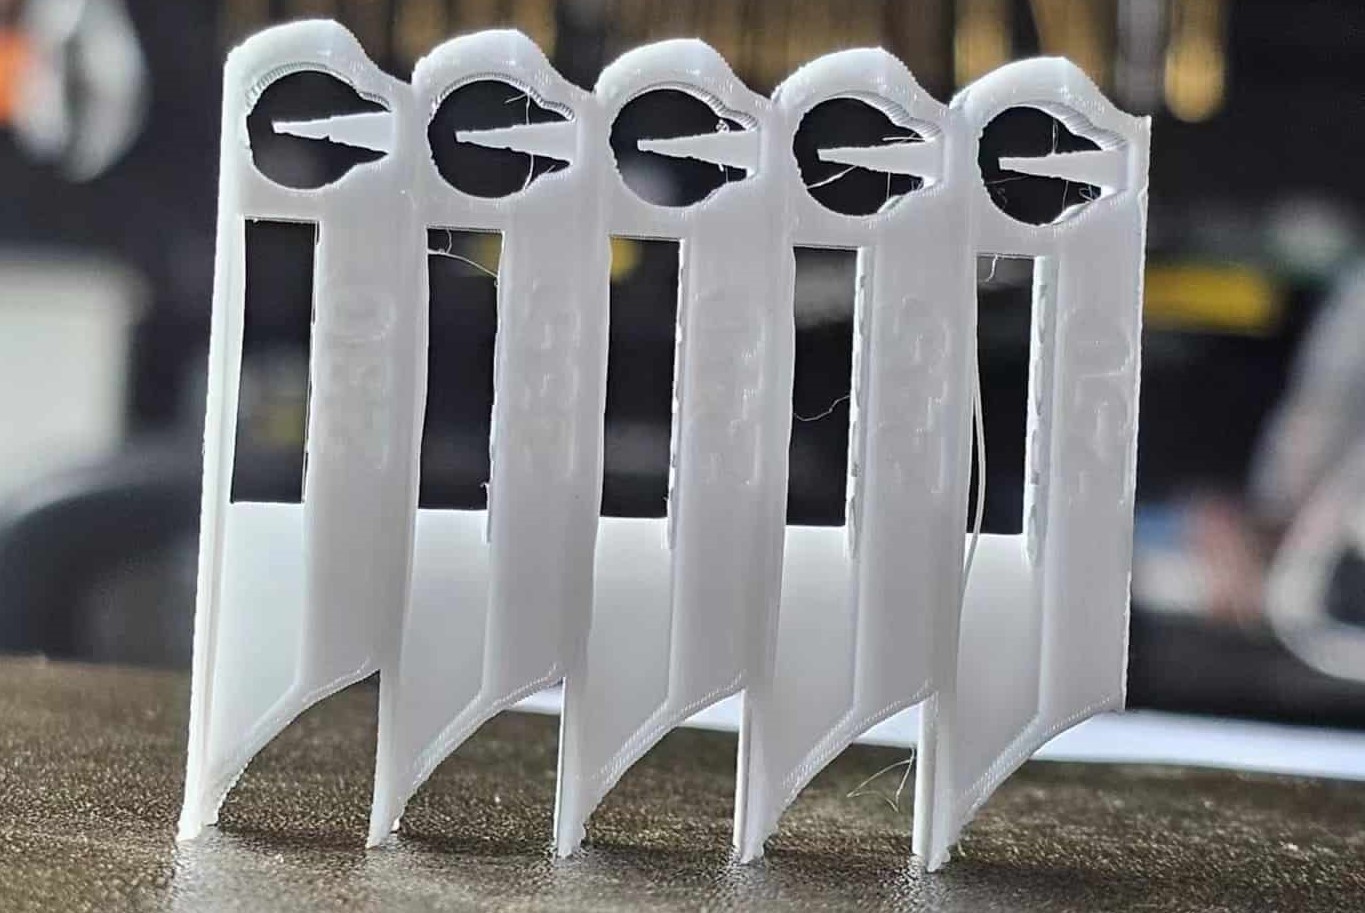
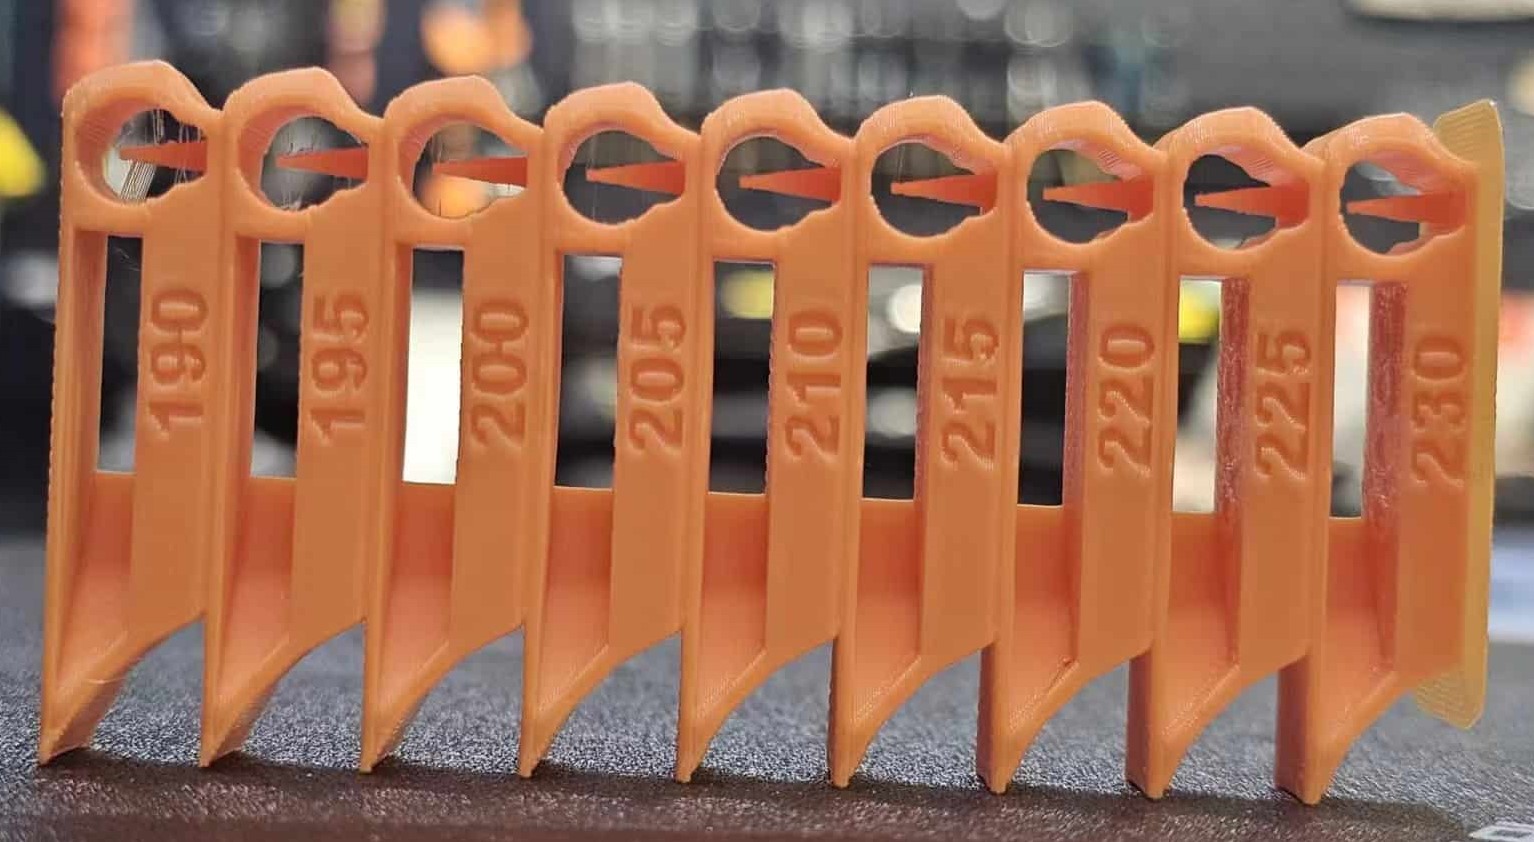
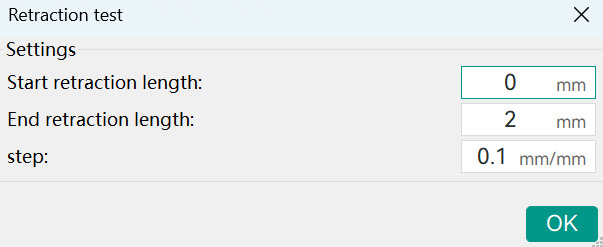
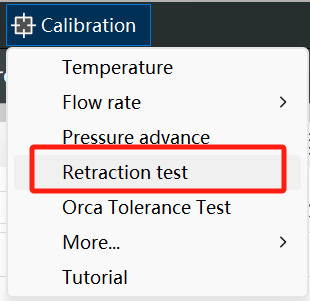
- Retraction Test Result:
| Retraction range | Test result | Print time | |
|---|---|---|---|
| PLA | 0mm-2mm | 0.2mm | 13m25s |
| PETG | 0mm-2mm | 0mm | 13m25s |
Retraction is increased by 0.1mm for each layer from bottom to top to ensure minimal retraction for faster printing. Less retraction leads to reduced printing time.
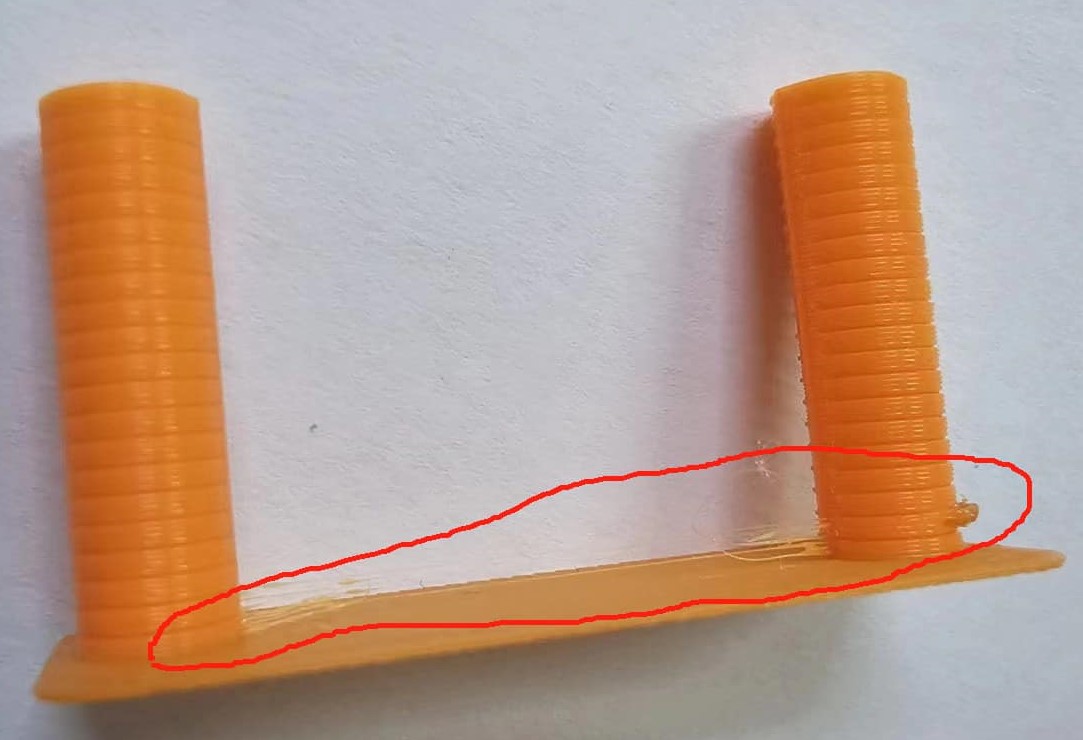
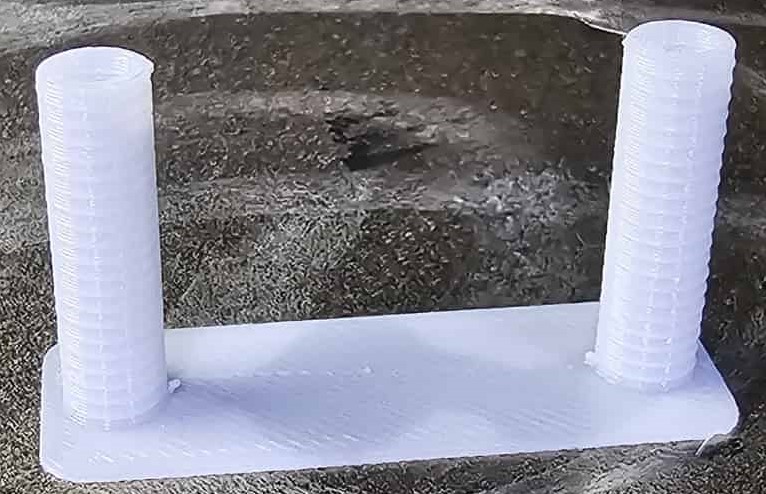
Analysis: As observed in the images, PLA exhibits severe stringing at 0-0.1mm retraction. Therefore, to balance printing speed, a retraction of 0.2mm is chosen. For PETG, the situation is excellent, showing no signs of stringing even at 0mm retraction (bottom layer). The two small white dots in the image are due to a small amount of leftover material on the back of the nozzle.(the importance of cleaning the nozzle before each print)
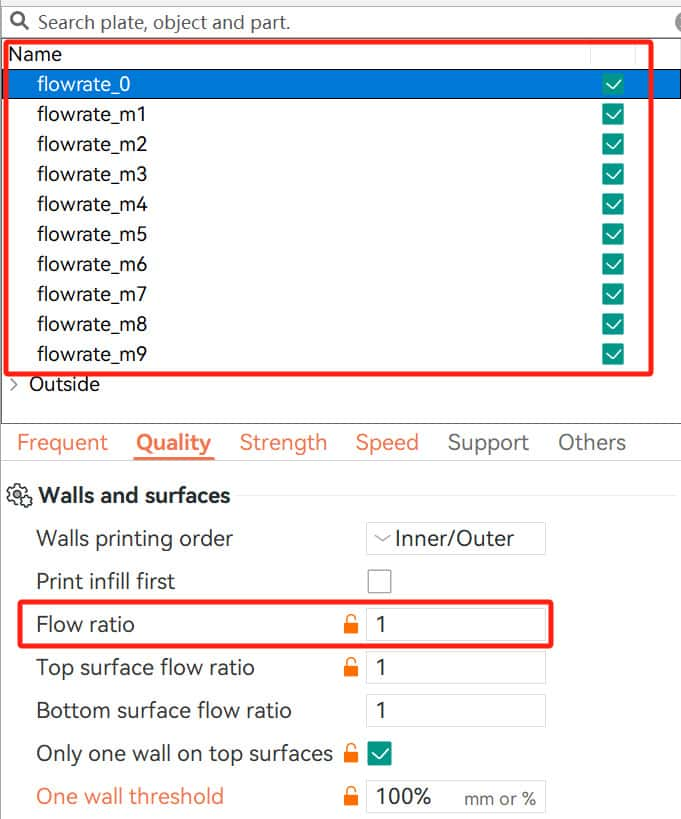
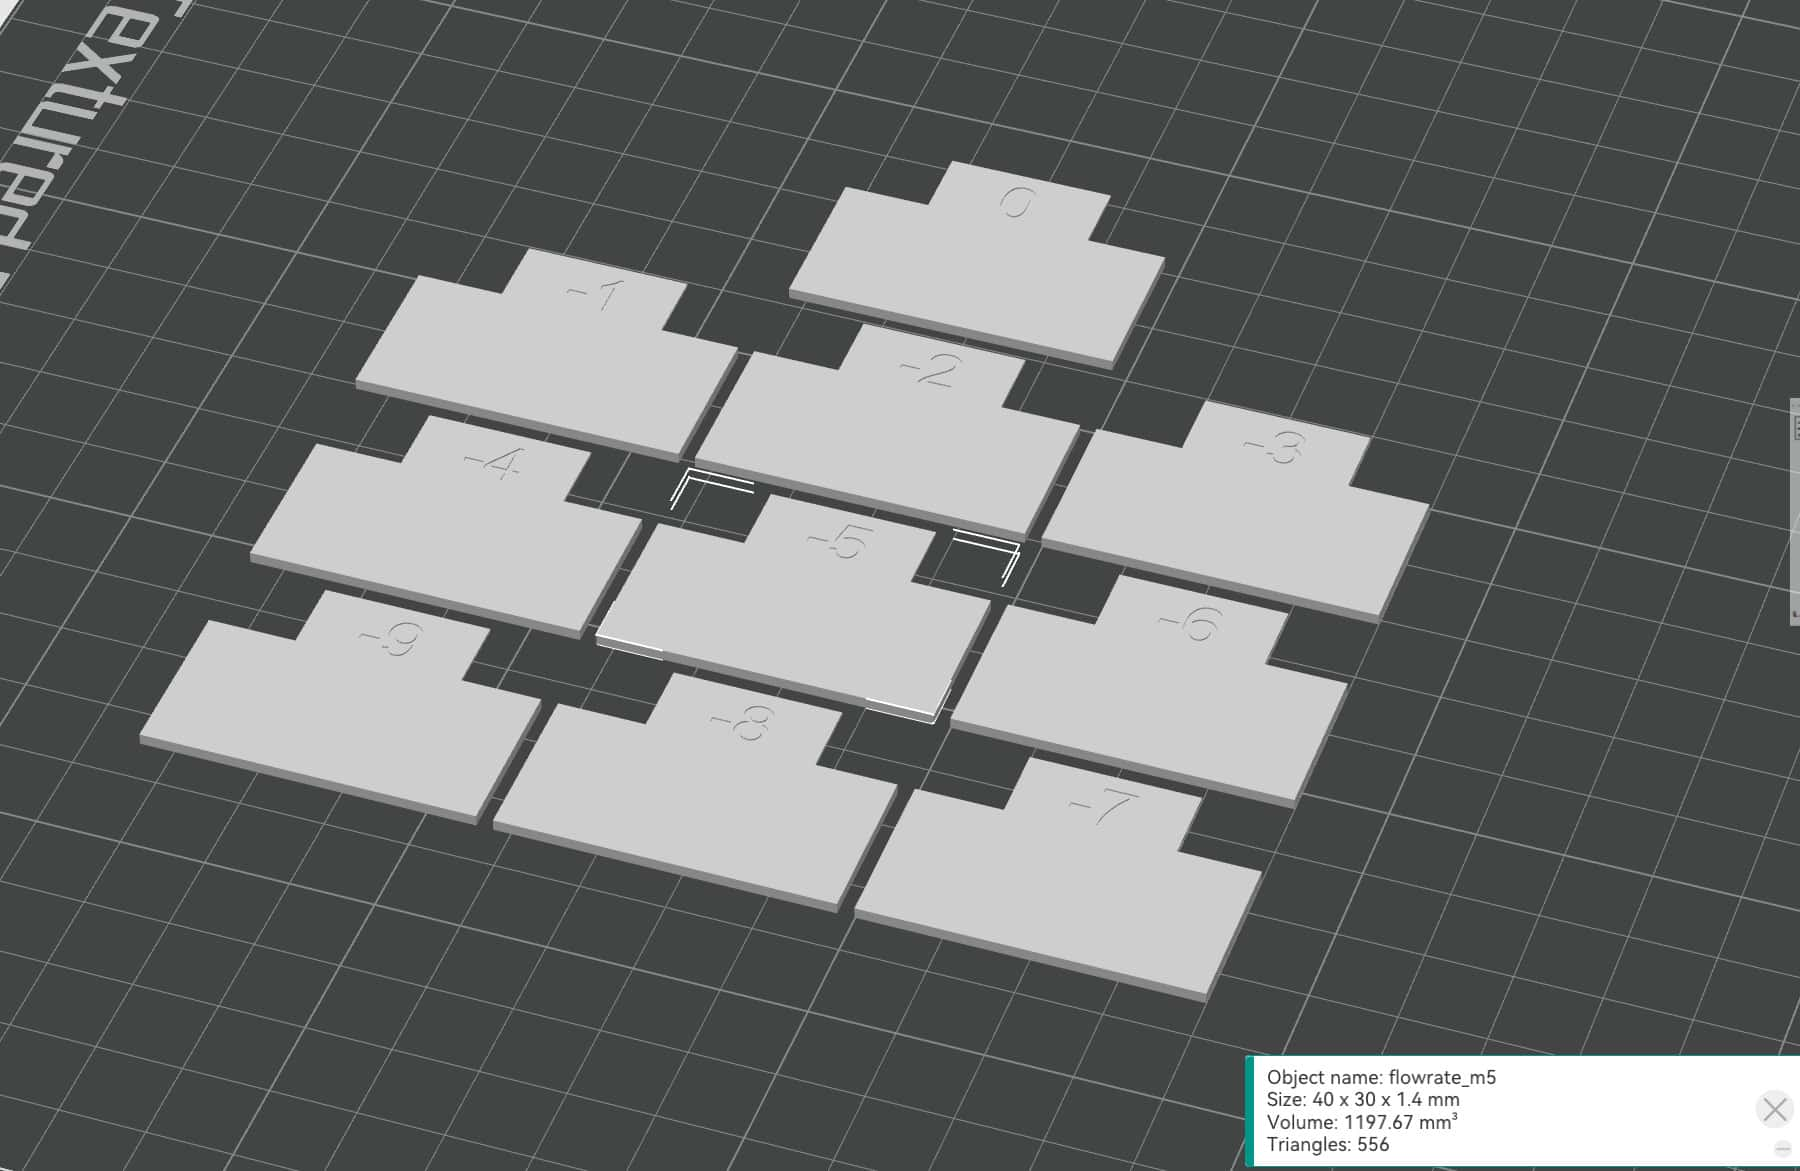
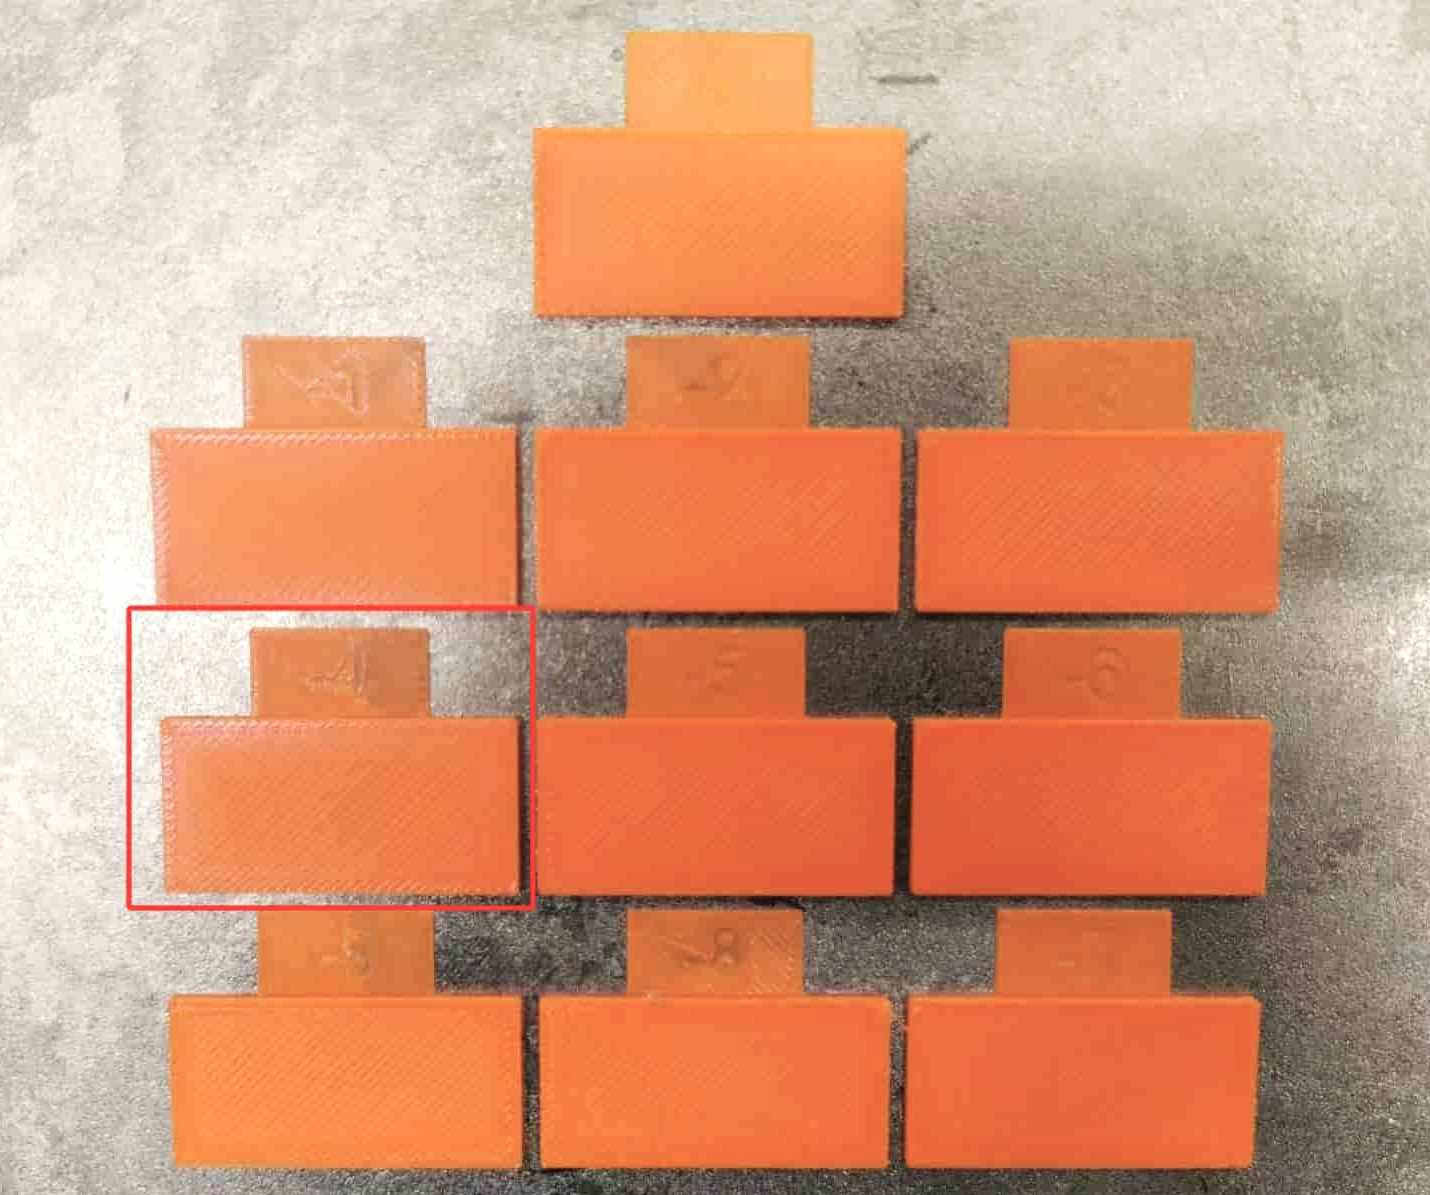
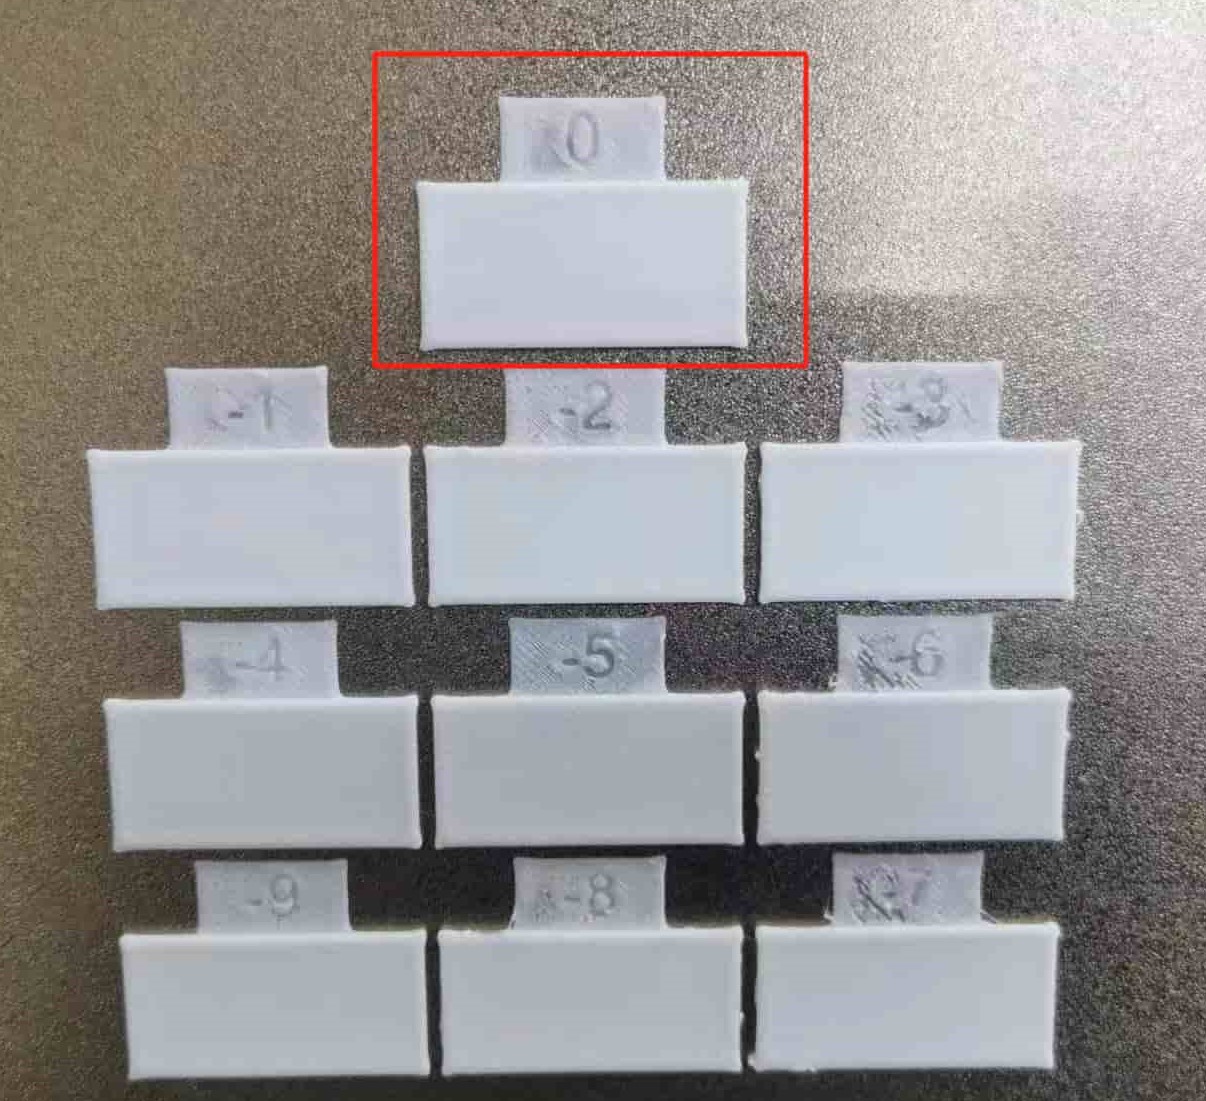
- Flow Test Result:
| Flow range | Test result | Print time | |
|---|---|---|---|
| PLA | -9 to 0 | 0.9216 | 23m53s |
| PETG | -9 to 0 | 1 | 25m53s |
Bambu Lab P1S has a higher flow ratio, and to minimize errors, we conducted a detailed flow ratio test. The test involved 10 calibration blocks, where fine adjustments were made. During calibration, 10 blocks (-9 to 0) appeared on the heated bed. The flow ratio for these blocks started from 0.91, increasing in 0.01 increments. After slicing and printing, each block showed a different flow ratio. We selected the optimal flow ratio based on print quality. The new flow ratio was calculated using the formula: Current Flow Ratio x (100 + Number corresponding to the smoothest block surface)/100.
Analysis: Based on the printing results, it's evident that in PLA, the block -4 has the smoothest surface, resulting in a flow ratio of 0.96 * (100 - 4) / 100 = 0.9216. In PETG, the block 0 has the smoothest surface, yielding a flow ratio of 1 * (100 - 0) / 100 = 1.
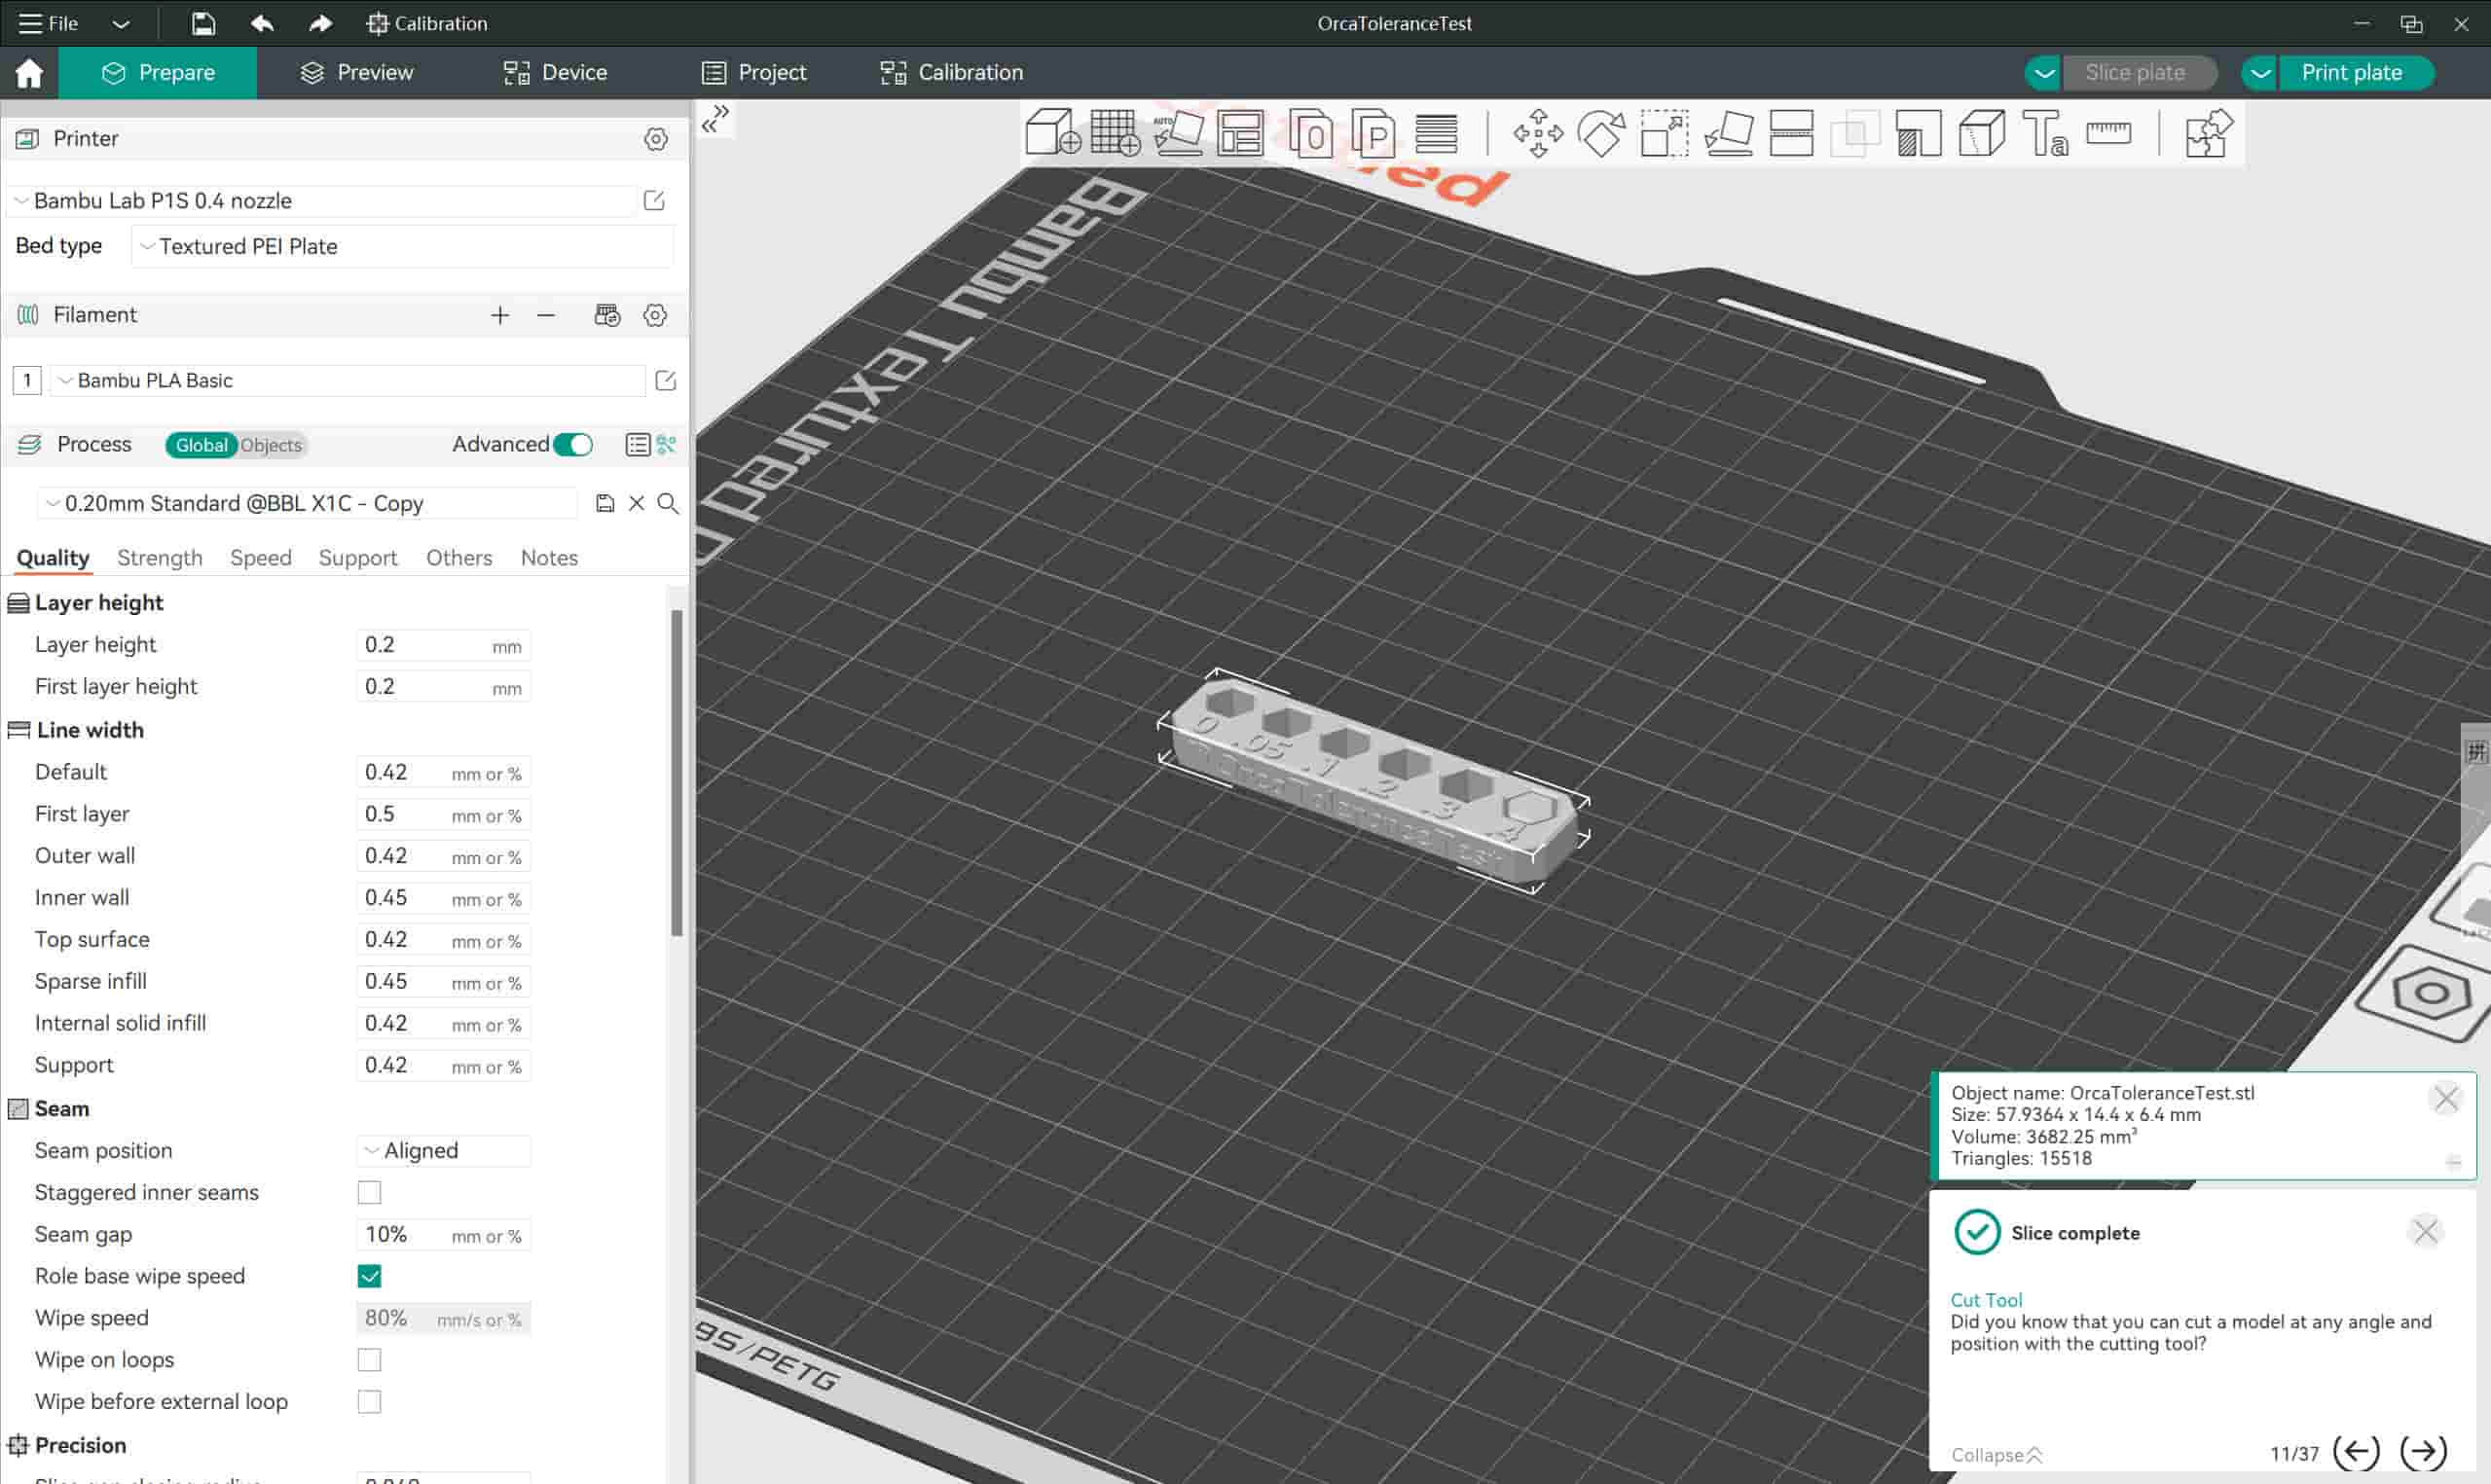
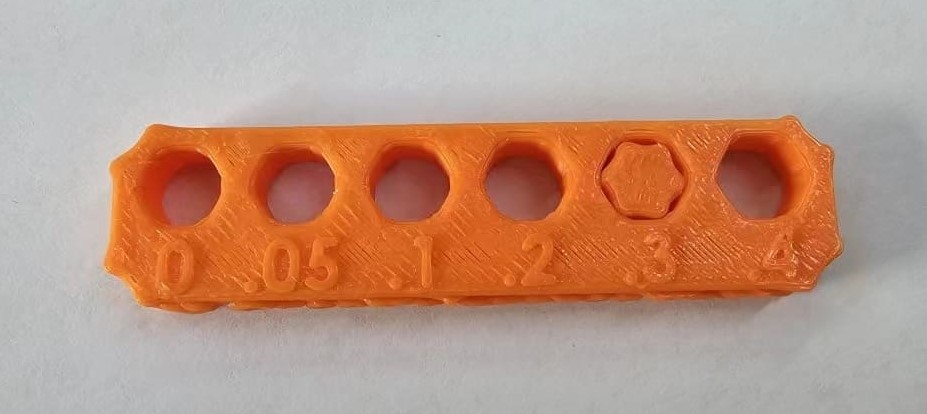
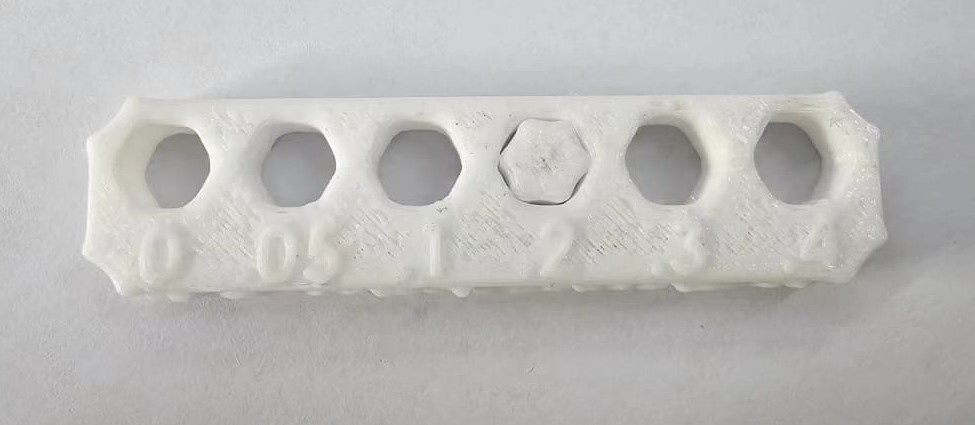
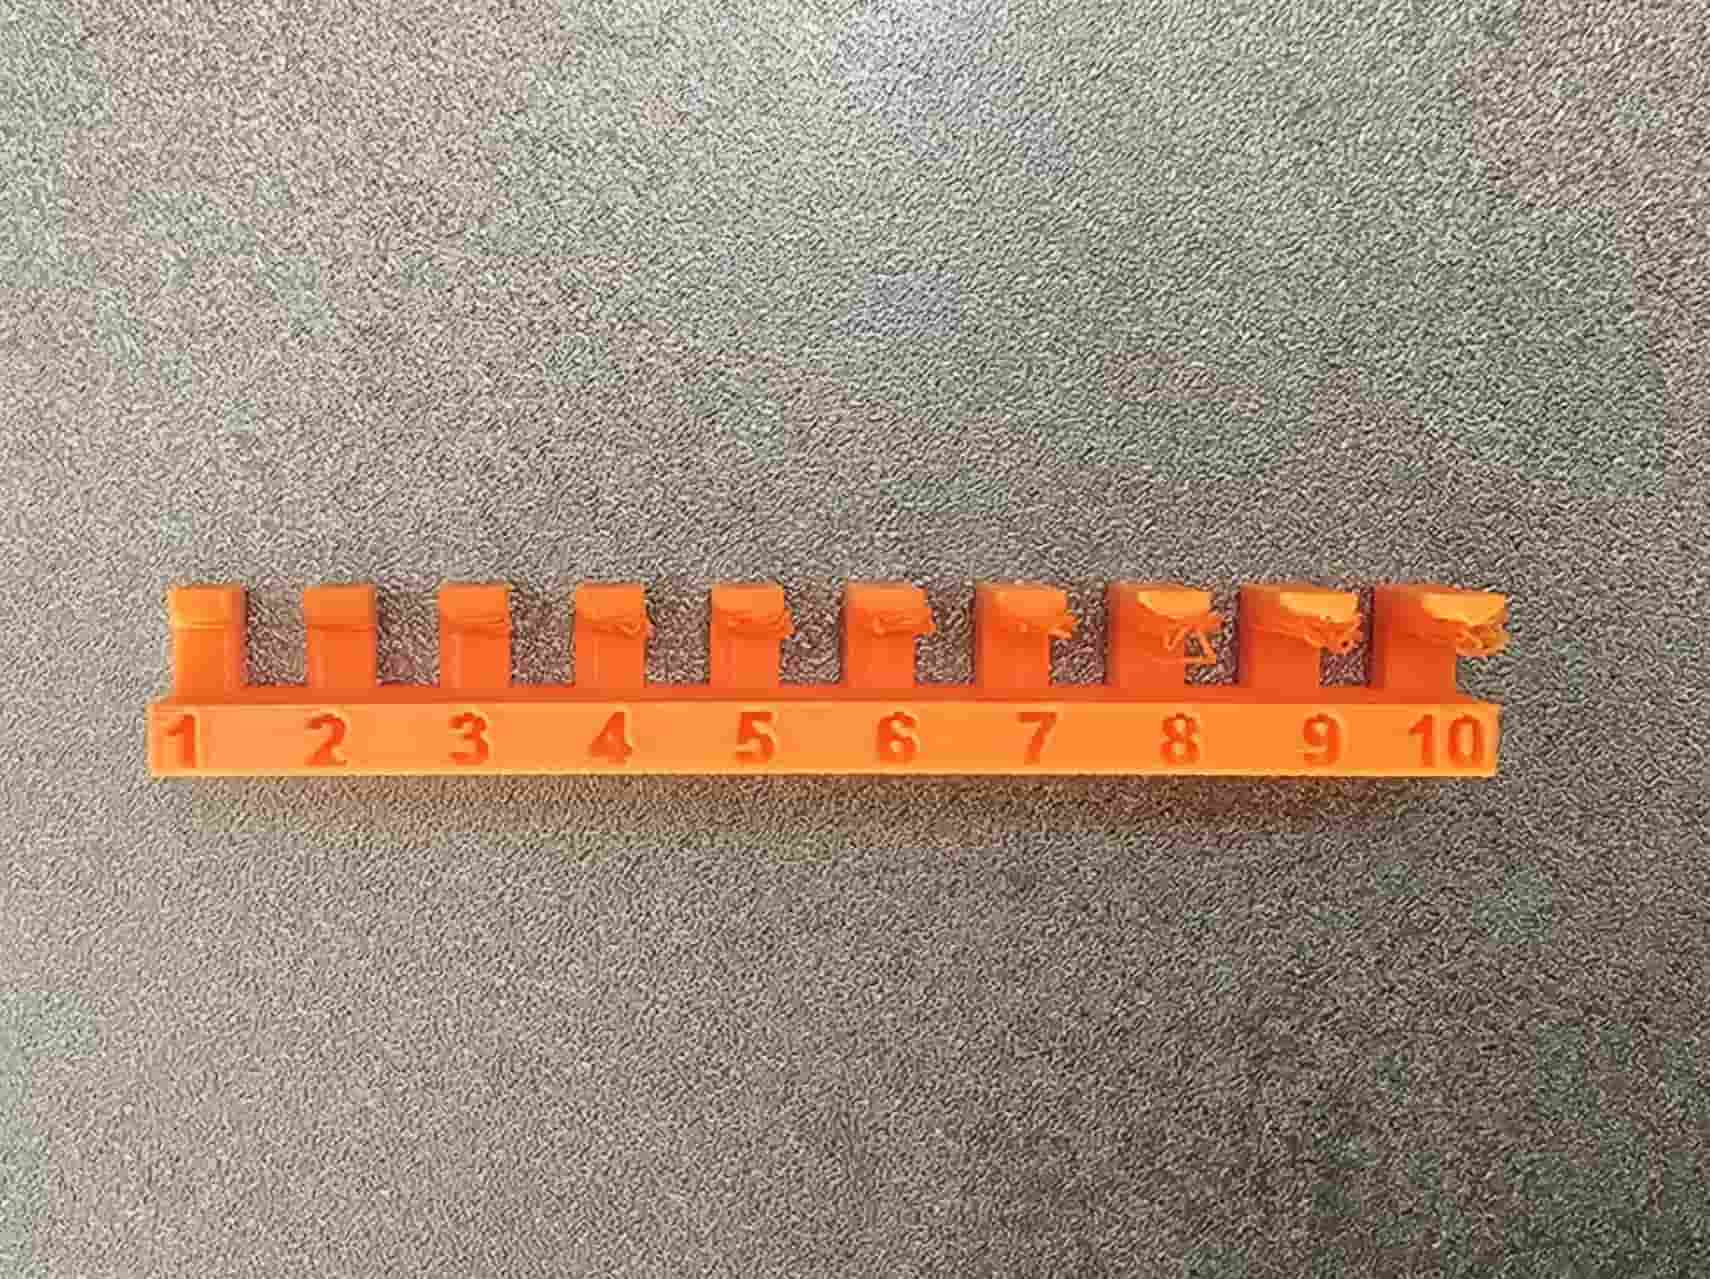
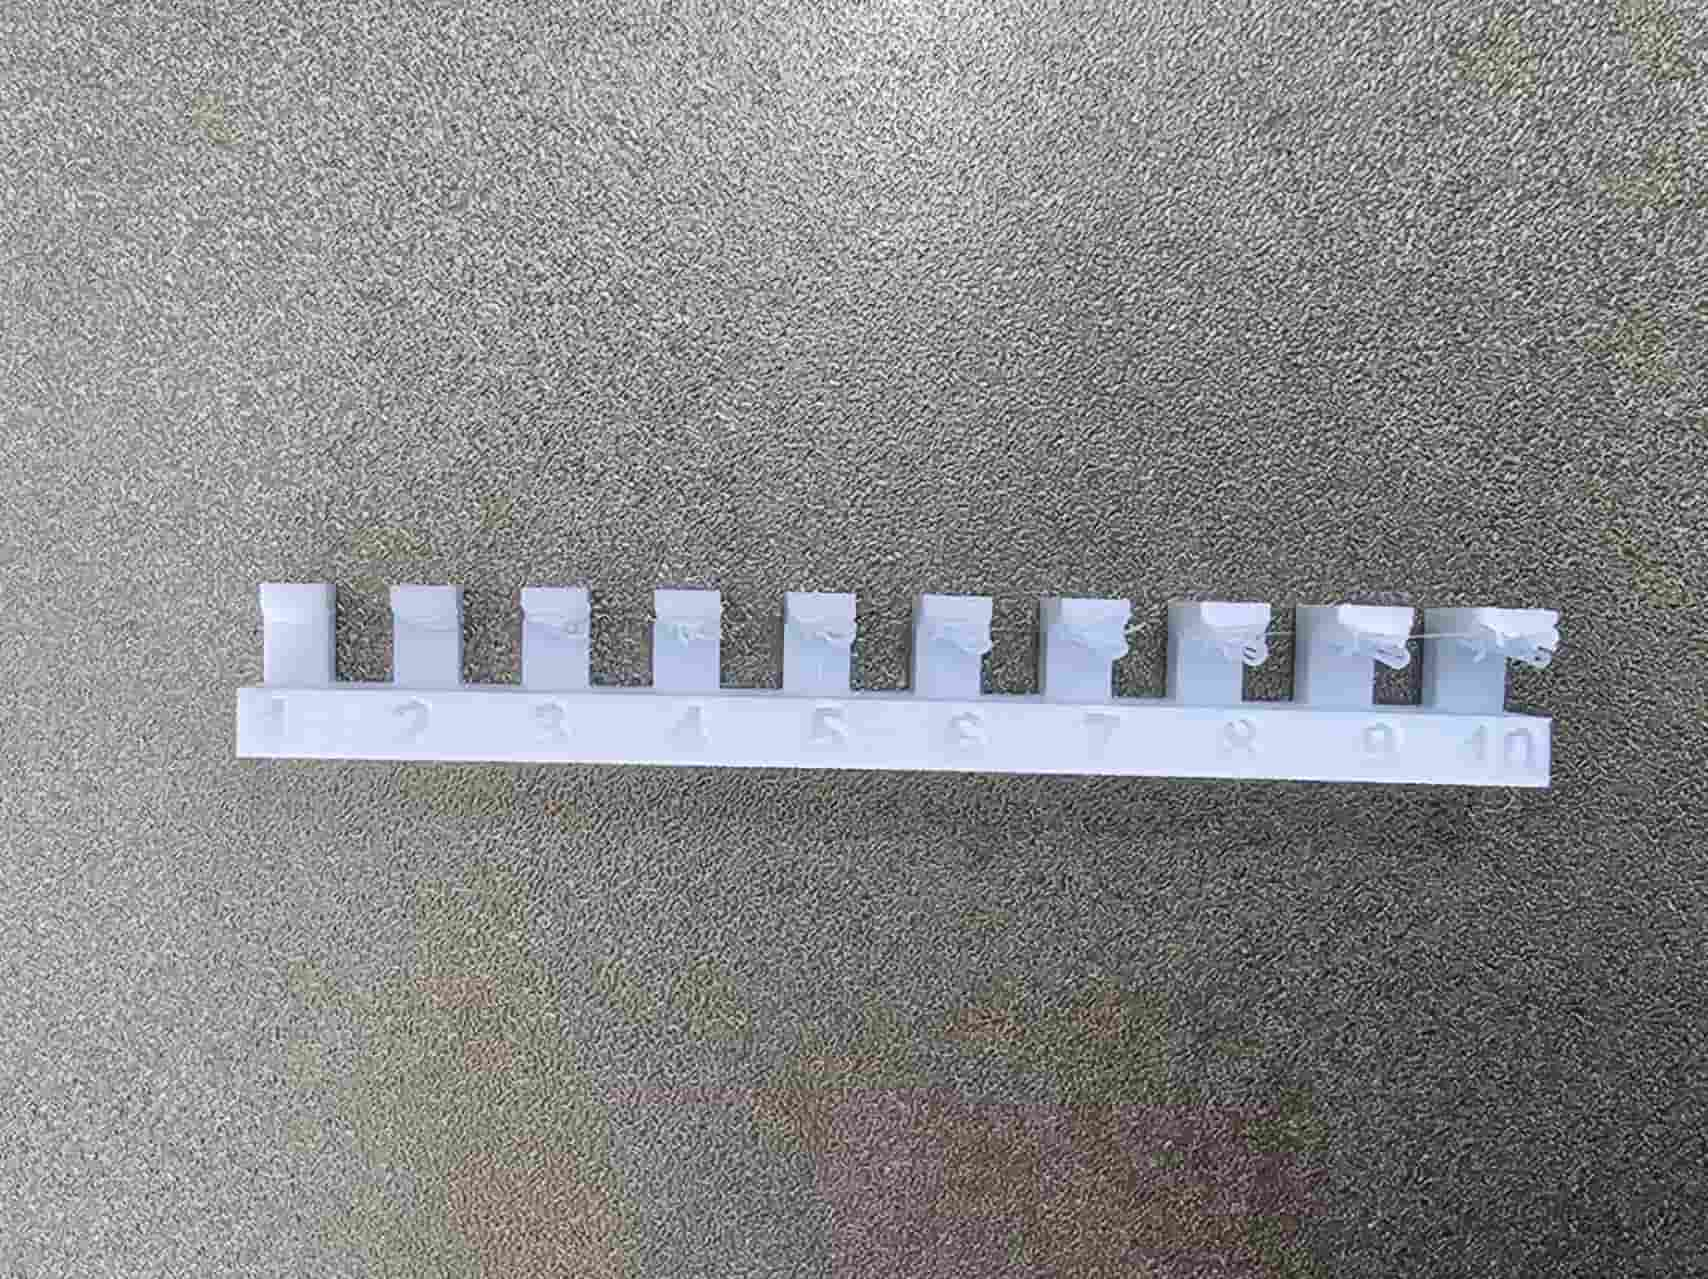
- Gap (Tolerance) Test Result:
| Gap range | Tight fit | Loose fit | Print time | |
|---|---|---|---|---|
| PLA | 0mm-0.4mm | 0.2mm | 0.3mm | 9m12s |
| PETG | 0mm-0.4mm | 0.1mm | 0.2mm | 9m12s |
Since we intend to create some mechanical structures, it's crucial to evaluate the printing size accuracy of the printer and consumables. This test model includes a hexagonal column and a base with six hexagonal holes, each with tolerances of 0.0mm, 0.05mm, 0.1mm, 0.2mm, 0.3mm, and 0.4mm.
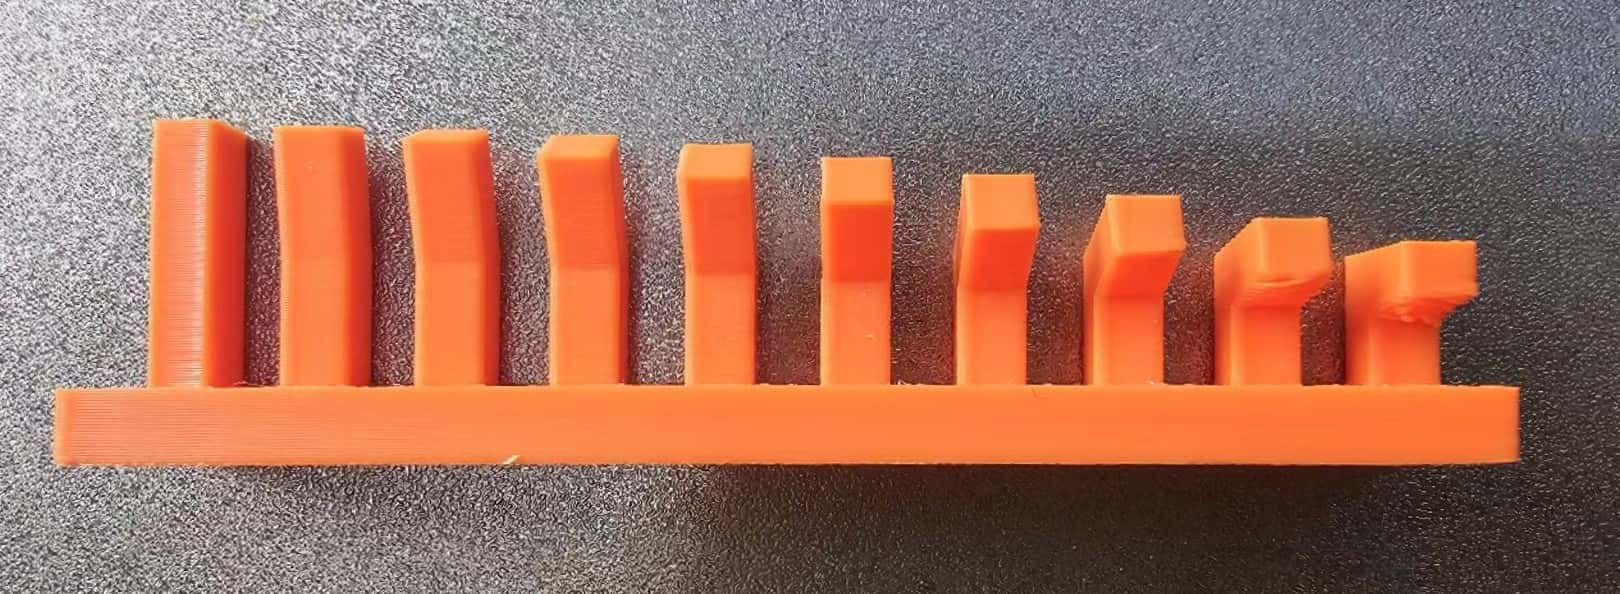
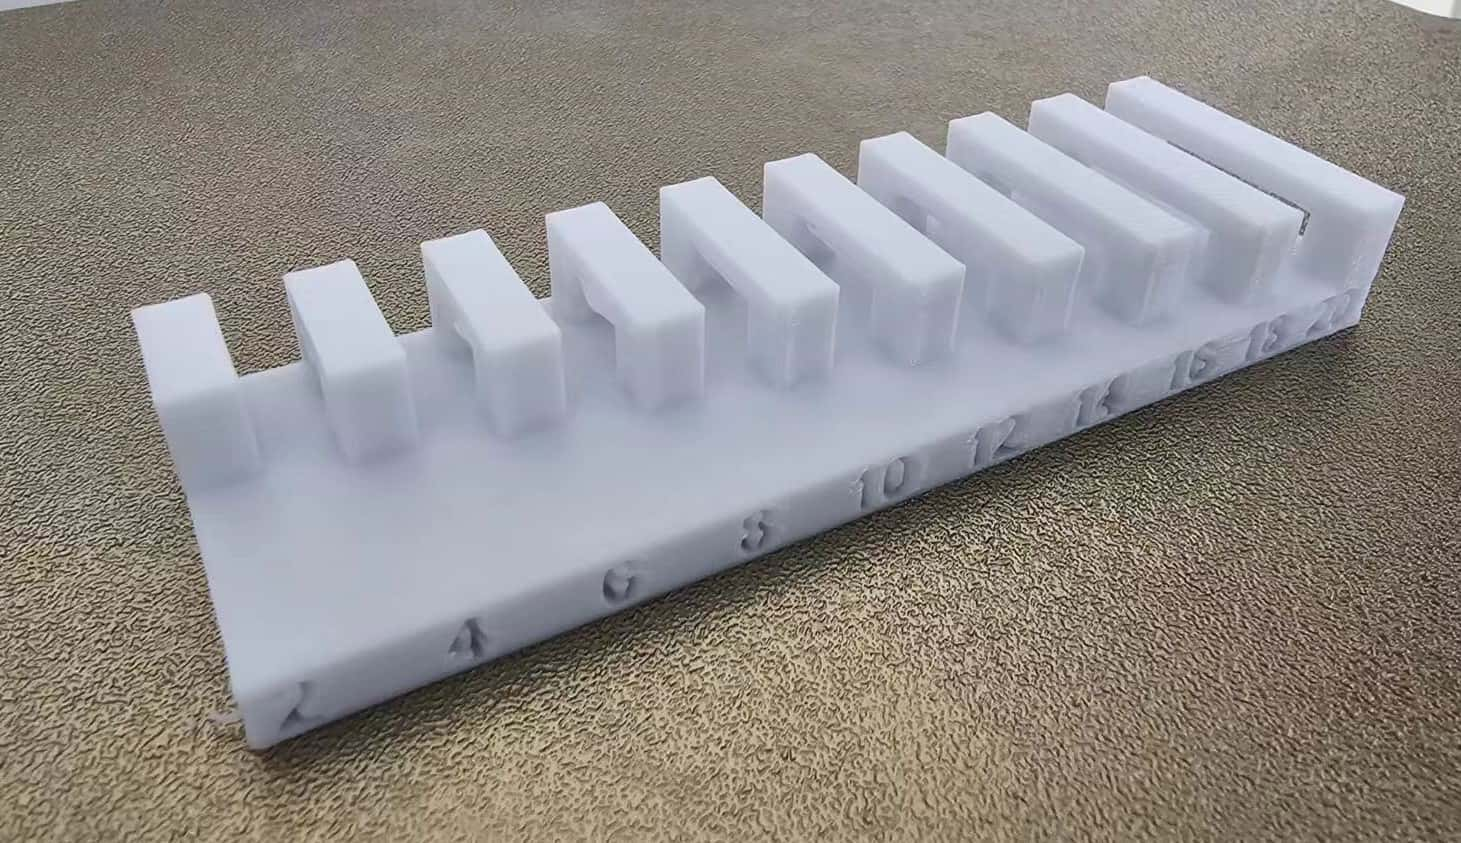
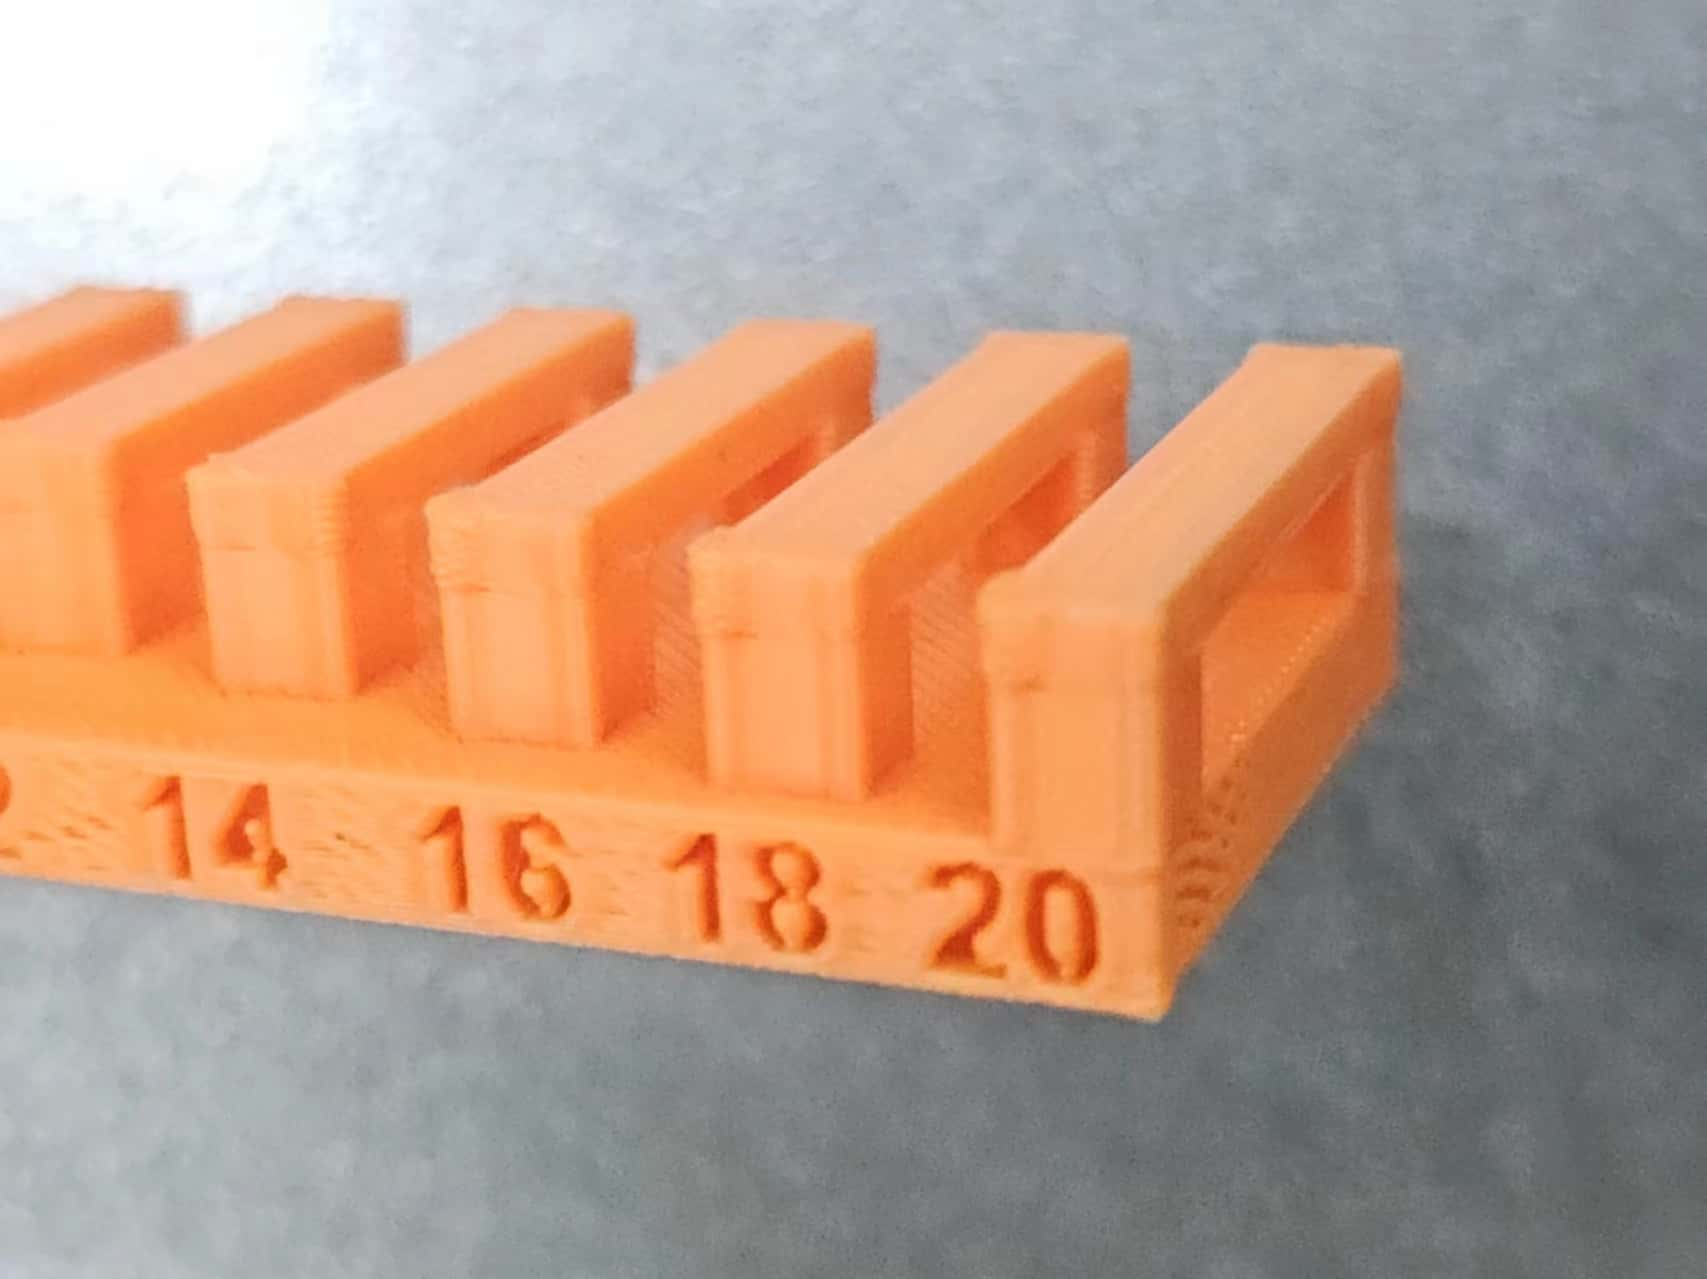
- Angle Test Result:
| Angle range | Test result | Print time | |
|---|---|---|---|
| PLA | 0°-90° | 40° | 28m33s |
| PETG | 0°-90° | 50° | 33m35s |
For this test, I downloaded an STL file from Fabacademy classes and utilized the temperatures, flow rates, and retraction settings obtained from previous tests. Analysis: Both PLA and PETG show overhang issues at 10 degrees. Comparing the shape of the square column and layer lines at each angle, the optimal angle for PLA is 40, while for PETG, it's 50.

- Overhang Test Result:
| Overhang range | Test result | Print time | |
|---|---|---|---|
| PLA | 1mm-10mm | 1mm | 17m14s |
| PETG | 1mm-10mm | 1mm | 18m46s |
For this test, I downloaded an STL file from Fabacademy classes and used the temperatures, flow rates, and retraction settings obtained from previous tests. The overhang angle in this test is set to 90 degrees. Analysis: Both PLA and PETG start showing stringing from 1mm overhang.
- Bridging Test Result:
| Bridging range | Test result | Print time | |
|---|---|---|---|
| PLA | 2mm-20mm | 18mm | 29m22s |
| PETG | 2mm-20mm | 2mm | 31m26s |
For this test, I downloaded an STL file from Fabacademy classes and used the temperatures, flow rates, and retraction settings obtained from previous tests. Analysis: PLA shows an overall good performance with almost no overhang on the bottom of the bridges. Even at 20mm bridging, there is only a small gap. However, PETG's performance is particularly poor, with overhang appearing at 4mm bridging. It seems that PLA is more suitable for models with bridging.


1.3 Individual Work
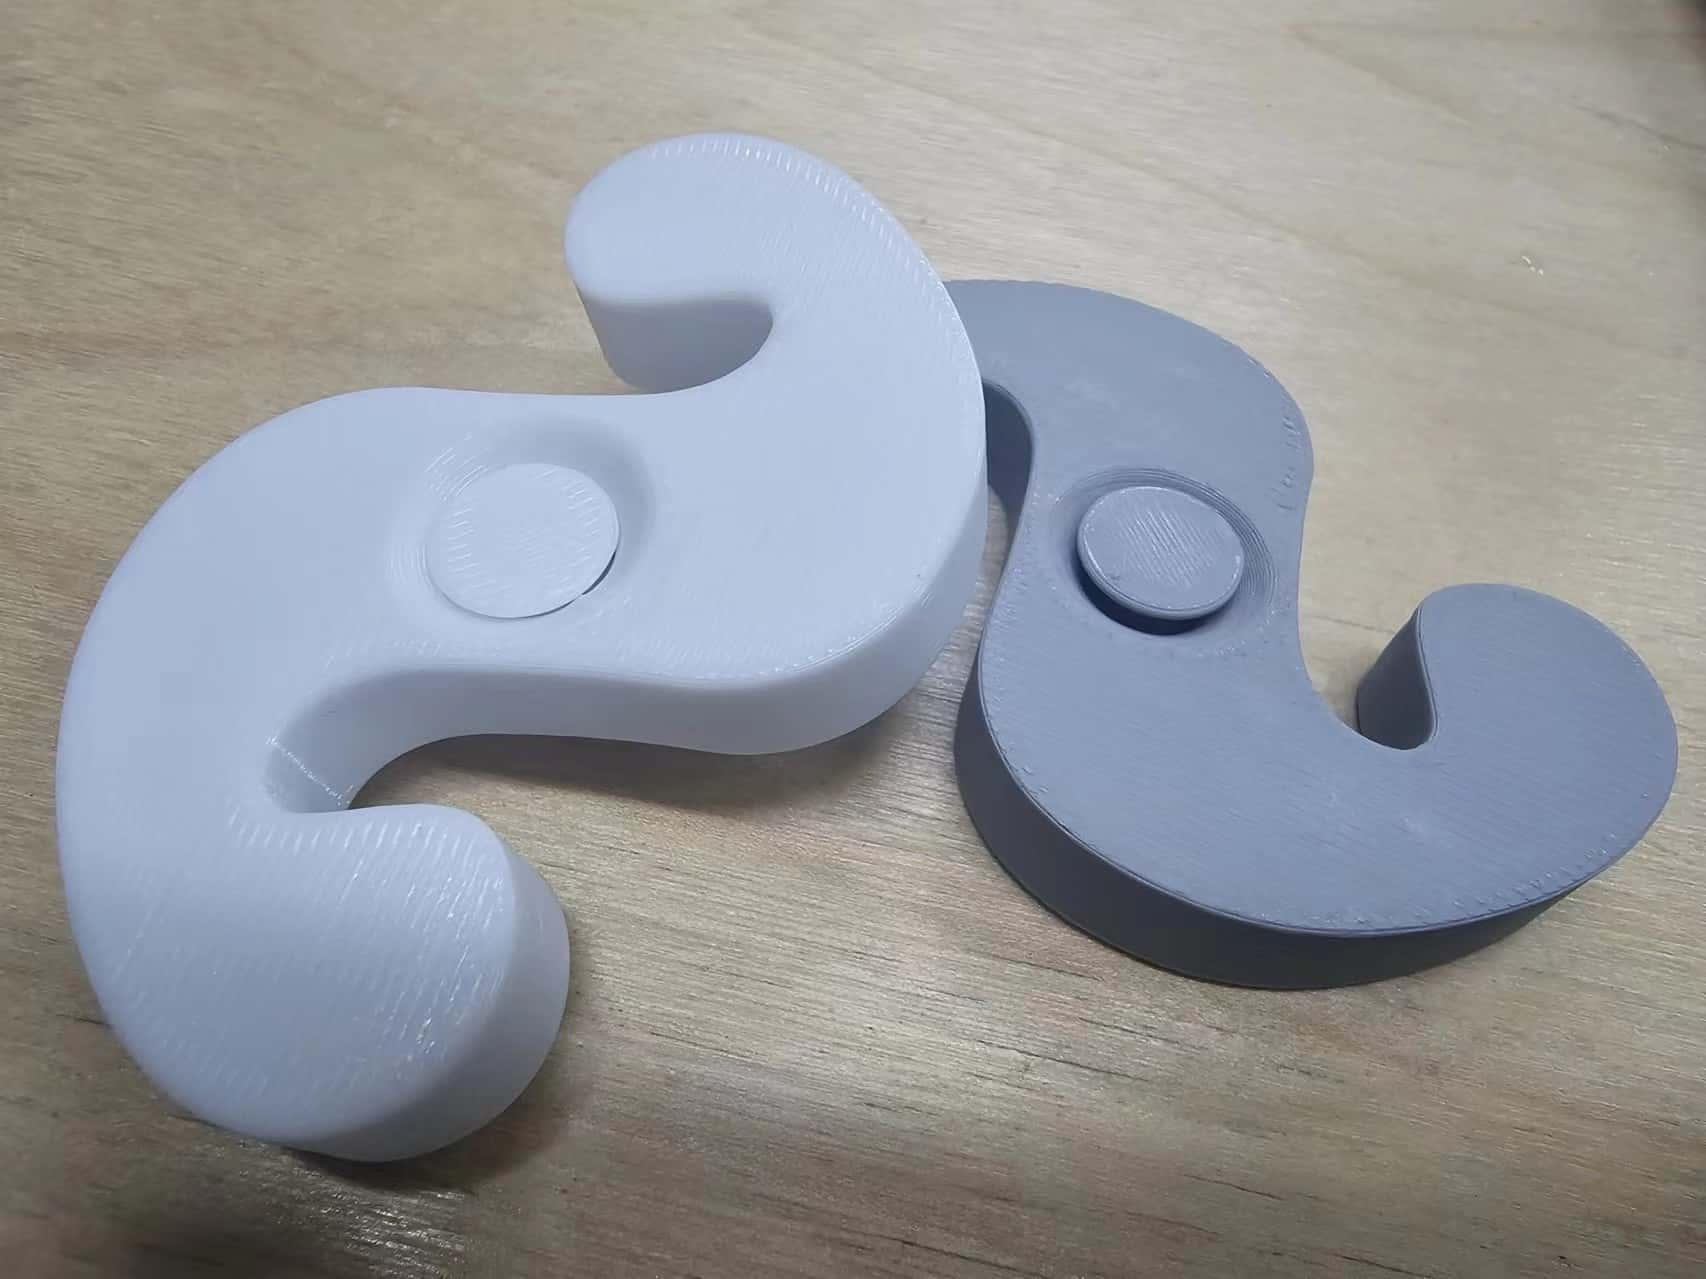
According to the assignment requirements: "Design and 3D print an object (small, few cm3, limited by printer time) that could not be easily made subtractively," and considering the group's Gap (Tolerance) test, I thought of the finger spinning commonly played with. Therefore, I used Rhino to design it!
1.3.1 3D Printing
- Model
- Slicer
- Printing
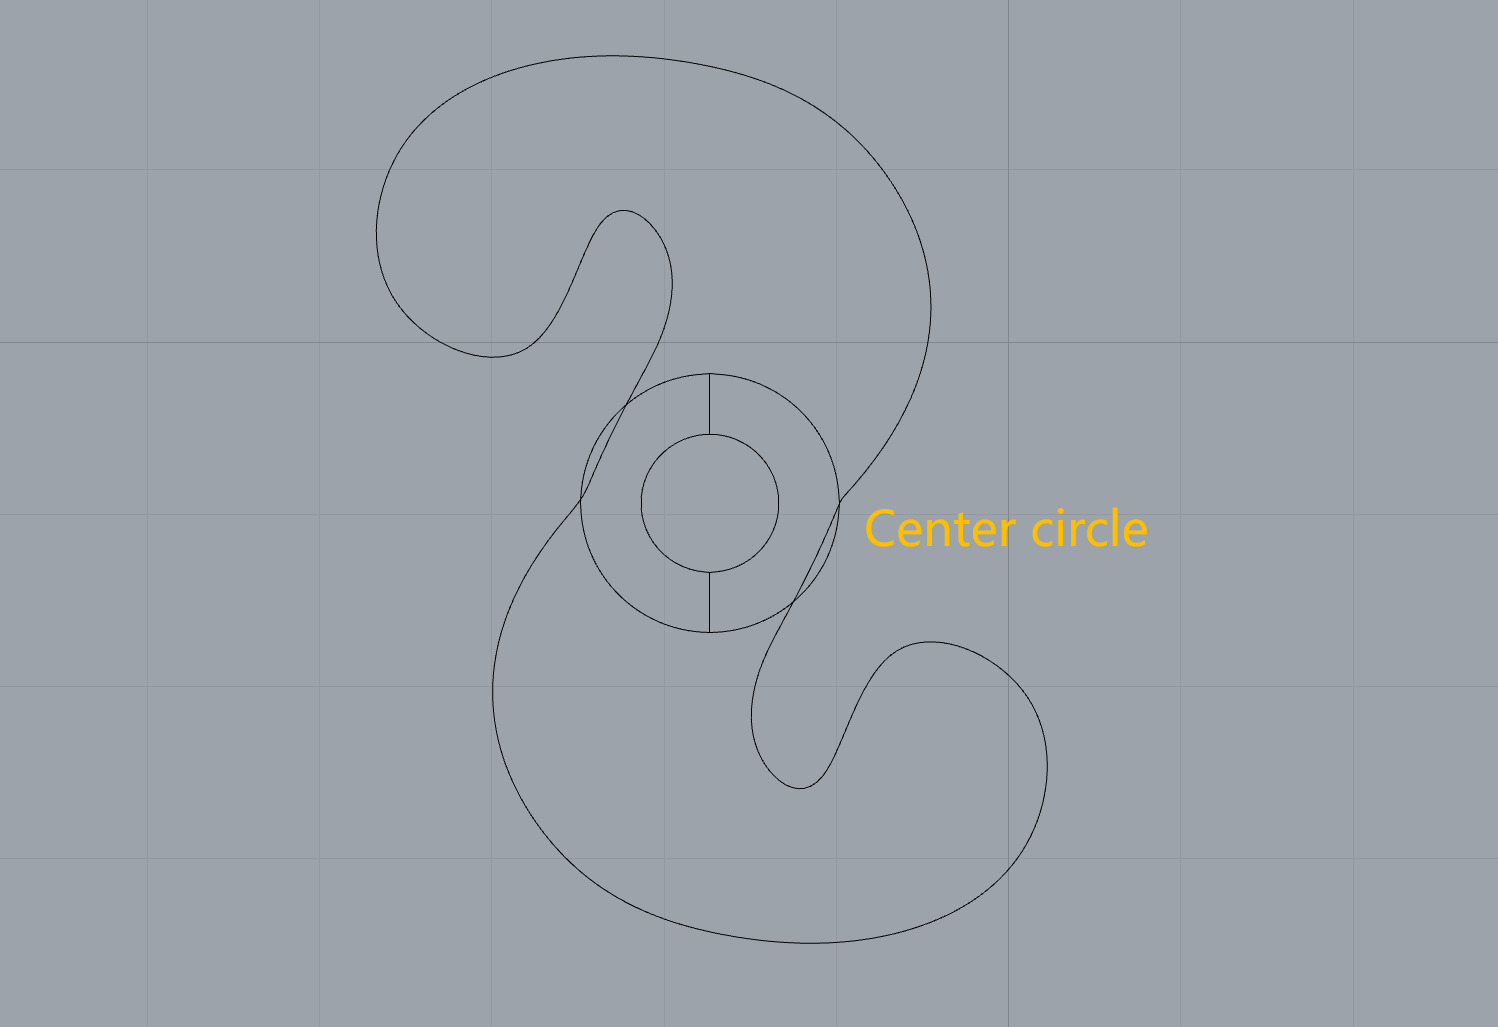
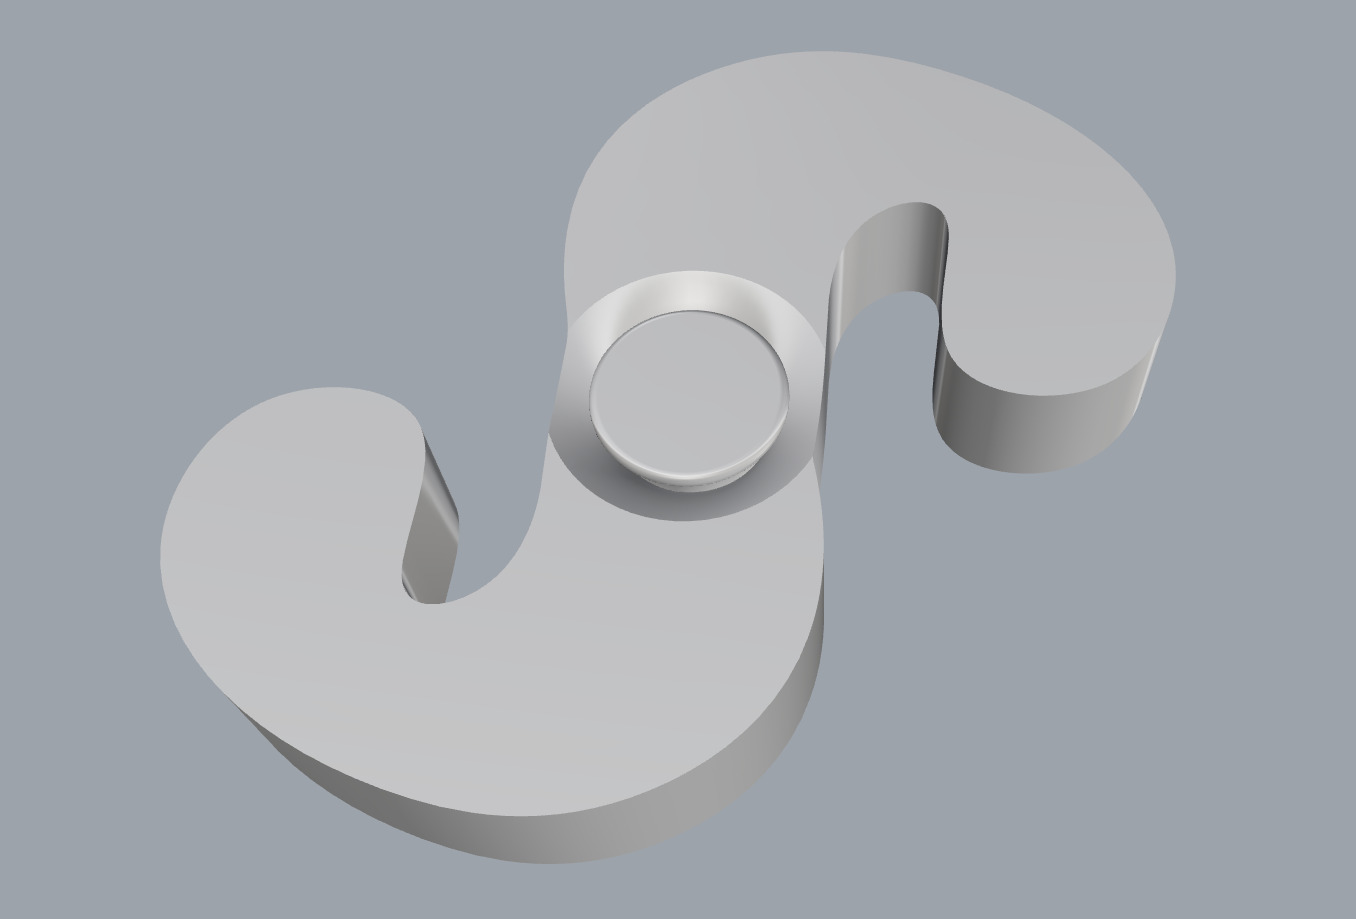
1.Because the S-shaped spinner is symmetrical front and back, I used mirroring + symmetry, and then moved to align the two endpoints.
2.Draw a circle in the center with dimensions of 10mm*10mm*8.7mm
3.Duplicate circles at distances of 4.35mm and 8.7mm, draw a curve connecting the four quarter points of the three circles, and mirror the design

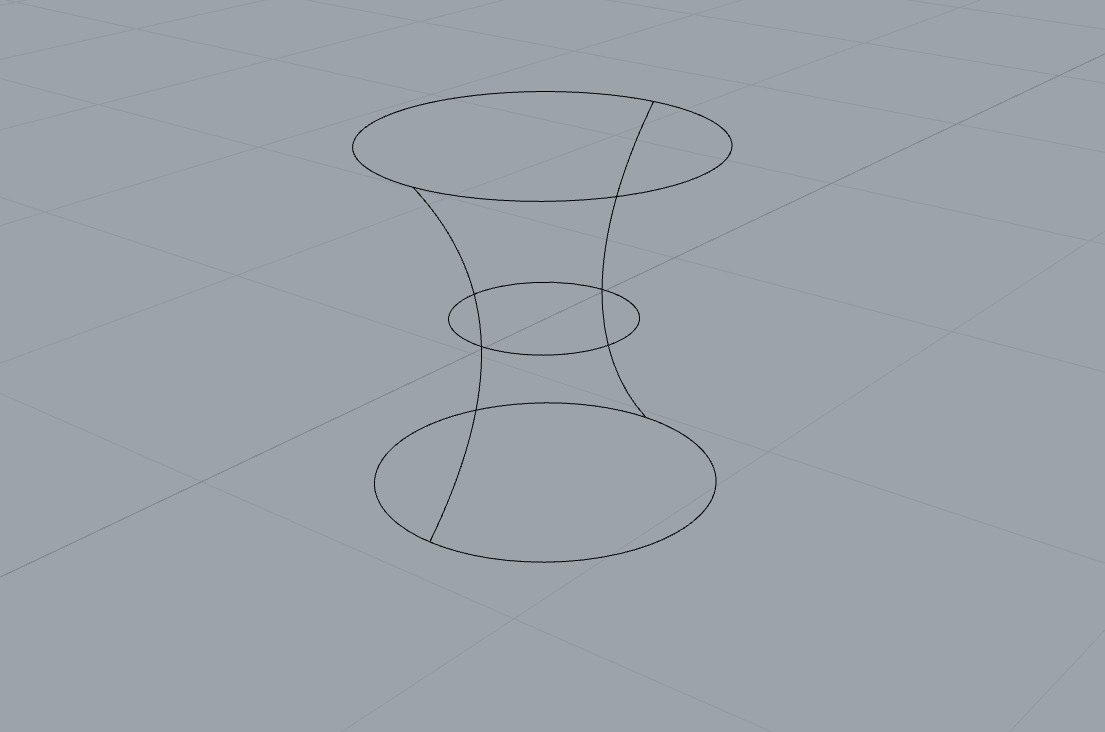
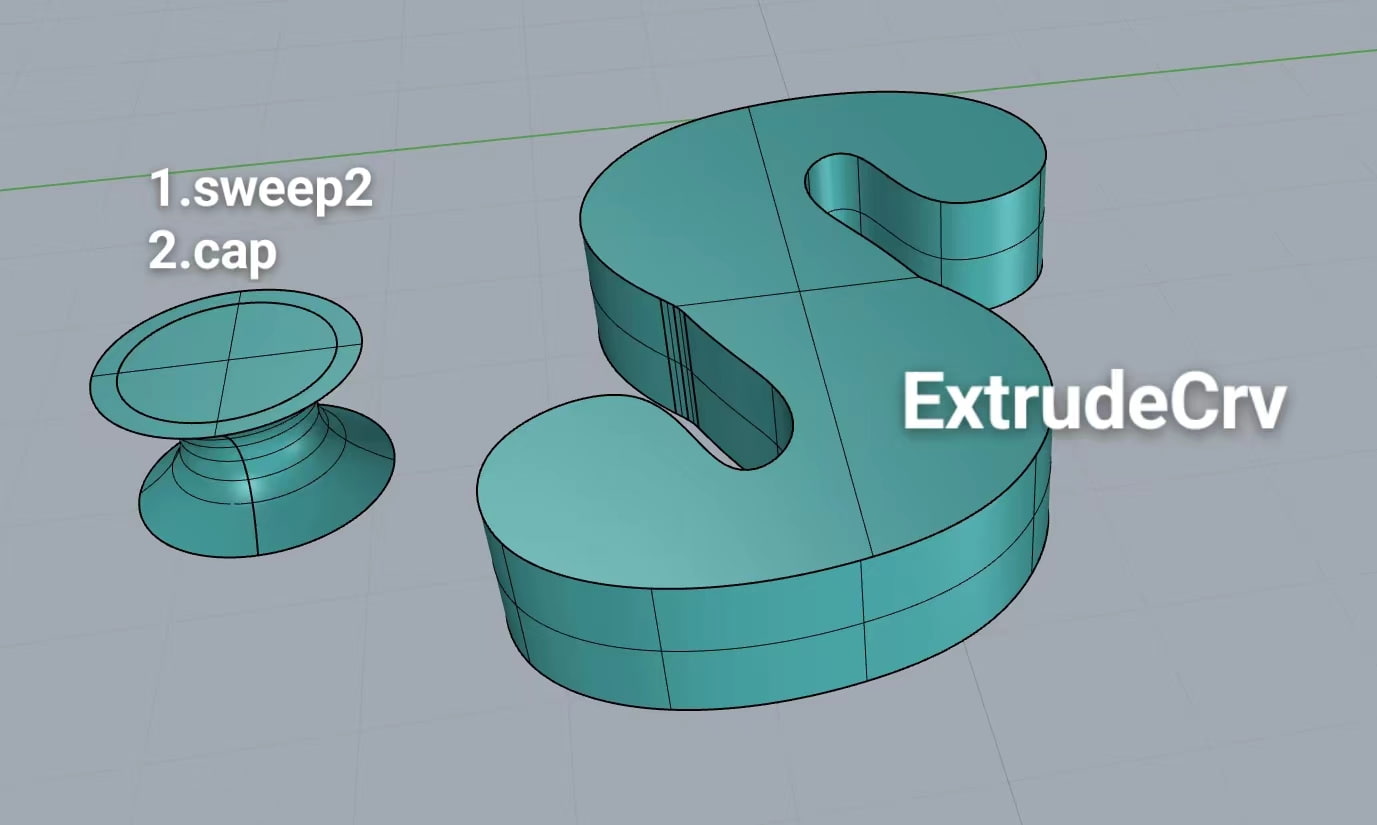
4.Select the cylinder, use Sweep2 —— cap, the closed S-shaped ExtrudeCrv8.7mm
5.Use BooleanDifference —— FilletEdge
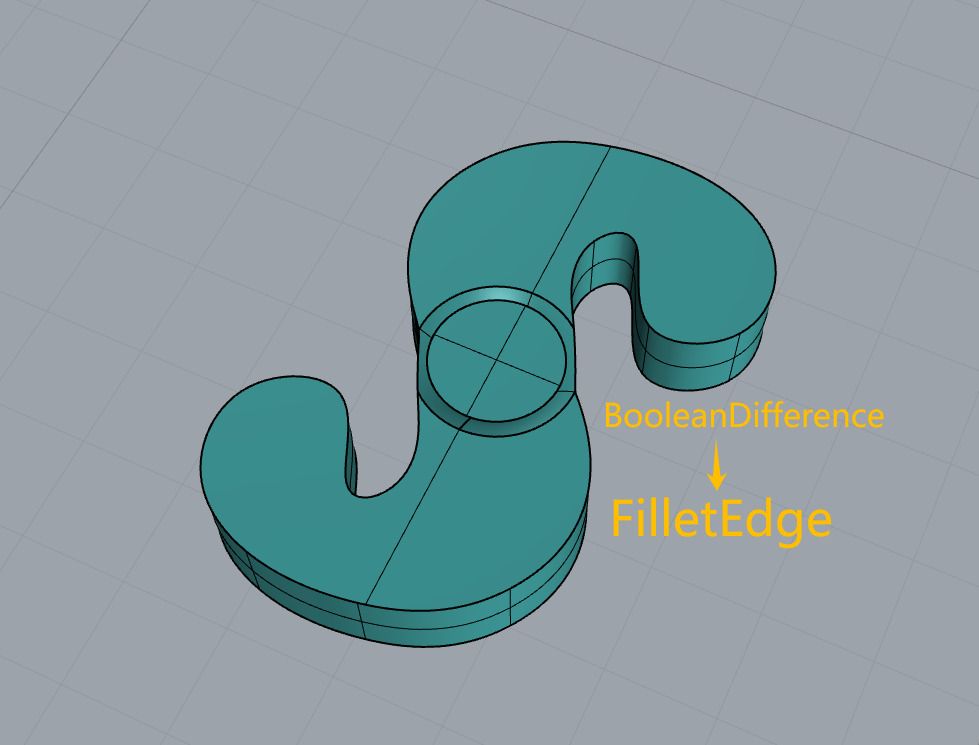
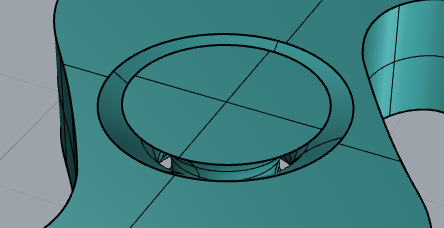
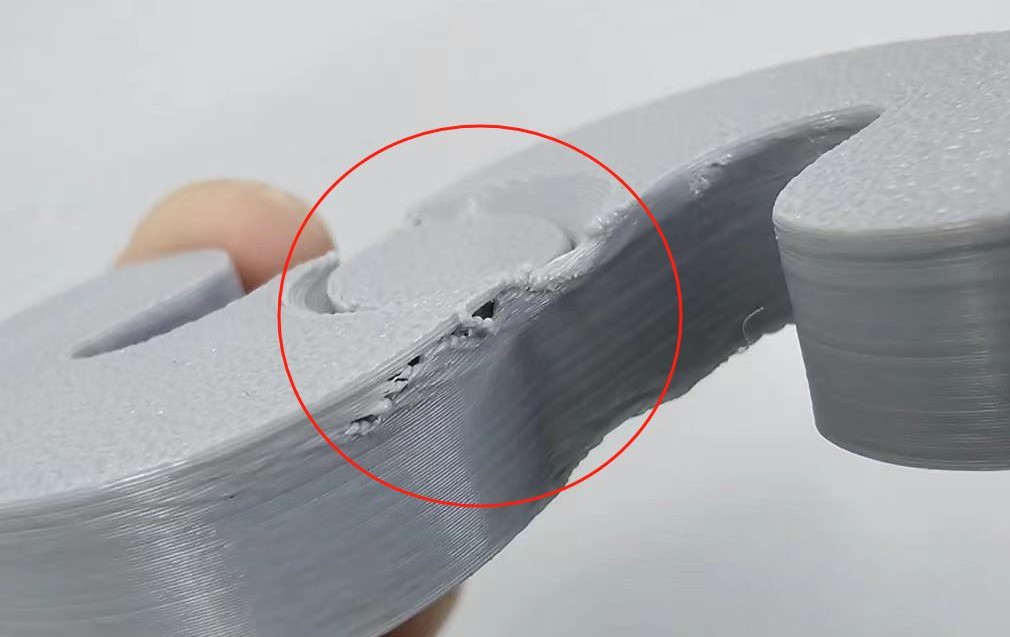
——Issue:
Due to the design of the model, the circles have cut out two grooves on the sides, resulting in very thin edges. During printing, I noticed the occurrence of dangling threads (visible in the printing section).
——resolution:
I widened the lateral sides by 1.6mm, which allows the base to be completely stable without any overhanging surfaces.I also rounded off all the edges, and it looks very nice!

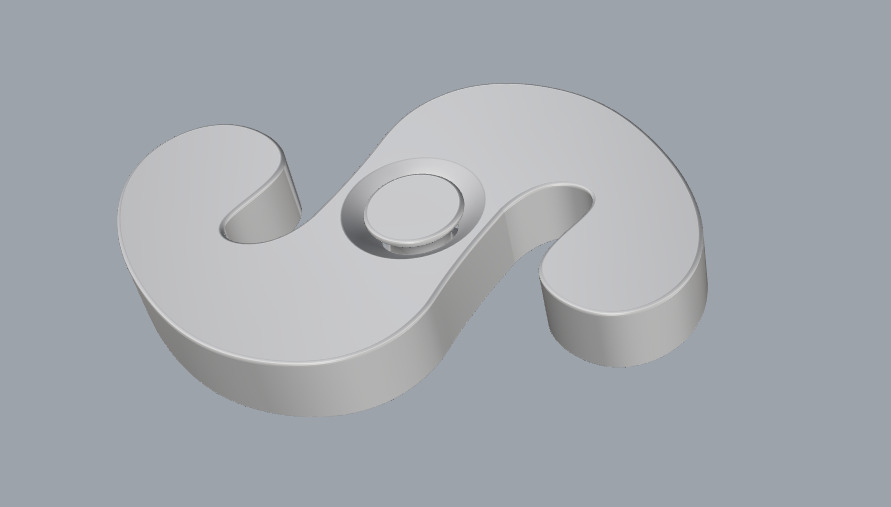
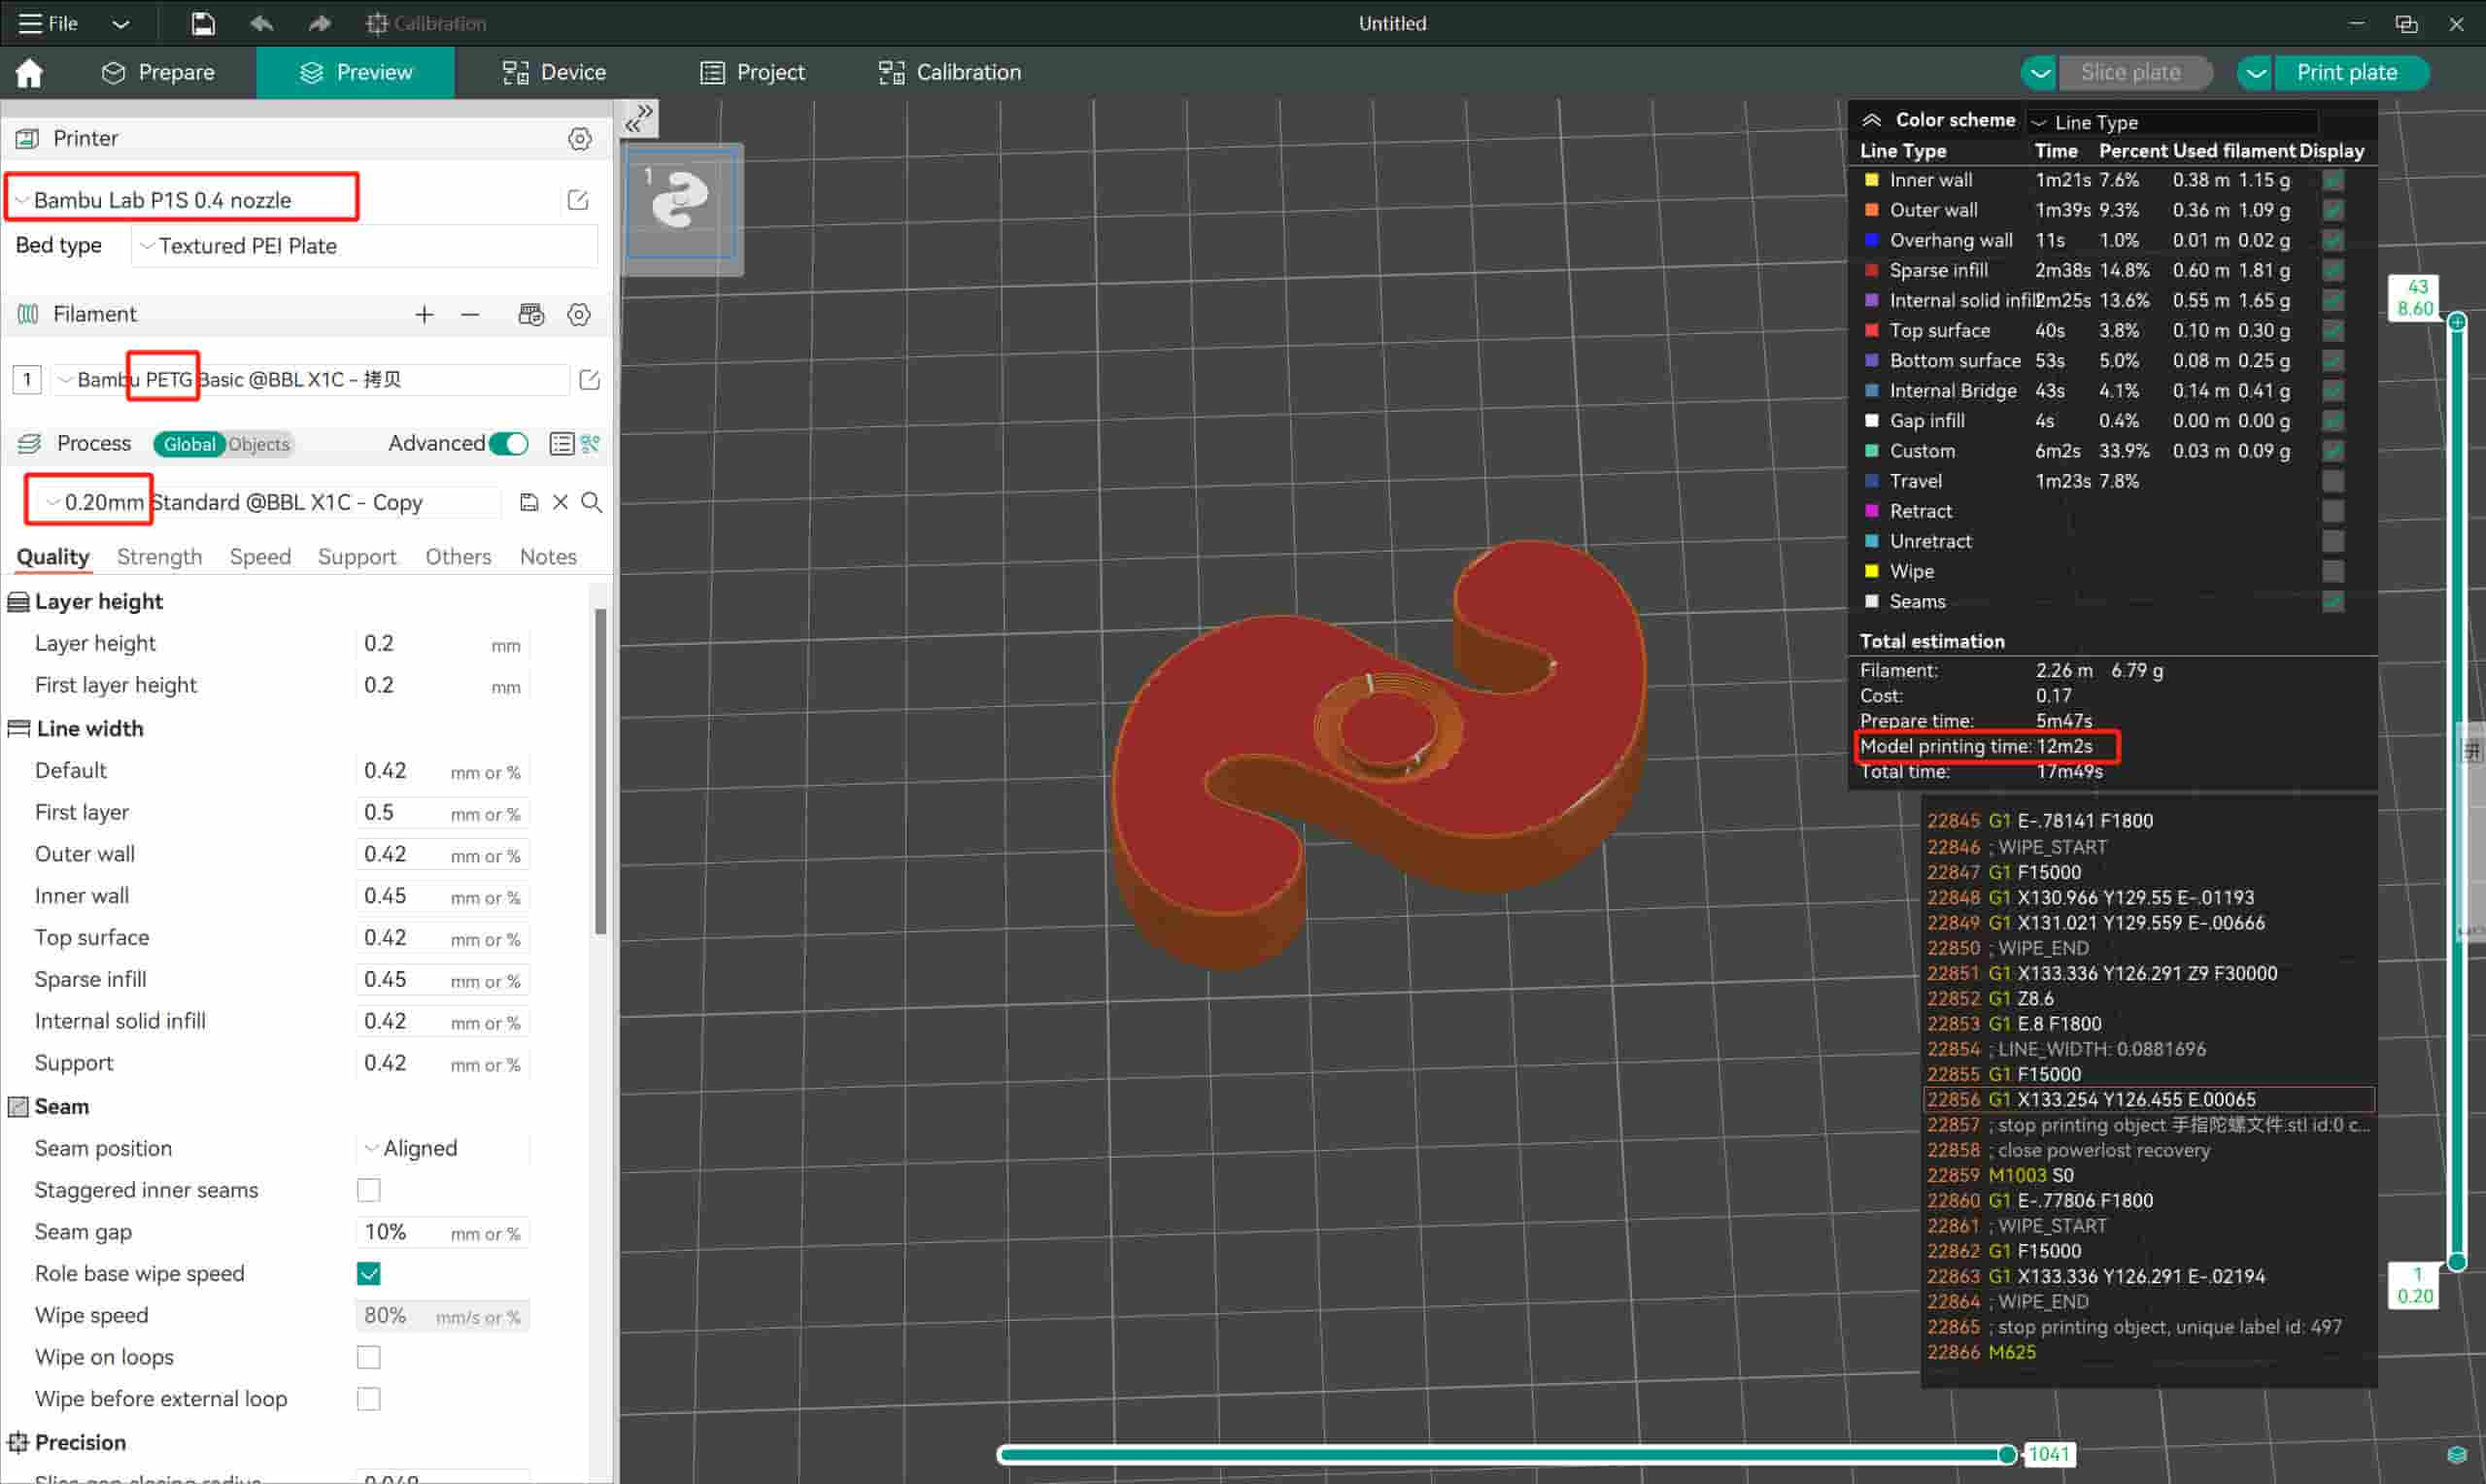
Type:PETG
Flow ratio:1
Print temperature: First layer:240 Other layers:240
Textured PEI Plate: First layer:80 Other layers:80
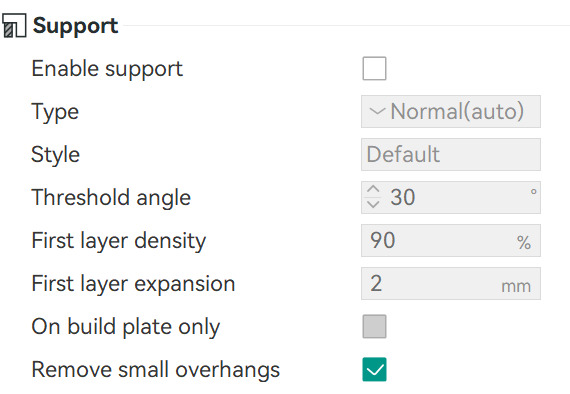
Support:0
Printing time:12m2s(Model printing)+5m47s(prepare)
1.Based on the data in the group assignment, modifying parameters in OrcaSlicer allows us to see a significantly reduced printing time for the model. Afterward, you can export a single-file or directly proceed with printing a single disc.
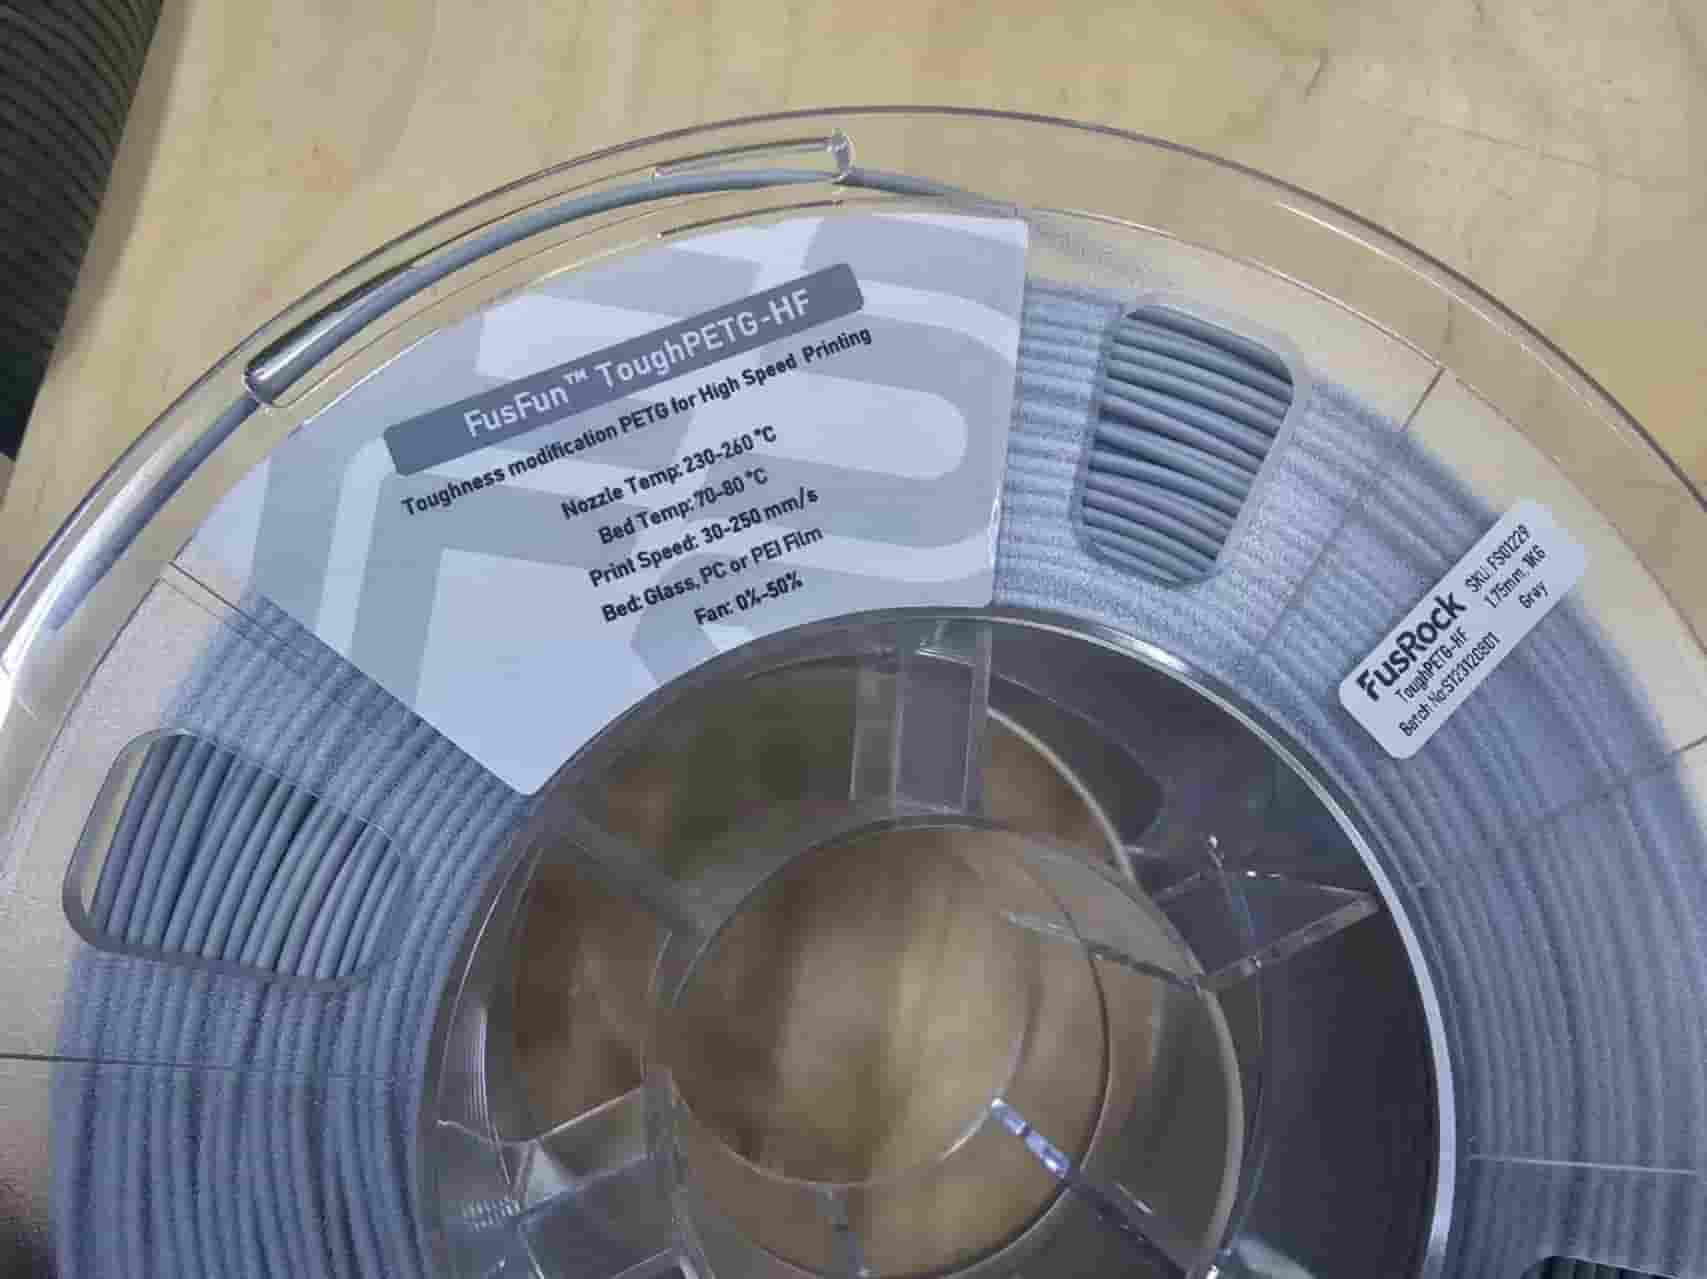
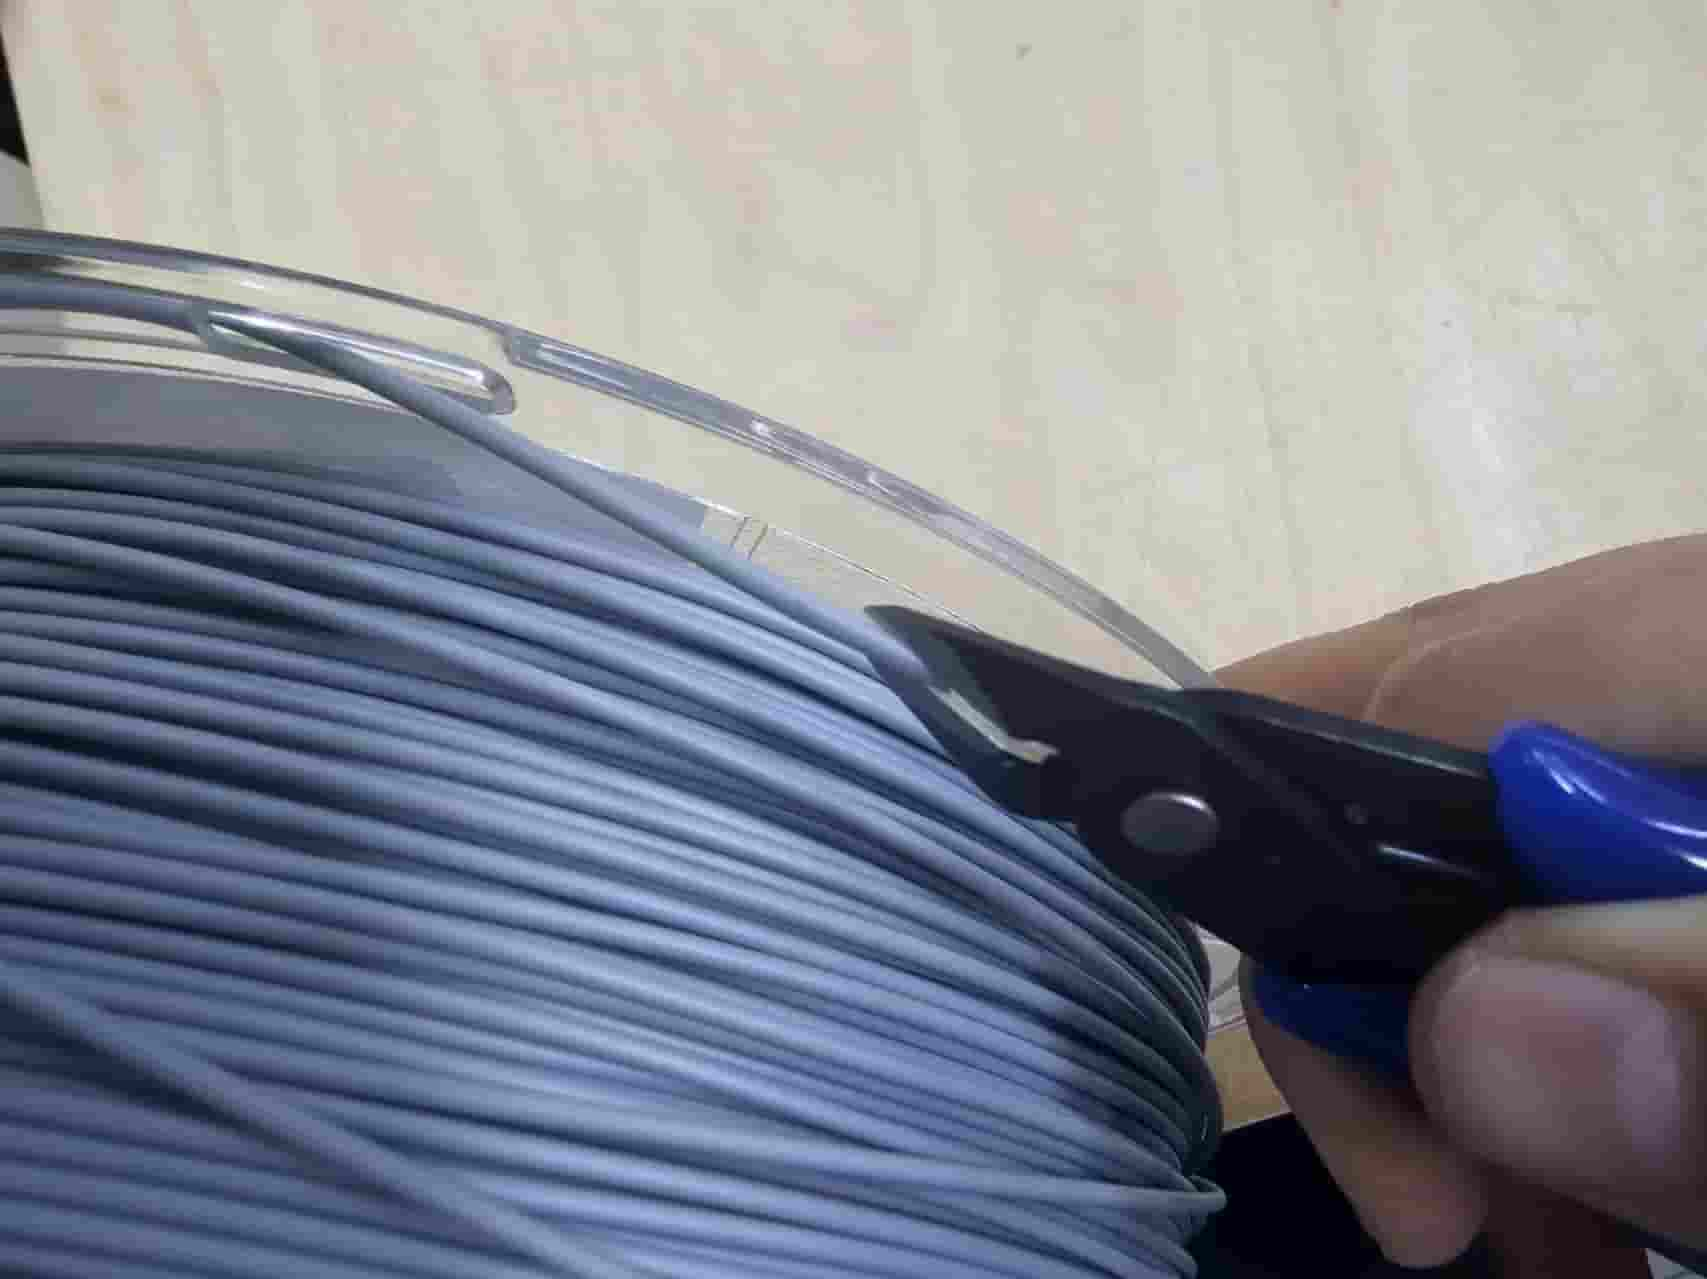
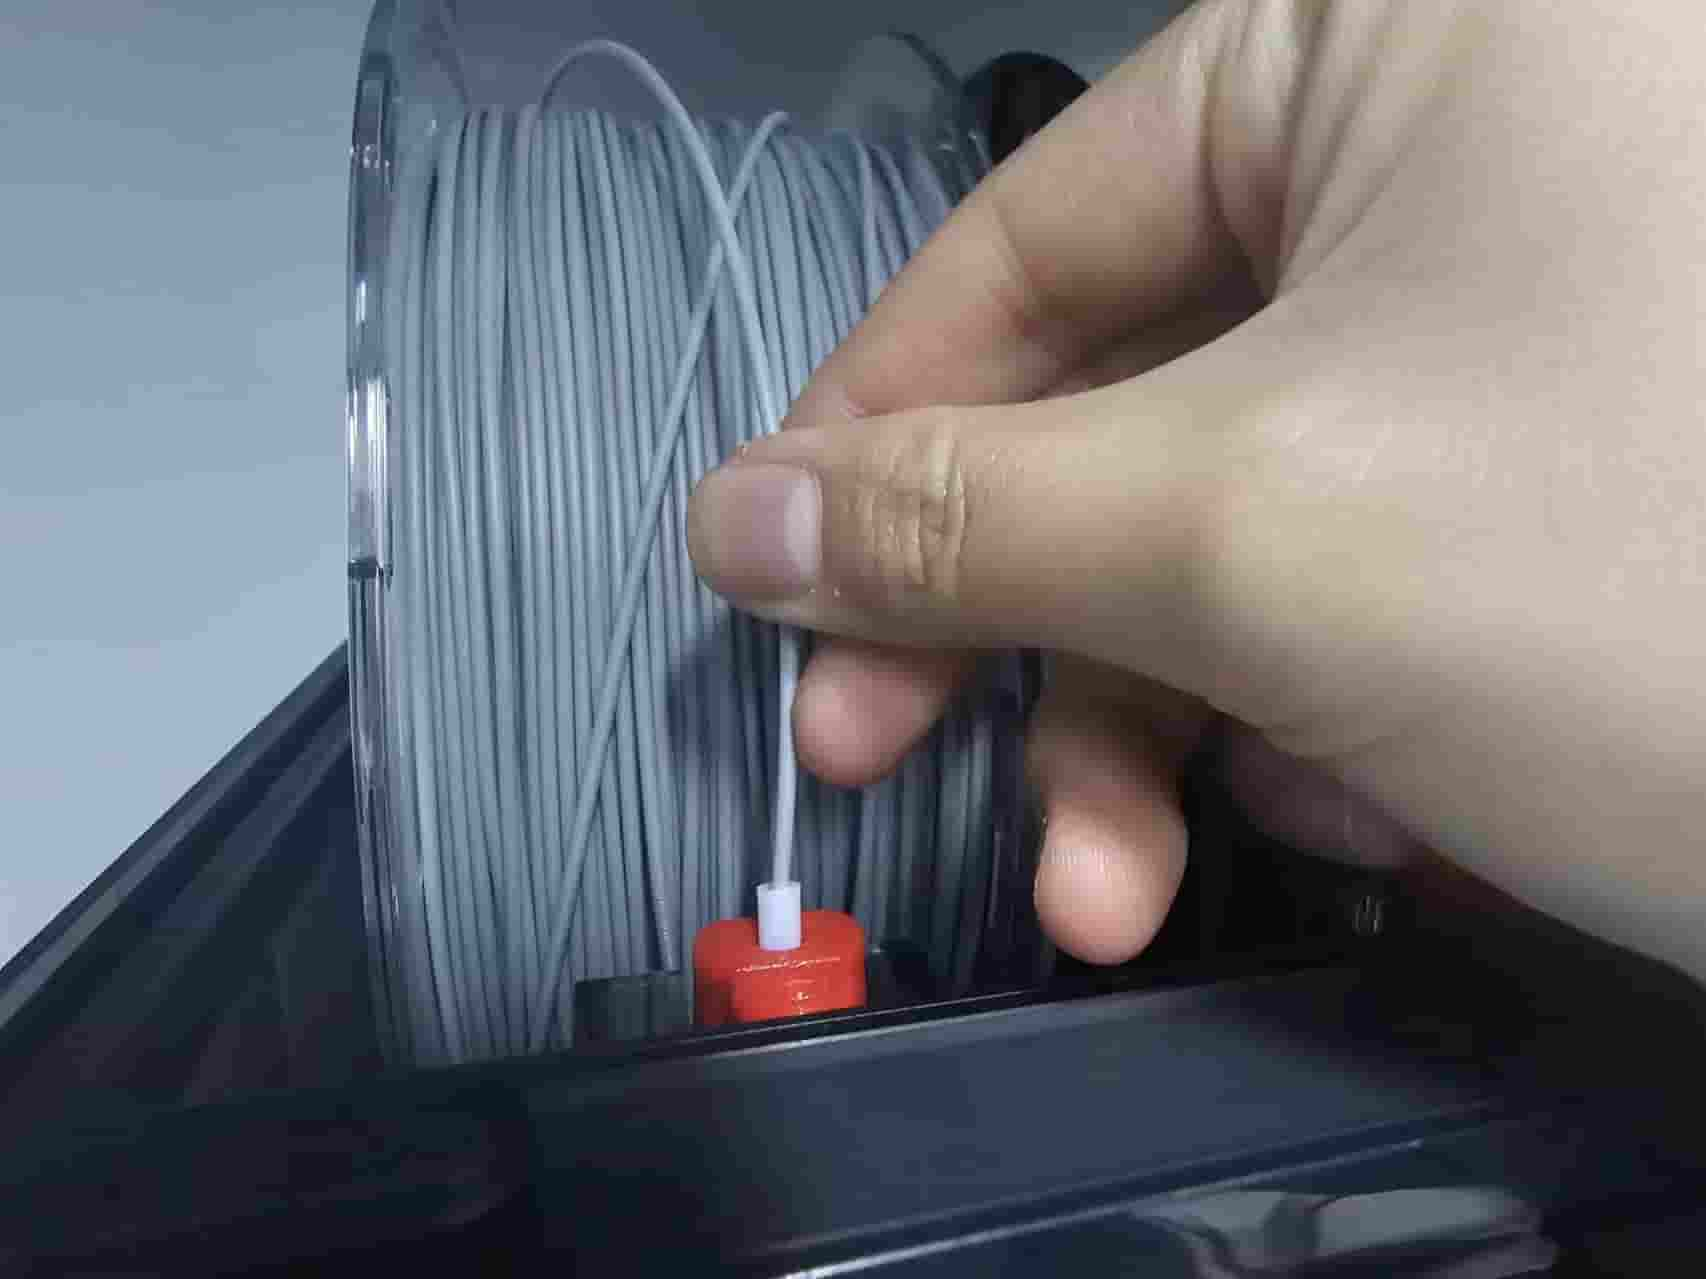
2.Choose PETG material, trim the nozzle to a pointed angle for easy feeding, and then insert the material head into the feeder.
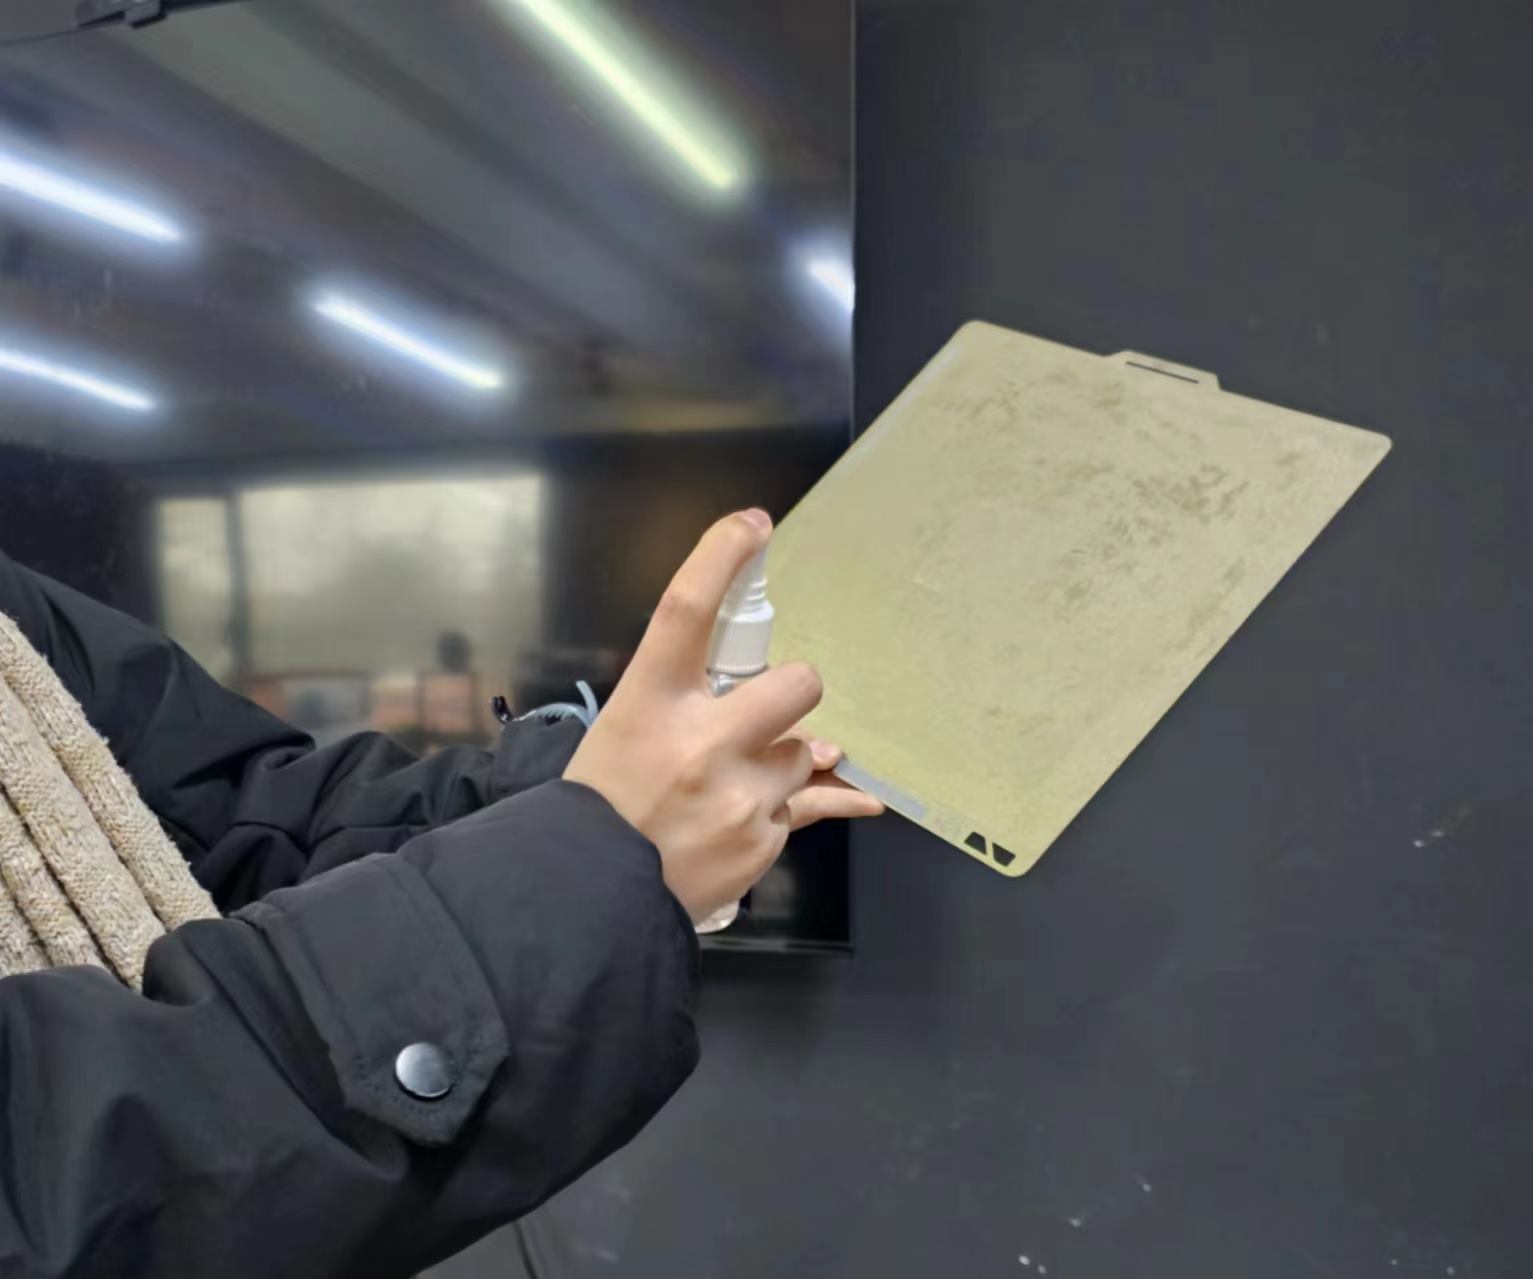
3.Spray adhesive onto Textured PEI Plate from a slightly greater distance to ensure even distribution of the glue on the surface. Repeat the process 1-2 times.
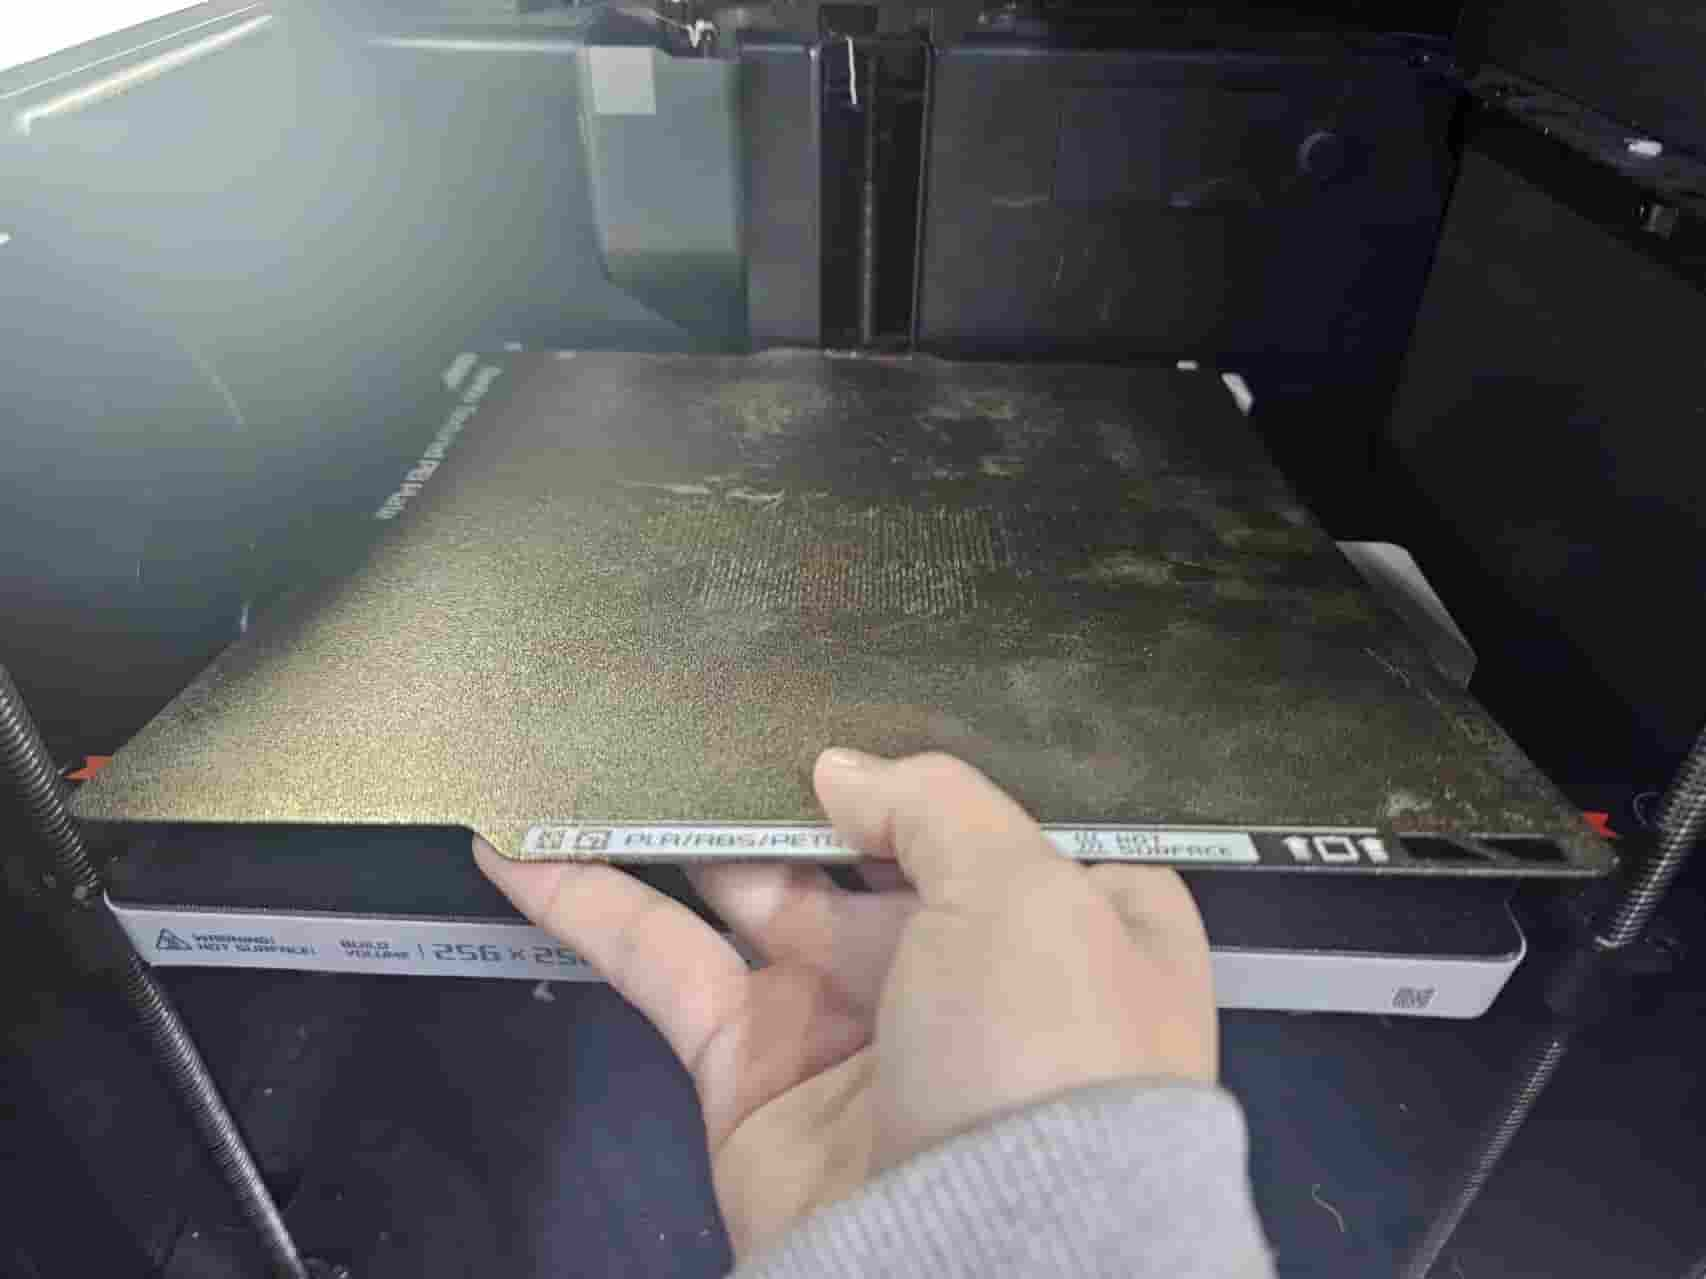
4.Place Textured PEI Plate onto the heated bed, starting with the front two corners, and gradually lower it into position.
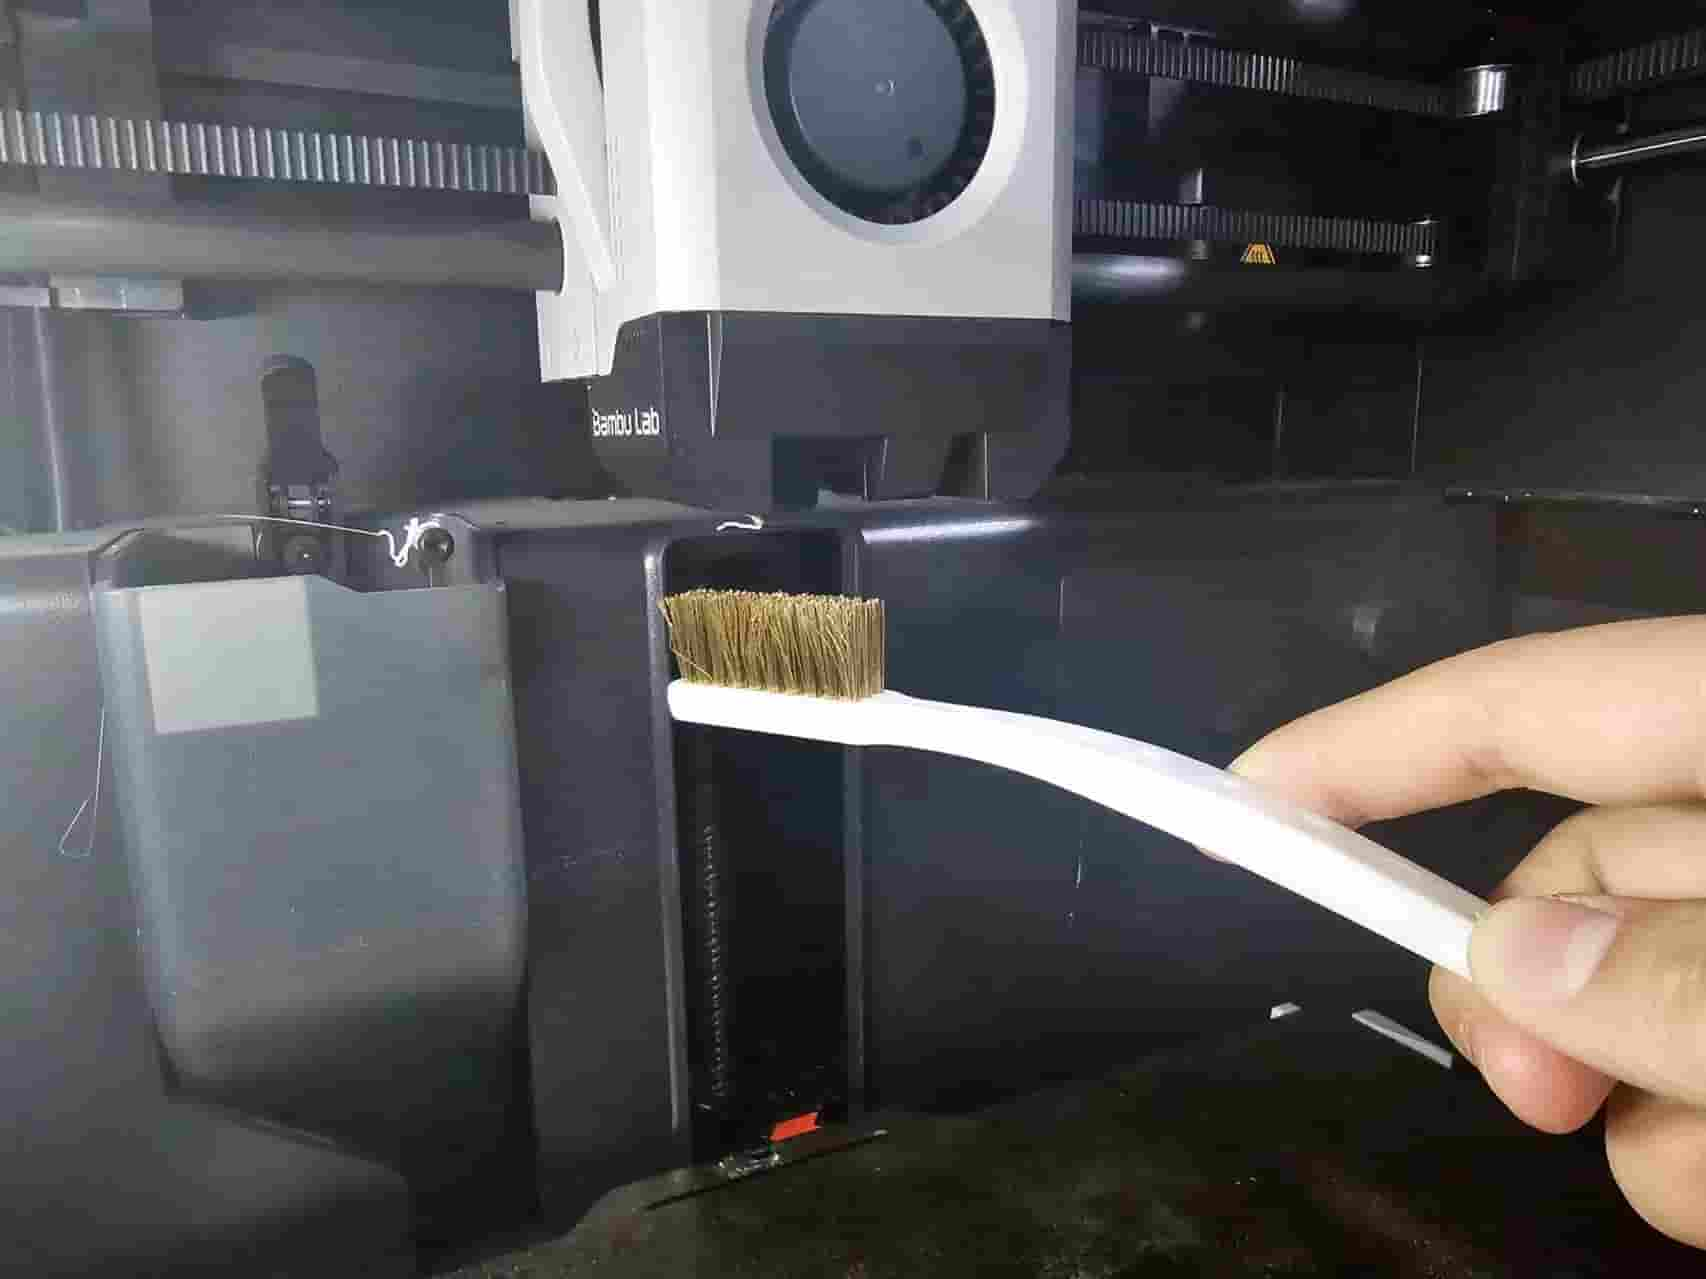
5.Heat the nozzle to 200°C and clean it thoroughly.
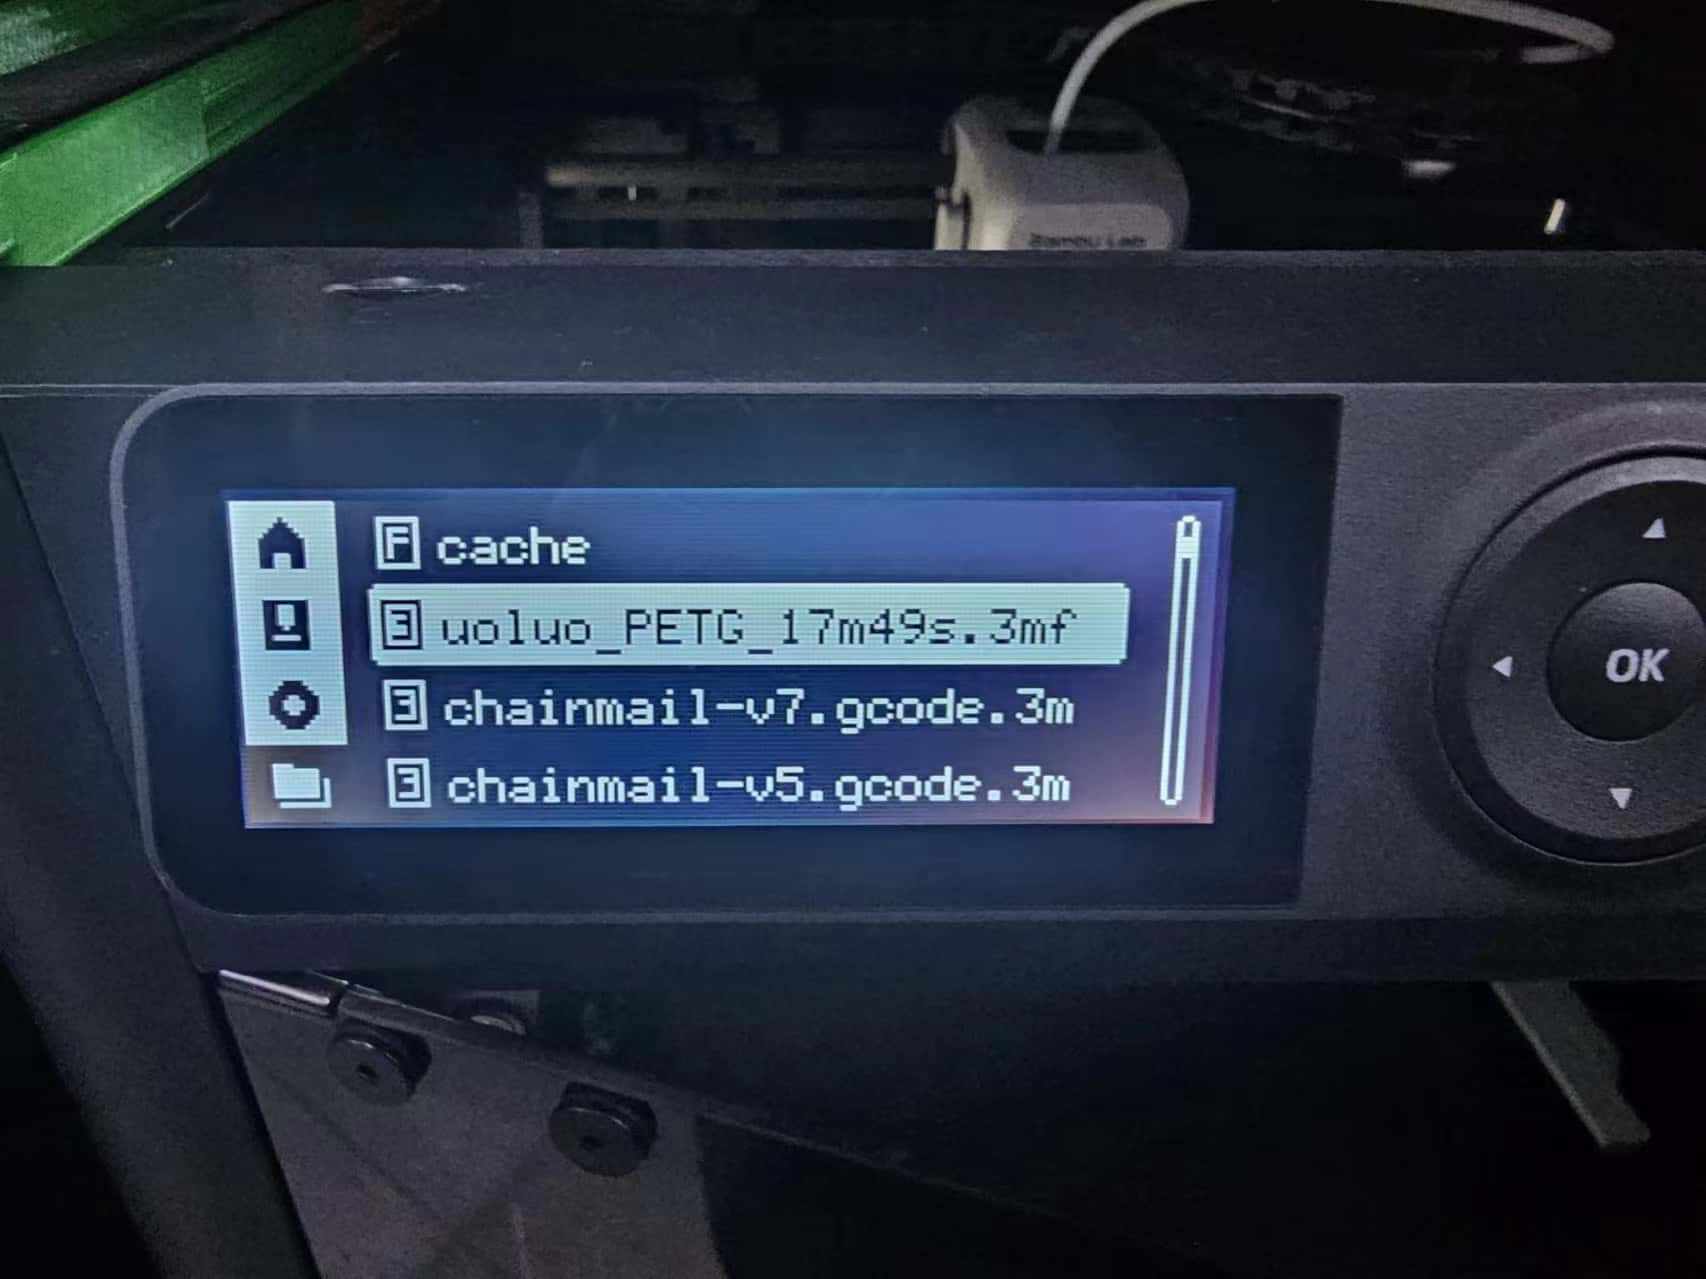
6.In the file, locate your document and observe that its total printing time is only 17 minutes _ very fast!
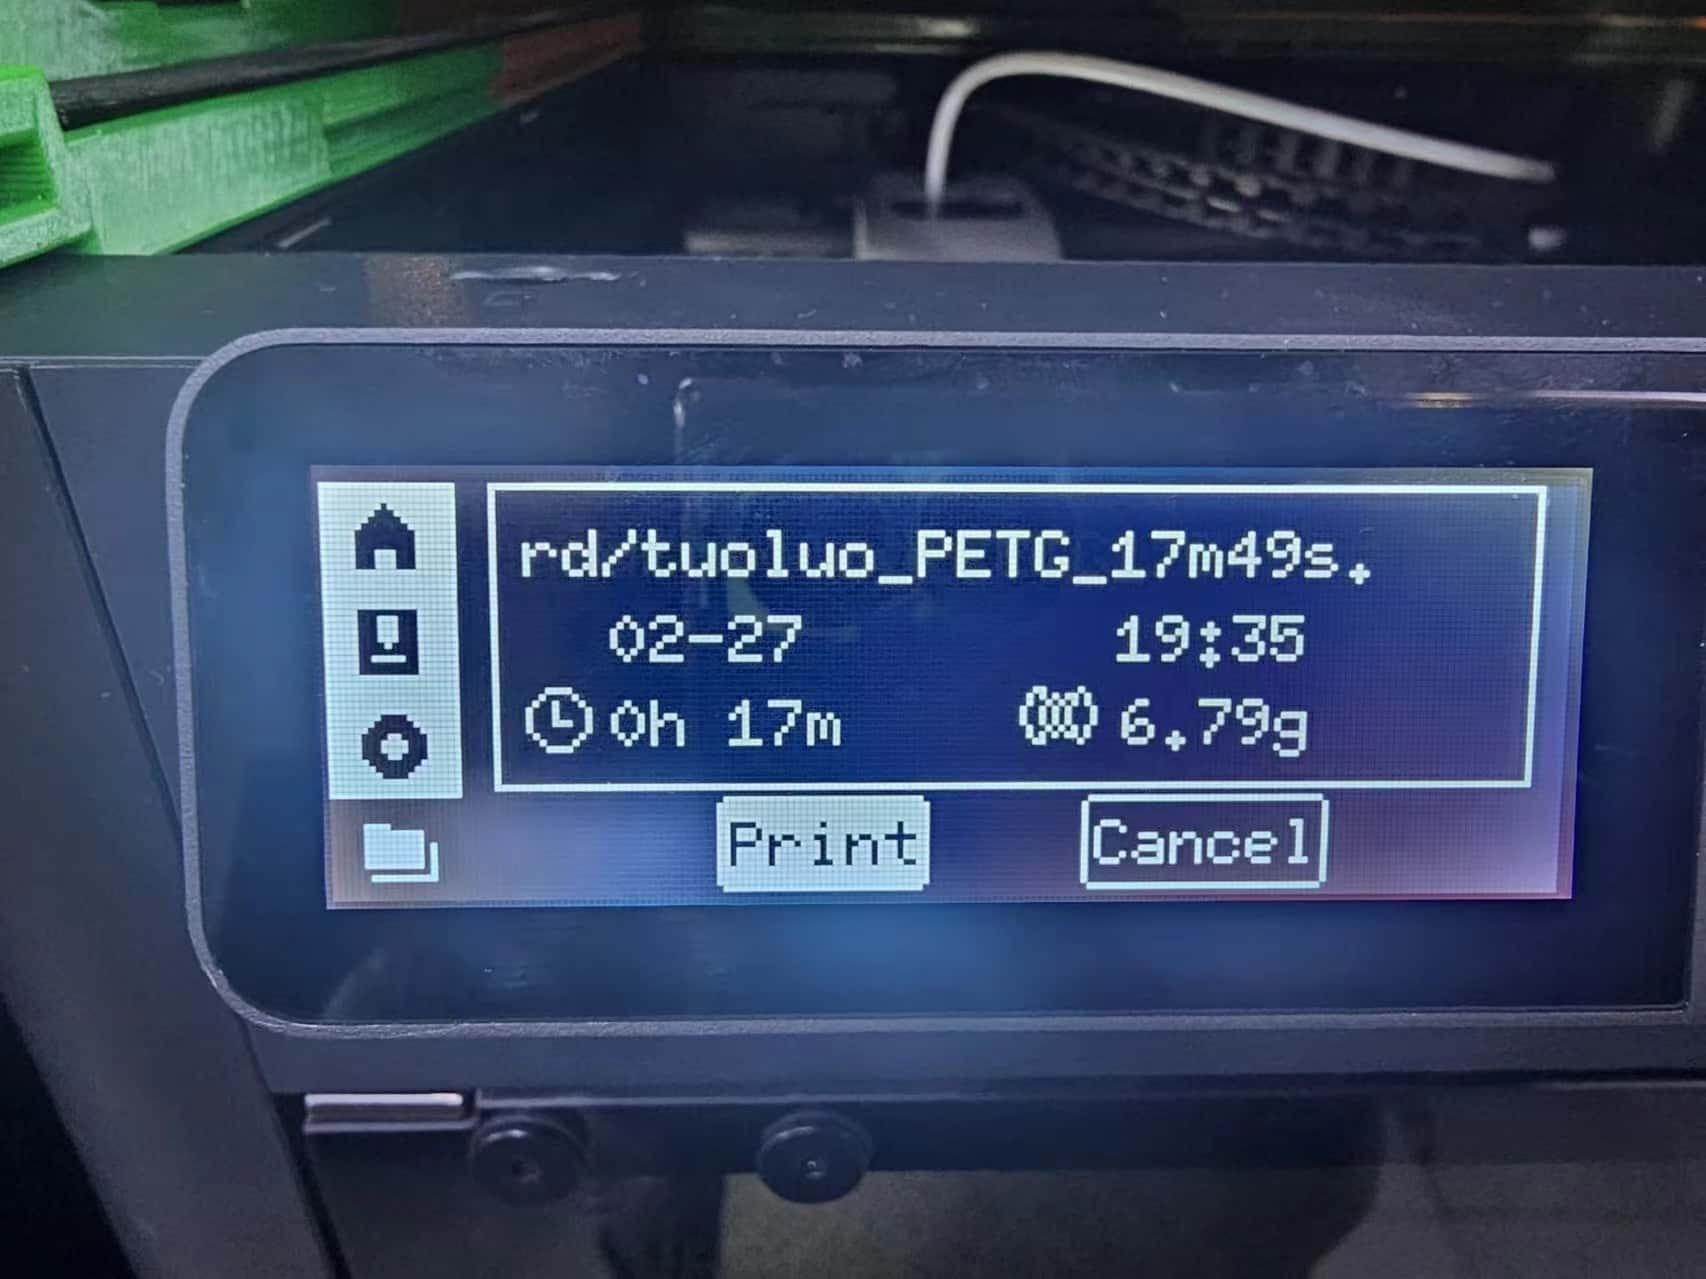
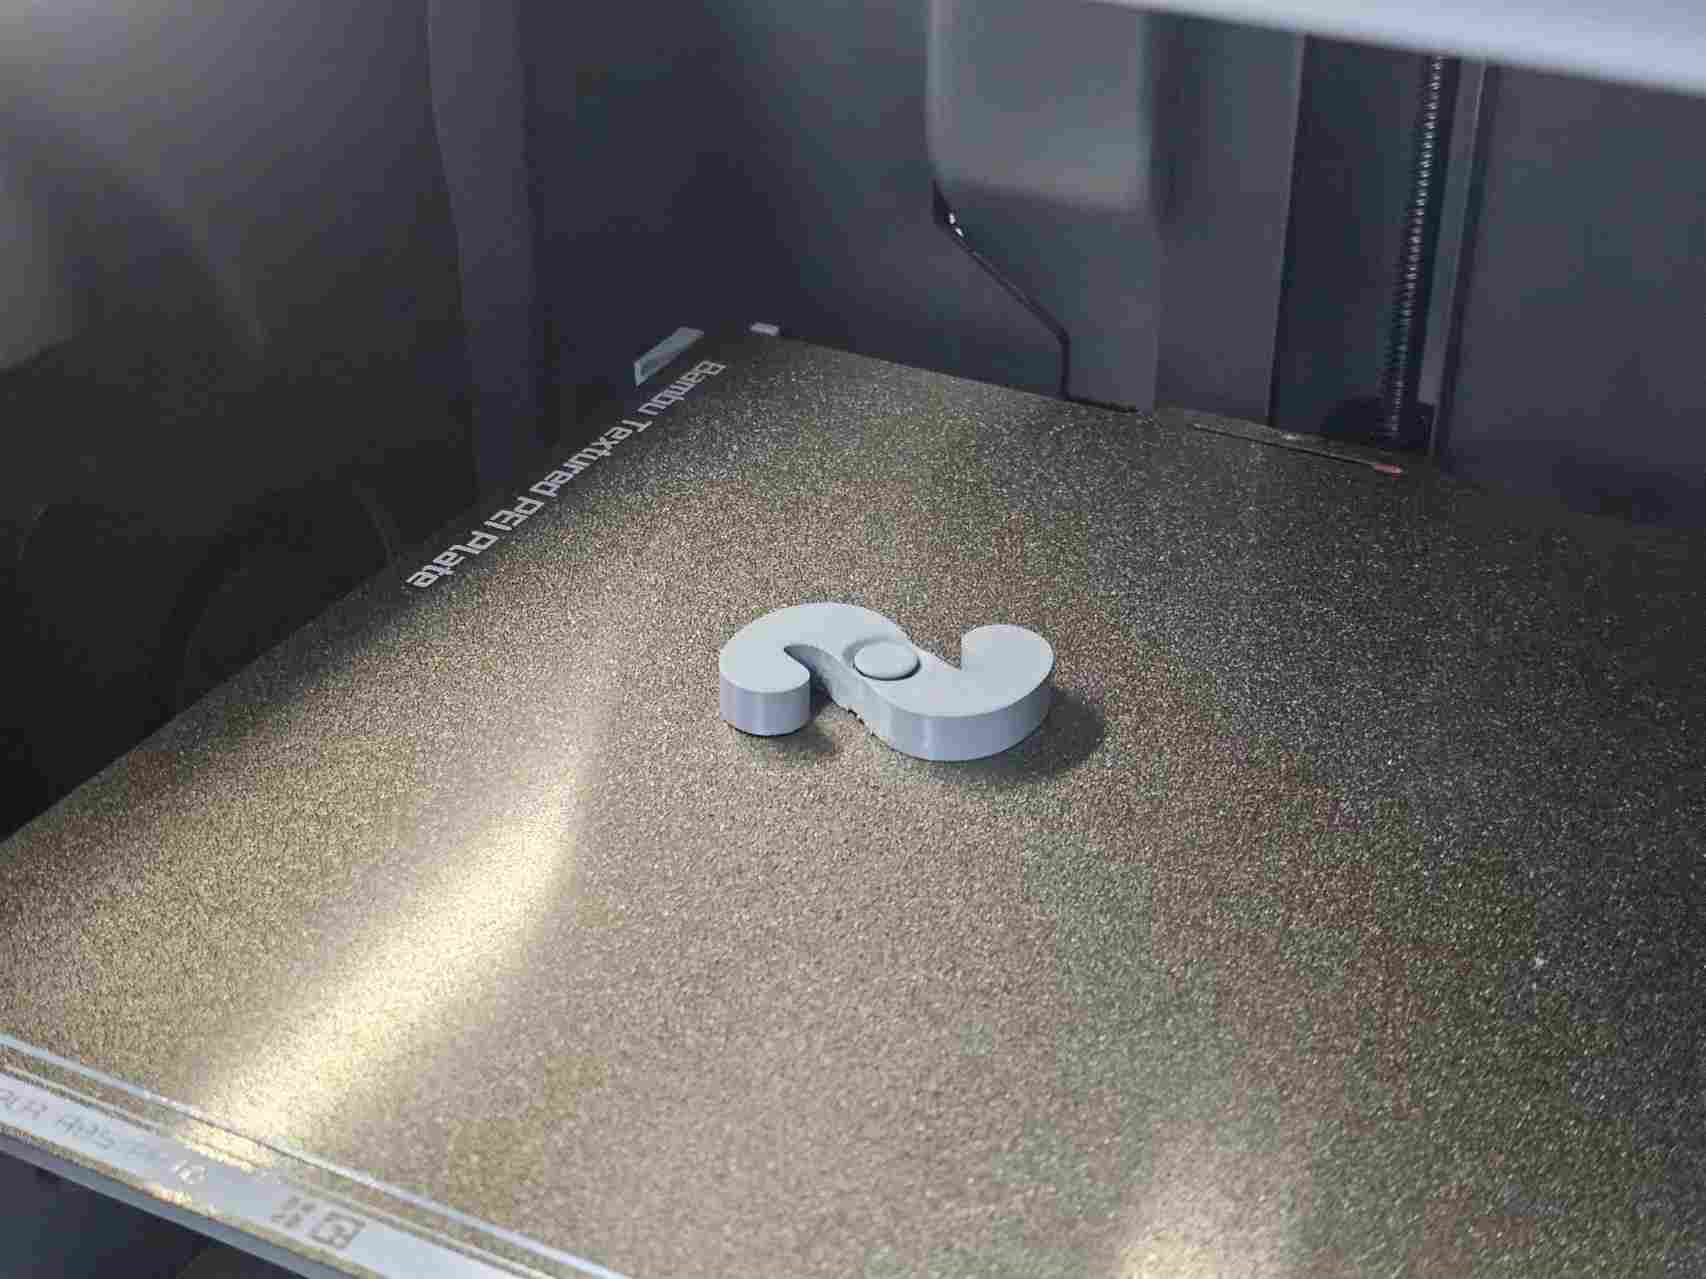
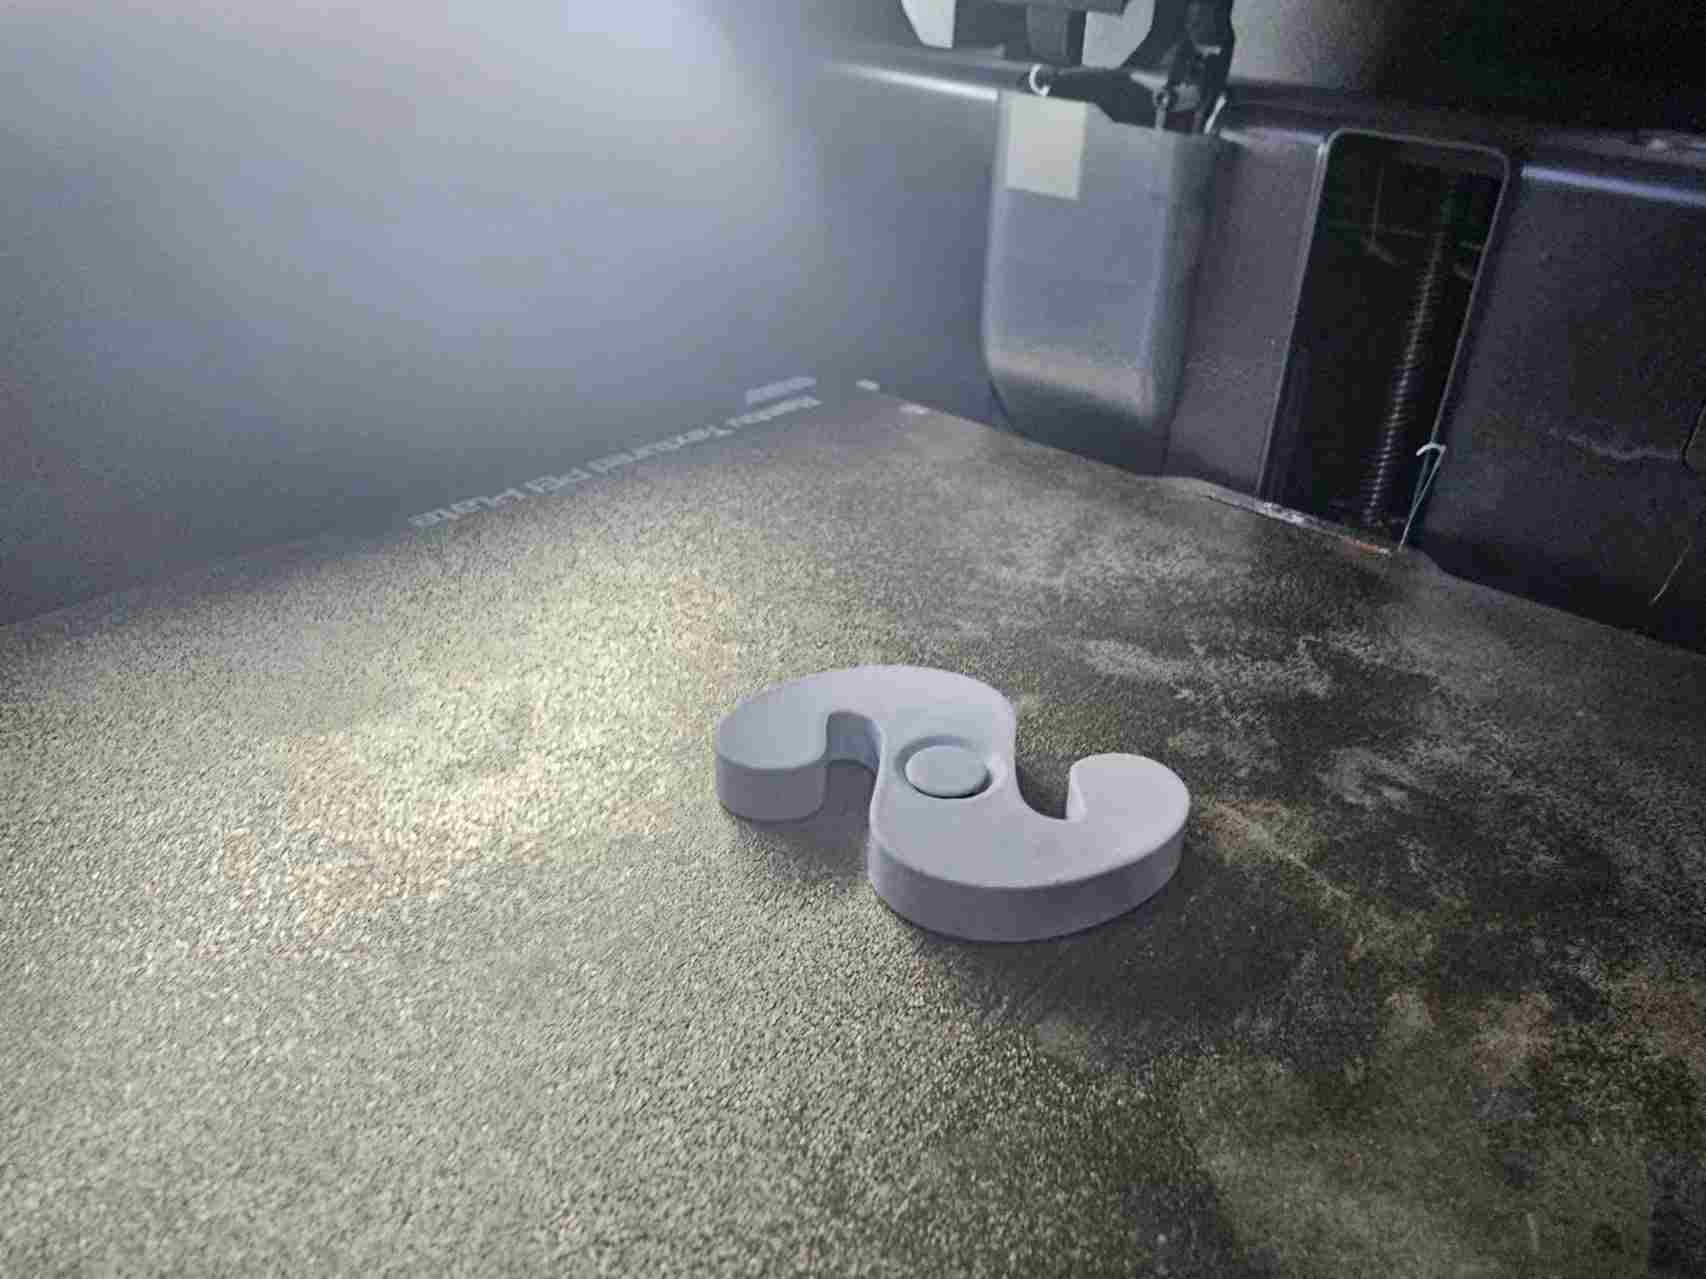
1.First printing
This is the issue I mentioned earlier – the walls are too thin, and there are overhangs in the middle, resulting in a suboptimal printing outcome.
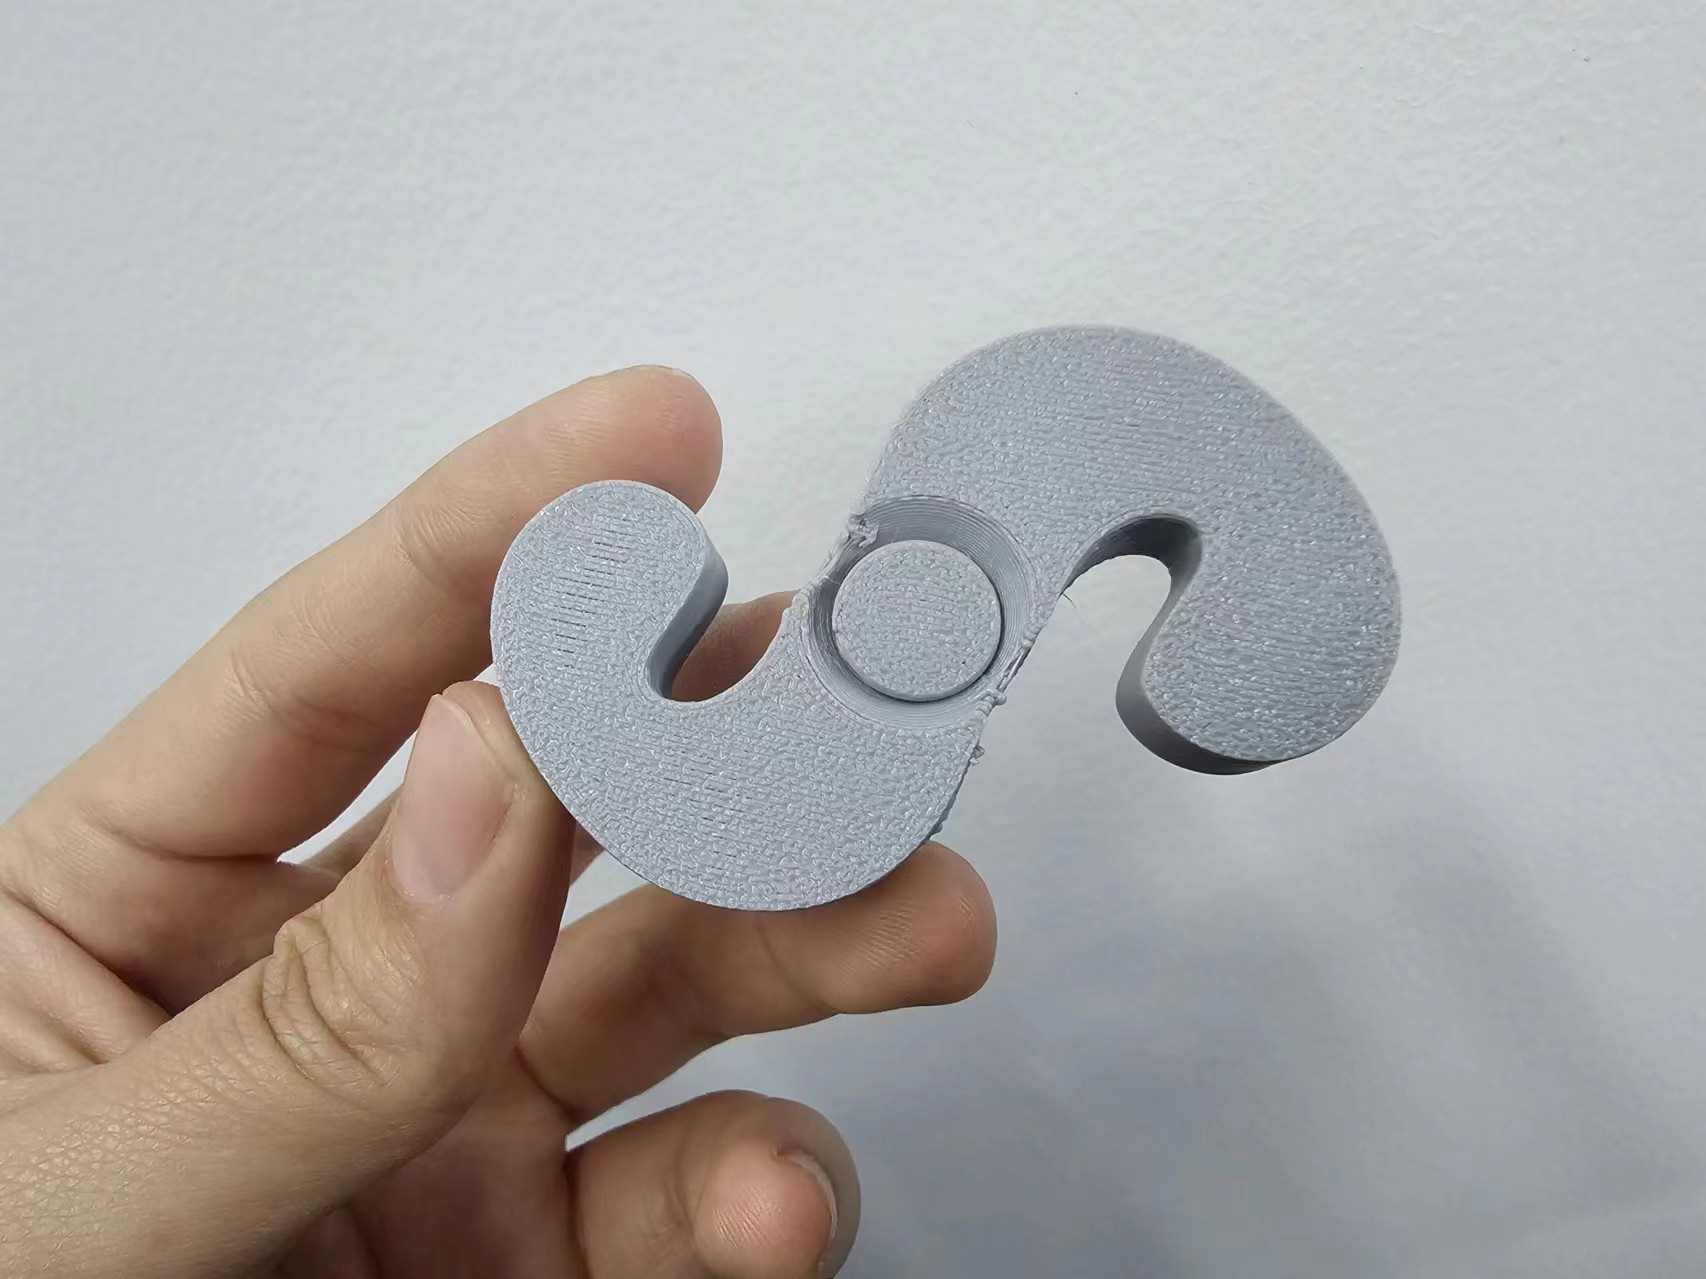
2.Second printing
Extremely perfect! It's fun! A child saw it and said they really liked it, so I gave one to them! Happy moments!
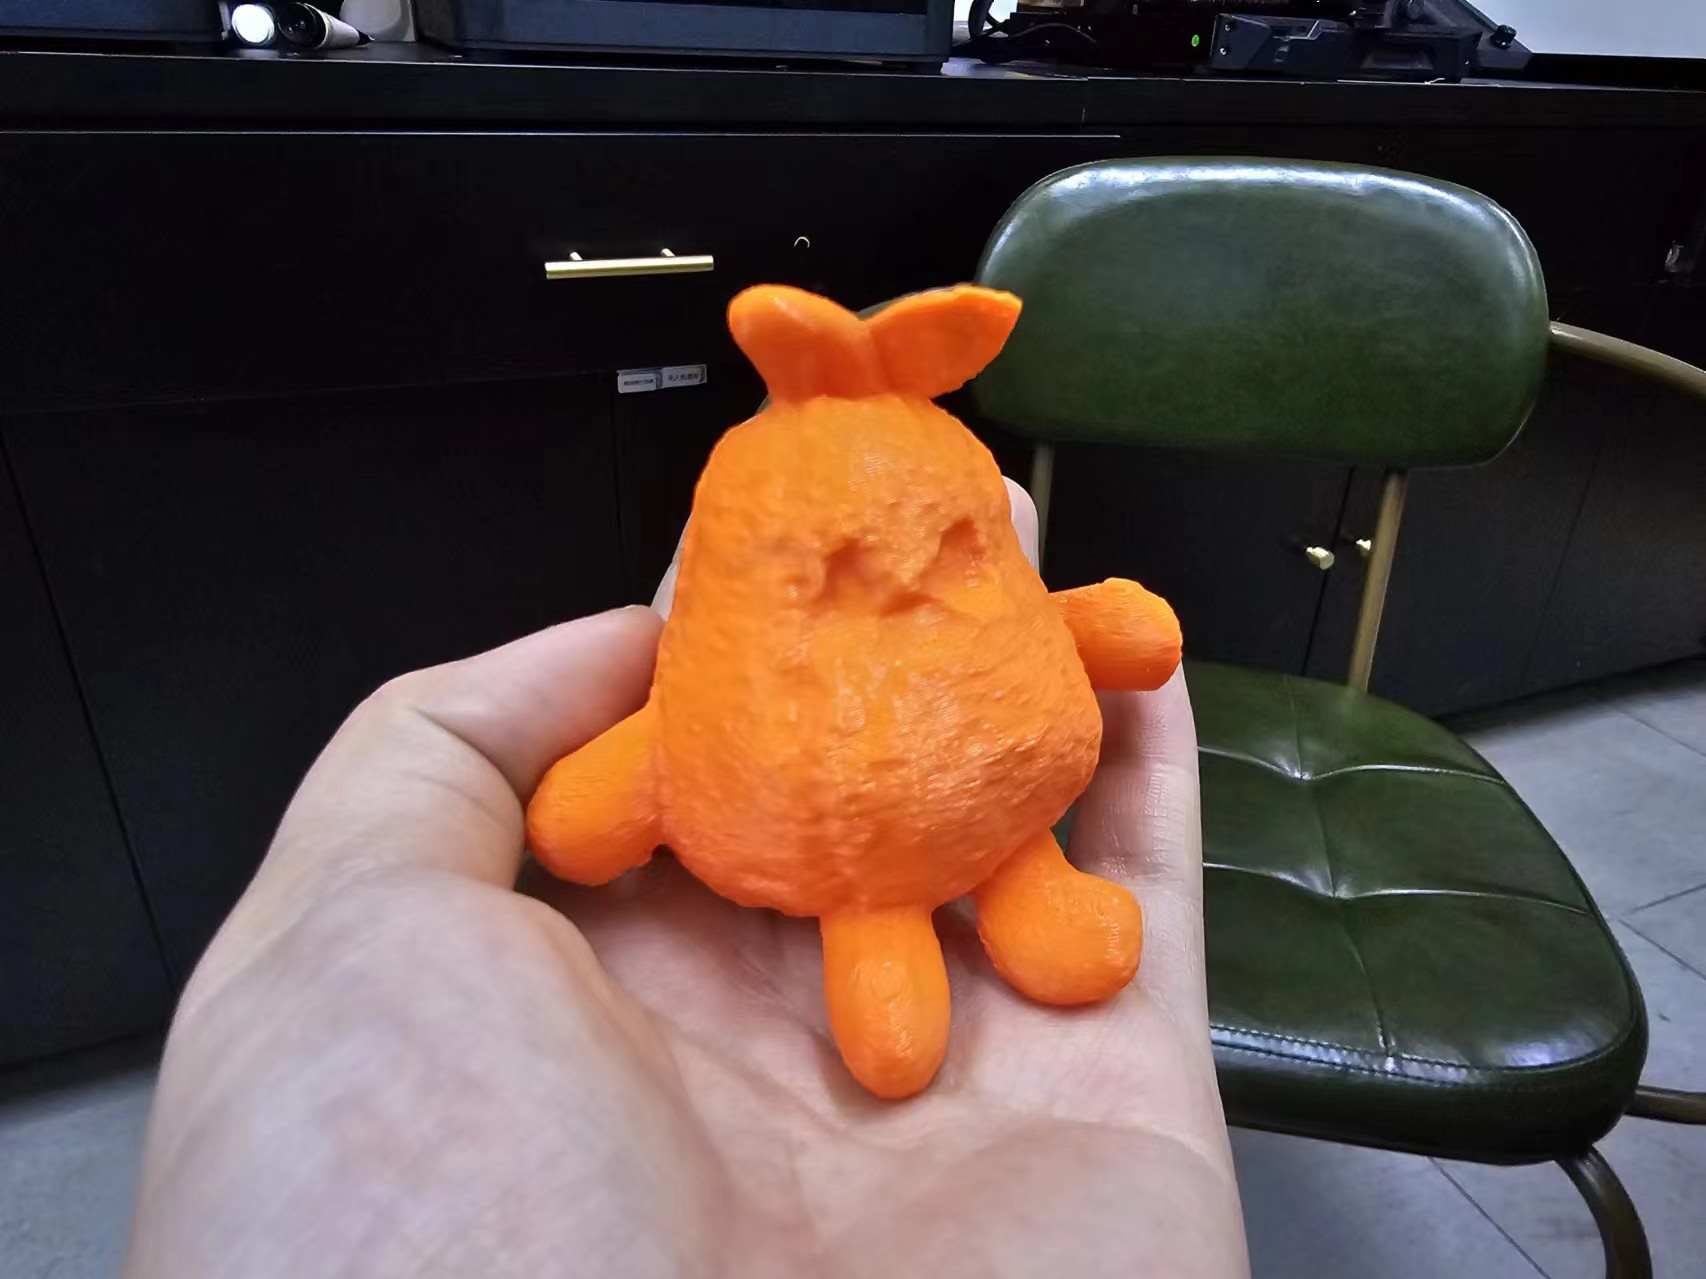
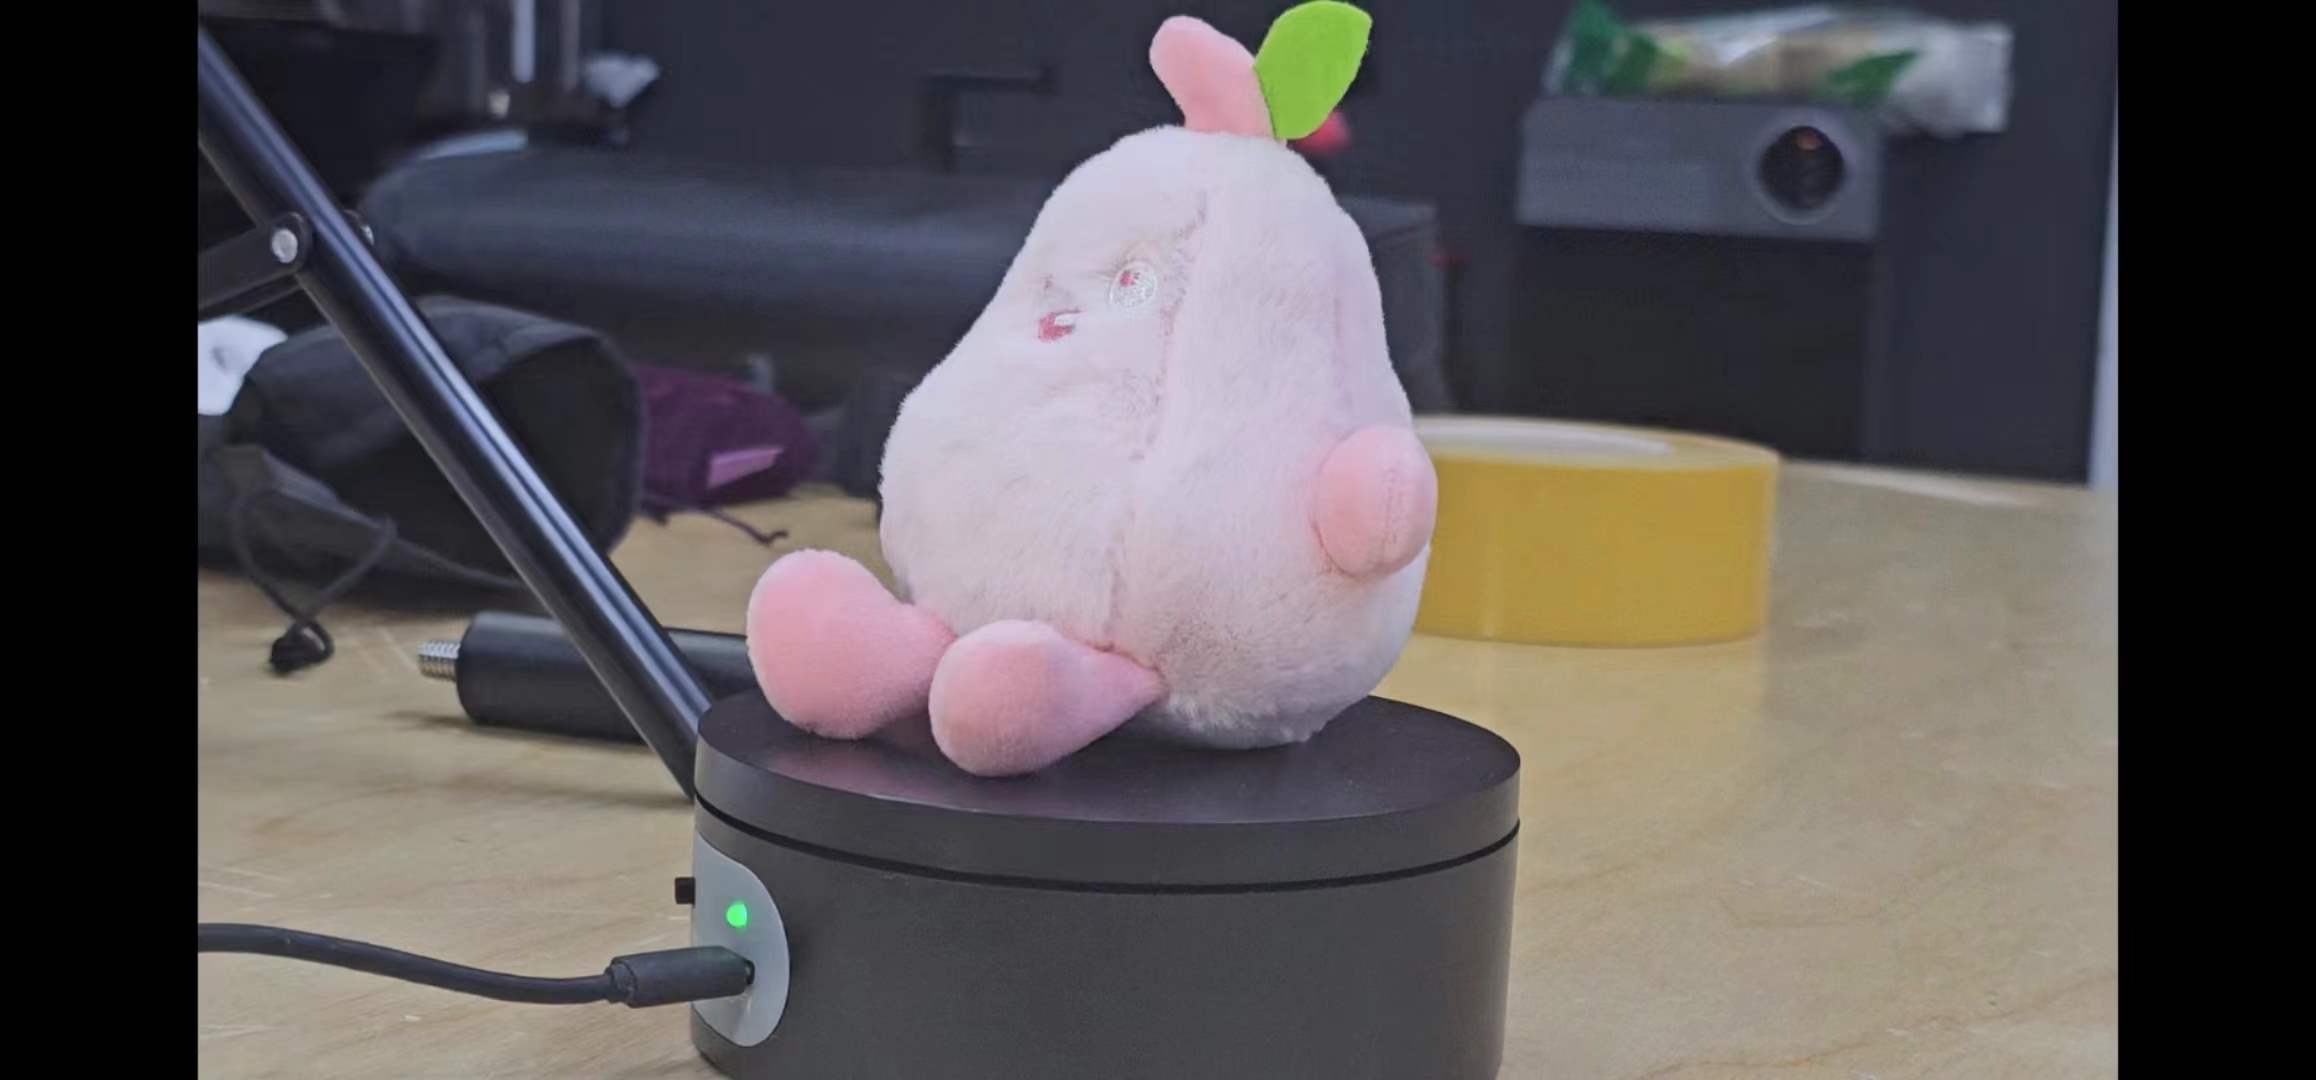
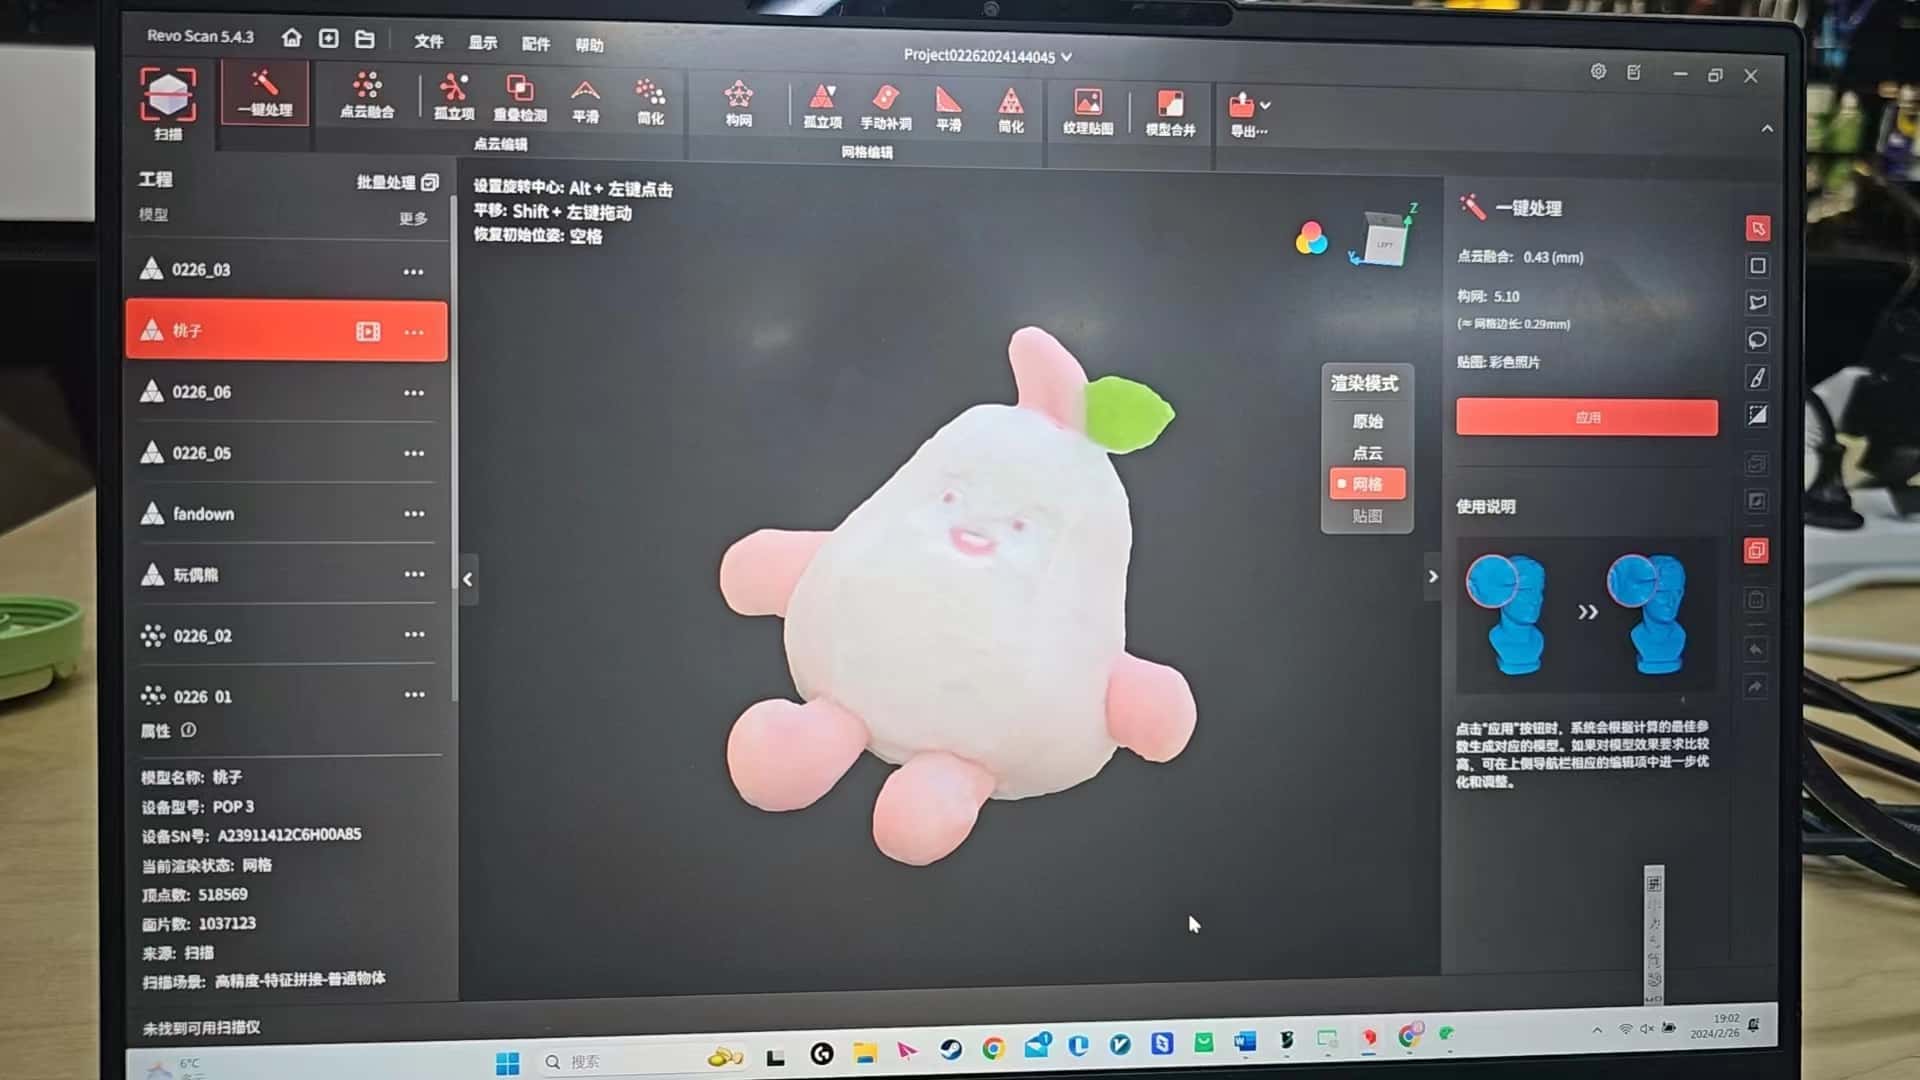
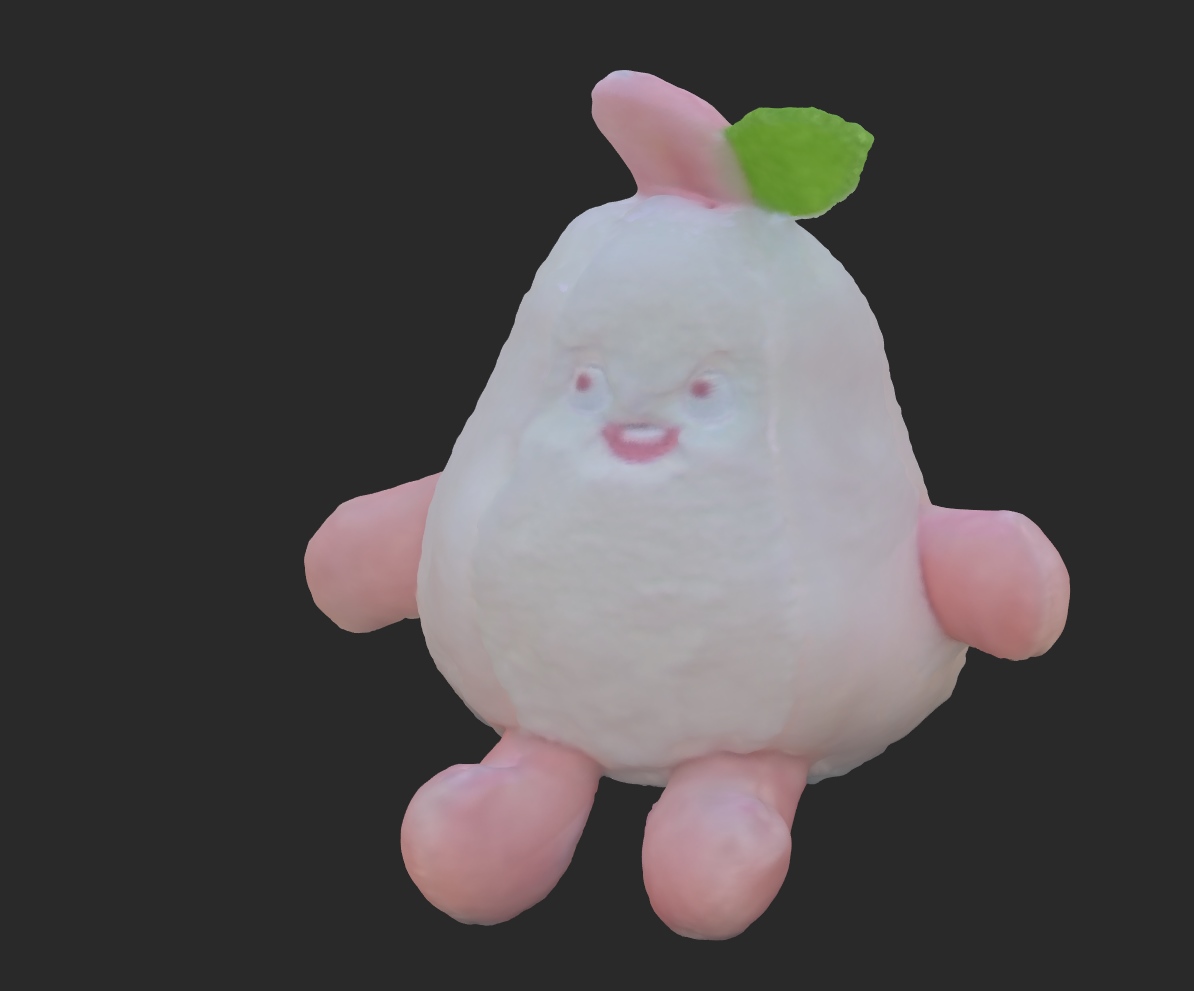
1.3.2 3D Scanning —— Revo pop3
- 3D Scanning
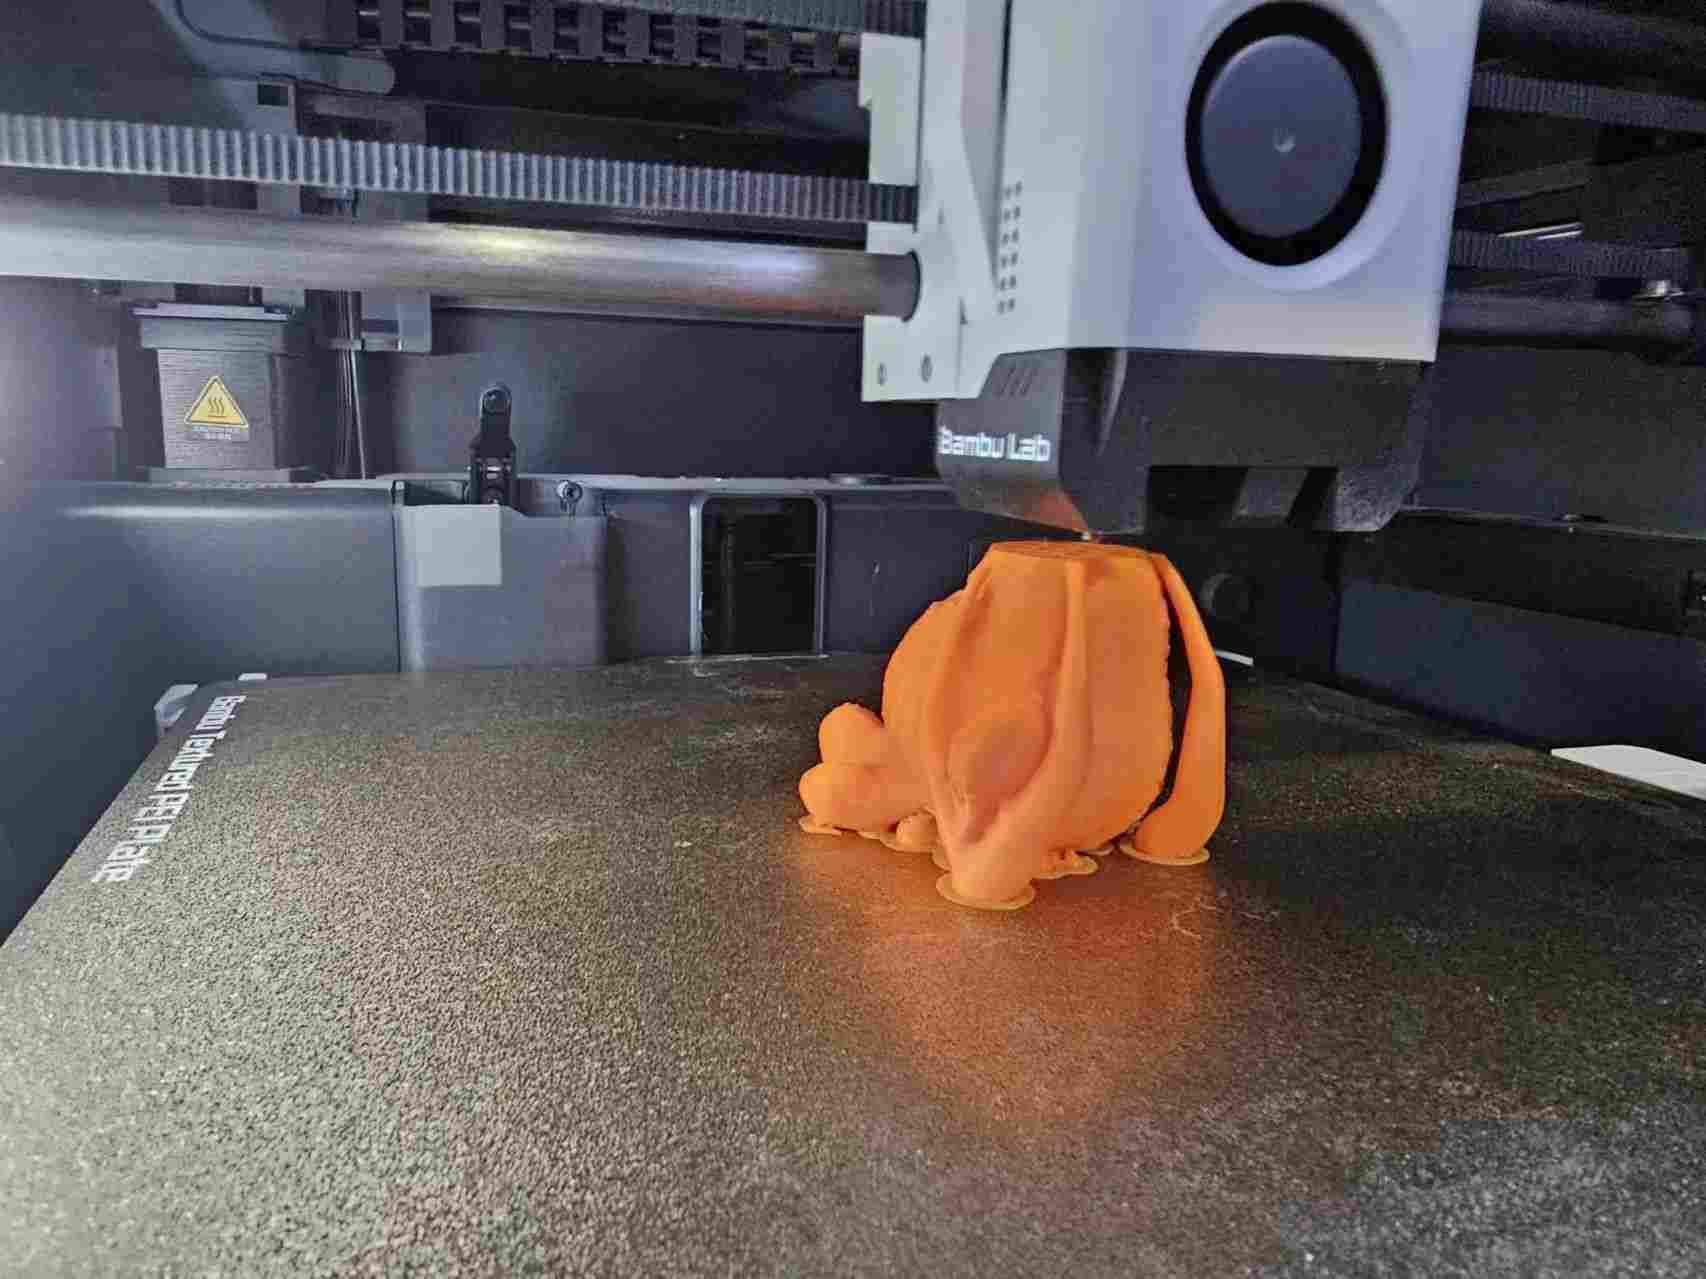
- 3D printing
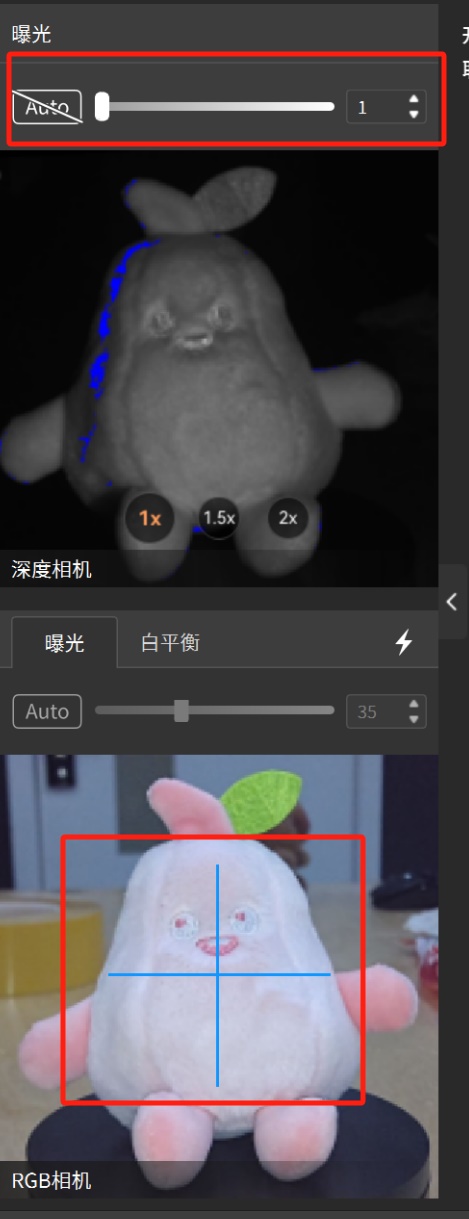
1.Download the software, connect the scanner and the rotating platform, and then enter the software to calibrate.
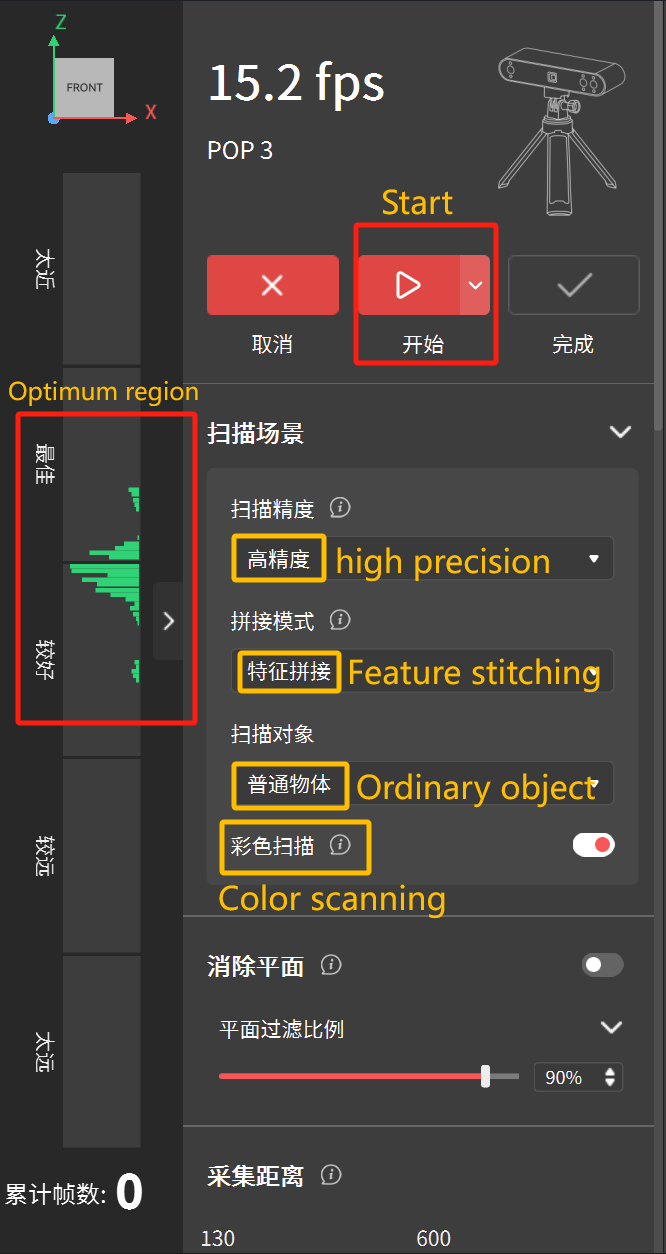
2.Place the scanned object in the middle of the RGB camera, adjust the exposure as needed (using Auto in indoor conditions), and then adjust the settings on the left side of the screen.Then select [high precision]——[Feature stitching]——[Ordinary object]——[Color scanning], Now you can start scanning!
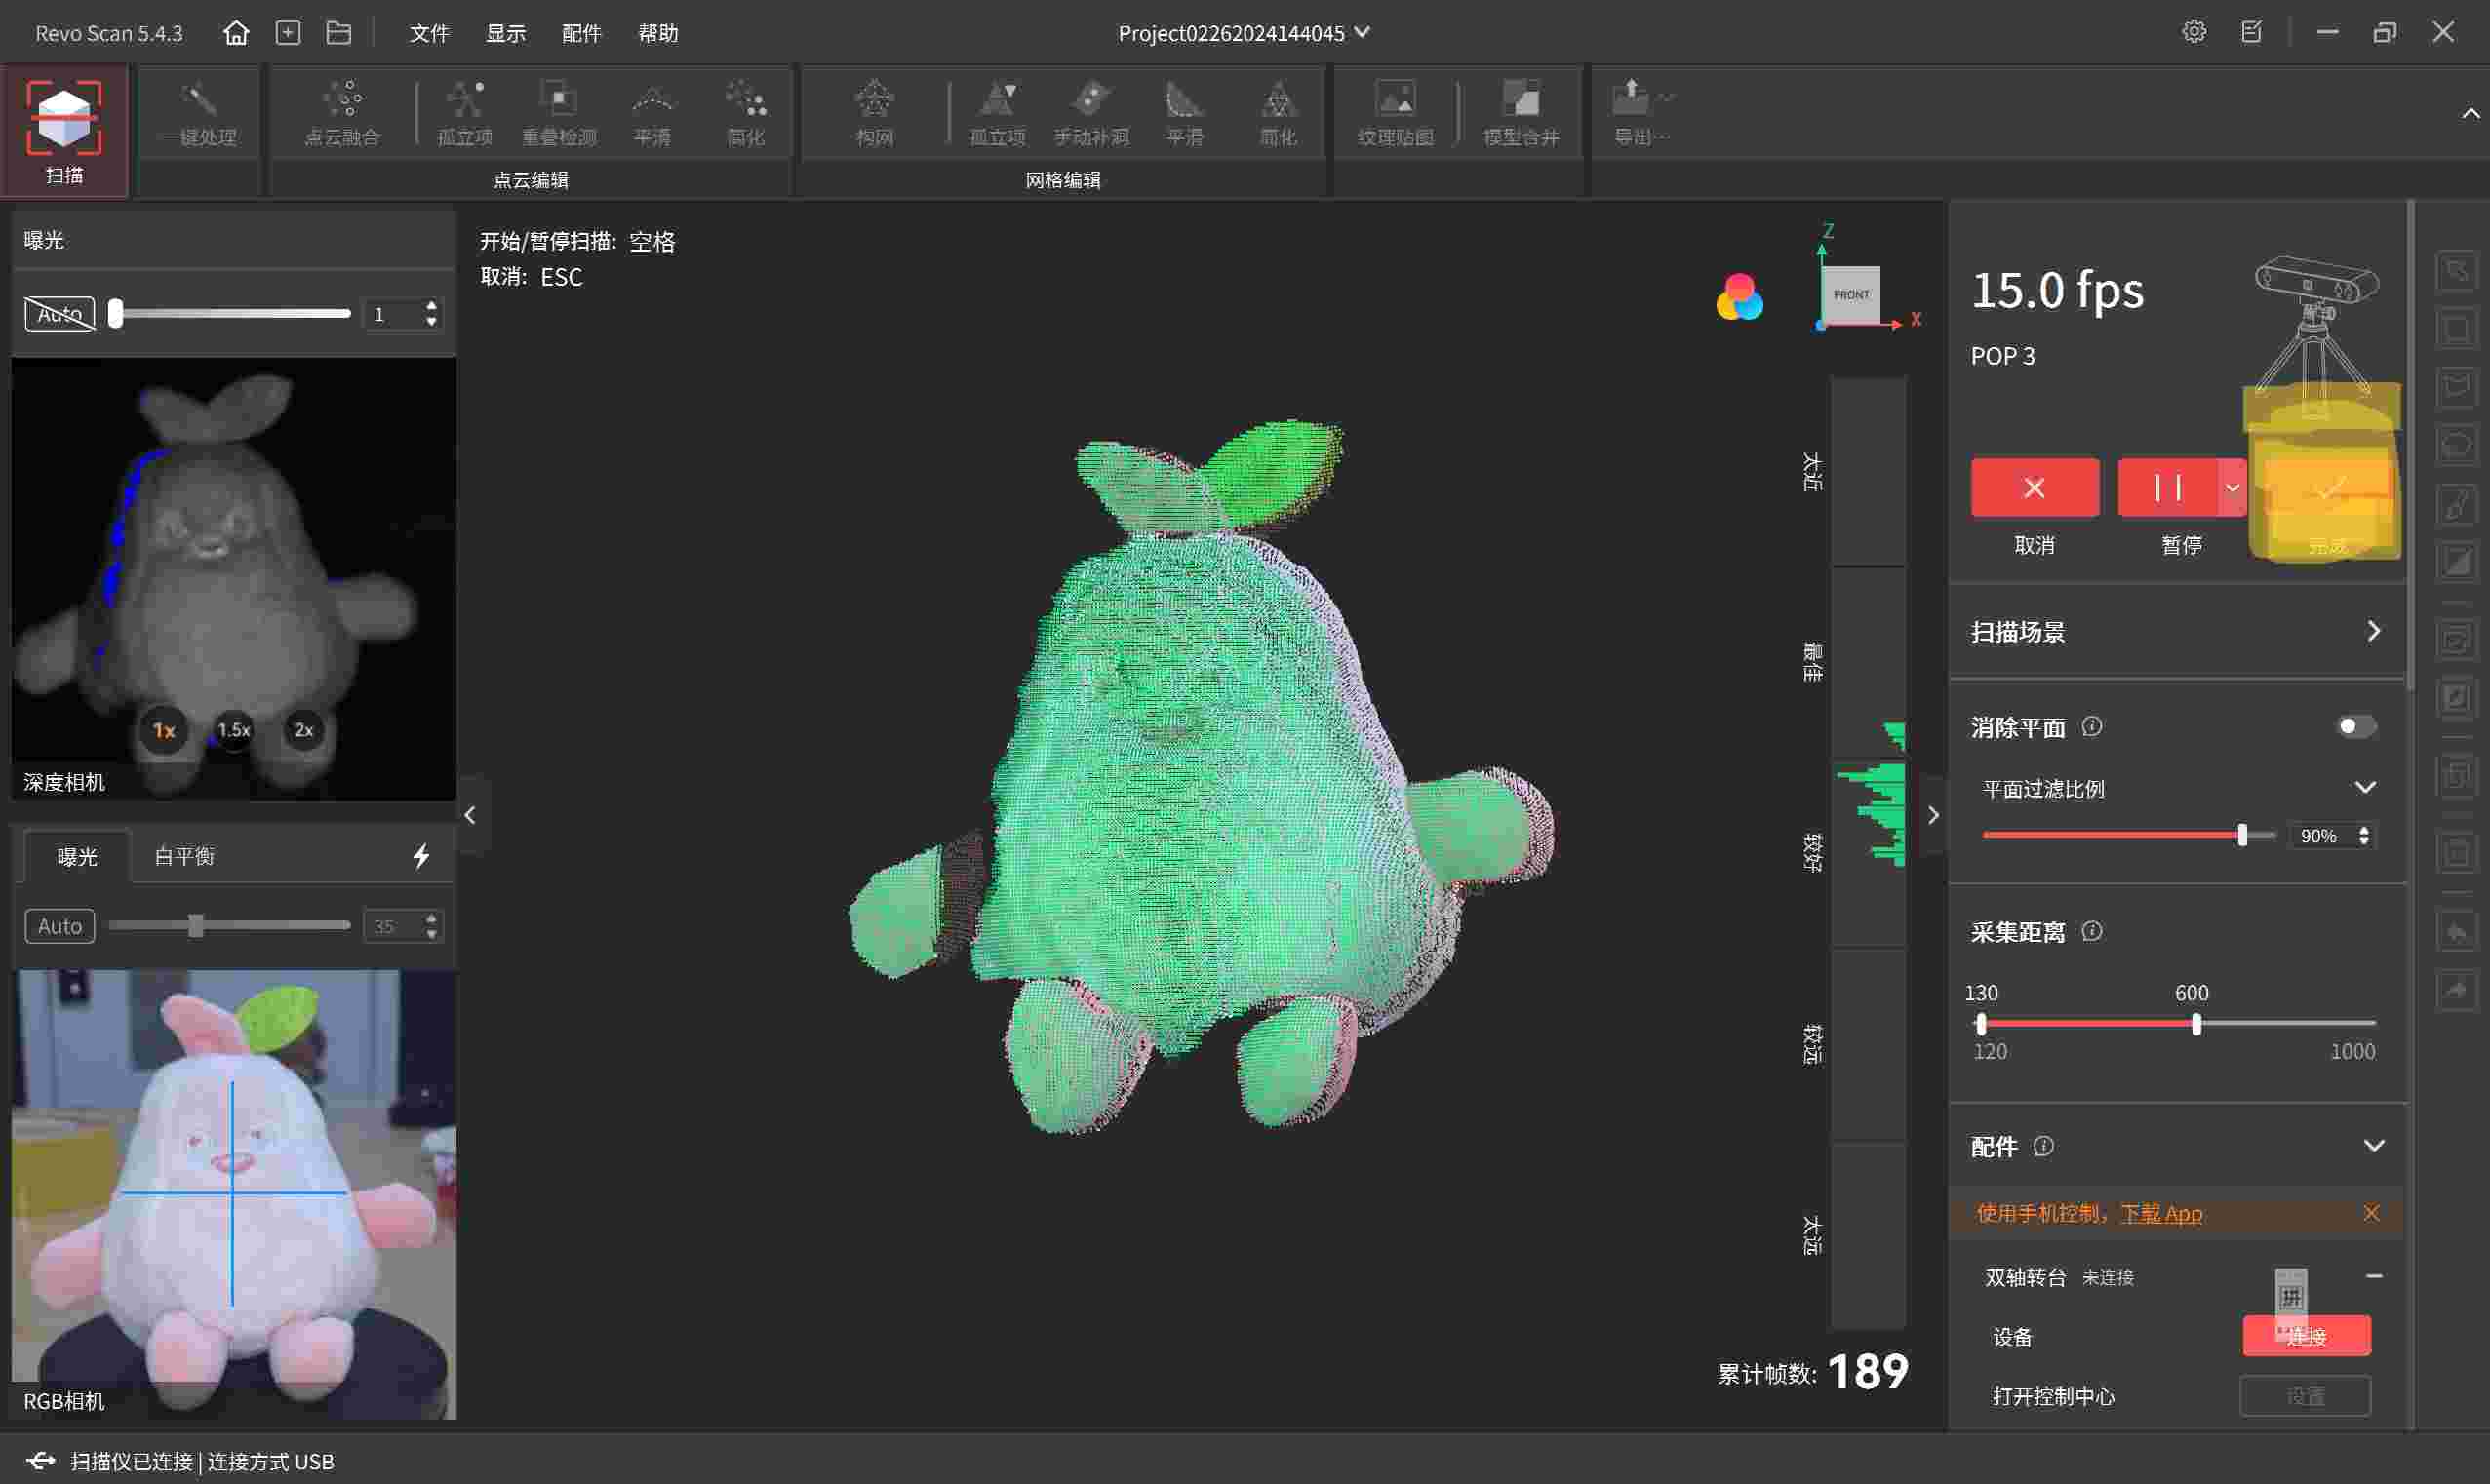
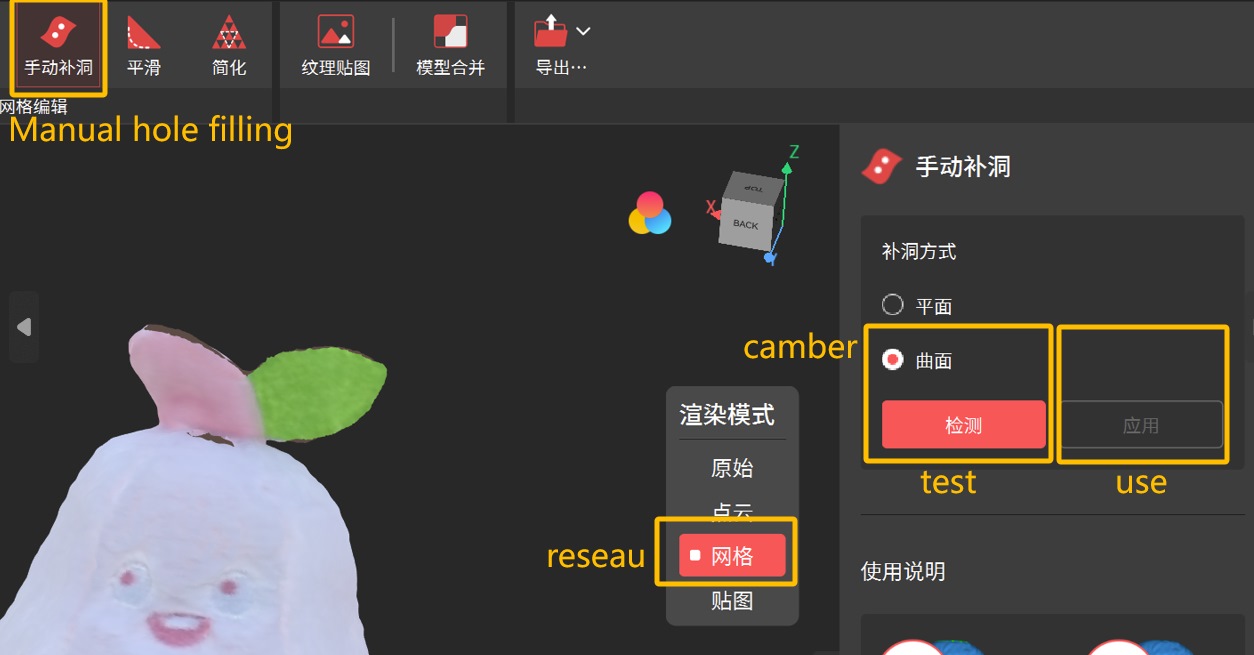
3.After scanning, the data is in the form of a point cloud. So, I performed one-click processing to create a mesh. After a long wait, it's finally processed.Then click [Manual hole filling]——[reseau]——[camber]——[test]——[hole]——[use]

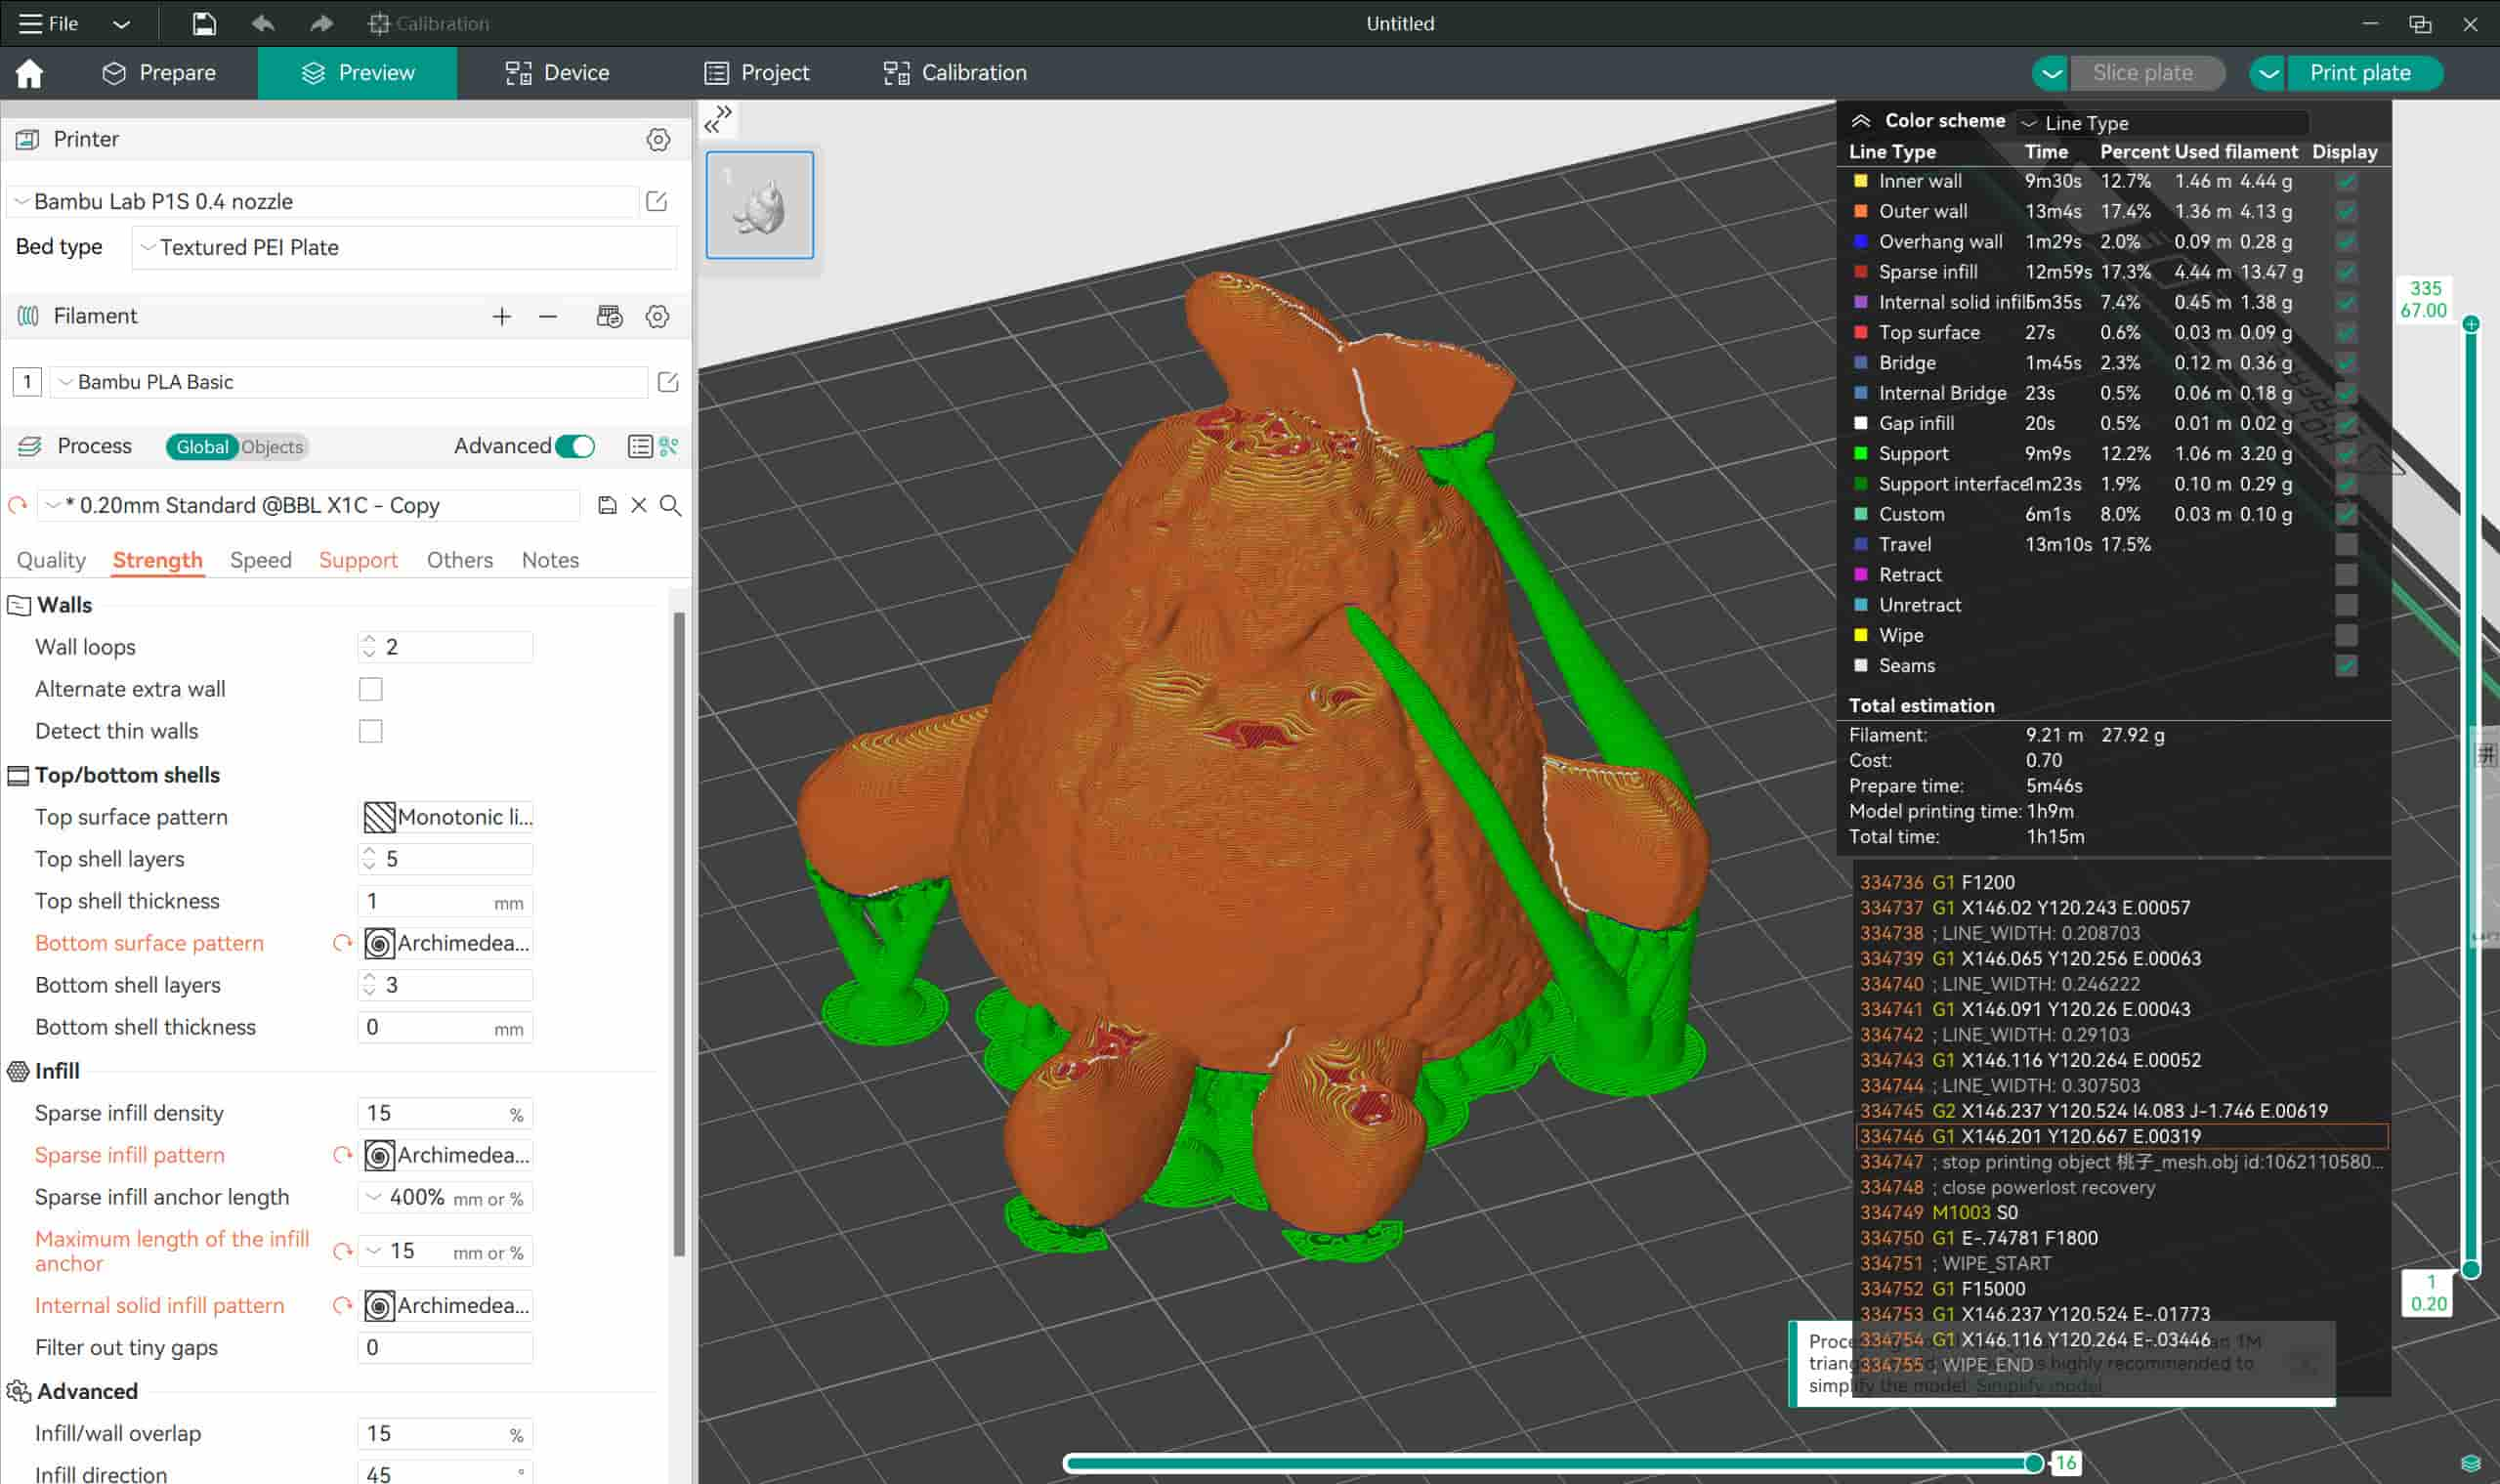
Type:PLA
Flow ratio:0.92
Print temperature: First layer:220 Other layers:220
Textured PEI Plate: First layer:60 Other layers:60
Support:tree(Auto)
Surface pattern:Archimedean Chords
Printing time:1h9m