5. 3D Scanning and Printing
This week we took up 3D printing and scanning. In our Lab we have a lot of 3D printers and a lot of people using them, so I have been around it some time. 3D Scanning was entirely new to me, even though we have had 3D scanners at the lab for some time.
Group Assignment
I had not done much with 3D printers, the first somewhat complex 3D printed parts had been while working on my bachelor's thesis a couple of months ago. Since I was somewhat overwhelmed by the amount of settings the process offers, I first tried to understand and learn the common best practices used at our lab, and asked our local expert for help.
I have now learned how to actually do something with our Bambu Lab printers, and I do know what to look for, and that they tend to sometimes have a life of their own. I can use the printers in a way that will not have them spontaneously burst into flames or throw error messages. I also do know how to deal with the most common error messages.
I also learned what to look for when preparing a printer, like having the print bed start out at 30°C if it is still a little wet from glue application - It will dry nicely that way, and it should not be totally wet.
Design Rules 3D Printer Bambu Lab
There will be a link to our group assignment page as soon as the page is up.
Individual Assignment
Since I do not plan on doing much 3D printing for my final project, I wanted to do something relatively simple (and fast) for this assignment.
3D Printing
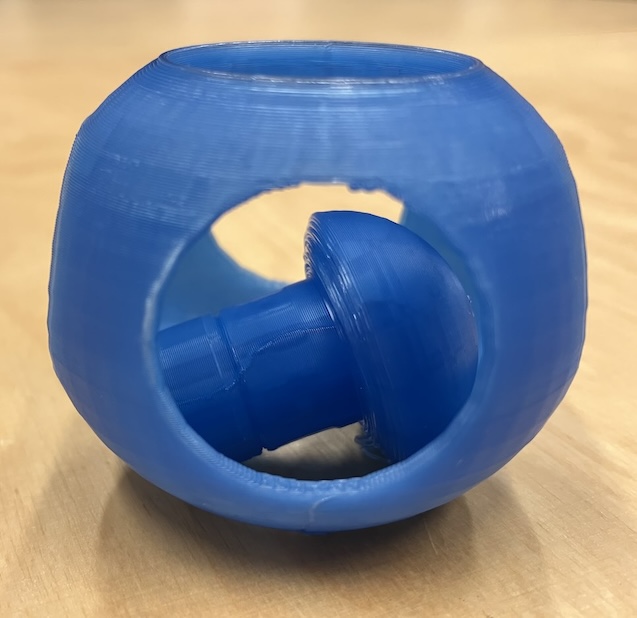
To stay proficient in using it, I used a tool I had already used in some courses we offer for school children - Tinkercad. I didn't have much of an idea of what I wanted to print, except that I wanted to make something consisting of two parts that need to be printed at the same time as one is locked in the other and cannot be taken out (or put in).
As Tinkercad suggests, I was just tinkering around for some time. I remembered a video of someone who showed how he made Christmas decorations with two balls inside of each other, from solid wood on a wood lathe. I am by far not good enough with wood turning (yet) to do something like that, but I used the form as an inspiration:
Download of the first versionI also designed two versions with different inner parts. For everyone's fun with printing, they are here, too:
Download of the second version
Download of the third version
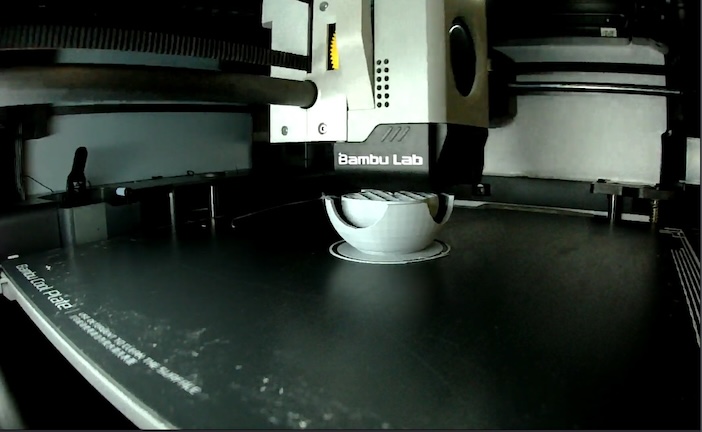
I prepared the printer and started the print as I had learned during the group assignment, and the first version came out nicely:
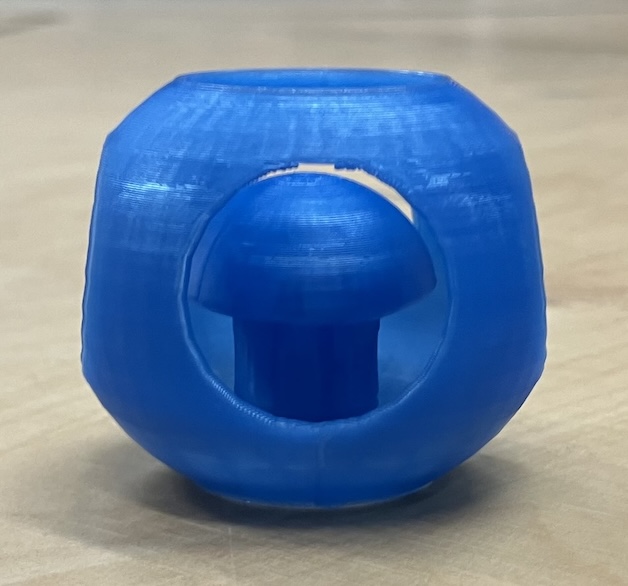
The inner part is lose, but too large to come out through the openings.
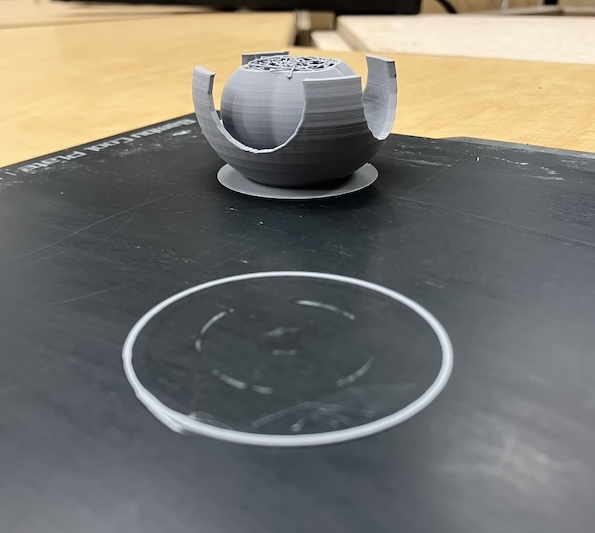
As for lessons learned, I learned that very small details can make a print fail, like a small contact surface to the print bed making the inner parts of the second and third versions of my part break off mid print. They both printed fine, then suddenly came lose from the print bed.
3D Scanning
We have an application to do 3D scans of objects at the lab, using add on depth scanners. After launching the application, you have to select an area to scan, and start walking around the object to film (and scan) it. The application will tell you to hold still every now and then, which it seems to need for some reason. It scans what was in the selected area at the beginning of the scan.
I scanned one of our coffee cups as a first attempt. Coffee cups are some of the most important tools at a Fablab, so it seemed fitting. Sadly, the iPad started to misbehave in the evening, so I couldn't do any other attempts or scan anything else yet.
Download of the scanned model