7. Computer Controlled Cutting
This week we learned about the CNC machine and computer controlled cutting in general.
The task for the week was...
- Making something yuge
- Group assignment here
Soooomething Biiig
Admittedly at the start of the week I wasn't quite sure what big thing I was going to make. First it was important to know what the constraints were. Each of us was given a piece of plywood approximately 2.5 x 1.2 meters long ith the option of either 9 mm or 15 mm in thickness to cut from. Similar in principle to the laser cutting week, we would have to cut 2D shapes and make three 3D objects with them. This can be done as we did with the press fit kits, with interlocking pieces or by a technique known as "waffling" in the biz.
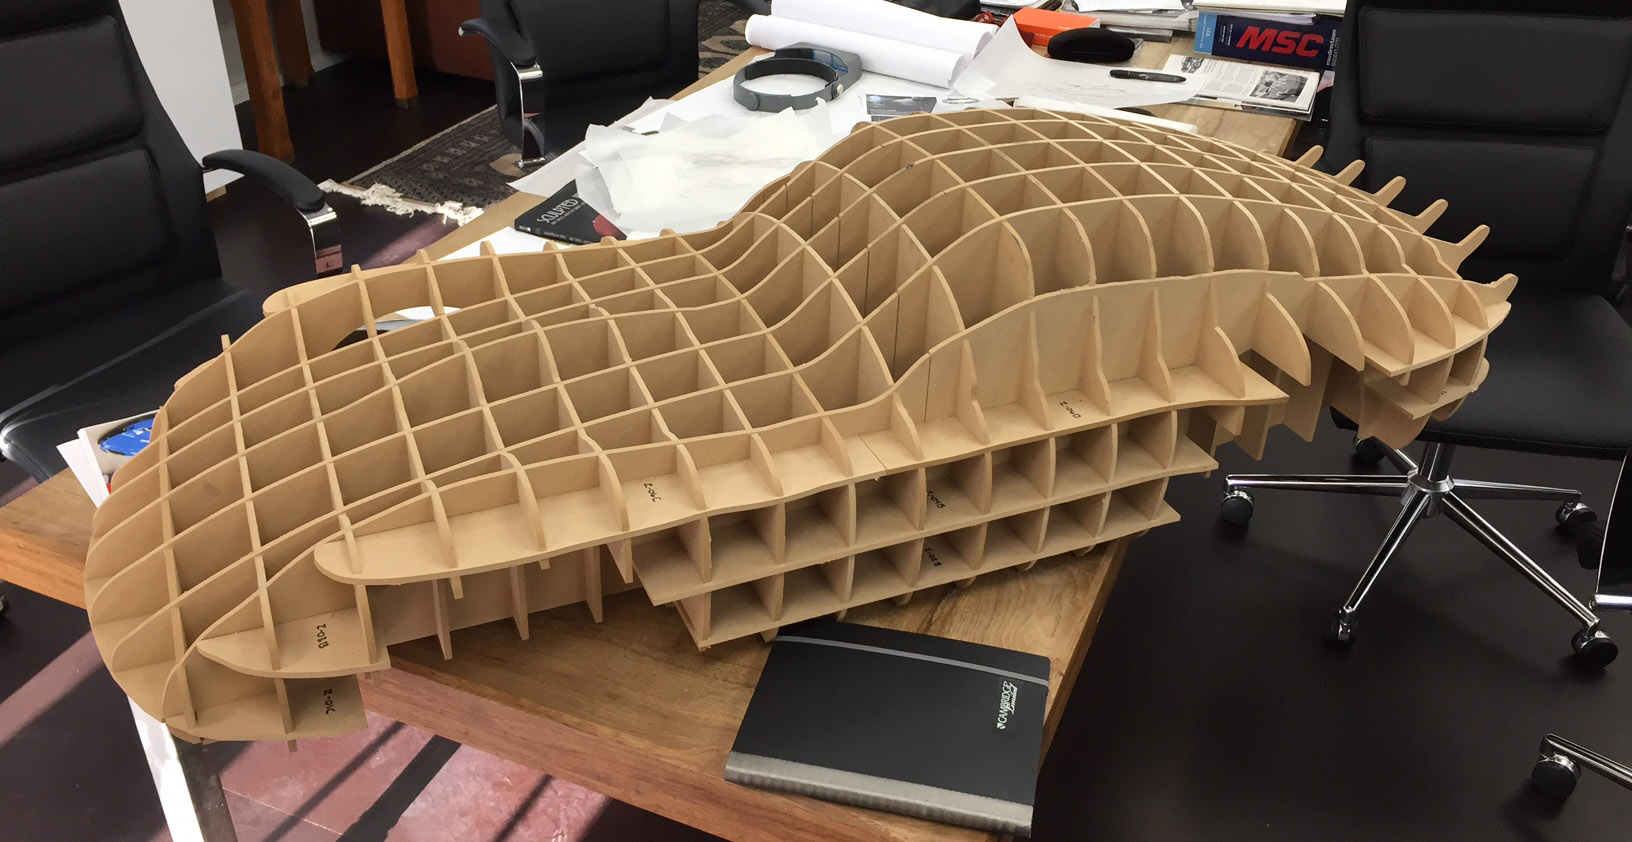
This is a technique where you can create 2 dimensional surfaces with curved, more natural looking edges and by interlocking you can get more complex organic looking lines. This also helps with structural integrity.
As I started thinking about what I wanted to make I thought "gee, I've really liked canoing the handful of times I've done it." And so it was decided. I would make a single piece of plywood. Foolish and naive I was. I began scowering the internet for design ideas and how exactly one builds a canoe. I learned of how designs for boats and canoes are generally laid out and actually did find someone who did make a canoe from one piece of plywood.

Wow, that really made it seem like some form of a canoe may be possible. After going over my options briefly with the teachers, I realized I would not be able to do it in the same fashion as on that website. The steps looked complex and too difficult for me to accomplish in a week with no boat making experience. And the plywood we were using would not bend like the one the person used for that canoe. I concluded that I would use a waffle structure and later add a skin to it if the cutting went even half successfully.
The first step was modeling the canoe. But I didn't really know how to get that classic canoe shape. The website had some schematics for their boat and with some finagling I was able to figure out certain proportions more or less. The curve of the hull definitely being the part that was my biggest question.
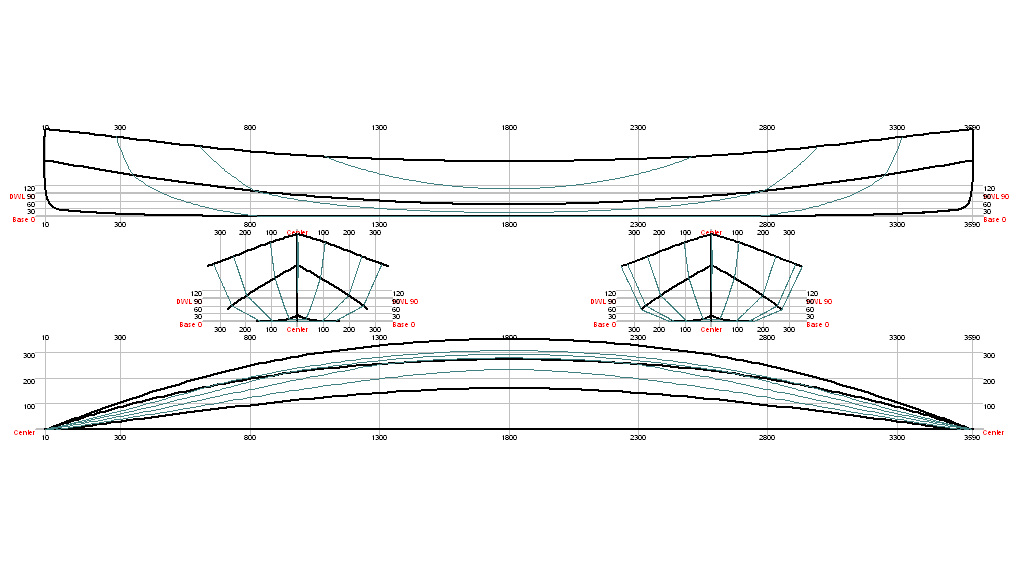
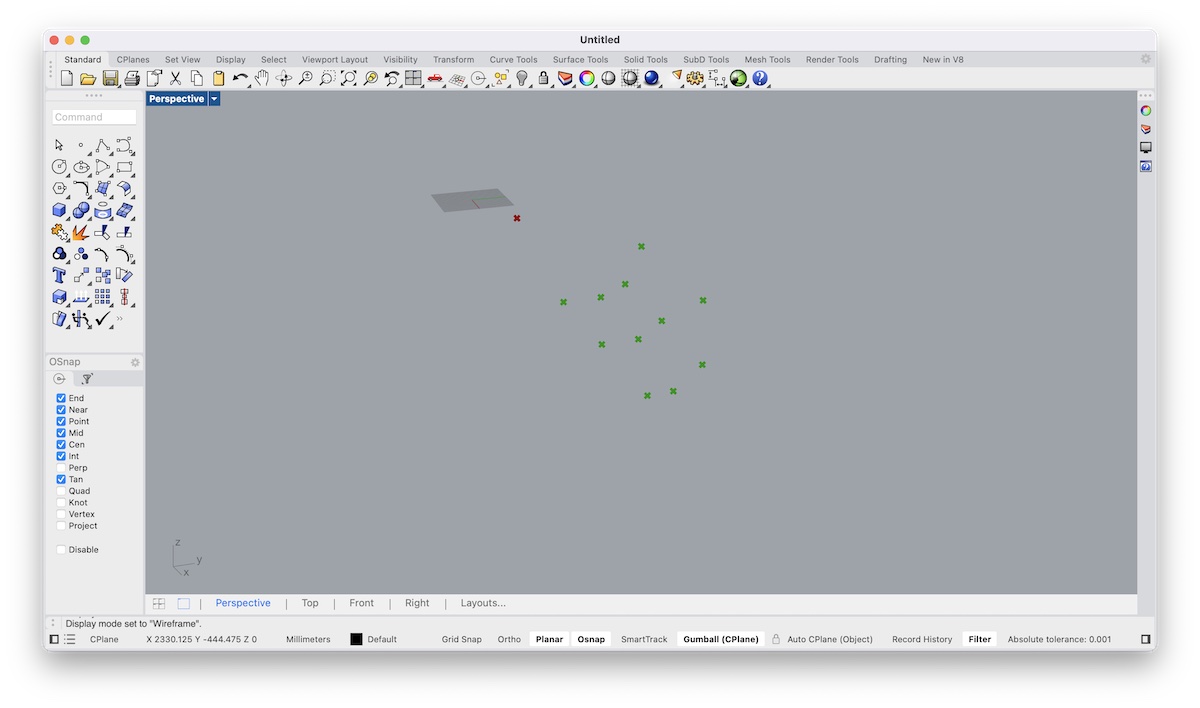
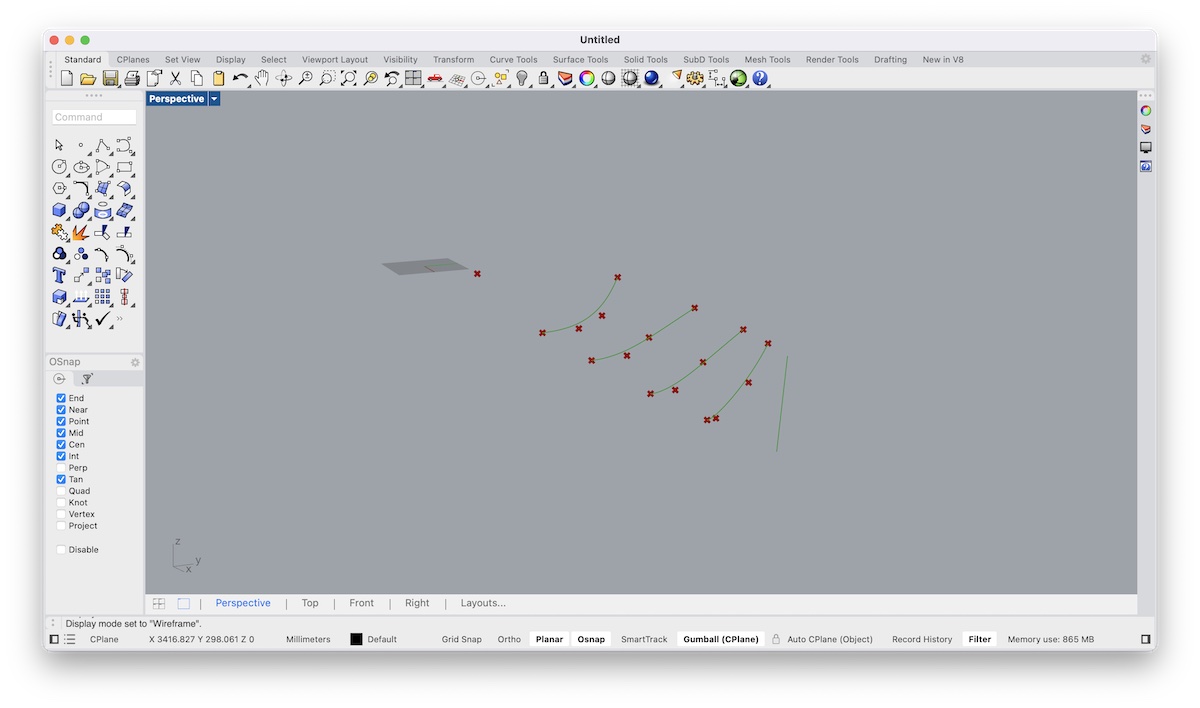
Starting in Rhino I began mapping key points in the curvature of the boat using the image above as a reference, again from the same website referenced earlier. I did this in 2D, flat, and then used the profile view to move them to their appropriate depths.
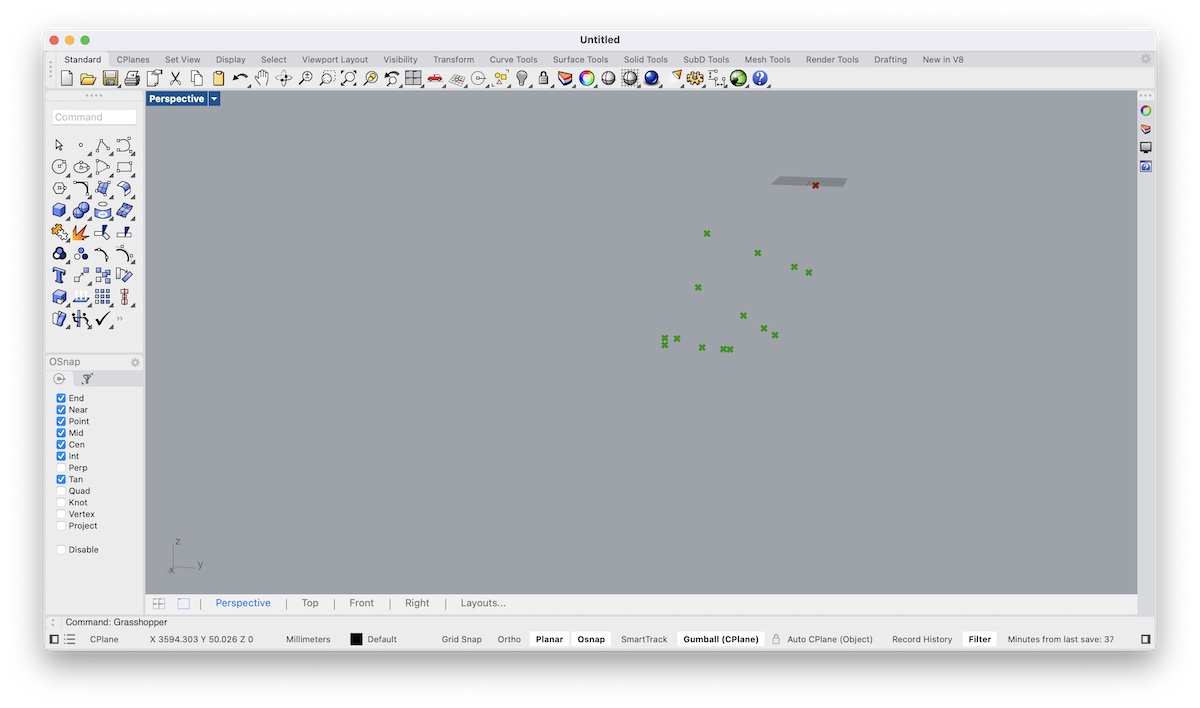
After that I had a few points at several levels of depth and made lines with each of those
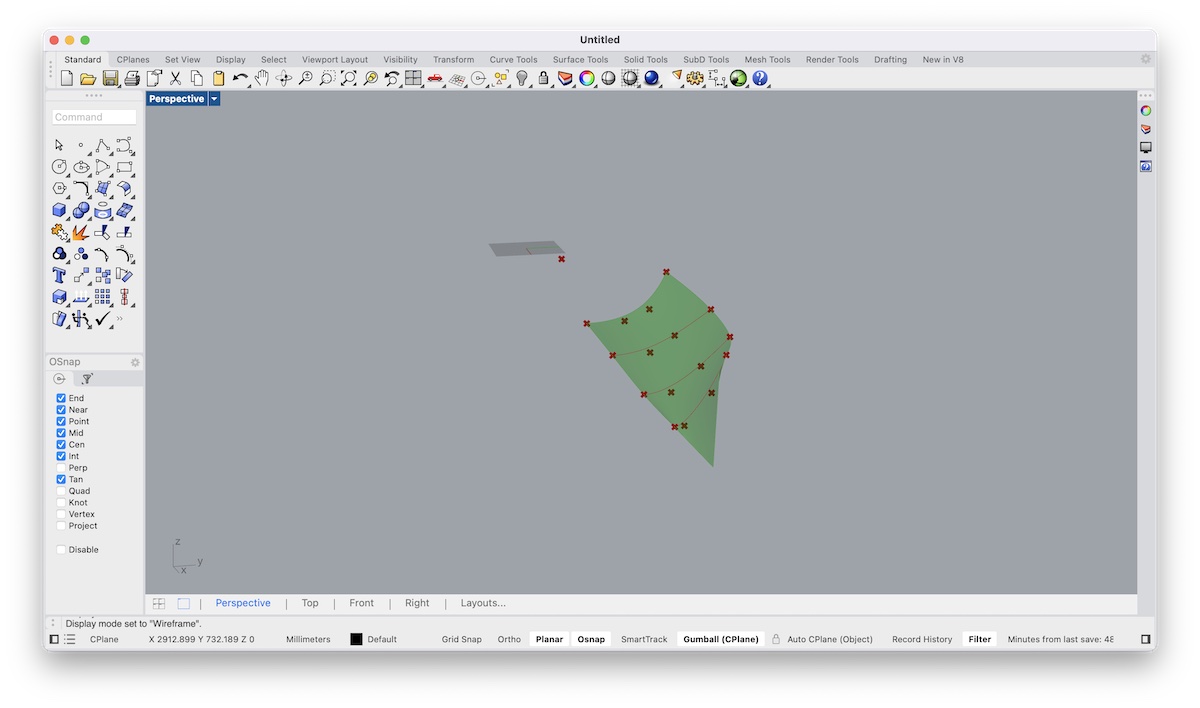
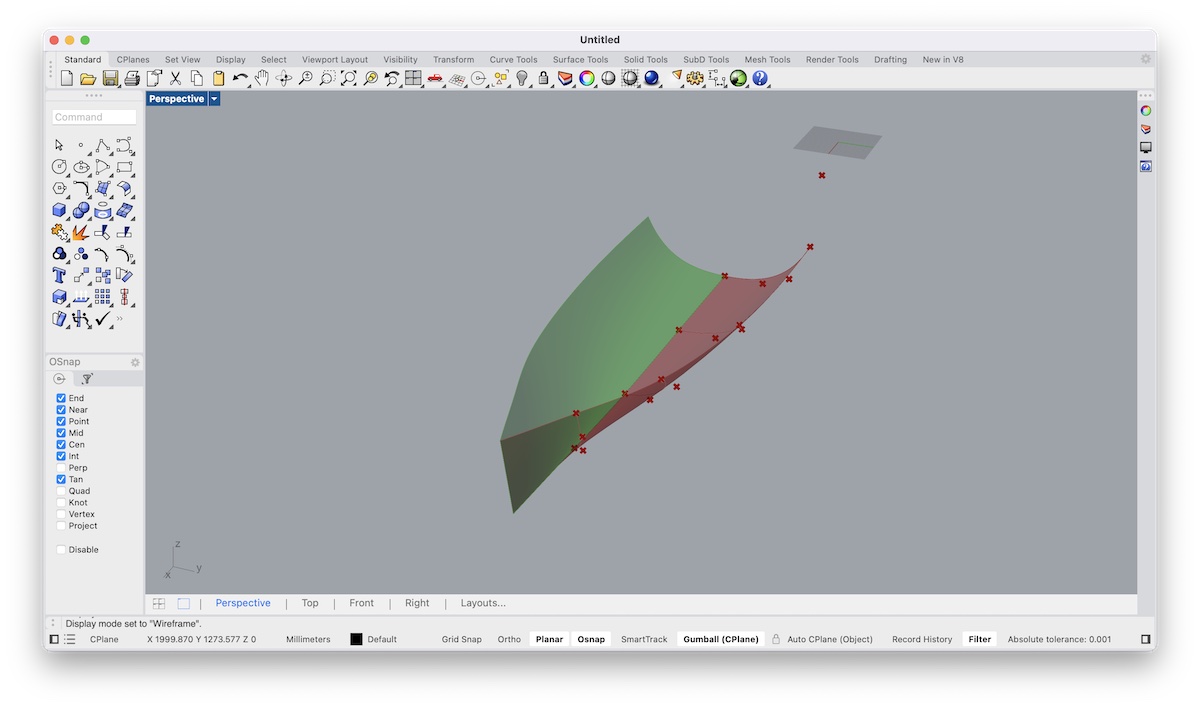
I had initially tried to just map out the walls and later fill in the bottom of the canoe but doing it separately led to a lot of mismatches between edges because of the curves throughout the shape. The best solution I found was to end all of the guide lines I had created at the center line of where I'd want the canoe bottom. Keeping the job as simple as possible, I decided the front and back of the canoe would be symmetrical, so once I finished a quarter of the shape using a loft and I could mirror the rest.

Admittedly at this point I was a bit lost. I aimlessly added a few more knick knacks to the canoe.
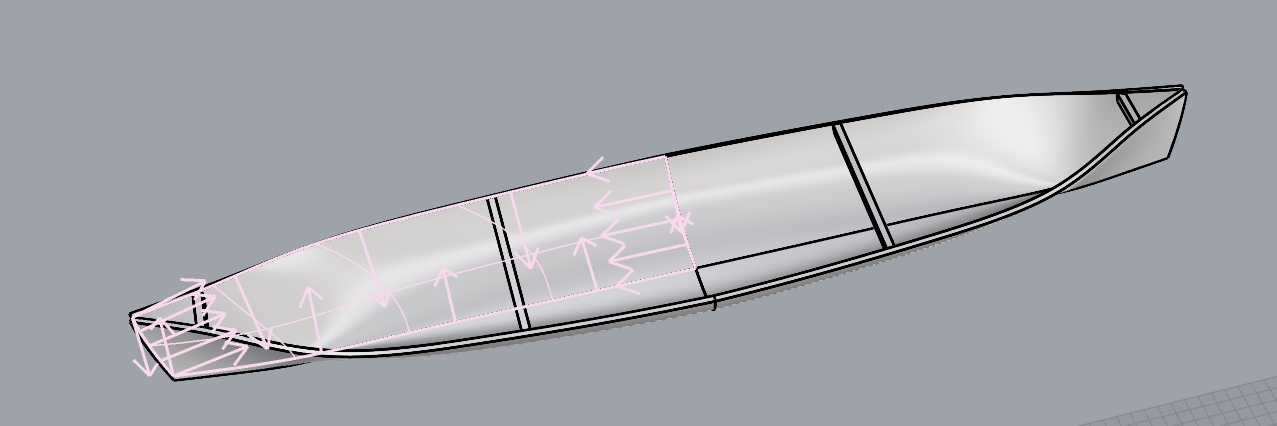
But wasn't quite sure how this all fit into the waffling structure. Many things didn't...learning experience I suppose. I ended up using a grasshopper plugin called Bowerbird which does the waffling automatically. You feed it a "brep" in rhino which has to have some thickness so the cross sections can be cut from it. Initially I was giving it a surface which was causing problems. After that the component is pretty straightforward and you just play with the number of cross sections you want in each direction (length and width). A classmate of mine, Andrea, also combined that with something to nest the final pieces in an efficient way to cut, so I copied that too. After plugging my model into it all though, I toiled for a long while to make it actually work without success. My canoe needed thickness so the waffles could have height but it was just a surface so it had nothing to it. Finally I got that figured out, adding thickness to the hull. For my waffle structure I added 0.5 mm to the width of the indents to allow for some tolerance when slotting the pieces together. I may go back and lower this number for a more snug fit.
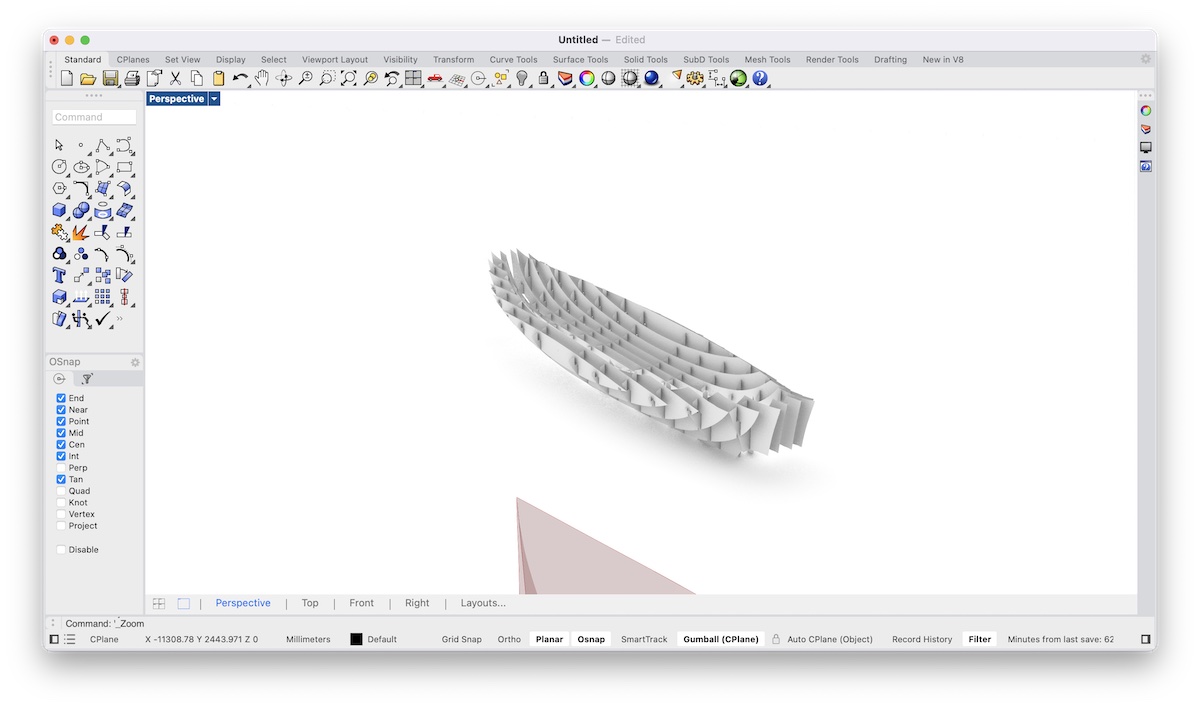
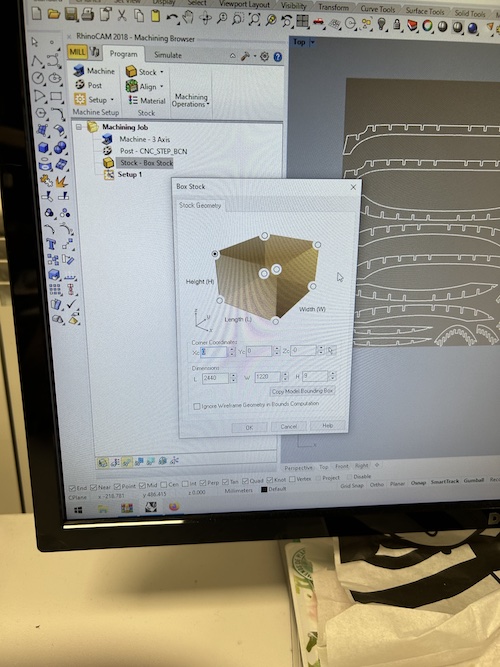
Well, it doesn't look quite like how I would like but maybe with a skin on top of it, it'll begin to look more canoe-y. After nesting my pieces using a program called DeepNest, the next thing to do was prepare for the cut. A program called RhinoCam is used to create the appropriate instruction files for the CNC machine we use (the RAPTOR). First, I imported the file into RhinoCam as a DXF. Then the next step was specifying the dimensions of the sheet we'd be cutting on.
Theeeeen we make a new machine operation, to engrave where will place our screws on the piece of wood. This is an important step because you really want to keep your material stable as your drill n mill it to ensure your pieces come out as precisely as you'd like.
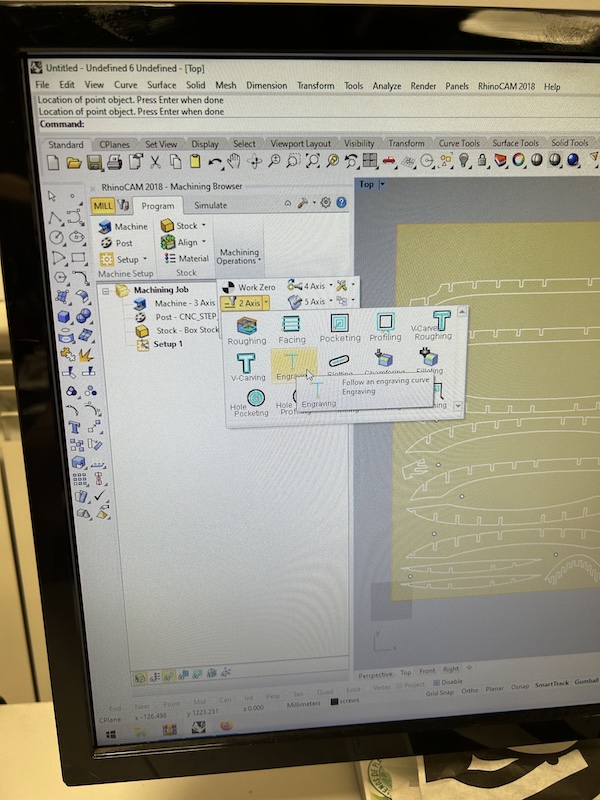
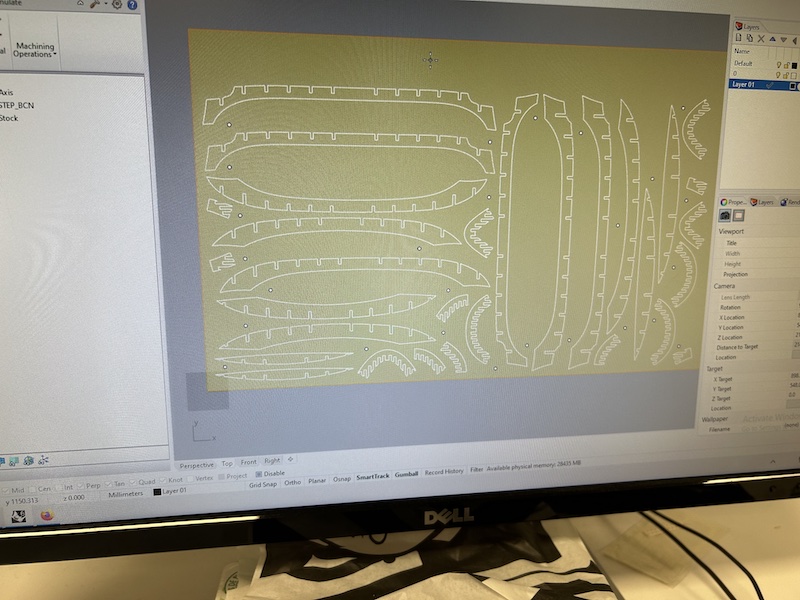
Finally, you create another machine operation for your actual project pieces.
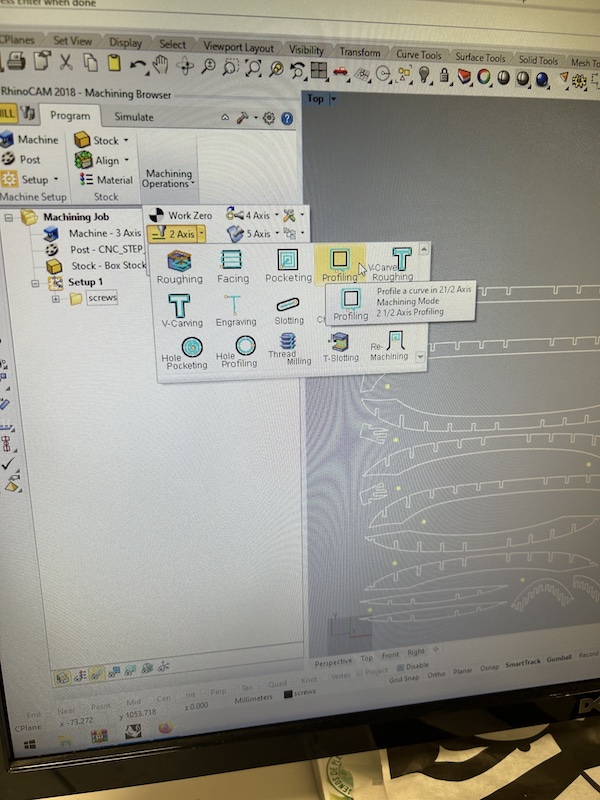
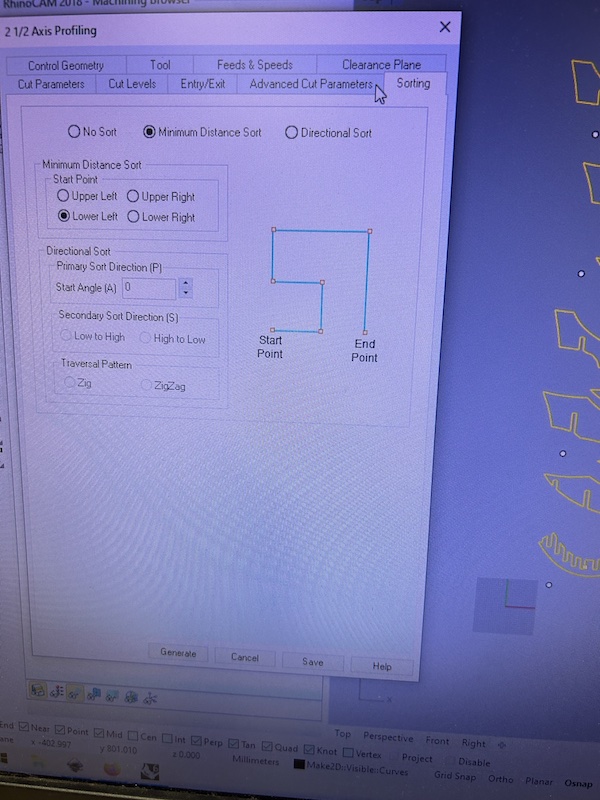
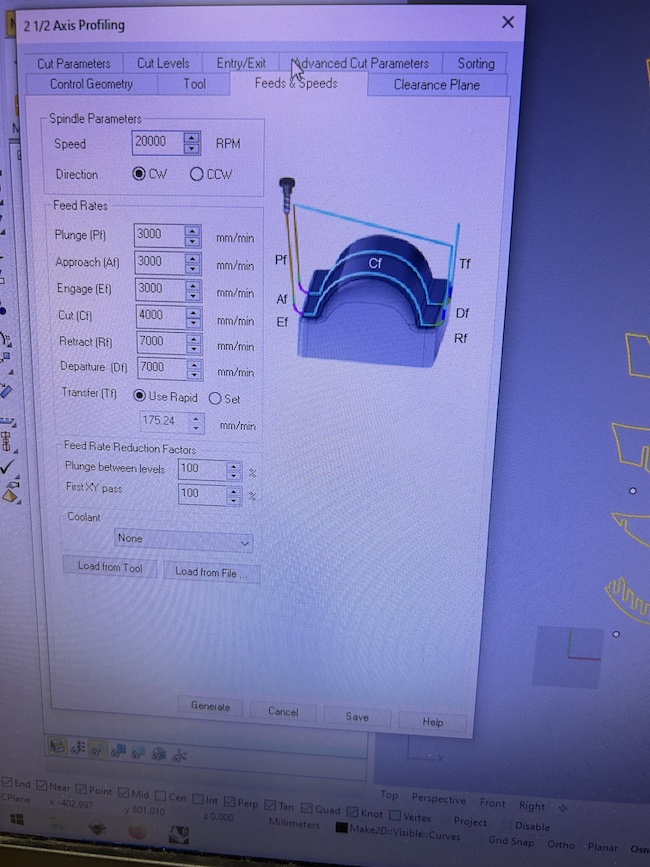
Here are all of my Rhino CAM settings
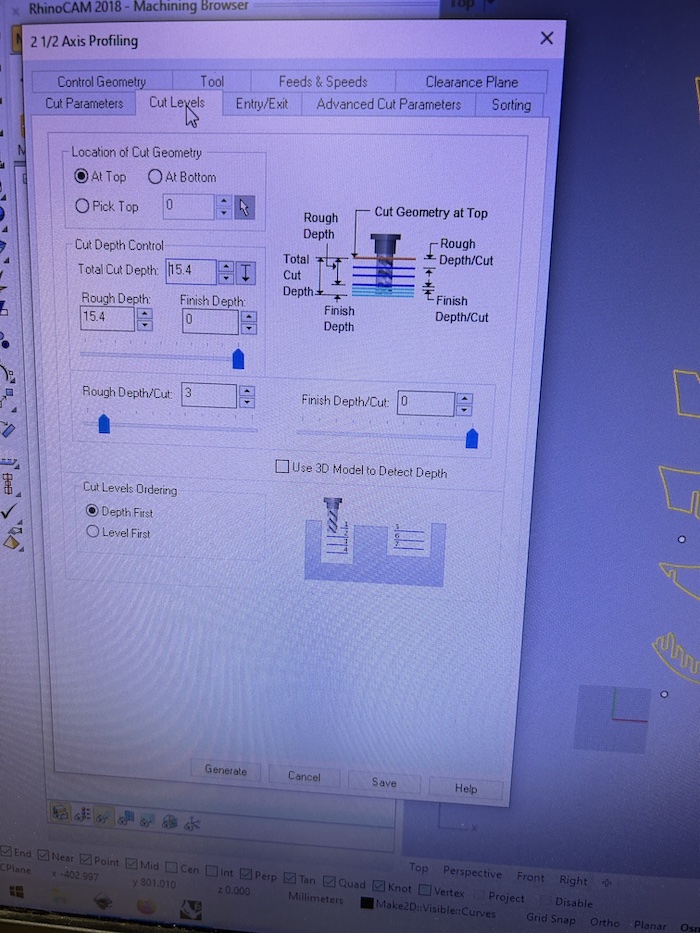
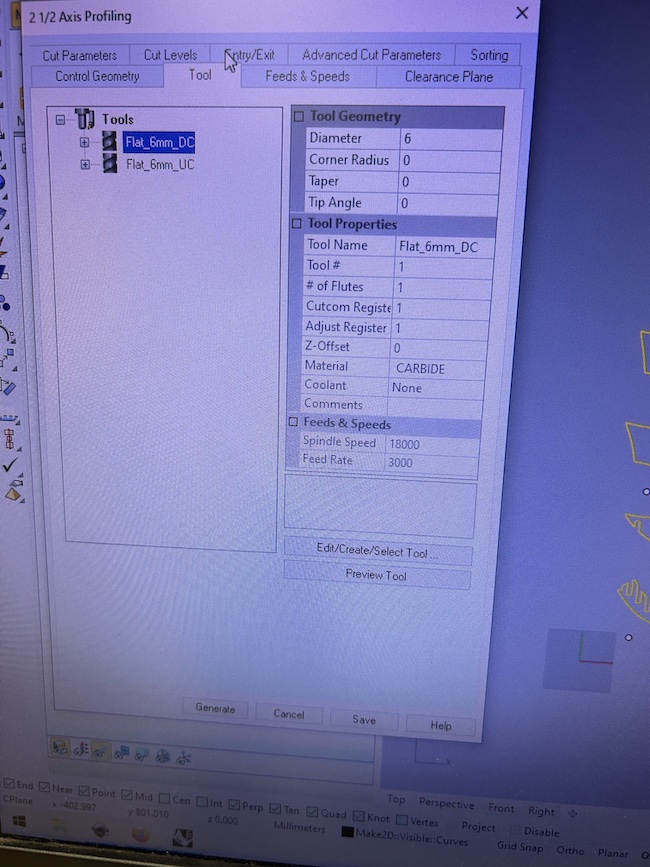
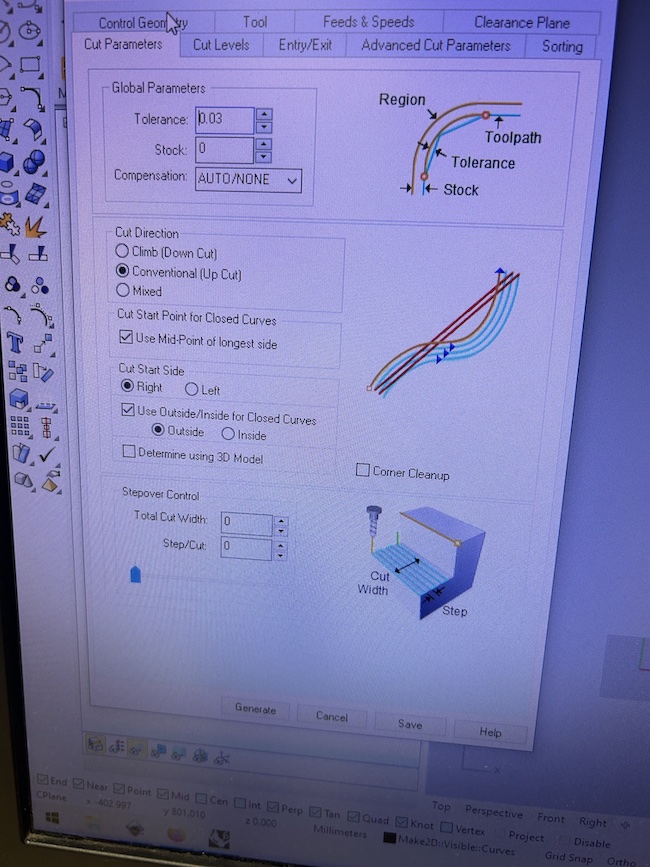
Key details
- Cutting depth on each pass should be at most half of the diameter of the mill. This heuristic is used because the deeper you screw in the more force that is applied to the mill and the more it can potentially move.
- We used a 6mm screw
- Use bridges to keep the material in place even after it is cut
I may actually make a third job to test the fits of the waffle indents before doing a full job but I have not yet been able to cut. This is where I leave you...
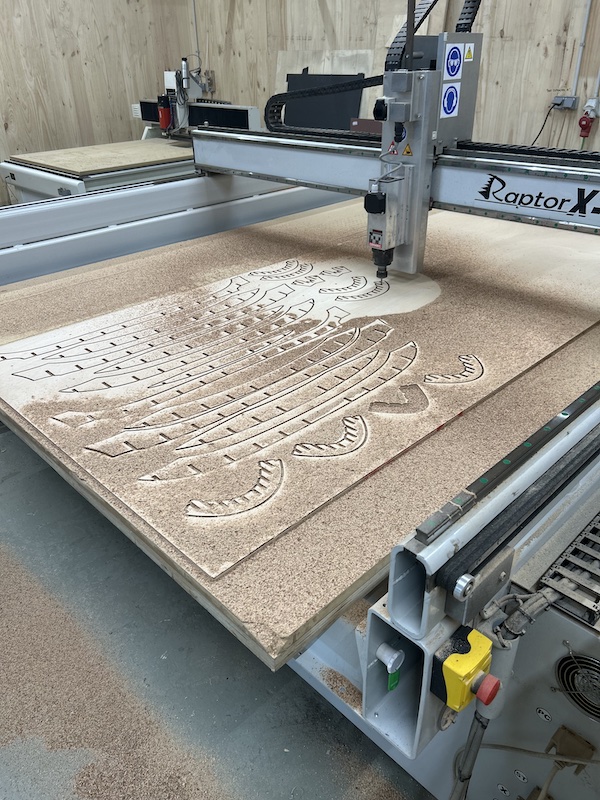
Aaaaand we're back. Here it is
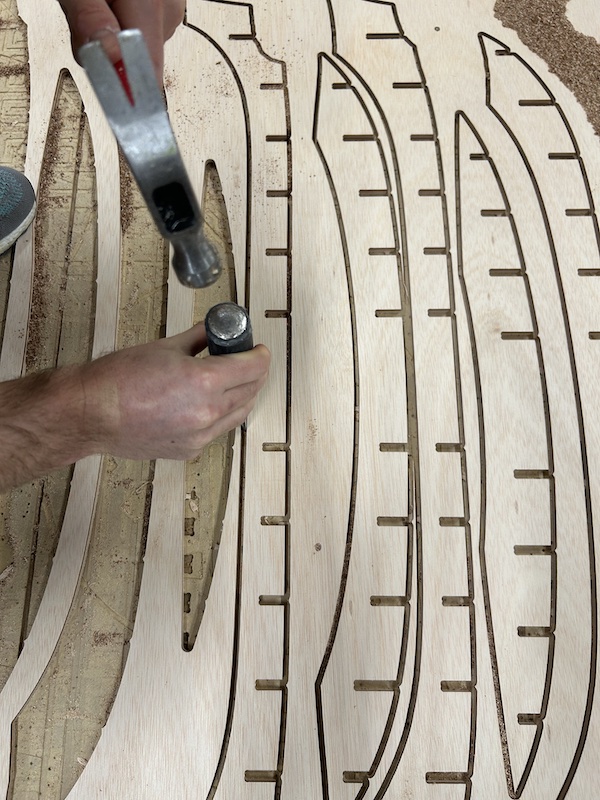
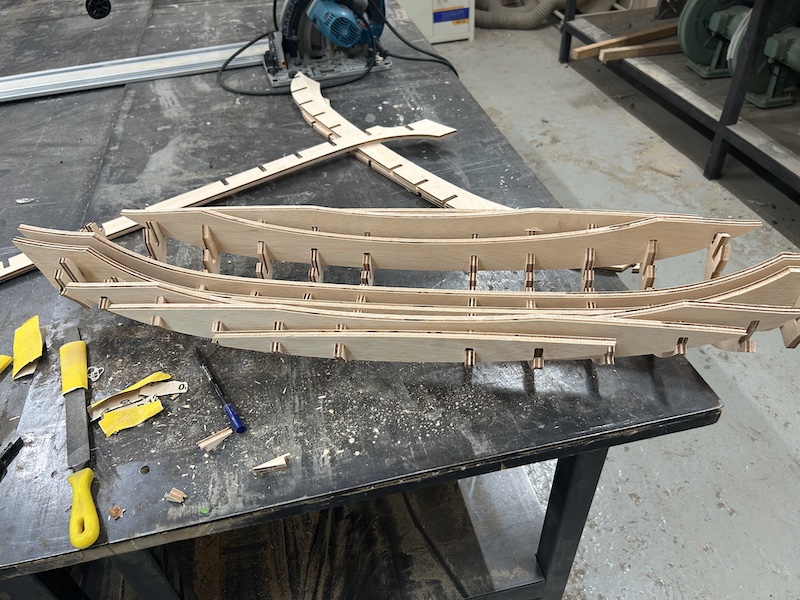
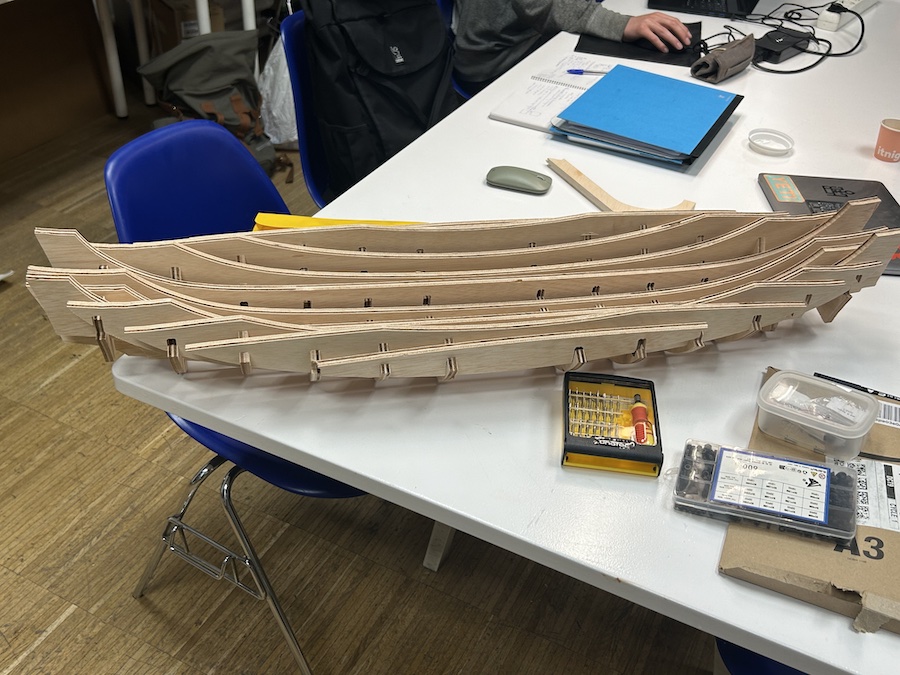
The fits ended up being far too tight and it was extremely difficult to make the pieces fit with each other properly. This makes the canoe look a lot more shallow than it should and I definitely broke some parts jamming them into their slots rather than being patient and sanding.