3. Computer controlled cutting
Overview
CO2 laser cutters are a cornerstone in the realm of digital fabrication, offering precision and versatility. These cutters operate by directing a high-powered beam of CO2 laser light through optics to cut and engrave a variety of materials. The laser's ability to vaporize or melt material along the designated path allows for intricate cuts and detailed engravings. Key considerations when operating CO2 laser cutters include understanding the kerf, which refers to the width of material removed by the laser beam, and the importance of correct sequencing — engraving before cutting to maintain material stability.
One crucial lesson from our sessions was the significance of material thickness and the necessity to adjust the design to accommodate the laser's kerf. This ensures the precision of interlocking components, a critical aspect in projects like the press-fit construction kits and the chess set where fit and function are paramount.
Vinyl cutters, on the other hand, rely on a different technology. These machines use a small, precise blade to cut designs out of vinyl sheets. Unlike laser cutters that can remove material through vaporization, vinyl cutters perform more like robotic precision knives, following vector paths to create cutouts. They excel at producing stickers, decals, and signage with clean edges and are particularly useful for projects requiring a single color or layered color applications.
While vinyl cutting is generally more straightforward, achieving a perfect application can be tricky. The adhesive nature of vinyl requires careful handling to avoid air bubbles and misalignment, as we experienced when applying the vinyl cut stickers to laptops. Each technology, CO2 laser cutting and vinyl cutting, brings its unique set of capabilities and challenges, underscoring the need for a deep understanding of their respective operational principles for successful execution.
Parametric Laser Cutting Task
For the week we had three tasks. One group task which you can find the link for here. We worked as a team to learn the basics of the laser cutting machines and materials we would be using.
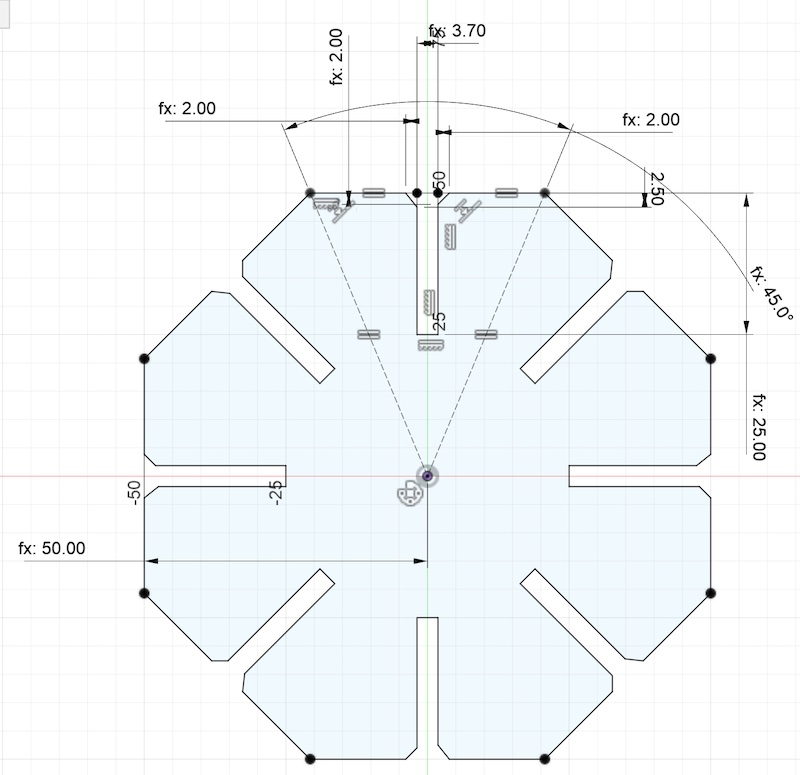
The first individual task involved laser cutting. We had to do a parametric design—so a design that could be changed with certain variables and levers—of a press-fit construction kit. This kit is basically a bunch of 2D shapes created with the laser cutter that can be fit together to create something 3D. Puzzle pieces would be a good example if they went in three dimensions. For this I initially opted for the most straightforward kit just to ensure I had something completed for the week.
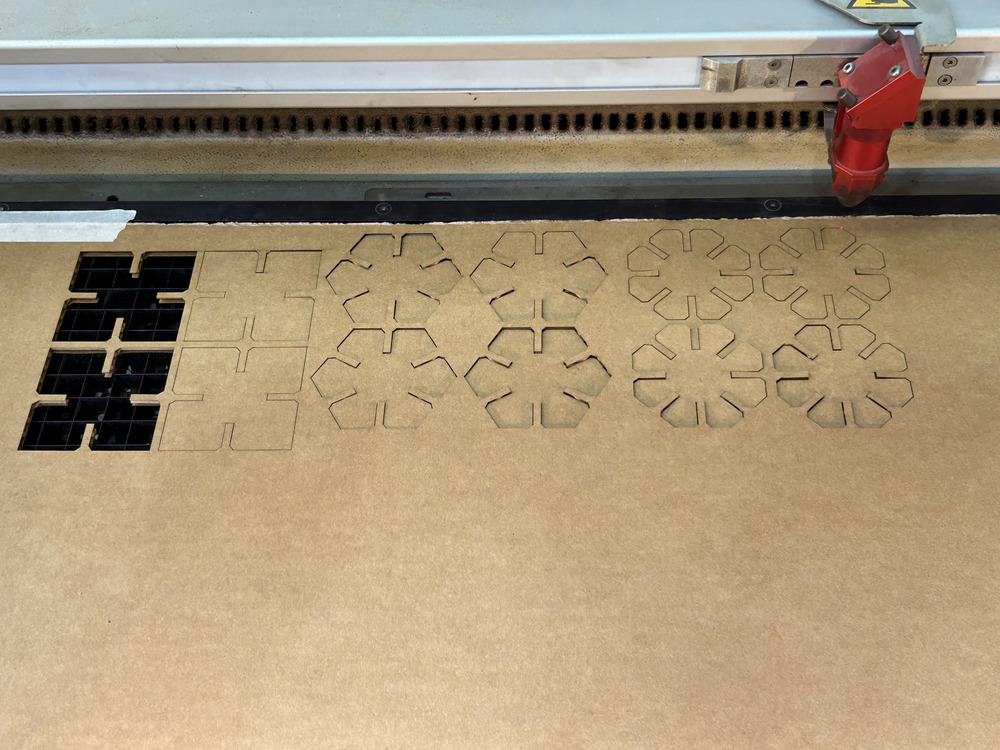
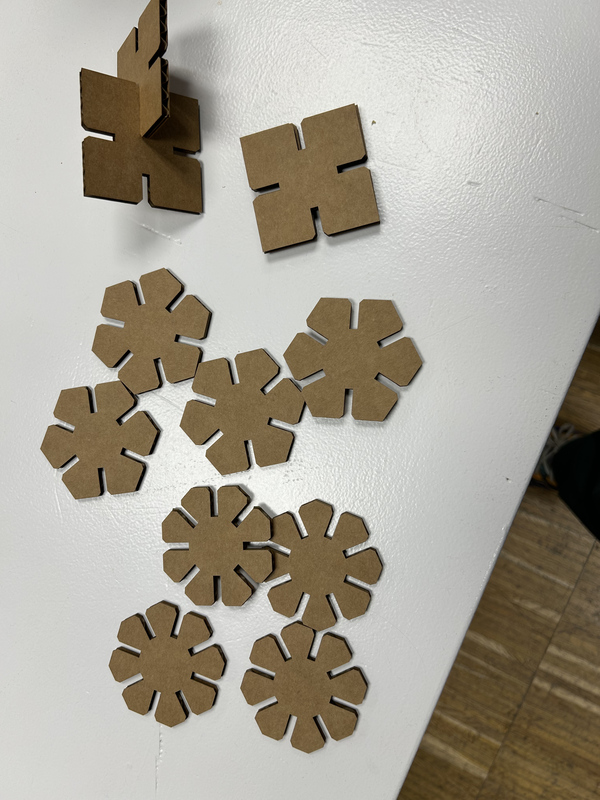
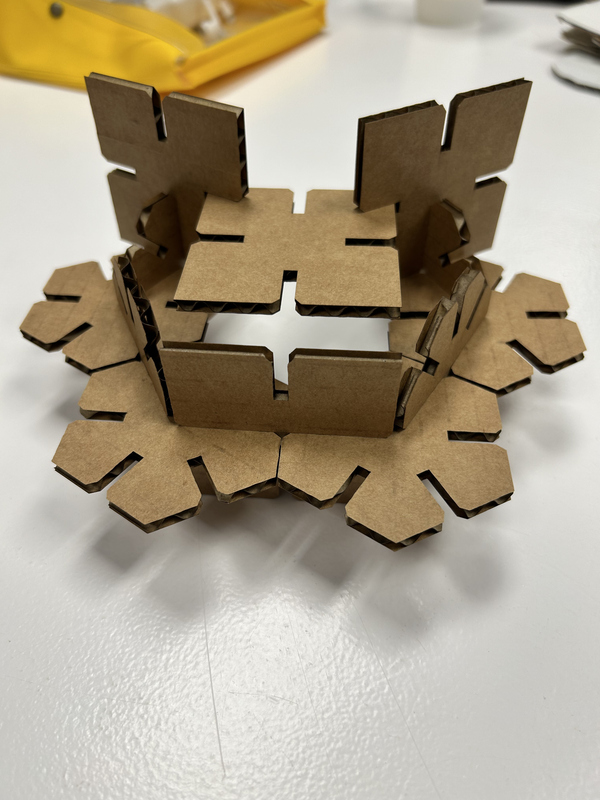
Initially this was done in Fusion 360 along with the class. Its constraint system made it really convenient to change parameters (side lengths, number of sides, etc...) and have changes propogate automatically to other parts of the design (the angle between sides, etc... It was also nice because you can go back in history and add new parts to the sketch if you wanted a more advanced design.
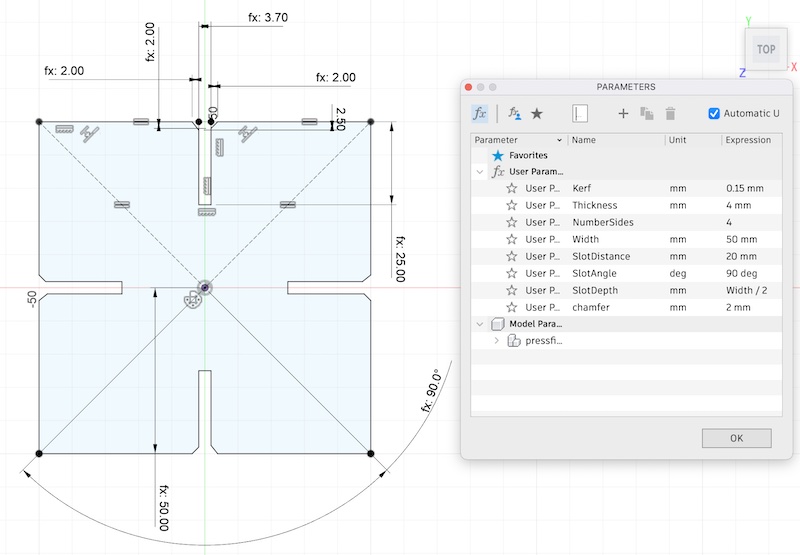
I then replicated this design in Grasshopper, a visual programming tool that works with Rhino because I plan on using Rhino for my final project. I felt it would be useful to get some practice in on Grasshopper this week. I added a ton more elements than were necessary while experimenting but it does far less than all the boxes I have indicate. I really like the idea of visual programming and seeing how all of the components flow together, making it easy to review what you've done. I did struggle a bit with the Surface Difference element which requires the normal vector of the surface to be pointed in the same direction (when laying flat). I figured out a way around it but had not understood exactly why. I was then told that the orientation, although flat, matters for surfaces when doing these type of boolean subtractions/unions.
Here is a link to my fusion file.
I then experimented a lot more with Grasshopper, familiarizing myself with a lot of the blocks and tools it has to offer. I made a few more potential press fit kits parametrically but opted not to actually laser cut and continue trying to model new things.
For cutting the key parameters are speed, power, and frequency. I did end up burning my cardboard because I accidentally used a power level for plywood! Generally speaking, for cutting you want more power but a much slower speed. Intuitively this allows the laser to actually have the time to cut through portions of the material before moving past it. We had a reference board to know the good levels for each parameter given the material which you can see below.
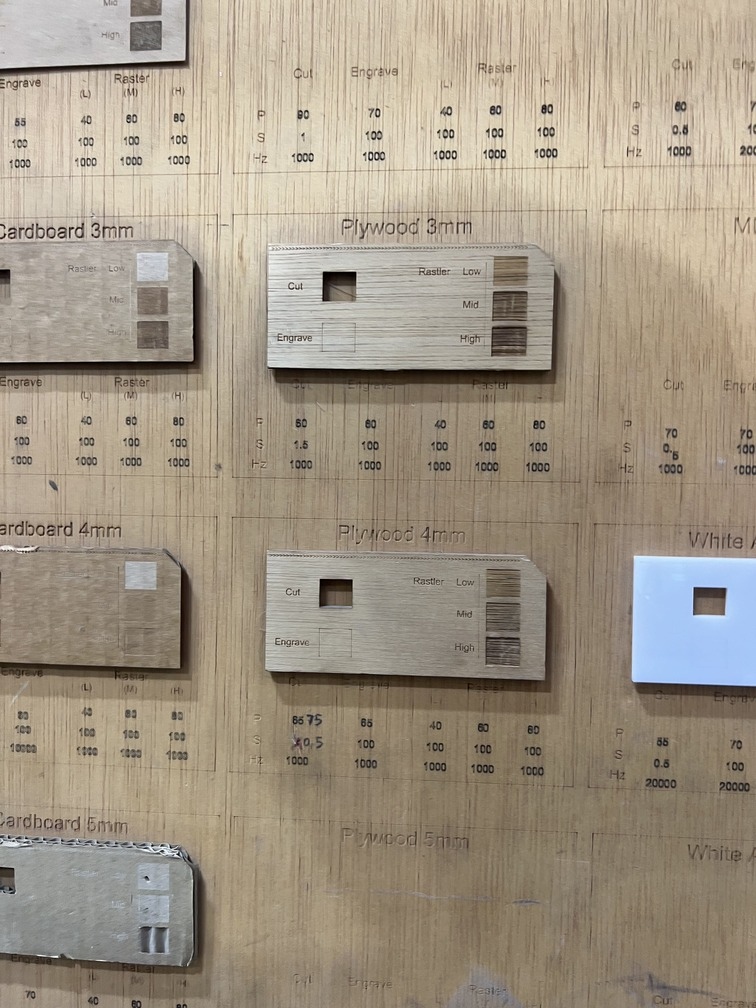
You have to be careful though- these are just good starting places. We still needed to run a test before each laser cutting run. One reason was because the two machines we used have some variance between them so small tweaks would need to be made. There were a few cases where I laser cut a piece but the power wasn't quite high enough to cut through. Burnt edges on your pieces also can indicate power was too high (or speed was too low!). Between tweaking power and speed you it seemed could usually arrive at a good setting.
En Passant?
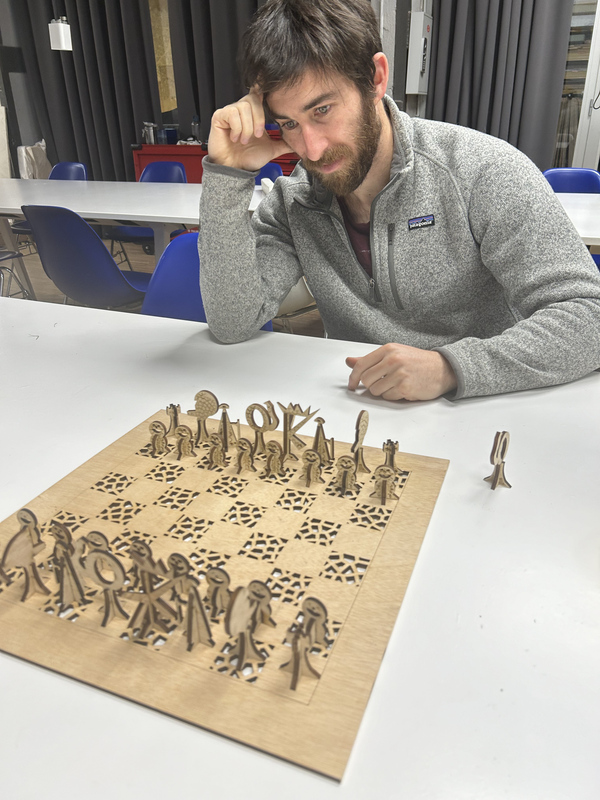
Finally, after speaking with my friend, Max, who is also here at the Fab Lab in Barcelona, we decided to create a chess set. We play all the time so it seemed like a worthy project for us to work on together. On our final day of working with the laser cutters this week we managed to design and cut our very first chess set! Max did the board where each dark square is represented by a voronoi pattern, his love interest for the week. And what a love it was. Would you just take a look at that board, a true head turner. I made the board pieces to the best of my artistic ability. Although it's unclear if they look like the pieces they are supposed to be, their uniqueness won't be denied. Admittedly, my part was not parametric as it ended up being simpler to do manually, especially given my limited knowledge on the Grasshopper programming language and our time crunch. To differentiate black from the white pieces Max also used the voronoi pattern on them. This was a great idea but because we only engraved the pattern on one side, it was very difficult to tell which pieces were black vs white.
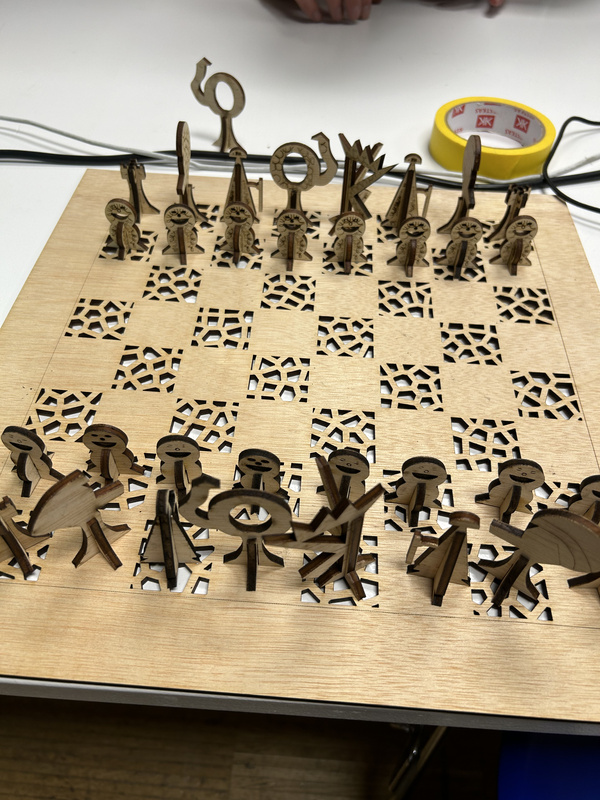
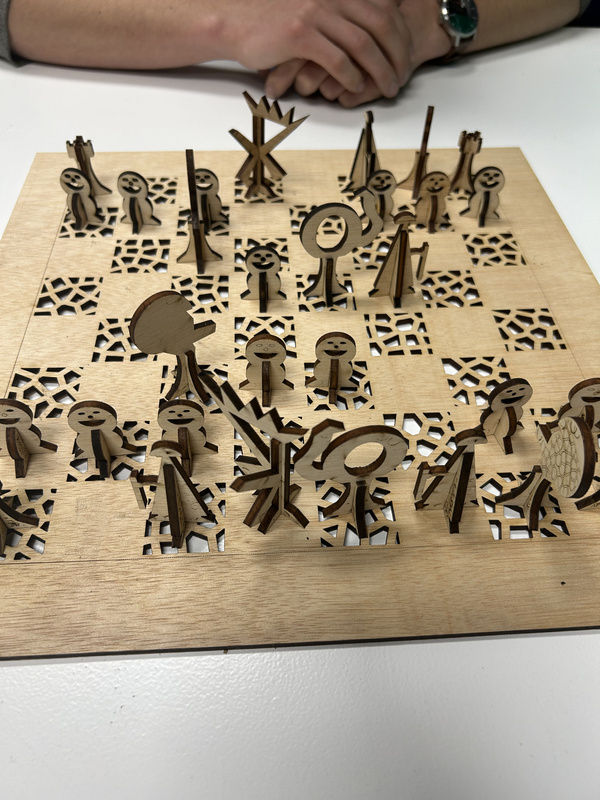
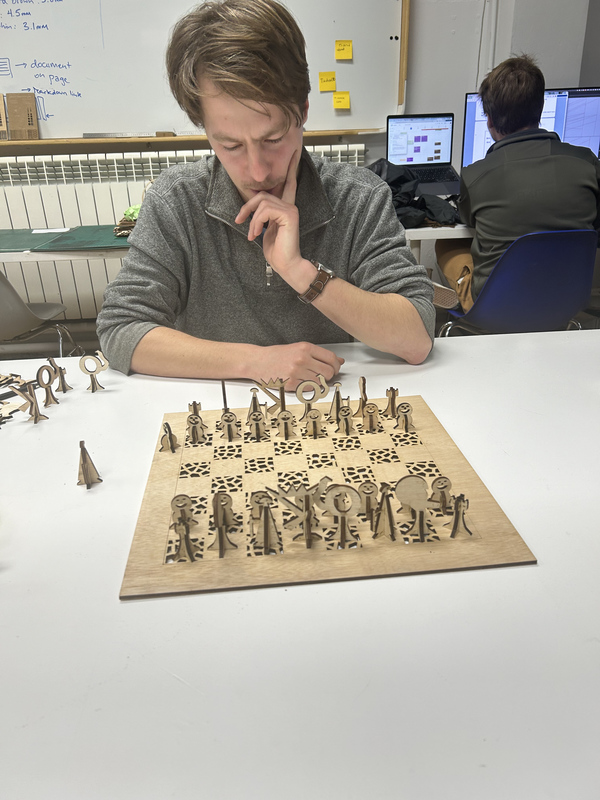
We christened the new chess set by playing a game and in the end we were really happy with the result considering we did it all in one day. I doubt it'll be our last chess endeavor in the lab.
Vinyl Cutting
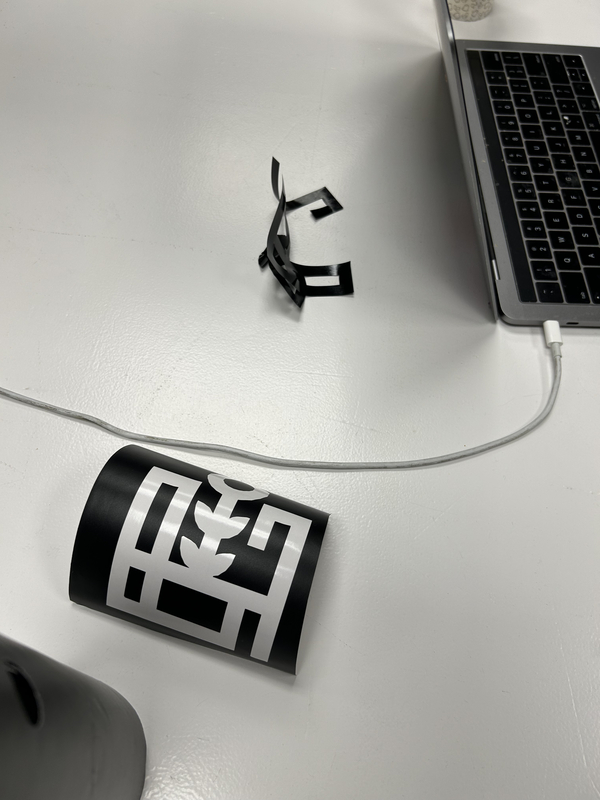
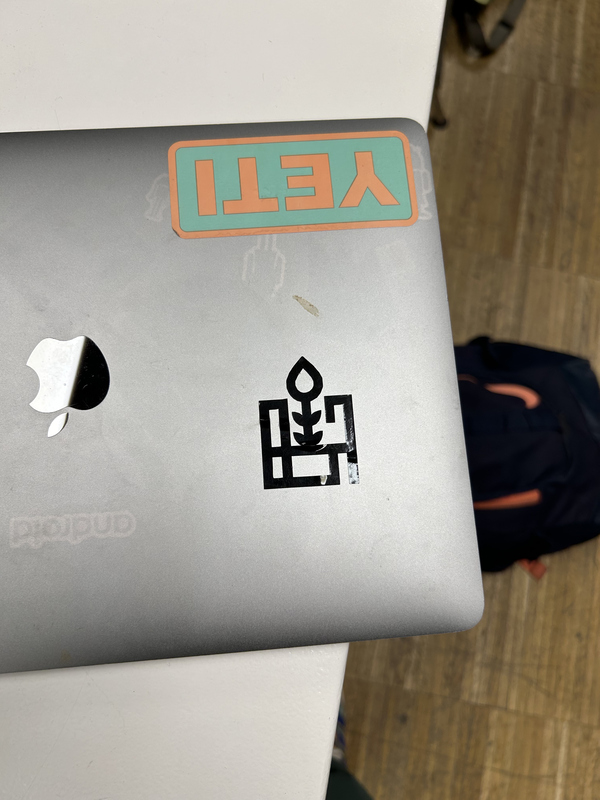
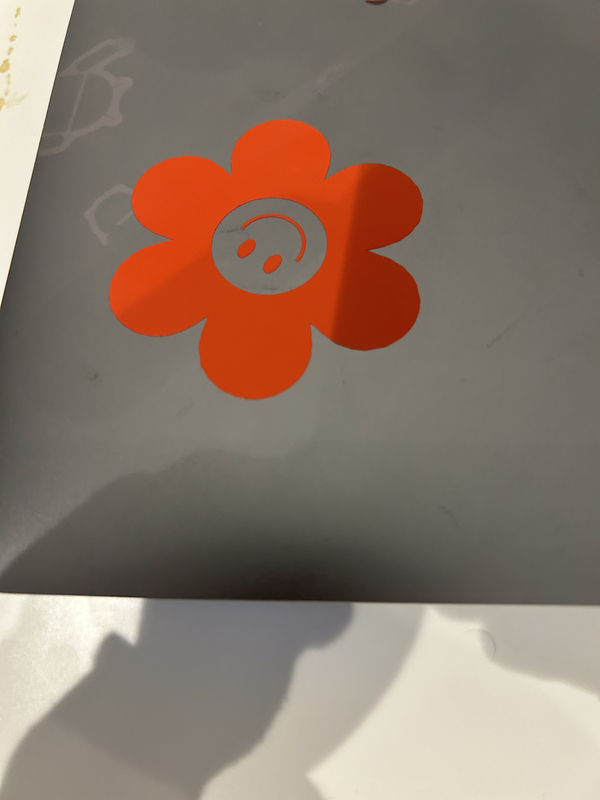
The second task we had to do involved vinyl cutting. This task was a lot more straightforward for me. I had created a logo in week 2 and it had a nice flat design that would work really well as a sticker. On my initial cut I failed to successfully get it off the vinyl material because I didn't properly use a stickier material to pull it off. Rookie mistake. On my second attempt I didn't quite get it onto my laptop cleanly but I was happy with how it looked.
My other friend, Mahe, also gave me her vinyl cut sticker for my laptop as well! Wow, what an unbelievably lucky day!!
Challenges and Lessons Learned
- A big challenge with laser cutting was mastering the order of operations in laser cutting — engraving should precede cutting, an oversight that taught us the importance of sequencing for future projects.
- Parametric design, despite its efficiency, introduced complexity. The dynamic nature of parametric tools demanded a steep learning curve, especially when trying to apply changes across multiple elements in Grasshopper. This sometimes led to unintended consequences in the design.
- Material considerations presented another learning dimension. The thickness of materials, their tolerance, and the kerf — the amount of material burned away during laser cutting — all had to be precisely accounted for. Miscalculations here could result in pieces not fitting together as intended, underscoring the importance of accurate measurements and allowances for the laser's cut width.
- During the vinyl cutting exercise, check that cutting is at the correct force. And be patient when removing your final product from the material.
- The chess set project also taught us lessons in design visibility. The decision to only engrave one side of the black pieces with a voronoi pattern, although aesthetically pleasing, inadvertently led to confusion during the game. I also learned sometimes a little manual design is OK. Not everything needs to be automated.