1. Project management
This week I worked on defining my final project idea and started to getting used to the documentation process.
Git. Why and What?
What is Git?
Git is a tool that helps teams manage changes to their projects, like websites or software. Think of it like a detailed history book of a project, recording who made which changes and when. It is one of many types of what is called a "version control system" (VCS). For a more in-depth expanation check out this webpage.
What is a Version Control System?
A version control system is like keeping track of revisions in a shared document, but for coding projects. It helps you see past versions and who made specific changes.
Why Is This Useful?
- It's like a time machine: If something goes wrong, you can go back to a point when everything worked fine.
- It's great for teamwork: Multiple people can work on the same project without messing up each other's work, sort of like collaborating on a shared Google Doc.
Types of VCCs
There are two main types: centralized, where everyone works on one main copy (like editing a single shared document), and distributed, where each person has their own copy (like having your own draft of a group project). A distributed system has a lot more flexibility in that it allows many versions to be worked on locally (on each contributor's computer) and only later merged together.
Figure 1: Distributed VCS (source)
In a centralized system you're more obligated to work off of the latest "main" draft on the central server. Although a bit simpler, this workflow can cause a lot of slowdowns on on big, complex projects with many contributors.
Figure 2: Centralized VCS (source)
Git is a distributed VCS (wooo!!)
Wait So...Why Git And Not Another VCS?
Git is a popular choice for managing project changes, especially for big projects with many people. It's well-liked because it's powerful and has a large community of users.
Finally Gitlab
GitLab is an online platform where people store their Git projects. It lets teams see and work on each other's changes from anywhere.
To Summarize
Git is a powerful tool to keep track of changes on projects both large and small allowing teams to work together smoothly without losing any important information. GitLab is a service we use to safely store projects without the risk of accidentally deleting them from our computer.
Setting Up My Webpage
Install Git Using Homebrew
To ensure I can track changes and save them remotely to gitlab I need to have the git software on my computer. There is a tool on OSX called homebrew that helps install software packages easily. I used this to install Git. Here are the steps:
- Open Terminal.
- Enter:
/bin/bash -c "$(curl -fsSL https://raw.githubusercontent.com/Homebrew/install/HEAD/install.sh)"
- After installation, install Git by typing:
brew install git
- Verify installation with:
git --version
Set Up GitLab Credentials
To communicate with GitLab securely we must set up our authentication credentials. This is done through an SSH RSA keypair. Here is a good explanation of how it works and what it does.
Generate Keypair
- Open Terminal.
- Use
ssh-keygen -t rsa -b 4096 -C "your_email@example.com"
to generate a new SSH key, replacing the email with my GitLab email. - Press Enter to accept the default file location and filename.
- Press Enter whe asked for a passcode to leave it blank. This is more convenient when pushing new changes to Gitlab and avoiding re-entering the passcode.
Adding Your SSH Key to GitLab
- Copy your SSH public key to the clipboard with
pbcopy < ~/.ssh/id_rsa.pub
- Go to GitLab and navigate to User Settings > SSH Keys.
- Paste my key into the "Key" field and add a title "Tony's Macbook".
Clone My Repository
Next I cloned the current html template in my gitlab repository that has been provided for me by FabAcademy. I've decided to use the default template to save myself time and can go back and make custom CSS changes later if I choose to.
- Get the Git repository URL from GitLab.
- Open Terminal and go to the directory where I'd like to store the project
cd "~/projects"
- Finally clone the repository using
git clone git@gitlab.fabcloud.org:academany/fabacademy/2024/labs/barcelona/students/tony-lambropoulos.git
Edit HTML Page
Add the html code to show the very explanation I am typing! I will be using <section> elements going forward for each section but on this first week I am using a mix of header elements, <h2> for big categories and <h3> and <h4> for sub categories, <p> elements for the actual text, and <pre> elements to highlight command line steps or code. I will also be using <figure> elements to keep my images and videos organized.

Add and Commit Changes with Git
Now that I've added my new HTML code and have seen how it looks locally by opening up the page using my browser I'm ready to push my changes to GitLab to see my changes on the internet.
git status
to see changed files. I ensure I haven't added any extraneous files to my repositorygit add .
to stage all changes, orgit add FILENAME
for specific files. This basically says "These are the files I've modified that I would like to track changes on."git commit -m "update my project management page with explanation of git, gitlab and steps to update my webpage."
to commit my changes with a message describing what I've done. This commits the changes staged in the previous step and are now officially within the history of this branch on my local computer. The commit message is very important because it will help me find when I made a certain change later by looking back through these commit messages withgit log
Push Changes to Remote GitLab Server
Finally I push my changes to FabLab's GitLab servers. This is done so that others who want to work off of my changes can now pull them from here. I use
git pushto push my changes and my changes are automatically reflected on my webpage thanks to hooks set up by my instructors.
Final Project Idea - Stackable Vertical Indoor Garden with Aeroponics
For my final project I would like to make a garden that can be mostly self-monitored.
The main priorities for this project are
- To optimize a small amount of space efficiently.
- Easy to get started and maintain
- Indoor
- Expandable- You can have 1 level of plants or you can add multiple levels without much extra effort
- Easily Extensible- if in the future another contributor would like to add additional features, this should be easy
- Inexpensive
- Material wise, keep the cost down to make it
- In terms of energy, find ways to use less or have green sources (solar?)
- Vertical- the garden can be built upward, minimizing surface area. This has become a popular method in more urban areas over the past few years.
- Stackable shelves- allows a gardener to start with a small plot and slowly expand upward without using more room than necessary
- Automated/minimal human intervention- Pumps on a timer for watering and delivering nutrients to the plants
- Aeroponics- A method of growing plants where their roots hang in the air and get sprayed with a mix of water and plant food. It's different from the usual way of growing plants in soil because it lets you carefully control how much nutrients the plants get. This can make plants grow faster and produce more yield than traditional methods. Also, without soil, there are fewer problems with bugs and diseases.
Overview

Plant Container
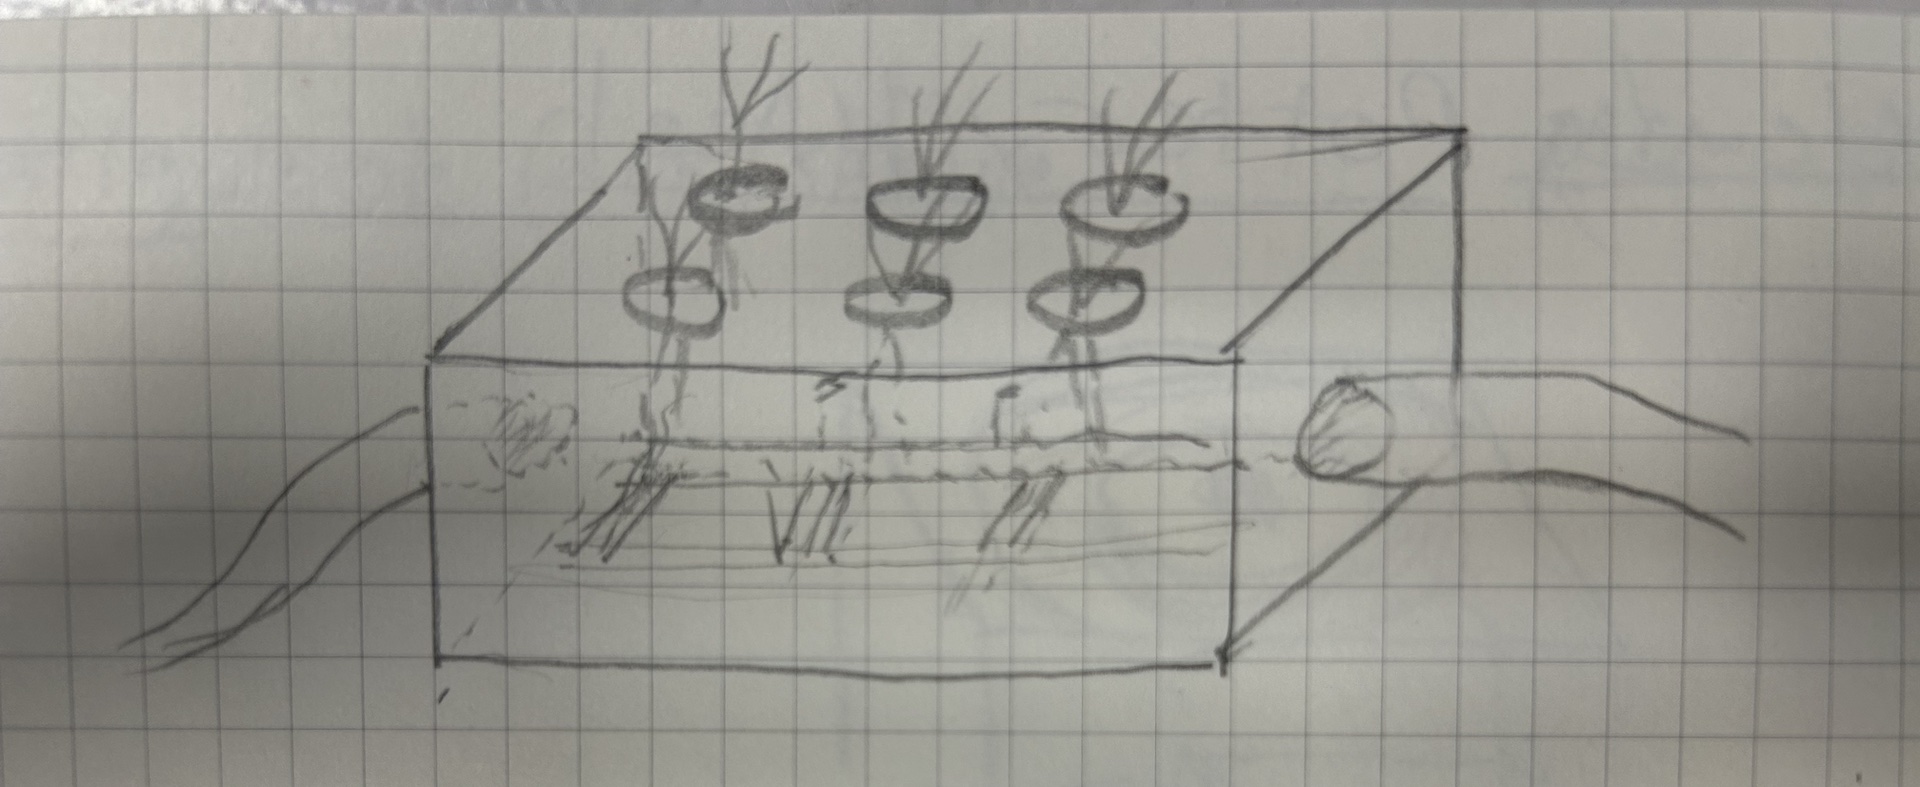
Adding Layers
