Week 2
Computer Aided Design
Fab Academy 2024
Riichiro Yamamoto
- Practice : Inkscape
- Practice : TinkerCAD
- Practice : Blender
- Practice : Rhinoceros
- Practice : Fusion360
- Modeling : Blender
- Blender Tutorial
- Model for Final Project
Practice : Inkscape
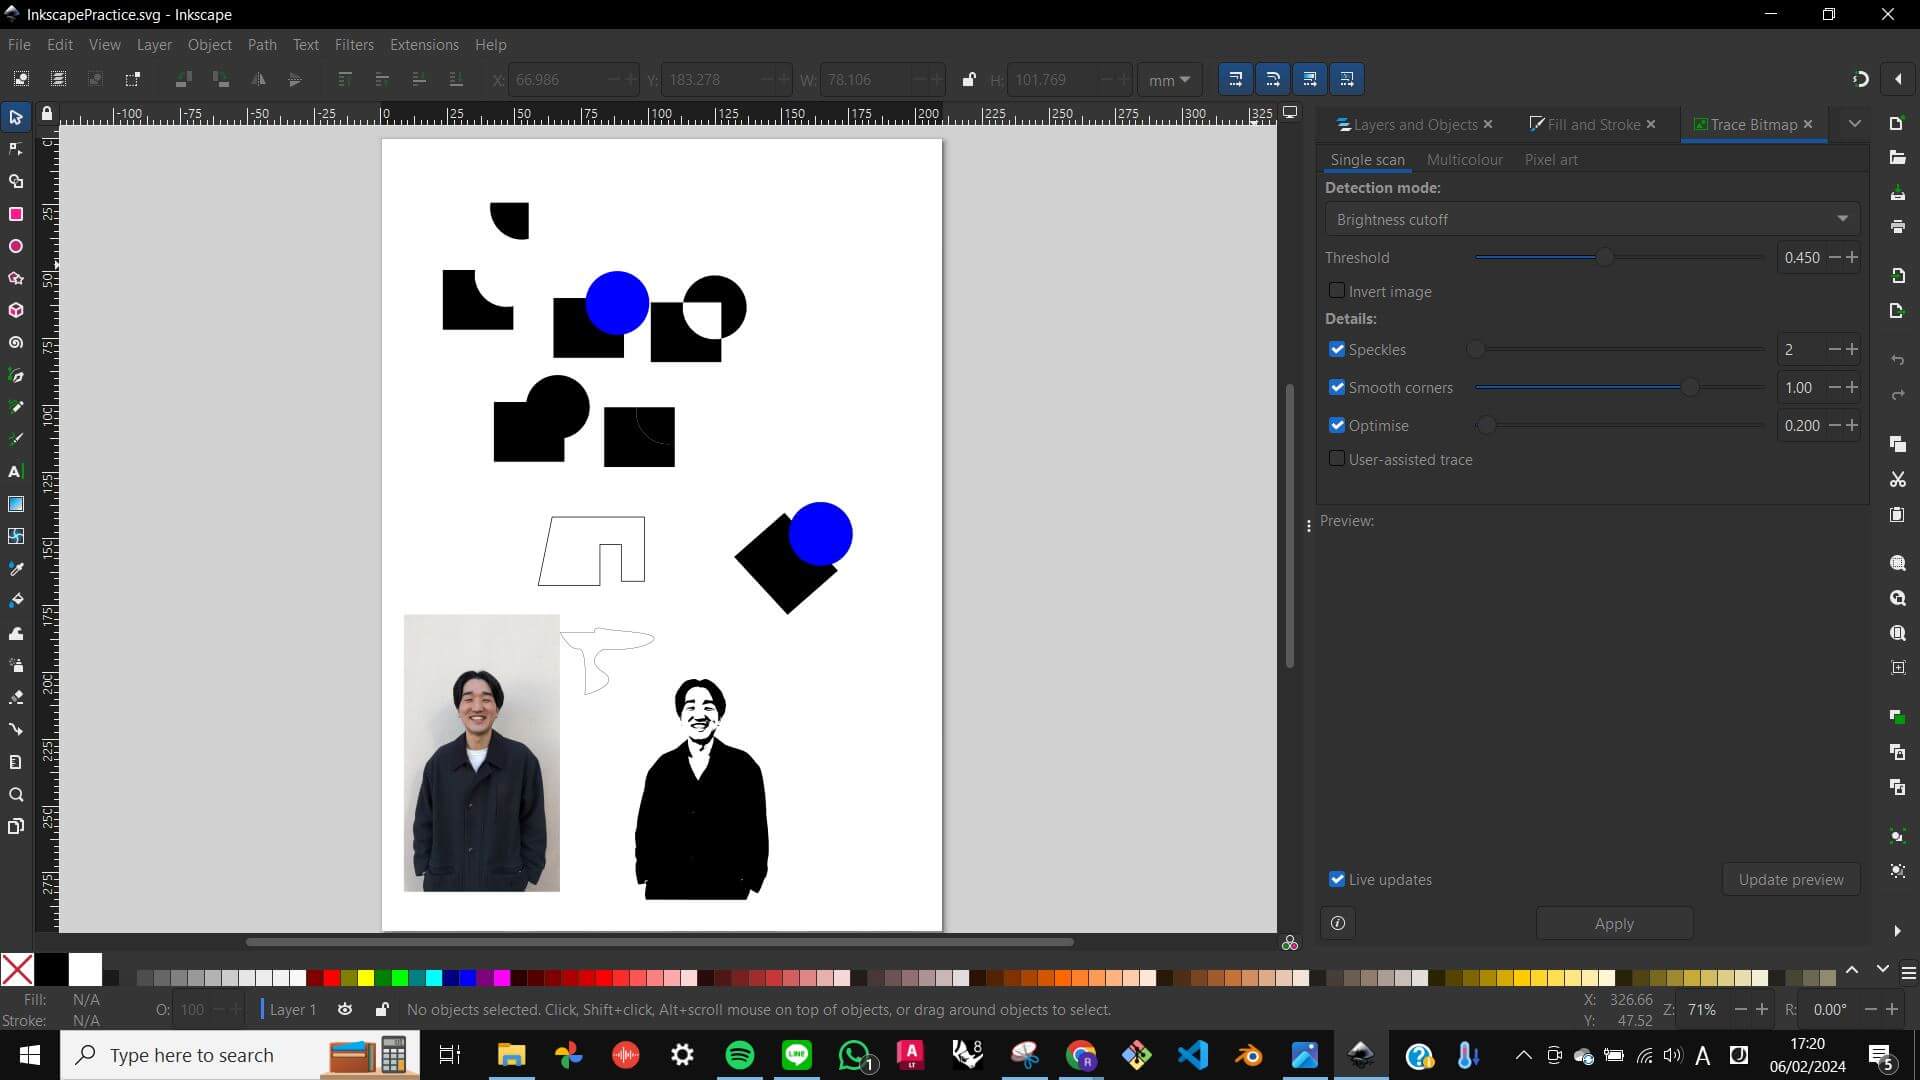
At first, we were introduced to Inkscape for 2D CAD. It is similar to Adobe Illustrator which I have a little bit of experience from before. In Inkscape, I followed instructions given by the tutor and tried to create shapes and different methods of boolean, such as boolean difference, union, and intersect. This is essential to understand since the boolean method was also used in 3D CAD.
Files
InkscapePractice.svg
Practice : TinkerCAD
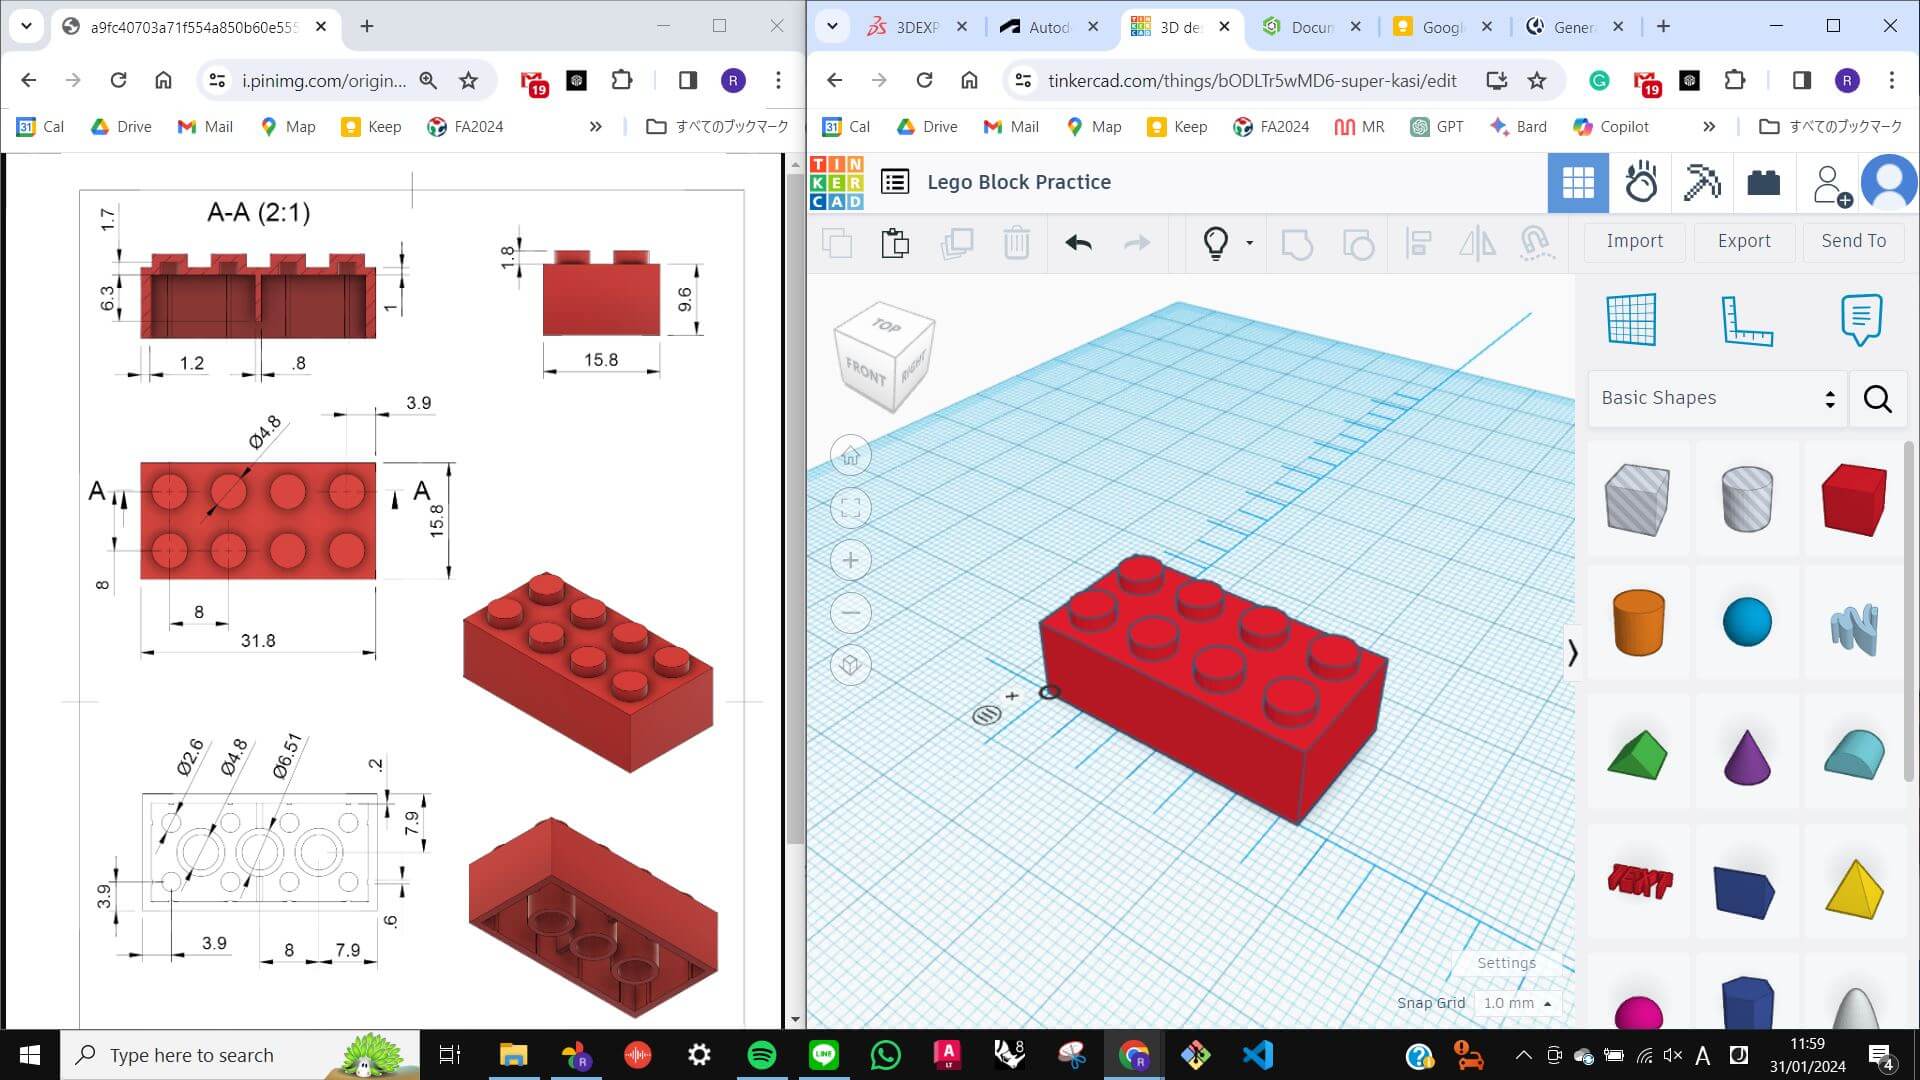
Next, we were introduced to TinckerCAD. In this session, we made a model of the Lego Block. We used a blueprint of a Lego Block which has all of the measurements. We started with 2D drawing and extrusion to make a simple box. Once we made two boxes, we made a boolean difference to create a hollow inside. In this session, we did extrusion and boolean difference repeatedly to create a simple model of Lego blocks.
Files
TinkerCAD_Lego Block Practice.stl
Lego Block Practice
Practice : Blender
At first, we were introduced to Inkscape for 2D CAD. It is similar to Adobe Illustrator which I have a little bit of experience from before. In Inkscape, I followed instructions given by the tutor and tried to create shapes and different methods of boolean, such as boolean difference, union, and intersect. This is essential to understand since the boolean method was also used in 3D CAD.
Files
Practice.blend1
Practice : Rhinoceros
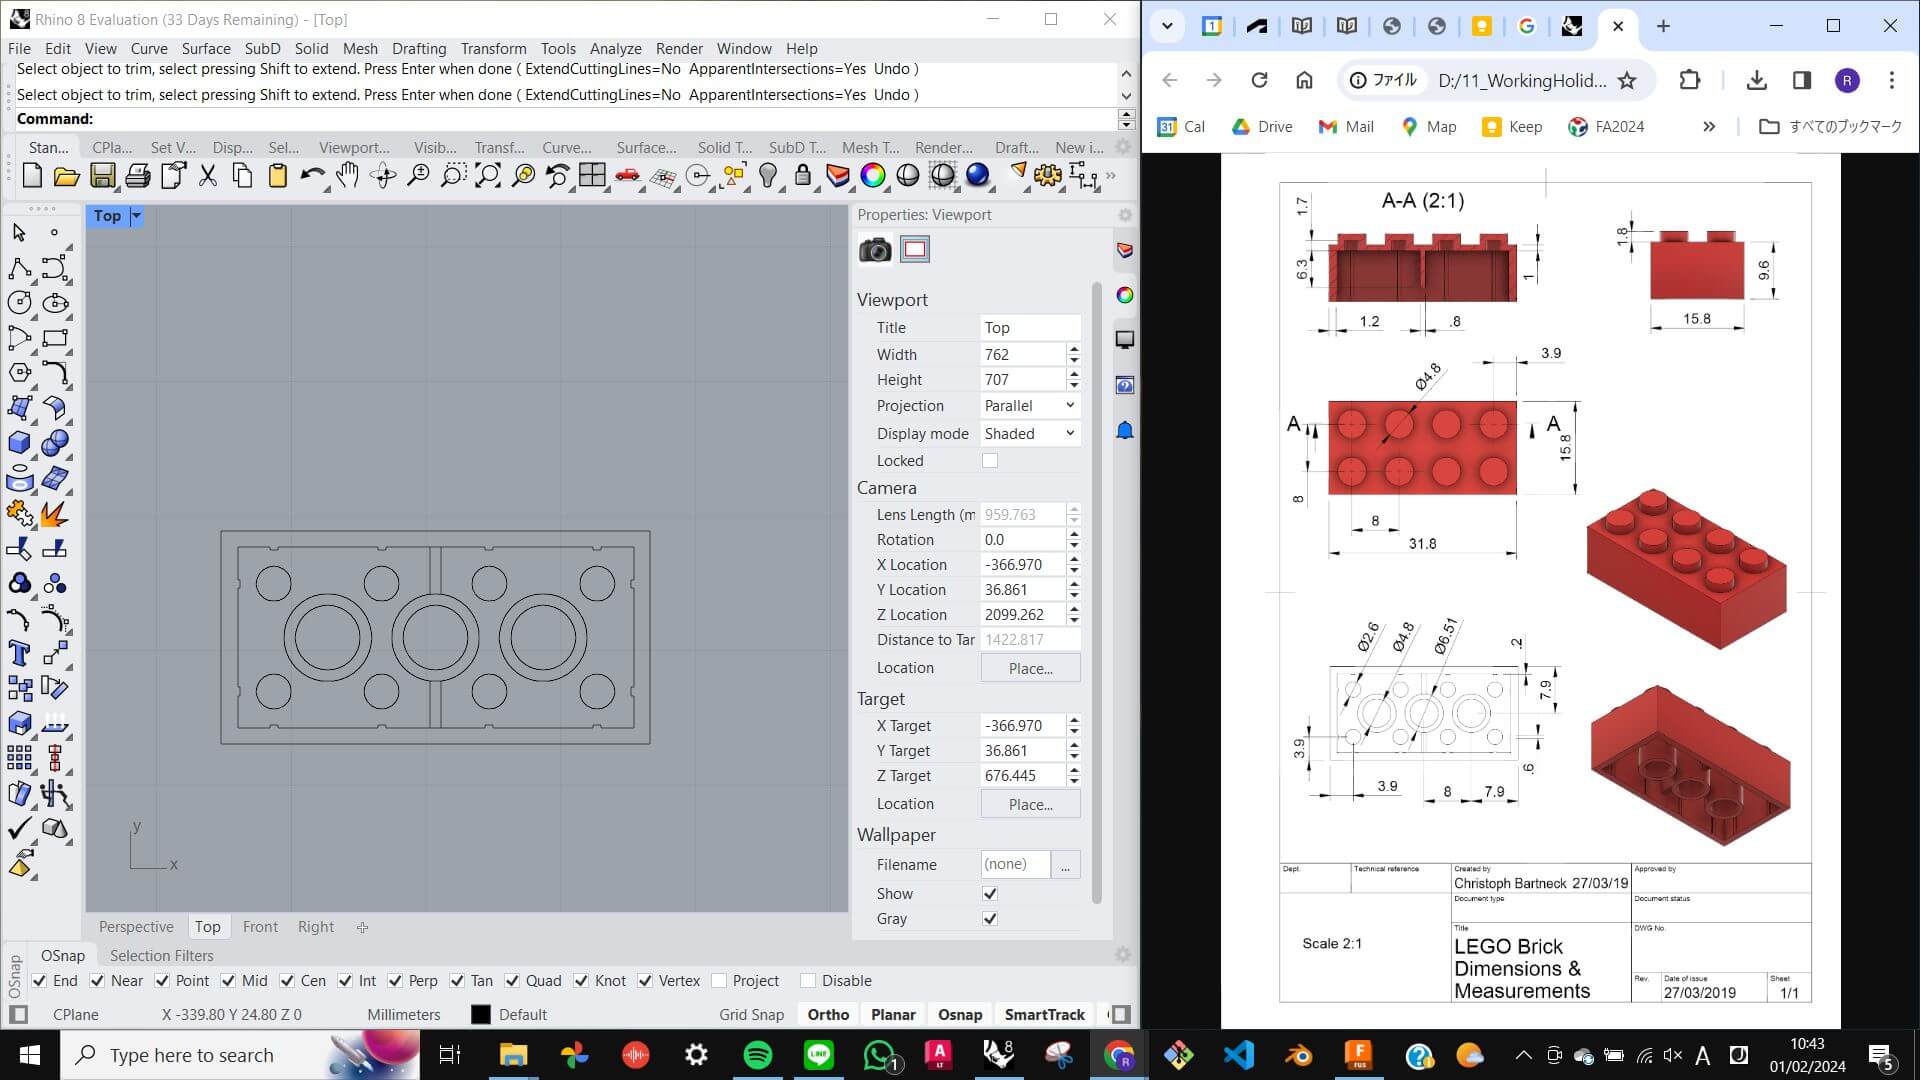
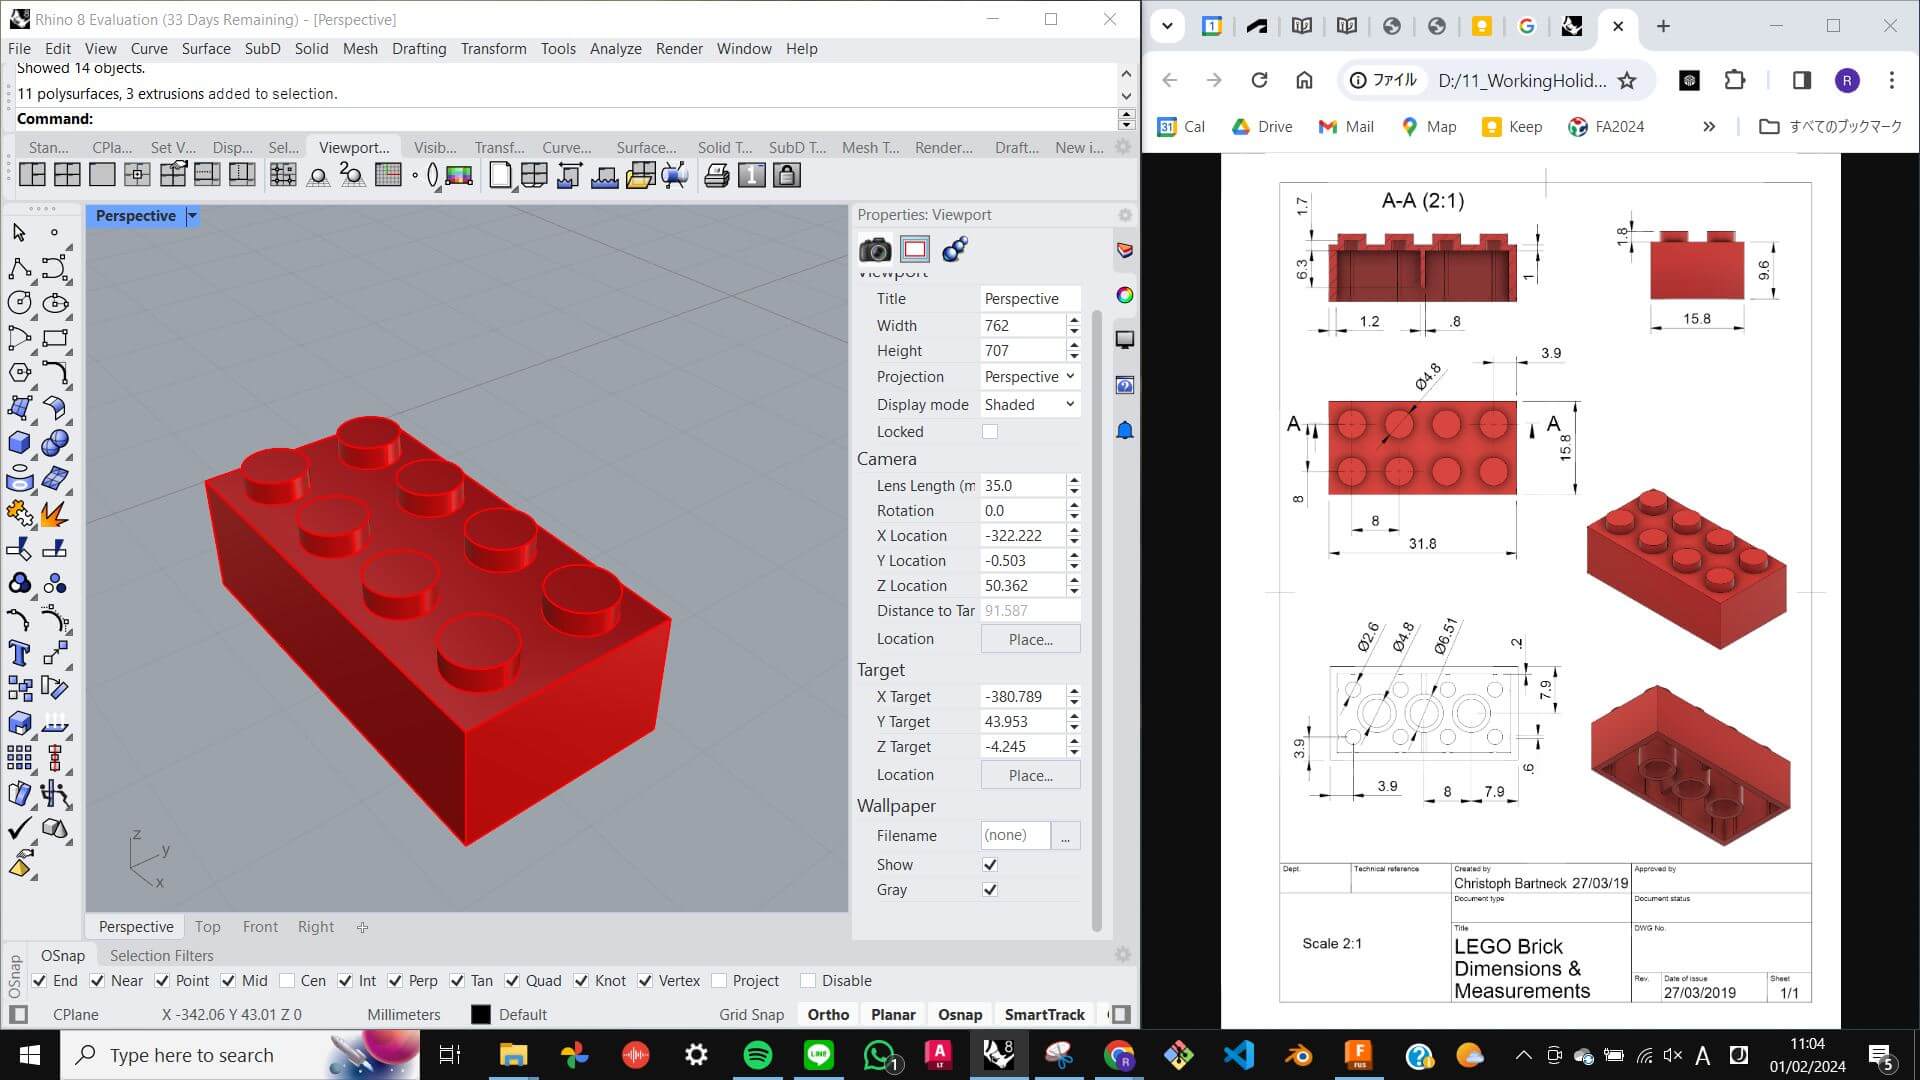
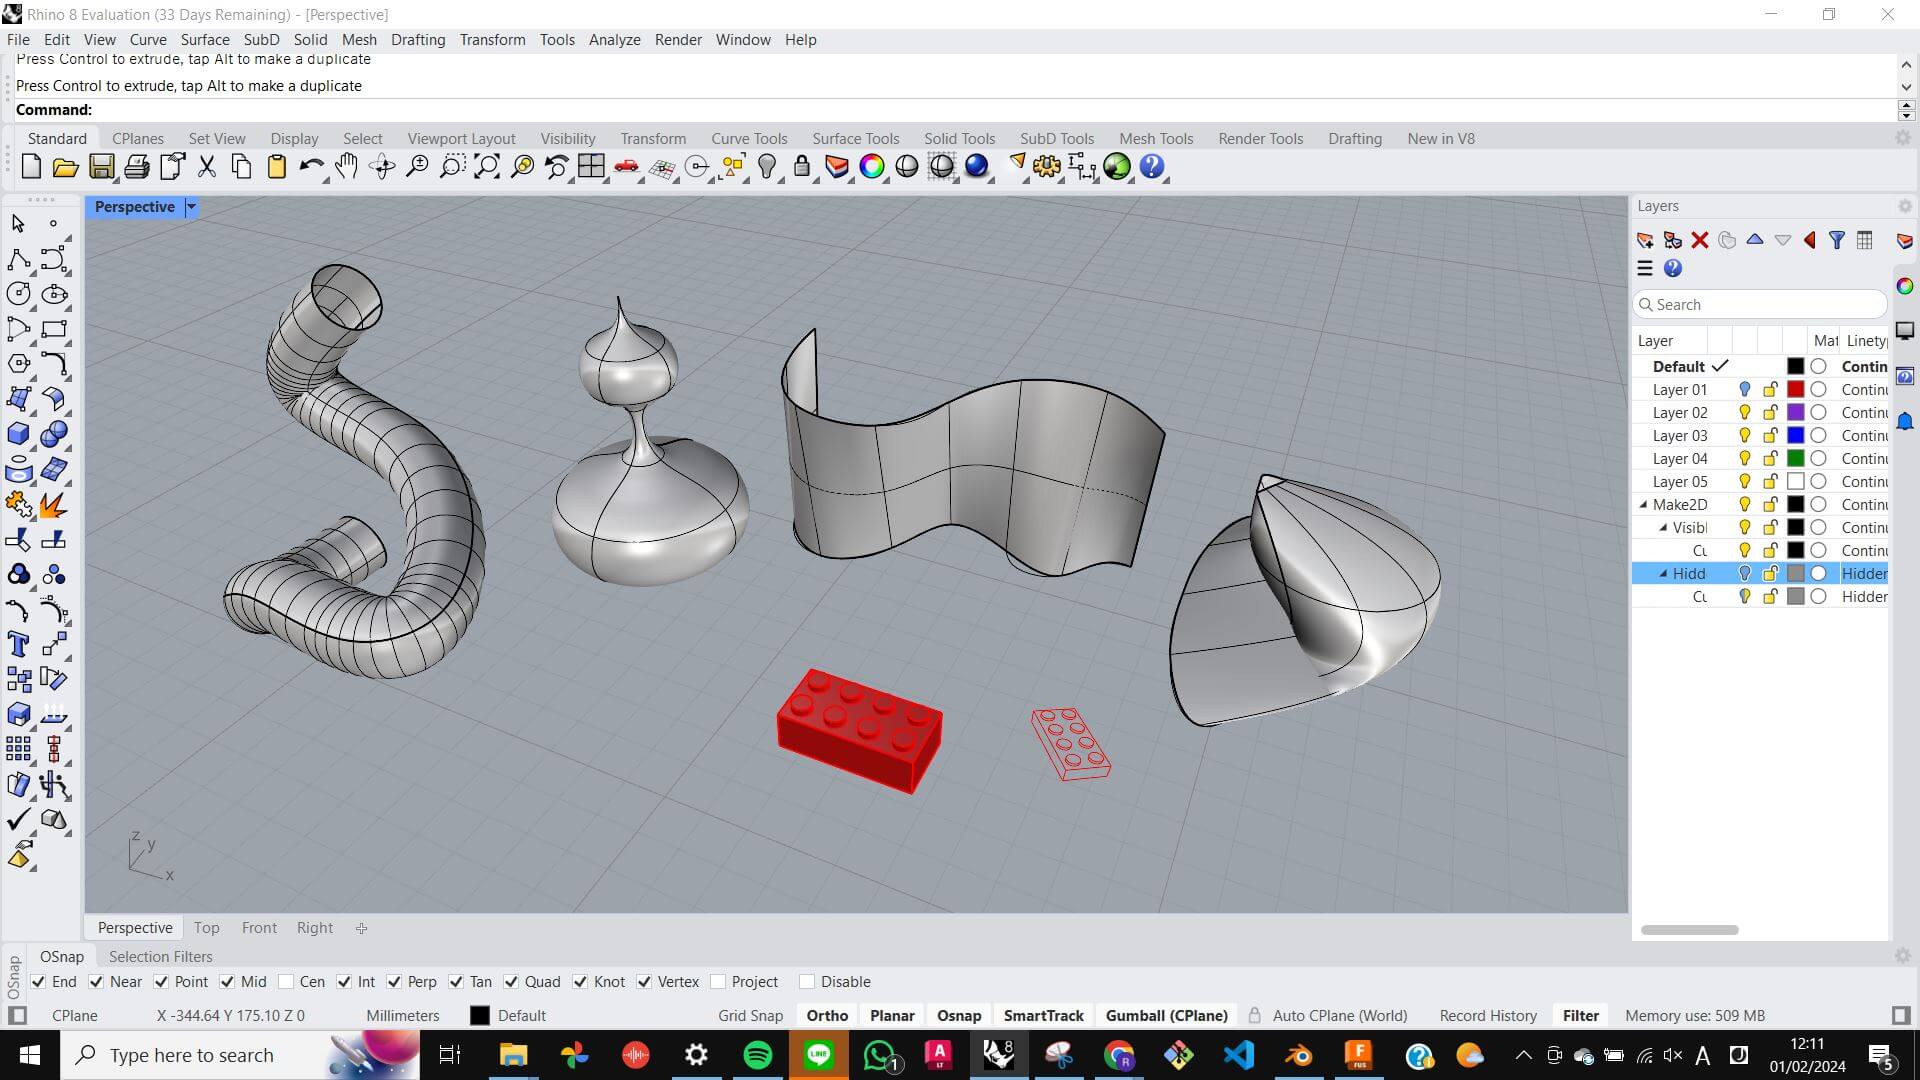
Next, we were introduced to Rhino. However I had already experienced it before, so It was not hard for me to create a Lego Block. Similar to Tinker CAD, Rhino’s workflow is mostly from 2D to 3D. Rhino being a hybrid of 2D and 3D, Rhino is often used for Architecture. (this is the reason why I have experience with Rhino.) At the end of the session, we were introduced to some other functions, such as sweeping and lofting. This is also the function I knew but it was a nice recap to remember how it works.
Files
Rhino_Practice.3dm
Practice : Fusion360
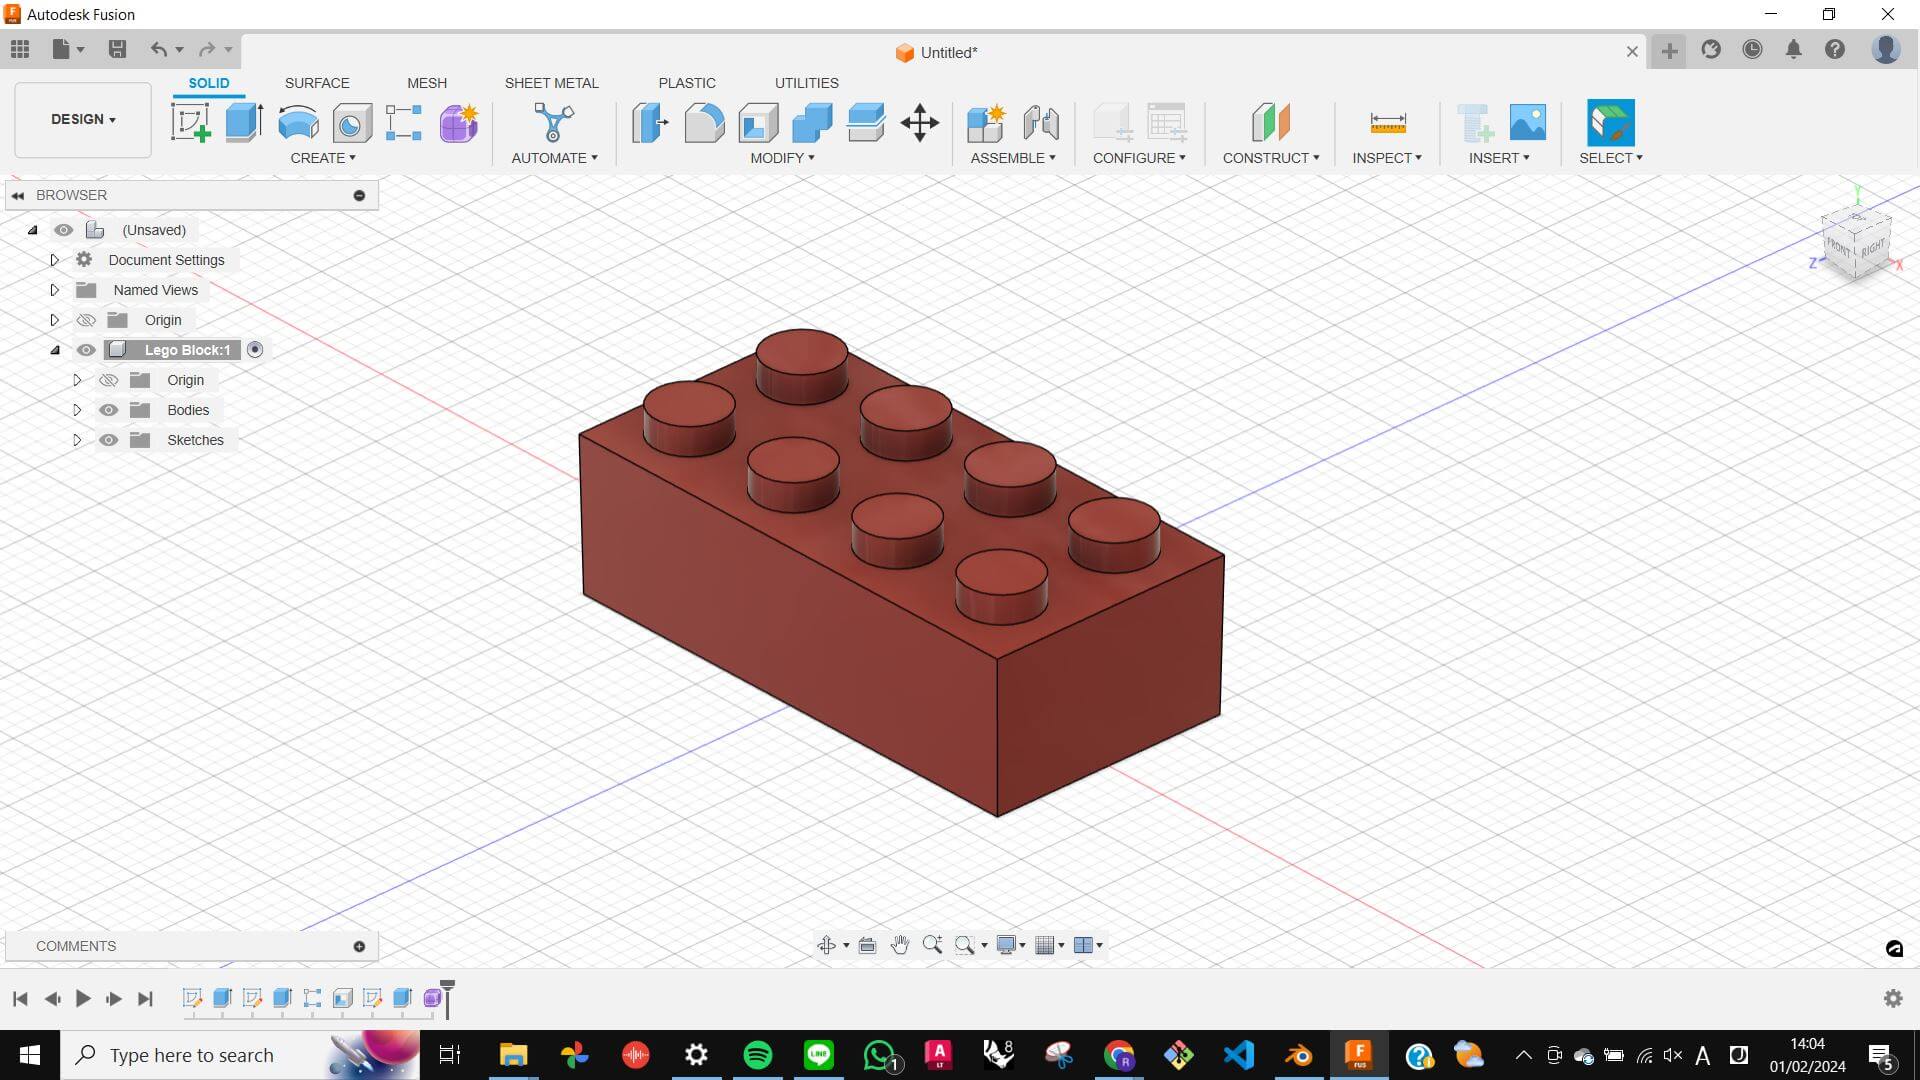
Next, we were introduced to Fusion 360, which I had no experience with it. It works very similar to other software (Solidworks and Onshape), however, the idea of components seems very useful when I want to make changes to many objects at once. In my understanding, it is important to follow the pop-up menu window to navigate the change that I want to make. Also, Fusion 360 has the function of making animation for mechanics. This function looks very useful to show the assembly of different parts.
Modeling : Blender
After getting introduced to different software, I decided to practice Blender for 3 reasons.
- Seems different from what I am used to.
- Function to animate objects
- Function to apply physics

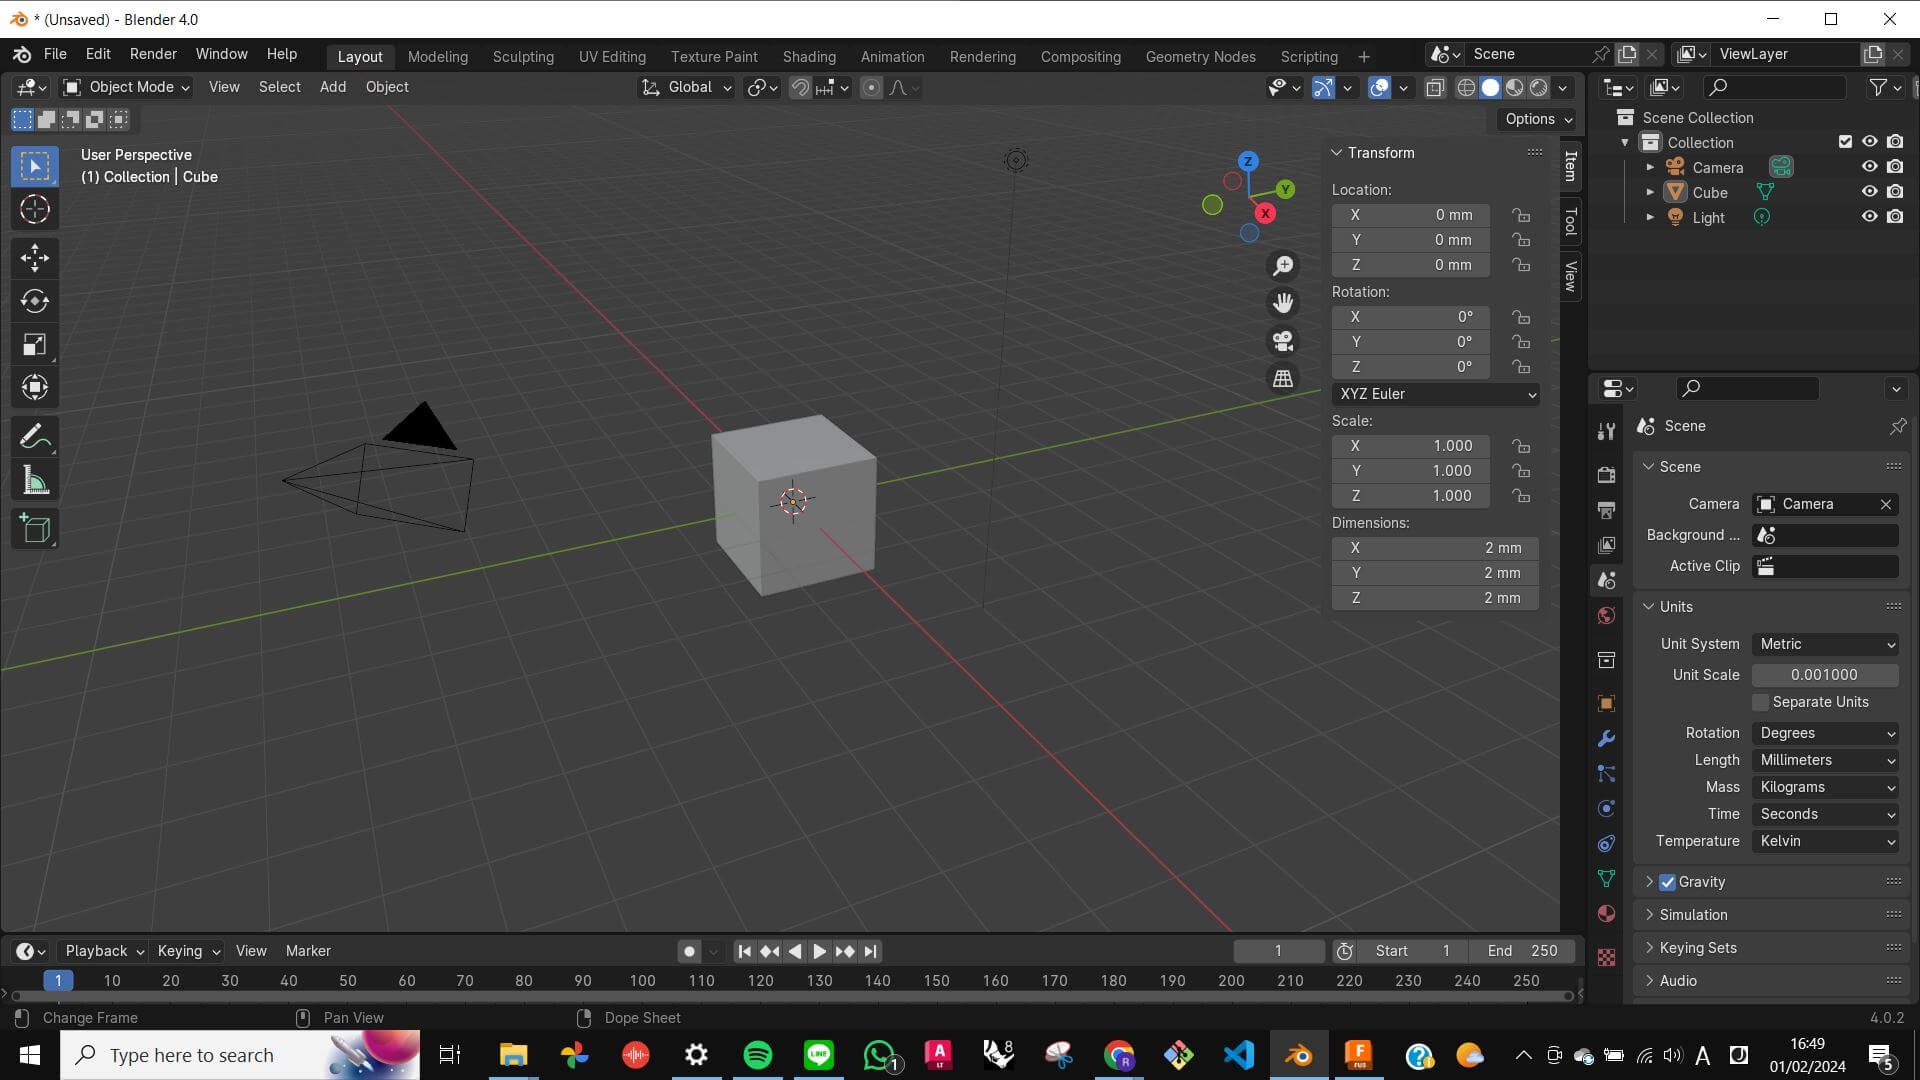
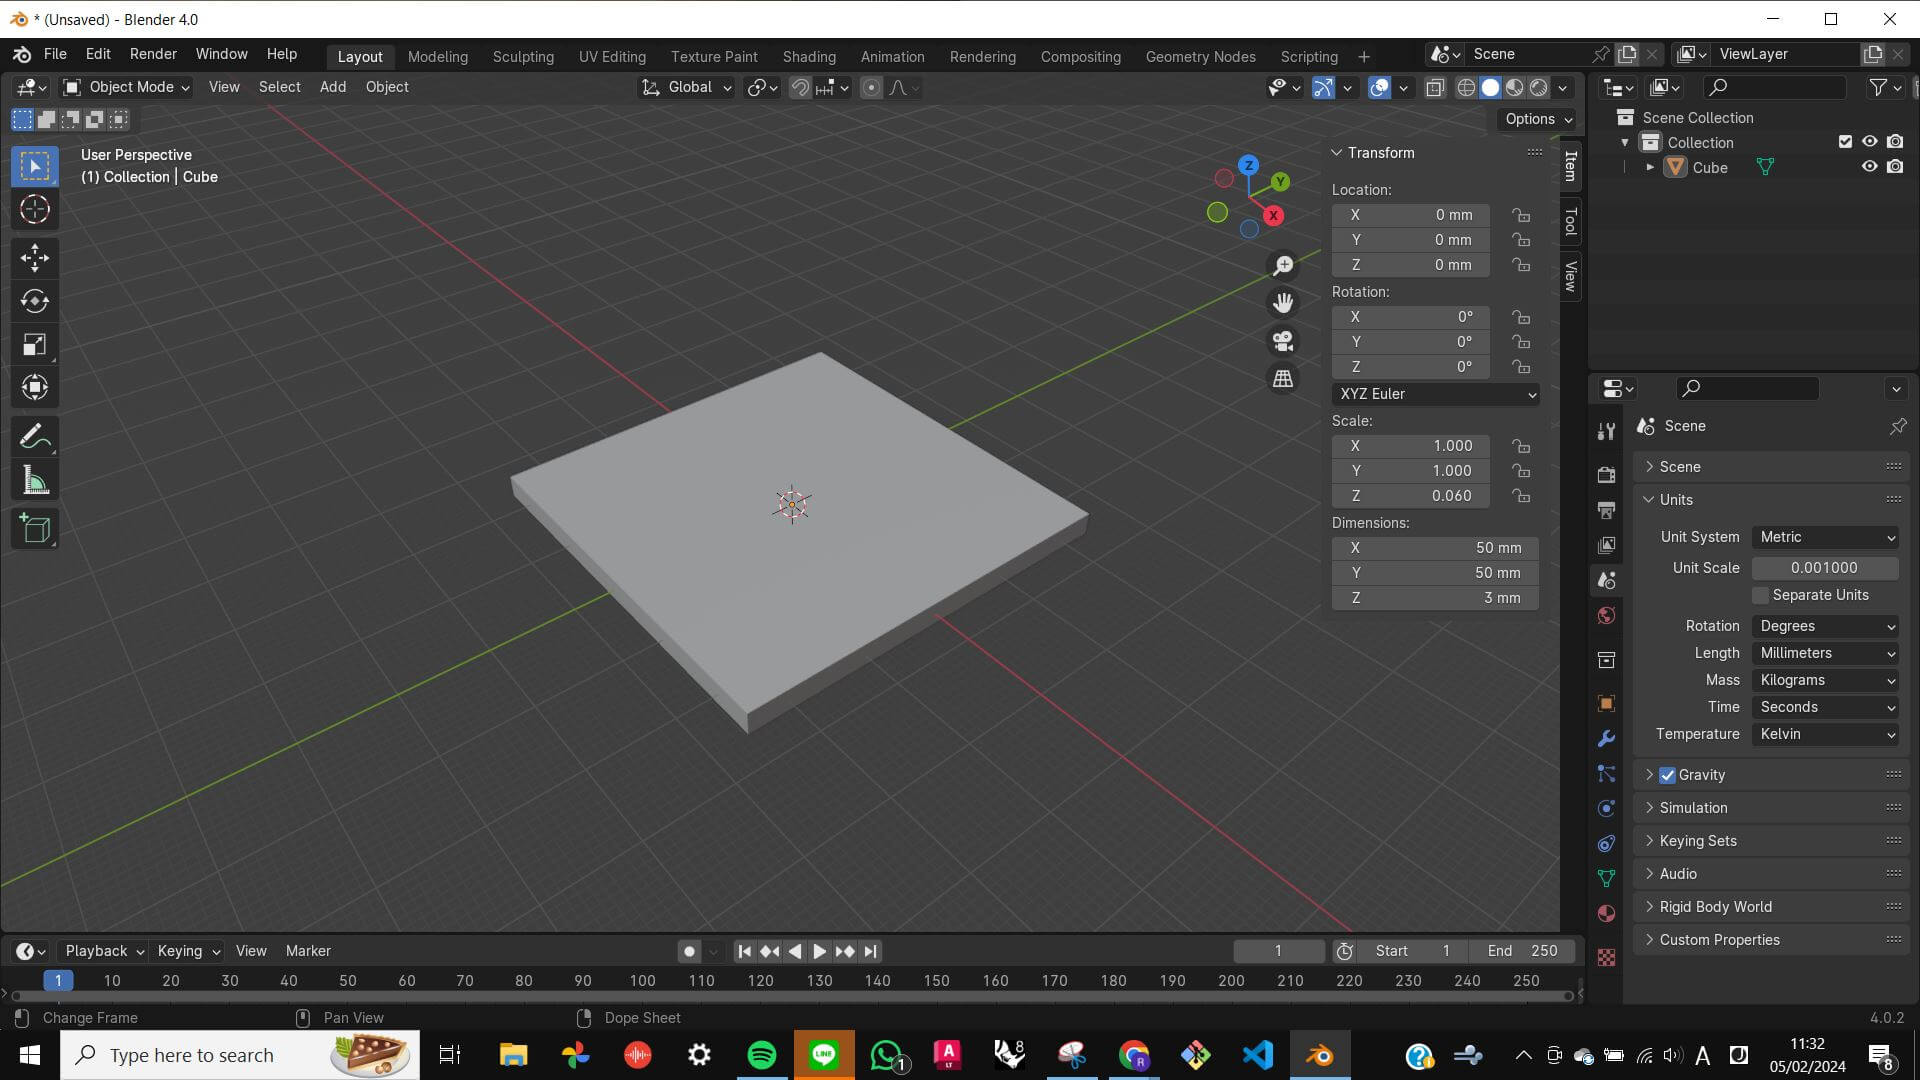
Blender Set-up (problem)
I had a problem with the scaling of the world in Blender. Whenever I added an object, it was really big and I needed to scale it down every time. My tutor helped me with this problem. To fix this, go to [Scene] on the side window - [Unit] - [Unit Scale] to 0.001 - [Length] to Millimeters, [Viewport Overlay] - [Scale] to 0.001, and hit [N] - [View] - [Clip] start to 0.1mm end to 100000. If I want to set this scaling as default go to [File] - [Default] - [Save Startup File]
Blender Tutorial
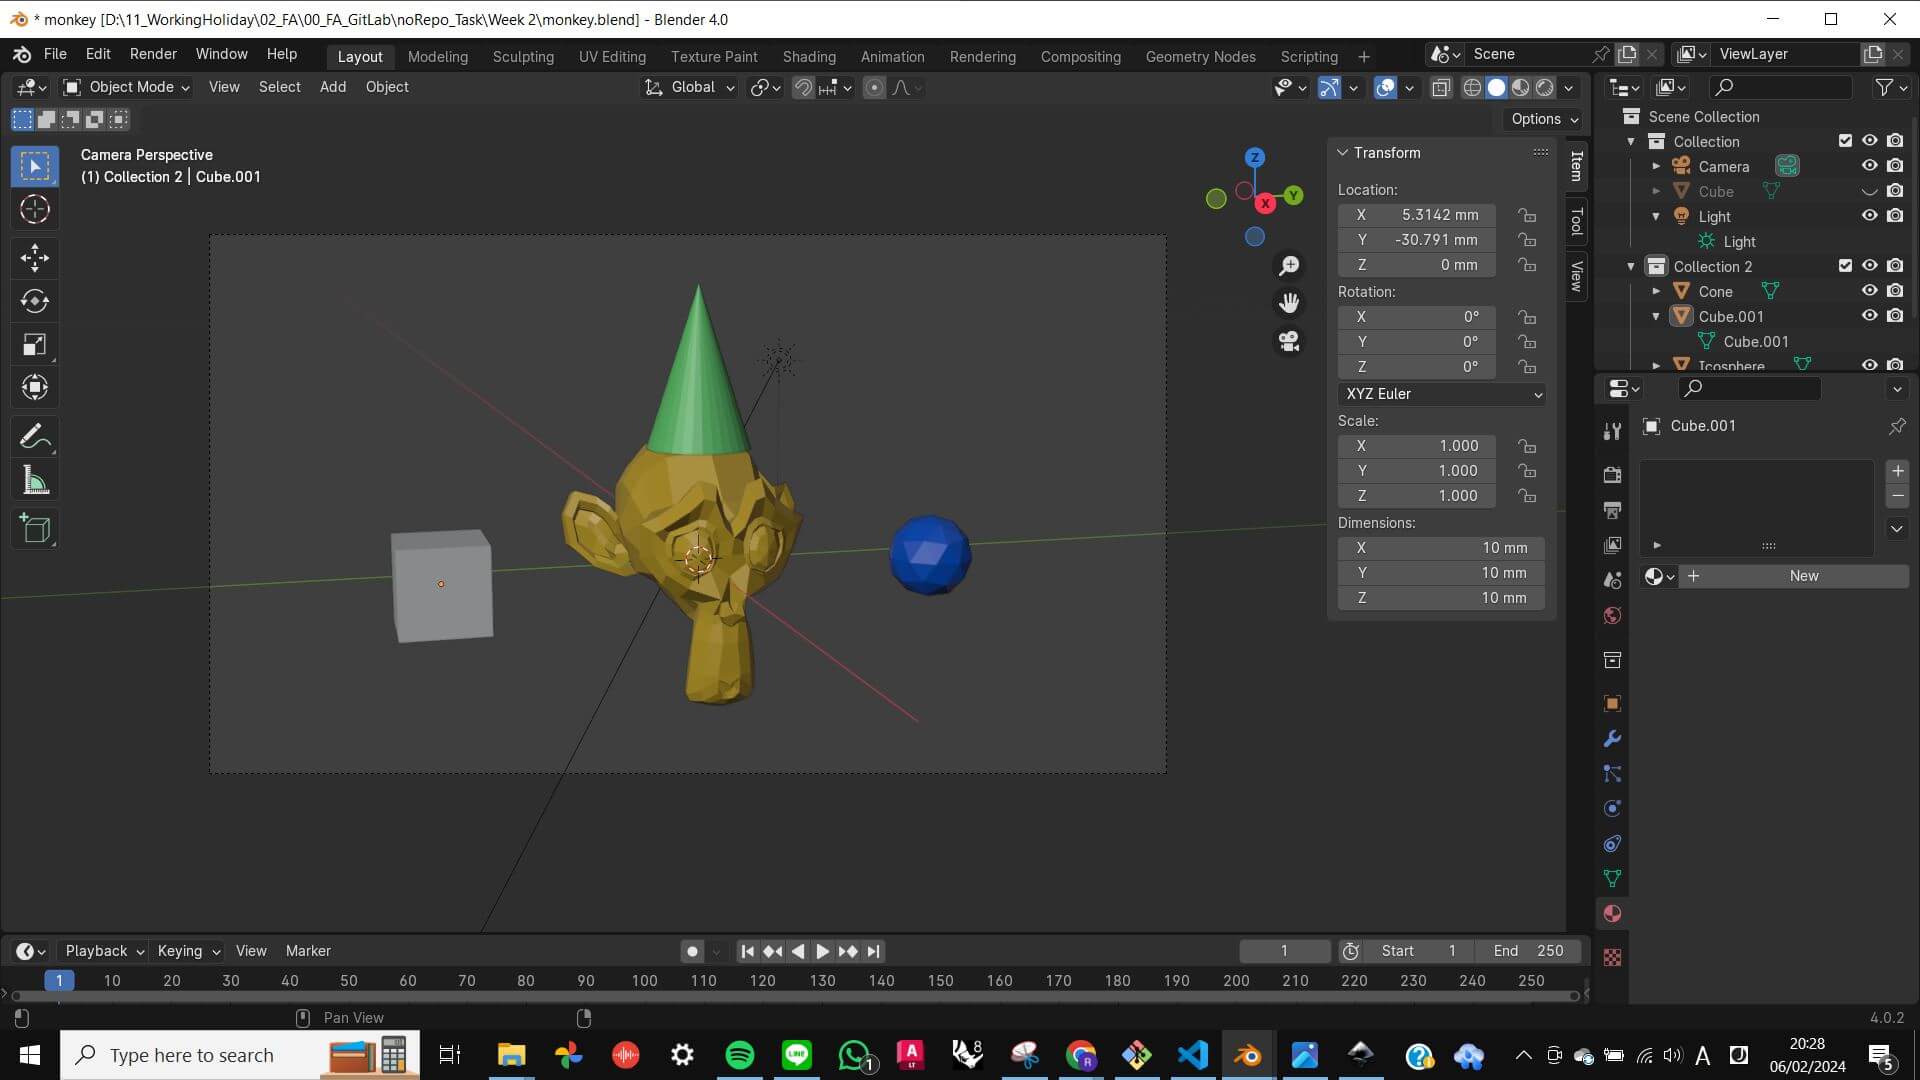
To get used to Blender more, I decided to follow the famous Donut tutorial which was recommended by my tutor. Below is my journey of making a donut in Blender. Instead of going through every detail of those tutorials, I will only record methods and commands that I learn from them.
Tutorial 1 Basic
[Ctrl] + [A] : Apply
[Shift] + [A] : Add
[Shift] + [D] : Duplicate
[Shift] + [Z] : Switch Views
[Tab] : Switch Modes
[G] : Grab
[X] [Y] [Z] : to align on XYZ axis
[Ctrl] + [P] : Parent
[Alt] + [P] : Clear Parent
[B] (when grabbing object) : select grabbing point.
[0] : camera view
[N] : Properties
[Material] : Material editing
[S] : Scale
[R] : Rotate
Files
monkey.blend1
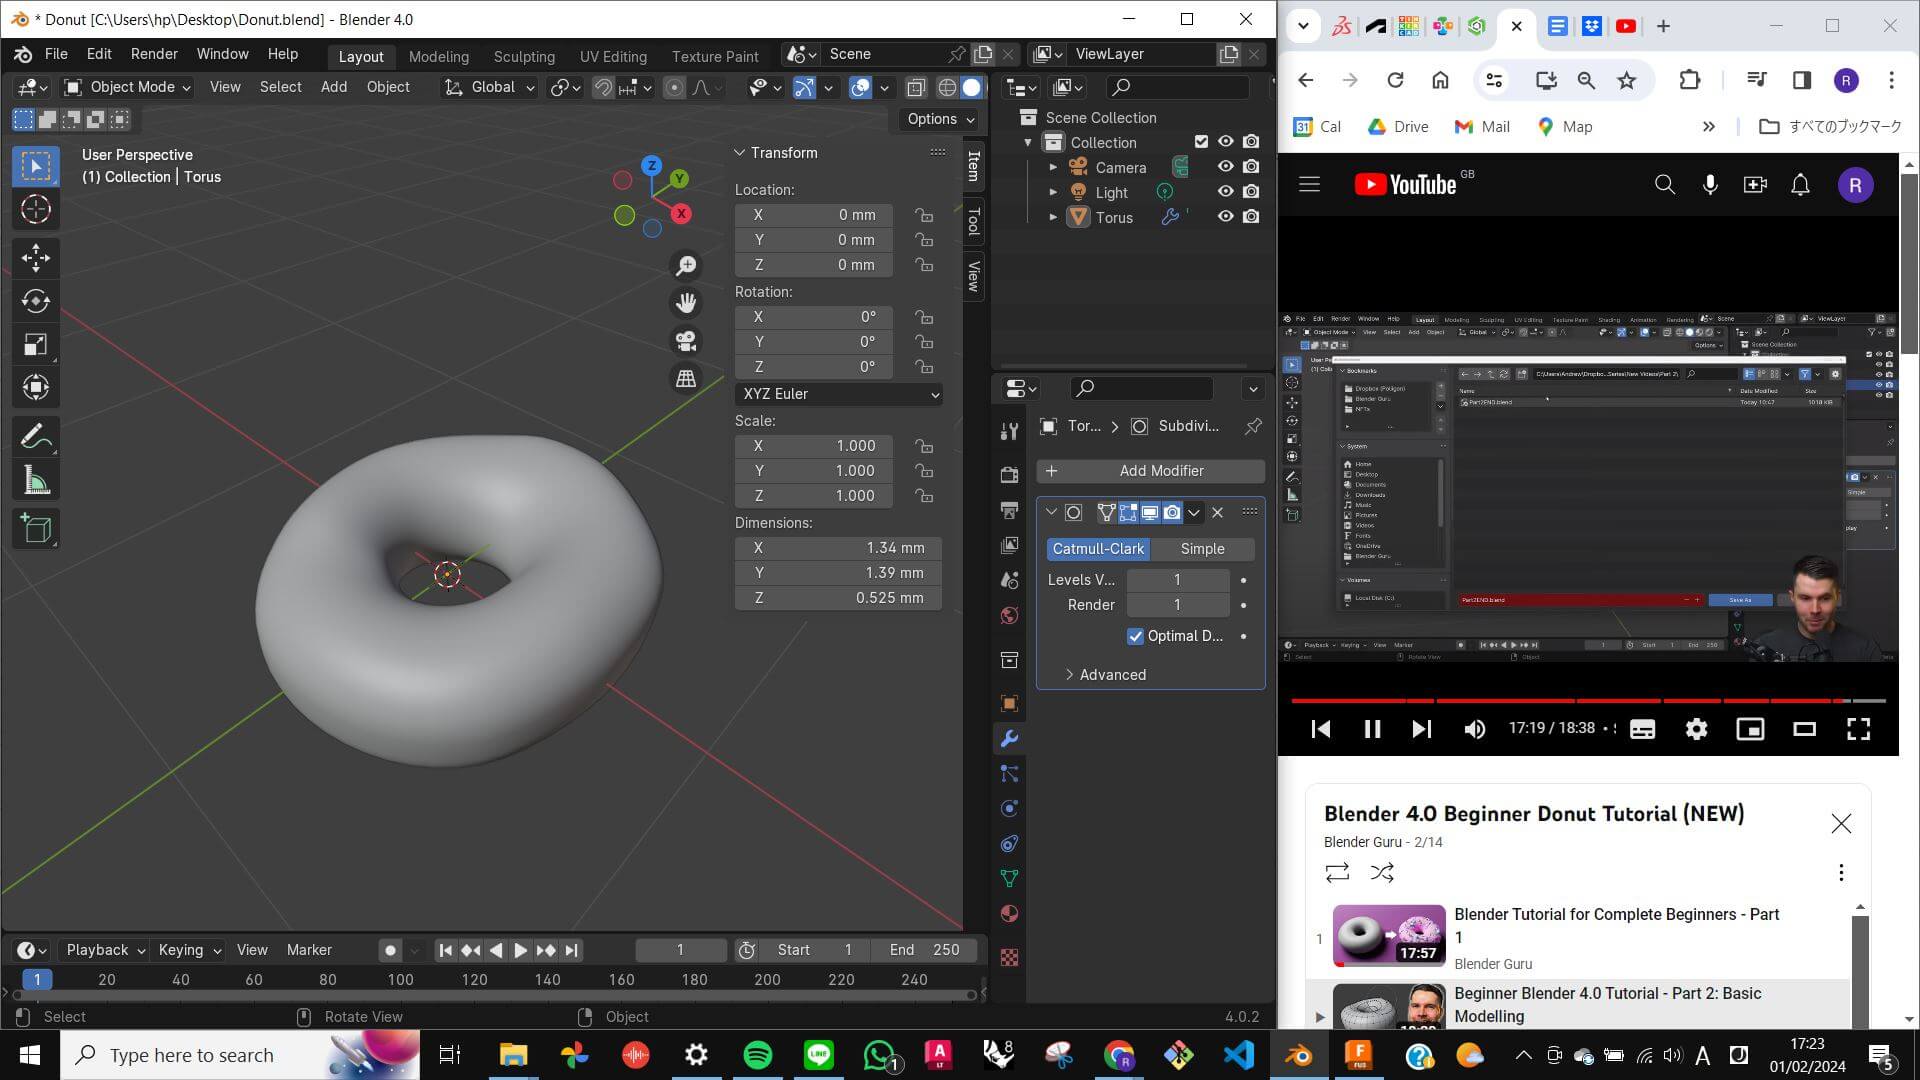
Tutorial 2 Basic Modeling
After adding object [Shift] + [A], a chance to tweak with a pop-up window at the bottom.
No high resolution. (slow to render, hard to work with. Easy to add resolution after)
[Right click] - [Shade smooth] : fake smooth shading
[Modifier] - [Generate] - [Sub-division] - [Level] viewport 1 render 1 (keep it light)
Vertex = Point, Edge = Line, Face = Surface
[Propotional Editing] : icon with two circles on the top right. Allow the surrounding vertex to move according to the selected vertex.
[Alt] + [Left click] : select edge all around the object.
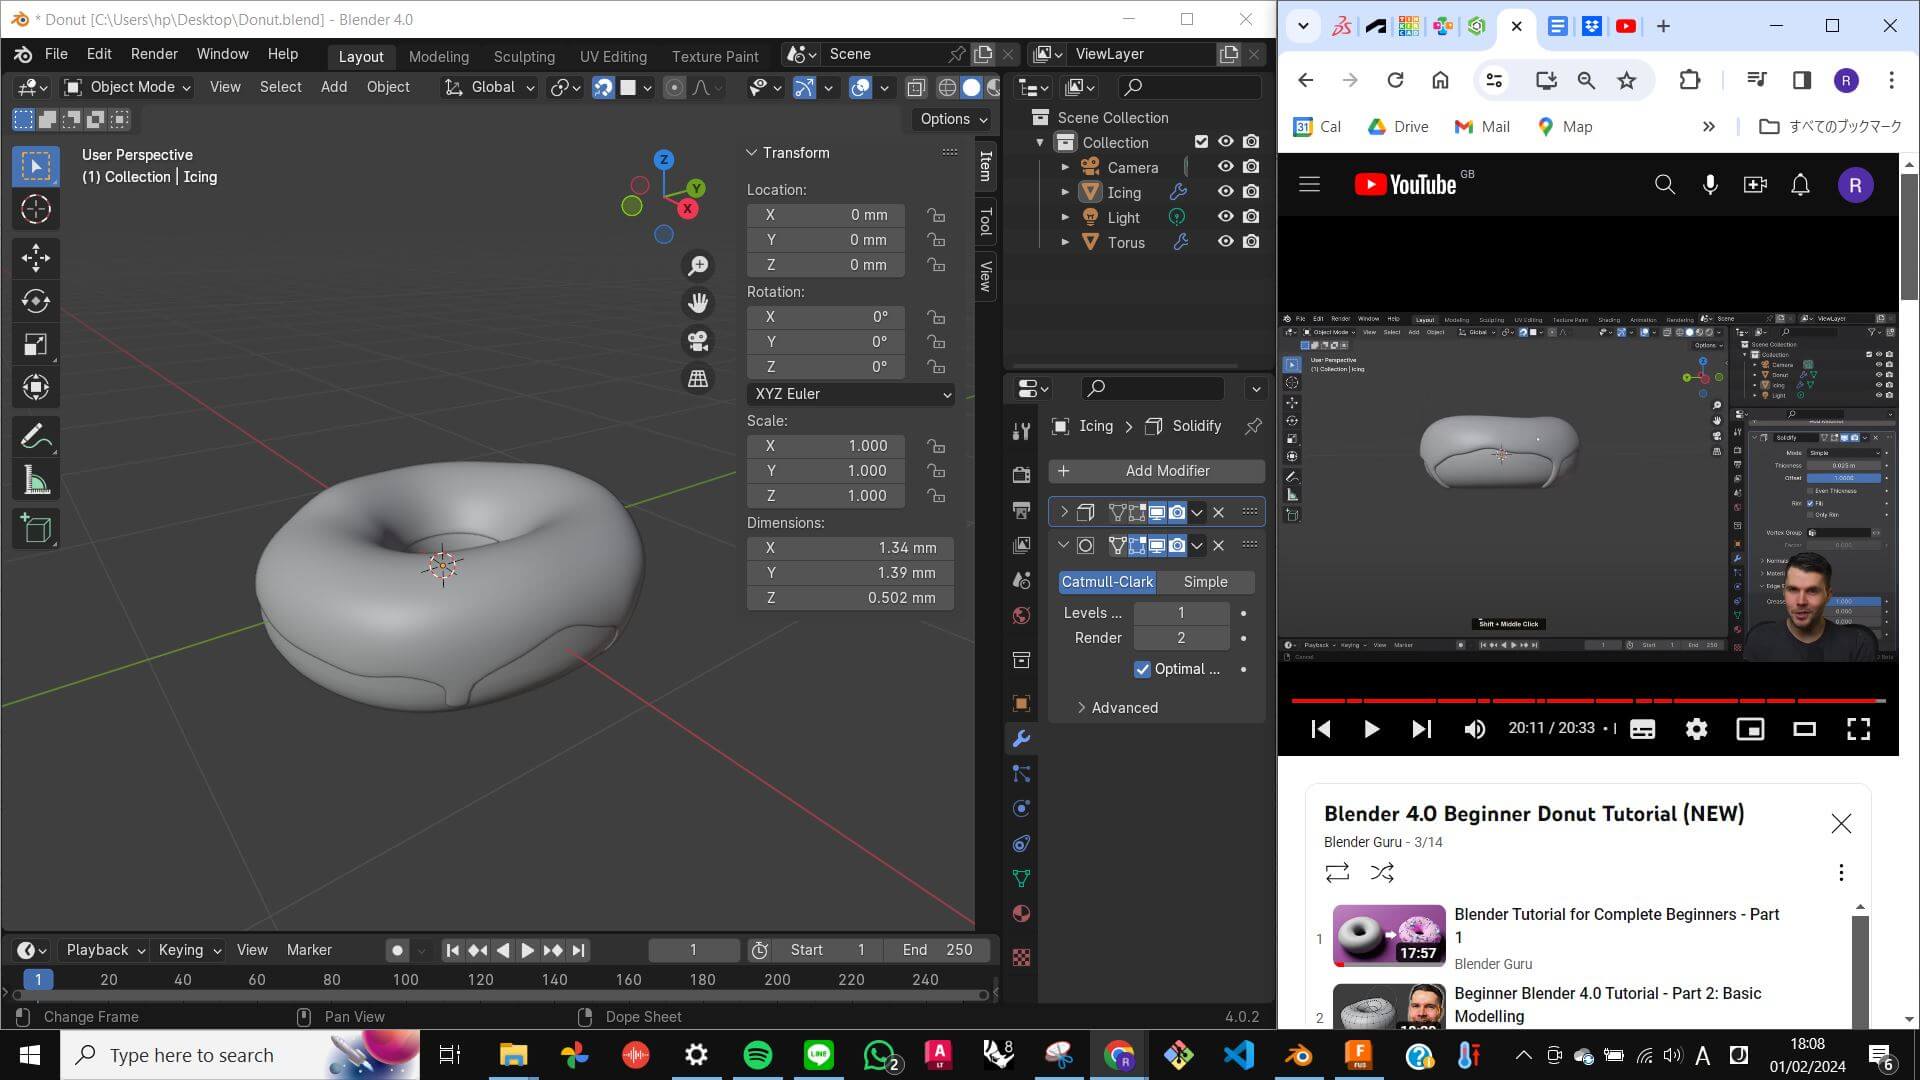
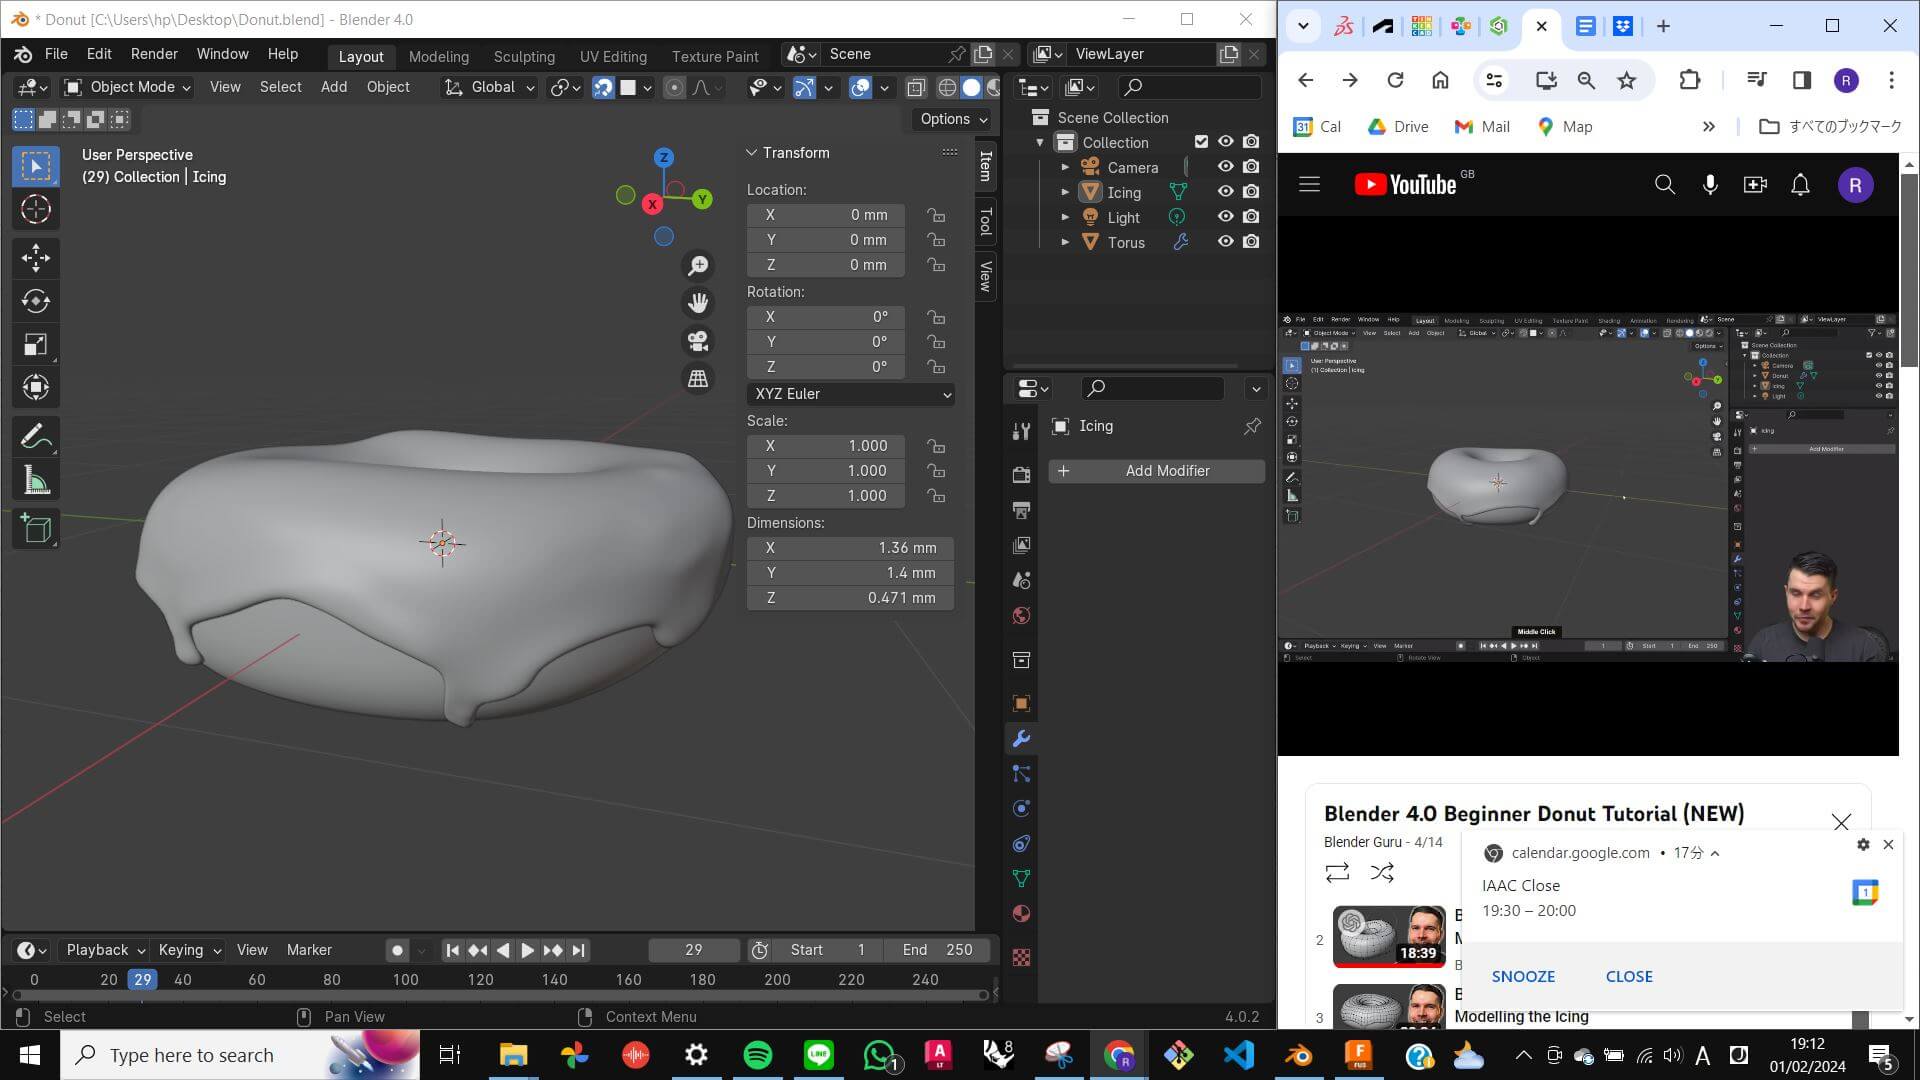
Tutorial 3 Icing
[D] - [Right click] : duplicate an object in the same position.
[Toggle X-Ray] : icon with two squares on the top right. Allow to select the thing behind it.
[Modifier] - [Solidify] - [Offset] to 1(for thickness outward)
[Snap] : magnet icon on the top middle. Allow to snap.
[Snap] - [Face Project] : allow to snap on faces.
[Modifier] -[Sub-division] : to add more geometry
[Alt] + [Left click] - [Ctrl] + [+] : to select next edge.
[H] : Hide
[Alt] + [H] : Unhide
[Modifier] - [Solidify] - [Edge Date] - [Crease]
[E] : Extrude
Tutorial 4 Sculpting
[Modifier] - [Deform] - [Shrink Wrap] - select target - [Apply]
[Modifier] - [Thickness]
Sculpting Mode
Inflate blush
[F] : to change size of blush
[Shift] + [F] : to change strength
Looks low poly because the subdivision is applied after sculpting.
If I want to go into more detail [Sub-division] - [Apply] then sculpting again
[M] : Mask
[/] : Isolate object
[Ctrl] + [i] : Invert
[Mesh filter blush] : uniform inflation
[Smooth blush]
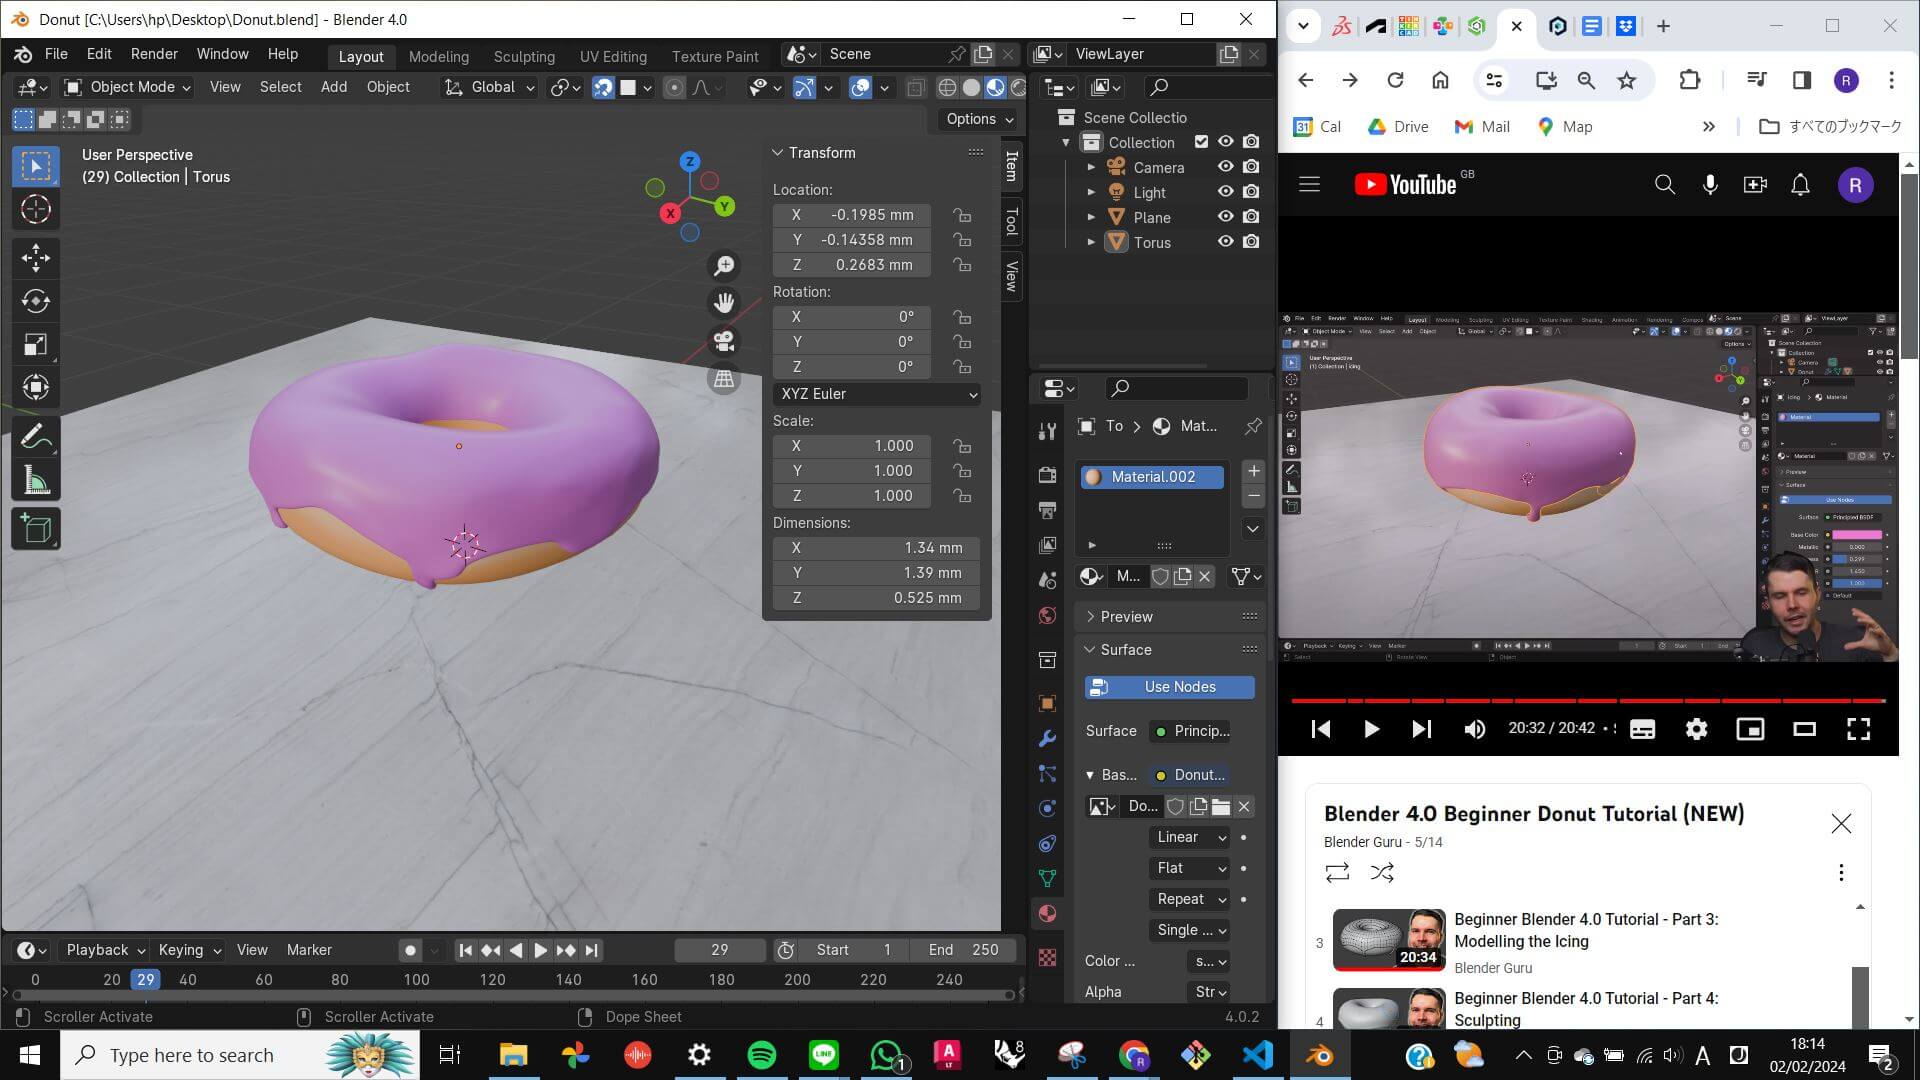
Tutorial 5 Material
Render view
Side window - [Material] - color & roughness
[Ctrl] + [P] : Parent. select child, then select parent. [Object Keep Transform]
[Material] - [Image texture] - open image
[Shading] : tab on top right
Join Area : Right-click on the border between windows to get rid of unused windows
Node Setup windows : the bottom window on the Shading menu. Workflow is from left to right.
[Shift] + [A] or drag line and release : add new element
[Image texture color] - connect to roughness - change color space to noncolor - add image
To add normal map : convert image texture to [vector: normal map] - normal
[Ctrl] + [space bar] : Full Screen
Use Add-on (to skip the image texture part)
PDR Shader
[Texture Paint] : paint directory to mesh
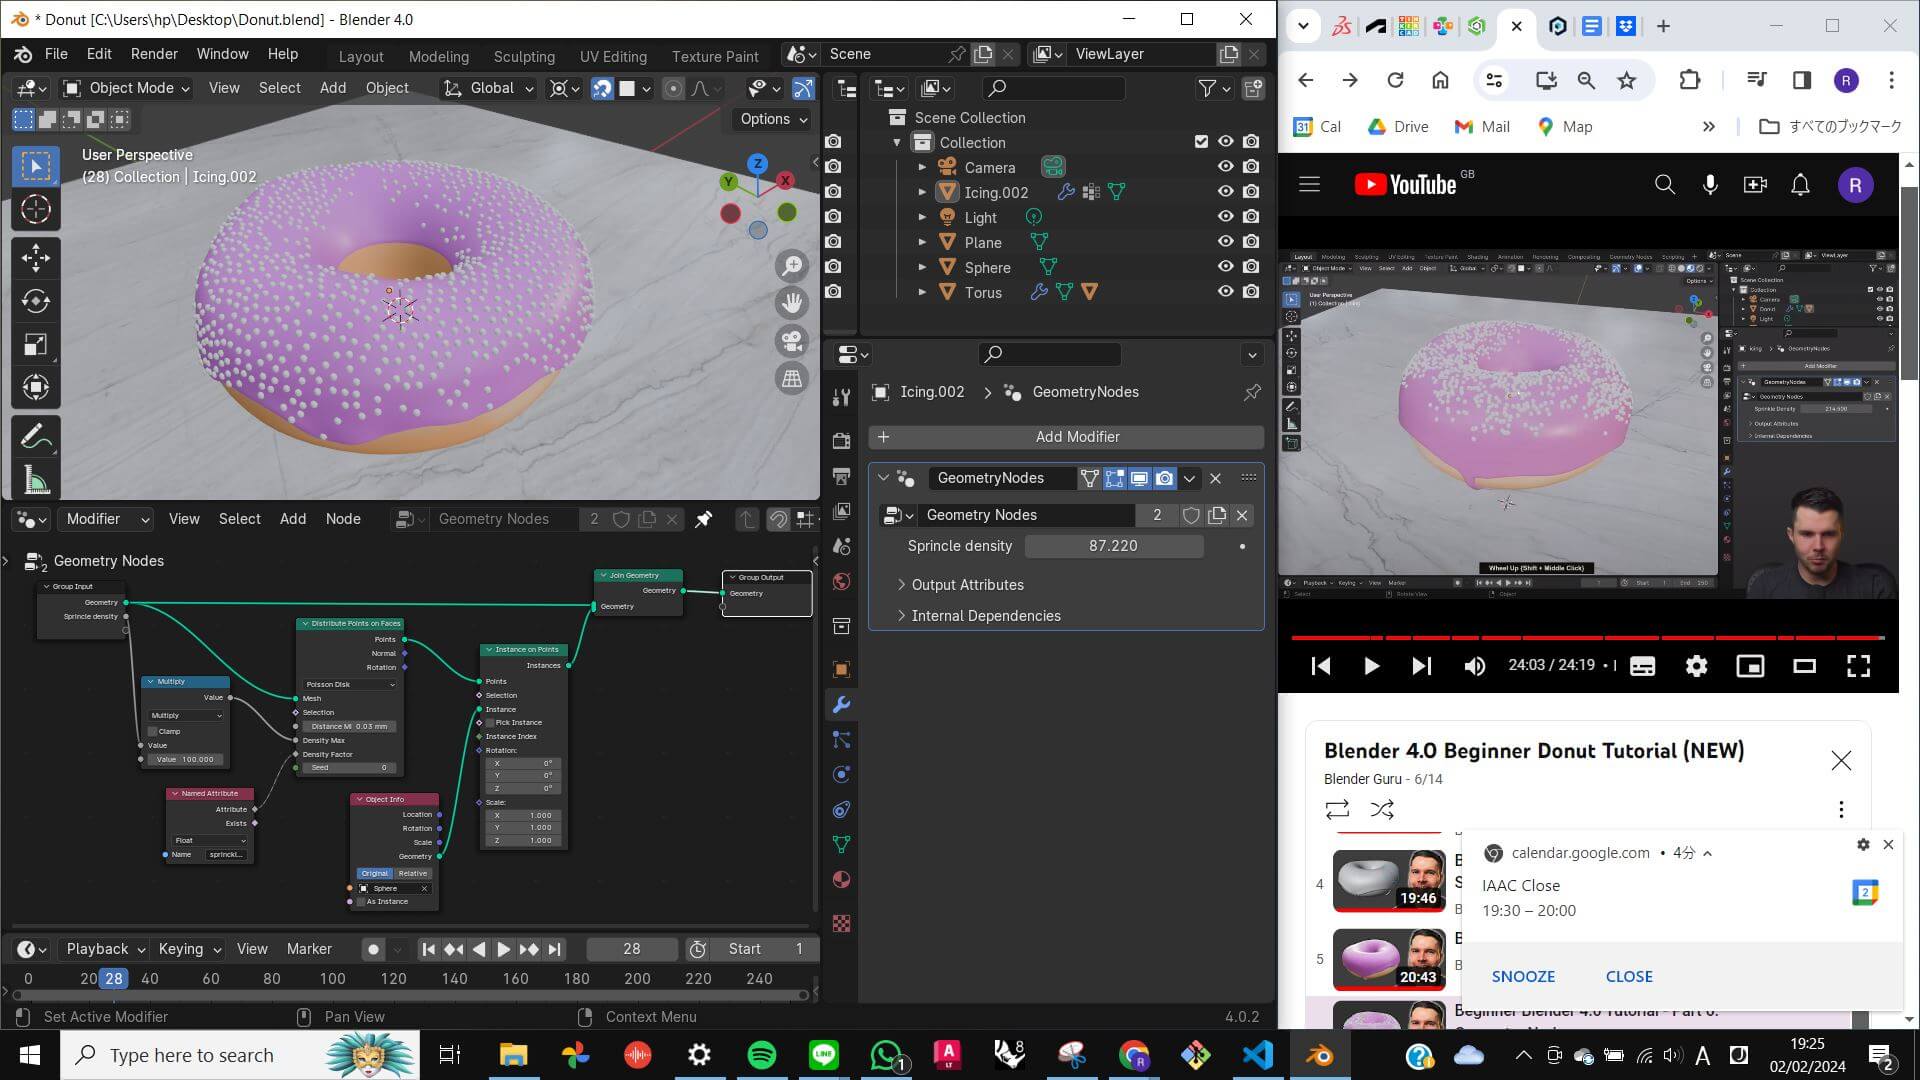
Tutorial 6 Geometry Node
Middle mouse click and drag to slide tab
[Select] - [New] - [Geometory Node] : to create whatever I want to do
[Shift] + [A] - point - [Distributed points on face]
[Shift] +[A] - geometry - [Join Geometry]
Geometry node does not show in render because it does not exist.
So, create shape - UV sphere - drag&drop from collection to Node
Connect [Geometry] - [Instance]
[Weight Point] : distributed point of face
Create Vertex - automatically added group - name it - go to Node - [Names Attributed] - connect to [Density face]
[.] (number pad) : quickly zoom into the object
[A] : Select all
Math in Node - [Shift] + [A] - [Utility] - [Math] - [Math]
Files
PracticeBlender_DonutTutorial.blend
Model for Final Project (particle)
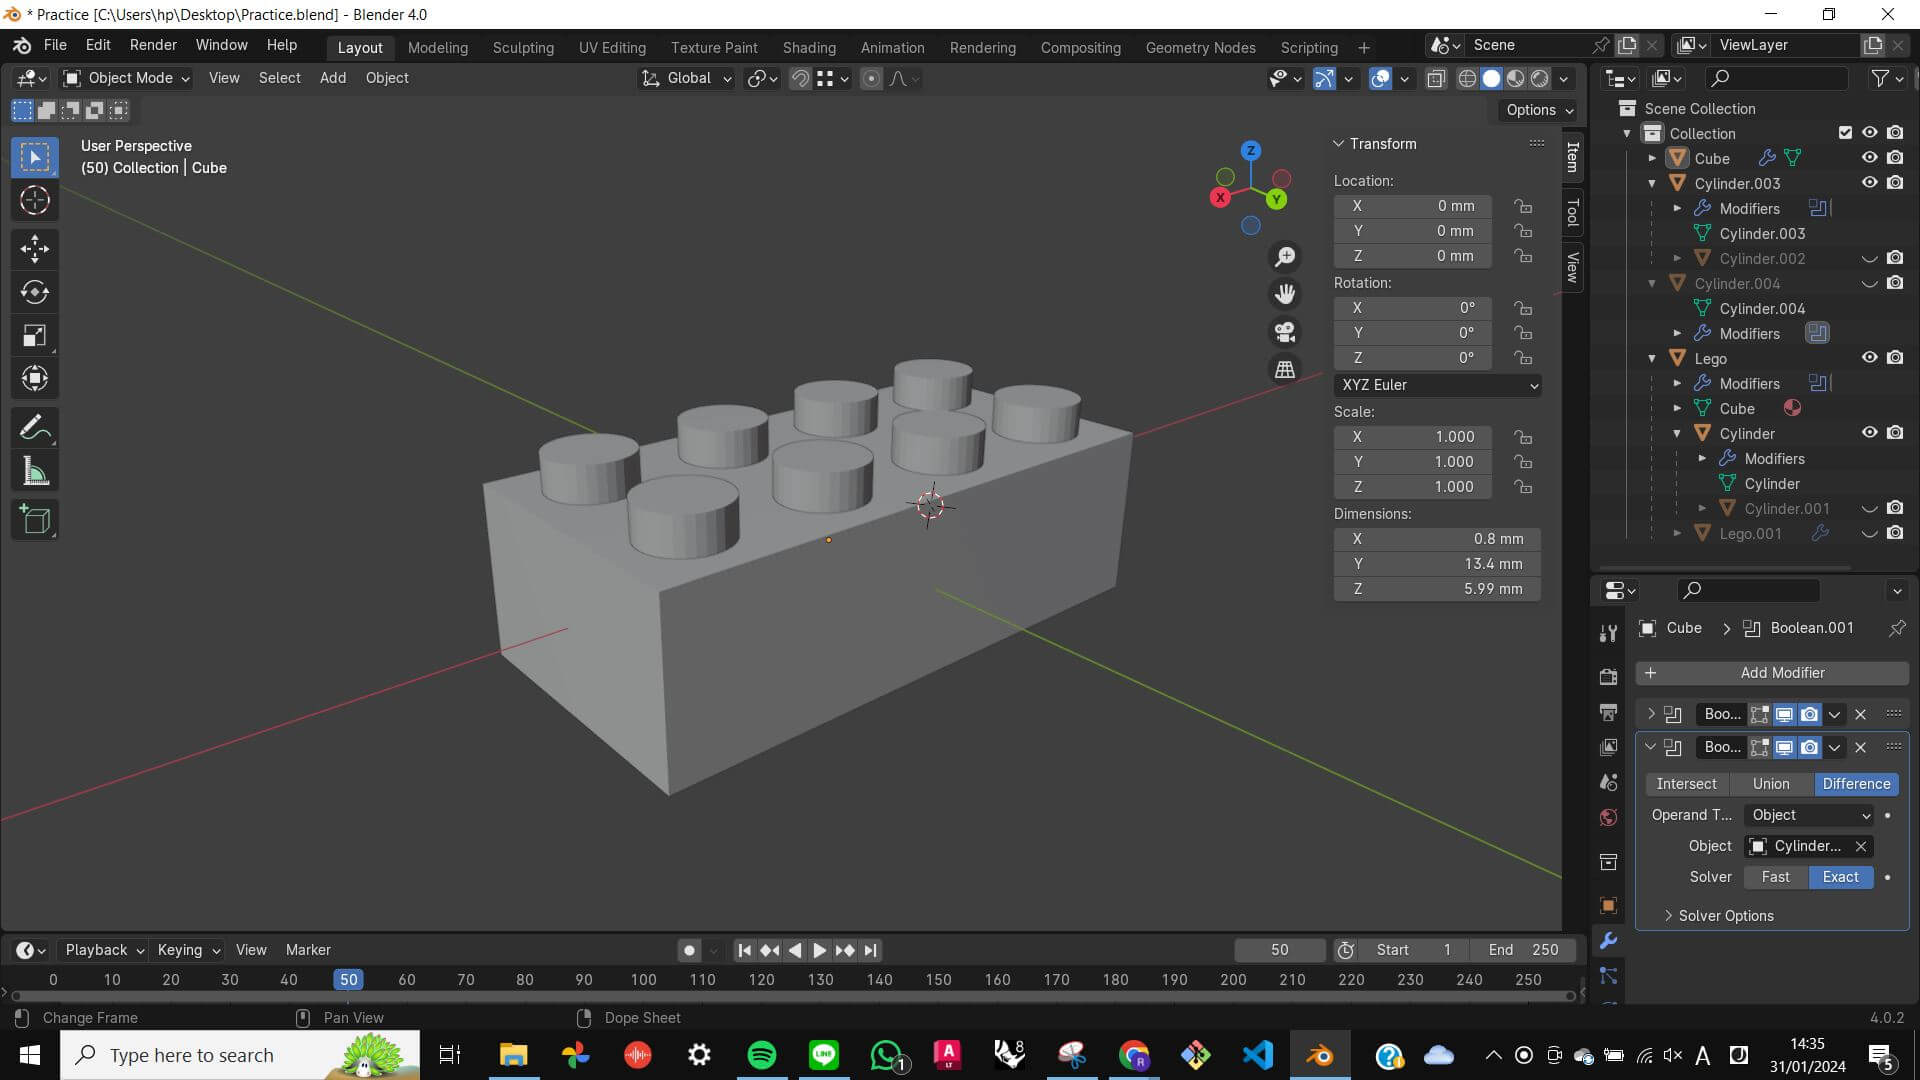
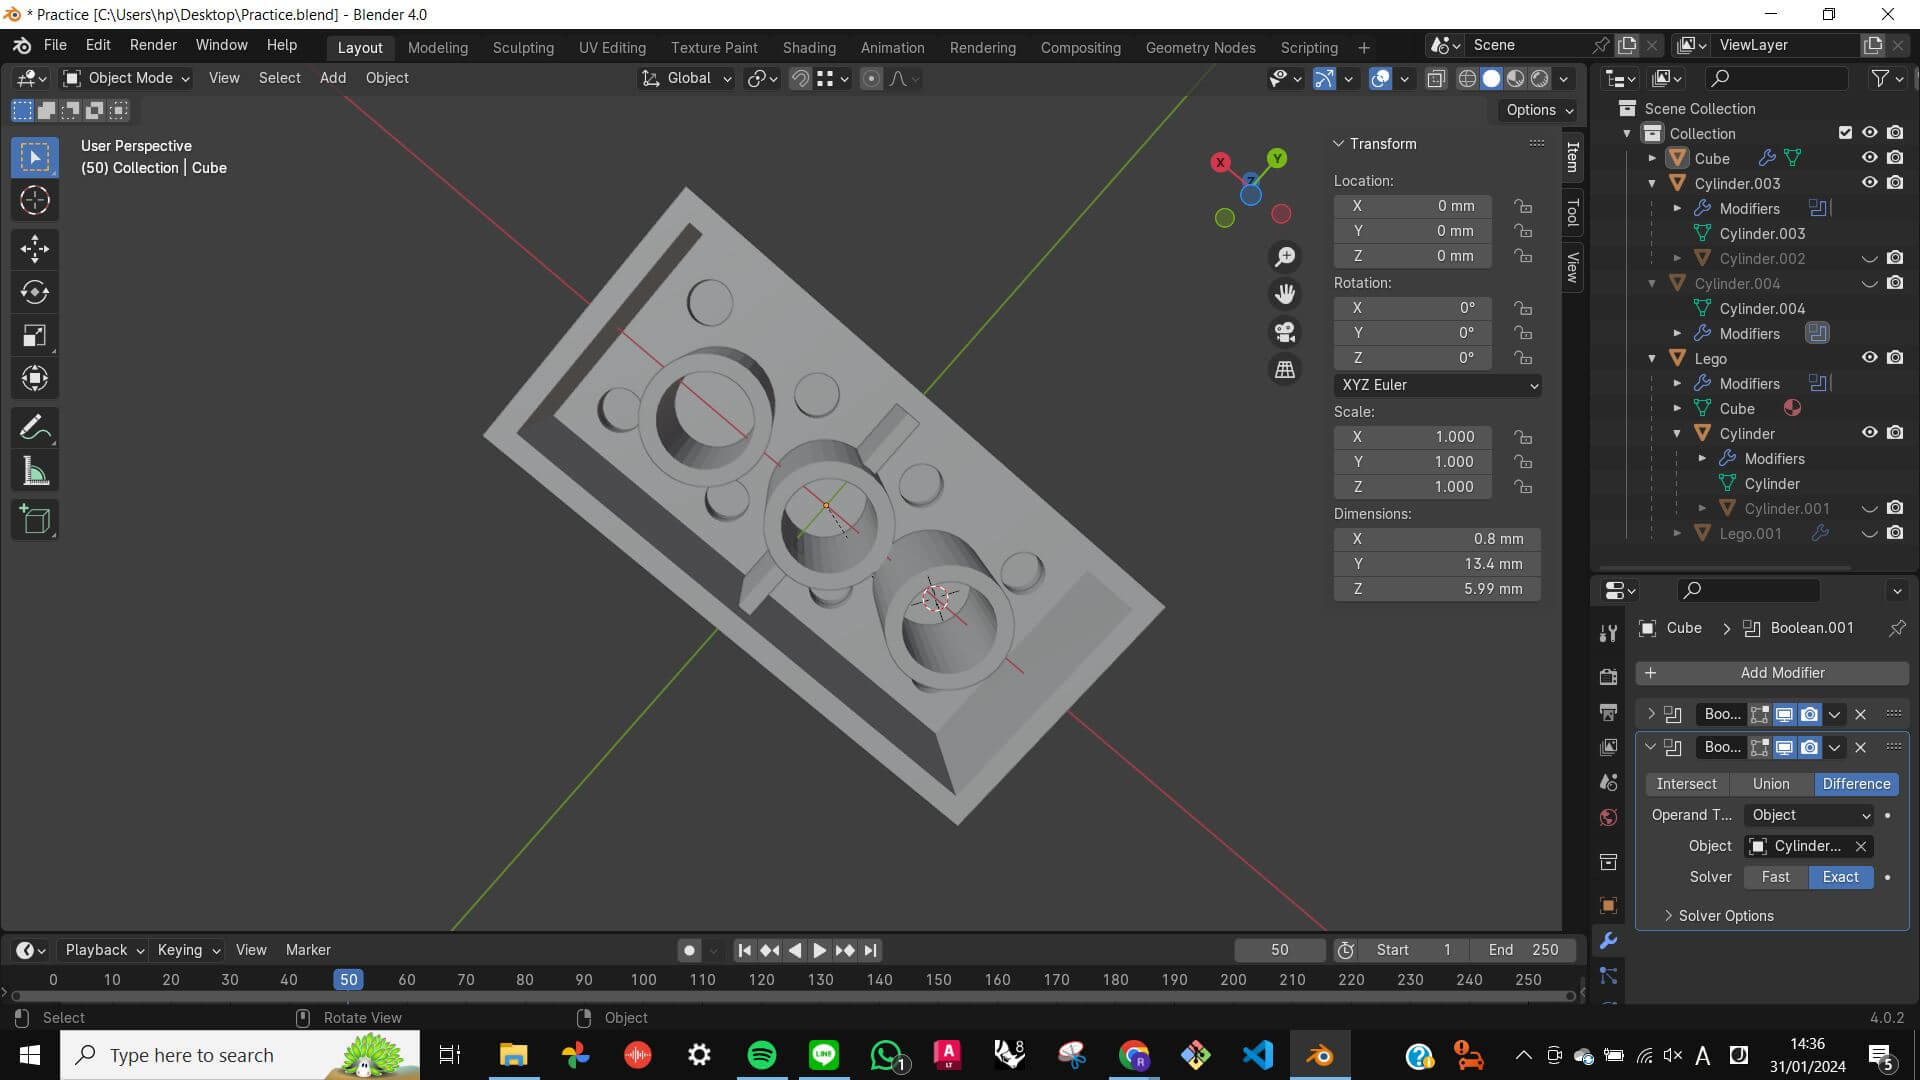
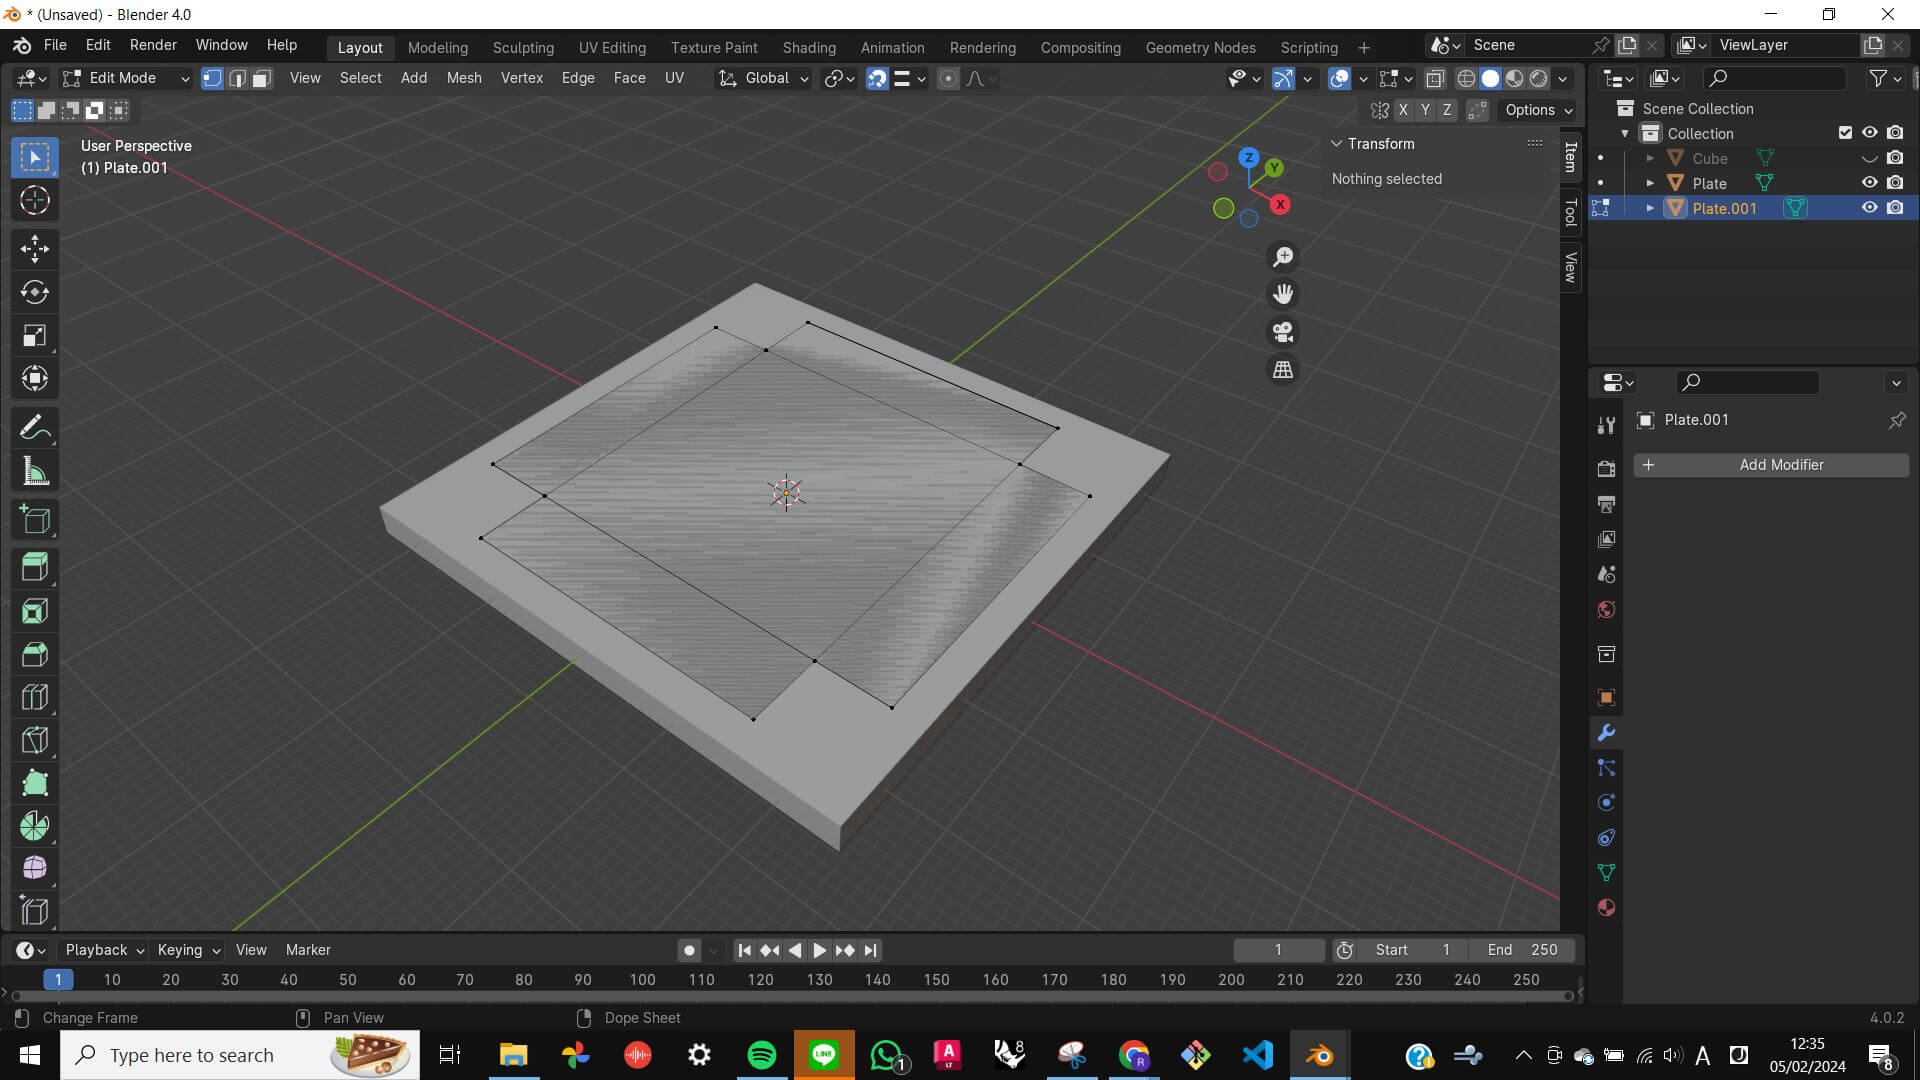
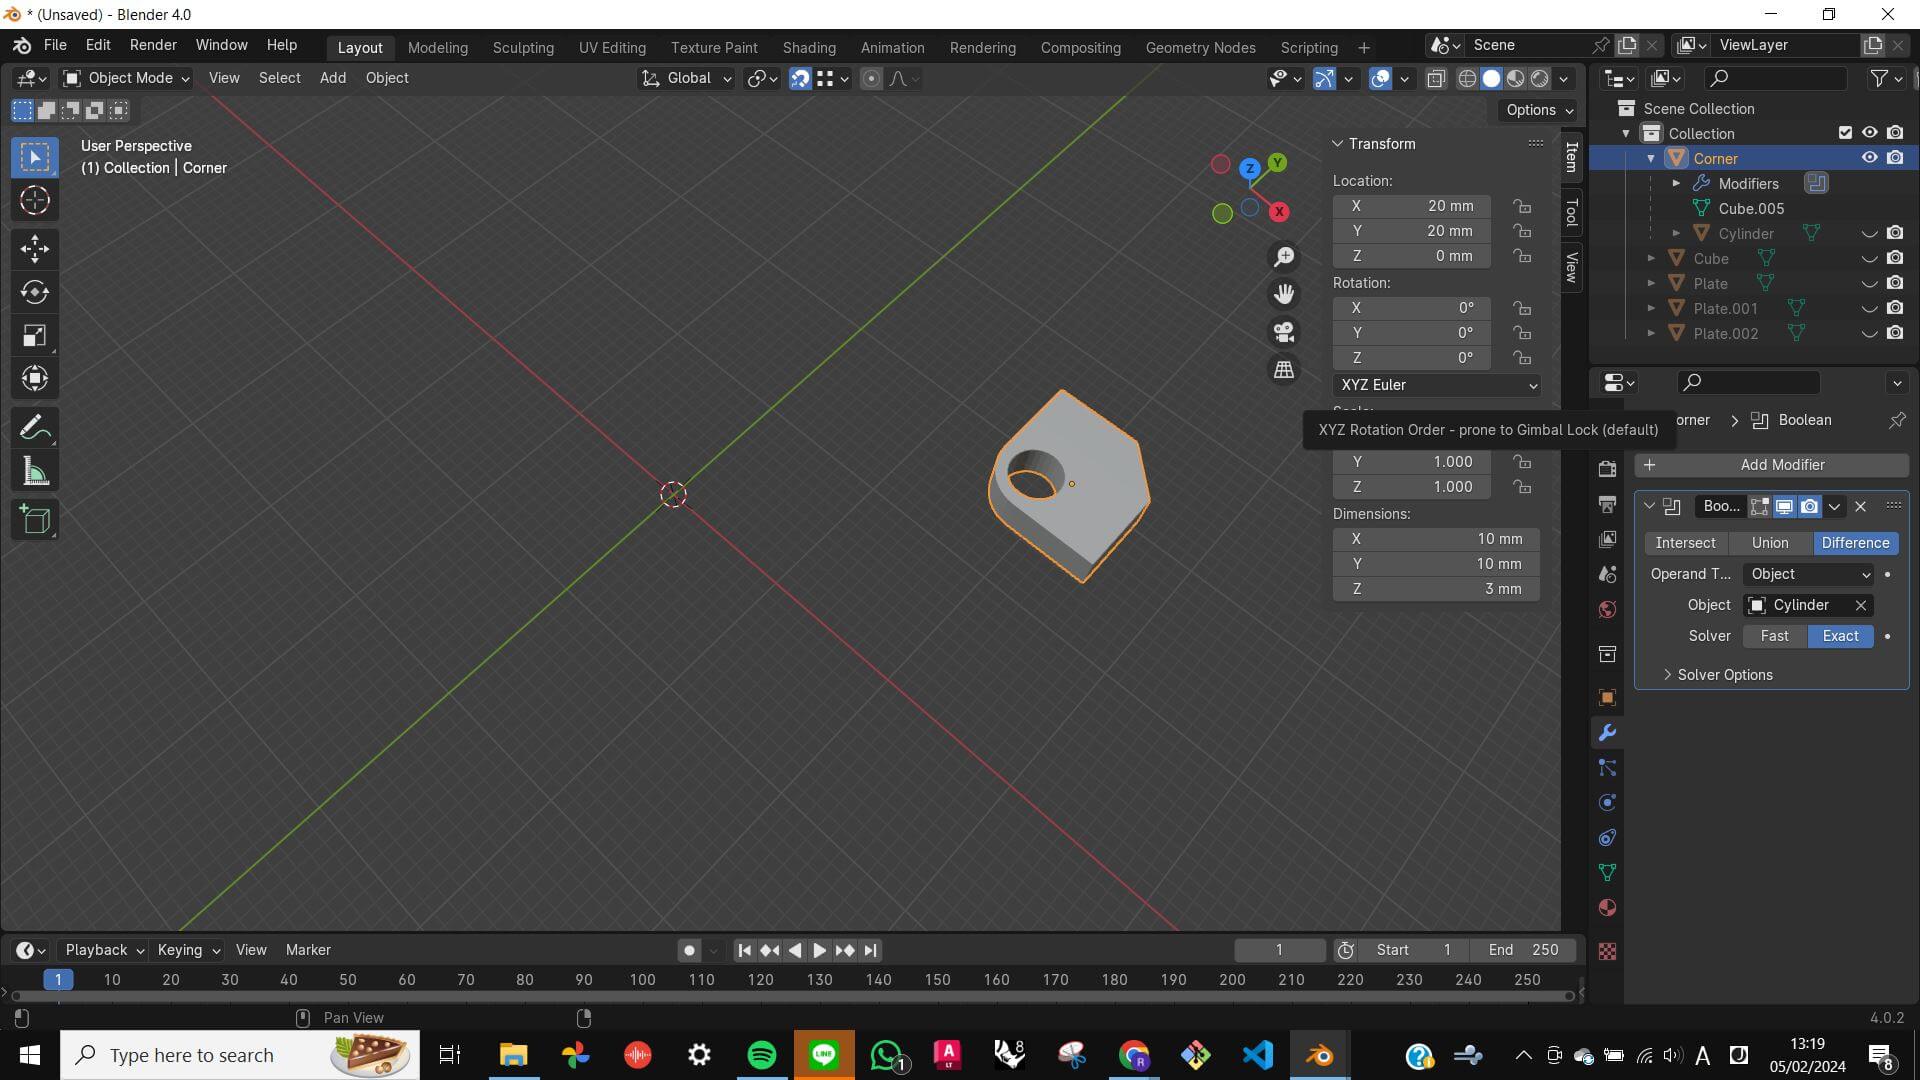
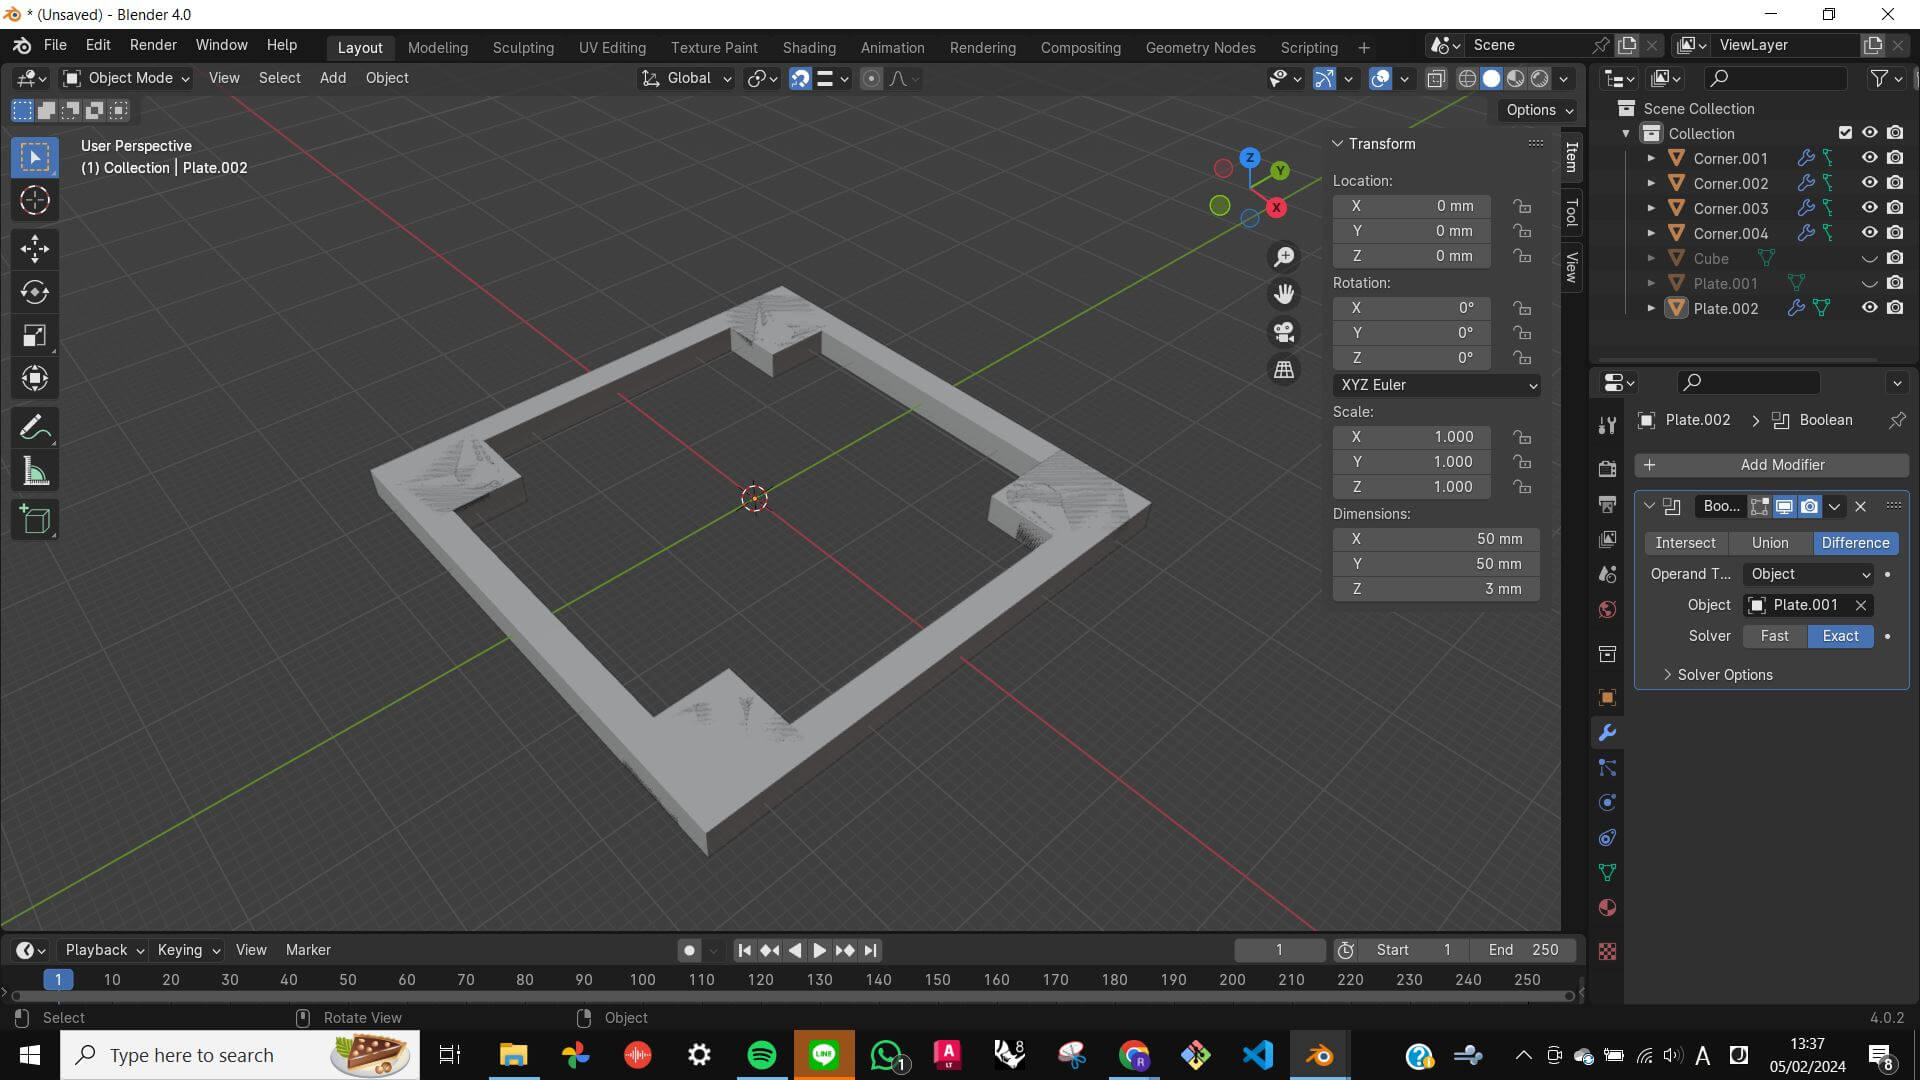
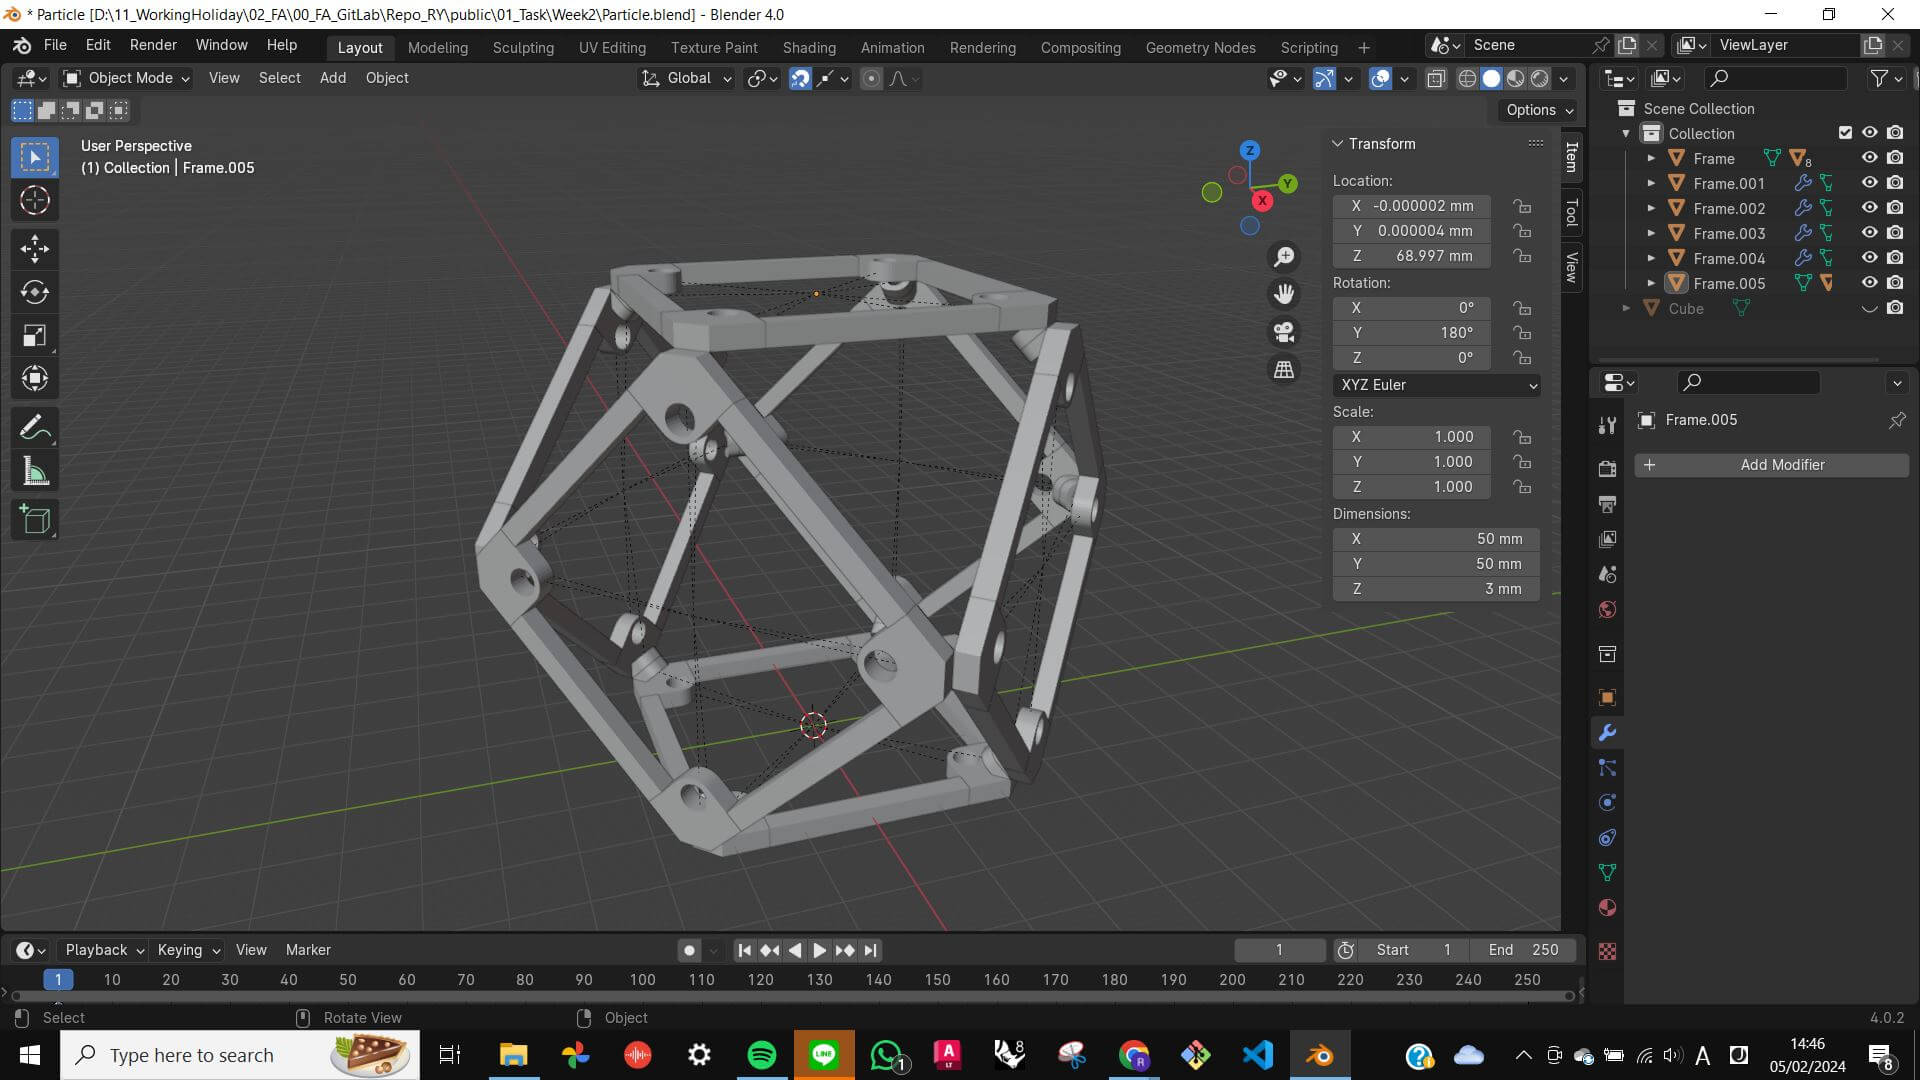
For the week 2 task, I wanted to model a part of my final project. Since my project is about particles I wanted to model a cell of particles. As a reference, I took one shape from Discretely assembled mechanical metamaterials from MIT the Center of Bits and Atoms. I replicated the most simple shape which is a 6 square attached together.
First I started with a box, then modified it to a plate shape. Second, I made a hollow inside using a boolean difference. Third, I made a corner part and duplicated each corner. Finally, duplicated a square frame five times, and created a particle.
Files
ModelforFinalProject_Particle.blend


Model for Final Project (animation)
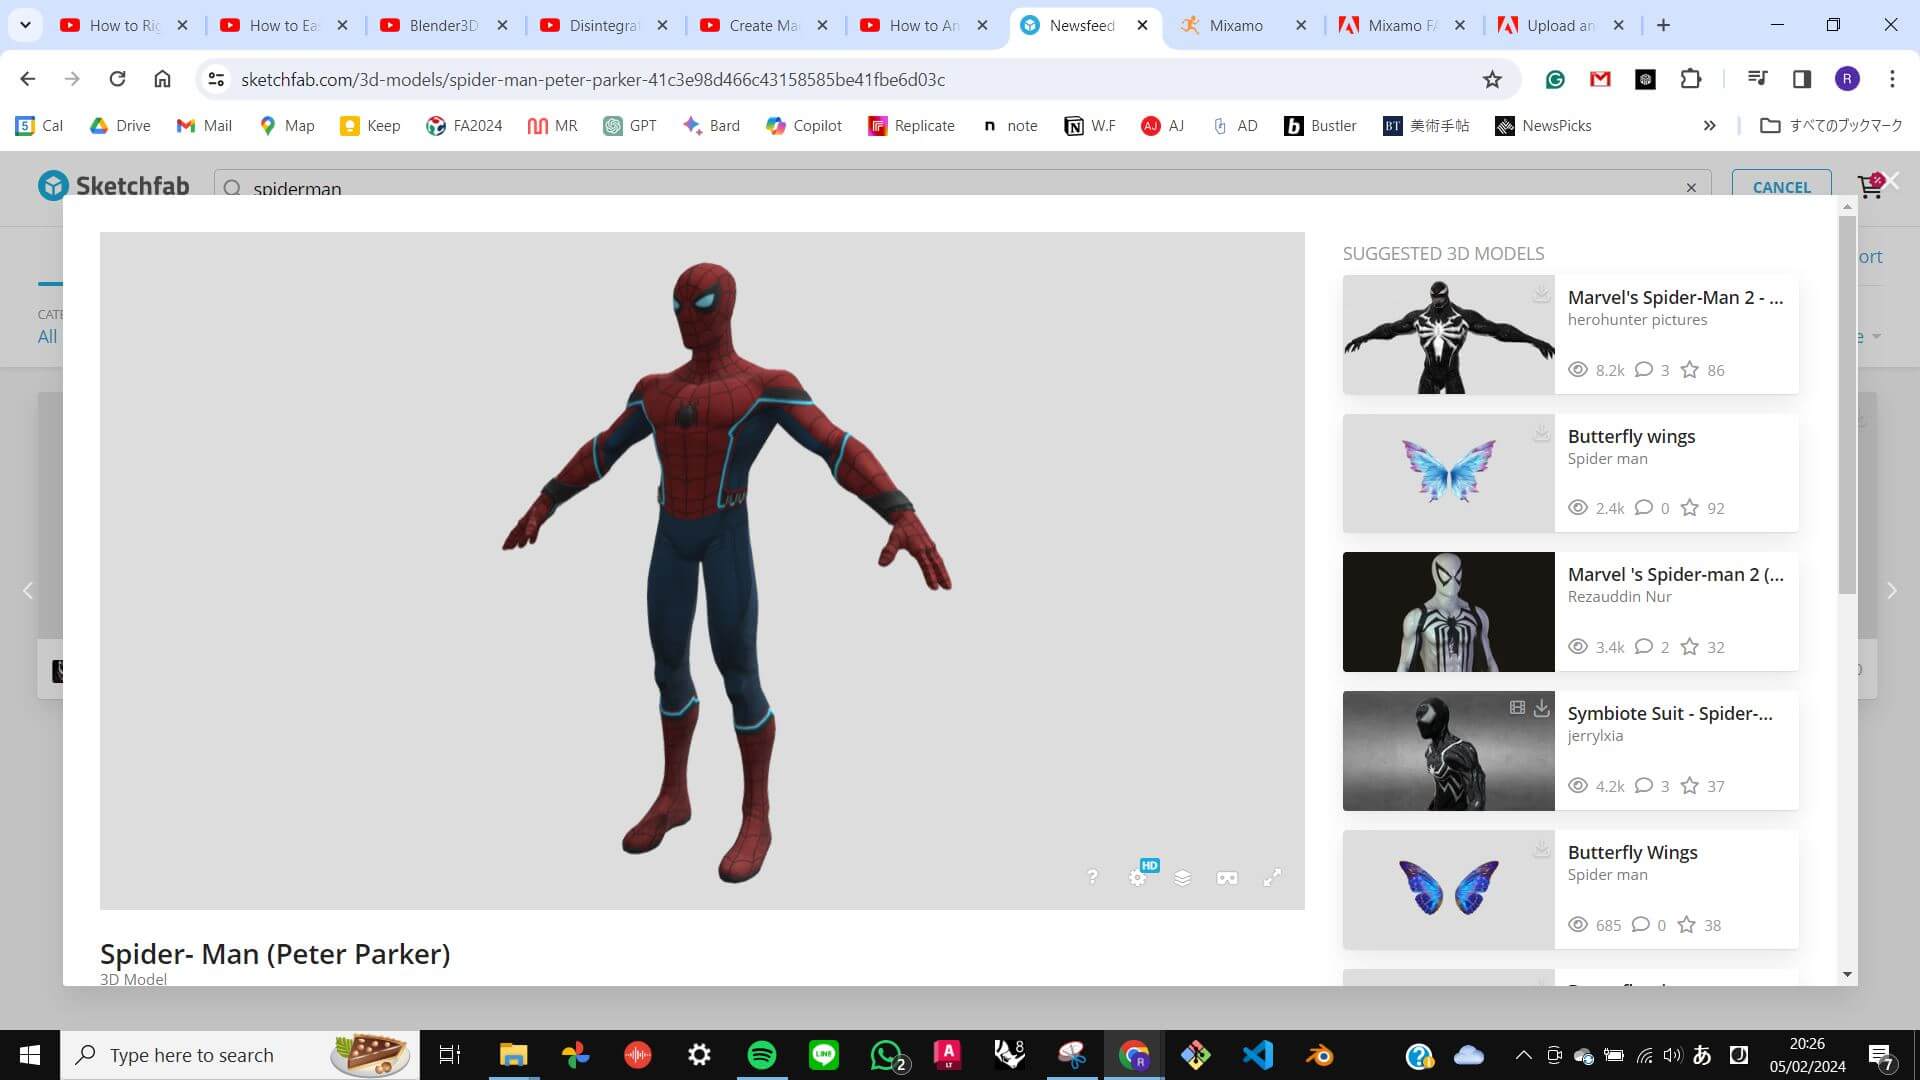
Also, I wanted to create an animation of what my final project aims to look like. Since I want to create aggregate particles moving in response to human movement, I simply wanted to create a model using particle function and animated character movement.
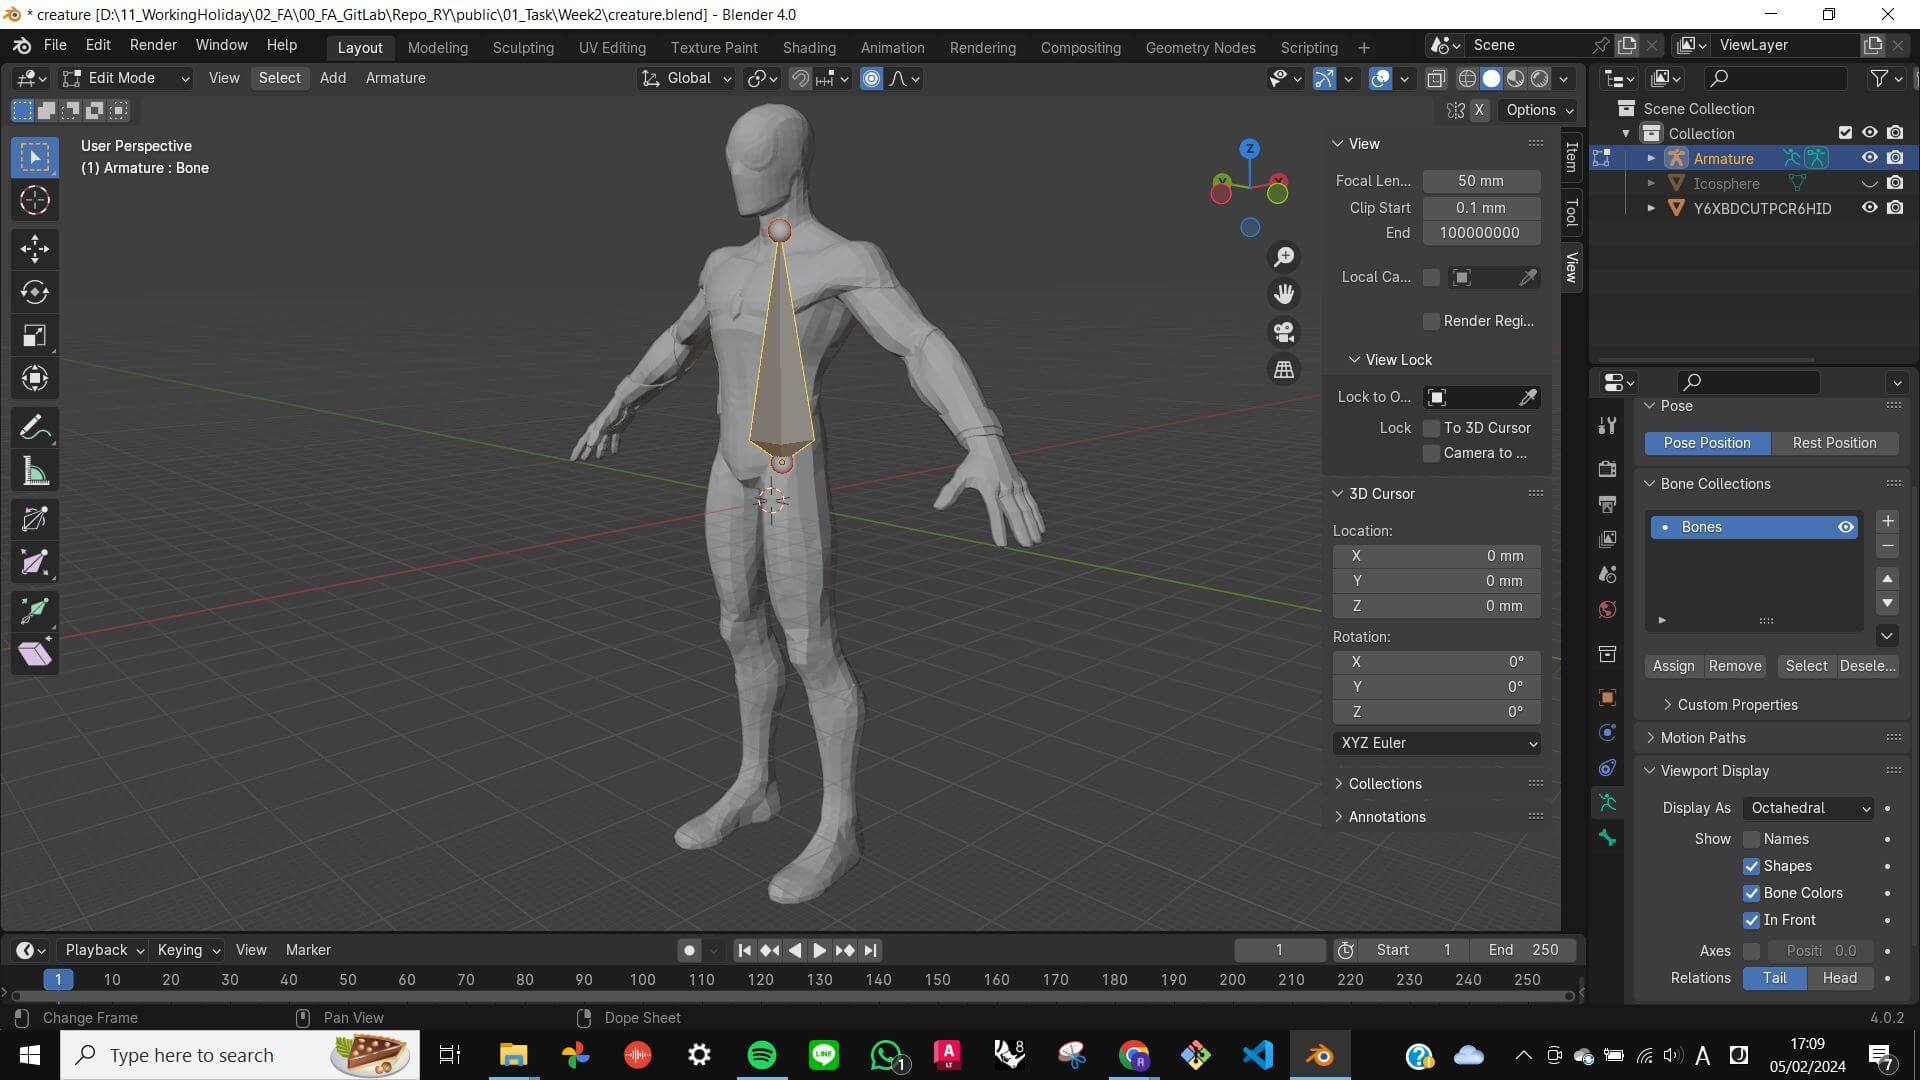
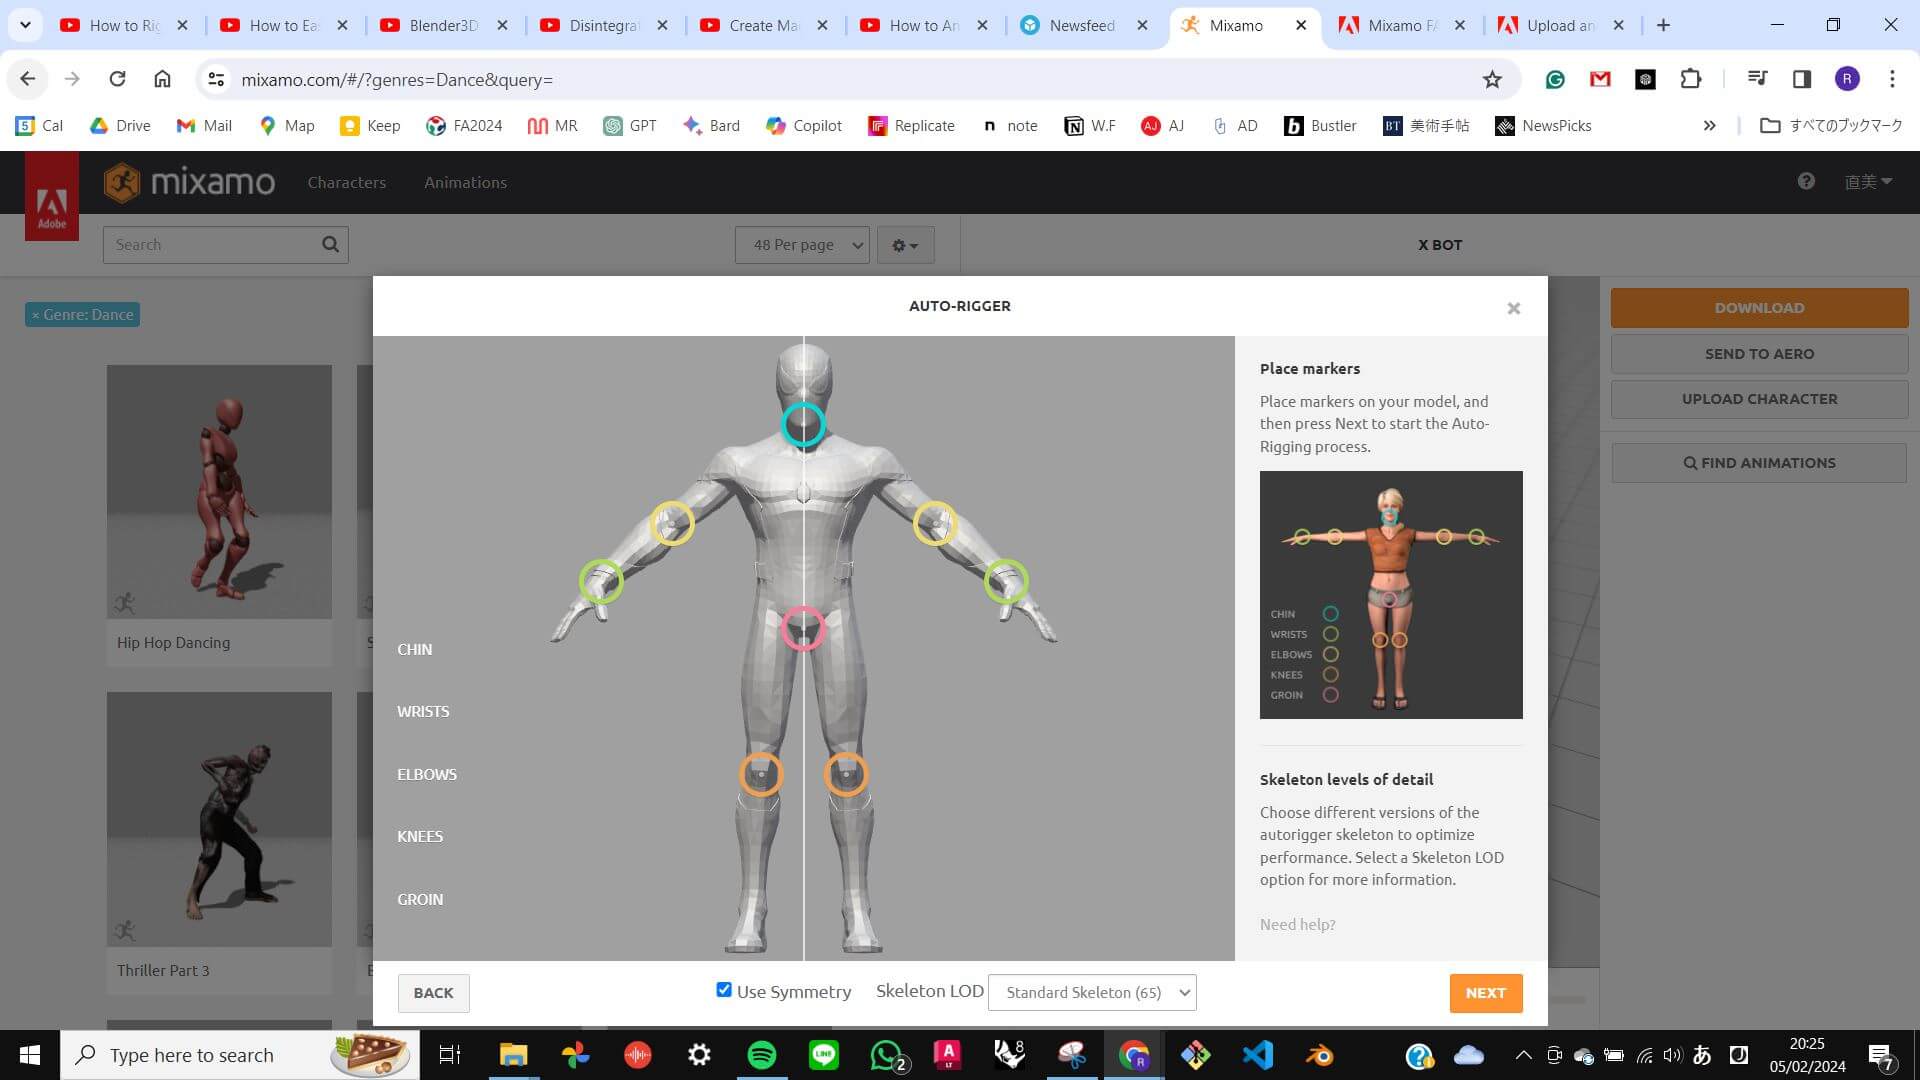
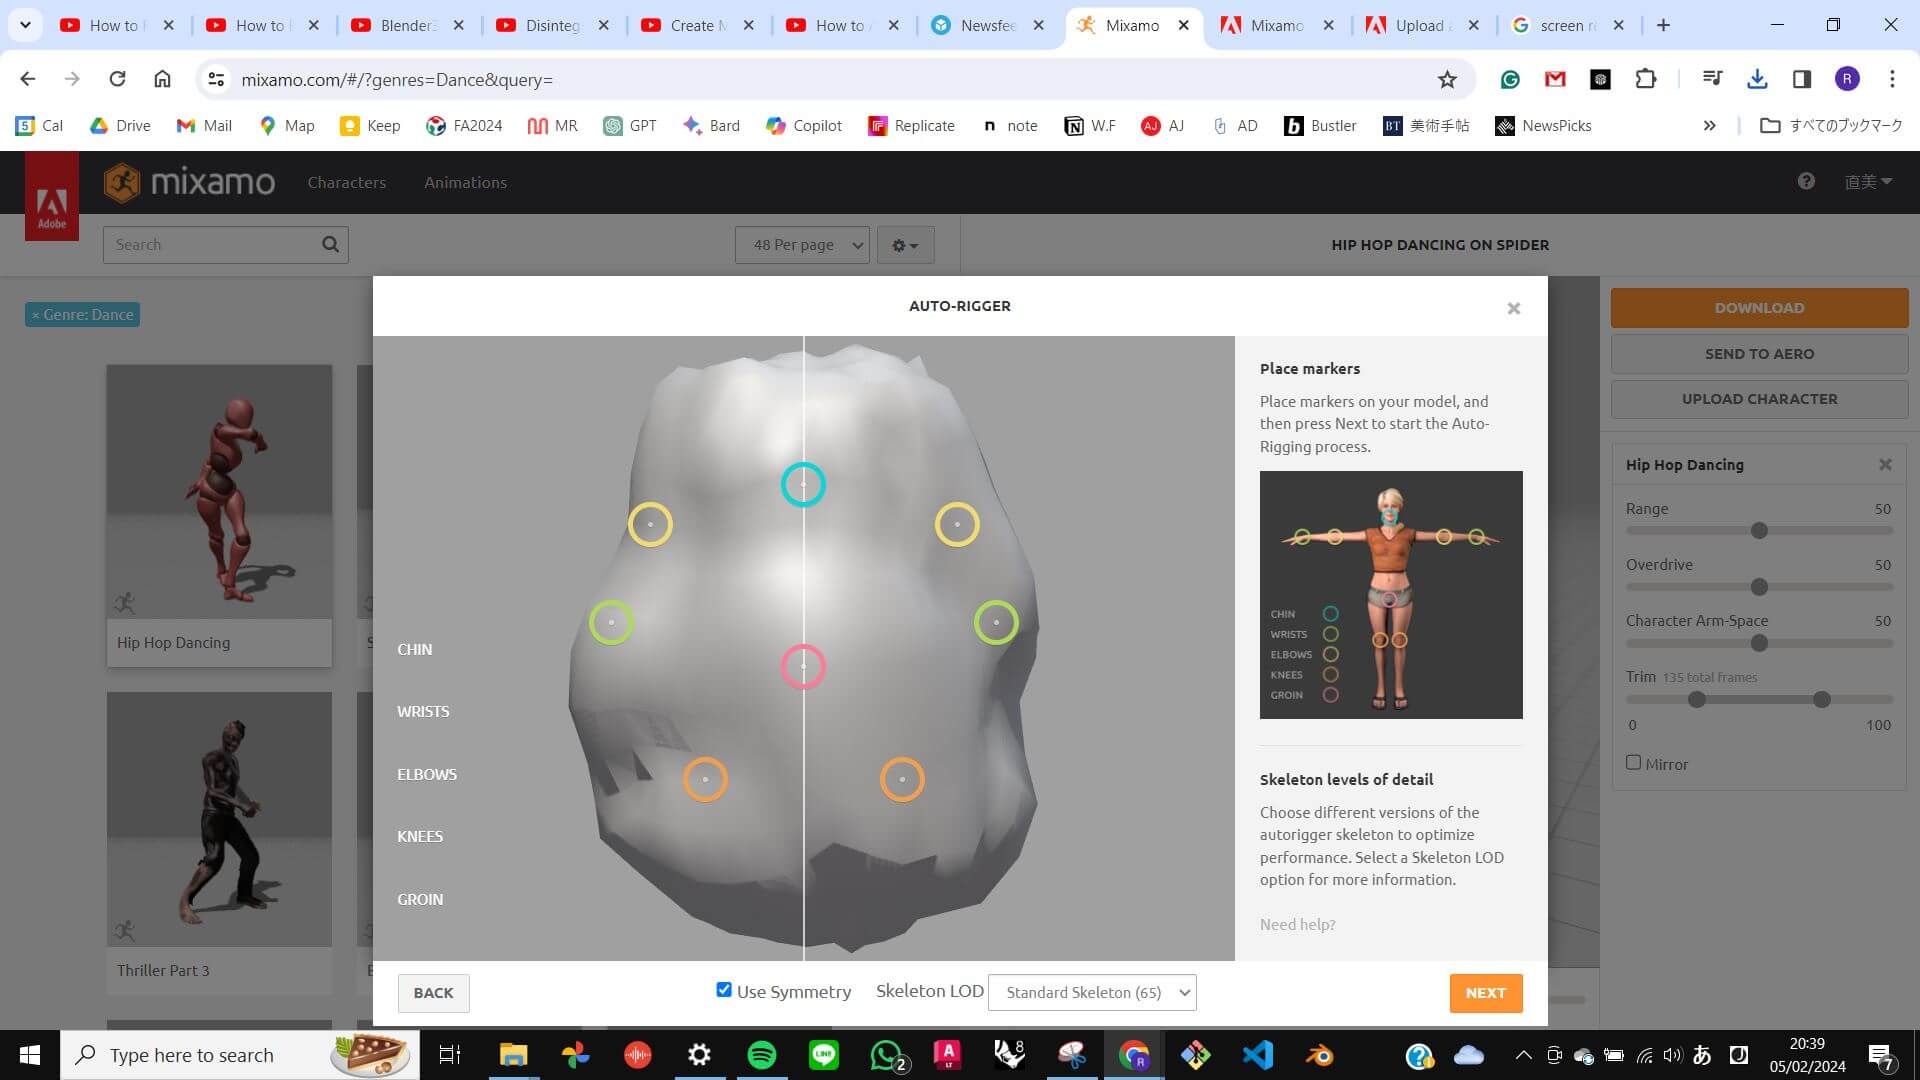
First I imported a human model, then added amature bone. However, it was consuming a lot of time so I used Mixamo to automatically rig my model. Second, I added movement that is available in Mixamo to my rigged model and then imported it to my file. Third, I replicated the model and tried to turn the model into particles. However, it did not work as I thought. Those particles should move according to the rig movement instead of appearing and disappearing in the same place, and also the human model should not appear with particles. I think the particle function might be causing this problem
Key command and method I learn from this challenge.
[Shift] + [A] - [Amature] : add amature bone
Right-click the bone to subdivide
Select point of bone - [E] : to add new bone
[Tool tab] - [X-Axis mirror] : for arms and legs, creating mirrored bone structure
Mixamo: a website that can easily add human amature to model
Files
ModelforFinalProject_Animation.blend
creature.blend1
animation_challenge.blend1
Video(.mp4)
W2_Particle Animation FAIL in Blender_RY FabAcademy2024_compress.mp4