15. Wildcard week
This week, we will discover embroidery and much more....
Embroidery
"Embroidery involves using a needle and thread to create decorative designs on fabric, sometimes adding beads or sequins for extra detail. This ancient craft enriches textiles with unique and intricate patterns, reflecting cultural traditions and personal creativity." _If you ask chatgpt to explain it in 2 sentences, lol...
In my words: it's a machine that can create your designs in thread and stitch onto a piece of fabric...
The type of machine that we are using is a Brother innovis NV870
A couple of things that must be done before starting: create the design in Inkscape with the extension that you have to install. You can find the extension (inkstitch) here
Create the file
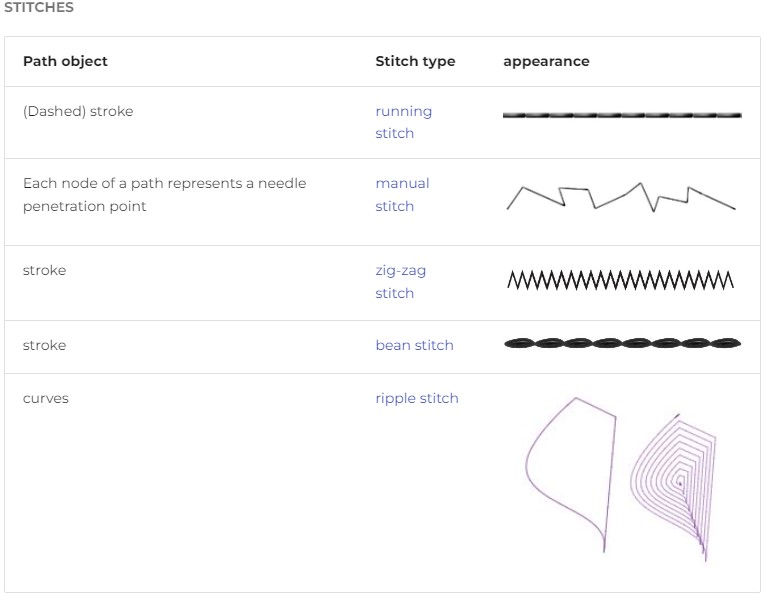
On this page, you can find all of the needed information to create your file (must be a vector) using inkscape with the extension. Below you can find a summary of what i did:
- Open inkscape (with the extension already installed)
- Start a new document
- Select the type of hoop you want to use and import this into your parameters. I am using the small one so the setup will be 13x18cm.
- Import the drawing that you want or create it yourself. This can be a .svg or .ai file or you can also create just text.
- I used a png of a duck so i had to trace the image in order to create the vector.
- Select the drawing=vector of the duck and open it with the extension Inkstitch
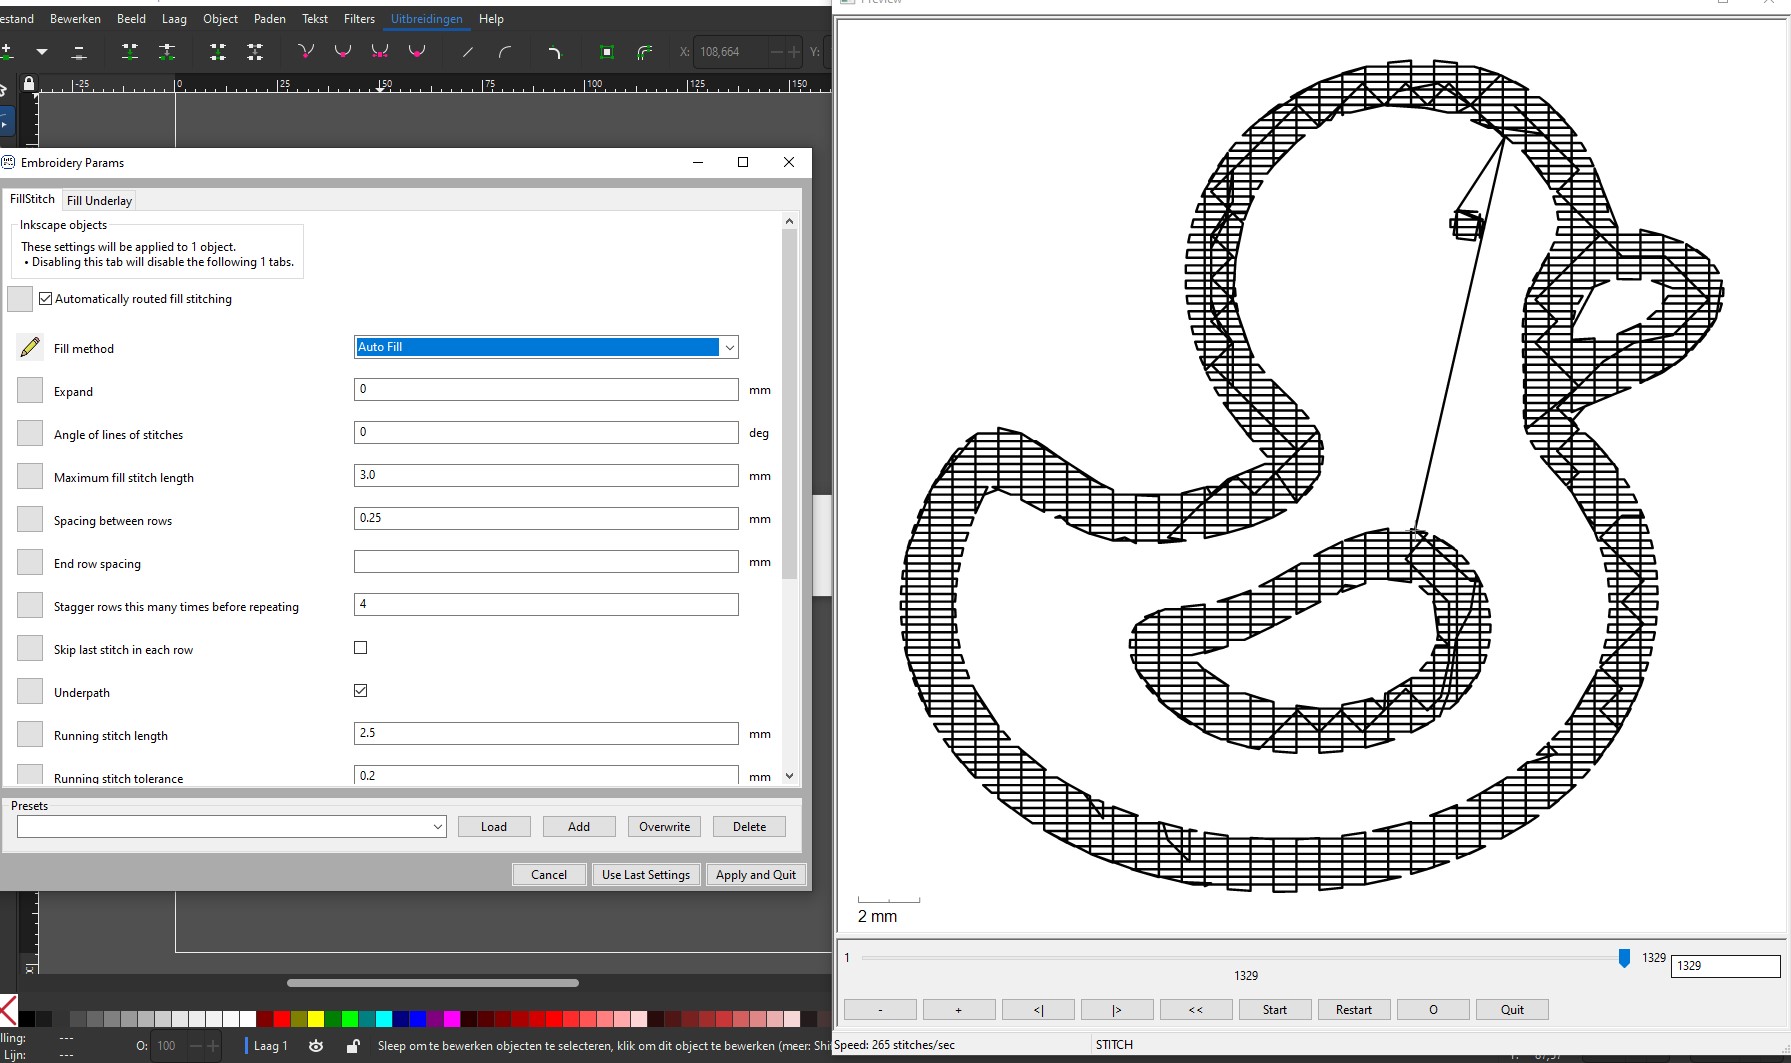
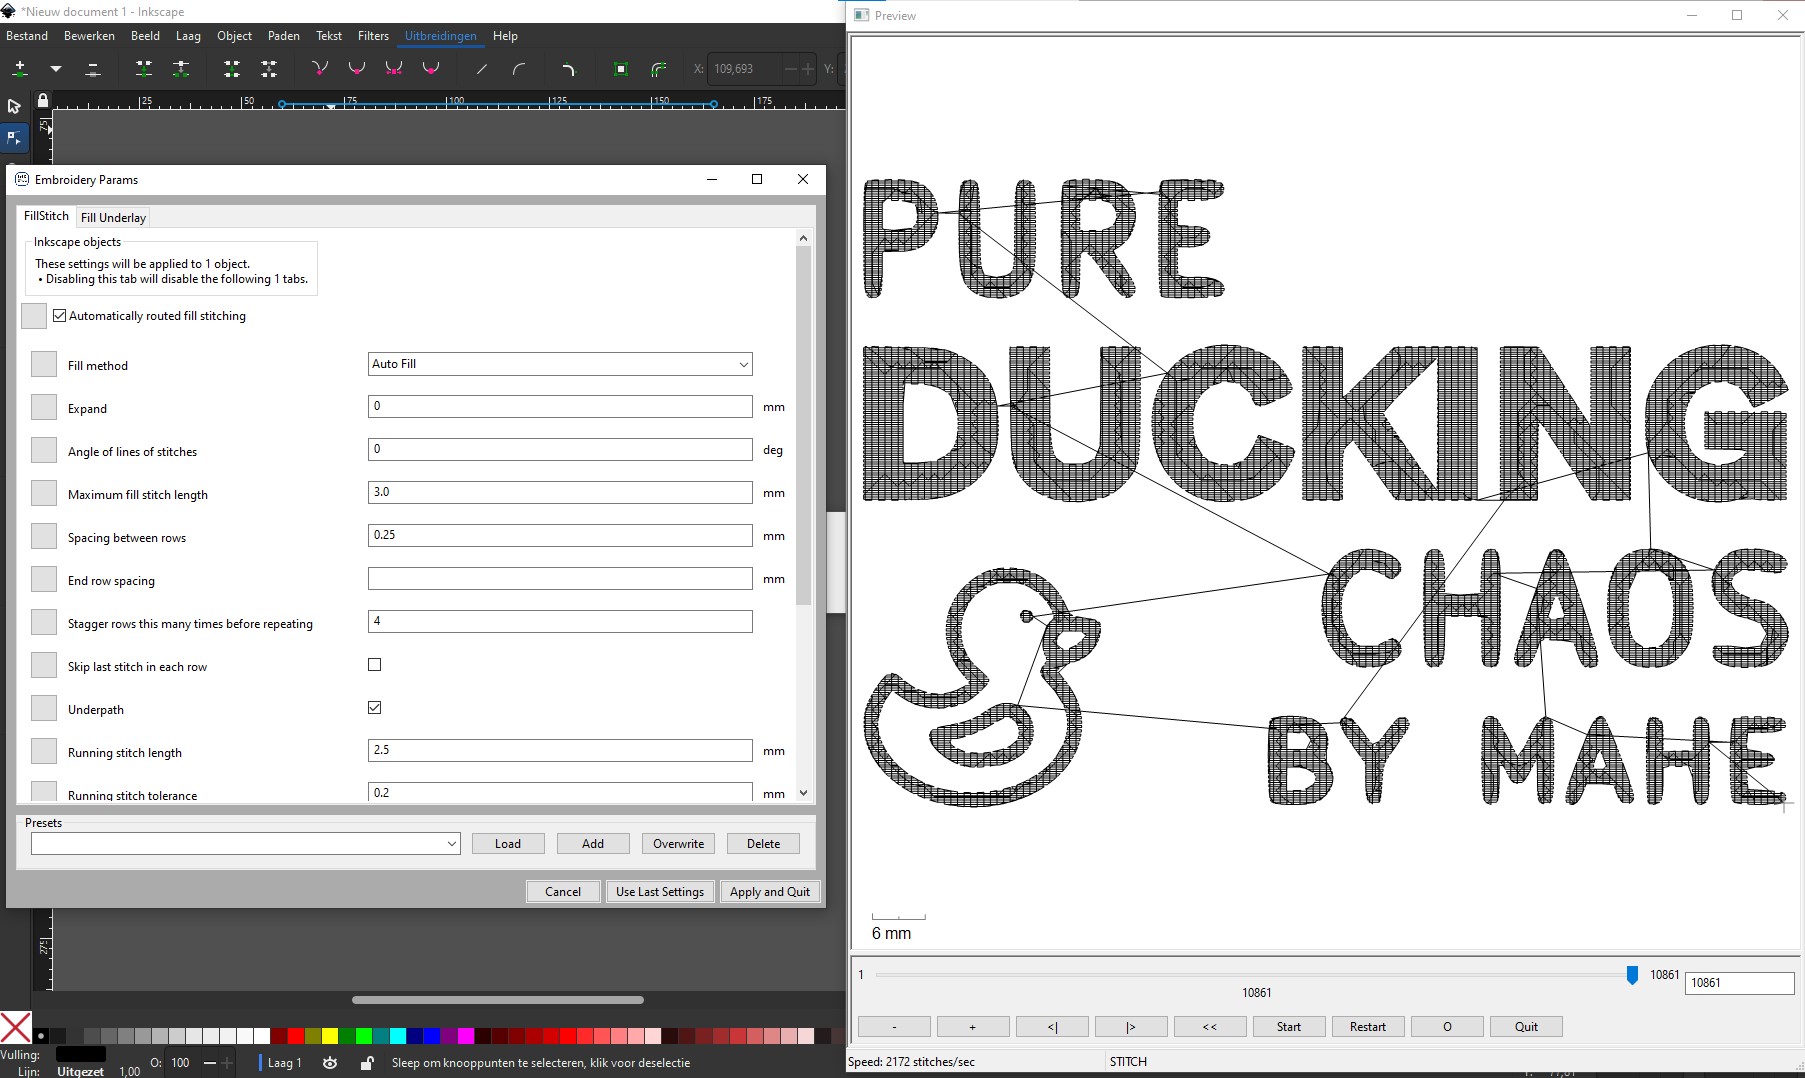
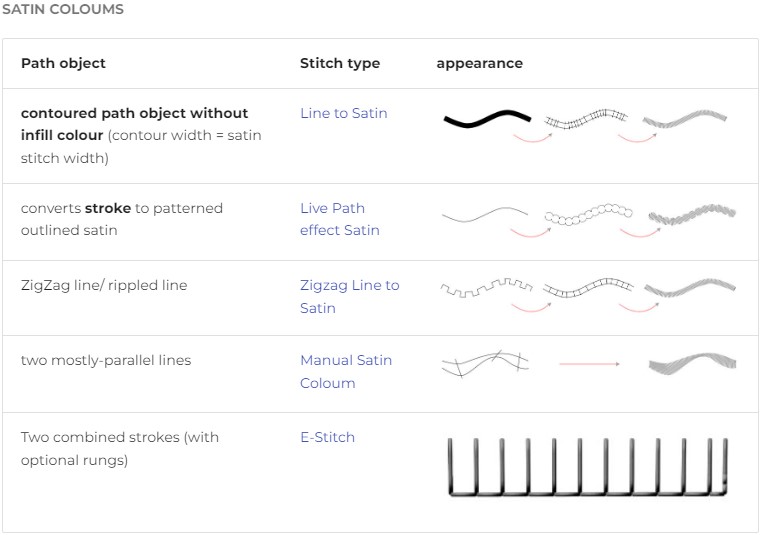
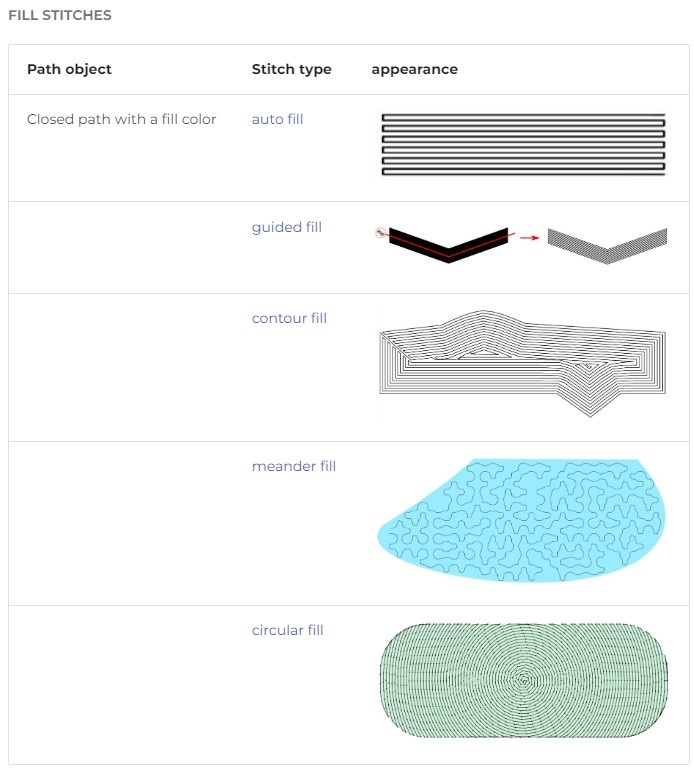
- Set up the parameters in Extensions > Ink/Stitch > Params: there are plenty of parameters to change but you can always use the default ones. I used auto fill for the fill method.
- Apply the changes
- Save your files as .pes
Start the embroidery
Now that the file is ready, we can start the embroidery!
- Put the file onto the thumbdrive and plug it into the machine.
- On the interface of th emachine, you can select the file.
- There is the option to adjust the size if it is necessary.
- Choose the color you want for the bobbin and the spool, in my case, i am using orange for both.
- Add the spool into the machine and the thread allong the path. On th emachine there are 7 numbers that represent the path for the thread. It can be tricky sometimes but it is also an option to just put the thread through the eye of the needle.
- Add the fabric with the underfabric into the hoop and then add the hoop into the machine. In this case, i used felt for the underfabric and cotton sheet for the fabric.
- When everything is set: the spool+thread through the needle, the fabric stretched in the hoop and the file ready: Press start!
- Monitor the stitching and check if the thread is still intact and did not break.
- You can follow the stitching progress on the interface of the machine.
- When the machine is ready, you can cut the thread and take the hoop out of the machine.
- You can "clean"= cut away the threads with scissors that are not part of the embroidery but just the bridges between the parts that are embroided.
The embroidery takes 32 minutes (without complications)!
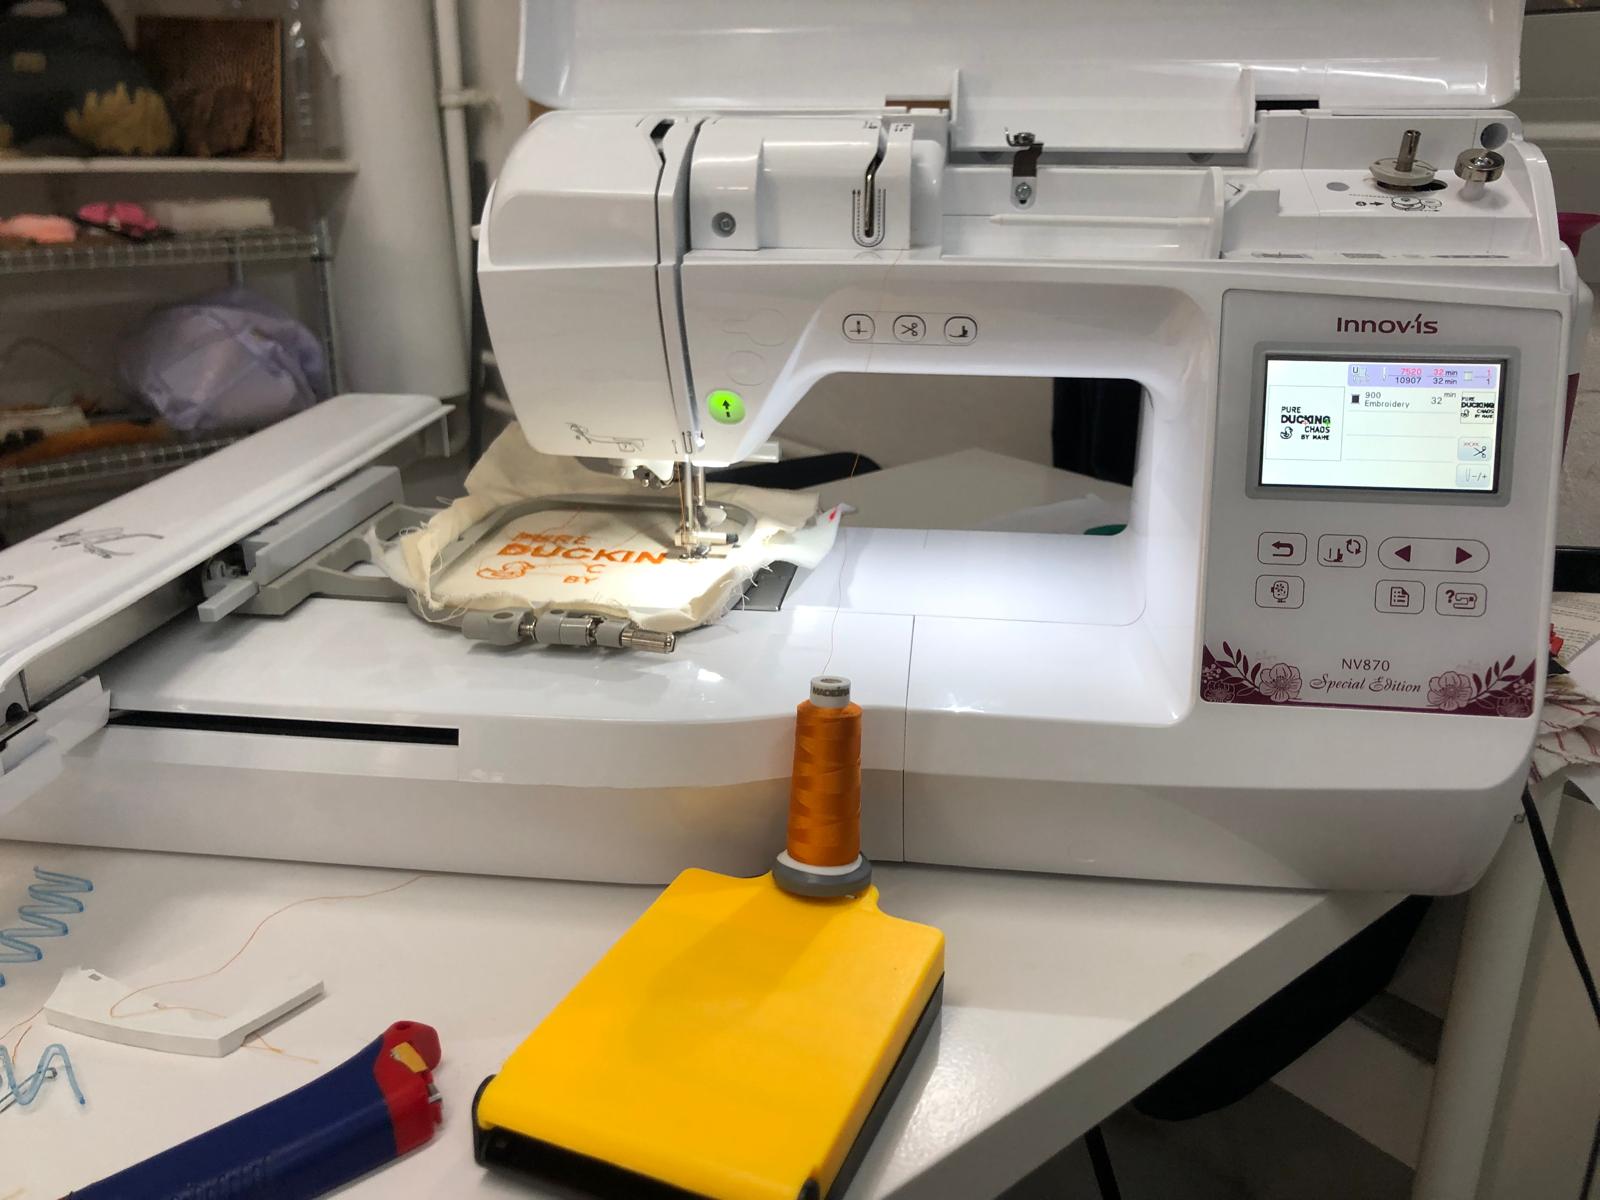
Unfortunatly, I did have some complications... The thread got stuck multiple times and because of that the thread broke too. So I had to find a way to let let it work without having the spool getting stuck. I used a pencil and a box to let the spool freely spin and avoid getting stuck and breaking the thread. You ca, see the yellow box with the spool in the picture.
Other than that, it all worked fine :)
Pictures and video of the process
Final result
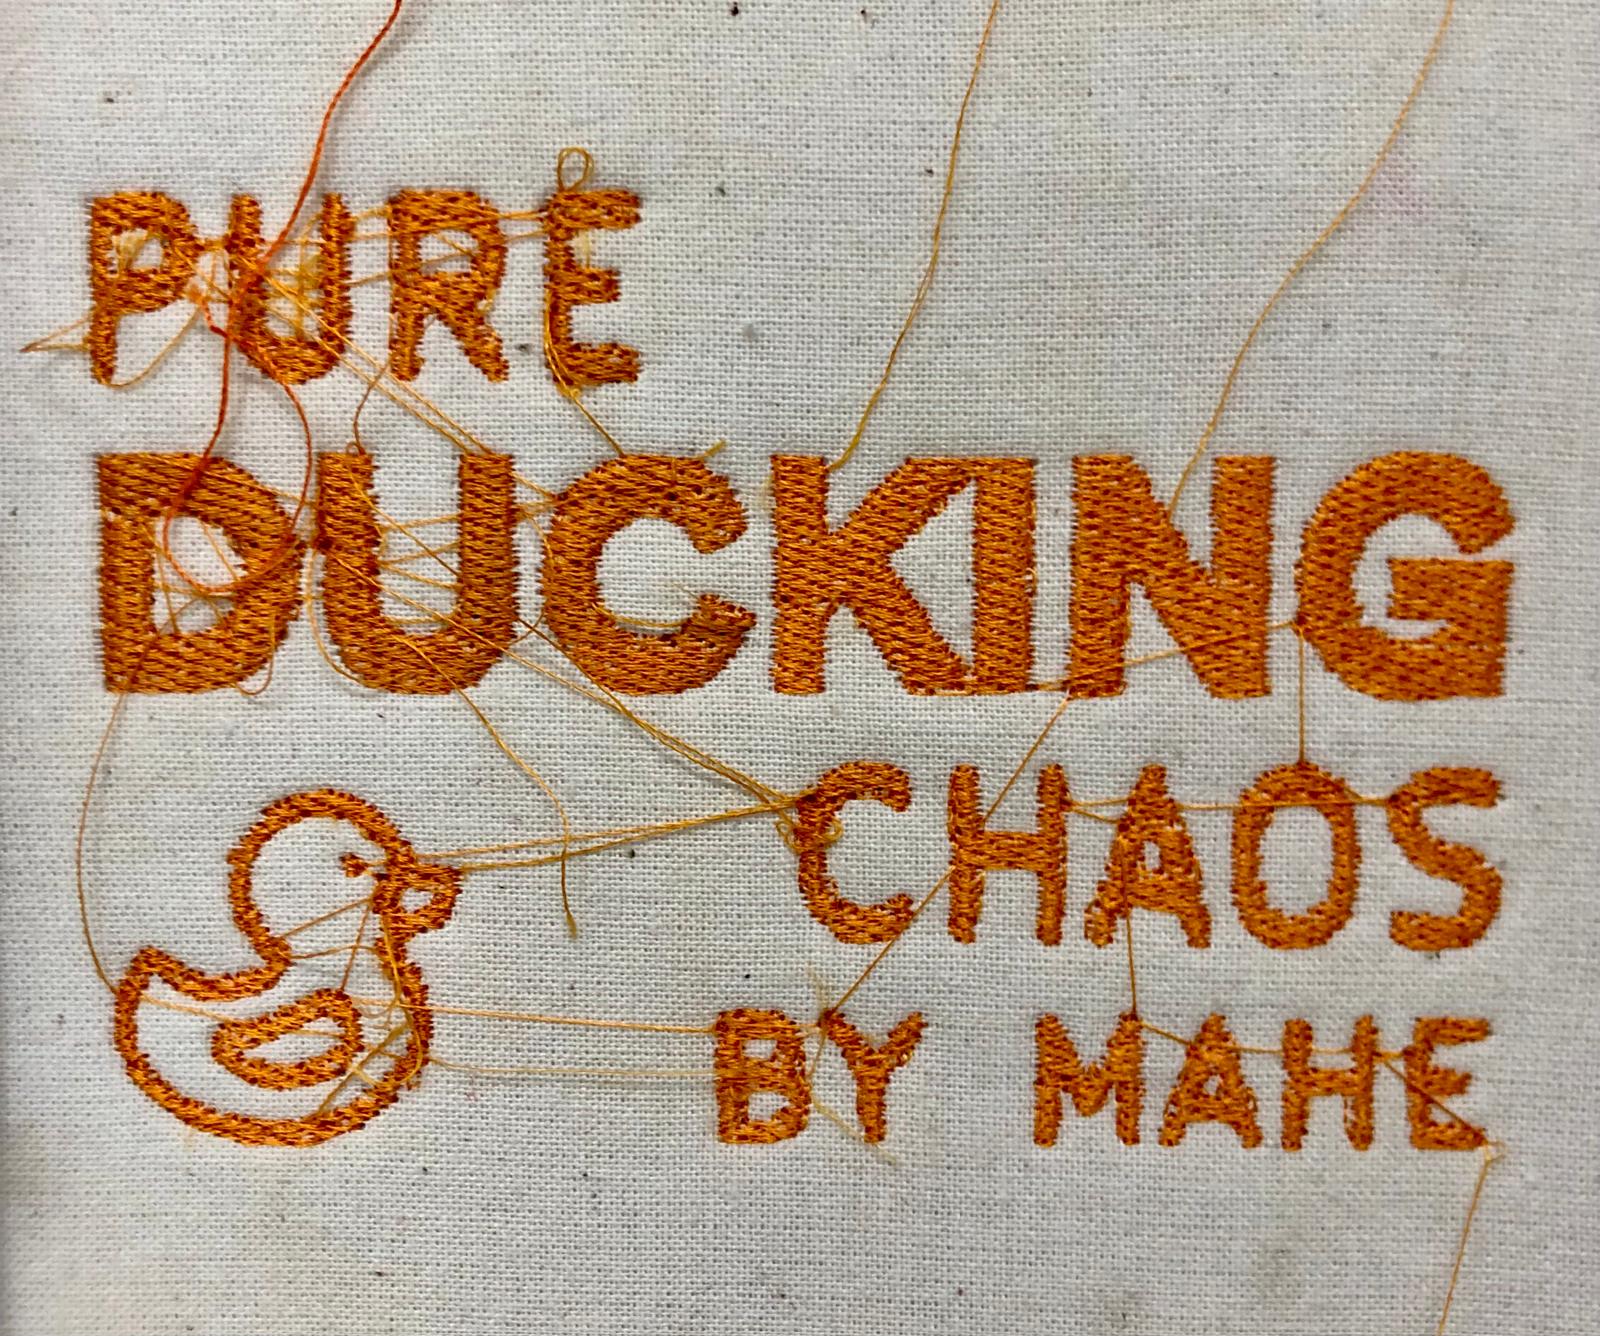
This is the result! As you can see, it looks a bit chaotic with the threads that go everywhere...And to be honest, the entire process took me 1.30h and the stitching only takes 32min :p
