10. Mechanical and Machine design
This week it was all about building our machine! We did this in groups and i was part of the Instrumaaant group!
You can find our work on this page.
During the break week I was away for a week so my contribution is not much. I did my best :)
Individual contribution
We started this project with a brainstorm where I shared my thoughts and ideas. At the end of the brainstorm we combined all of our ideas and decided to create a one string instrument. Along the process of creating the prototype, we had to drop some stuff because we did not have enough time left. I believe we had 3 days where we could all be in the lab together :p.
PCB and soldering
The pcb has a design where both sides need to be milled. To do this, I used alignment holes with pins but there was still too much of tolerance!
Once the board was milled on both sides, it was time to collect the components and solder them onto the board.
This is the problem with the tolerance when miling both sides:

Assembly of the instrument
We all assembled the machine and tried to find the solutions together! It was nice to see how we could find answers to our problems by putting our heads together.
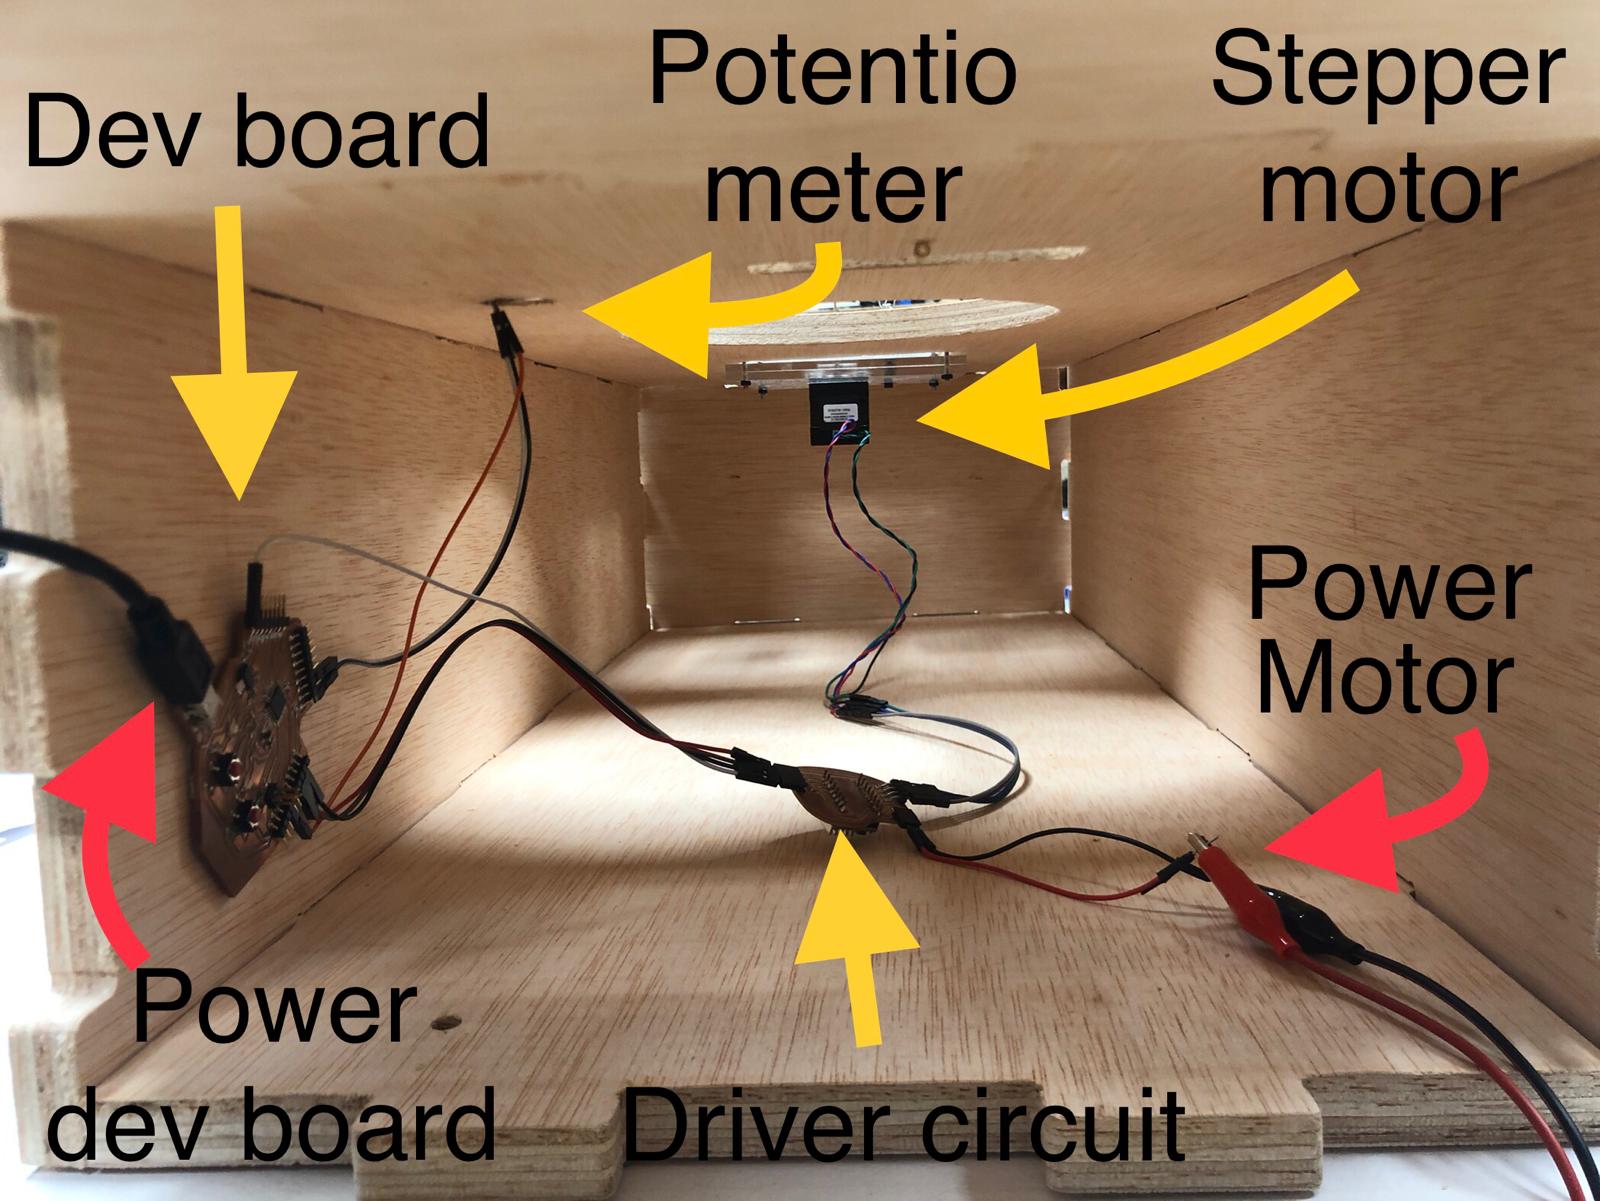
Some problems we encountered were the pcb that did not work and the tension of the plug where the string was attached to on one side. To solve these problems, we decided to use a dev board that danni made and made the part where the plug was too loose a bit thicker so that it would fit better.
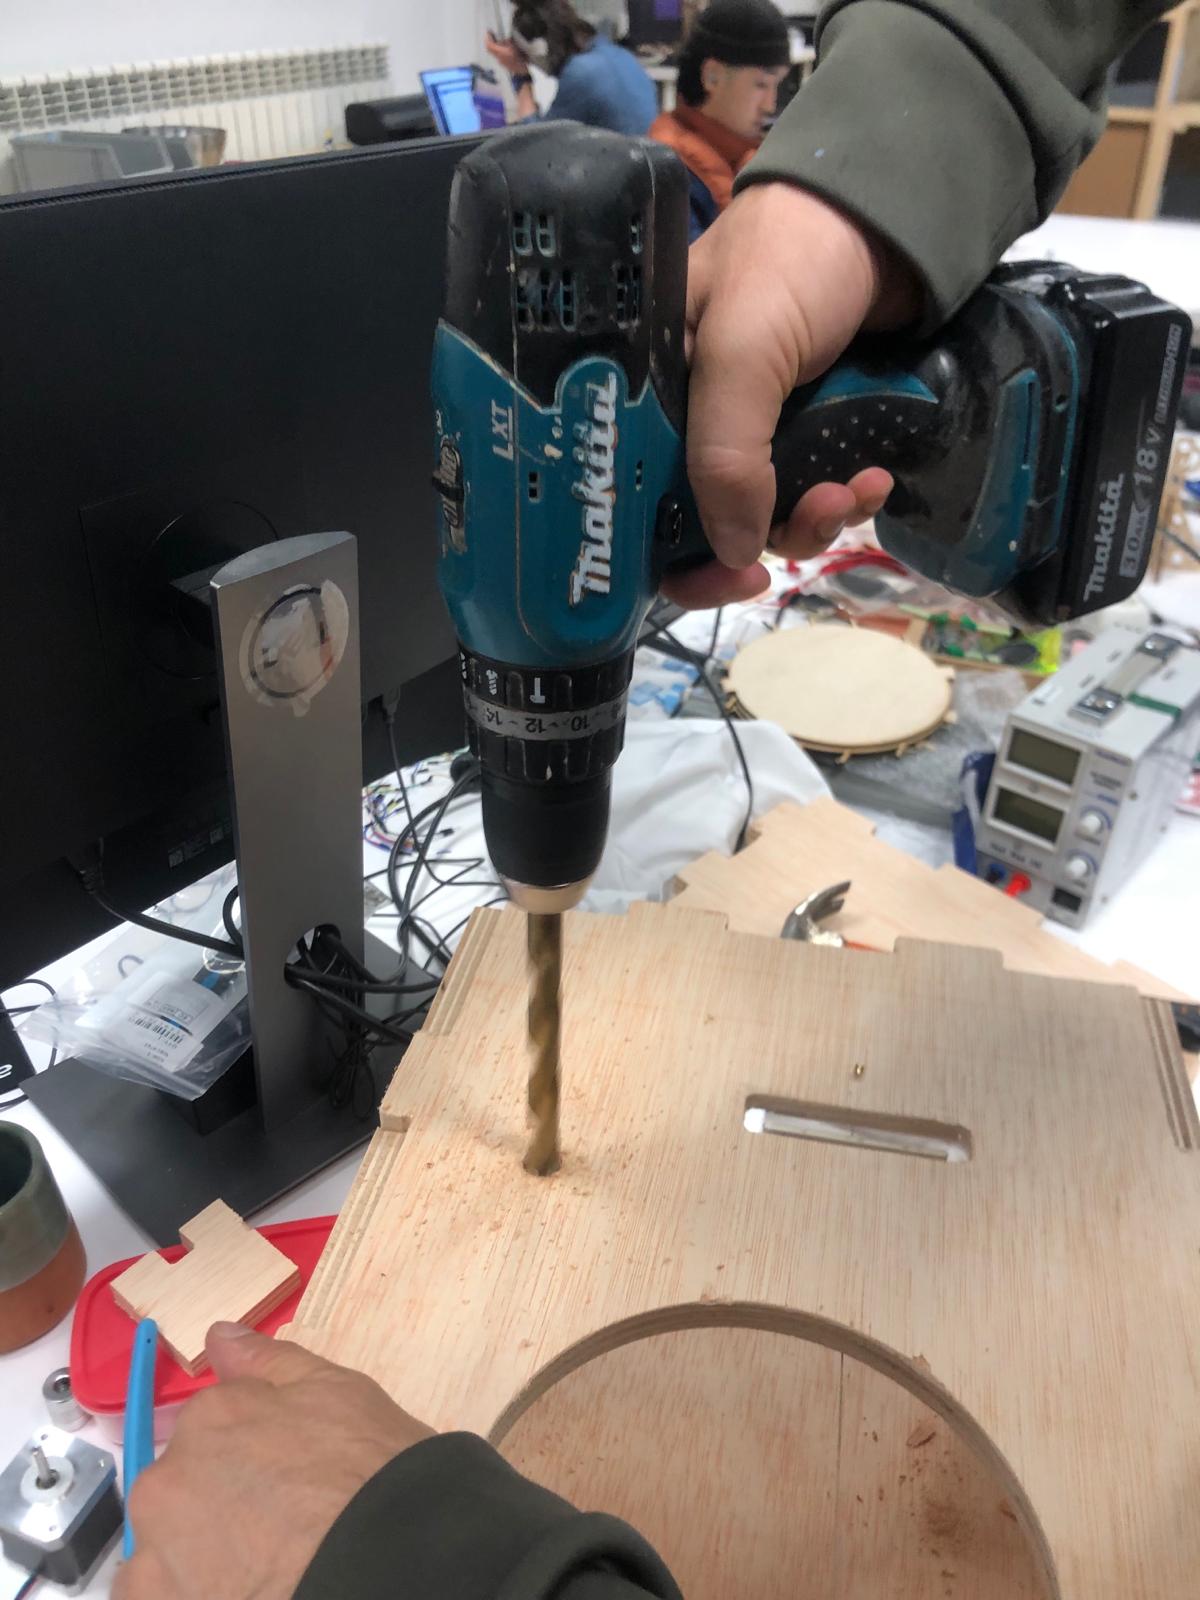
We also had to drill the hole for the potentiometer because whe cnc'ing the wood we did not know it yet where we were going to put it:
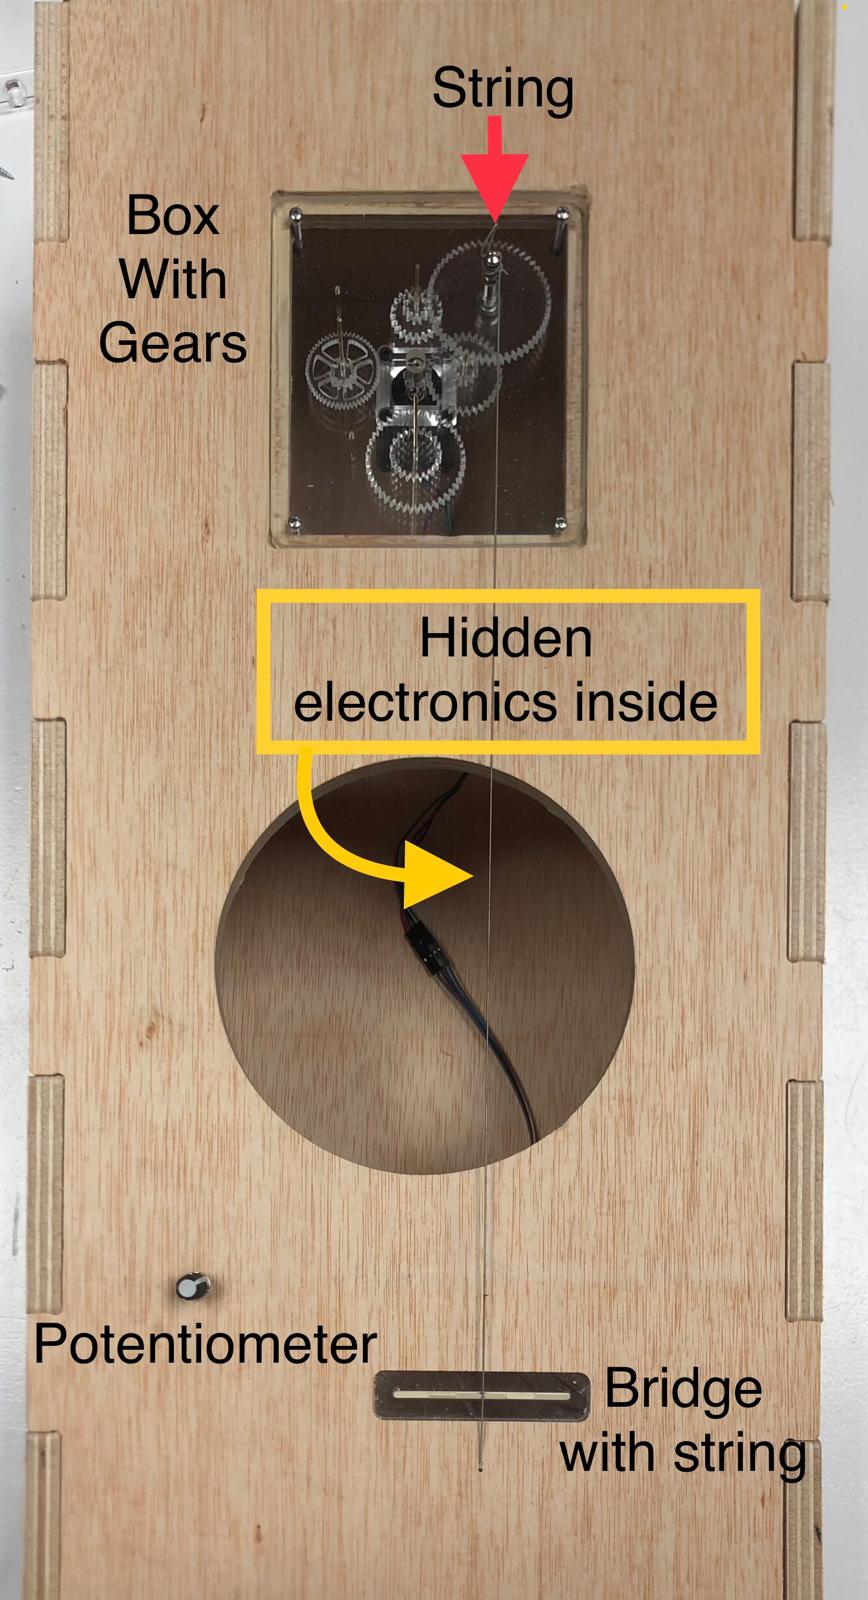
Once it was all working and assembled, i took the pictures and added the text and arrows to explain the instrument.
Testing the instrument
Once it all was assembled and connected, it was time to test the instrument!!
In the end, we deciced to name it Arbol = tree in spanish. The instrument can be used in many different ways :)