7. Computer Controlled Machining
This week it is all about CNC (= Computer Numerical Control)!
For this topic we dive deeper into how to design your pieces and how to operate the machine.
Points to talk about: used software, end mills, machine, design, setup,... cnc process, finishing of the pieces, assembly and test.
This is the type of machine that we will be using this week: RaptorX-SL - Series.
2D design
For this assignment, we have a big sheet of Plywood. Dimensions of this sheet are: 2440mm x 1220mm x 15mm or 10mm.
I had a couple of ideas for this assignment: a Work From Home standing desk, a fun rocking chair for a toddler, a birdfeeder that i designed a couple of years ago, a chair/stool with a shape based on an animal.
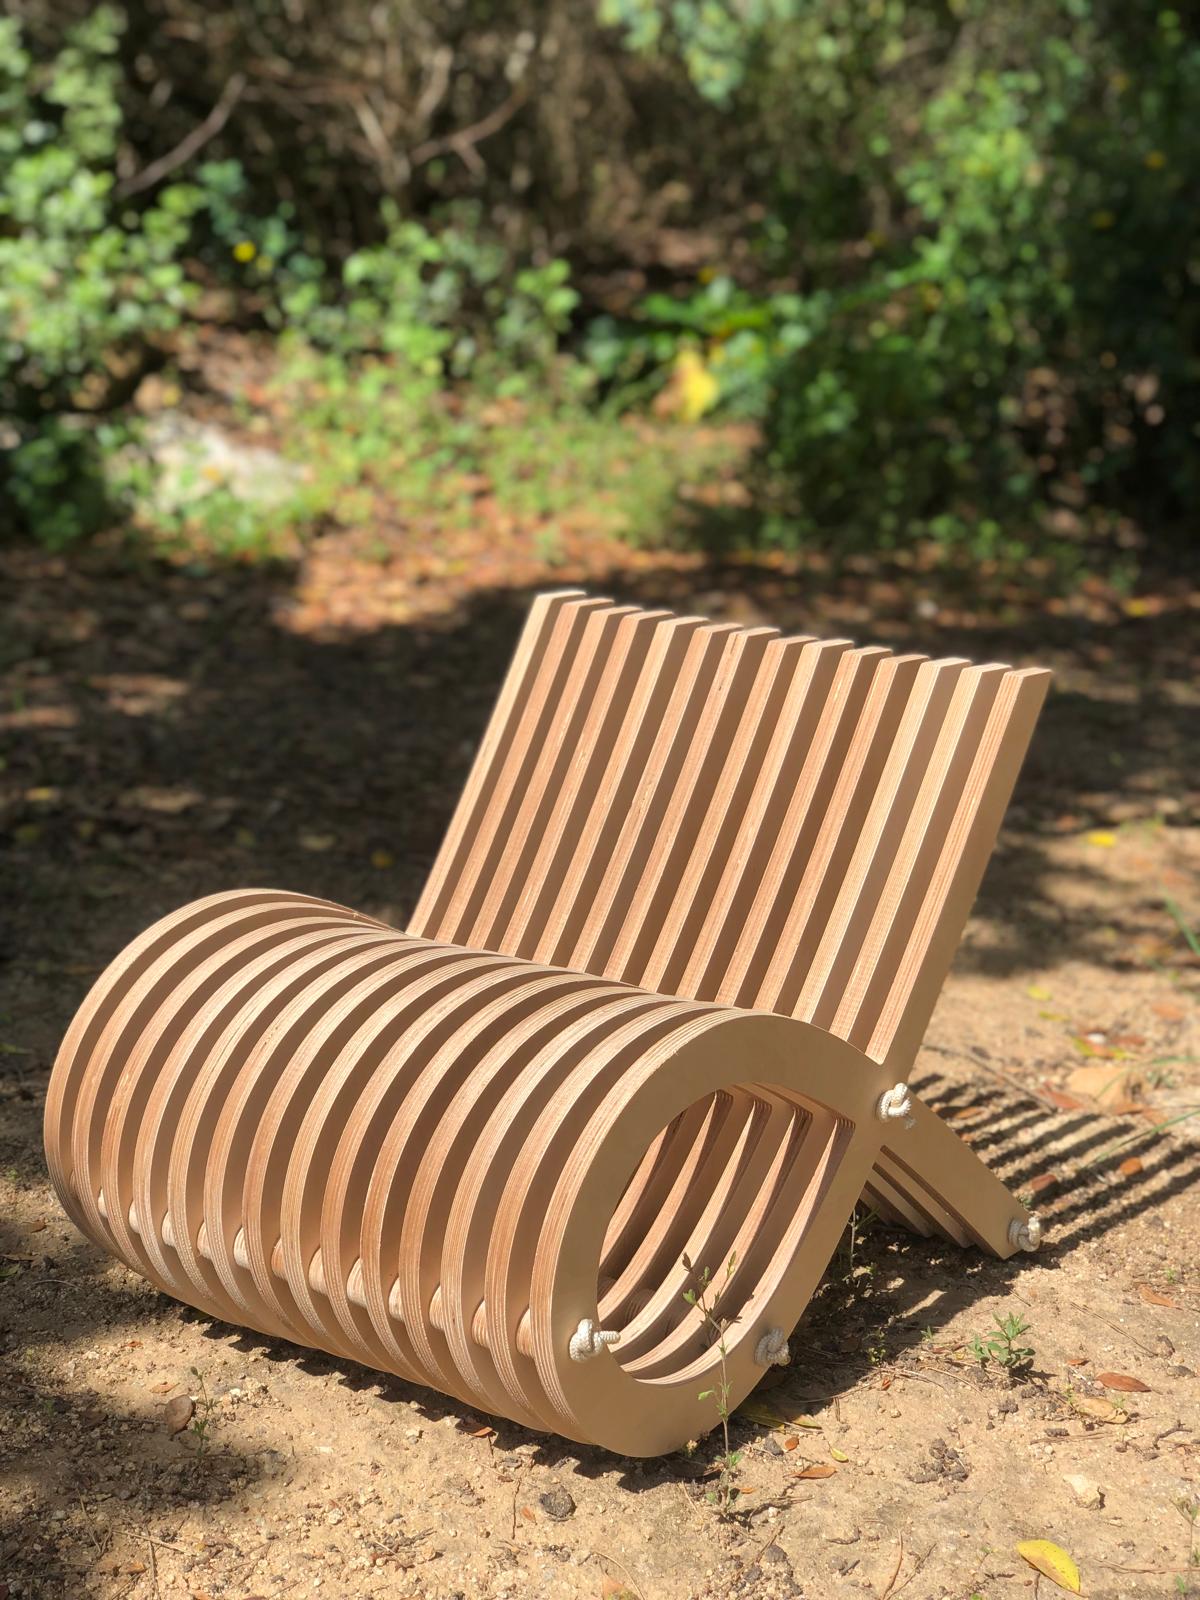
I choose for the chair/ stool shaped like a fish :) and based on a chair designed by Marc Newson.

I used Rhino to design the shape. The shape it pretty straighforward: a fish shape with 4 holes repeated 14 times with wooden "washers" in between.

workflows for CNC production
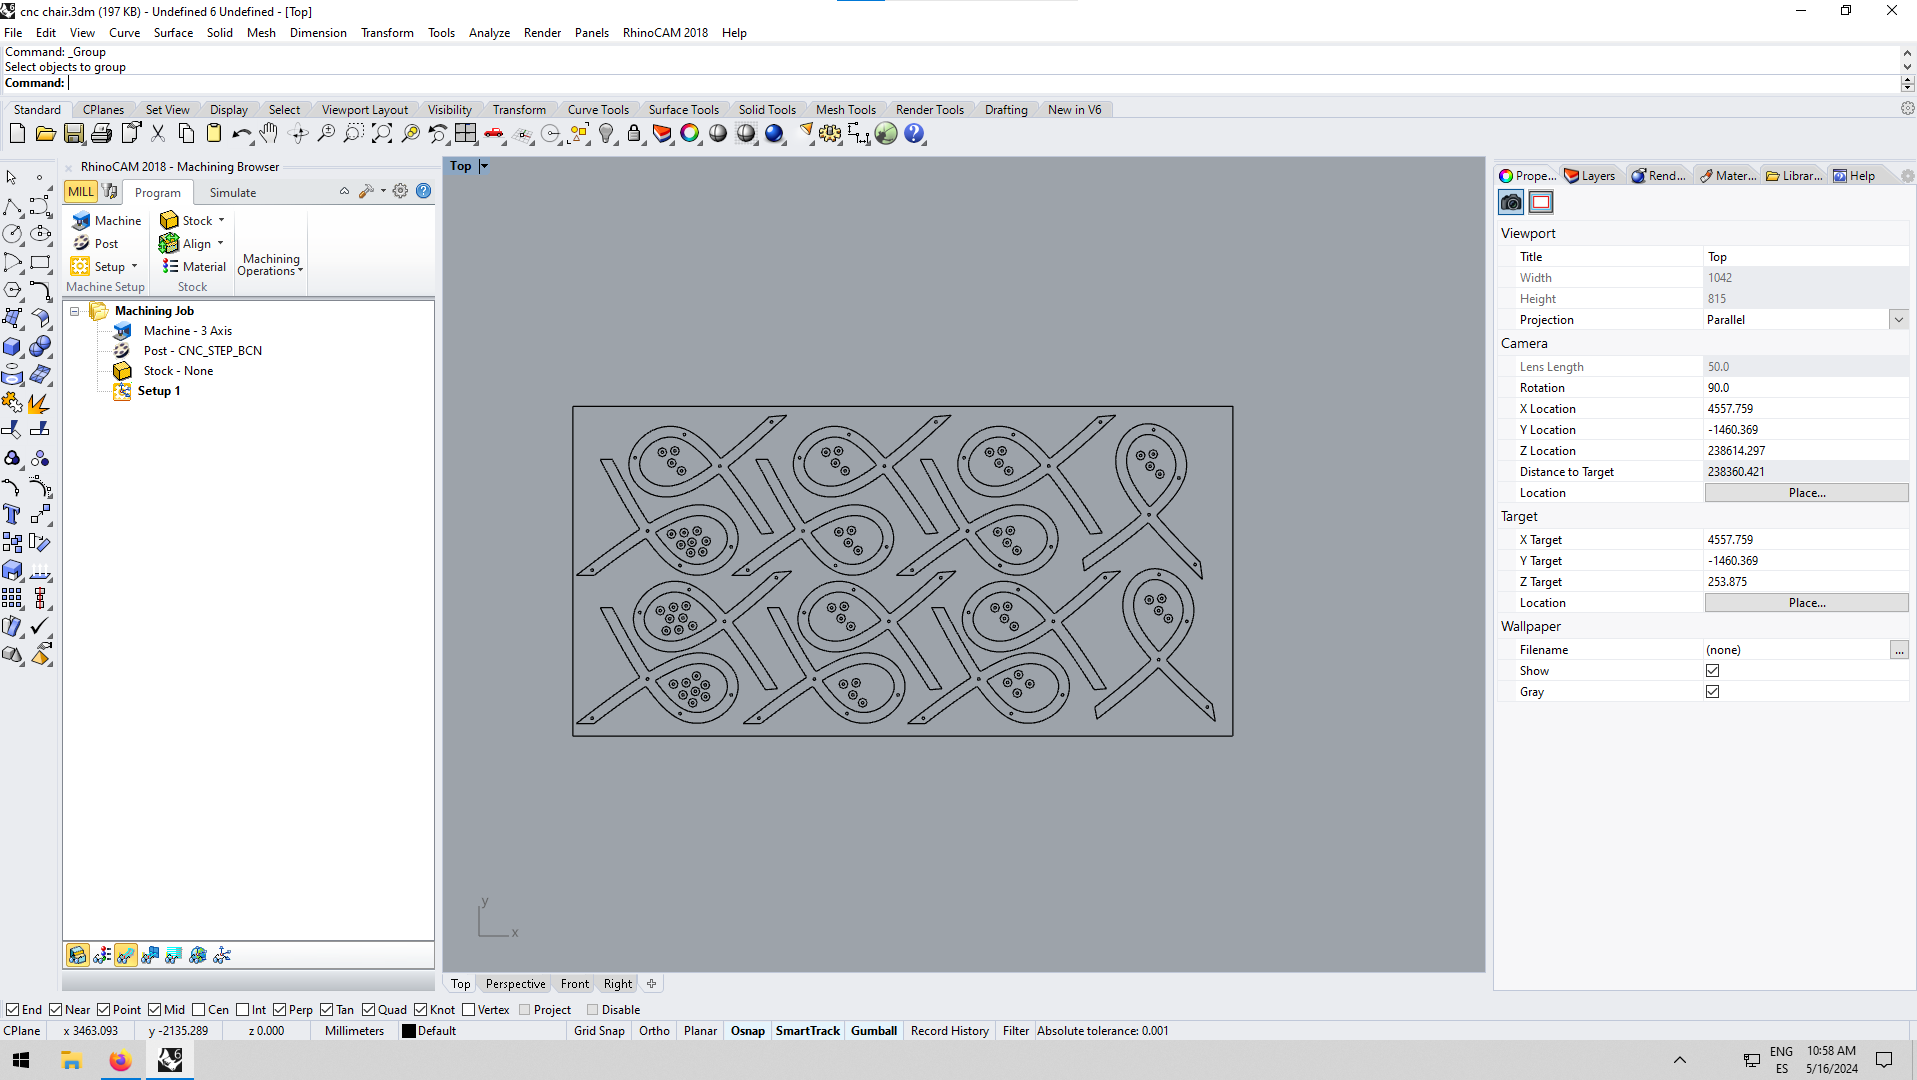
Export the file to Rhino 6 and import it in Rhino on the desktop computer. This computer has Rhinocam.
This is the software we need, to create the file that the cnc can read and where we set up the design and the necessary positions for the screws.
With this software you can set up all the parameters.
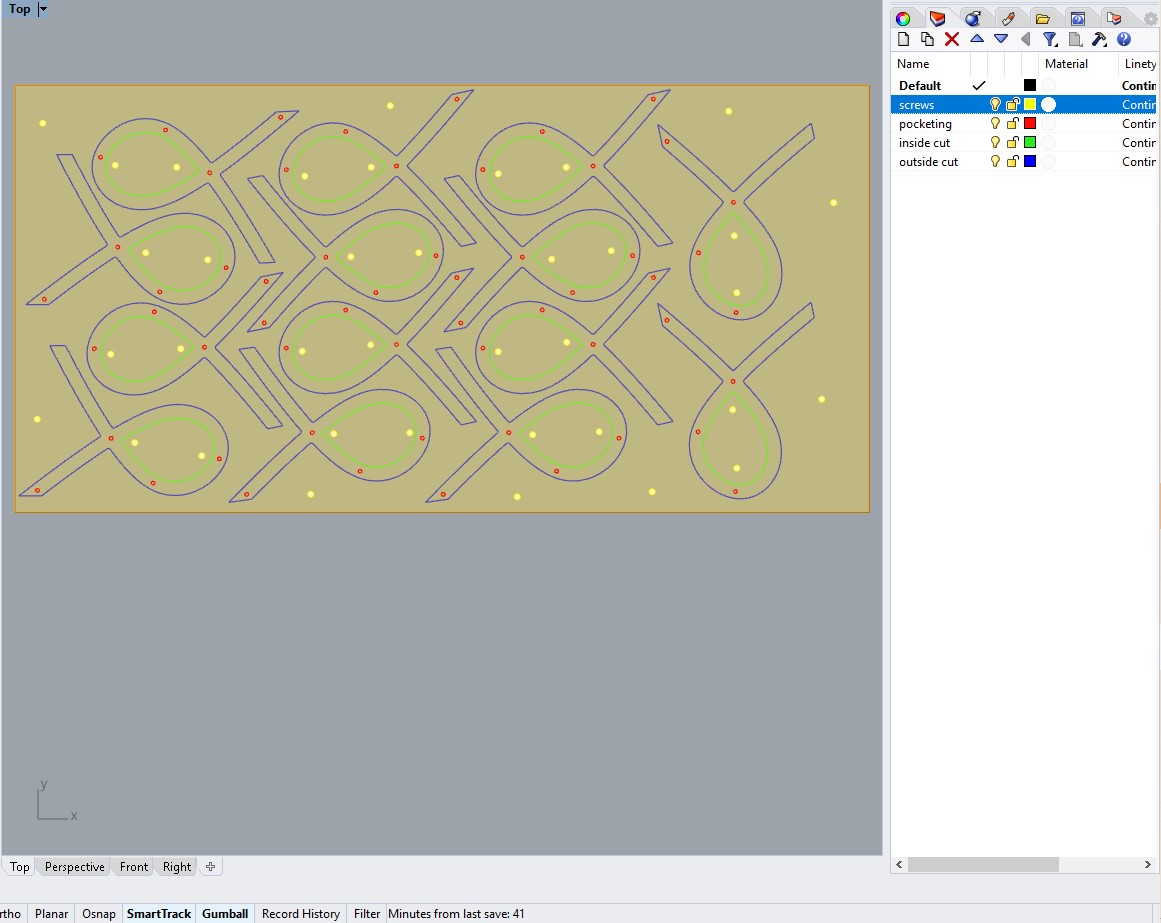
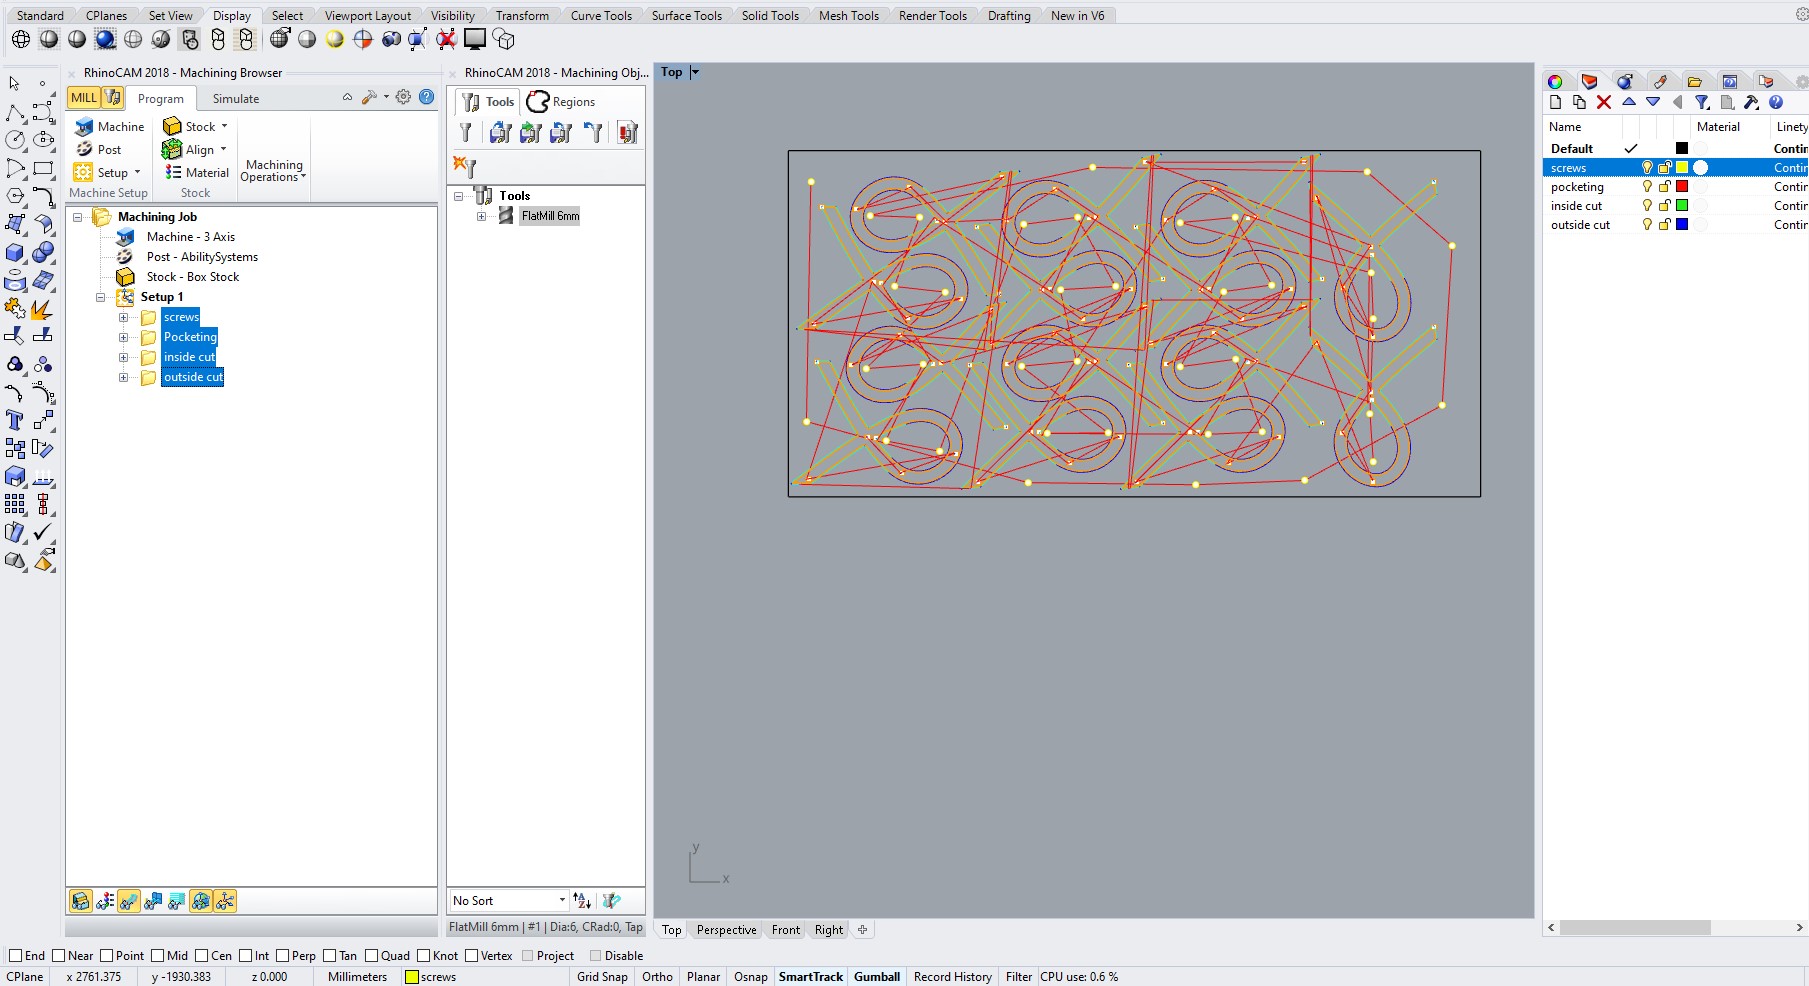
To make the workflow easier, it is better to create differet layers to define the different cuts and settings.
I used the layers: screws, inside cut, outside cut and pocketing.
To win some time and avoid big loss of material, it is important to organize the sheet as good as possible. The spacing between the parts needs to be big enough for the mill to pass in both directions.
In the layer Inside cut, i added everything where the mills needs to cut on the inside of the line. This is in my design the part of the inside of the stool. I also added the wooden washers in this space because this is a lost part of the cut.
In the layer of outside cut, i added the big shape of the stool. Here the mill cuts on the outside of the line. The washers are also cut on the outside of the line.
in the layer Pocketing, i added the holes where the rope or rebar goes through. This is also on the inside of the washer.
Need to add screenshots in rhinocam of the set parameters (this is the only screenshot i currently have.)
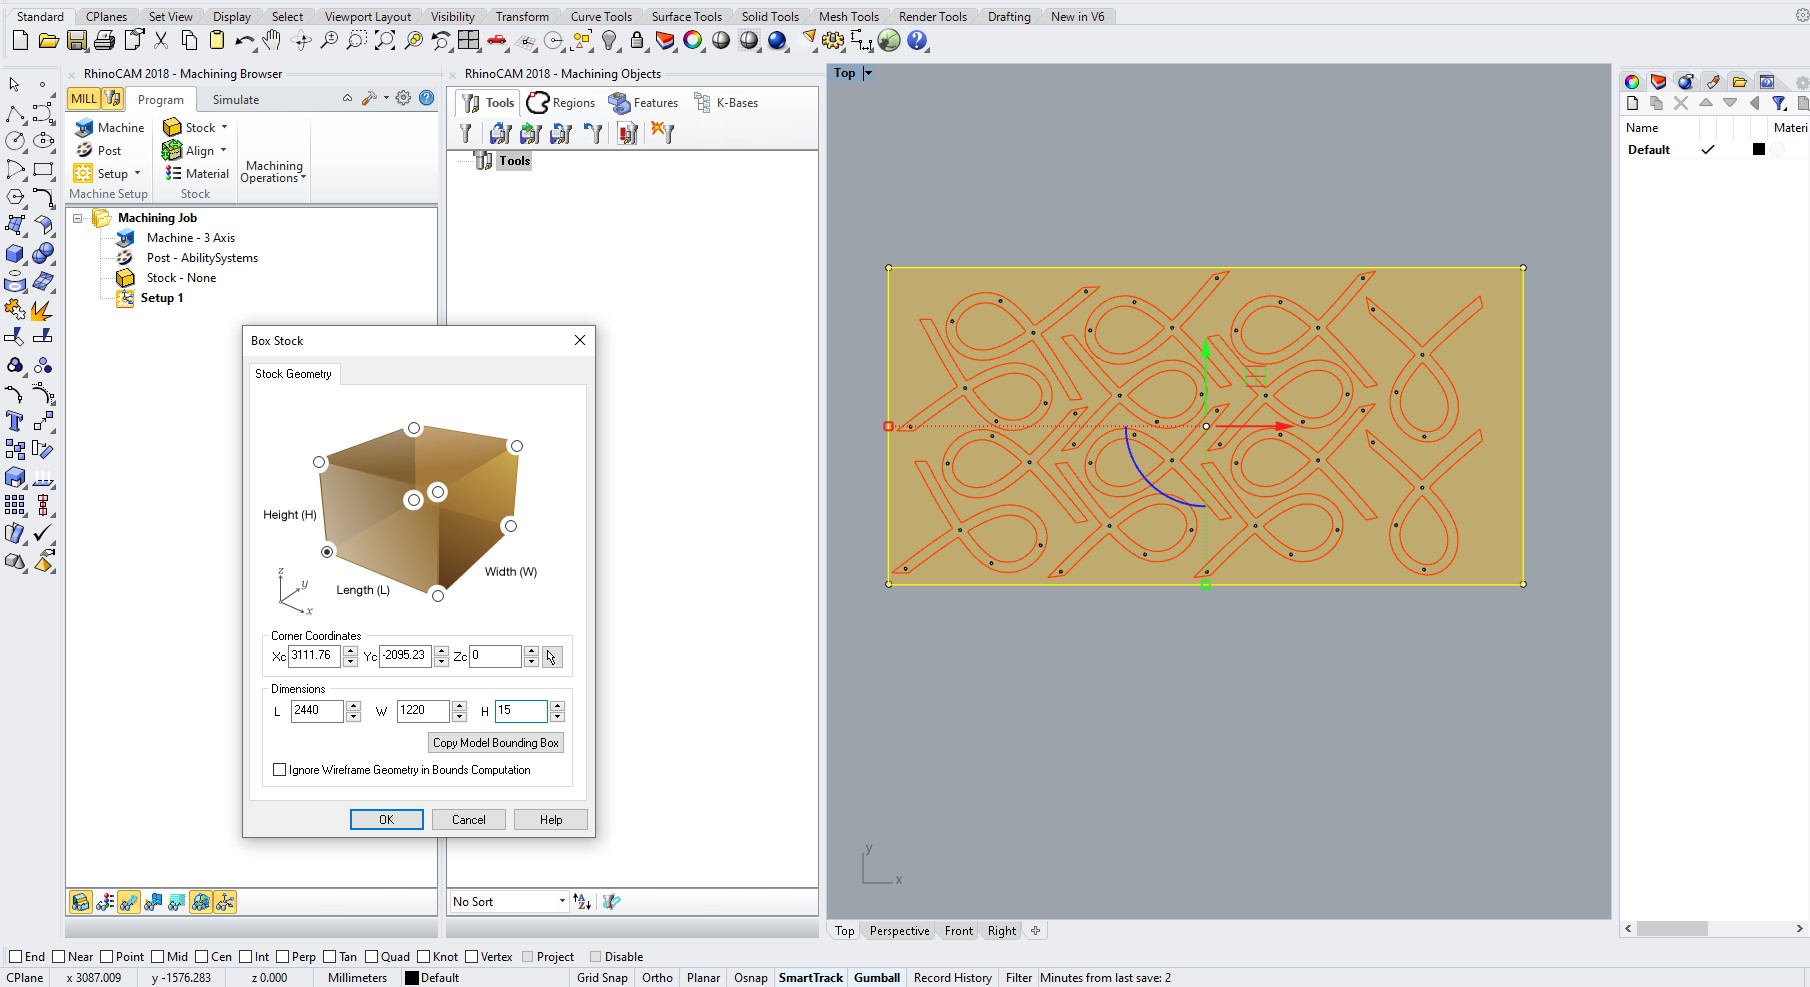
Import the file
Create box stock
Add the dimensions of the sheet that you will cut in.
IMPORTANT: in the screenshot you can se ethe selected dott in the lower corner. This upper left dott should be selected!
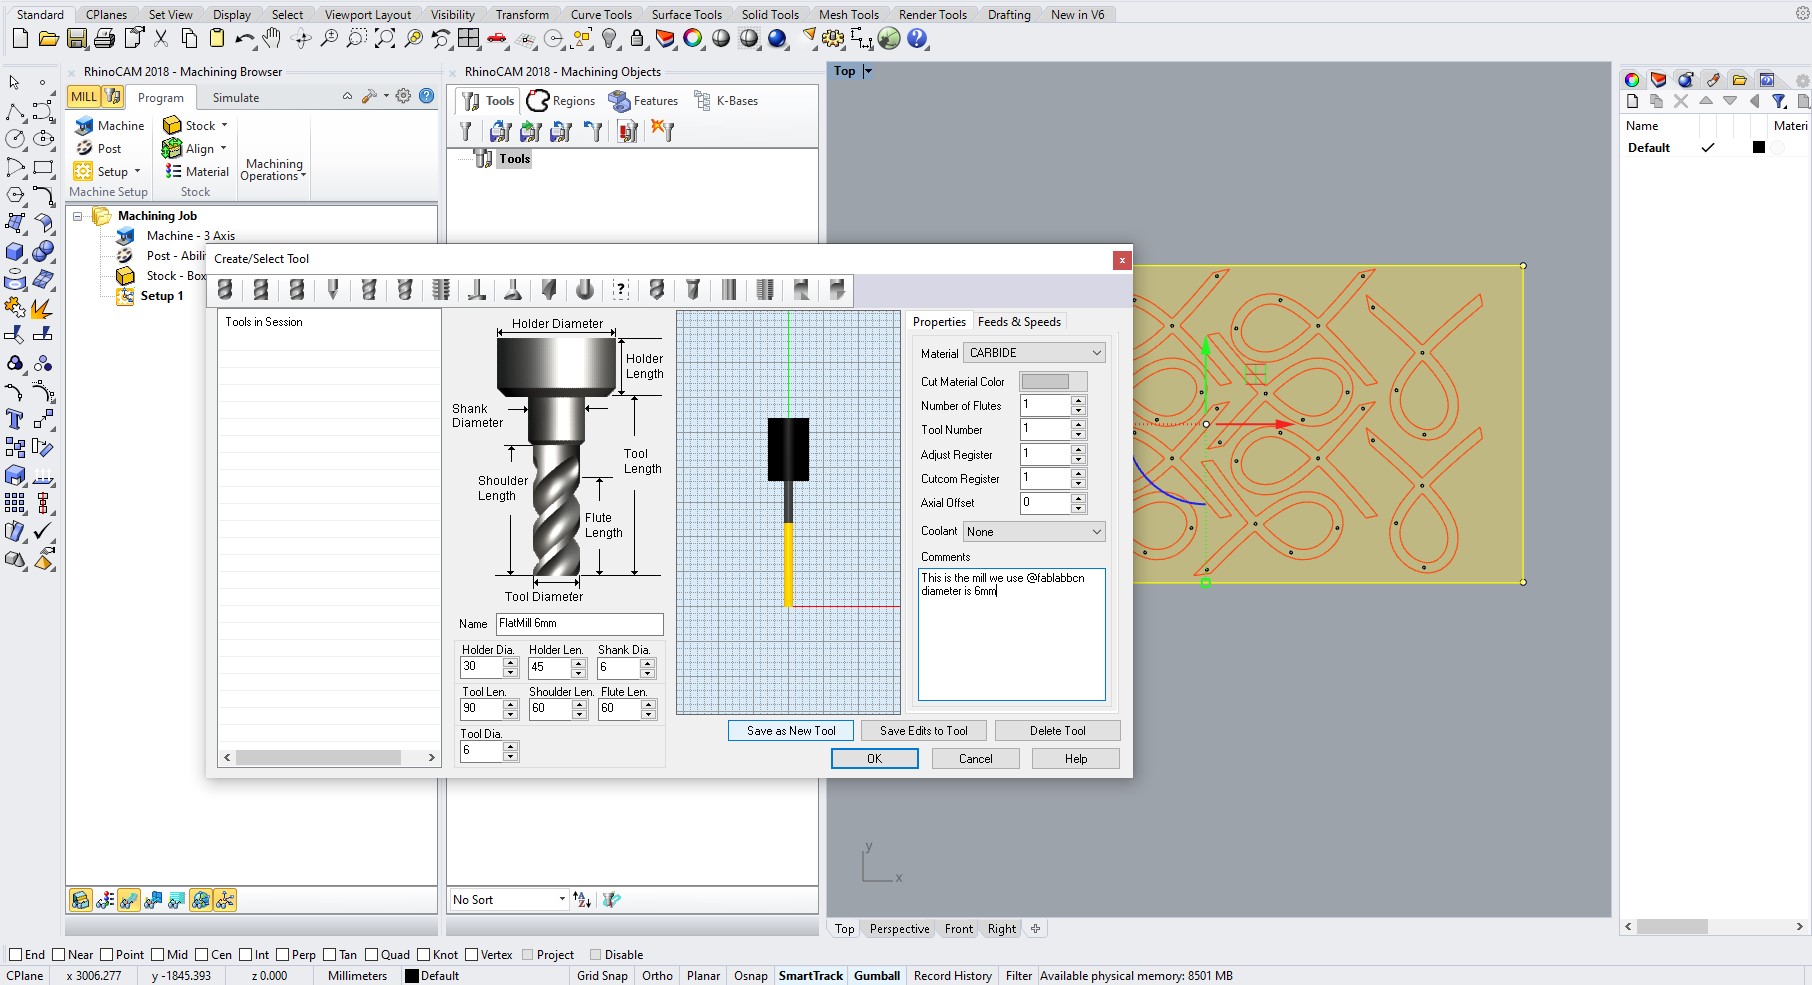
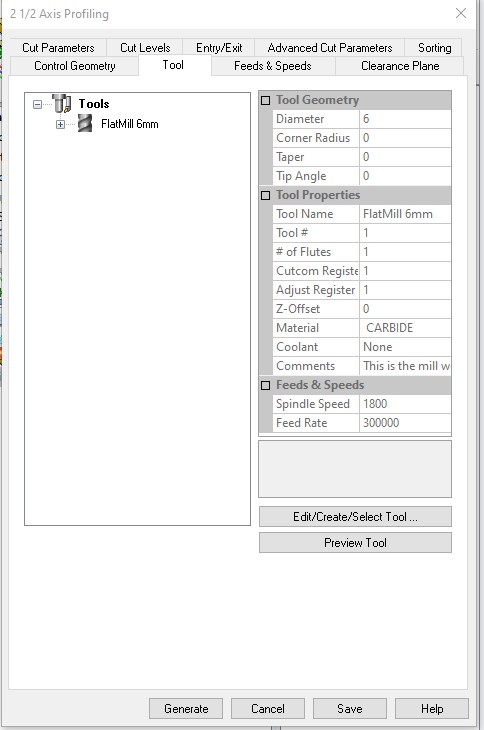
Create or add the Flatmill 6mm
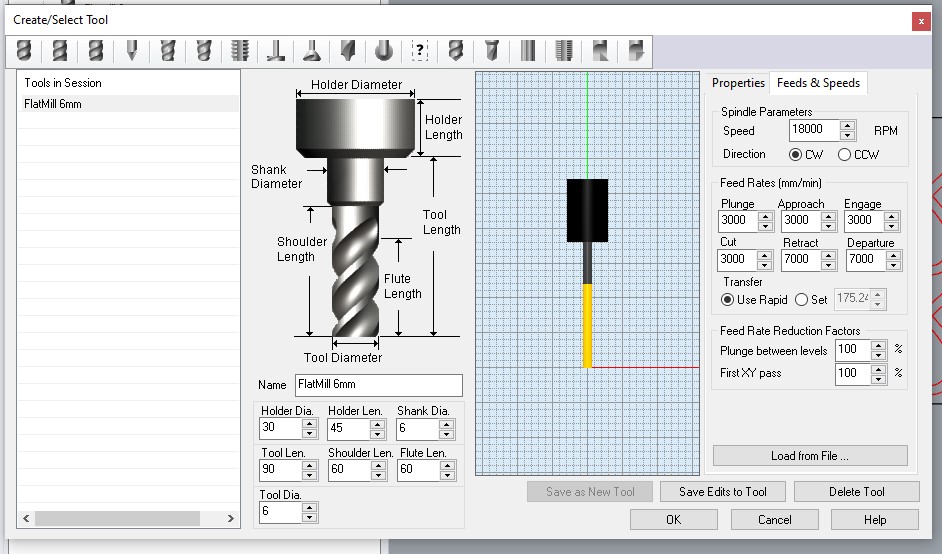
Add the properties of the endmill that you will use. In this case, i will use the same endmill for all the processes. Here you also see the speed and feed settings!
Create layers
As mentioned before, here you can see how i did the layering.
Settings
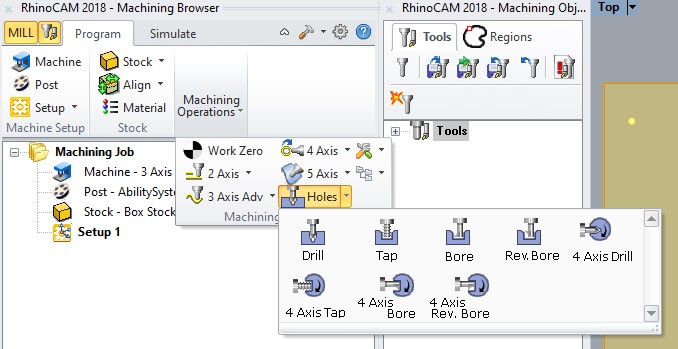
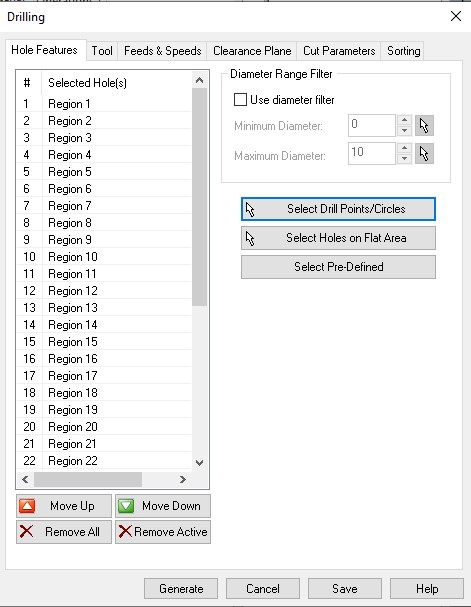
Select the screws
Select the points that you added for the screws so that the machine knows where to drill holes. You can see the generated path (red lines).
 a>
a>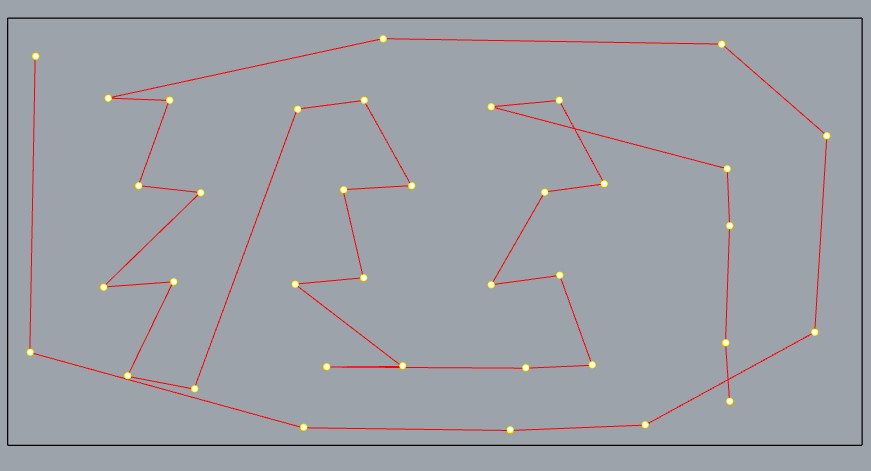
Select the points that you added for the screws so that the machine knows where to drill holes.
Setting the parameters
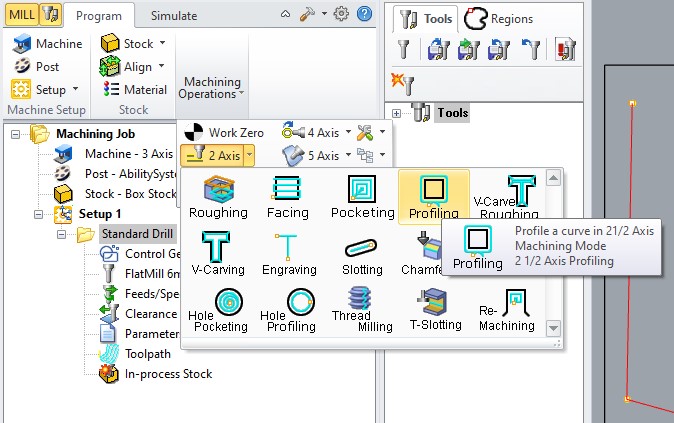
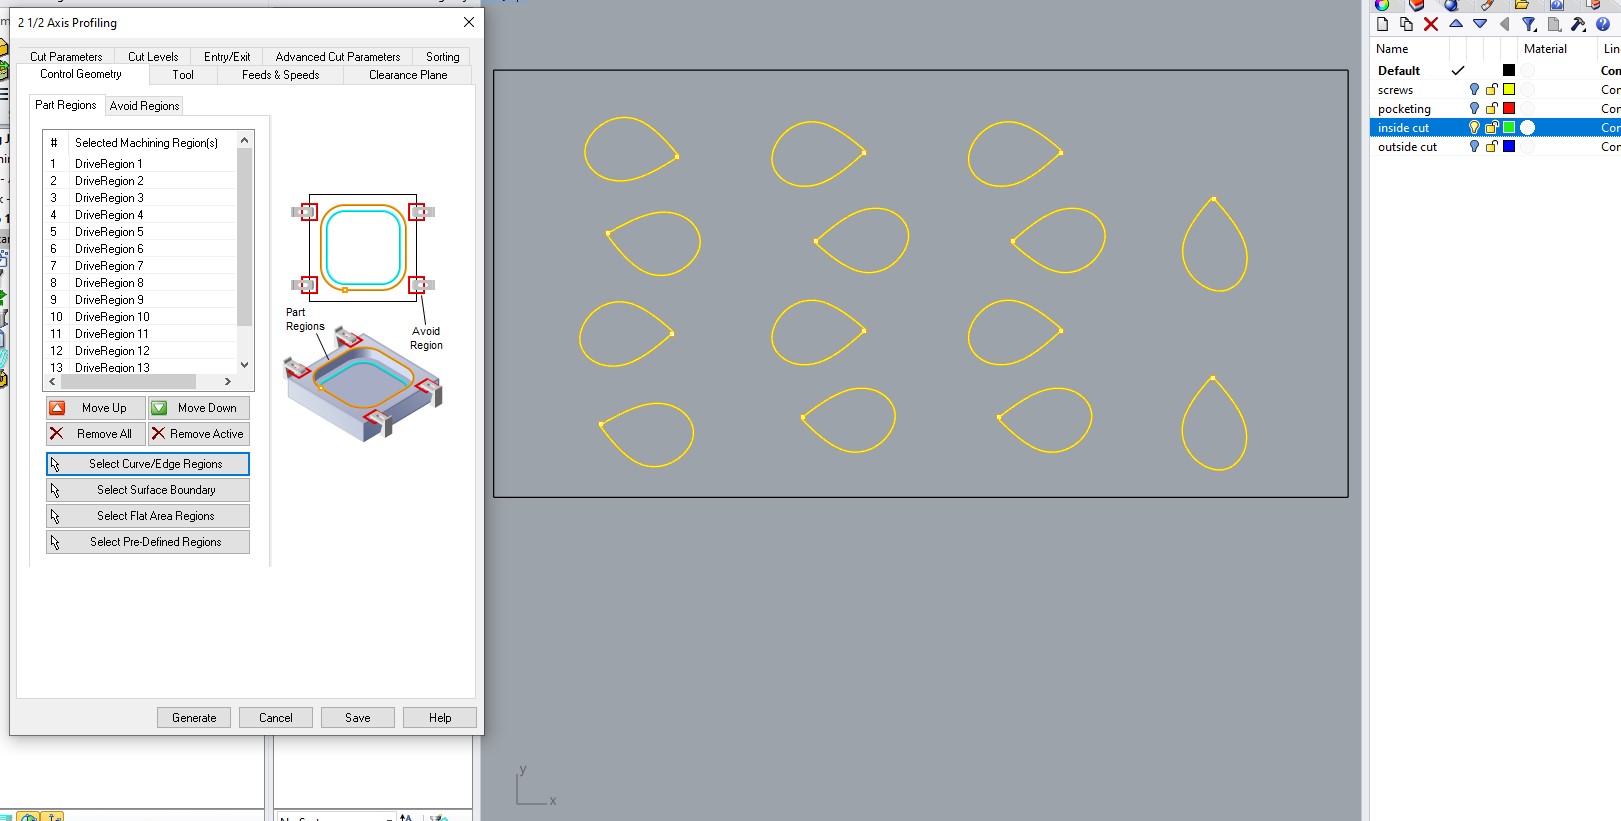
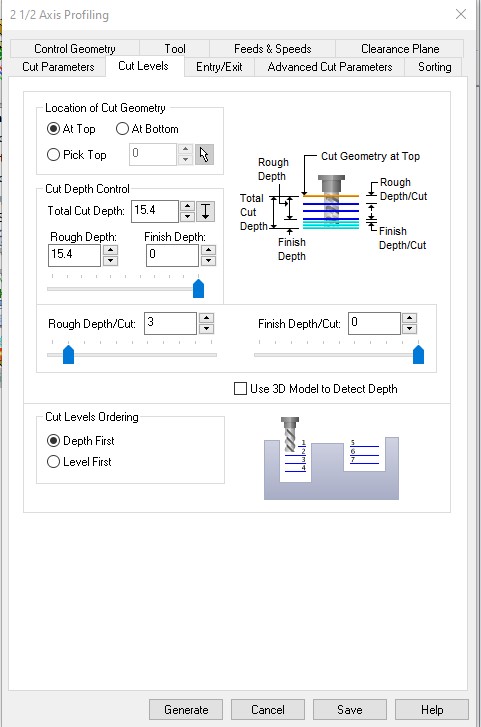
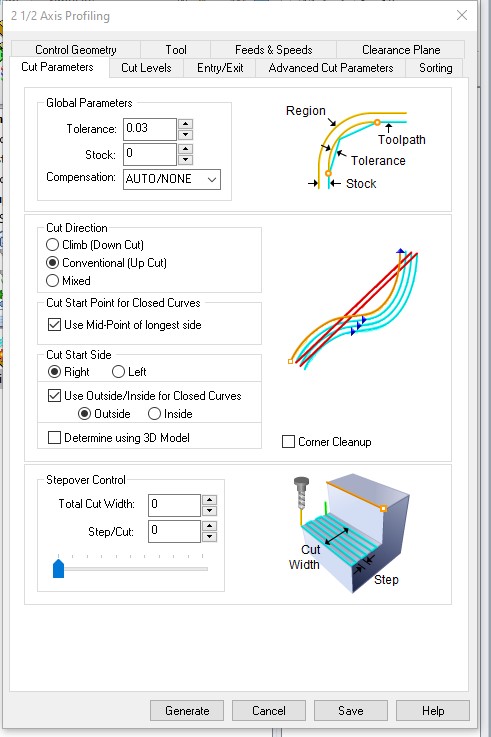
In machine operations/2 axis, you have the profiling tool. With this you can create the paths to cut. Here it is important to make some changes in order to have a good result with the type of wood that we are using (plywood). Something that i should have changed was the number of bridges! Some of these snapped so i had to add screws. (this documentation has been re-done and edited to avoid the problems i encountered).
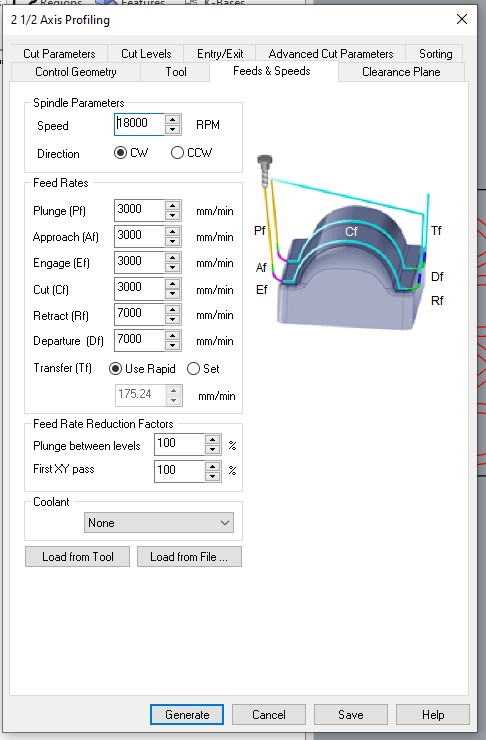
Furthermore, some important settings: the speed of the spindle is 18000, the feed rates in mm/min for the plunge, cut, approach, engage are 3000mm/min and the retract and departure are faster: 7000mm/min.
Outside cut
Select the points that you added for the screws so that the machine knows where to drill holes.

Inside cut
Select the points that you added for the screws so that the machine knows where to drill holes.
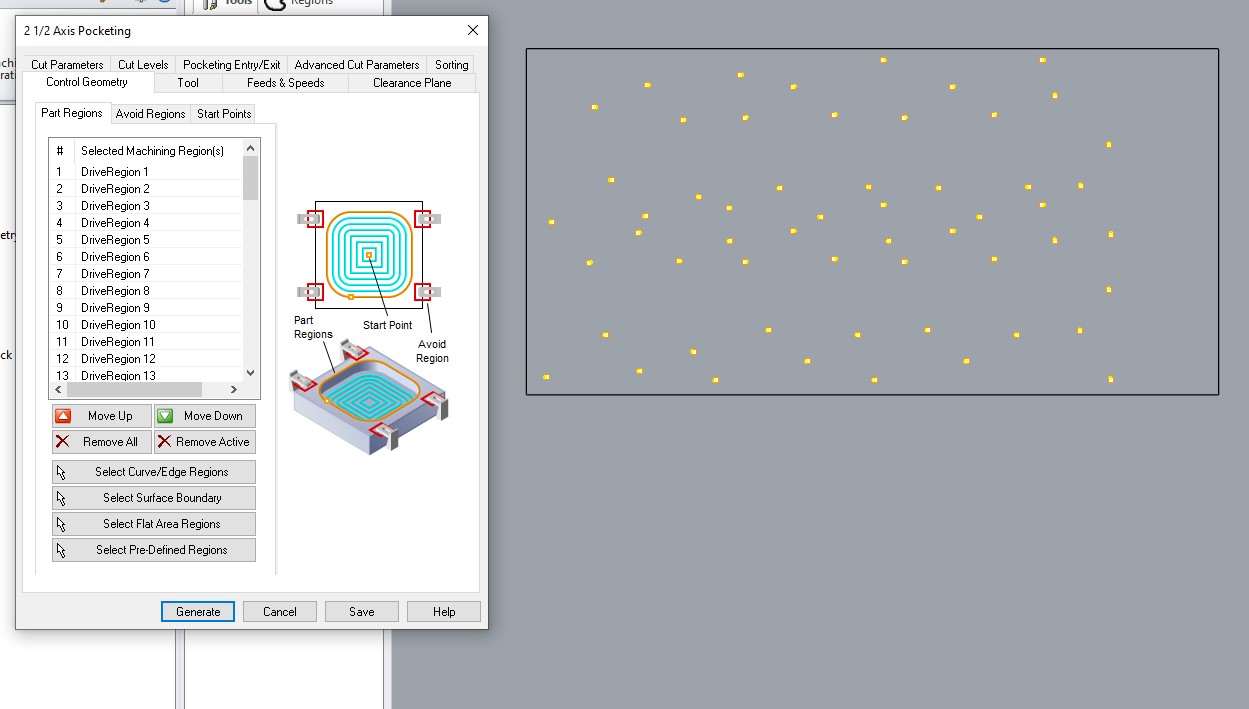
Pocketing
Select the vectors that need to be pockets.
Paths
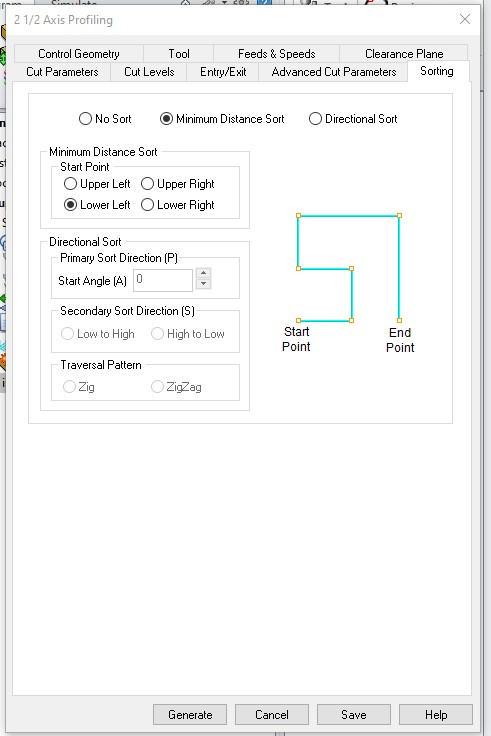
Here you can see the generated paths. Also: the layers have a specific order. This is done to have a smooth process and to avoid cutting into a piece that is loose.
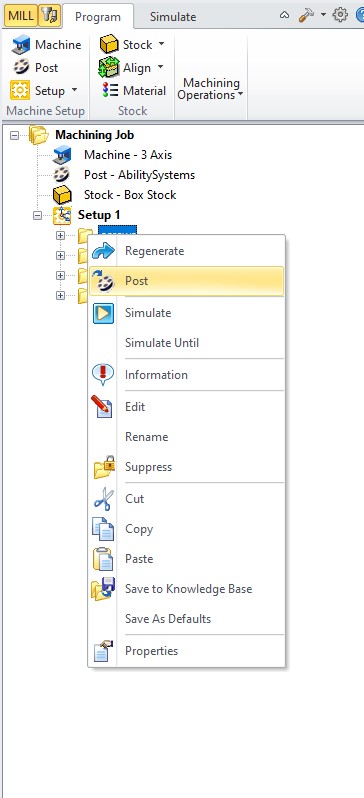
Export
Select the layers and right click on the folder icon. Here you can select "post".
The files need to have .nc.
UNFORTUNATElY: i've done this entire setup in a demo mode so i can't save it. = no file for the cam part...
CNC production
Let the fun begin :)
Use safety glasses before cutting!
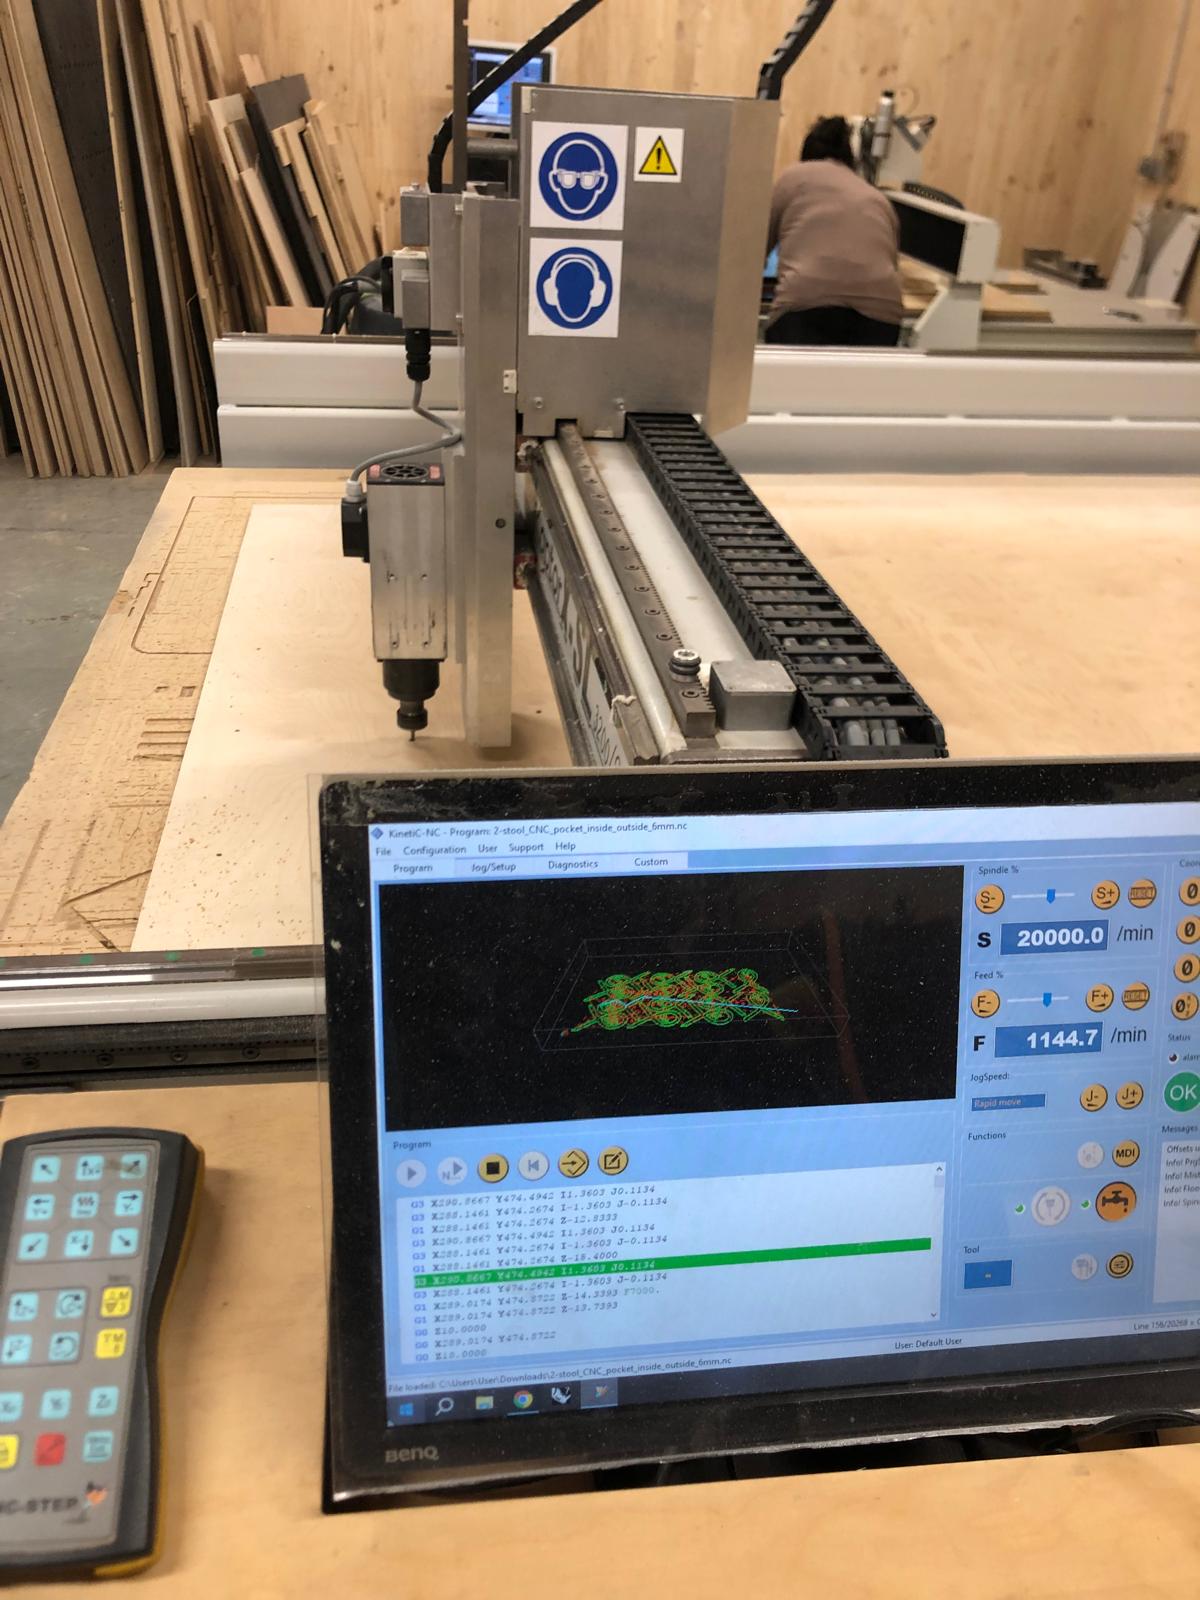
- 1. Downloading the file onto the desktop computer that is connected with the cnc.
- 2. Putting the wooden sheet onto the cnc platform.
- 3. Changing the mill with the one we choose. In this case a 6mm.
- 4. Setting the origins: first the X and Y and then the Z.
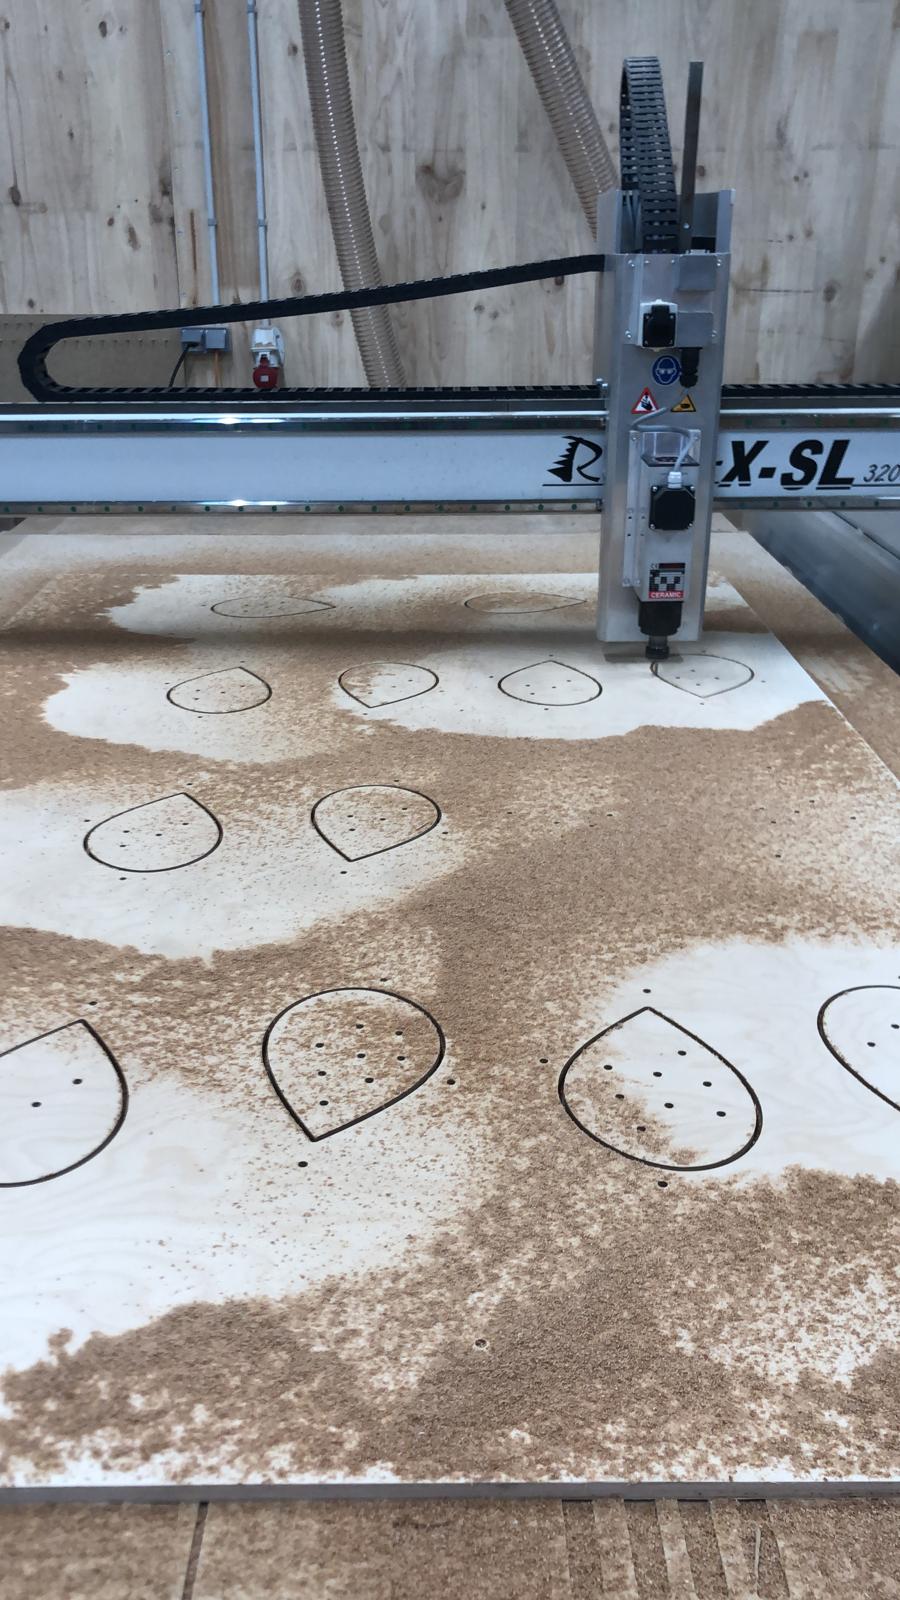
- 5. Start the first cycle: screws! In this cycle, the machine mills the designated holes for the screws.
- 6. Screw the sheet onto the sacrificial board. Make sure that you screw the screws first in for 2/3, get out and screw them back in for 100%. Doing it this way makes sure that the sheet is fully flat onto the sacrifivcial board.
- 7. Start the second milling cycle: Pocketing.
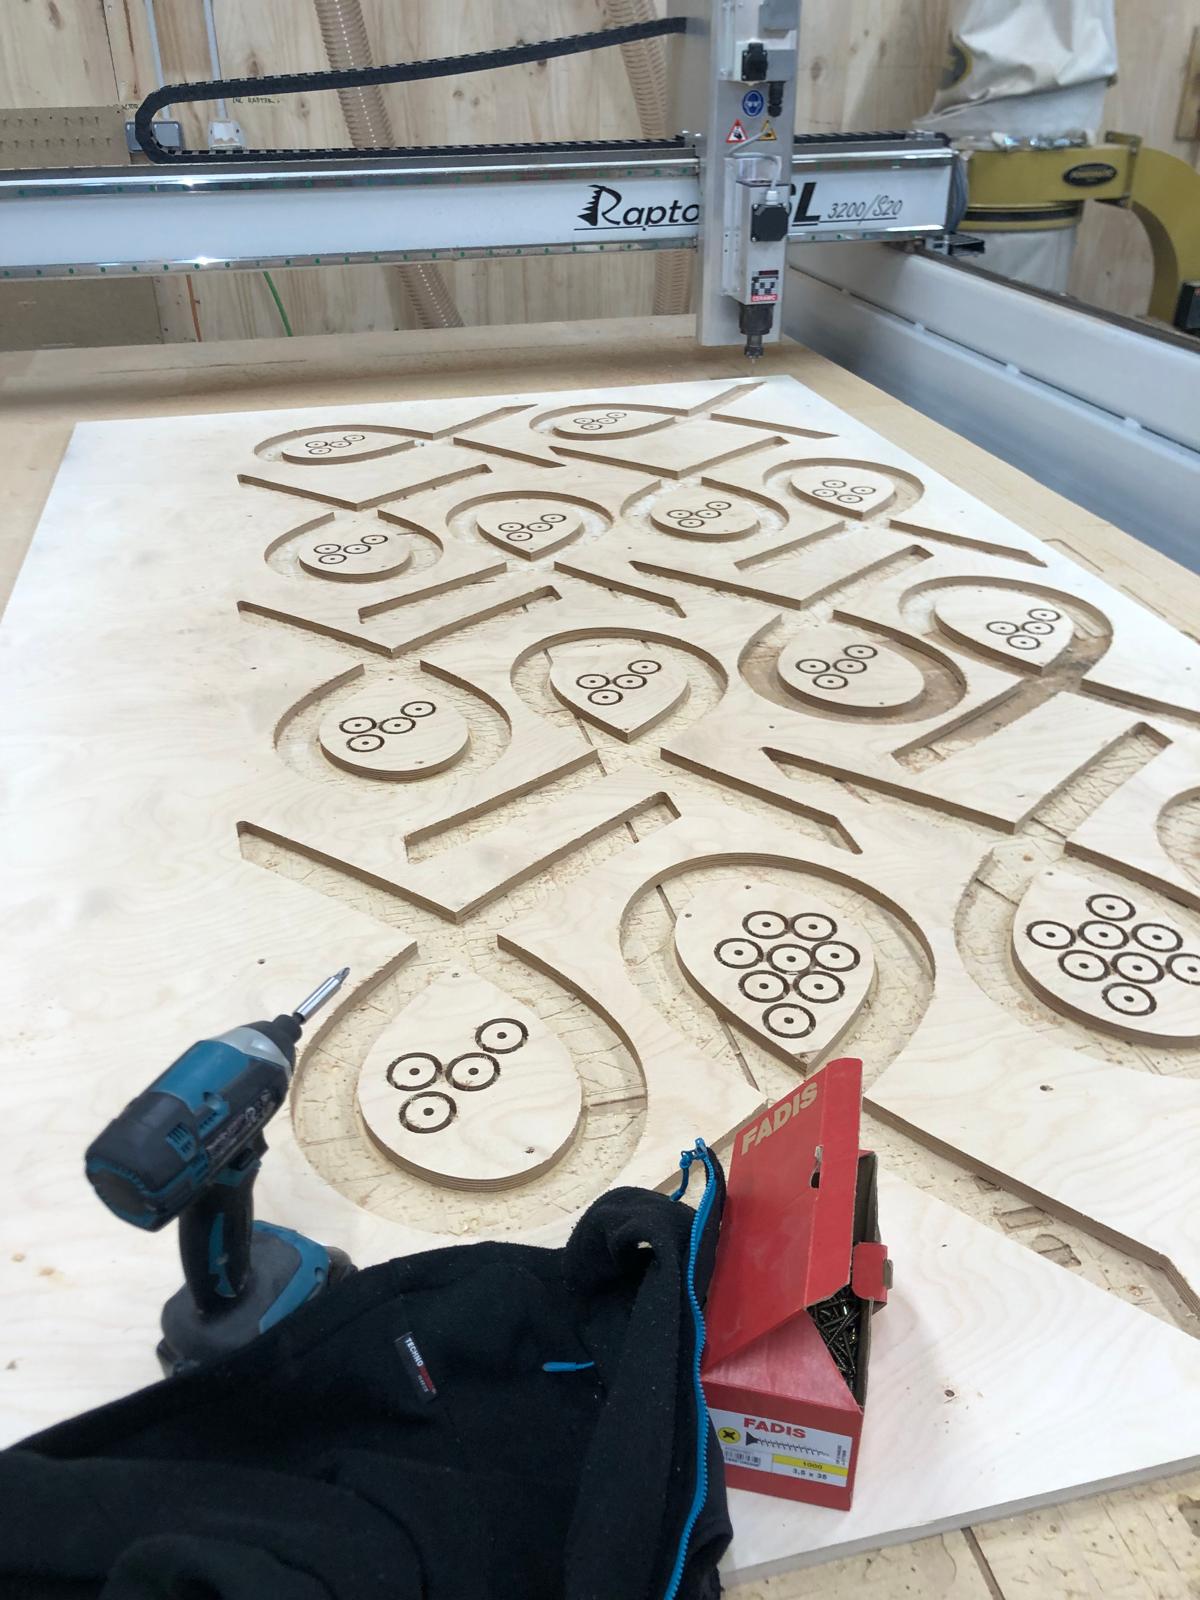
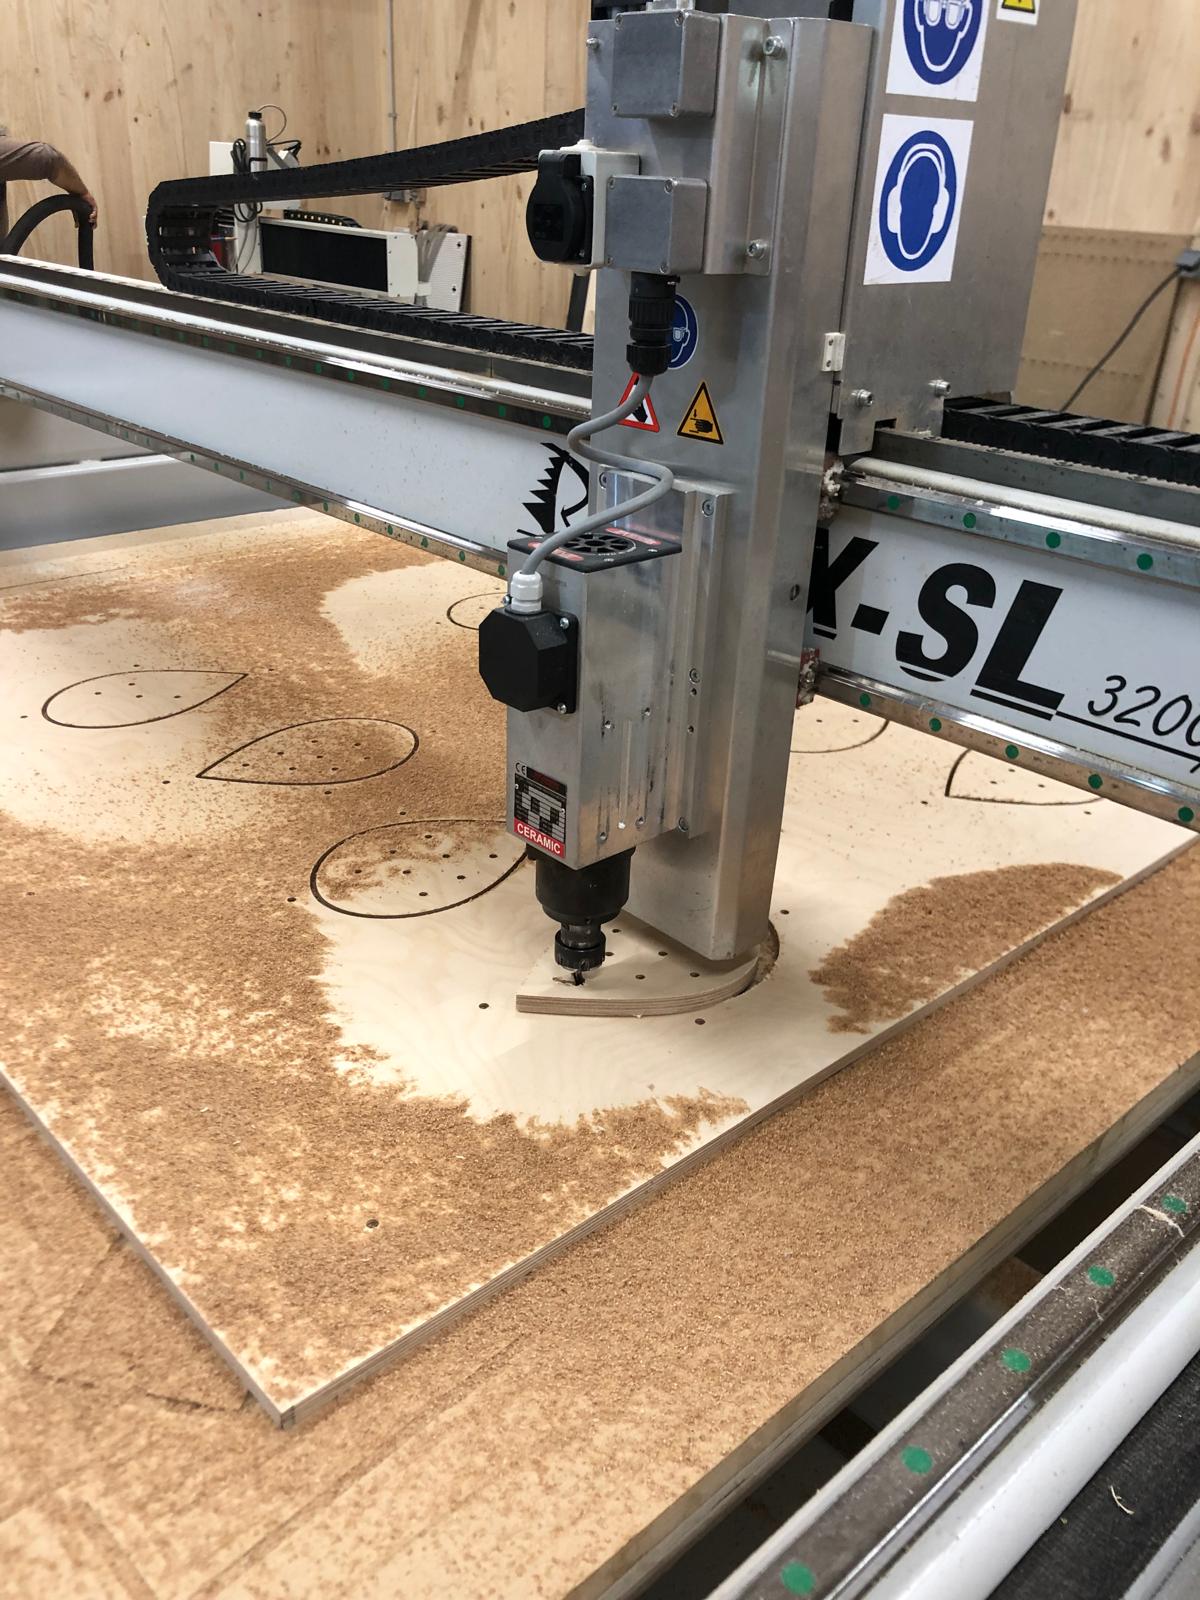
- 8. Start the third milling cycle: inside cut. This is the part inside of the fish. Inside cut means that the machine mills on the inside of the line.
- 9. Fix the problem: unfortunatly as you can see in the second picture, the inside shape was only connected to the sheet with bridges. These bridges were not strong enough and broke because the milling of the machine is to strong. To fix this problem i used screws to fix all the pieces to the sacrificial board.
- 10. Relaunch the machine. (i had to press the emergency stop button when i saw the bridges break. To continue with the process, i had to create a new file where i only kept what had to be milled. Thi sfile is the Second Try file :p)
- 11. The machine is ready after 1.30h of cutting (problems included)
- 12. Cleaning the surface with the vacuum to have a clear view of the milled pieces before taking them off (unscrewing) of the sacrificial board.
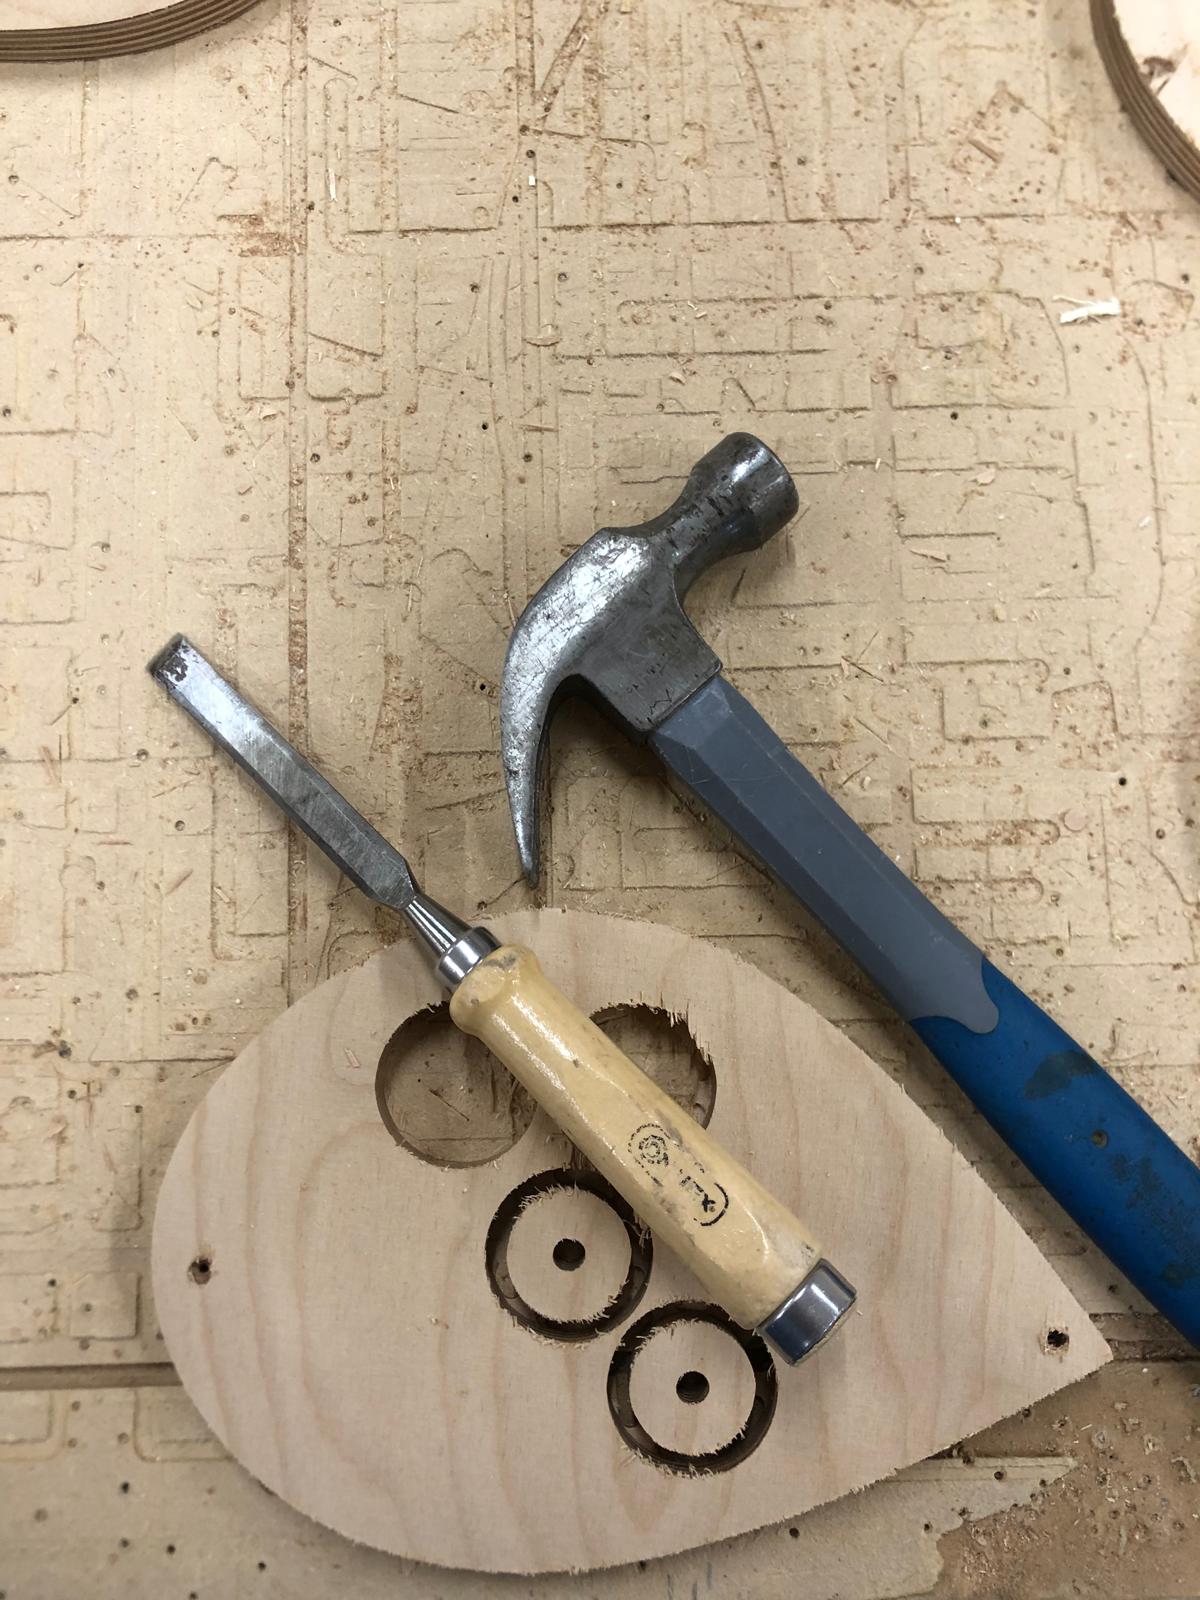
- 13. Taking the pieces out of the wooden sheet. To do this, i had to break the bridges between the pieces. I used a hammer and a chisel
- 14. Take everything from the machine and leave it clean and organized behind.
- 15. Time to sand the pieces.
- 16. Time to assemble!! woohoo
- 17. Take some nice pictures of the end result
- 18. Be happy with the result :p
Pictures and videos from the process
Here you can see some pictures of the process and below some videos.
These are the tools i used to break the bridges.
Here you can see the problem with the bridges. I got lucky that the bit did not brake! In the steps above you can read how i fixed it.
here is a video where the cnc is preparing the screw holes.
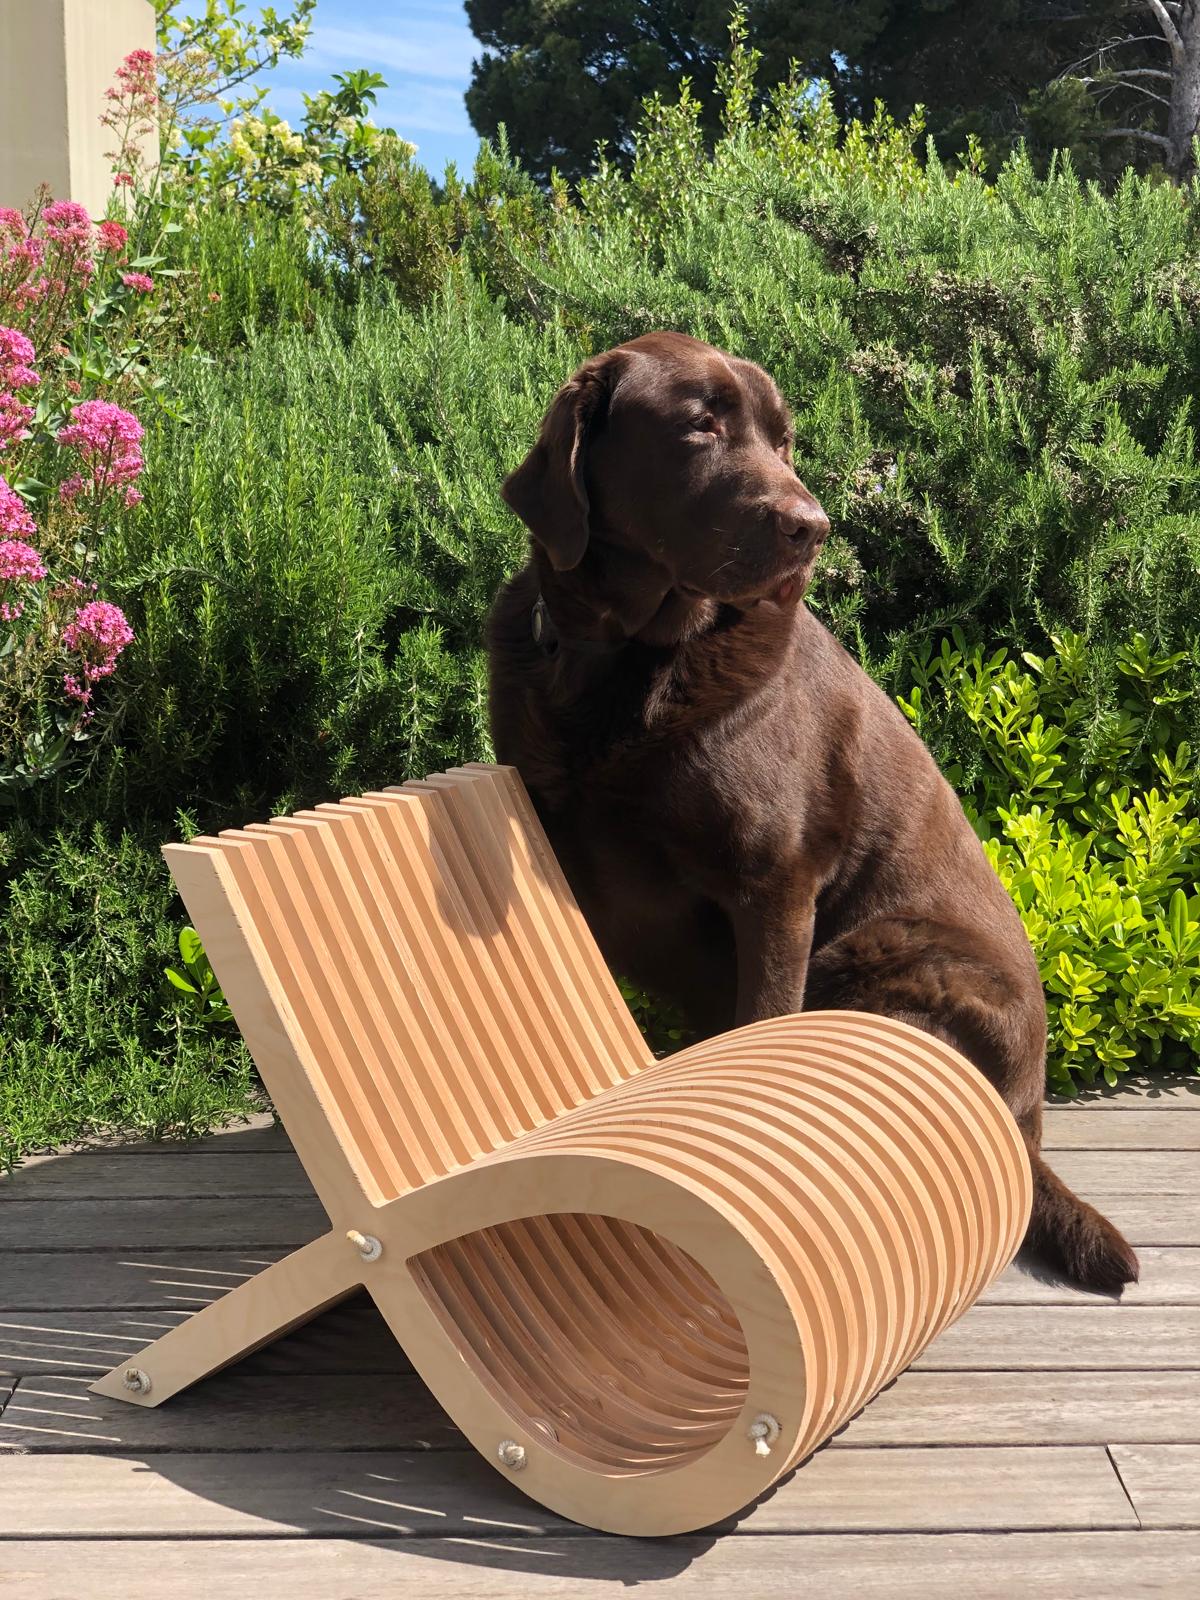
Final product
There was no toddler available for the picture so my dog can give you an idea of size :p.