5. 3D Scanning & Printing
- 3D scanning
- 3D printing
3D scanning
3D scanning is pretty amazing! With a scanner you can convert an object (real physical object) into a digital 3D model.
There are 3 types of scans we have seen in the lab.
1. Skanect, creating 3D models using a depth sensor.
2. Revopoint (more details), this is the camera: Revopoint POP 3
3. Photogrammetry with Regard 3D
used softwares:
Regard 3D: converts photos of an object, taken from different angles, into a 3D model of this object.
Meshroom: can reconstruct 3D models of objects in photographs.
Meshmixer: to edit the mesh
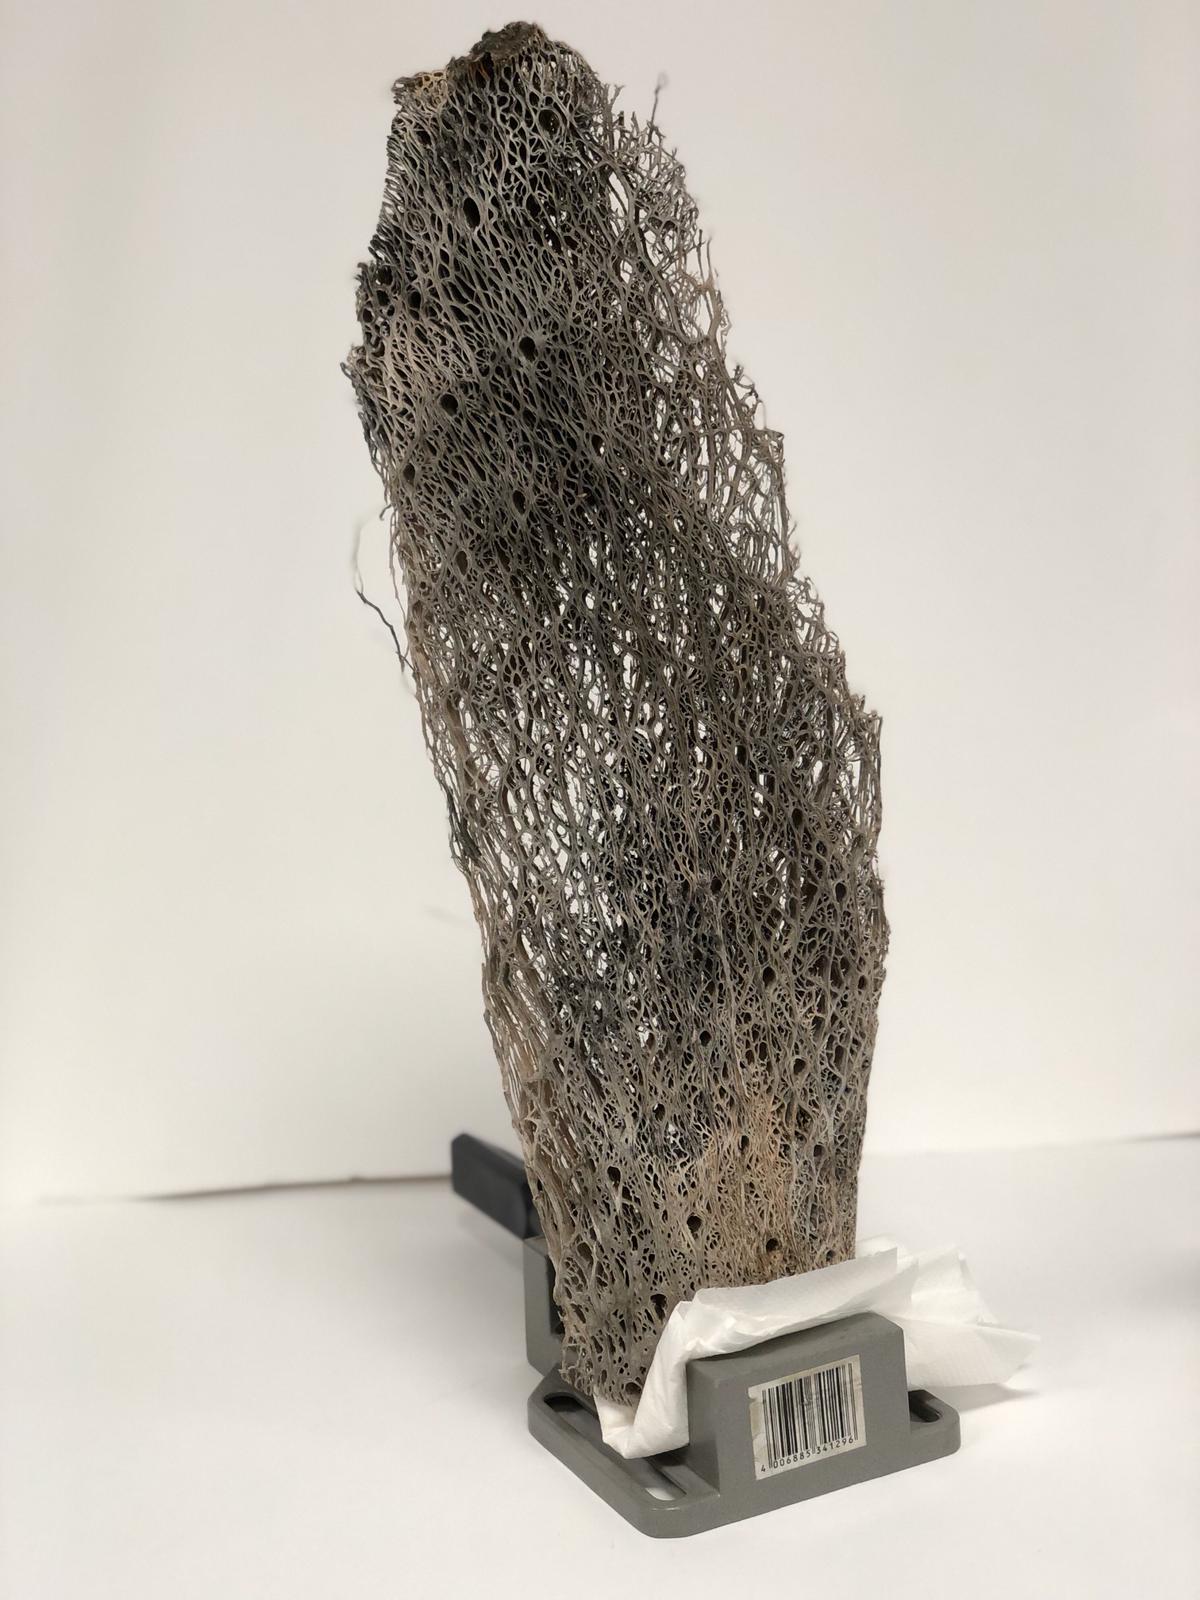
3D scanning a cactus
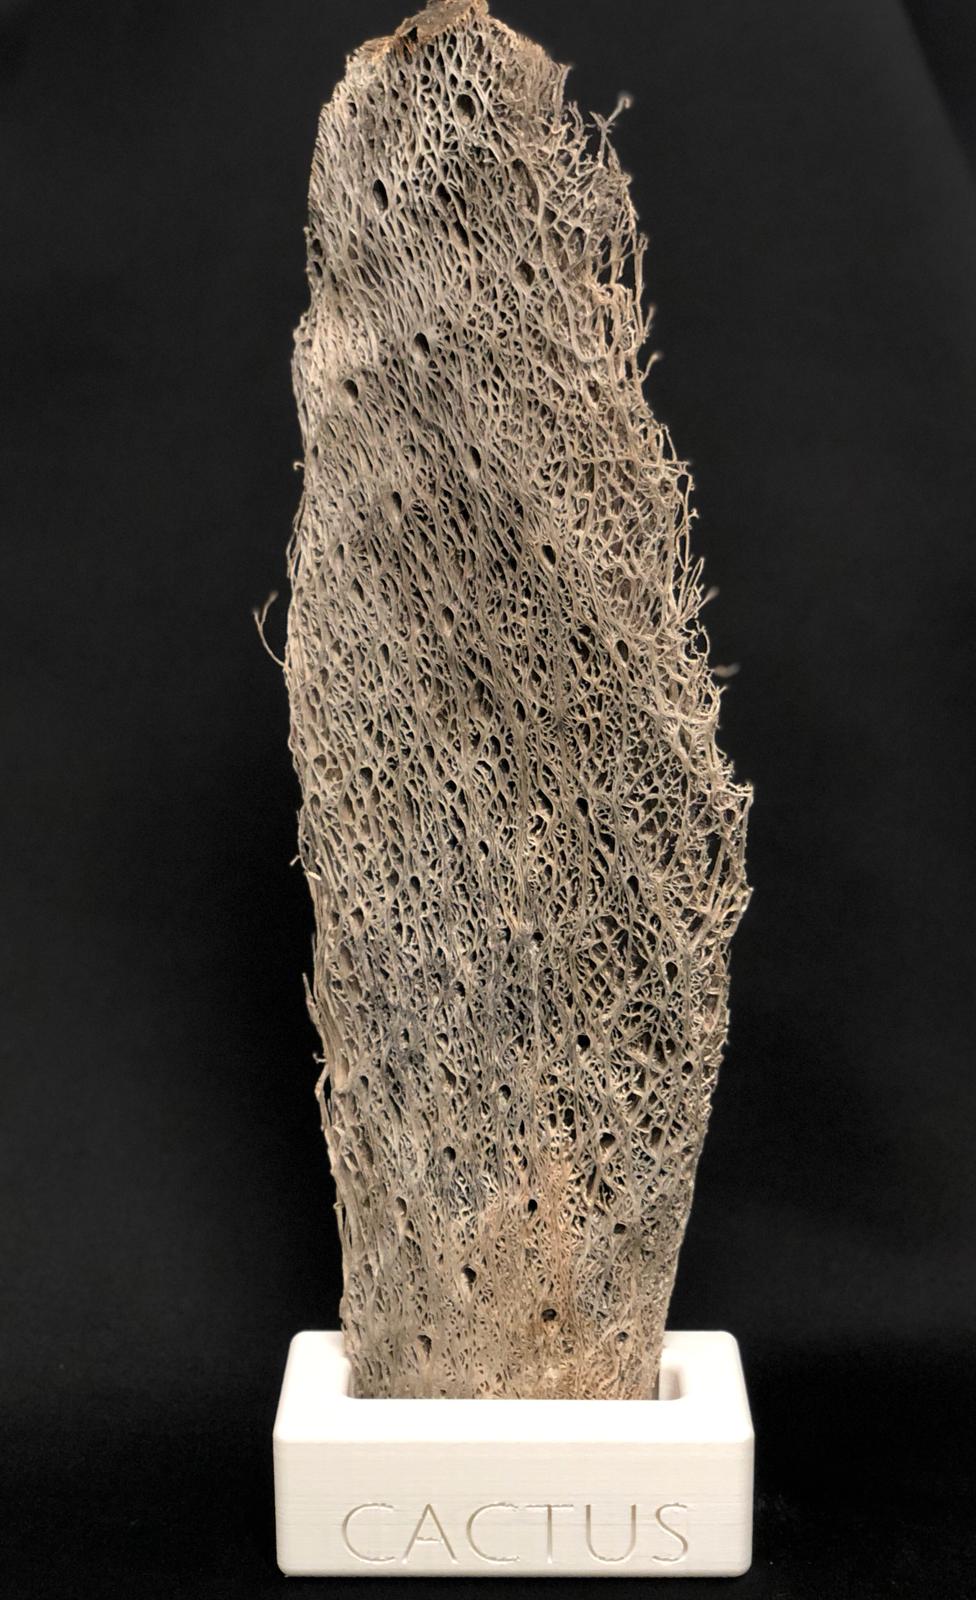
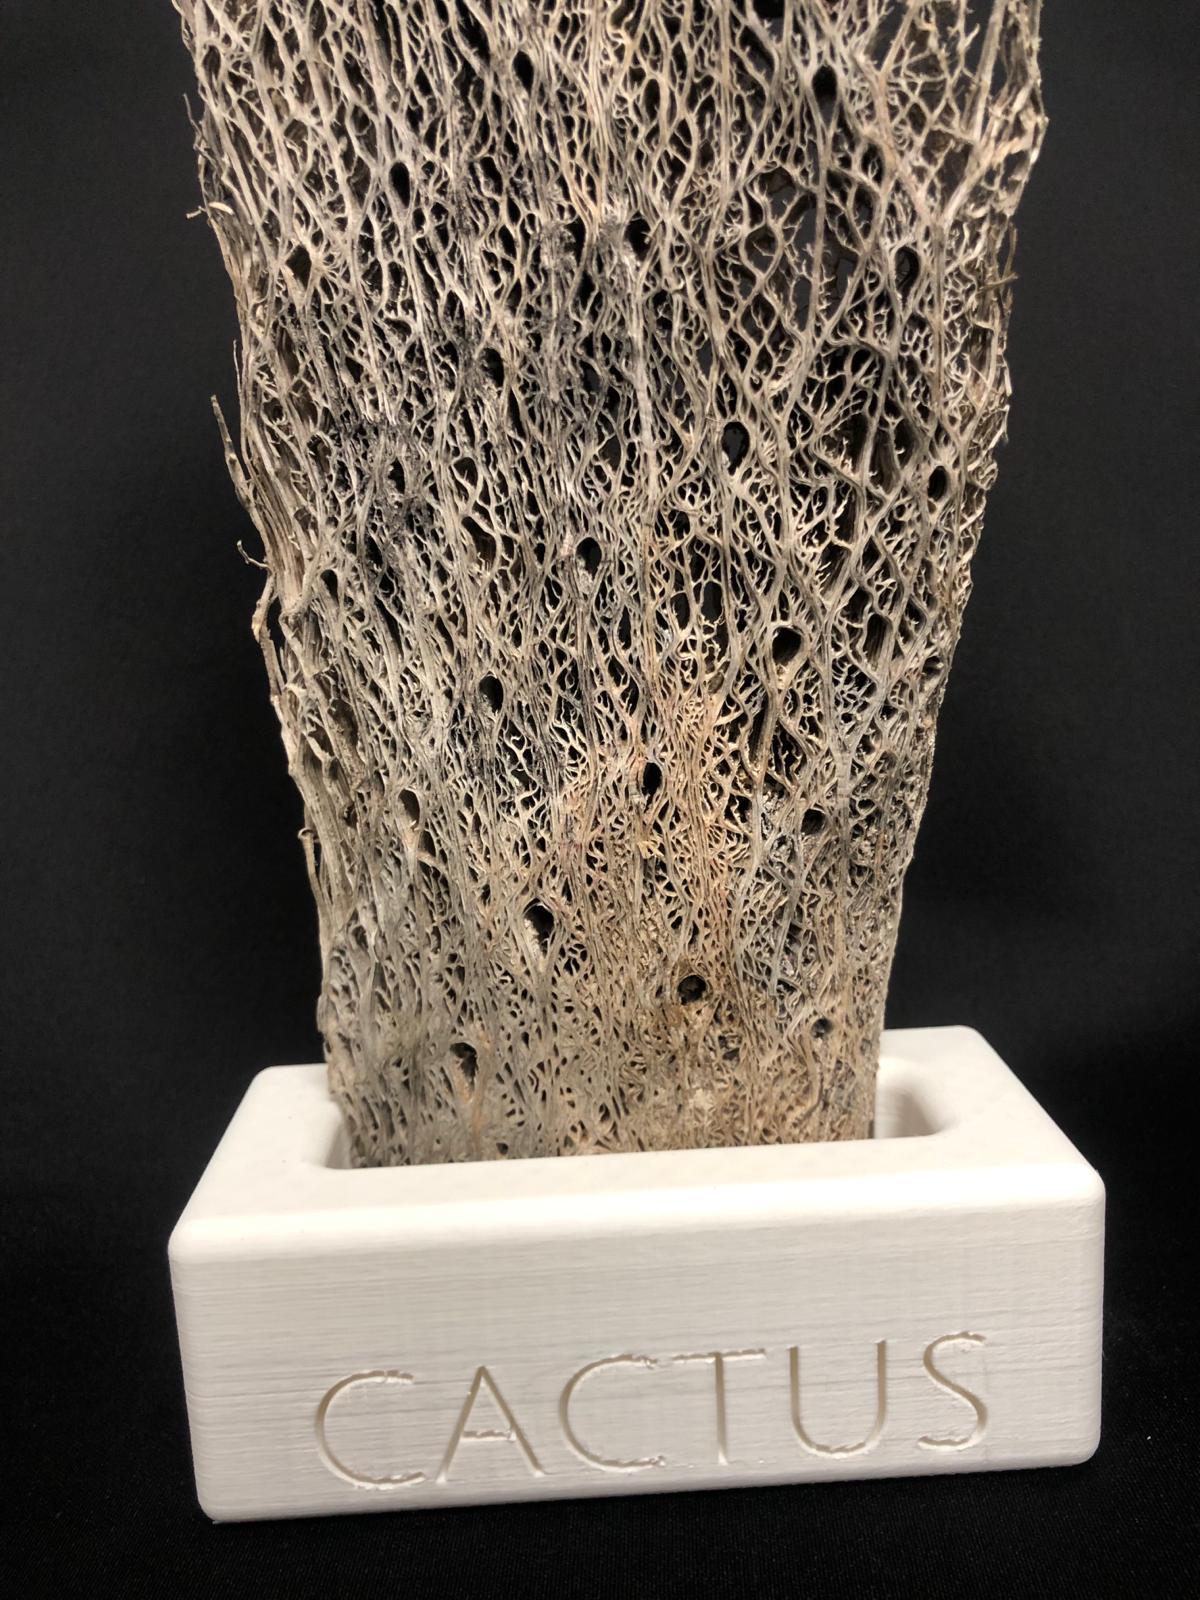
While walking in nature, I found a piece of a dead cactus. It looked really nice and beautiful so I took it to the lab to scan it.
I tried to scan the cactus but failed to make a good scan. The best scan is just a part and is the frontside of the cactus. Next time I will use a black background with better lighting and maybe use some contrasting spray paint so the scan would be better.
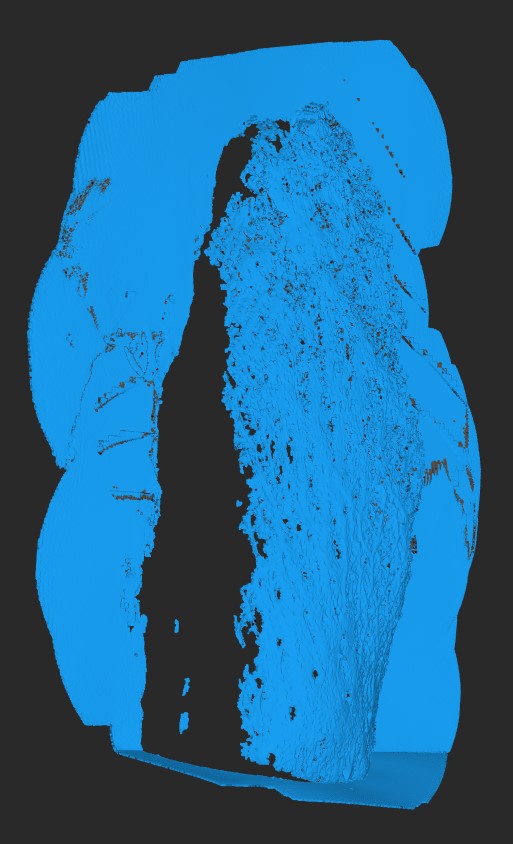
I used the Revopoint pop 3 scanner to create the image of the cactus. With the software, Revoscan 5, you can see the scanned parts in blue.
Once the object is scanned, which in this case did not work as good as expected, you can export the scan as a mesh.
3D scan of the cactus:

3D printing
3D printing is an easy way of making something fast or even at home. It is accessible and affordable for everyone.
3D printing has a couple of advantages and disadvantages:
Advantages of 3D Printing
- Customization: Allows for the creation of highly customized products tailored to specific requirements.
- Complex Geometries: Enables the production of complex geometries and intricate designs.
- Rapid Prototyping: Accelerates the product development process with quick prototype production.
- Reduced Waste: Generates less waste compared to subtractive manufacturing processes.
- On-Demand Production: Allows for parts to be manufactured on demand, reducing inventory needs.
- Speed: Certain processes can produce parts faster than traditional methods, especially for prototyping.
Disadvantages of 3D Printing
- Material Limitations: Limited range of materials compared to traditional manufacturing.
- Surface Finish and Post-Processing: Printed parts often require time-consuming post-processing.
- Size Constraints: Limitations on the size of objects that can be printed in one piece.
- Print Speed: Often slower than traditional manufacturing methods for mass production.
- Strength and Durability: Mechanical properties of printed parts may not match traditionally produced parts.
- Cost of Equipment and Materials: High-quality 3D printers and materials can be expensive.
- Some Expertise Required: Requires knowledge and expertise in design, printer operation, and material handling.
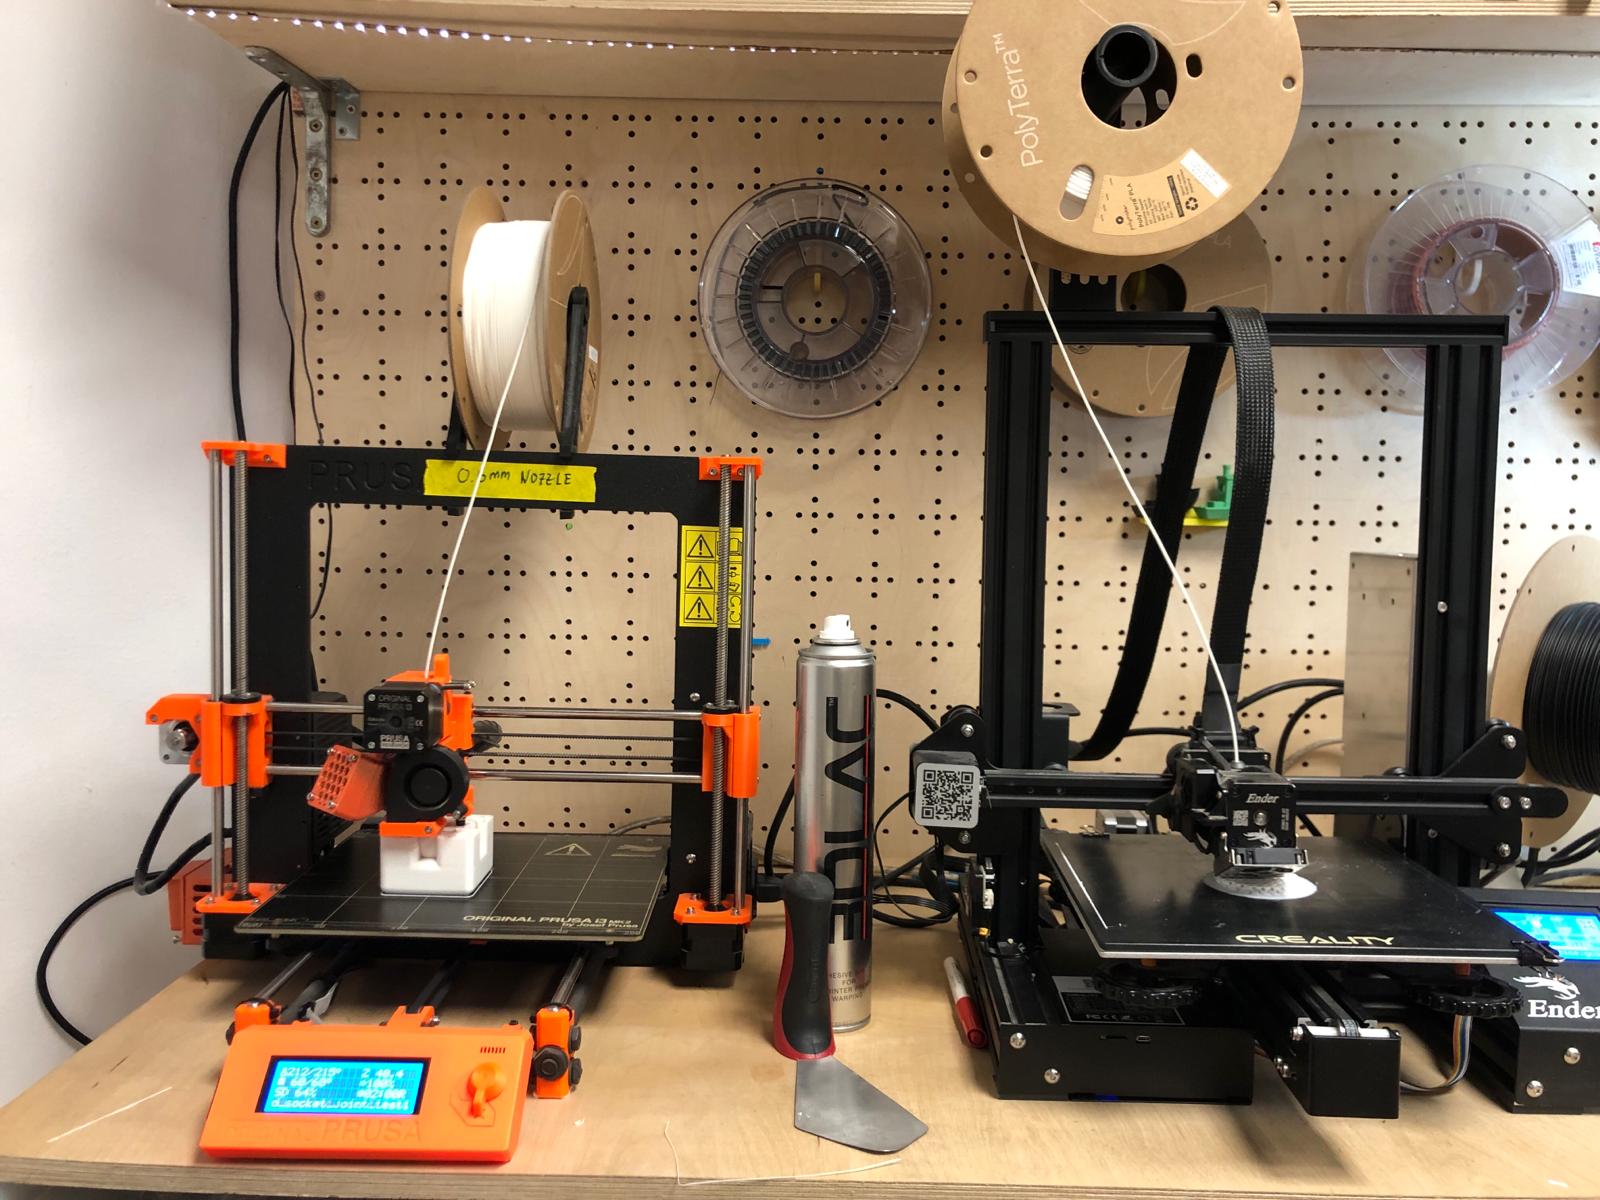
There are a couple types of 3D printers that are here available at the lab.
- FDM printer: Fused Deposition Modeling, works plastics like PLA, ABS, PetG,...
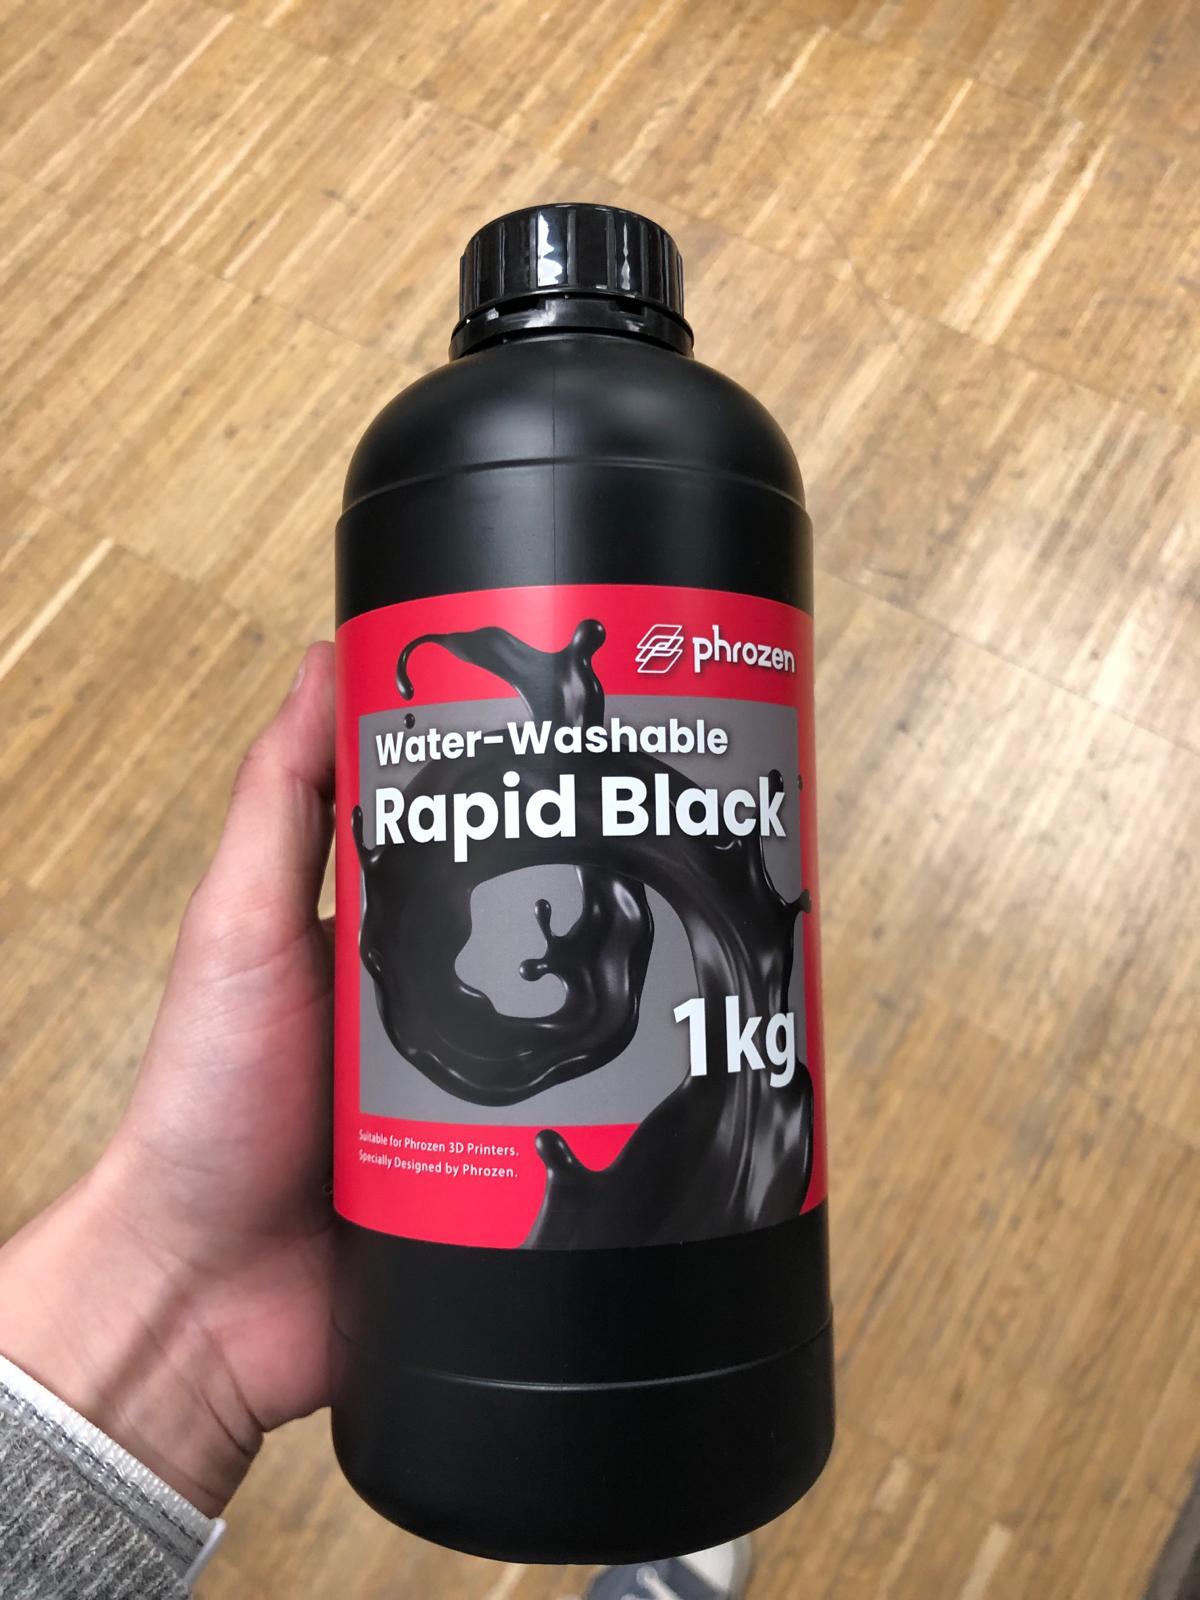
- SLA printer: StereoLithogrAphie, works with resin.
Design for 3D printing
3D printing has a specific list of requirements. Not everything you design can be 3D printed.
These are the most important factors to keep in mind when designing something that needs to be 3D printed:
- Understand the 3D Printing Process
- Know the Printer and Material, every printer and every type of material has its own settings
- Layer-by-Layer Construction with only horizontal extrusion (from left to right not up and down)
- Design for Manufacturability
- Orient Parts Optimally so that you don't need support or you know the direction of the extrusion of the filament and can apply the forces to your part.
- Minimize Overhangs
- Avoid Sharp Corners
- Wall Thickness and Layer Height
- Consistent Wall Thickness
- Layer Height
- Support Structures and Bridging
- Design for Support Removal, the less support, the better!
- Bridging
- Tolerance and Fit
- Allow for Shrinkage, some materials shrink a little bit so when you design a piece that needs to fit into another piece, it is good to have some tolerances
- Hollowing and Infill
- Hollow Parts, depending on the quality of the printer, hollow parts can be tricky.
- Infill Patterns, there a plenty of different types of infill. Some patterns are stronger than others.
- Surface Details and Texturing
- Embossed/Engraved Features
- Surface Texture
- Design for Post-Processing
- Easy Cleaning and Finishing, each material has its own best way for post processing. ABS can be smoothened with acetone and PLA can be smoothened with sanding papaer and water.
The following steps are important when 3D printing:
1. Install the correct program to slice your model and create the .gcode
2. Import your model, saved as a .stl, in the program. In this case for the fdm printers, Cura is a good program.
3. Check your print settings: print speed, print temperature, bed temperature, infill, quality, build plate adhesion and support. There is a big list of settings but these are the important ones.
4. Slice your model and check the preview.
5. Export the .gcode and save it onto the removable disk.
6. Introduce the sd card or usb stick into the 3D printer.
7. Before starting the print, it is important to level the printing bed and check the filament (correct material and length of the remaining filament.
8. Start the print and check that the first layer is good. If not, stop the print and check or change the settings. Also check if the printing bed is leveled and clean.
9. Print is ready: takes it of the printing bed, carefully with the spatula. Avoid sharp spatulas that can scratch glass printing beds.
10. The print can now be polished or spraypainted. To make prints in ABS smooth, you can use acetone.
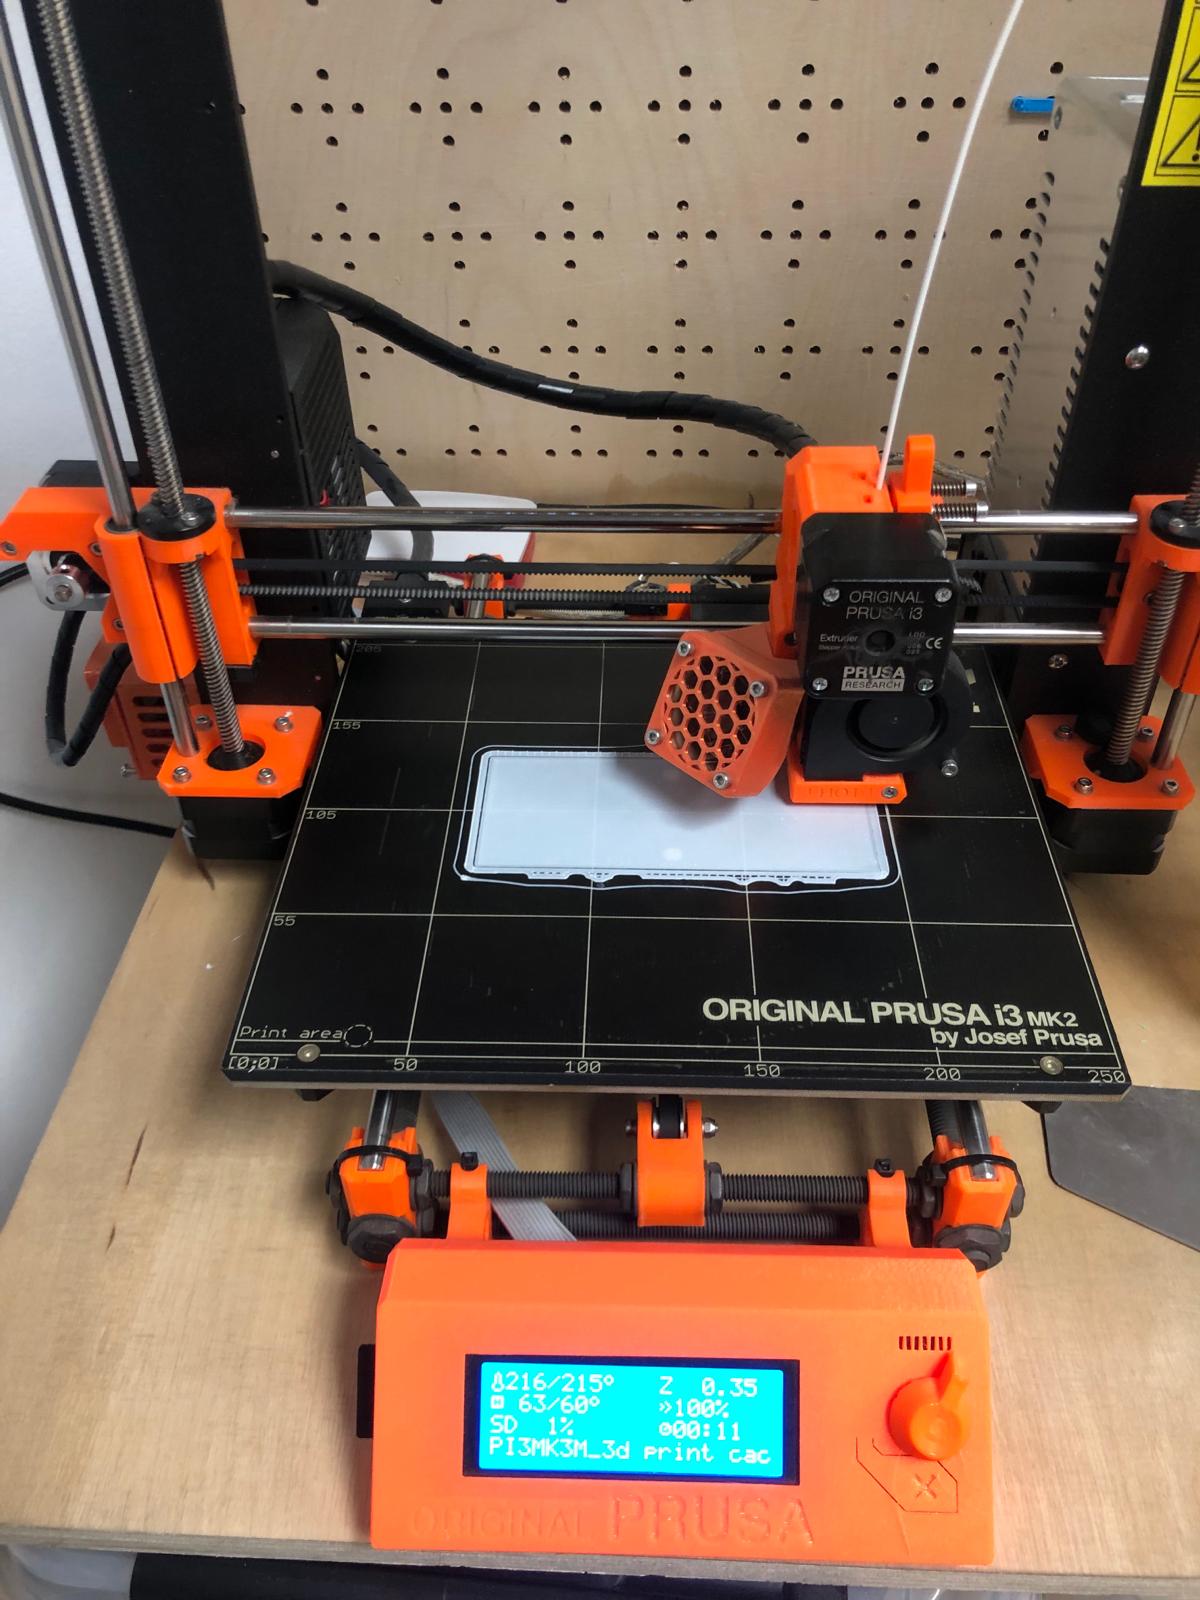
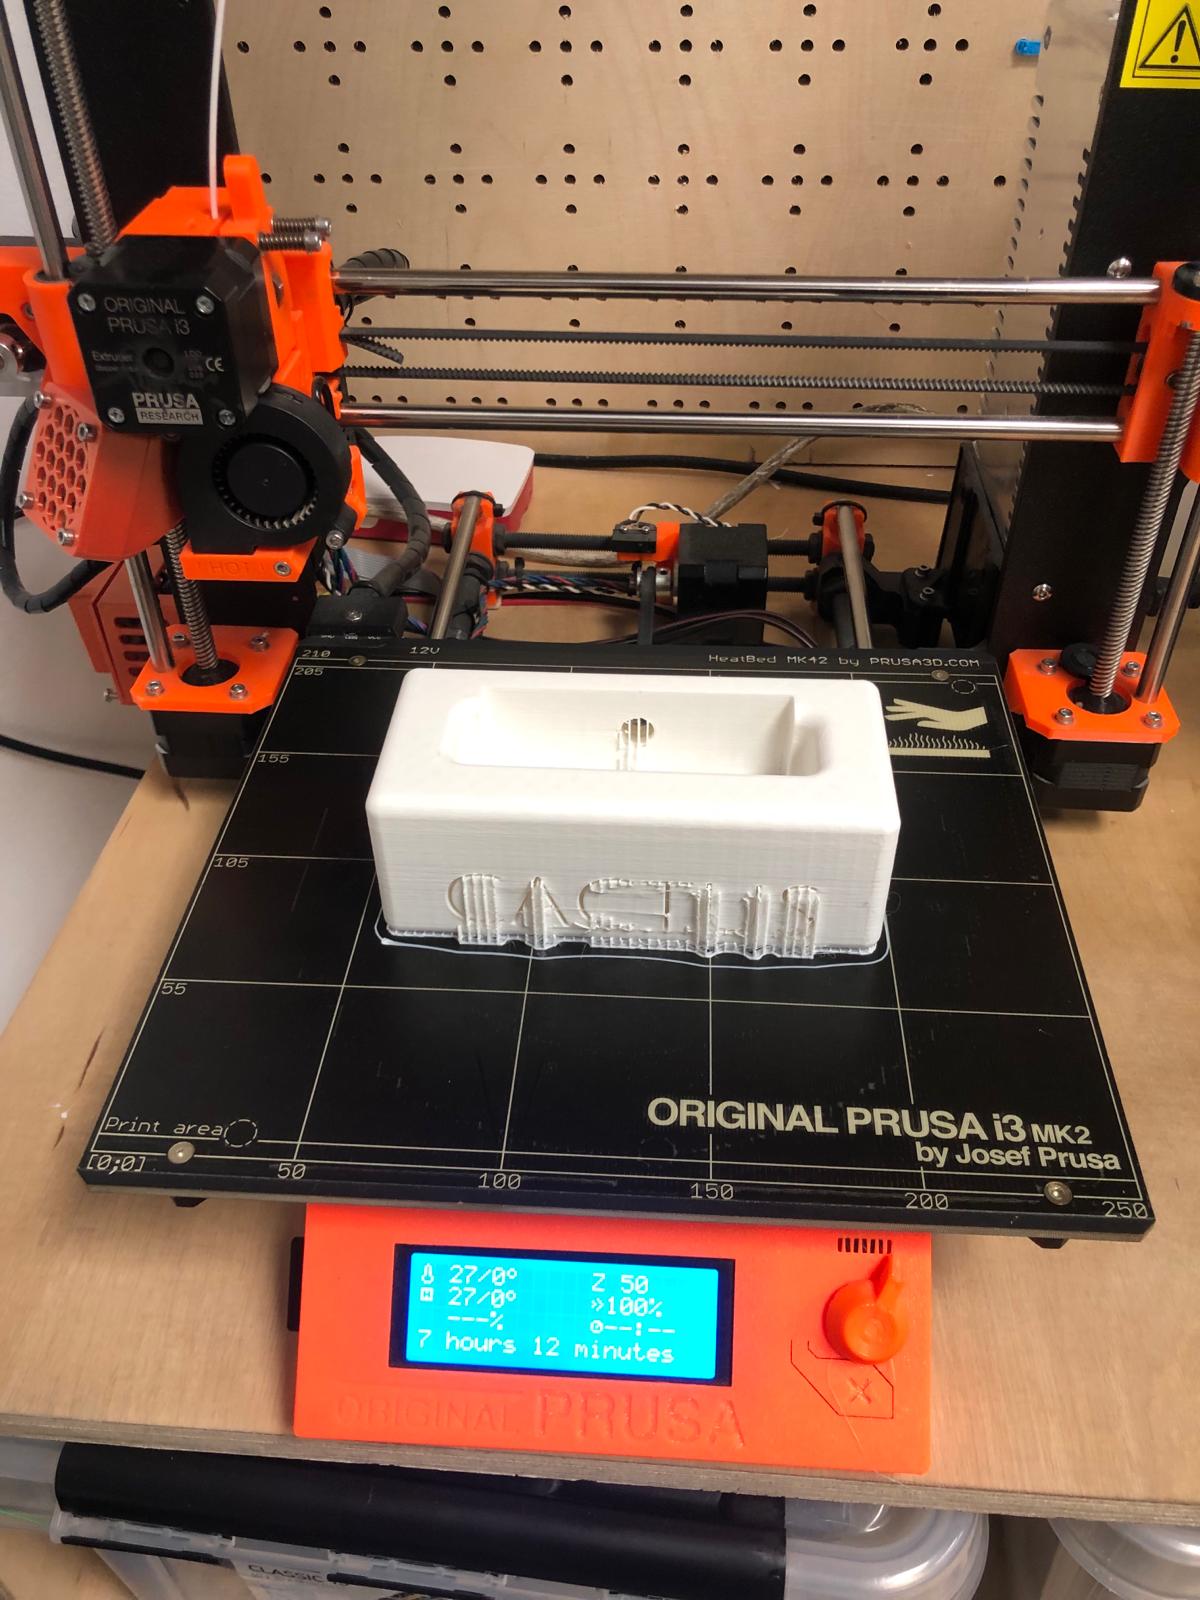
FDM printer: Ender and Prusa
Example of filament: PLA

SLA printer: Anycubic

Example of resin:
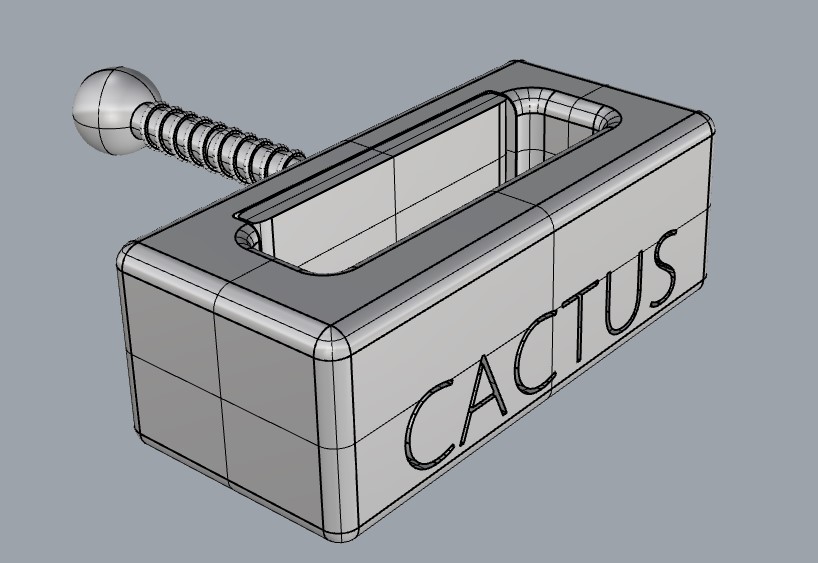
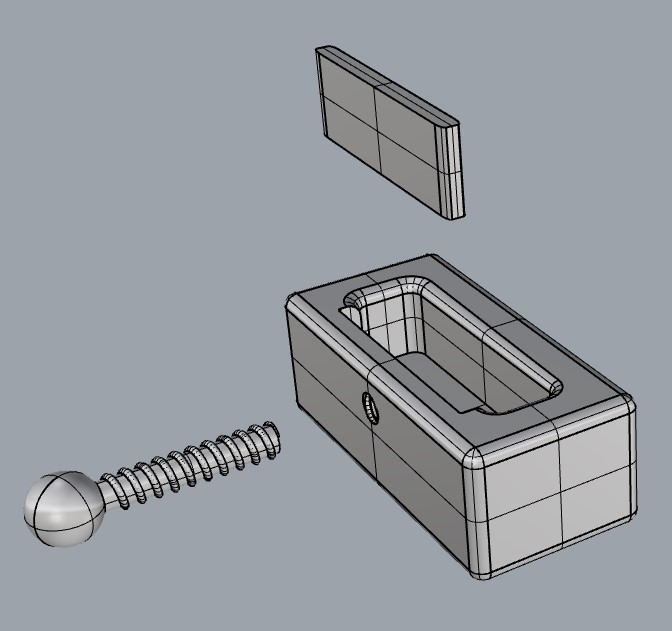
3D printing a stand for the cactus
The cactus I found is really nice and it would be cool to create a stand for it.
For designing this stand I'm using Rhino. The stand has a custom vise and this is easier to create with a 3D printer than with any other tools. I could have used an existing screw with some bolds but this would have taken away the opportunity to create a custom vise with the size that was necessary/ i wanted.
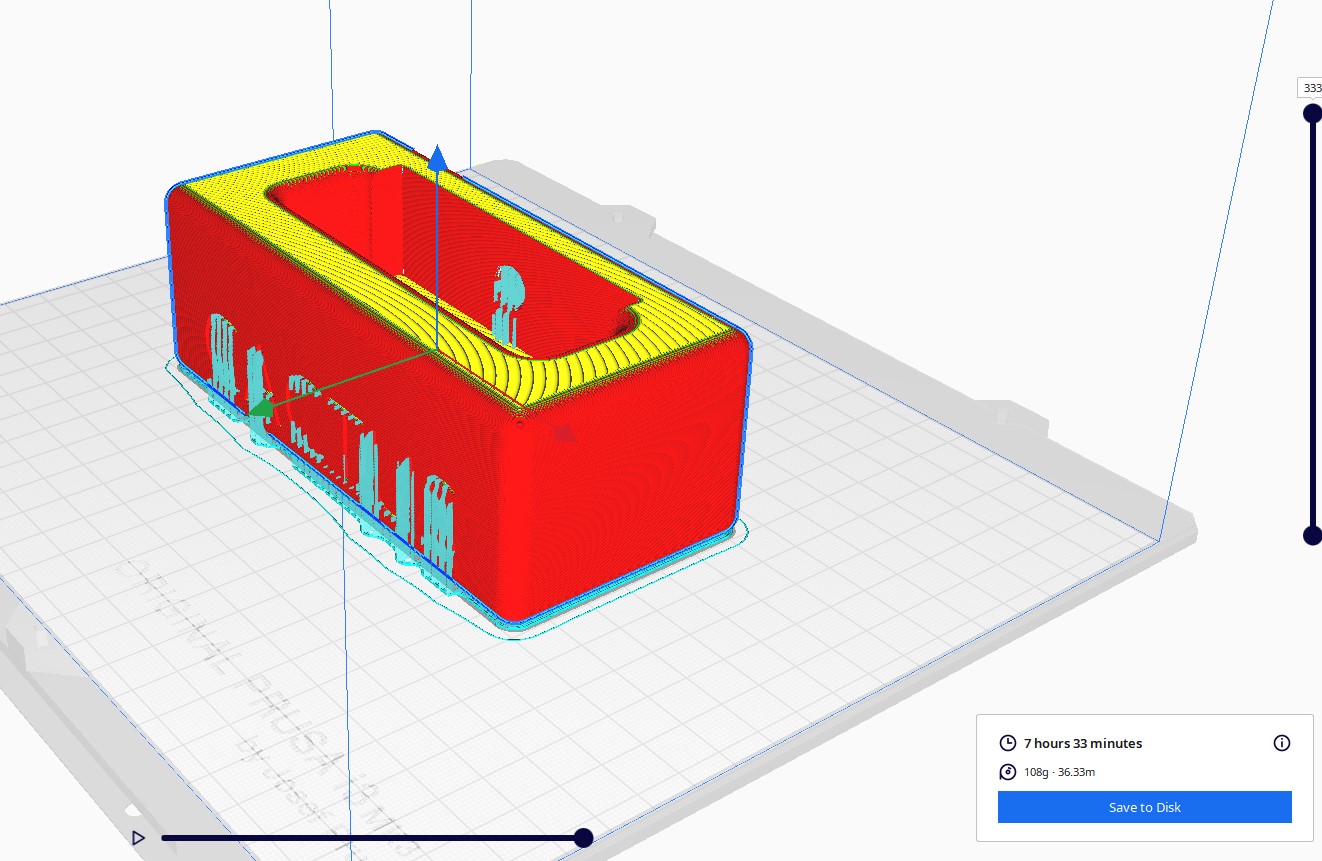
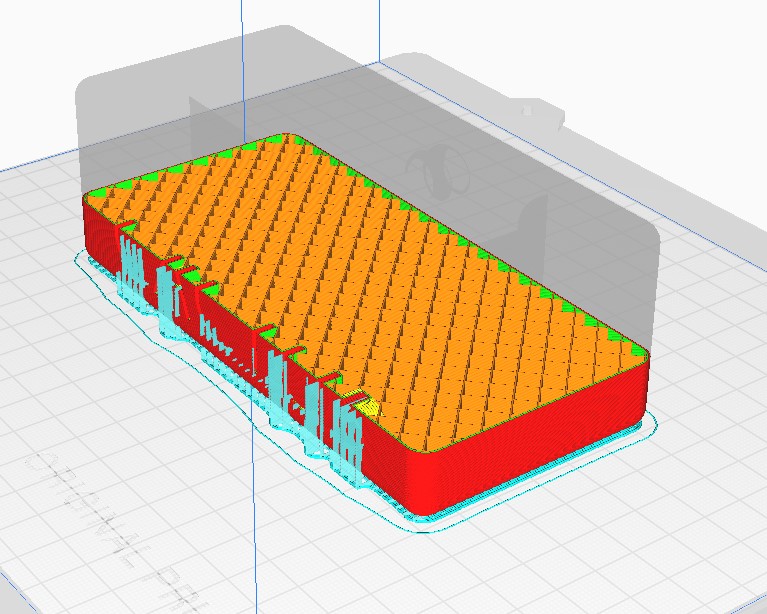
Now that the design is ready, it is time to export the file as a .STL and import it in the Cura software.
This is what it looks like in the Cura program when I adjusted the settings.
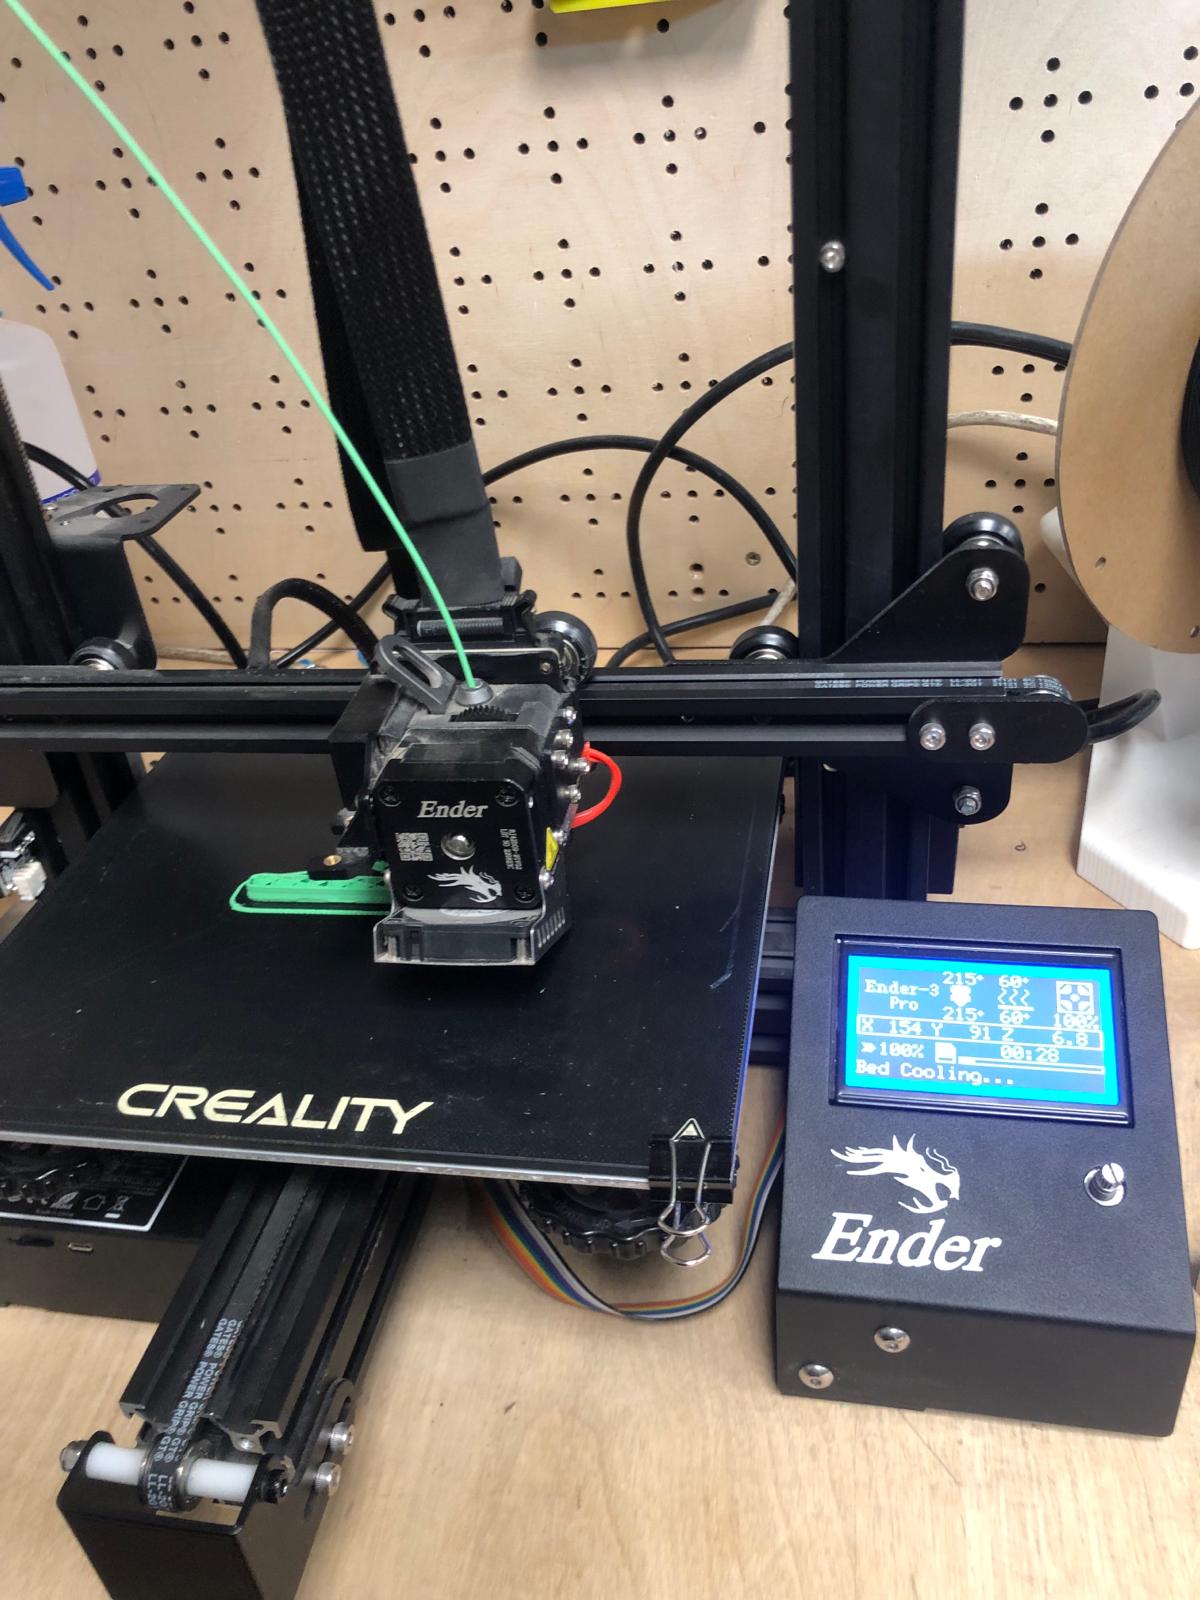
These are the settings I used for the Prusa printer: The material is PLA. Print speed: 80mm/s and for the initial layer 40mm/s, print temperature: 215 °C for the first layer, 210 °C for other layers, bed temperature: 60°C, infill: 20%, quality: 0.15mm, build plate adhesion: clean with alcohol or use adhesive spray in case it is necessary, support: on.
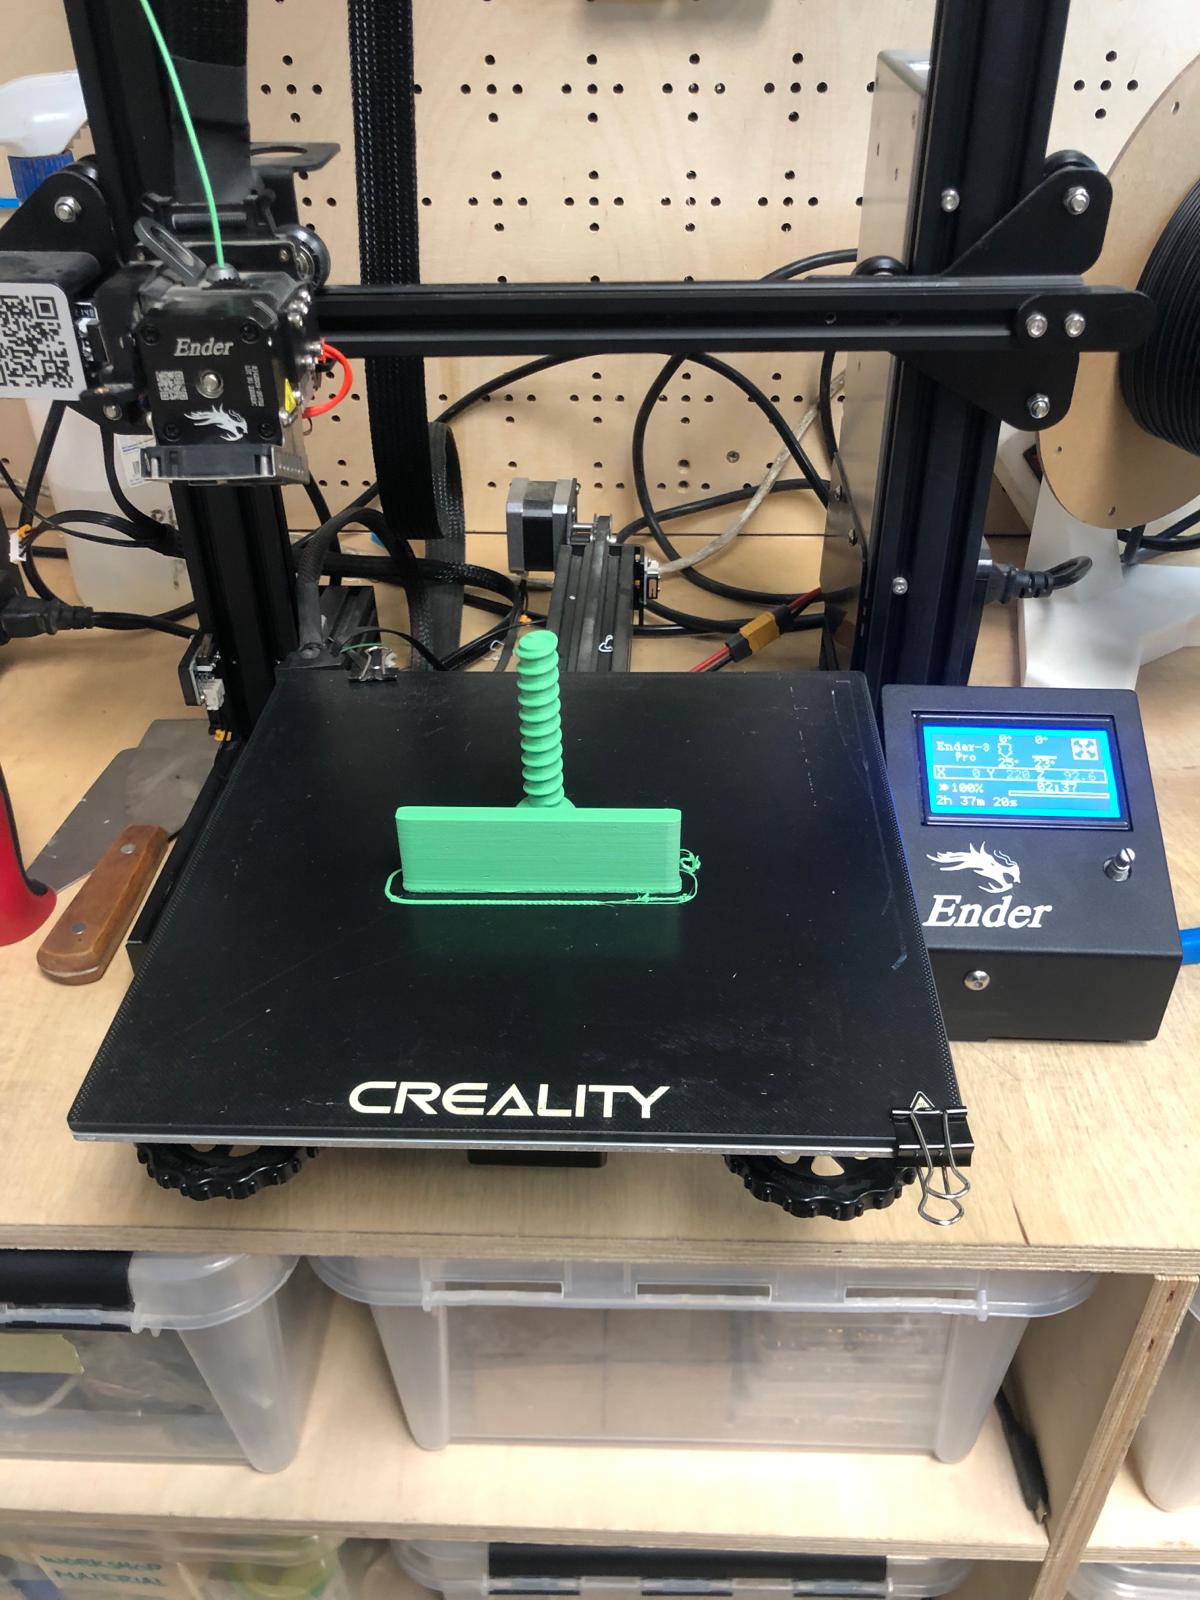
This is what it looks like! I have to adjust the vise system to make sure that the cactus is stuck in the 3d print.
Here are some pictures from the printing process. For the big solid part, I used the Prusa printer. For the small parts, I used the Ender.
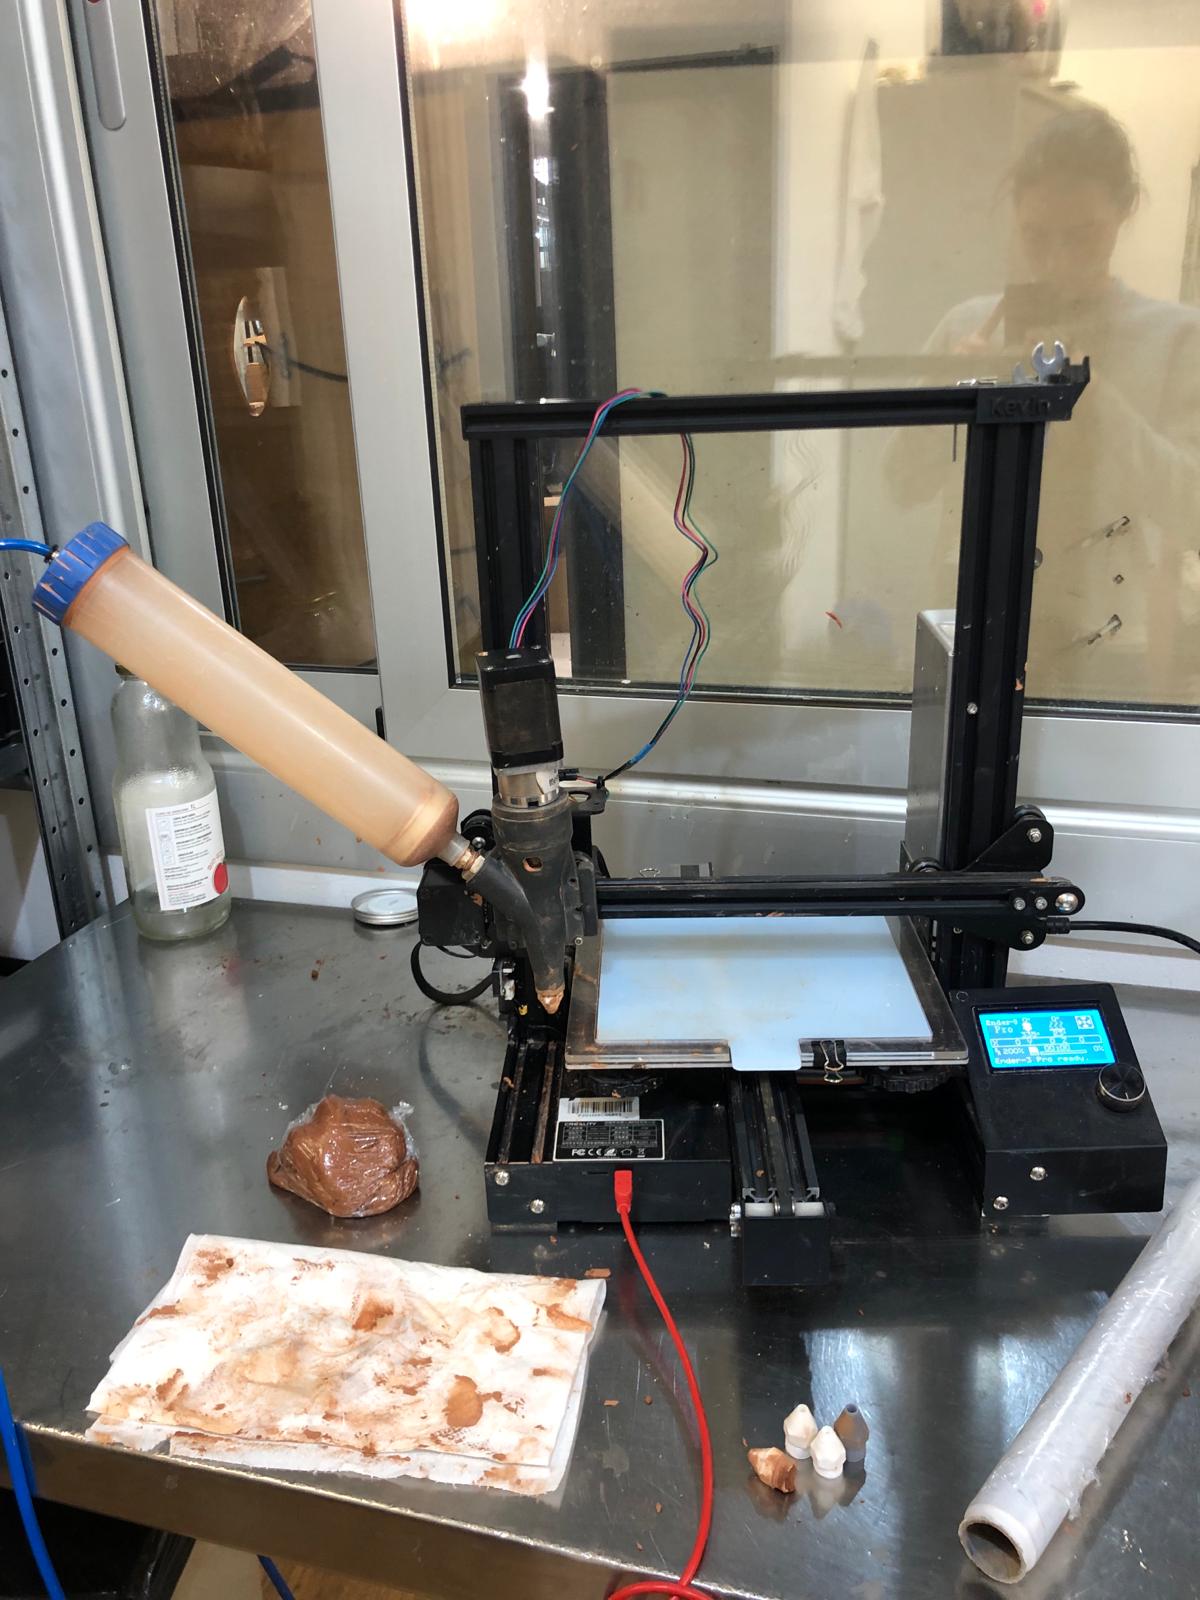
EXTRA: 3D printing with clay
Still in an experimental phase, but it is possible to 3D print with clay. This requires a special setup for the 3D printer.
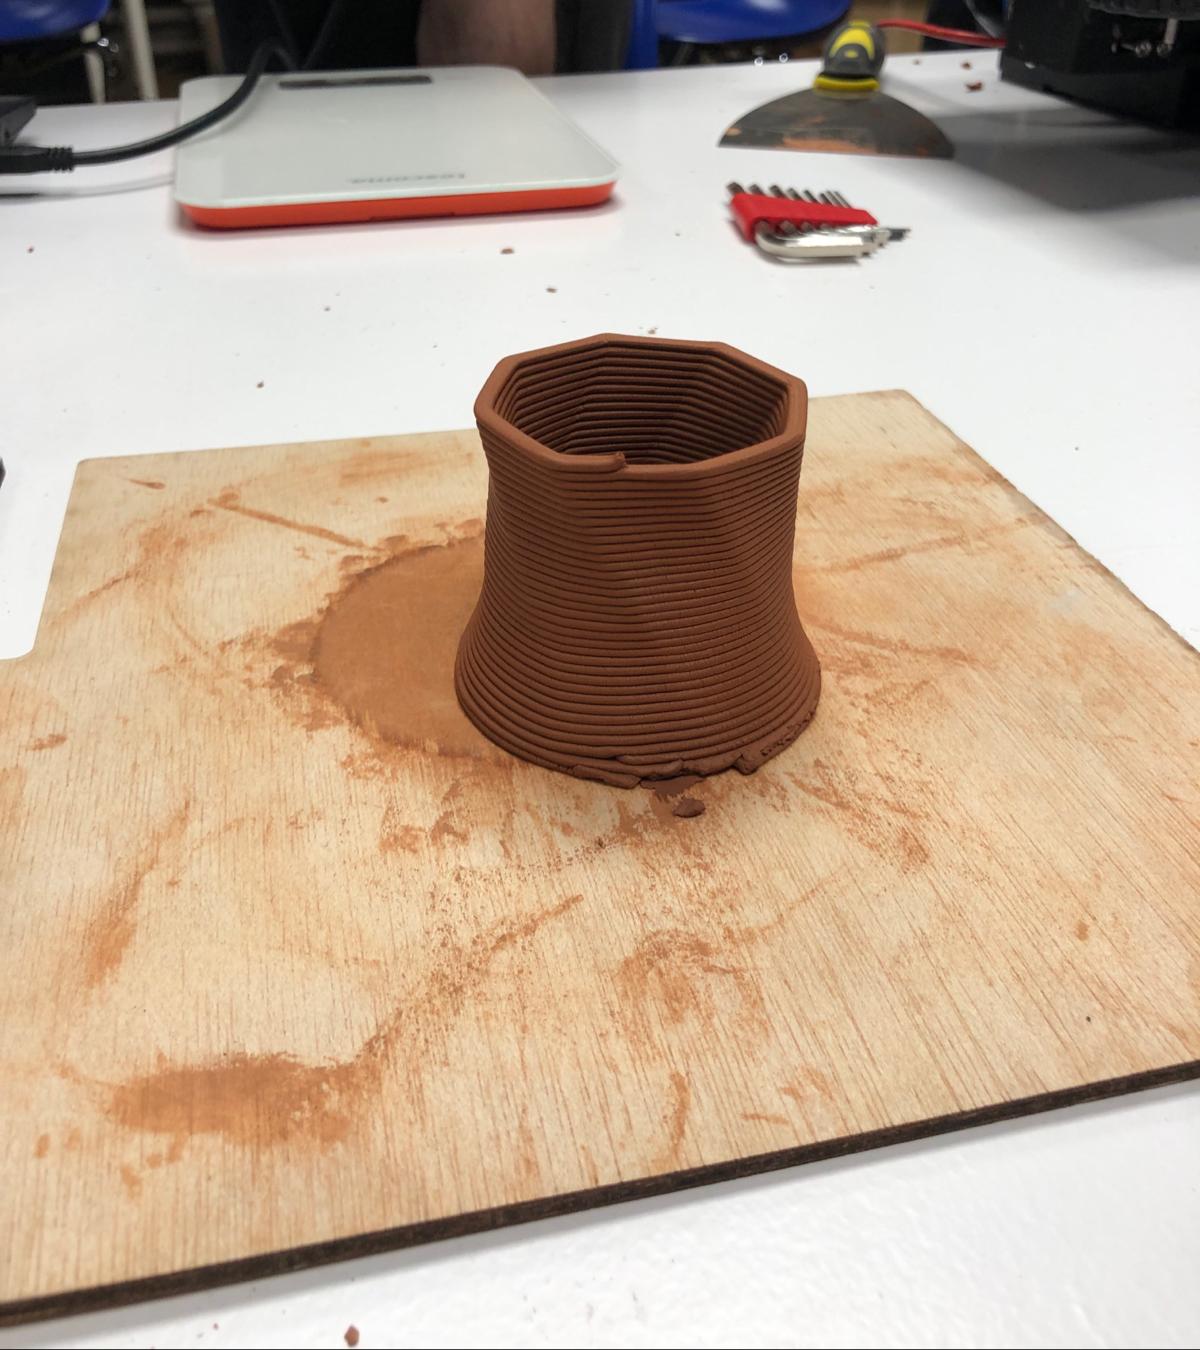
This is a result of printing with clay!
The pictures below show the setup for printing with clay.
There is a closed container where the clay goes inside with a lid on top where the pressurised air pushes the clay towards the nozzle.
The types of nozzles are bigger than the ones we use on a fdm printer.
The clay needs to have a very specific structure so it is not too solid nor to liquid to print. As you can see on the picture, the printing bed here is a lasercut sheet of PMMA. (this sheet on top of the bed is not heated and can easily be taken out of the printer.
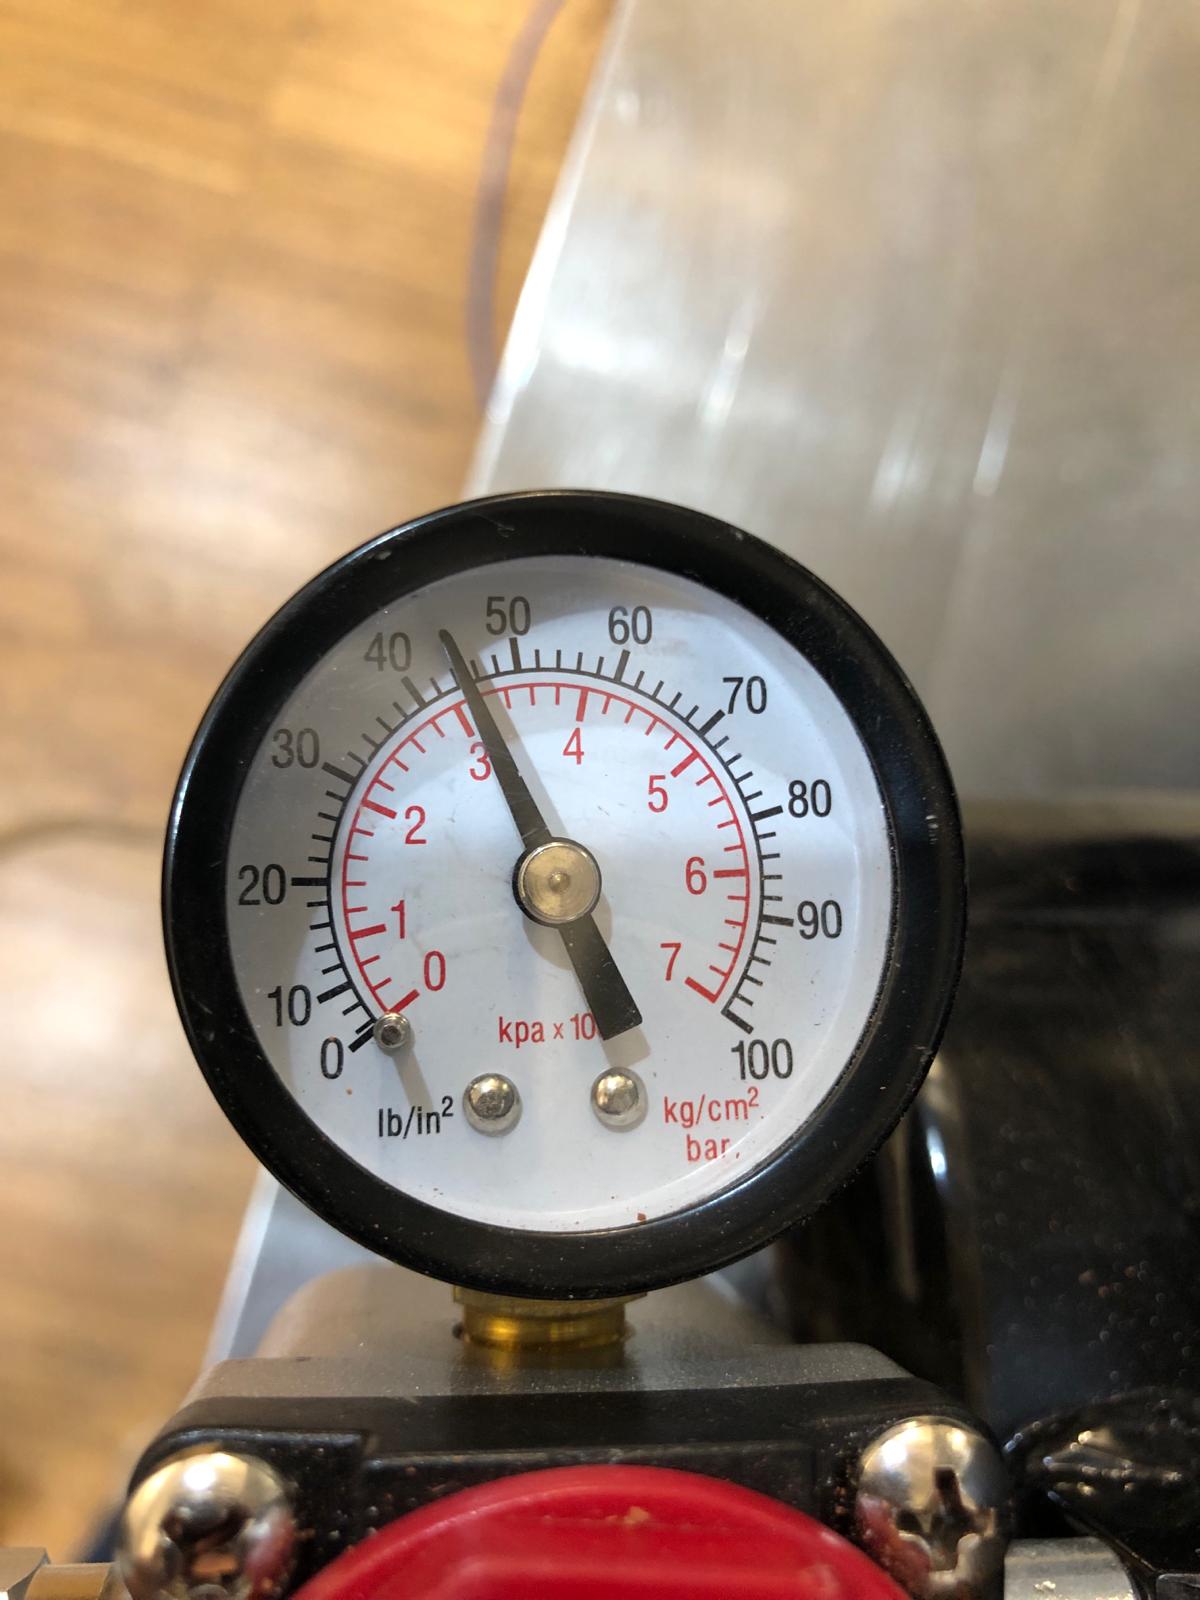 This is the pressure, 3 Bar, needed to push the clay into the direction of the nozzle
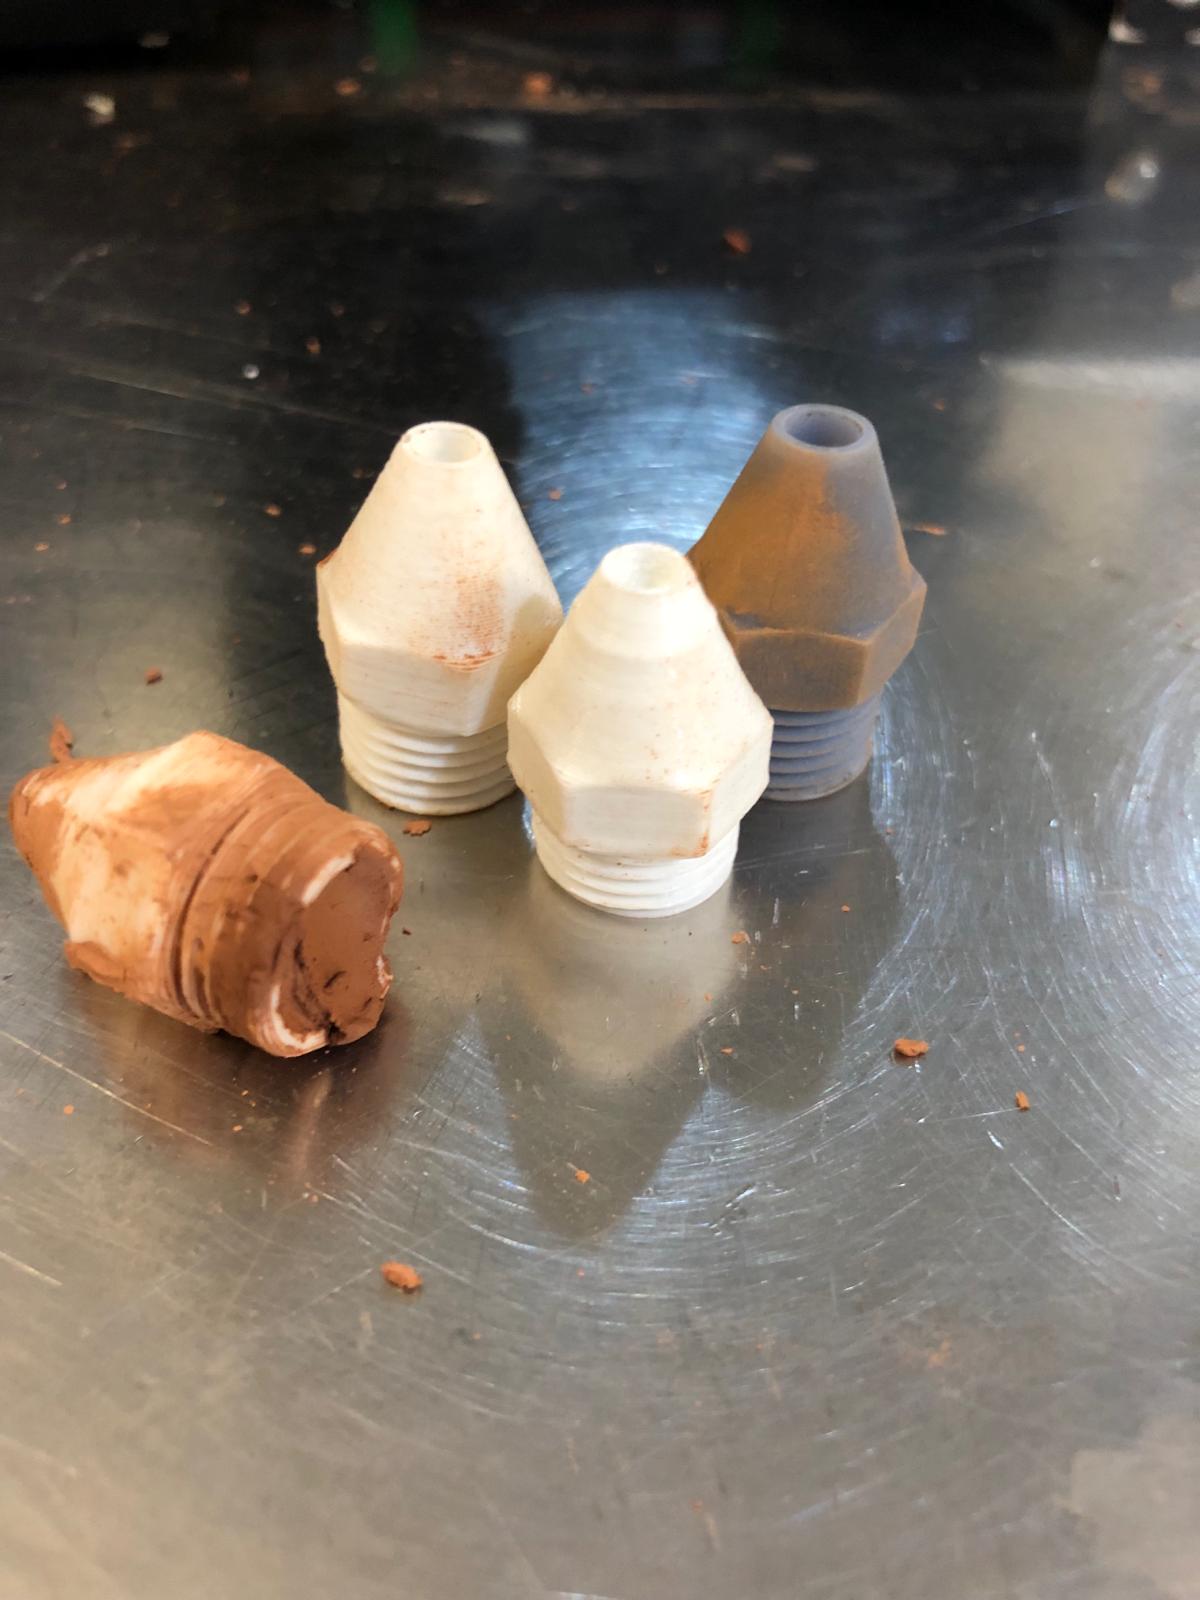 Nozzles to print
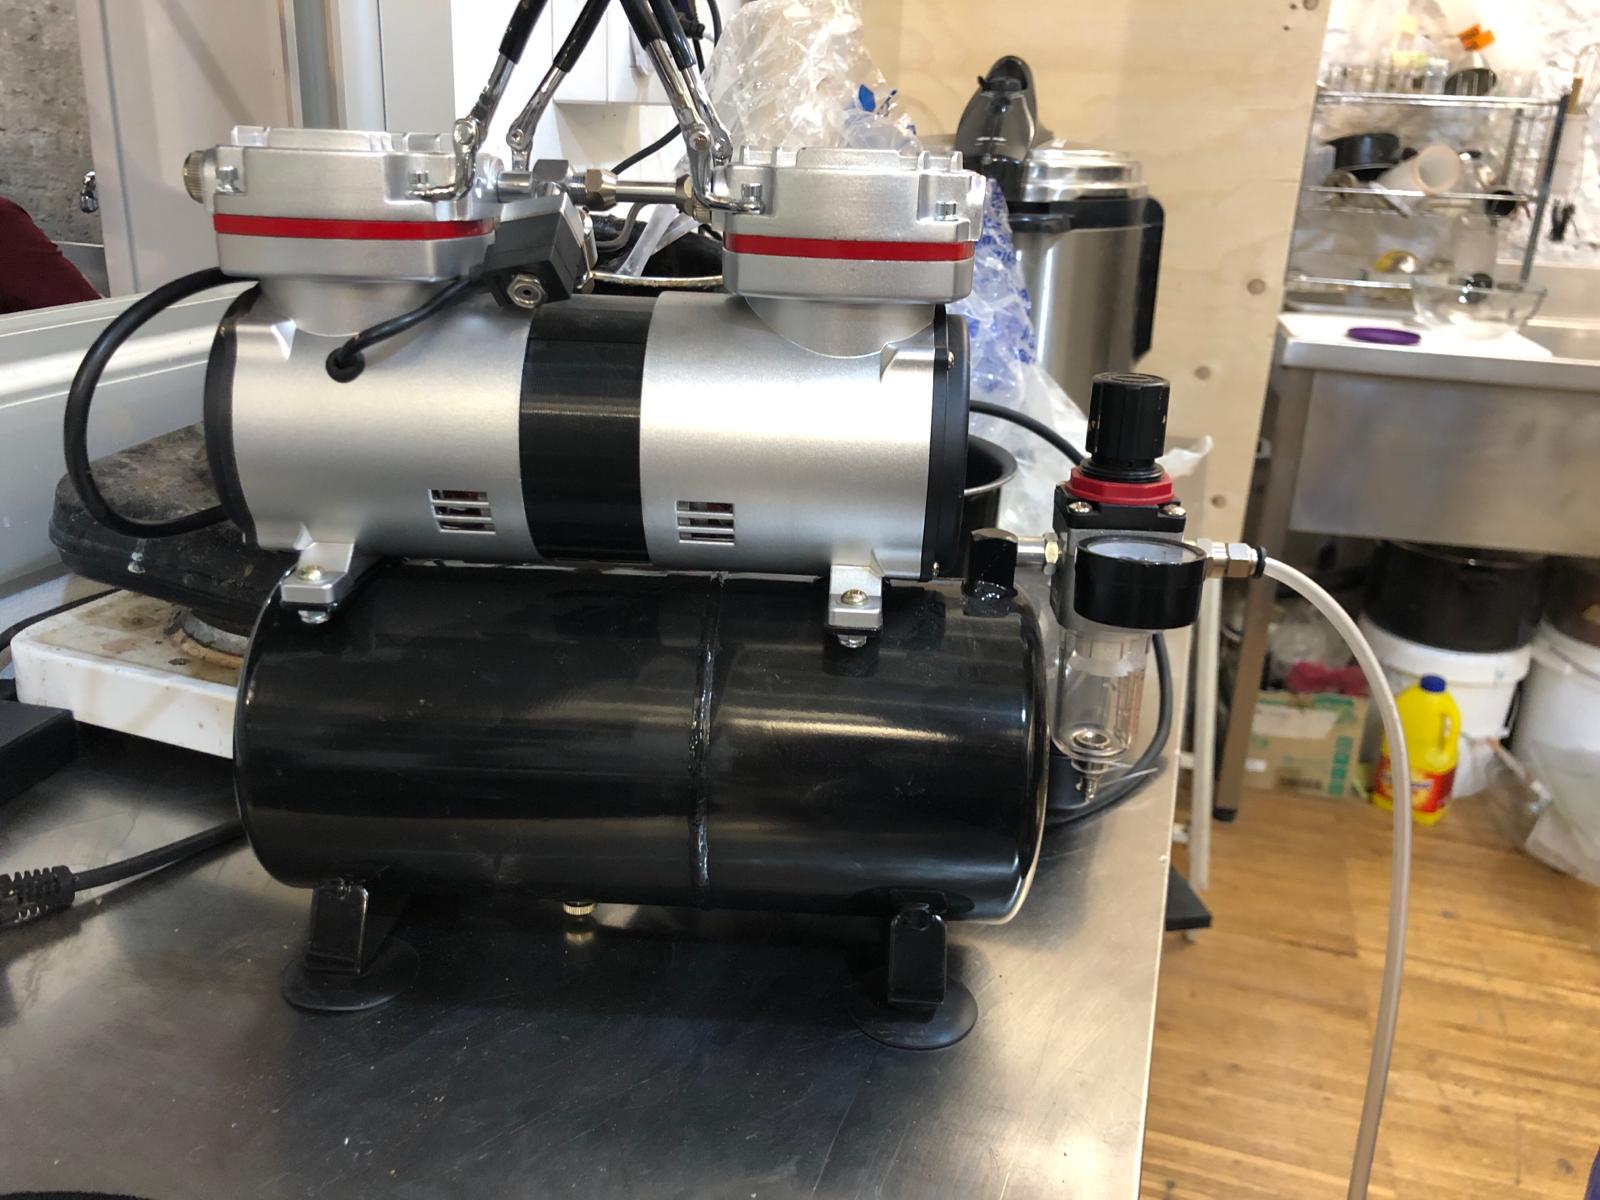 Pump for air pressure
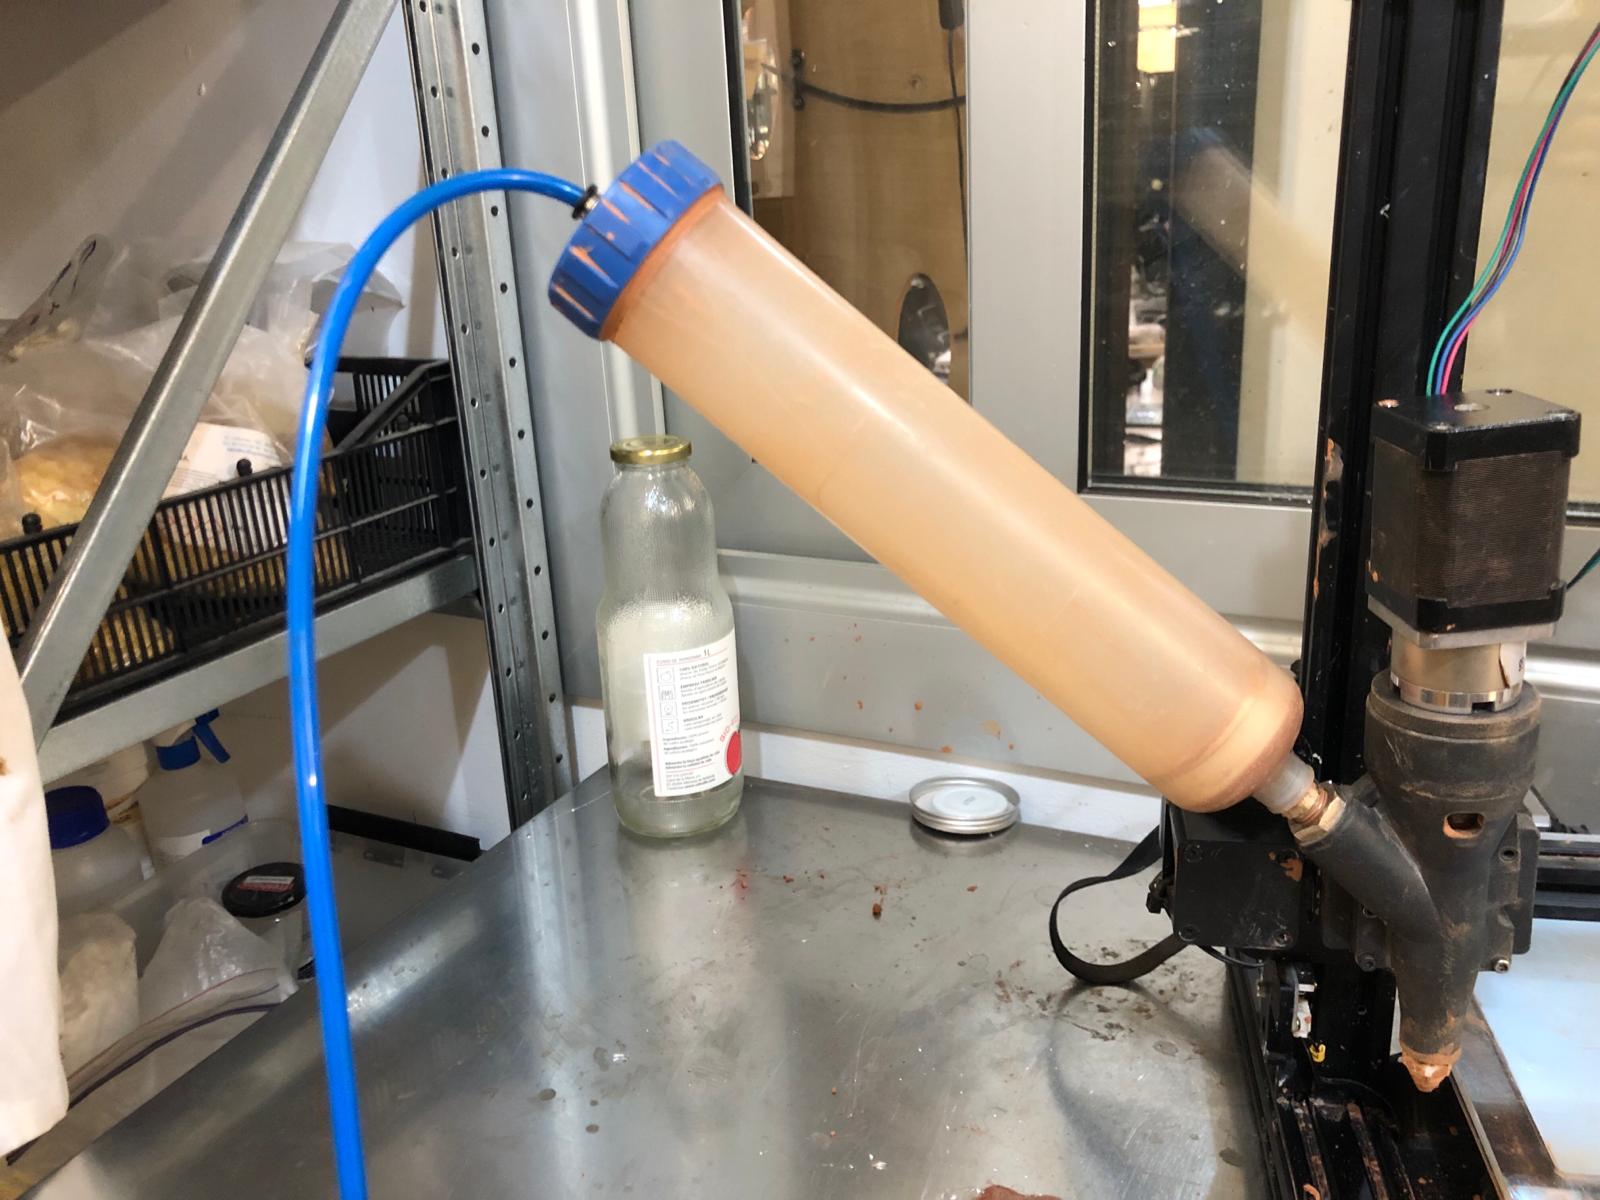 The clay cavity/ container