Final Project
06/29/2024
Description
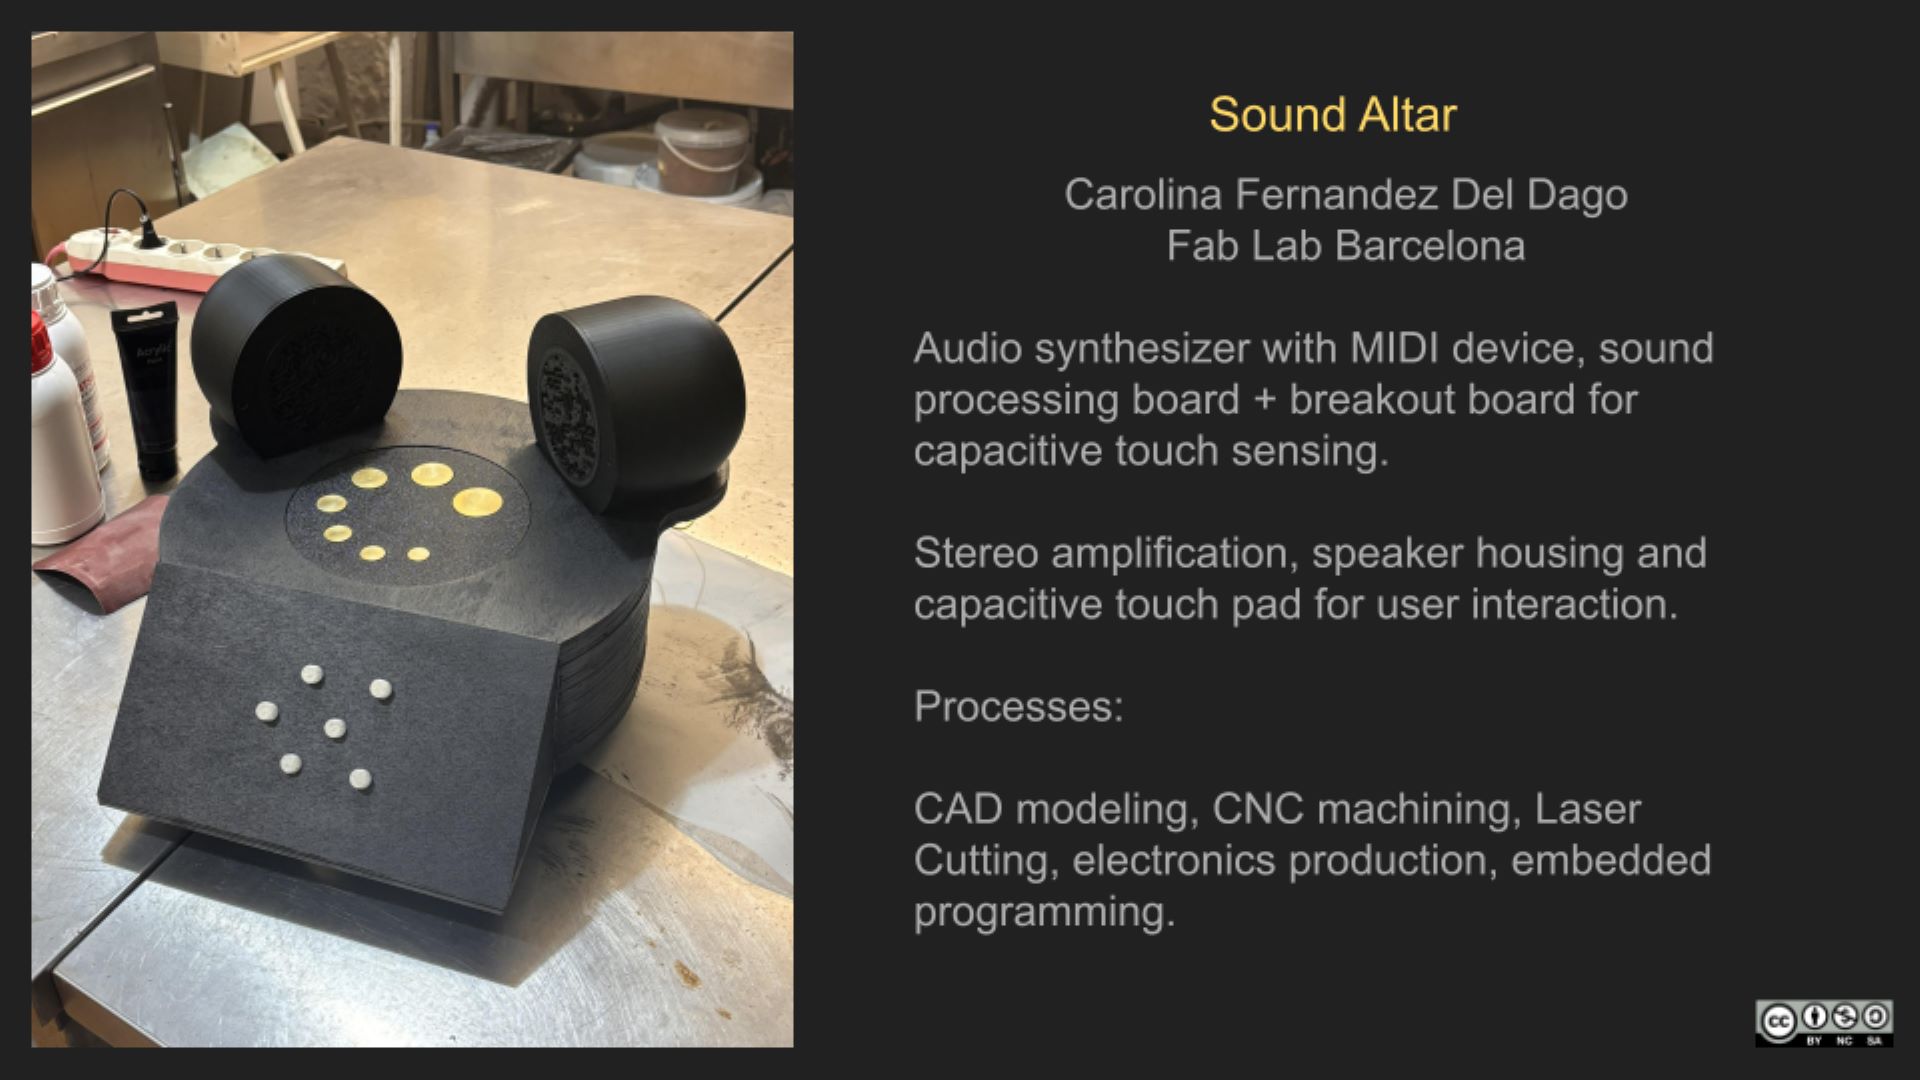
The sound altar is a ritual/contemplative piece that is a miniature of the cosmos and functions as a sythesizer and small reverberation chamber. It's an object for playing with sound as a form of meditation, offering, prayer and grounding.
Slide

Video
Bill of Materials
Electronics
- 1 x ESP32 WROOM: €4,57
- 8 Switches: €5,00
- 3 Potentiometers: €3,00
- 2 Circuit Boards: €3,00
- Jumper wires: €3,00
- 2 SL 87 FS - 8 OHM speakers: €32,00
- 1 generic AC/DC wall adapter: €6,00
- 1 PAM8610 Mini Stereo AMP: €8,50
- 1 Bela Mini Kit: €150,00
Housing + Components
- Black PLA for 3D printer: around €5,00
- Transparent TPU for 3D printer: around € 0,98
- 1 medium sheet of Plywood or MDF: €15,00
- 1 20x40cm Bronze plate: €10,00
License
Creative Commons Attribution-NonCommercial-ShareAlike 4.0 International (CC BY-NC-SA 4.0).
Processes & Files
Speakers
The speakers I got needed to be fitted / integrated into the synth body somehow, so I designed housing for my stereo sound system out of parts that were 3d printed on the A1 Bambu Lab printer. The design I came up with is sturdy and holds the speakers well. I tried to keep the infill settings on the lighter side in the slicer so as to not dampen sound but enhance it.
I wanted to make a reference back to computer controlled cutting week and continue working with a maze design. First, I output a maze by using an online maze generator. I then reworked the maze in Fusion 360 by tracing it in the sketch environment and extruding that to create a speaker grill design.
Synth Body
The synth body is a total prototype - I went for a design that was a box but with curved edges since I have been working with this concept since the beginning. I needed a surface that would be placeholders for the speakers as well, which is how the current shape came about. Additionally, I wanted a sort of front console panel for my buttons/MIDI controller, one that was a bit more ergonomic and attractive to use.
Touchpad
In many ways, the touchpad is the fundamental component of my final project. I want to be exploring capacitive touch for these types of devices, in order to make interactive art and furniture in the future.
I decided to mill a thin sheet of brass in the Roland CNC machine we have at the lab to make capacitive touch buttons that would interact with the mini Bela system and set off sounds. The layout was "hand friendly" and reminiscent of a spiral movement.
Button Pad
It was important for interaction to add buttons to the synth and make them as user-friendly as possible since my MIDI board includes six tactile switches that are hard and small to the touch. The final result was a single button pad that was 3d printed with bendy TPU, which is nicer to the touch.
Legs
I wanted the synth to be elevated as to not lay flat on the ground. I printed them using TPU filament, the same type used for the button pad. It is suitable for uses requiring impact-absorption and a soft-touch surface. Examples of TPU 3D printed parts include tubes, seals, bushings and vibration dampeners.
MIDI controller
I used a MIDI controller device that is also able to interact with an additional potentiometer board. These were designed in Kicad and programmed with Arduino IDE. They interact with the Mini Bela board. The controller is equipped with a ESP32-S3-WROOM MCU and 7 possible tactile switches that are meant that set off sound.
Pure Data + Arduino Code
Sourced materials
Thank You
Thank you to the entire team at Fab Lab Barcelon. Thank you to Josep, Julia and Adai for your incredible help and attention, which was admirable. Thank you to each and every one of my classmates. I have learned so much from all of you and could have not done it without you. I understand how my brain works in such a better way thanks to watching you all work.