Week 06 - Embedded programming
Group assignment
Compare performances & Development workflows on microcontroller: on the link below you can find the complete process of this week's group assignment, covering usage and setting up parameters.Click here
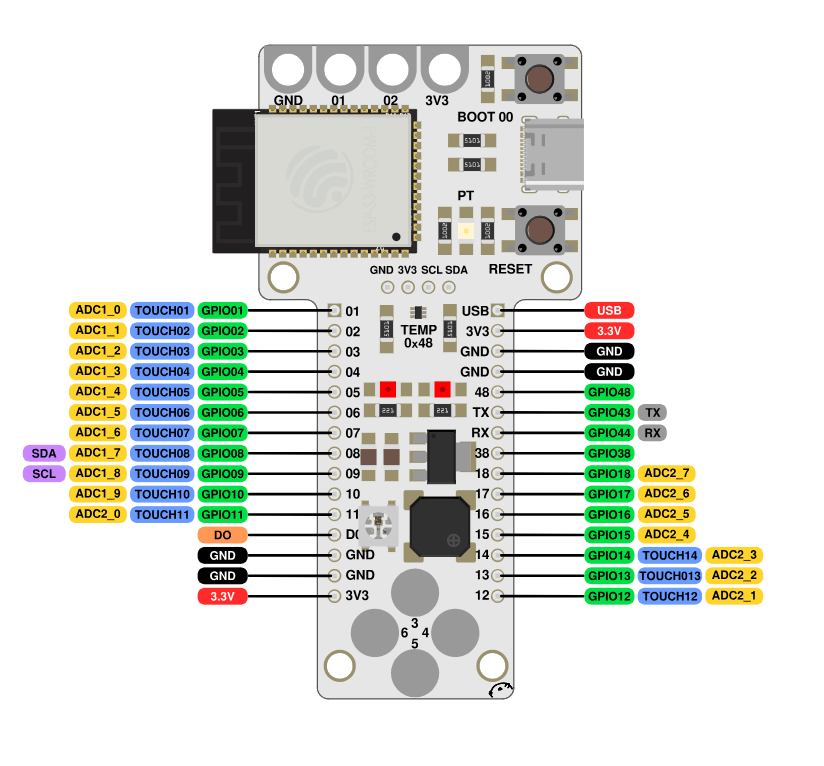
Barduino board: ESP32-S3
Understanding inputs & outputs

Neopixel exercise
Temperature sensoring
1. Load the library indicated in the code.
2. Copying the code to Arduino and substituing the values of the pin from our Barduino board.
3. Verify and send.
4. Open serial monitor to check the change of parameters.
Adventronics challenge
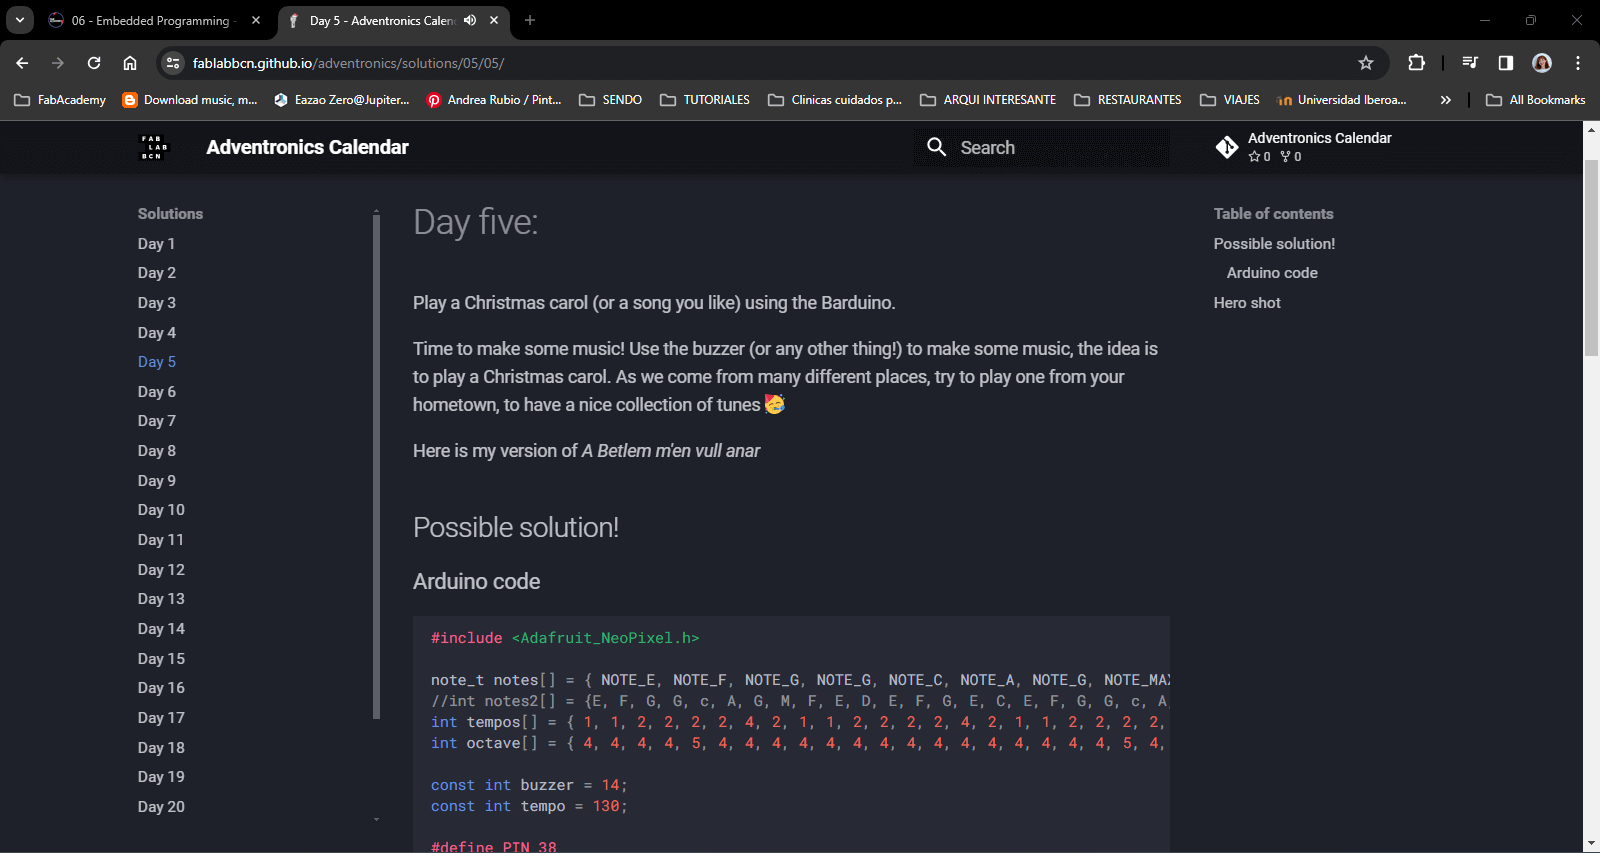
Day 5: Play a Christmas carol(or a song you like) using Barduino
1. Load the library indicated in the code.
2. Copying the code to Arduino and substituing the values of the pin from our Barduino board.
3. Verify and send.

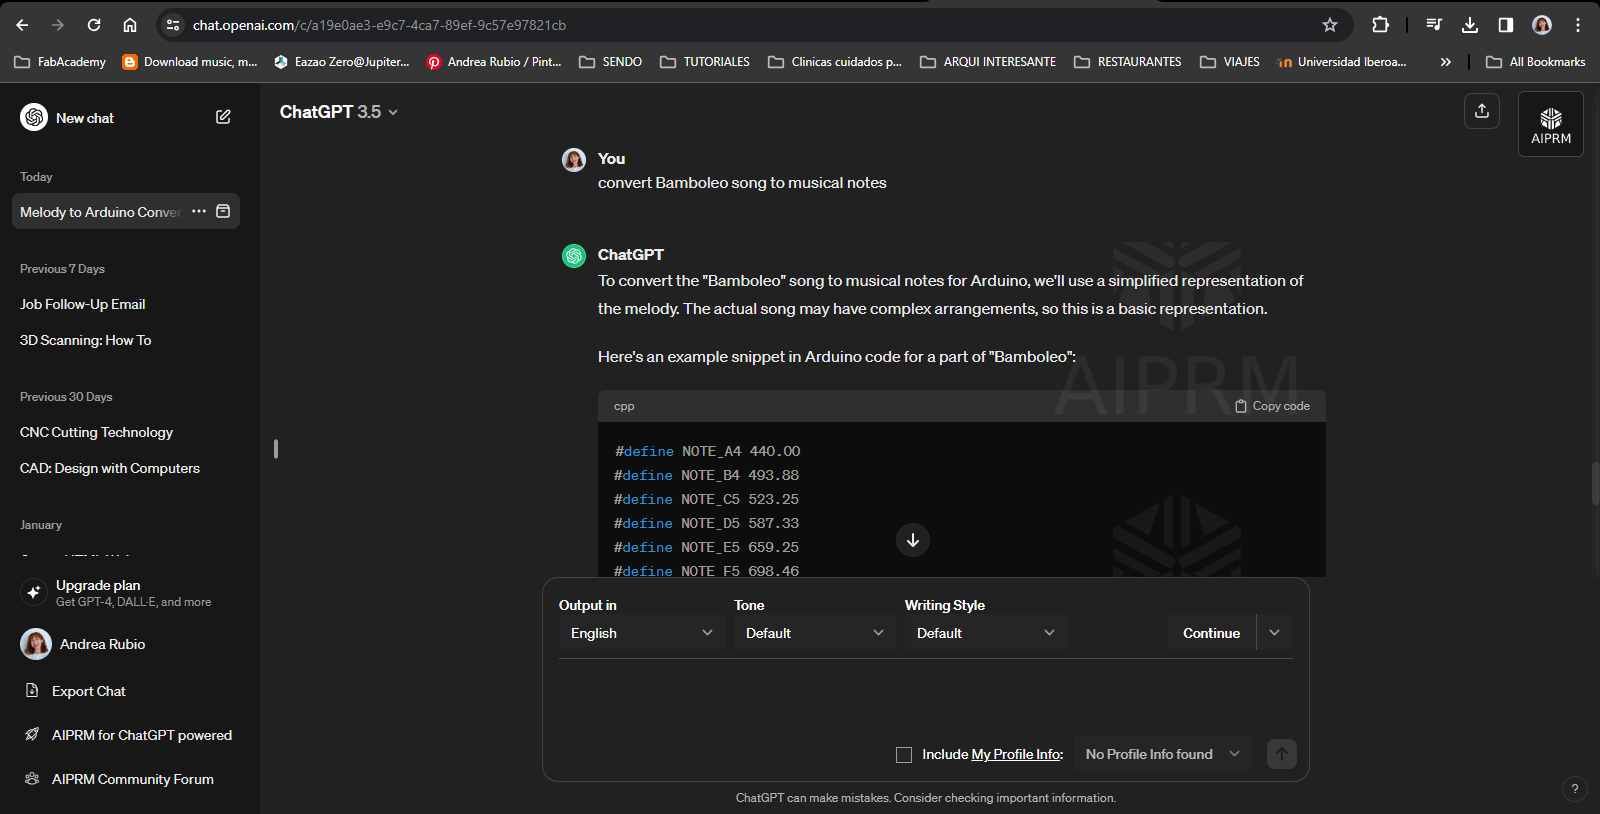
ChatGPT 3.5 + Arduino
"Bamboleo...ish"
1. Asking ChatGPT to generate the tone for the song "Bamboleo" from Gipsy Kings focused on arduino code.
2. Copying the code to Arduino and substituing the values of the pin from our Barduino board.
3. Verify libraries and code.

Observations
- The tones are not quite tuned as the melody.
- The library indicated in the code needs tweaking.
Quentorres board: seed-xiao
Understanding inputs & outputs
Same as with Barduino board, check the pinout from the seed-xiao provided by Quentins documentation and locate the pins you need to substitute.

"Button"
1. Clik on: File / Examples / 02.Digital / Button
2. Substitute the following numbers according to the helloboard guide:
const int buttonPin = 27; // the number of the pushbutton
const int ledPin = 26; // the number of the LED pin
3. Upload to Seeed XIAO
Code:
const int buttonPin = 27;  // the number of the pushbutton pin
        const int ledPin = 26;    // the number of the LED pin

        // variables will change:
        int buttonState = 0;  // variable for reading the pushbutton status

        void setup() {
          // initialize the LED pin as an output:
          pinMode(ledPin, OUTPUT);
          // initialize the pushbutton pin as an input:
          pinMode(buttonPin, INPUT);
        }

        void loop() {
          // read the state of the pushbutton value:
          buttonState = digitalRead(buttonPin);

          // check if the pushbutton is pressed. If it is, the buttonState is HIGH:
          if (buttonState == HIGH) {
            // turn LED on:
            digitalWrite(ledPin, HIGH);
          } else {
            // turn LED off:
            digitalWrite(ledPin, LOW);
          }
        }
"Multiple blinks"
1. Clik on: File / Examples / 01.Basics / Blink
2. Substitute the following numbers according to the helloboard guide:
const int ledPin = 26; // the number of the LED pin
const int ledPin = 0; // the number of the LED pin
const int ledPin = 1; // the number of the LED pin
3. Upload to Seeed XIAO
Code:
void setup() {
        // initialize digital pin LED_BUILTIN as an output.
        pinMode(26, OUTPUT); pinMode(0, OUTPUT); pinMode(1, OUTPUT);
      }

      // the loop function runs over and over again forever
      void loop() {
        digitalWrite(26, HIGH);  // turn the LED on (HIGH is the voltage level)
        delay(1000);                      // wait for a second
        digitalWrite(26, LOW);   // turn the LED off by making the voltage LOW
        delay(1000);
        digitalWrite(0, HIGH);  // turn the LED on (HIGH is the voltage level)
        delay(1000);                      // wait for a second
        digitalWrite(0, LOW);   // turn the LED off by making the voltage LOW
        delay(1000);
        digitalWrite(1, HIGH);  // turn the LED on (HIGH is the voltage level)
        delay(1000);                      // wait for a second
        digitalWrite(1, LOW);   // turn the LED off by making the voltage LOW
        delay(1000);                     // wait for a second
      }
Resources
Josep Martí // Fab Lab Barcelona lead instructor
Adai Suri // Fab Lab Barcelona instructor