15. Interface and Application Programming
This week we need to write an application that interfaces a user with an input &/or output device that I made.
The plan is to set up a MQTT server on my laptop which a ESP32-C3 XIAO will connect to and publish the position changes of a potentiometer. We will then use node-red to subscripe to this information and display it using a user interface.
MQTT
MQTT is a standard messaging protocol that connects machine devices and allows machine-to-machine communication. It is designed to be a lightweight, efficient protocol for sensor data transfer.
The protocol relies on a publish and subscribe messaging pattern. At least three parties take part in MQTT communication.
The publisher does not send information directly to the subscriber. This makes it easy to add more clients to the network. The network is also bi-directional which means publishers can also be subscribers on another topic.
A common MQTT broker is mosquitto.
MQTT data packet consists of:
All the clients, sensors and the thermostats must first connect to the MQTT broker by sending CONNECT packets that contain their client ID, username, and password for authentication. Must have the following:
MQTT network replies with the CONNACK packet, which includes two parameters: sessionPresent and returnCode
Installing MQTT Mosquitto
I followed a guide by howtoforge on how to install on ubuntu.
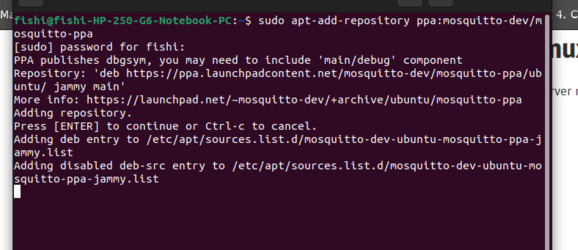
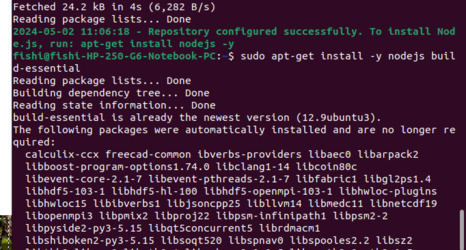
We add the official repository add-apt-repository ppa:mosquitto-dev/mosquitto-ppa -y
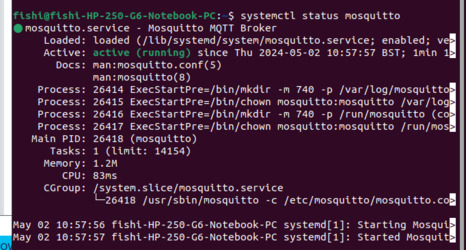
Then we install using apt install mosquitto mosquitto-clients -y. Once that is completed we can check its status using systemctl status mosquitto.
It is also useful to know the restart command is systemctl restart mosquitto. To stop you can use sudo systemctl stop mosquitto.service. Clear any stored data using sudo rm /var/lib/mosquitto/mosquitto.db. Start the service using sudo systemctl start mosquitto.service
It is recommended to add a authentication username and password however for this test I did not. This means we need to edit the mosquitto.conf file to allow anonymous connections.
I used vi to edit the read-only file. redhat goes across all the controlls.
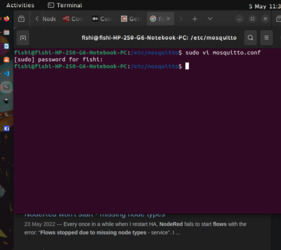
I opened the terminal in the correct folder and used sudo vi mosquitto.conf to open the file. Used 'i' to enter insert mode and navigated to the bottom and added:
listener 1883
allow_anonymous true
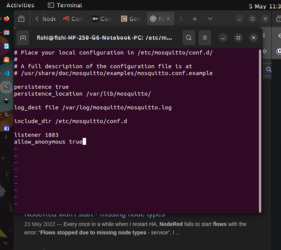
Then used hit 'esc' and ':wq' to write to the file and then quit. I then restarted the server with systemctl restart mosquitto
It is also required to know the address of the MQTT server in the future. You do this by running hostname -I. You probably need to check this everytime you restart the server.

Installing node-red
Used sudo npm install -g --unsafe-perm node-red to install node-red. Then node-red to run.
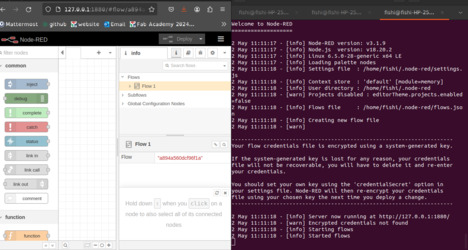
You can then navigate to the browser to the address it gives you. http://127.0.0.1:1880/ in my case.
Example Node-Red Projects
I started with some examples to get to know how things worked.
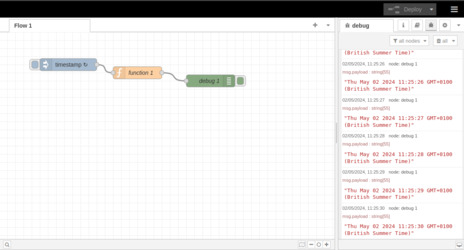
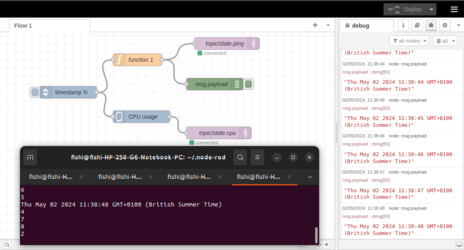
Medium had an example where they output the current data and time to the debug sidebar.
We then added a connection to the mqtt server to publish the cpu temperature and the measurements were output in the terminal.
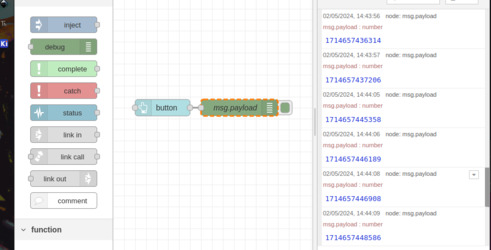
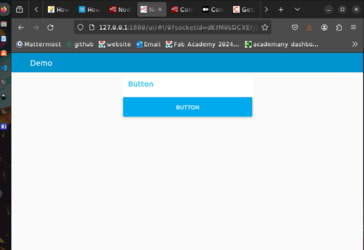
I made a simple button ui.
Influxdata introdiced how to set up the mqtt nodes as subscribers and publishers. As I am running the server locally I use localhost as the server and port 1883.
It however did not actually use a sensor in their example, just used some code to create random numbers which were printed into the debug sidebar.
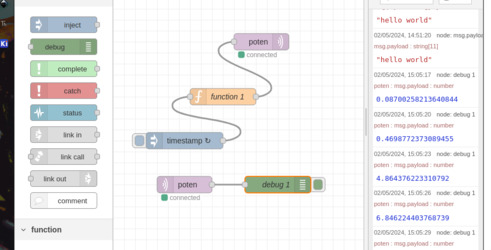
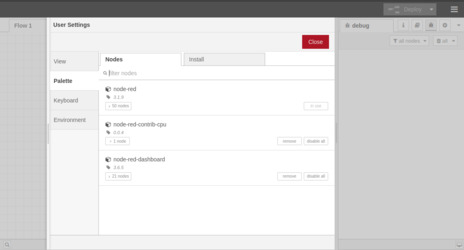
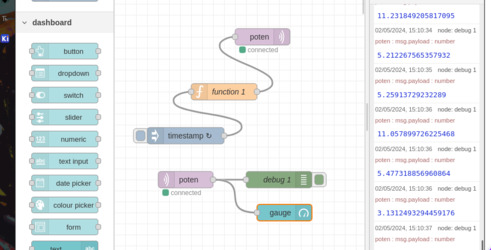
I installed the dashboard palette so I could then create some ui.
Then connected a gauge node which updated with the random numbers. You can see the created webpage at the browser address '/ui' (http://127.0.0.1:1880/ui).
Example MQTT Projects
There was a nice small in-terminal test of the MQTT server on bhave.
Mosquitto has two command line utilities of mosquitto_pub and mosquitto_sub we can use.
Start by creating a subscriber of the topic 'hello' mosquitto_sub -v -t 'hello'
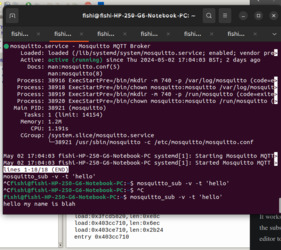
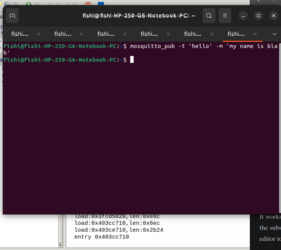
Then we publish a message to the topic in a new terminal mosquitto_pub -t 'hello' -m 'my name is blah'
Then we get a message back in the subcribing terminal.
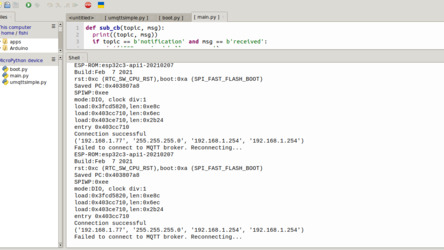
On randomnerdtutorials I followed a guide on getting two esp modules talking to each other through the broker as I had two boards made from last week.

In this case the boards are both publishers and subscribers.
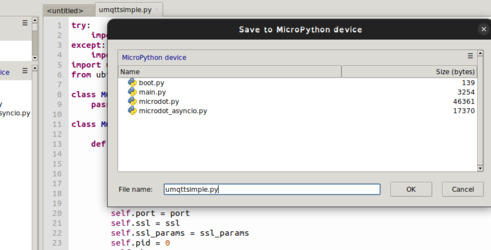
We use the uqttsimple.py library which will need to be saved onto both of the ESP32s.
I had a lot of trouble getting them to connet to the mqtt server to beginwith however I think I was not using the correct ip address for the server.
ESP 1
We load the boot.py. We need to edit the code to have the right details. The ssid and password needs to watch the local network and then use hostname -I to find the server ip.
The main.py also needs to be saved.
ESP 2
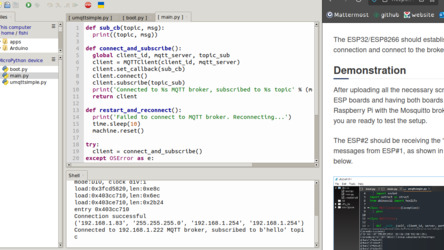
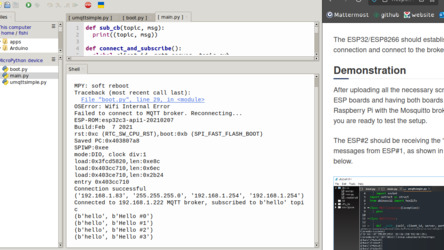
ESP 1 should receive the “received” message

ESP 2 should be receiving the “Hello” messages from ESP 1
Potentiometer to ESP32 to MQTT to Node-Red
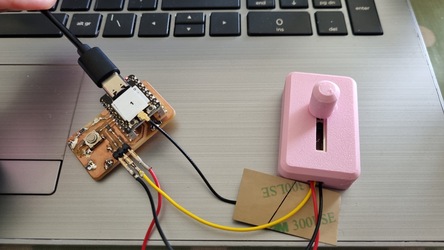
We will be using one of the ESP32 boards that I made last week that has a analogue input on pin 4.
The base code that i will be adapting is made by random nerd tutorials.
It uses the umqttsimple.py library. This is saved onto the esp32.
The boot.py is left empty in this project.
The original main.py is built around taking temperature measurements so we will need to make some edits.
To begin with we chnage the ssid, password and mqtt broker ip address to match ours.
I then change the publishing topic to match our project topic_pub_poten = b'esp/esp32c3/poten'
I increased the messaging interval message_interval = 0.5
I then made refrence to this example code which uses the machine ADC class to covert the analogue to digital signal. pin = ADC(Pin(4)).
The function to read the sensor is cut down.
def read_sensor():
try:
  pot_value = pin.read_u16() # read value, 0-65535 across voltage range 0.0v - 3.3v
  return pot_value
except OSError as e:
  return('Failed to read sensor.')
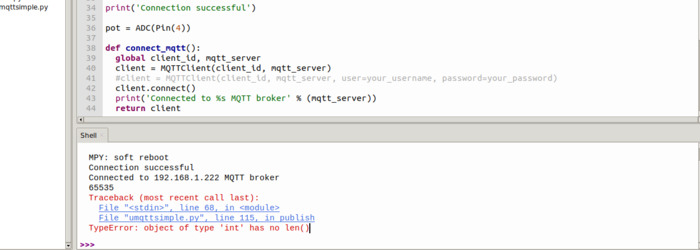
Then the function is called, the result is printed to the shell. The value is then converted to a string and published to the topic every 0.5 seconds.
while True:
  try:
    if (time.time() - last_message) > message_interval:
      pot = read_sensor()
      print(pot)
      client.publish(topic_pub_poten, str(pot))
      last_message = time.time()
This did work however it only utalised about a third on the potentiometer before it maxed out at 65535. Ideally we would just change the resistor on the PCB to be a higher value however we can adjust the range slightly in the code using the ADC class.
To make the ADC more useful it supports changing the input voltage range via attenuators:
We set it to 11db to have the greatest increase in area using pin.atten(ADC.ATTN_11DB). It is still not quite the entire length but it is much improved.
Final code:
import time
from umqttsimple import MQTTClient
import ubinascii
import machine
import micropython
import network
import esp
from machine import Pin, ADC
esp.osdebug(None)
import gc
gc.collect()
ssid = 'yours_ssid'
password = 'your_psw'
mqtt_server = '192.168.1.xxx' # hostname -I'
client_id = ubinascii.hexlify(machine.unique_id())
topic_pub_poten = b'esp/esp32c3/poten'
last_message = 0
message_interval = 0.5
station = network.WLAN(network.STA_IF)
station.active(True)
station.connect(ssid, password)
while station.isconnected() == False:
pass
print('Connection successful')
pin = ADC(Pin(4))
pin.atten(ADC.ATTN_11DB)
def connect_mqtt():
global client_id, mqtt_server
client = MQTTClient(client_id, mqtt_server)
#client = MQTTClient(client_id, mqtt_server, user=your_username, password=your_password)
client.connect()
print('Connected to %s MQTT broker' % (mqtt_server))
return client
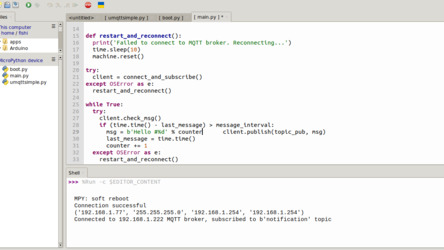
def restart_and_reconnect():
print('Failed to connect to MQTT broker. Reconnecting...')
time.sleep(10)
machine.reset()
def read_sensor():
try:
pot_value = pin.read_u16() # read value, 0-65535 across voltage range 0.0v - 3.3v
return pot_value
except OSError as e:
return('Failed to read sensor.')
try:
client = connect_mqtt()
except OSError as e:
restart_and_reconnect()
while True:
try:
if (time.time() - last_message) > message_interval:
pot = read_sensor()
print(pot)
client.publish(topic_pub_poten, str(pot))
last_message = time.time()
except OSError as e:
restart_and_reconnect()
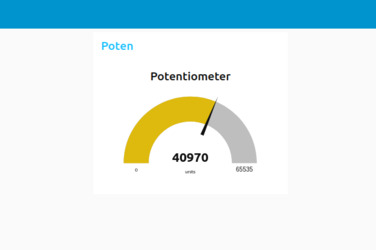
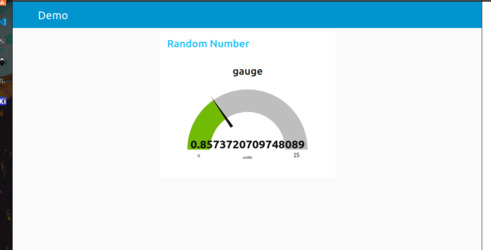
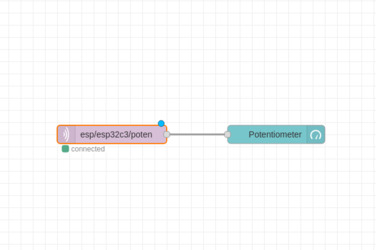
In node-red I just made a simple subscriber mqtt node that output to a gauge the value that is sent on the subscribed topic.
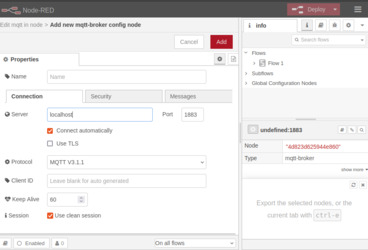
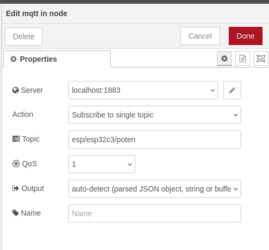
Mqtt settings
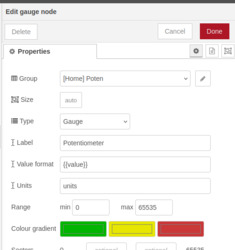
Gauge settings
Gauge result