Week 4, Embedded Programing
For this week, I did the coding part that controls the relay on the railgun. The code really is not too complex but in this case, It really didn't need to be.
Now then. First off, I am not really good at coding and mainly use tinkercad for getting an idea of how I need the code to look so if there is something funky or a way to optimize the code further, I probably missed it.
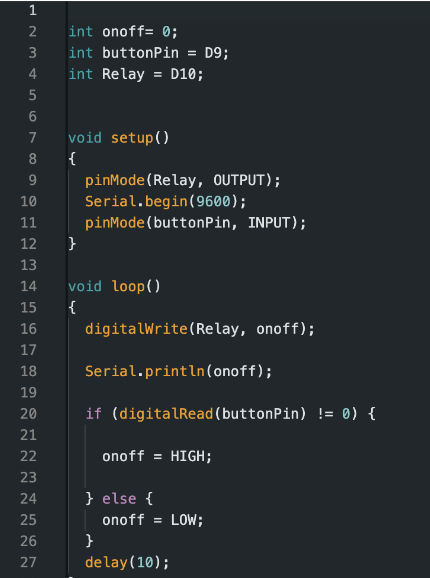
The code for the microcontroller really had only 2-3 main parts to it. 1st is to listen for the button connected to pin D9 to see if the pin is on or not. Next is to output “HIGH” to the relay pin, D10, if D9 gets powered. The final part isn't really necessary which is why I don't count it as a part but it is to print to the serial monitor if the relay pin is outputting or not. 1 if it is, 0 if it's not.
All of this isn't really all that impressive on its own, but considering that it is really the first time I coded without just being guided through it, I think it's quite nice.
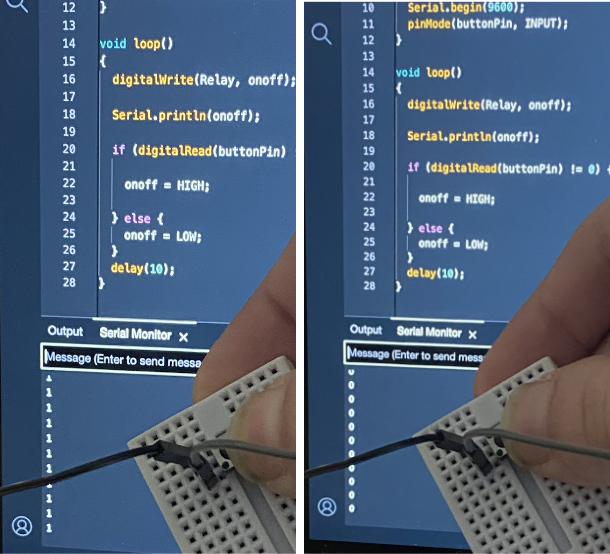
Here is the response on the serial monitor for if the button is being pressed or not.
It's a lot easier to tell if it's hooked up to the relay because the relay gives an audible click when it receives a high or low signal.
I was planning on having the active loading mechanism to be the bulk of the programing but I ended up not using it so those ideas were put on hold (at least for now)
The autoloader would have had a bit more to it than the relay control does. It would have had to have stepper control/positioning as well as the relay control. Stepper motor would have been what opens the loading breach as well as what gives the armature a kickstart to help it launch out.
The order would have been, open loading breach > wait for button input > move forward to kickstart the projectile, move back to open position to restart.