Now the first image to the second image is a pretty big jump. Let me explain a bit on how I got there.
For me, the way I design is a little funky, I design first and then add in vars as I need them.
My brain is a smidge weird in the fact that i can just fully visualize a design and how it works in its entirety just in my head which is why if you see any of my real world design sketches, they look like they have just been jotted down… and that's because they probably were.
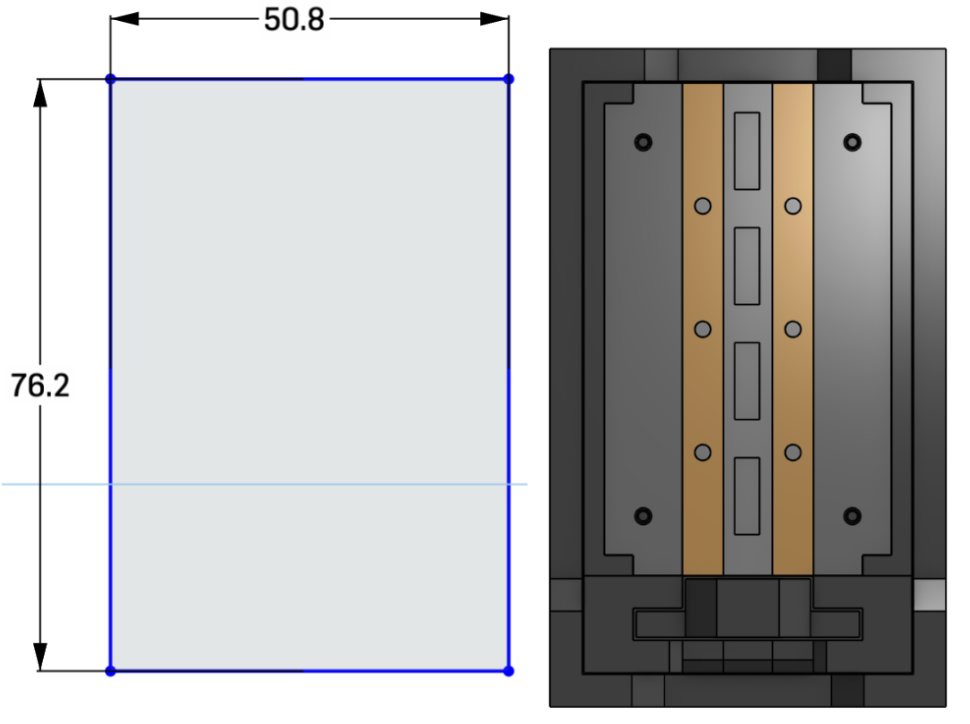
To start off, I had a basic idea of what I wanted to have my end design be, But due to some limitations I wasn't able to fully realize this inital design.
The basic idea was to have a modular design that I could upgrade as I liked. Which is why you see the design line look like this. This means that if need be, I could change one part of the barrel unit and all of the subsequent parts would be able to follow that change
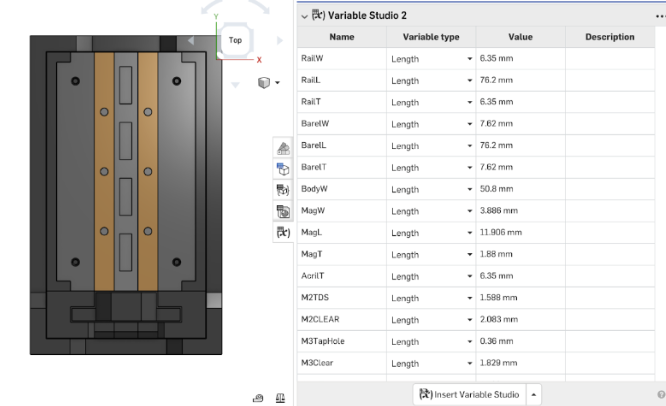
If i wanted to change the barrel length of the rails, I would go into the variables table (as seen on the screenshot above) and change the var related to barrel length
I set a lot of variables and a lot of my variables are based on previous variables using other variables and mathmatic equations
Originally, the barrel unit was set to be a whole 6 inches as compared to the 3 inches that it is now but after realizing that may just be a bit too long for me to actually print, I set it to be just 3 inches. There are some physics calculations to correctly optimize my rail length to make sure that it's all being used but that's a bit too complex for me.
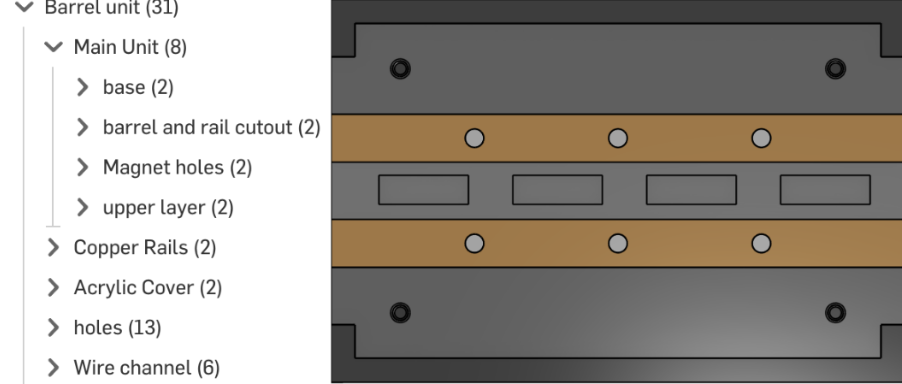
The main things I needed to have in this part are the rails, the cover, the holes, the magnet holes, and the barrel itself. I designed it based around the rails as they would be the hardest part to process so I wanted them to be the least processed part of the barrel units design.
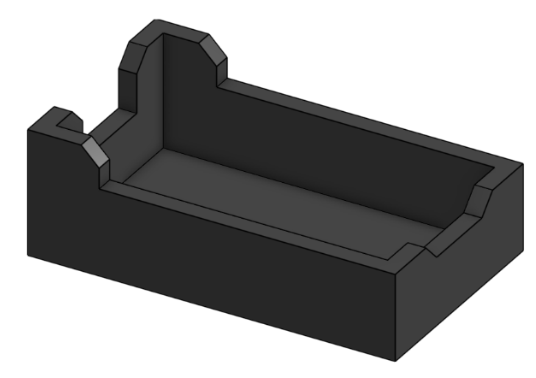
The next part I designed was the loading mechanism. I say mechanism because I originally planned it to rely on an active loading system as opposed to the passive one that it has now. The difference would be if the armature (projectile in question) would be loaded in before firing (passive), or if it would be loaded in as part of the firing process as a kickstart (active). As I didnt think I would have had enough time to design an active mechanism, I opted for a simple loading breach as a passive mechanism.
The final and least complex part would be the housing for all of this. It really didn't have to be anything fancy, all it had to do was not obstruct the other components as well as keep them in place. It could've just been a hollow box that holds the loading unit and the barrel unit together without obstructing the bore of the barrel, but me being me, had to make to look nice, so I did.