Case Design and Construction
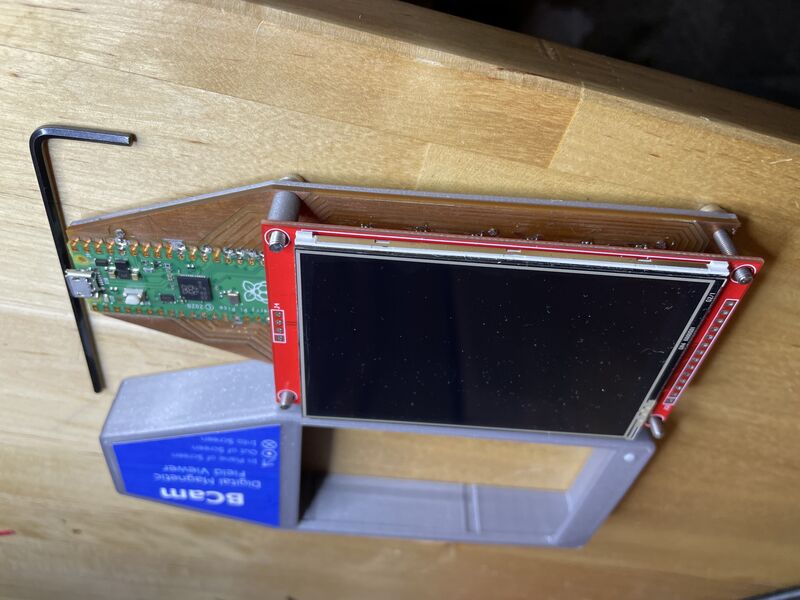
The case for the project was designed in OnShape and 3-d printed. Along the way, I made two significant changes in my design:- I decided not to permanently solder the LCD to the main motherboard, but leave the design with header sockets. This results in a thicker finished product, so the sensors are farther from the onscreen arrows, but it leaves me with more margin for error and final tweaking.
- I originally intended to make the PCB itself the bottom plate of the case, but it had too many ugly solder joints for that, and I was worried about short-circuits. So I designed a thin plastic plate that screwed on to the underside of the PCB.
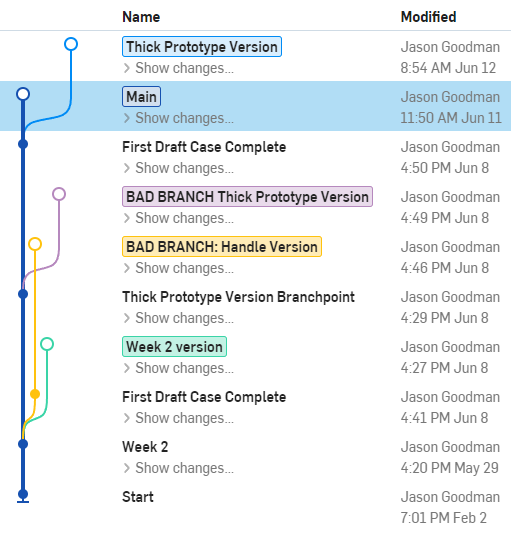
One neat feature of OnShape is that it has its own version control system similar to Git. I used this to create "branches" for the case design, that allowed me to develop the "thick" and "thin" versions of the case simultaneously, and merge changes between them as needed. The image above shows my final project branch structure.
Another feature of OnShape I used is being able to incorporate multiple "part studios" into a project. These let you work on separate components in isolation, and then bring them together with "mates" (like joints in Fusion) in an Assembly file. I had separate part studios for the PCB, the LCD display, and for the case.
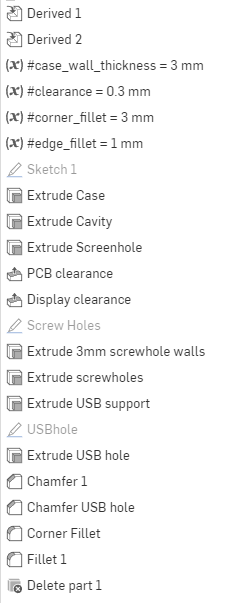
The image at right documents my steps for creating the case, with more detail below:
- Use a "Derive" operation to import the shapes of the PCB and LCD objects I designed earlier.
- Create parameters specific to the case design
- Draw a sketch of the overall shape, based on the derived geometry
- Extrude the main body of the case
- Extrude the cavity that the components will fit in
- Extrude the hole for the LCD screen
- Add clearance so we get a loose fit for the PCB and LCD
- Draw and extrude screw holes (the screws screw right into the plastic)
- Sketch and extrude holes and supports for the USB port
- Chamfer and fillet everything
- Sketch and extrude a hole to allow the Pico's reset button to be pressed
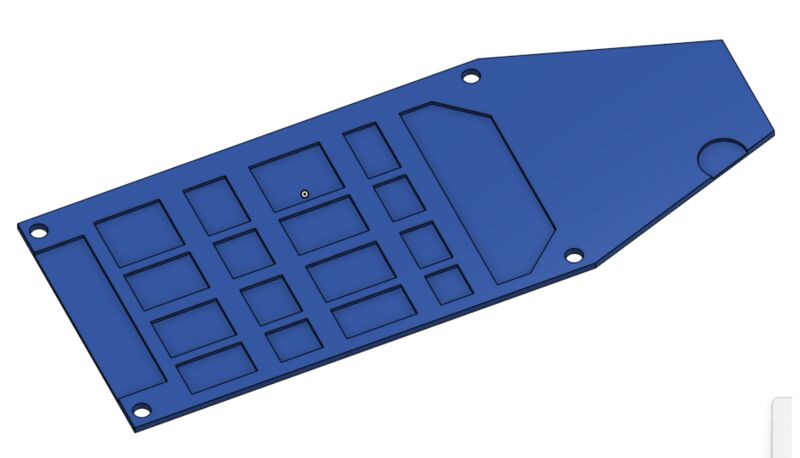
- Sketch and extrude the baseplate
- Thin the baseplate in places where the PCB's solder vias would press against it
- Create cylindrical "standoffs" to hold the LCD at the correct spacing from the PCB.
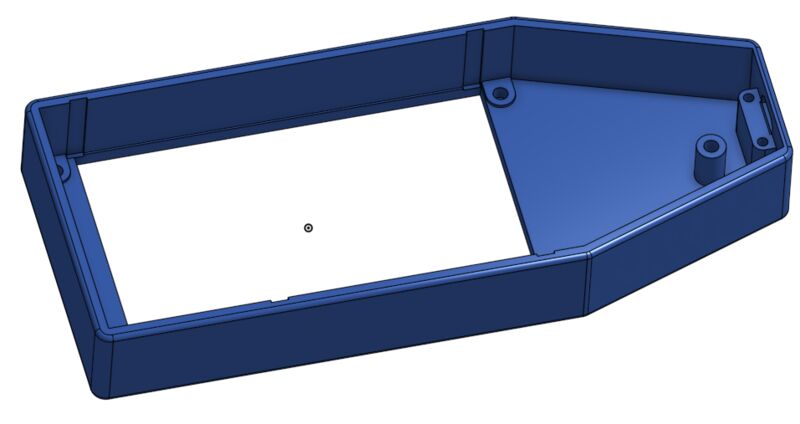
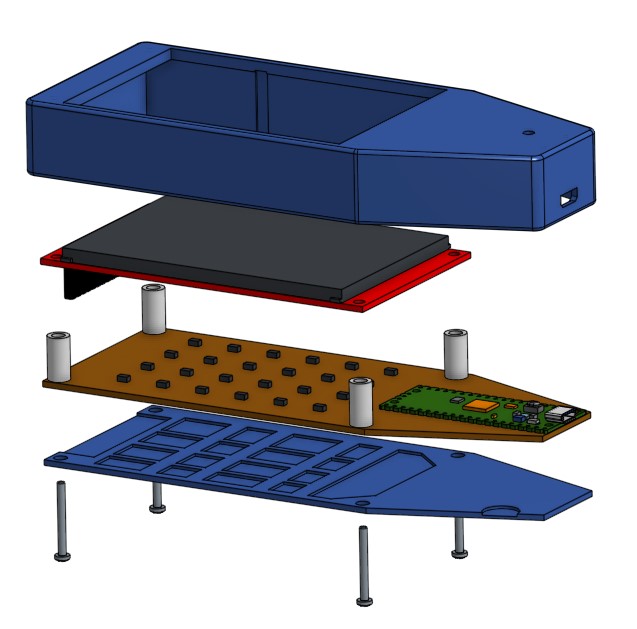
Another great feature of OnShape is it allows you to make "exploded views" of your project, like this:
3-d printing the project was totally standard, so I don't have any photos of that. I did have to re-print the design twice, once to accomodate the baseplate, once due to minor alignment and tolerance problems (I mis-measured the LCD screen when creating the design, so the hole for it ended up in the wrong location.)

Vinyl Label
I printed out the label I designed earlier onto printable sticker vinyl. In theory I could have cut it out with the vinyl cutter, but it was such a simple shape it was easier to use a sharp knife and a straightedge.Final Assembly
The diagram above does a great job of showing how the project is assembled. The steps are:- Plug the LCD screen into the PCB.
- Place the backplate under the PCB.
- Put the cylindrical standoffs between the LCD and PCB.
- Put four 3mm x 20mm stainless steel hex cap screws through the backplate, PCB, standoffs, and LCD. I needed to add some 3mm washers to get the screw penetration right.
- Drop the whole assembly into the case.
- Tighten the screws into the holes in the upper case.