Week 2: Computer Aided Design
Assignment(s) for this week
- Model (raster, vector, 2D, 3D, render, animate, simulate, …) a possible final project
- Compress your images and videos, and post it on your class page
This week I basically duplicated my sketch on to Adobe Illustrator. I colored in the components to what
I think they will look like. As seen on my Final Project Page, I have already my sketch there. I sketch that on a friends iPad using Procreate and exported it as a .jpg. This week I made a vector .ai file in Adobe Illustrator. I used a series of shapes (mainly rectangles and elipes) to make the outline of the Sesor box.
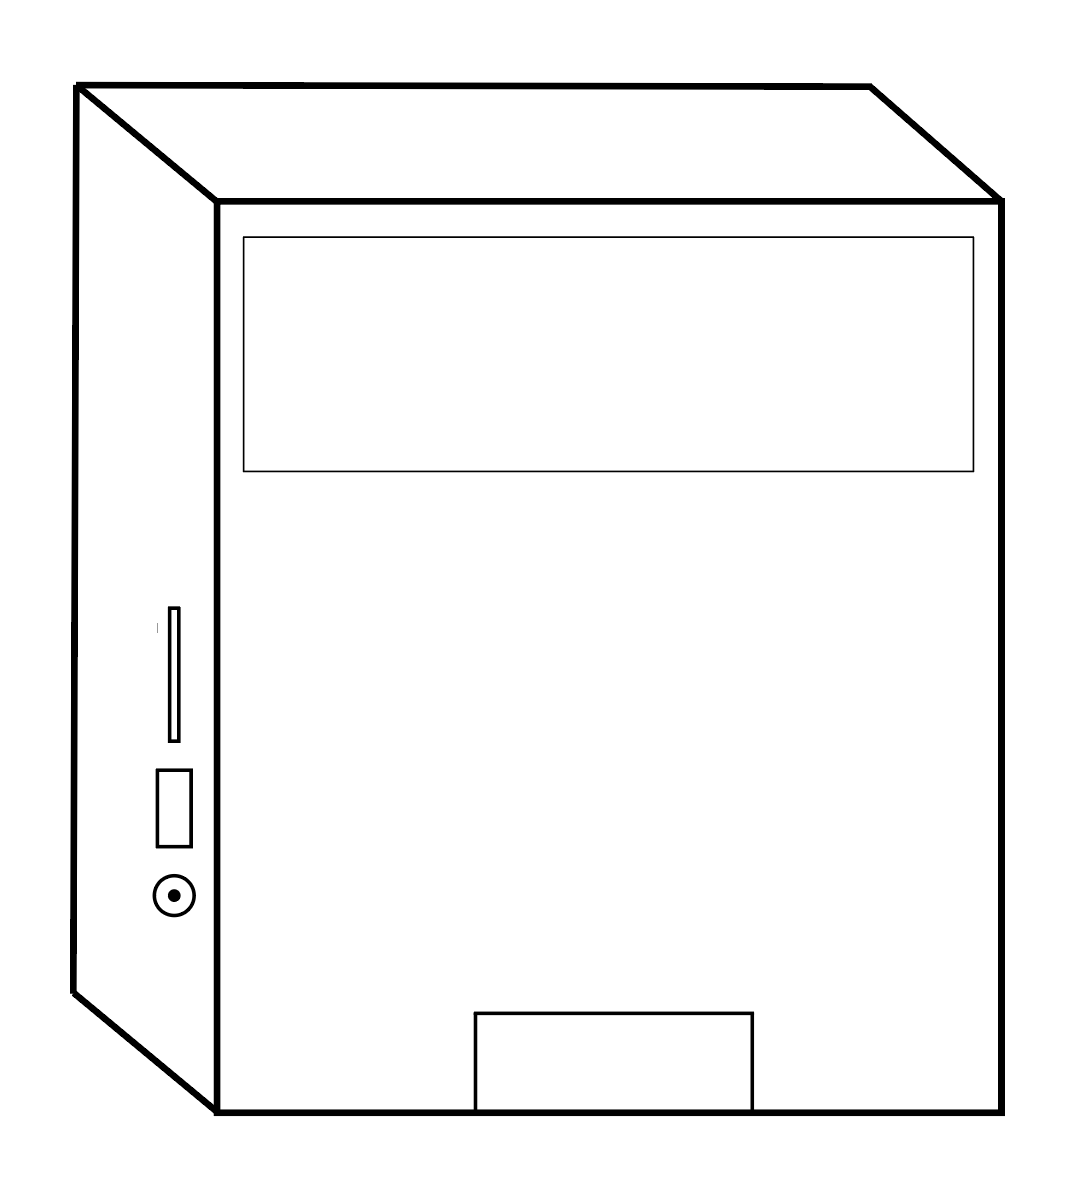
I then colored in the sketch with what colors I am intending the box to be. The outside 'shell' will be a charcol gray, LED light at bottom of sensor with flash either green or red depending on what the user is 'telling' the sensor (i.e. if you tap your ID card and sucessfully sign in, the light will blink green), and lastly the LCD screen will most likely be blue as most screens we have are that color.
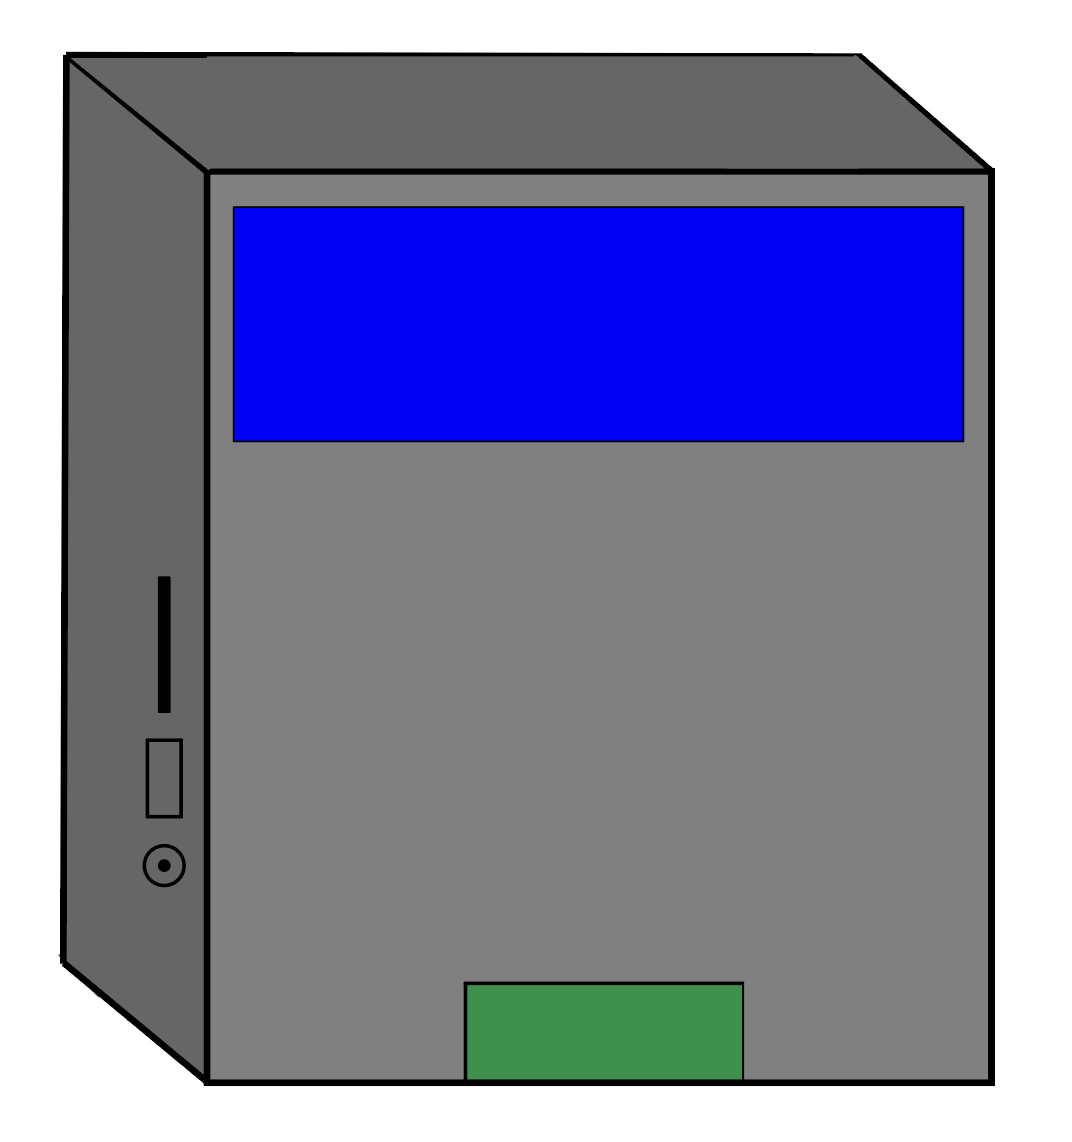
Next task for me to do was create the 3D modeled version using Fusion 360. I am decently familiar with Fushion as I have used it both in my Industrial Design class last year, during my shifts at the Fab Lab and personal projects.
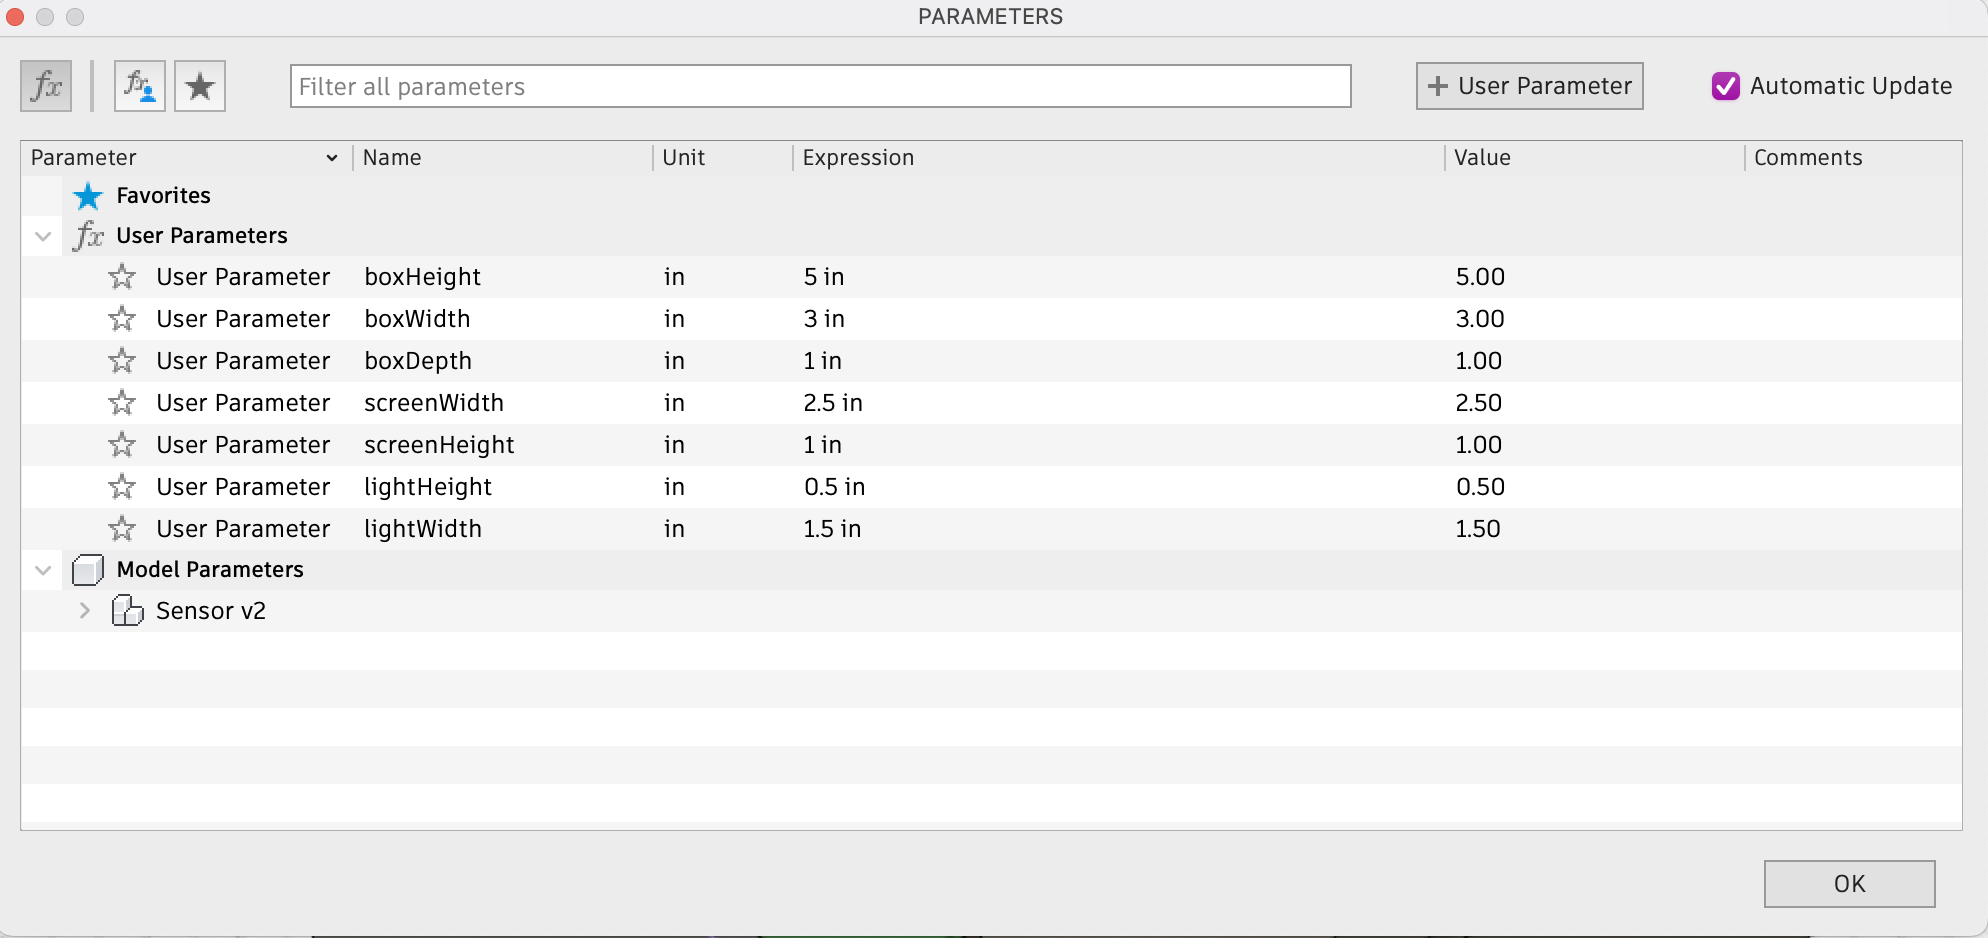
- First thing I did was set and establish my parameters for my design. By making my design parametric, it makes it easier for me to change one dimention and porportionally adjust the related ones, so if I initally want my length to be 5in but actually need it to be 6.75in, Fushion would automatically adjust my height, depth, etc.
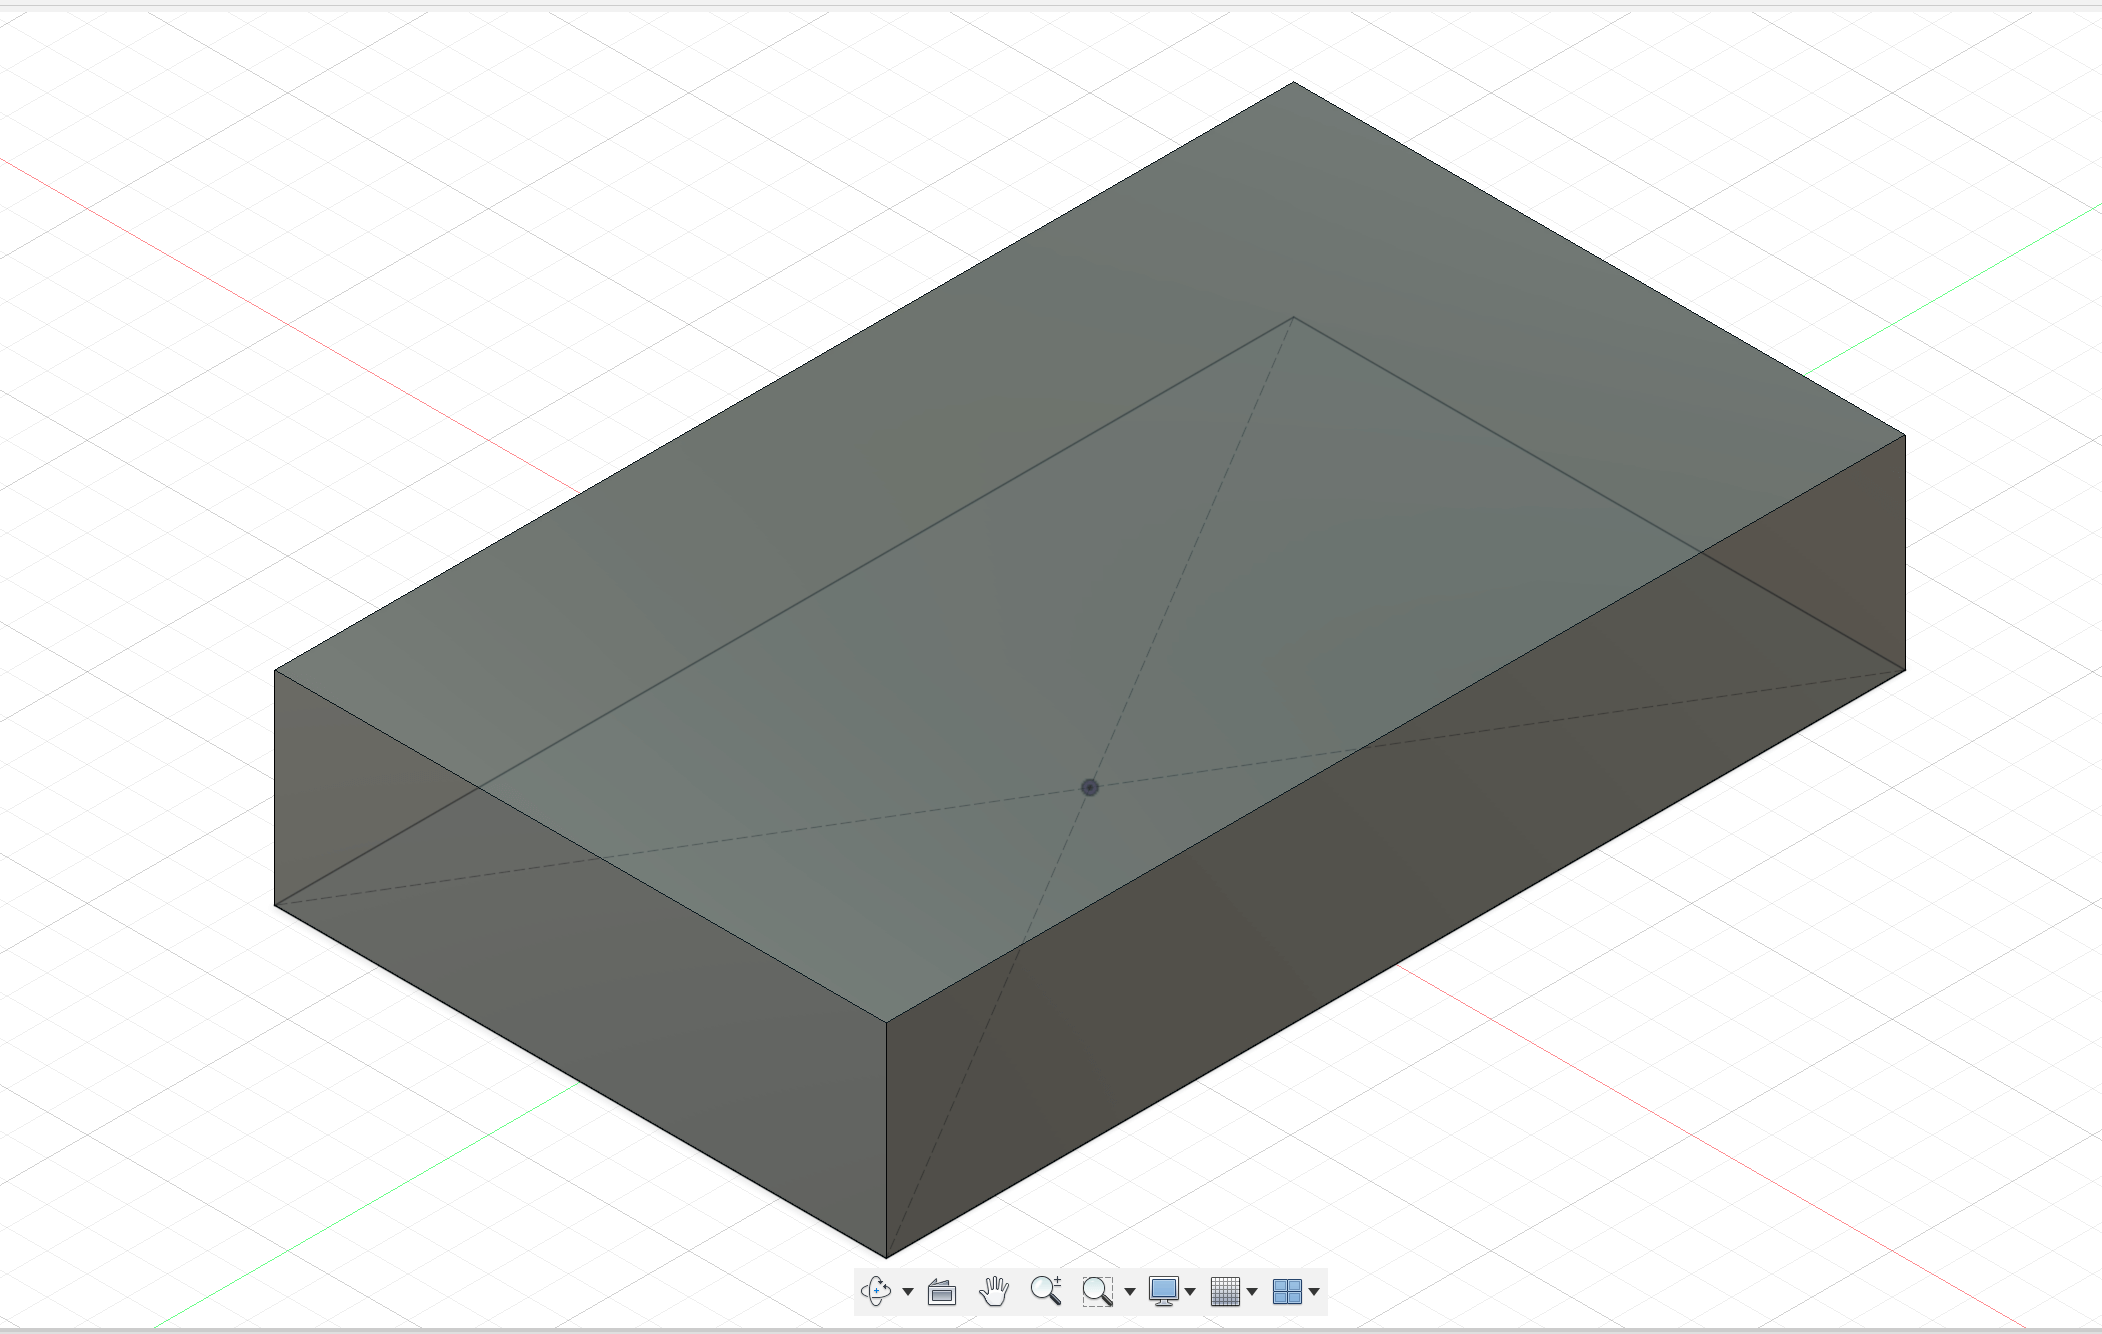
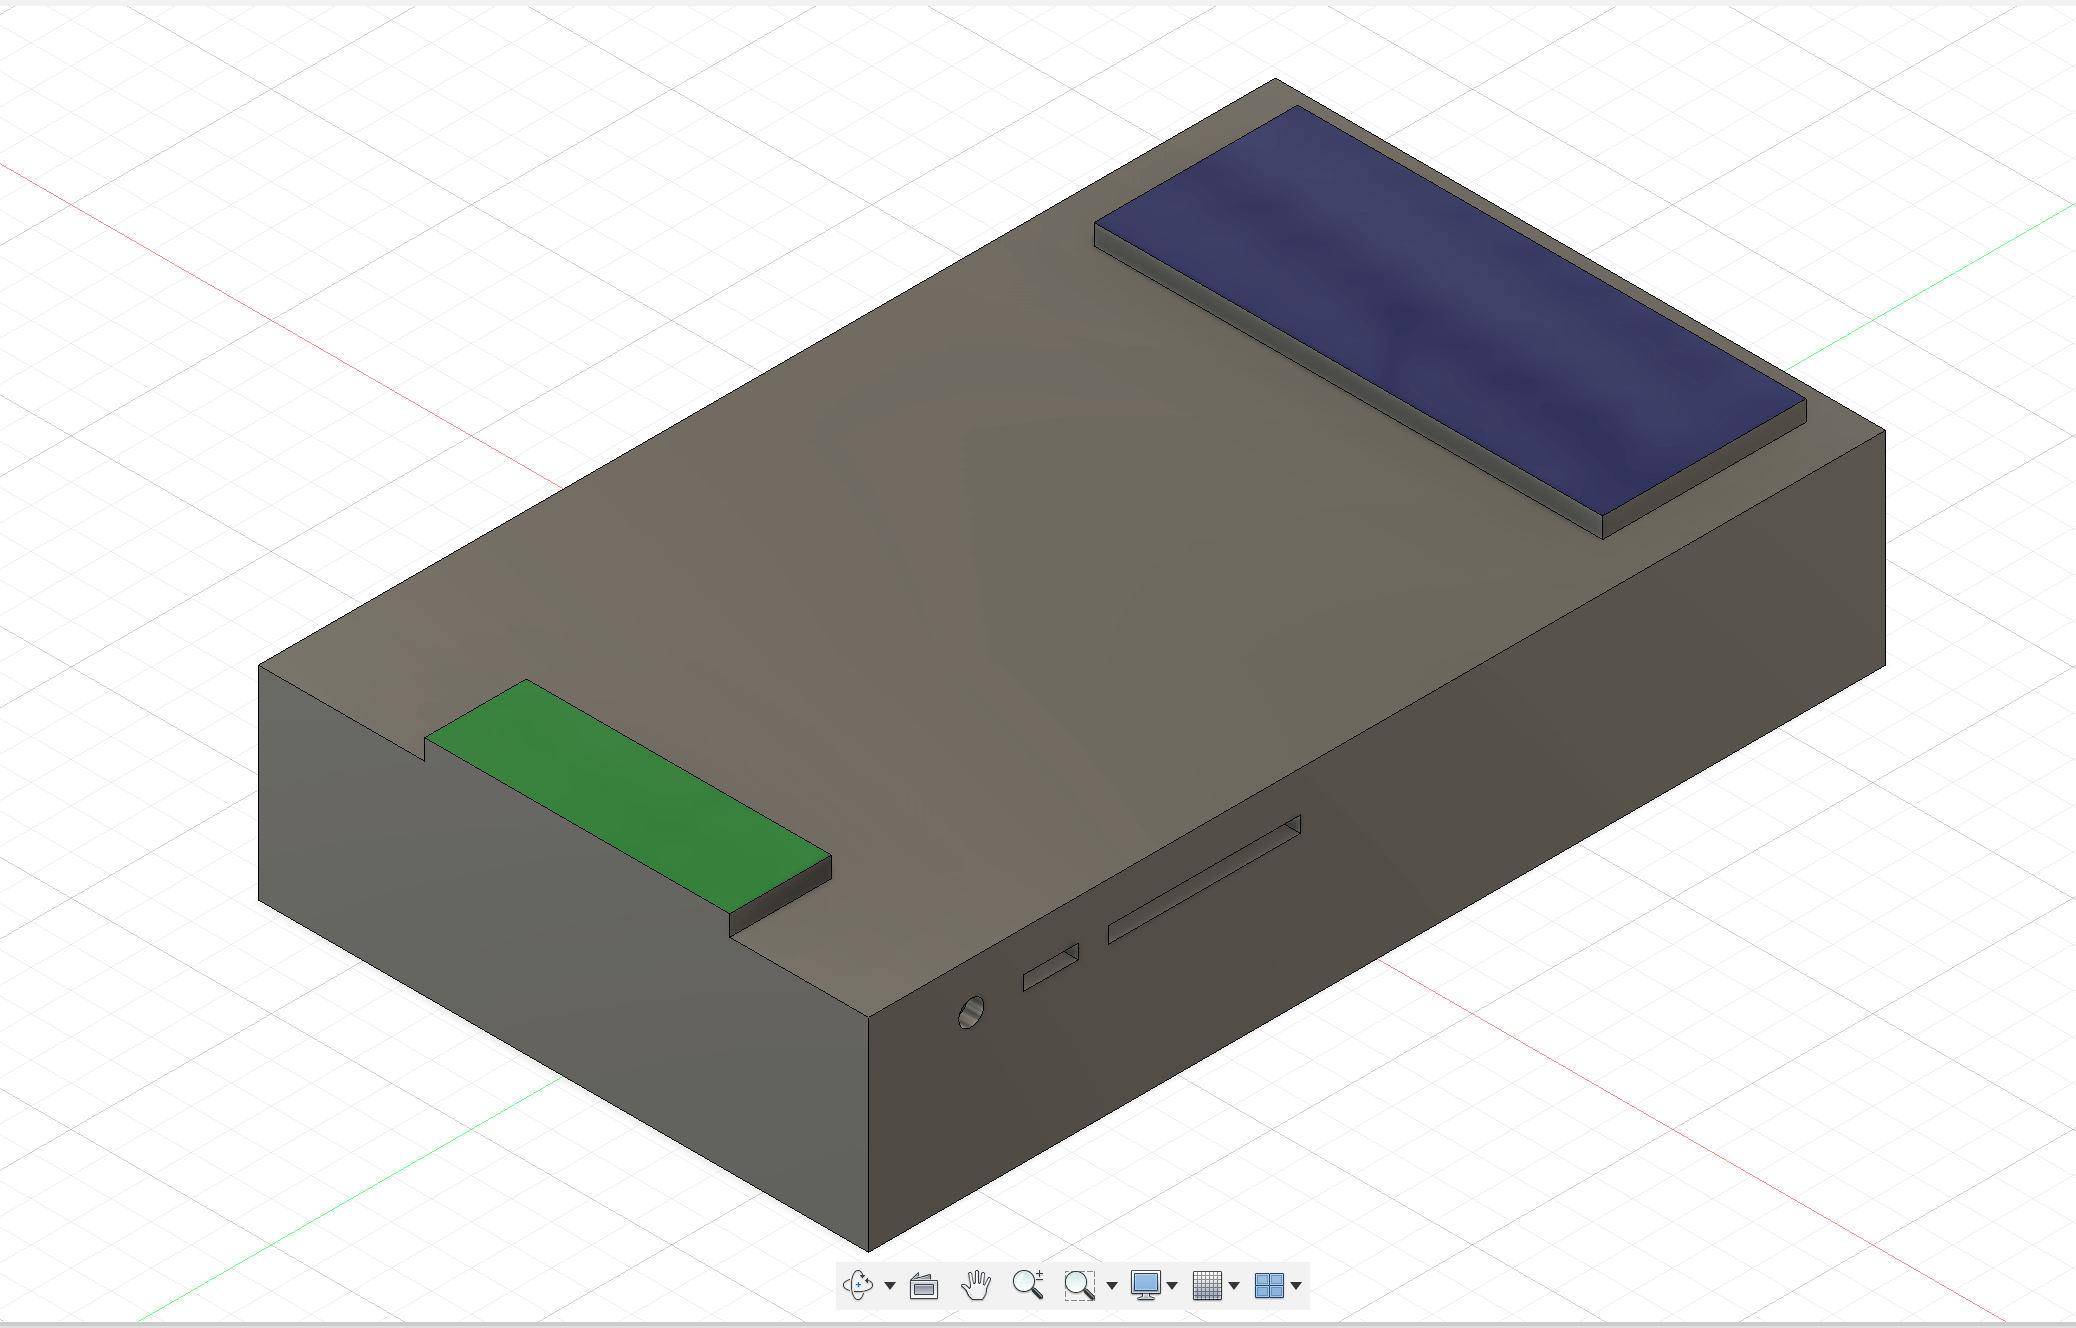
- From there, I created the sketch of my 2D rectangle then extruded it to the proper height. Initally I had some difficulty figuring out how to make the cut outs for the power, SD card and USB port but after talking with my instructor (shoutout to Brandon, Fab Academy '21 Graduate) he showed me I can make new components on only one face of my body!
- It is difficult to incorperate the LCD screen and LED via 3D model but I just added two more rectangles then extruded them slighly above the sensor shells body.
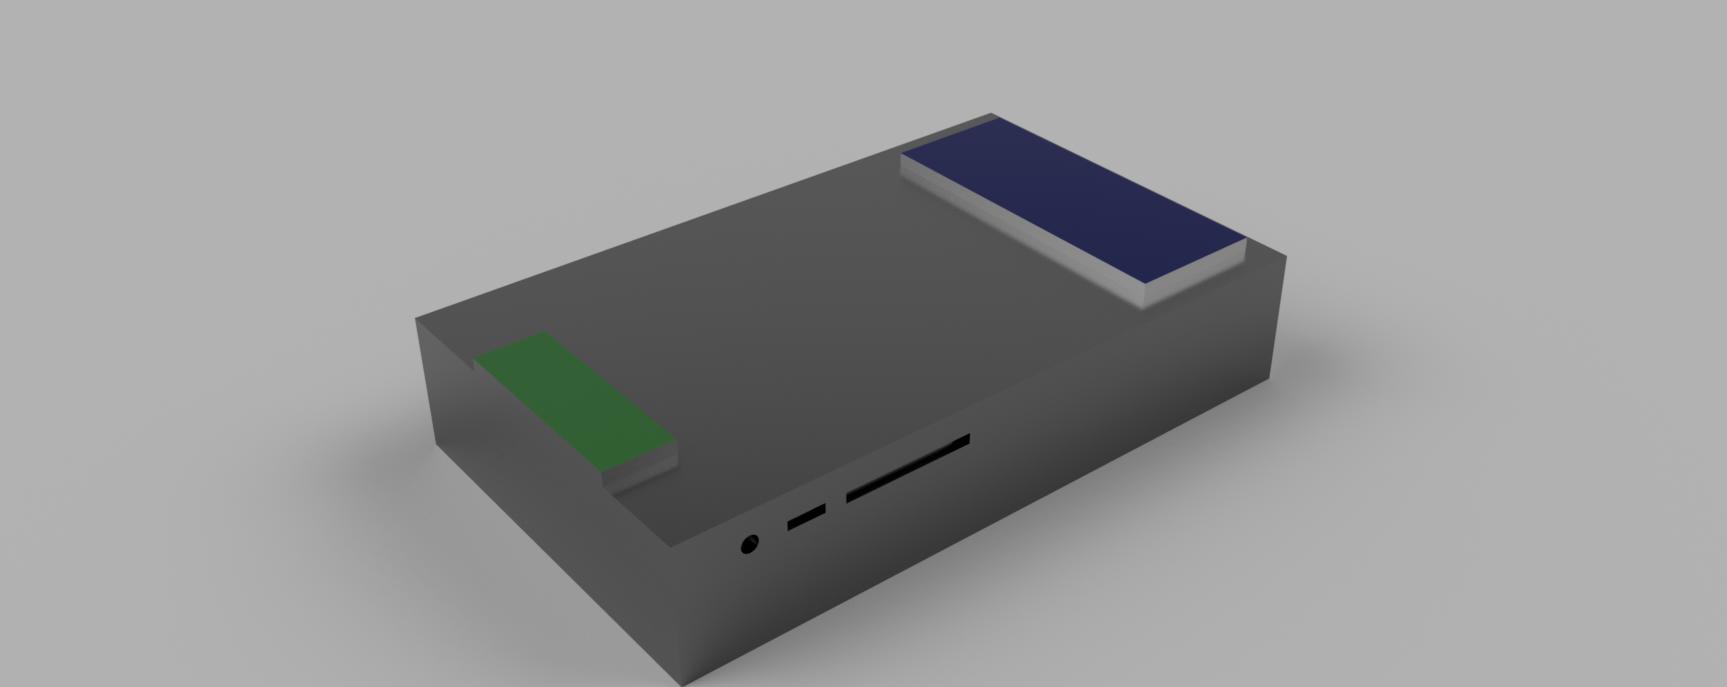
- Lastly we are to Render our projects! One really handy thing about Fushion 360 is it has built-in Redering. I simply colored my components the same as what I did in my sketch then added some background to show a final image of my Final Project and here it is!!