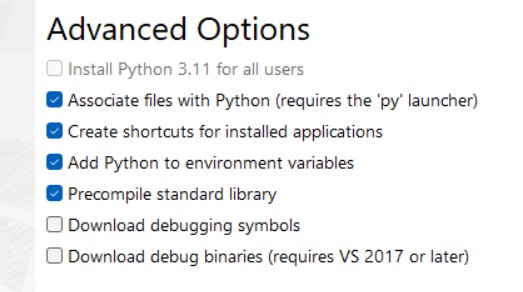
I ran into some problems getting python to work in the command module this week. I think that making sure to include environment variables during installation, and using “python” instead of “python3” in the command module fixed most of my problems. The image was taken after I installed it. I would recommend checking the “for all users” box as well.
Week 14: Interface and application programming
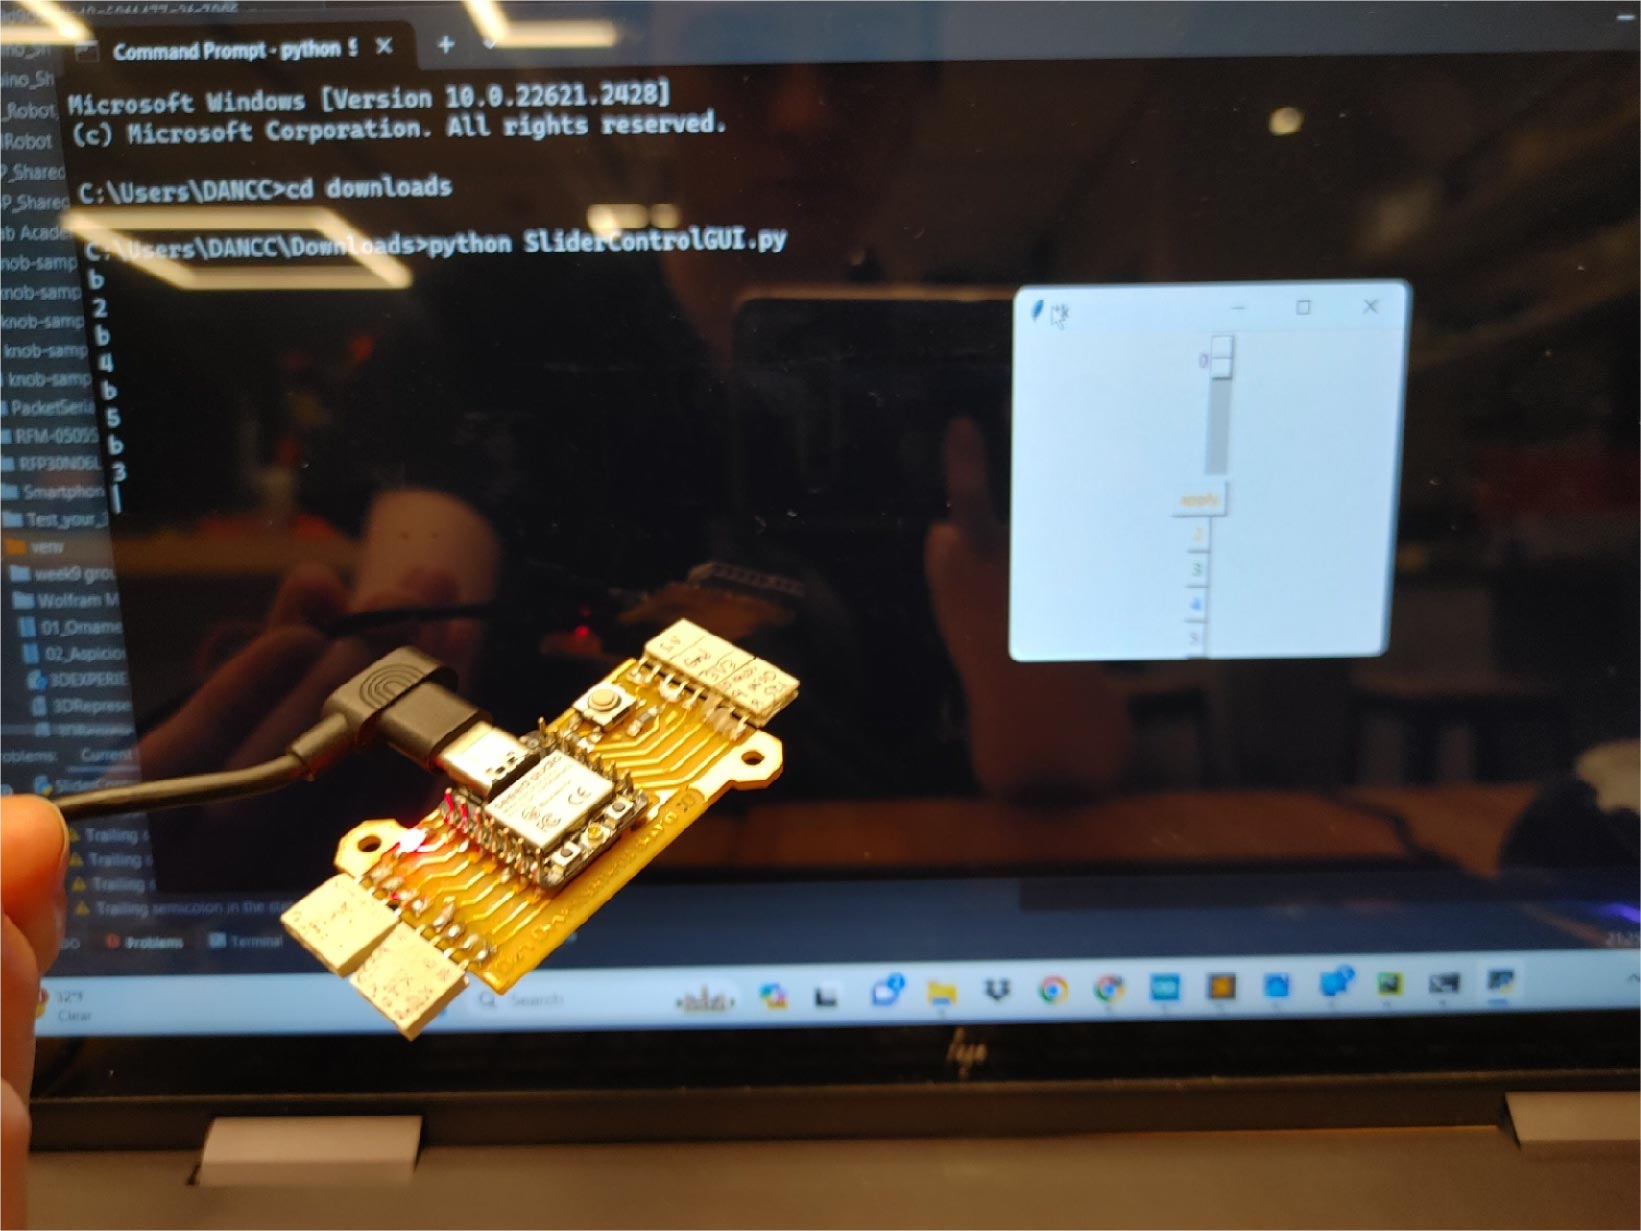
This week I programmed a GUI using Tkinter that can control multiple different functions on a microcontroller. I also worked in a group to set up a much simpler Tkinter GUI.The group documentation can be found here.
I used Pycharm as a development environment for the GUI, and I used command prompt to run the program. I wanted to use sliders to control different values on my microcontroller, so that I might be able to adjust the brightness of an LED or the speed of a motor in a fast and easy to manipulate way.
Tkinter
Tkinter commands documentation
I decided to go further into Tkinter even though it was part of the group work because I was interested in being able to control a microcontroller with my laptop, though I think it ended up failing to satisfy what I wanted to with it in the first place. Tkinter has a library full of easy to set up user interface options, which you can call up with only a few lines of code. The issue for me was that the connection to the board was very slow. If you want to use Tkinter to adjust things in real time, I would consider looking into ways to reduce the delay.
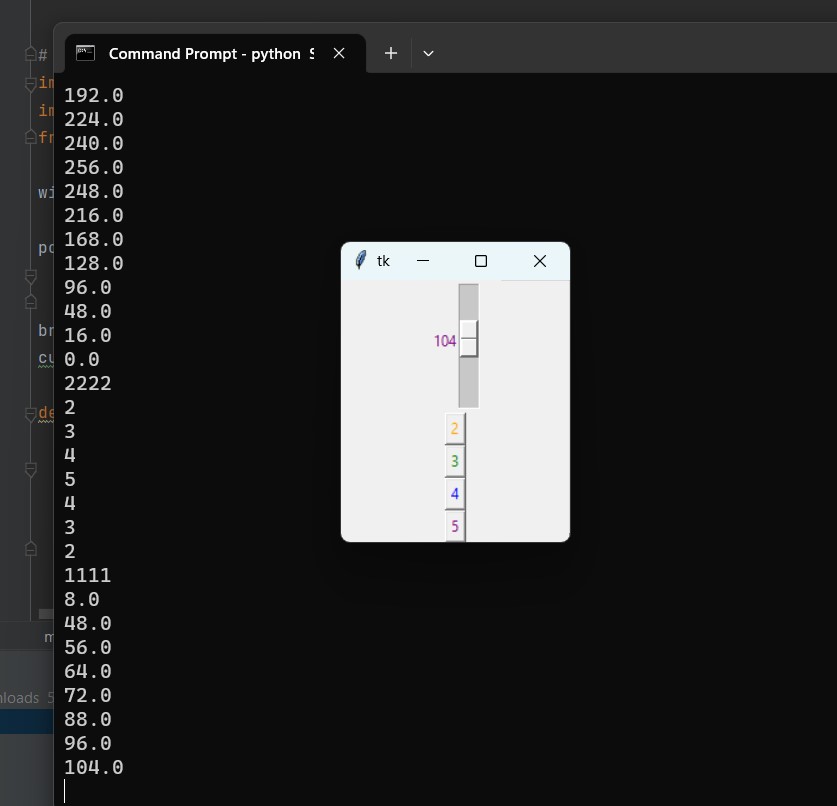
Here is a video showing the application communicating with my board:
Here is the Python code I used to create the GUI window:
[ Download ]
# Importing Libraries
import serial
import time
from tkinter import *

window = Tk()

port = 'COM7' # setting up the port - will be specific to your machine
ser = serial.Serial(port, baudrate=115200)
brightness = DoubleVar() # variable that the slider will use to keep track of value

def sendValue(value,code):
    ser.write(code.encode()) # sends the code to tell the microcontroller what to do with the value, encode is so it can be read by microcontroller
    print(code) # prints to console, for debugging purposes
    time.sleep(1) # delay because microcontroller wasn't receiving all the messages, and I thought this might help, not sure it does
    ser.write(value.encode())  # writes the inputted value to the Serial Monitor
    print(value) # printing the value in the Terminal

def sendSlides():  # user selects send or adjusts slider
    value = str(brightness.get());
    sendValue(value,'a')

def sendTwo():  # user selects 2
    value = '2';
    sendValue(value,'b')

def sendThree():    # user selects 3
    value = '3';
    sendValue(value,'b')

def sendFour(): # user selects 4
    value = '4';
    sendValue(value,'b')

def sendFive(): # user selects 5
    value = '5';
    sendValue(value,'b')

def main():

    # create and pack the buttons for the window
    # packing the buttons makes them appear and fit in the window
    lightSlider = Scale(window, fg='purple', command=sendSlides, from_=0, to=255, resolution=8, variable=brightness)
    lightSlider.pack()
    setBtn = Button(window, text="apply", fg='orange', command=sendSlides)
    setBtn.pack()
    twoBtn = Button(window, text="2", fg='orange', command=sendTwo)
    twoBtn.pack()
    threeBtn = Button(window, text="3", fg='green', command=sendThree)
    threeBtn.pack()
    fourBtn = Button(window, text="4", fg='blue', command=sendFour)
    fourBtn.pack()
    fiveBtn = Button(window, text="5", fg='purple', command=sendFive)
    fiveBtn.pack()

    window.mainloop()

main()
The Python code connects to the board using serial communication, and sends signals to the board whenever the UI elements are interacted with.
The Arduino code listens to the messages from the serial monitor. It uses switch statements to differentiate between the different codes and then perform the associated functions. Here is the arduino code:
[ Download ]
String msg;
int value;  // initializing the variable to store what was sent by the Serial Monitor
int brightness = 150;
char code = 'a';
int LED = 2;

void setup() {
  Serial.begin(115200);  // make sure baud rates match between Arduino and Python code
  pinMode(LED, OUTPUT);  // set the built-in LED (connected to pin 2) as an output
  analogWrite(LED, brightness);
}

void loop() {
  while (!Serial.available());
  msg = Serial.readString(); // reads the serial monitor as a string
  Serial.println(msg);
  switch(msg[0]){
    case 'a':
      code = 'a';
      Serial.print("code changed: ");
      Serial.println(code);
      break;
    case 'b':
      code = 'b';
      Serial.print("code changed: ");
      Serial.println(code);
      break;
    default:
      value = msg.toInt();
      switch(code){
        case 'a':
          brightness = value;
          analogWrite(LED, brightness);
          Serial.println("brightness changed");
          break;
        case 'b':
          Serial.print(value);
          Serial.println(" blinks");
          for (int i = 0; i < value; i++){ // will go through this loop as many times as specified by the value that was sent
            Serial.println(i+1);
            analogWrite(LED, 0); // turn built-in led off
            delay(200);  // off for half a second
            analogWrite(LED, brightness); // turn built-in led on
            delay(250);  // on for half a second
          }
      }
  }
}