Fusion 360
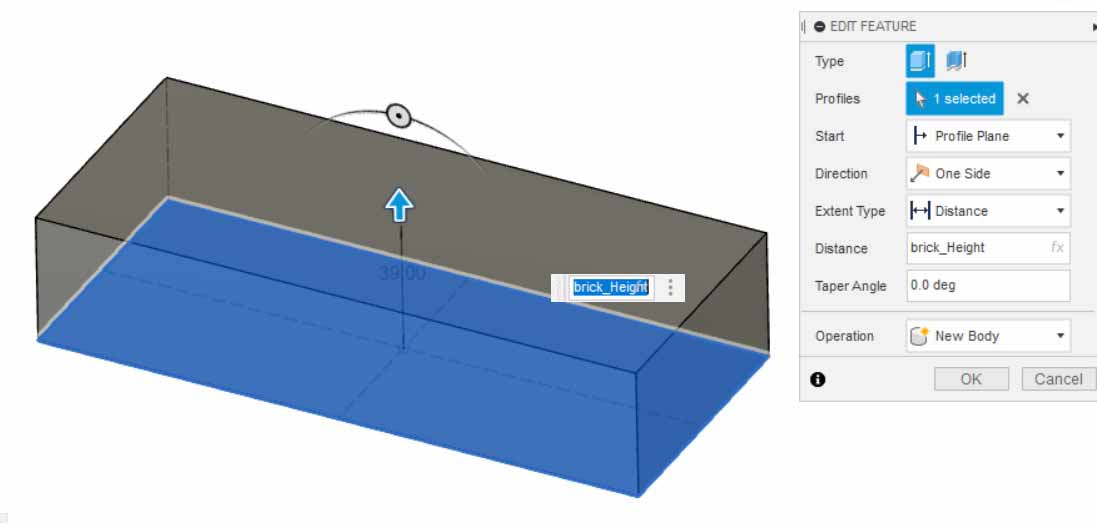
To start off, I measured the dimensions of the wax block, and created a rectangular prism in Fusion with the same dimensions. I used parameters to keep track of the dimensions of the block, as well as many other aspects of the design.
This week I created several molds using a cnc milling machine and a 3d printer. I also worked in a group to create a couple of silicone molds, and discussed material safety and procedures. The group documentation can be found here.
I designed a mold in Fusion 360 that could be milled out with a 3-axis router. I ended up making a couple of mold cavities for two separate objects.
To start off, I measured the dimensions of the wax block, and created a rectangular prism in Fusion with the same dimensions. I used parameters to keep track of the dimensions of the block, as well as many other aspects of the design.
I wanted to try to create a mold for an airless tire. I created a sketch on the face of the prism, and used circular patterns to copy aspects of the design around the wheel. I designed it to be cast in two separate halves, and attached together afterwards with a 90 degree offset. The offset would make the wheel roll smoothly on flat surfaces despite the treads.
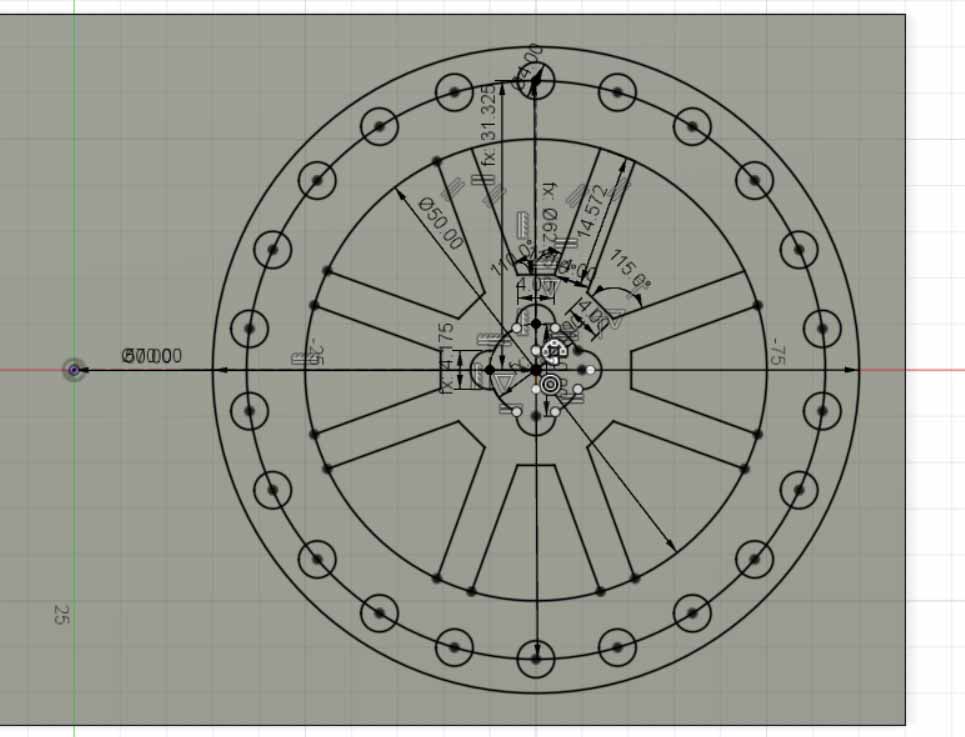
I extruded the sketch a couple of times to make a hole with the wheel geometry going most of the way up to the surface.

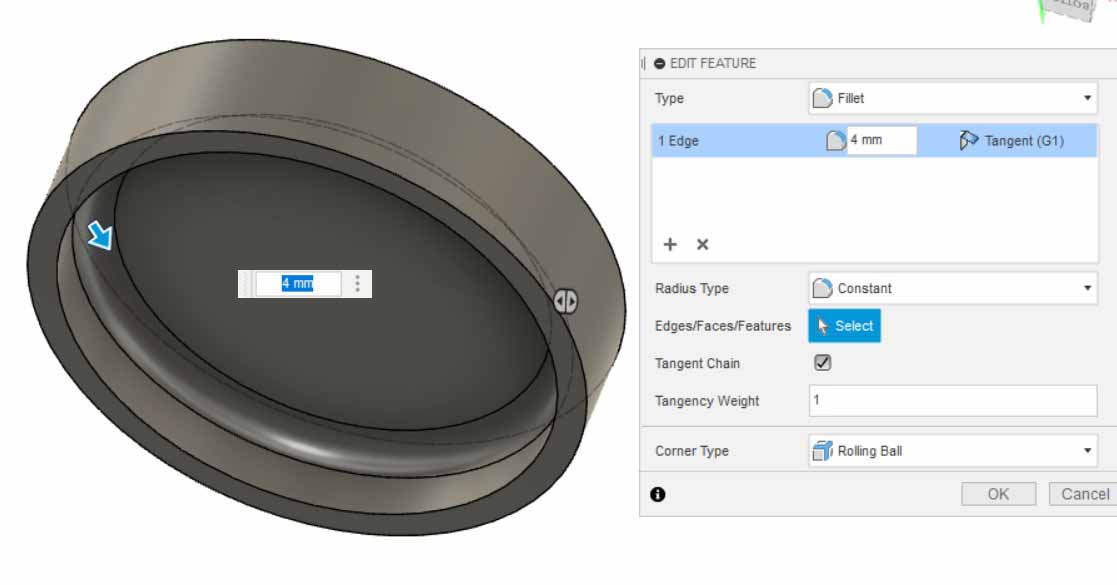
Next, I created a separate object with a rounded inner corner. I subtracted this from the wheel to round the edge of the wheel. Fusion 360 sometimes has difficulty when the filet operation affects unrelated edges.

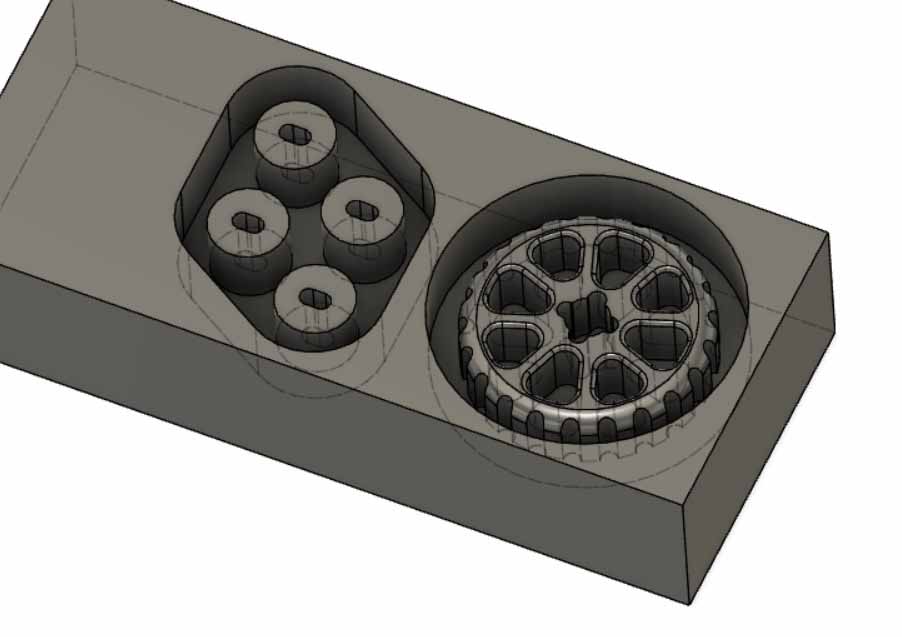
Once I was done with the wheel, I realized that I could cast wheels for my final project. I made a sketch with four copies of the same wheel and extruded it.

I realized after finishing this that my lab didn’t have a ⅛ in. endmill. I expanded the gaps around the wheels to make it possible for the bit to get around. This ended up being ineffective, because the roughing toolpath generation algorithm didn’t mill around the edge anyway.
Vcarve file: [ Download ]
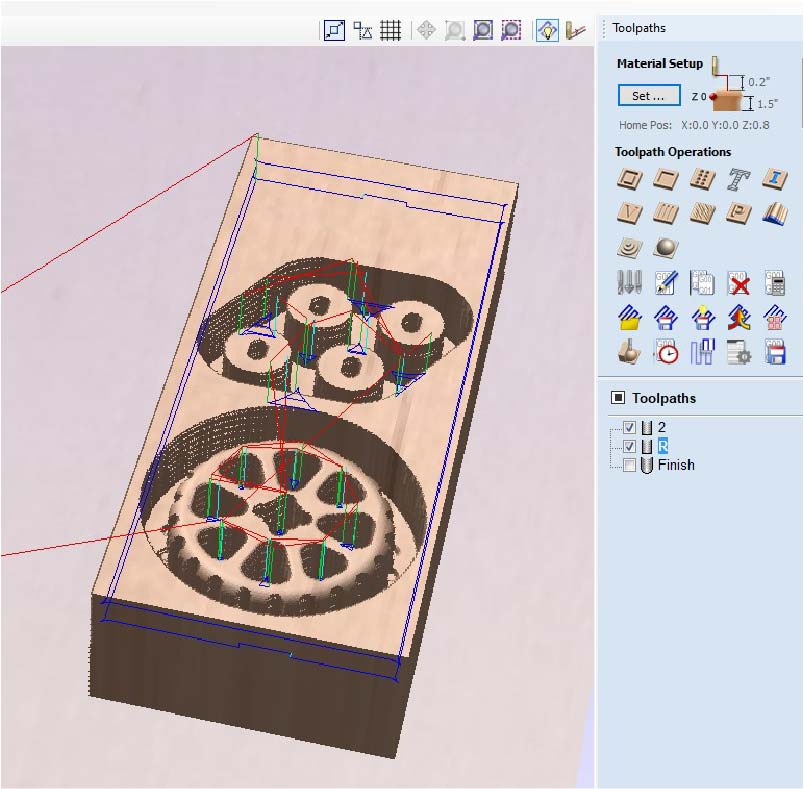
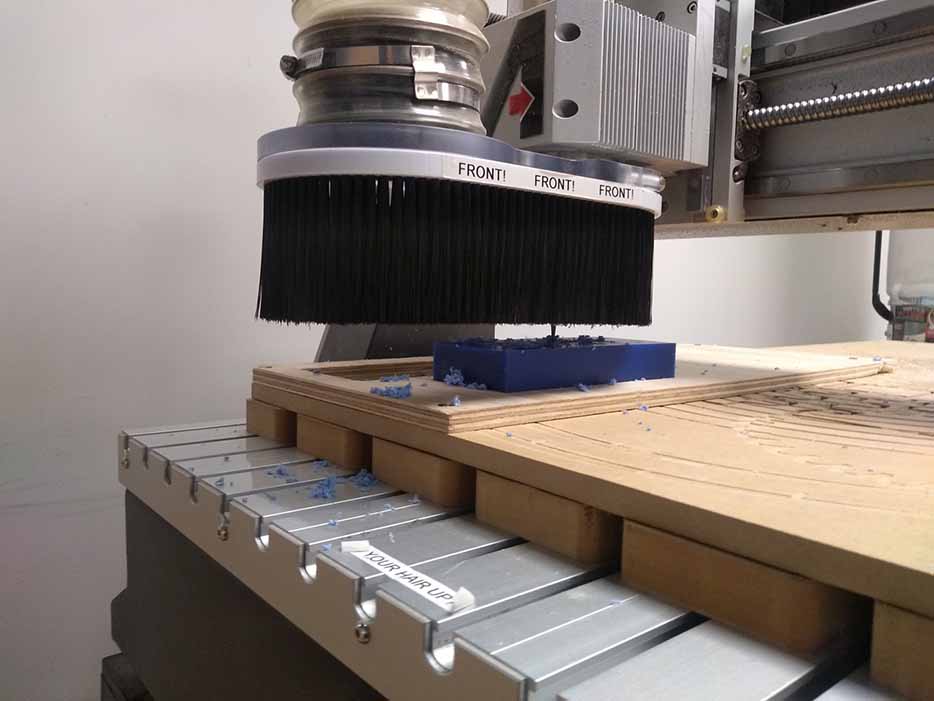
To hold the block in place, Brandon created a toolpath to mill out a hole in a piece of plywood. I then imported the stl file from Fusion, and positioned it over the profile used to make the hole in the board. This ensured that the 3d geometry would be perfectly lined up with the location of the wax block. I set the material thickness and z-0 position, and then created the toolpaths, with help from Brandon and a guide that he created. For the 3D roughing toolpath, I selected the ¼ in. end mill, and for the 3D smoothing toolpath, I selected an ⅛ in ball nose. I used the edge of the model as the bounds for the 3D toolpaths.
Here are the settings used for creating the wooden jig.
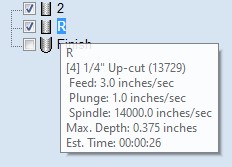
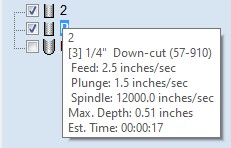
Here are the settings used for the 3D roughing toolpath.
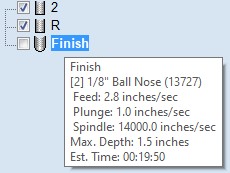
Here are the settings used for the 3D finishing toolpath.
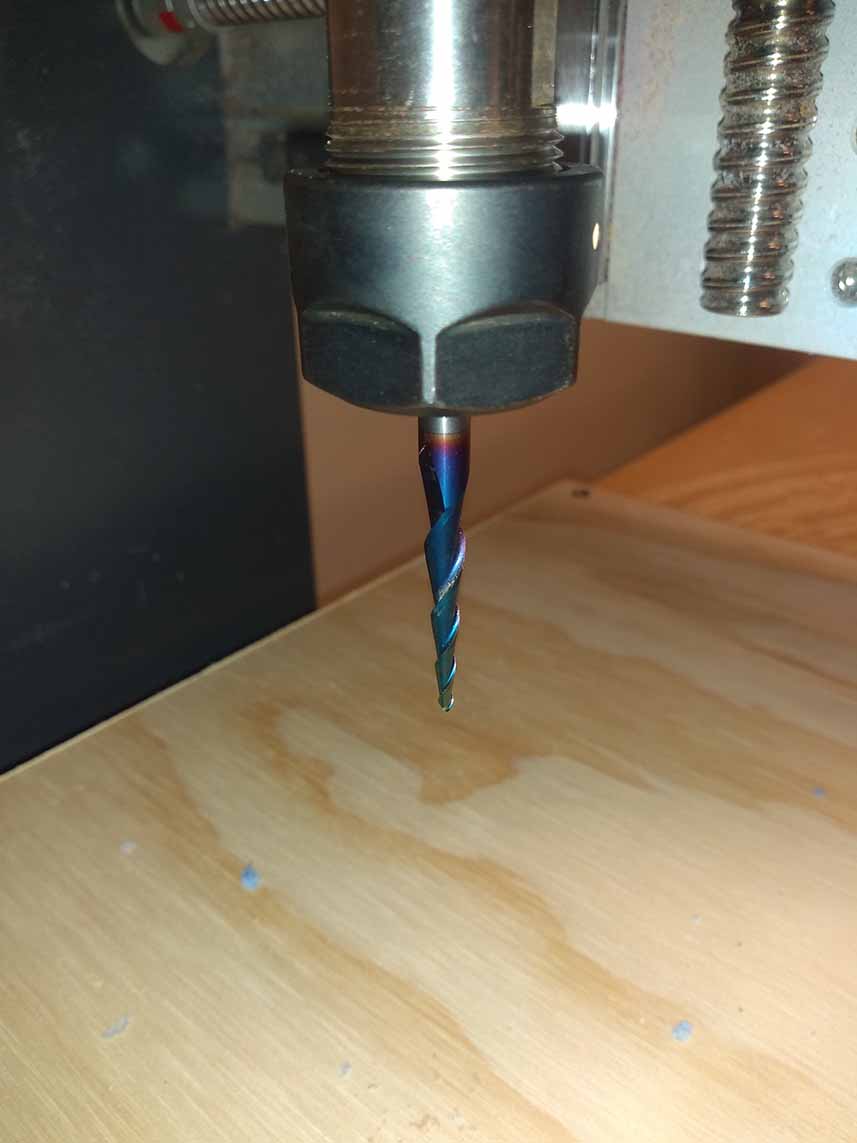
To set up the router, I ran the command to zero the x and y axis, and then used a metal conduction puck to zero the z-axis. I then switched the bit out for an upcut end mill. Brandon used a USB to transfer the files over, and I started the cut.

The rough cut didn’t do as much as I had hoped it might. In retrospect I would have made some sense to do a smoothing layer with the ¼ in. end mill before moving to the ⅛ in, because the taper of the ball nose bit was problematic.

I switched out for the ⅛ in. tapered ball nose bit, and zeroed the z-axis again. The smoothing tool path took around 20 min to complete.
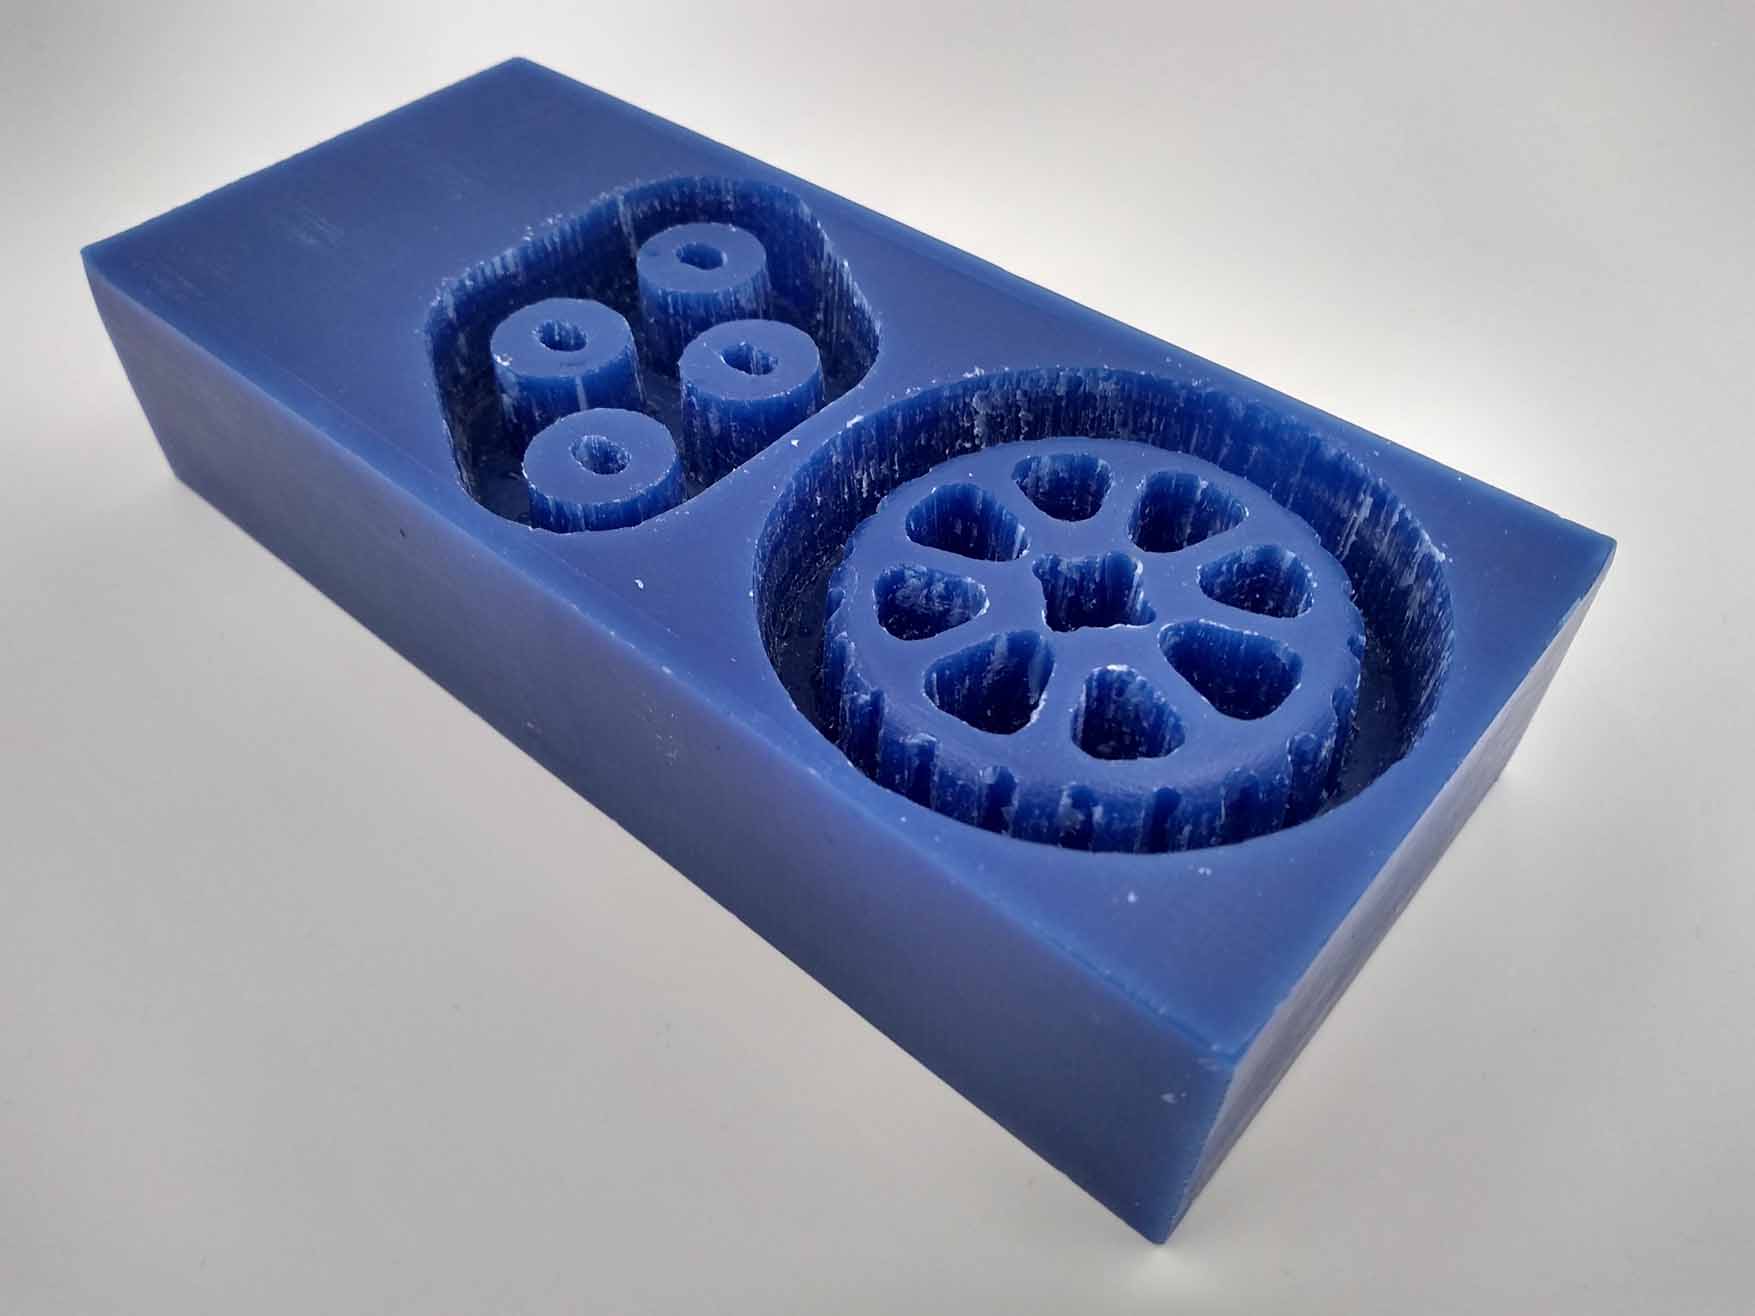
With the milling done I used a chisel, a file, and an X-acto blade to clean out the wax chips that were stuck in the groves of the mold. I also used sandpaper to try to smooth it down, but the end result was still pretty rough.
Our lab had three different options for casting material. Below is a summary of their properties and safety considerations:
| Material | Purpose | Mixing Ratio | Pot Life | Cure Time | OSHA Hazard Classification | Protective Equipment |
|---|---|---|---|---|---|---|
| Smooth-On Mold Star™ 16 FAST | Making flexible silicone molds | 1:1 | 6 min | 30 min | Not hazardous | Gloves, goggles |
| Smooth-On Smooth Cast 305 | Hard urethane casting | 1:1 by vol | 7 min | 30 min | Skin irritant, allergen, eye irritant, harmful if inhaled, respiratory irritant, possible carcinogen, damage to olfactory organs | Gloves, goggles, good ventilation |
| Smooth-On Flex-Foam It 6 | Urethane foam rubber casting (10:1 expansion) | 1:1 by vol | 35 sec | 2 hours | Skin irritant, allergen, eye irritant, harmful if inhaled, respiratory irritant, possible carcinogen, damage to olfactory organs | Gloves, goggles, good ventilation |
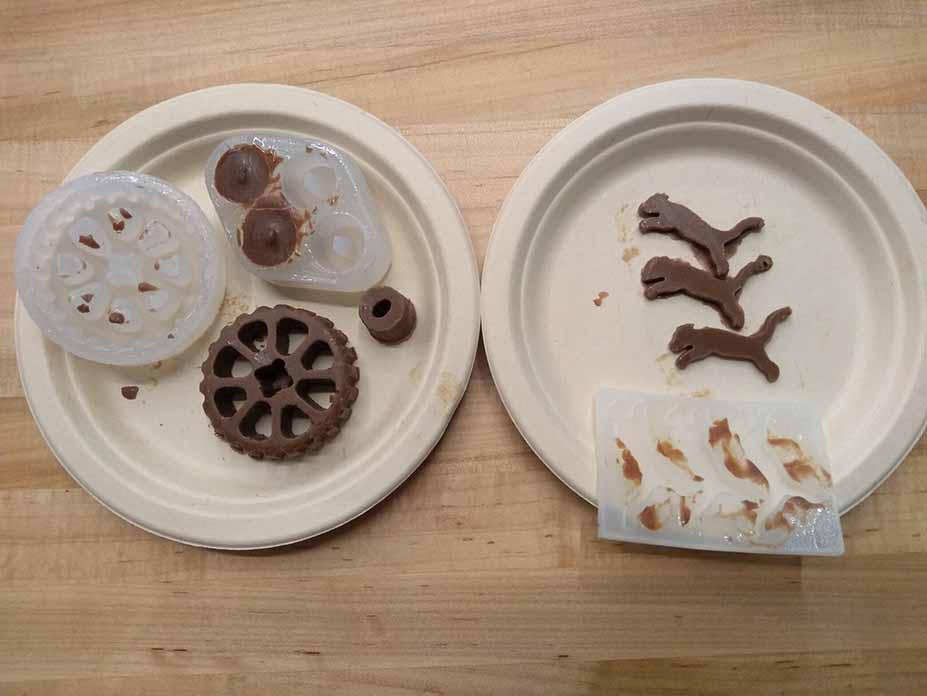
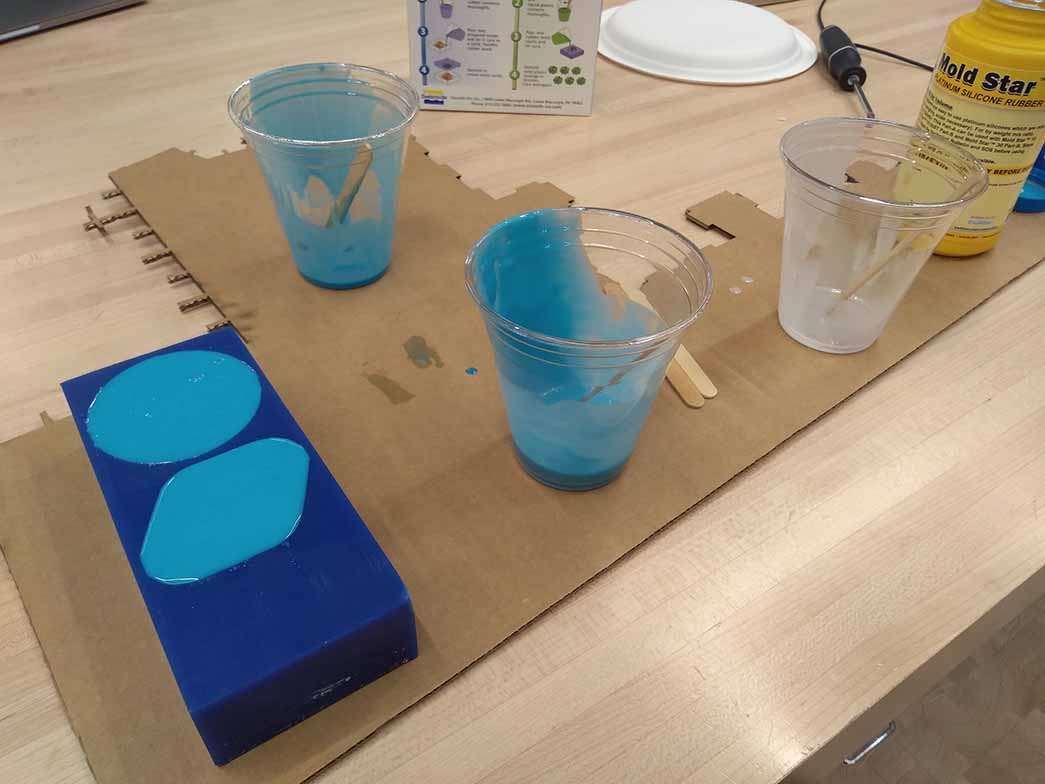
I used the Mold Star 16 to cast the mold. It had a 1:1 volume ratio, so I poured an equal volume into two cups, then poured each into the third cup and mixed thoroughly. I ended up with more than enough, so I filled the mold to the brim.
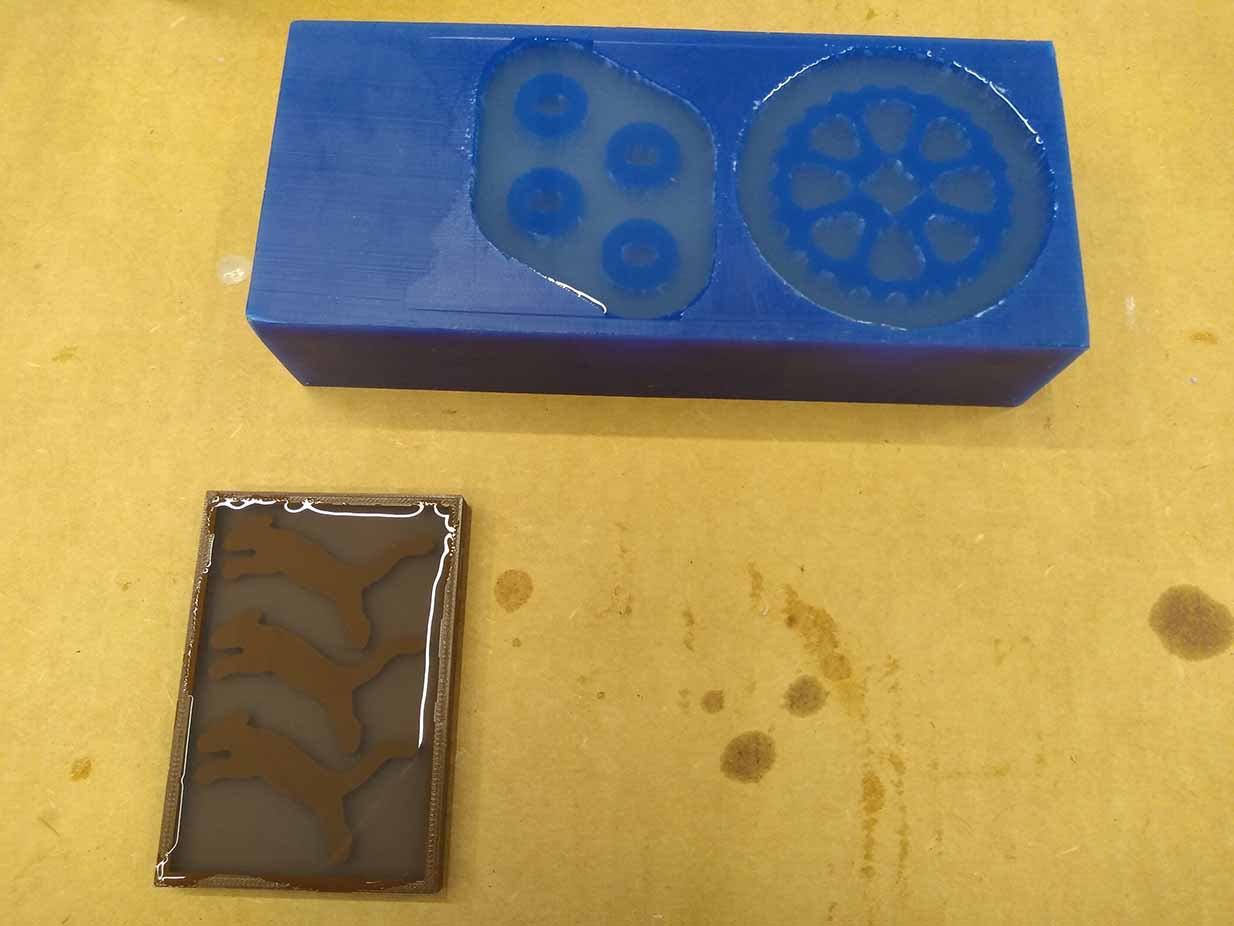
I wanted to try to cast the wheel in silicone, so I looked up methods for casing silicone in a silicone mold. The options I found included some products you could buy, or mixing rubbing alcohol with dish soap as a release agent to coat the inside of the mold. I went with the alcohol and soap option. My friend had some extra silicone that had just been mixed, and it was going to go to waste. I rushed the soap application and poured the silicone into the mold, though it ended up being lumpy because it was already starting to set. When it had fully cured I found that the soap trick didn’t work, and it had all fused into one block of silicone. I used an X-acto blade to try to cut the cast out, and found that it was weaker at the seam between the mold and the cast, but still unsalvageable.

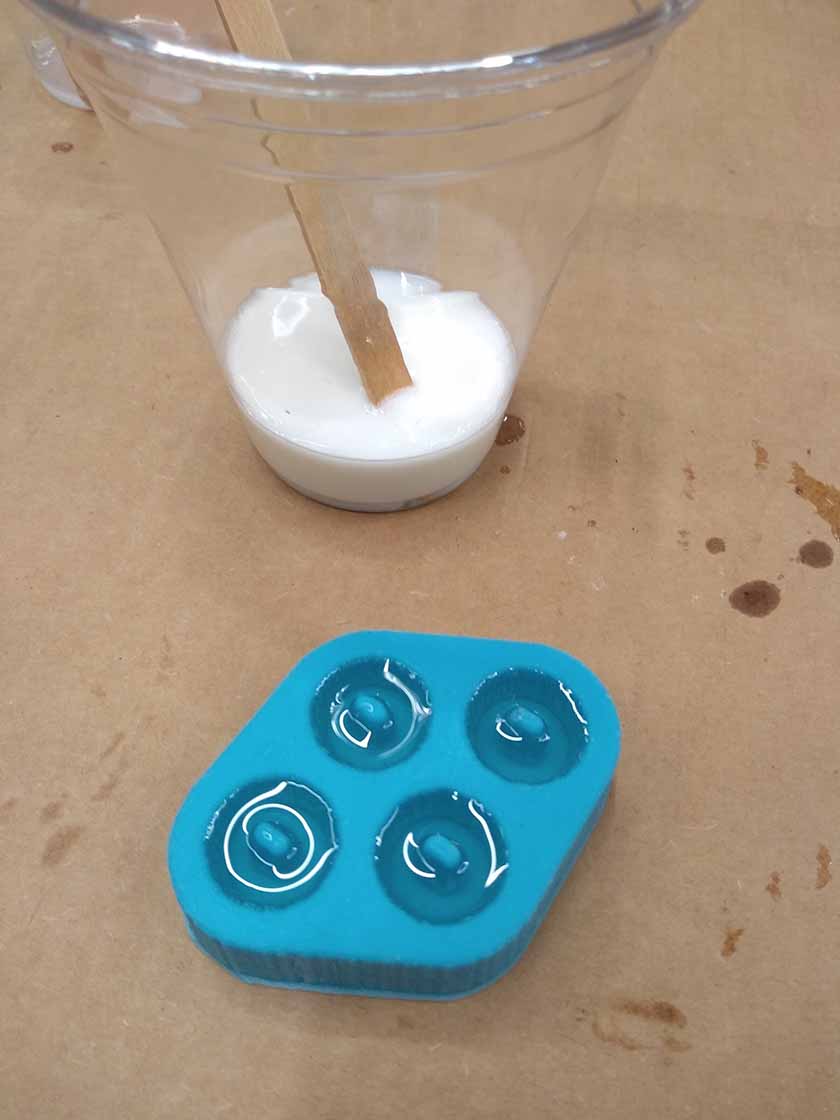
Next I cast the small wheels in hard plastic. This went well, though the shape of the wheels was such that they wouldn’t be usable anyway. I found that the solution in the cap where I had stirred it up cured much faster than the solution in the mold. It took around 5 min for the cup to harden, and at least 20 min for the wheels to harden. It took a long time for the solution to solidify in my friend’s cup when they had mixed some up earlier. The reaction seemed centralized around the wooden stirring stick, so my theory is that the rough texture of the stirring stick acted as a catalyst for the reaction.
I wanted to make some chocolate molds, so I went back into fusion and created a simple mold using a Phuma svg that I’ve used before in other projects. The modeling involved a rectangular pattern to copy the svg, and a few extrusions. It was a two hour print on default settings. (10% infill)


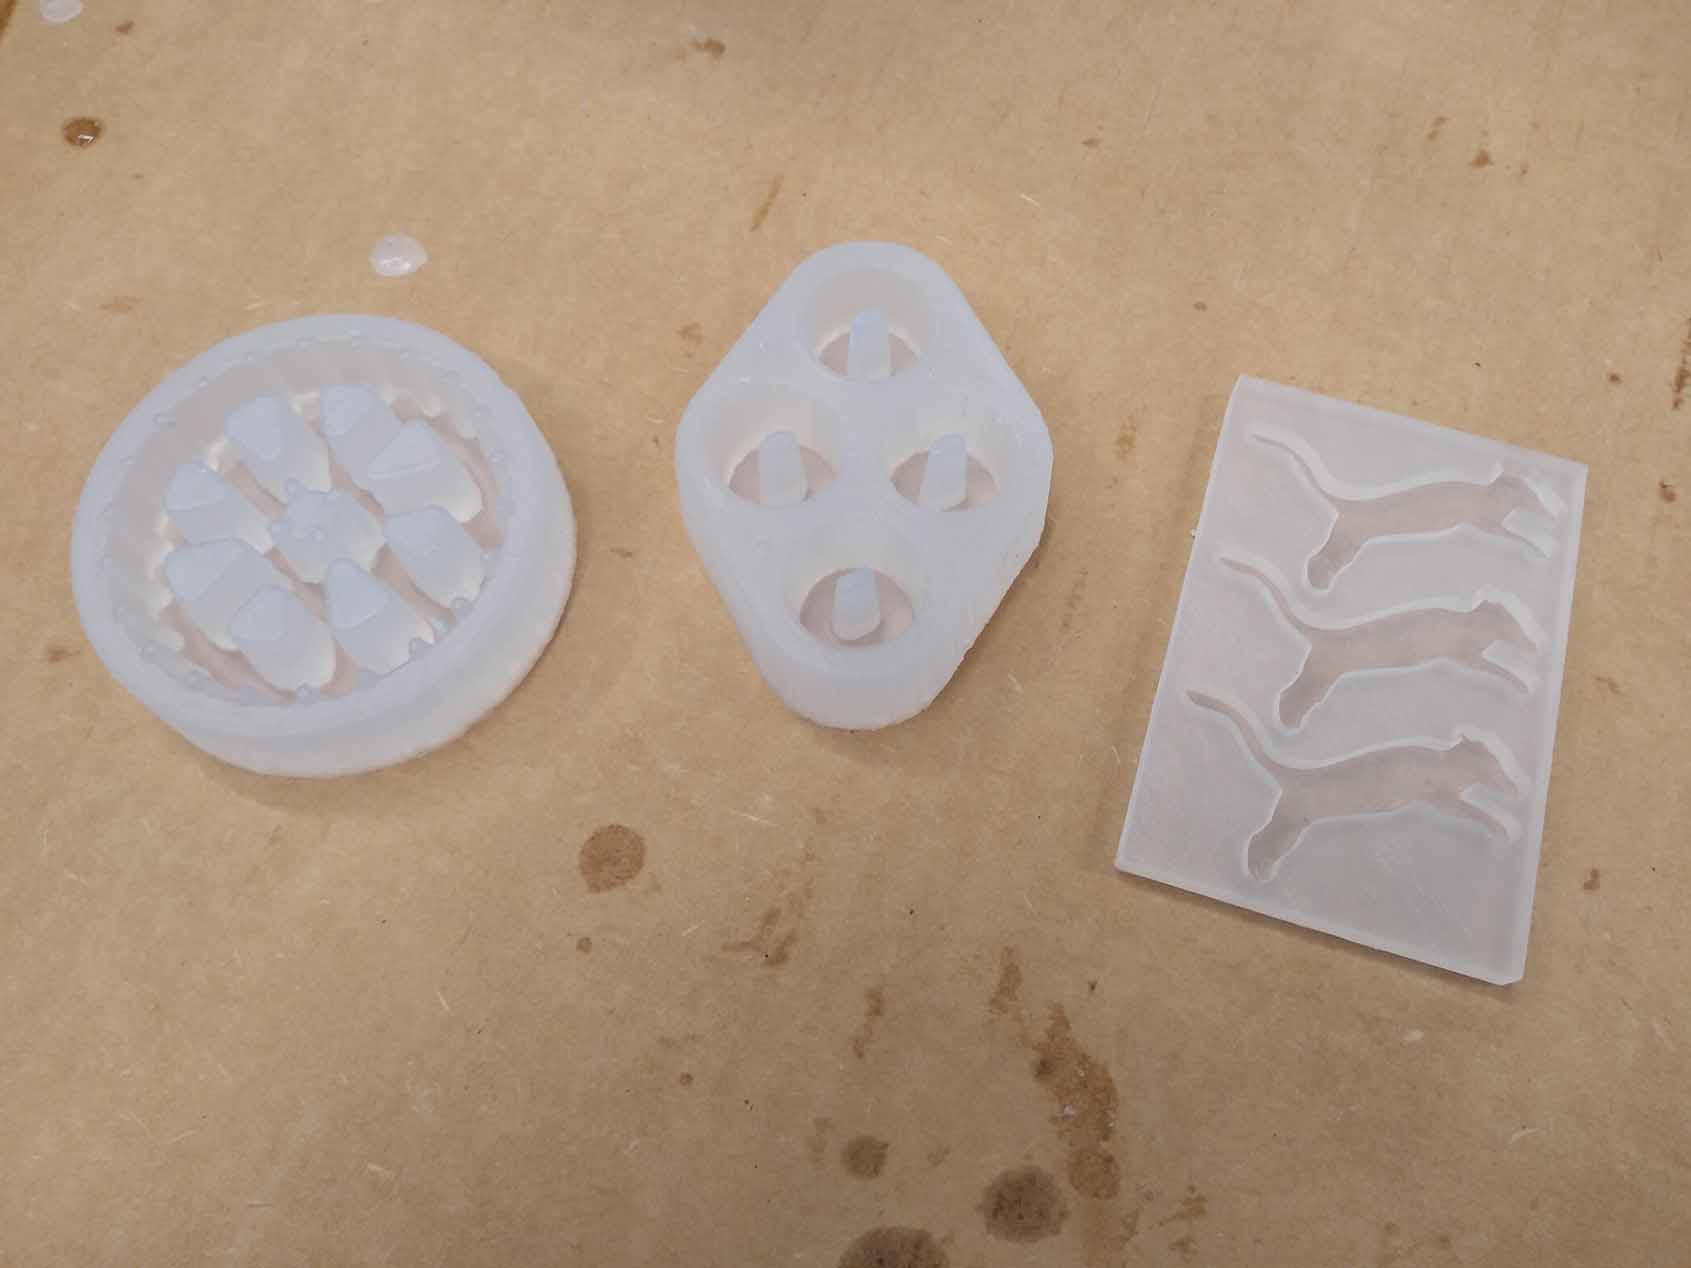
With the print finished, I worked with a friend to mix up some food safe silicone, and we each used a bit of it for our separate molds. After 5 hours, I removed the silicone from the mold, and found that it all worked out fine. We used Unicone platinum silicone rubber. The safety data sheet can be found here. It shows that the silicone is food safe once fully cured.
I cast a type of easily meltable chocolate in the molds and left them in a fridge for over an hour. It was a messy pour, but it came out ok. I used cooking oil spray as a mold release, which worked fine, though a lighter application would have been better, as the chocolate ended up being a bit oily after coming out of the mold.