Week 15. Wildcard week
I chose to use the embroidery machine to embroider a hat designed by students at our organization.
Individual Assignment
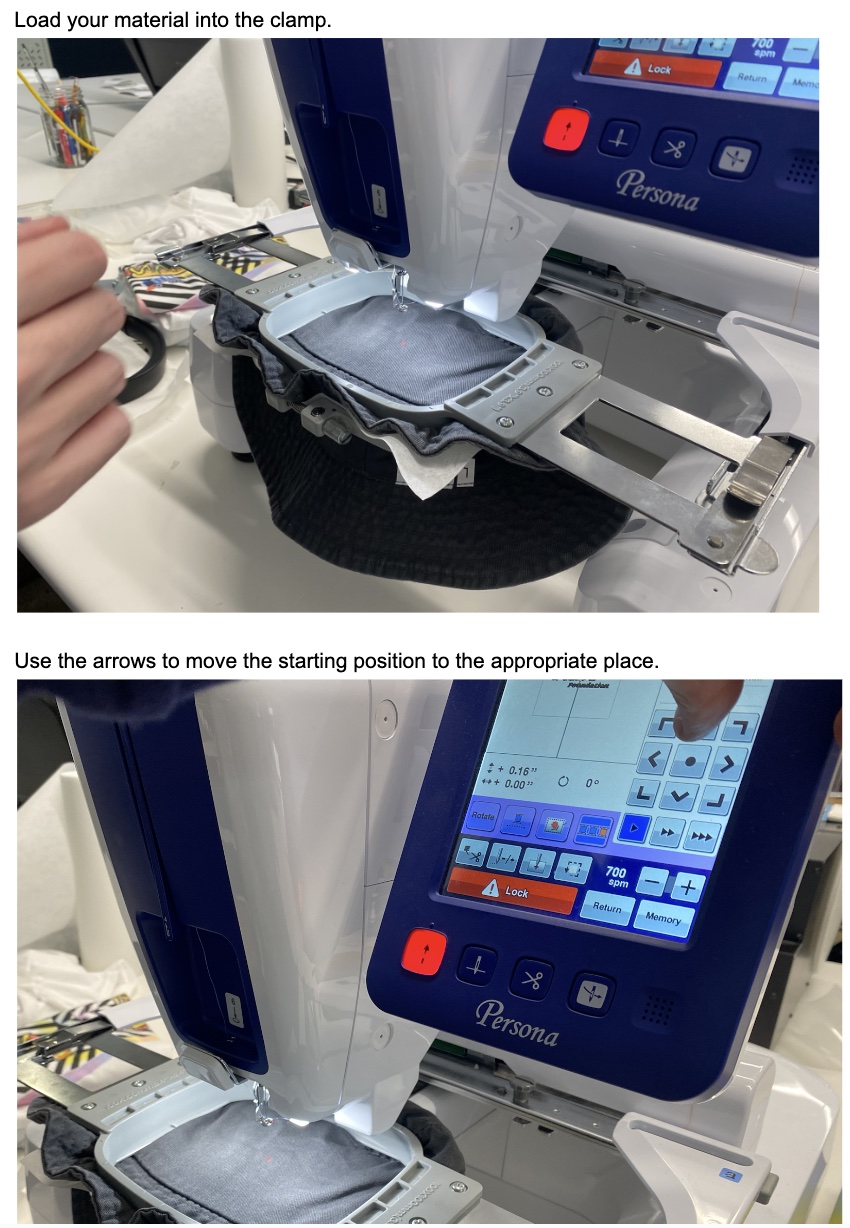
Wait for it to render the stitch-plan, and ensure that everything looks as it should.
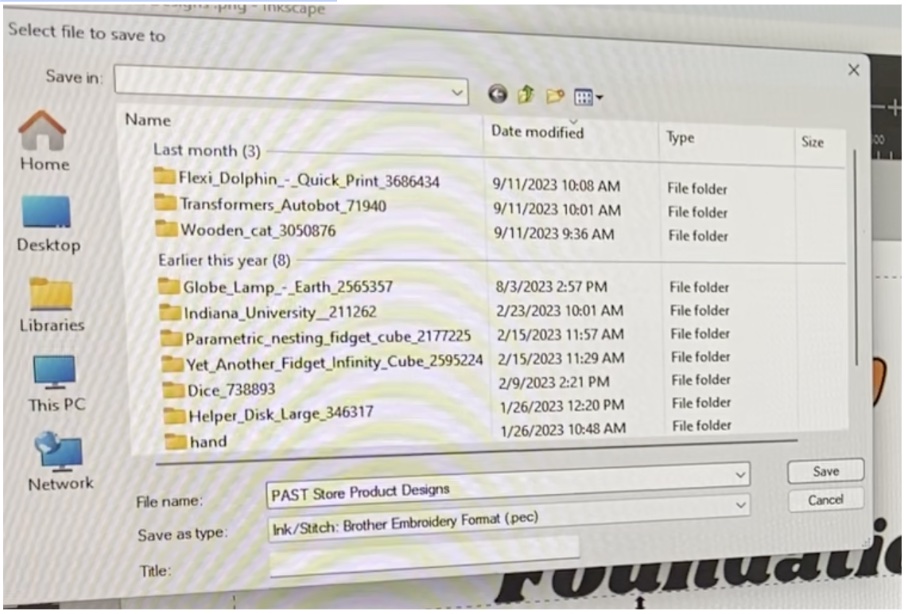
Save the file as a .pec file on a USB.
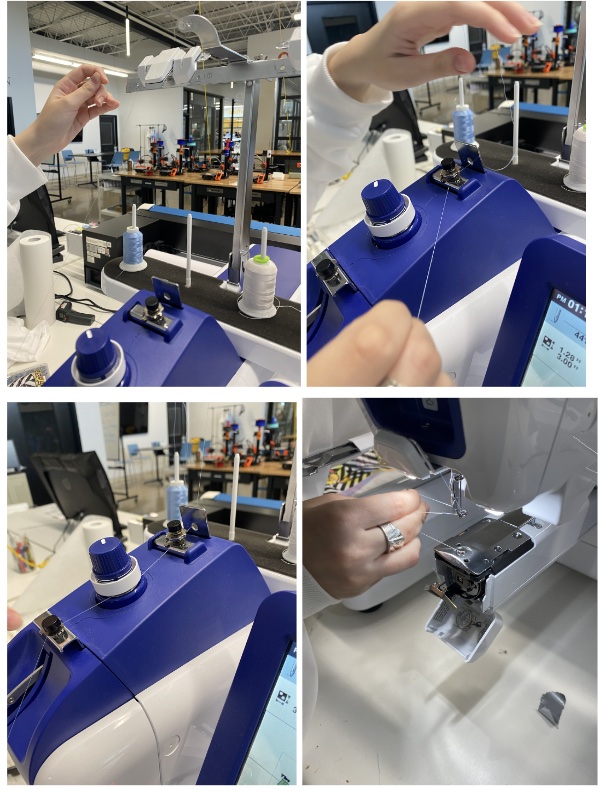
Now, time to prepare the machine. Since this is a single-needle machine, you will need to thread and embroidery each color one at a time. Starting with the blue "A" for this hat.
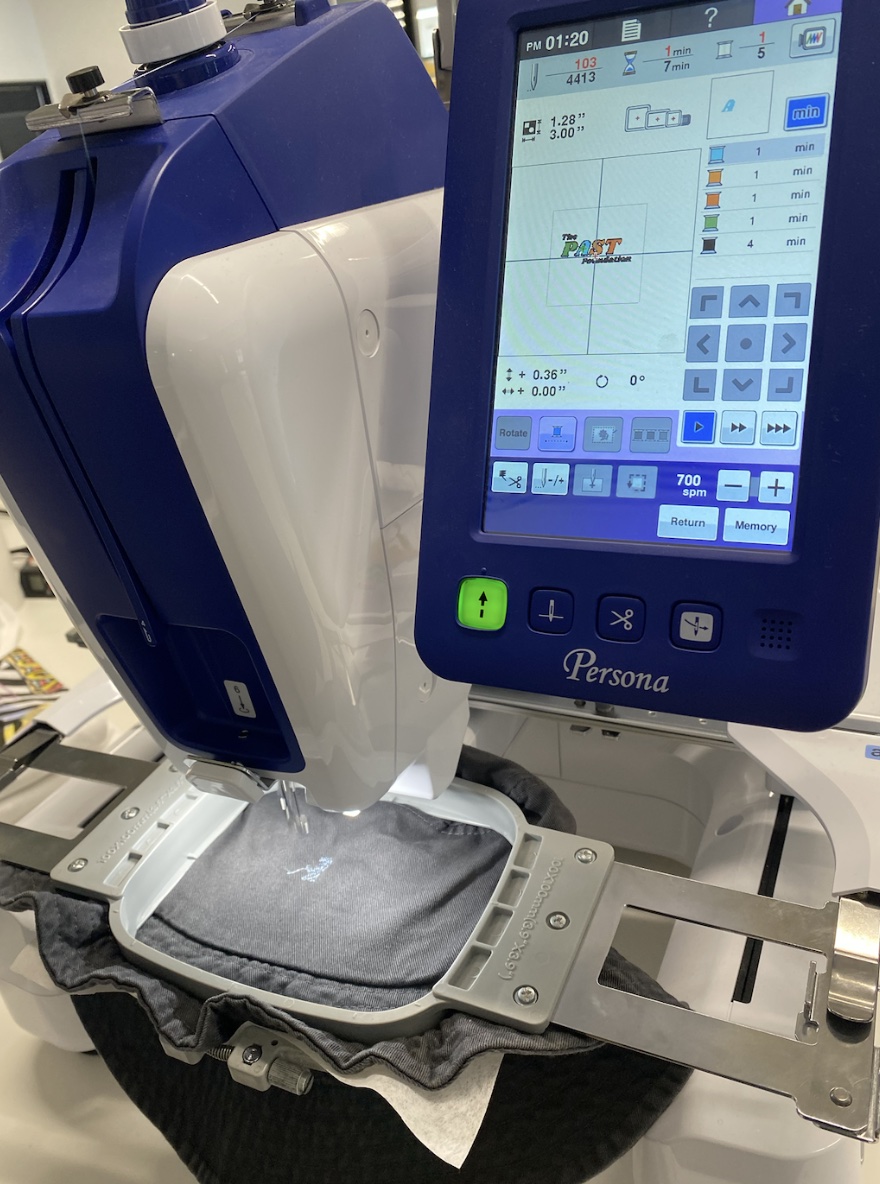
When ready, press the green button to start the process.
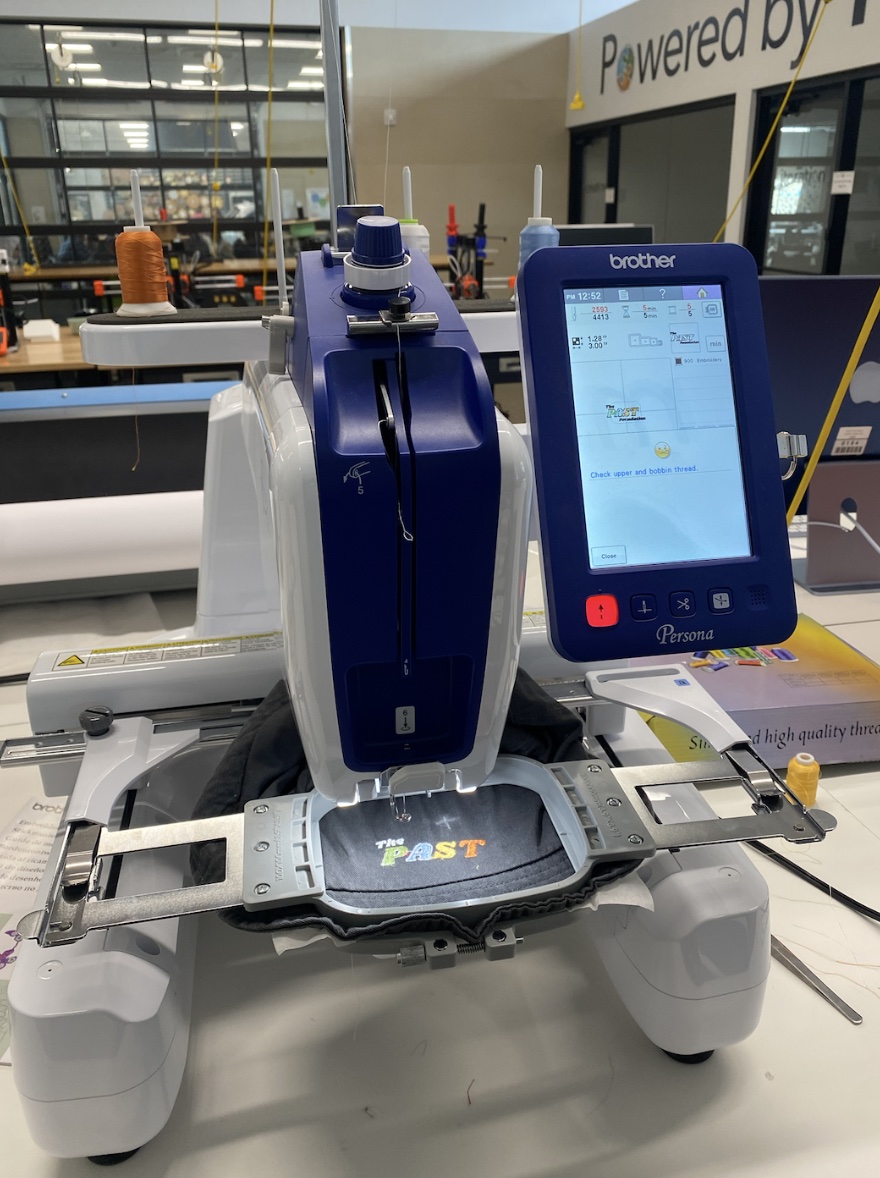
At this point, the thread broke halfway through a layer so we had to repeat one of the layers. The extra layer of white in one area is barely visible.
Here is a video of that part of the process:
Here is the final product:

Files
Here is the .pec File of the design: