Week 5. 3D Scanning and printing
This week I worked on several projects using CAD, 3D Scanning & Additive Manufacturing.
This week we optimized the settings for our 3D printers.
Group Assignment
Test the design rules for your 3D printers. Document your work on the group work page and reflect on your individual page what you learned about characteristics of your printer(s)
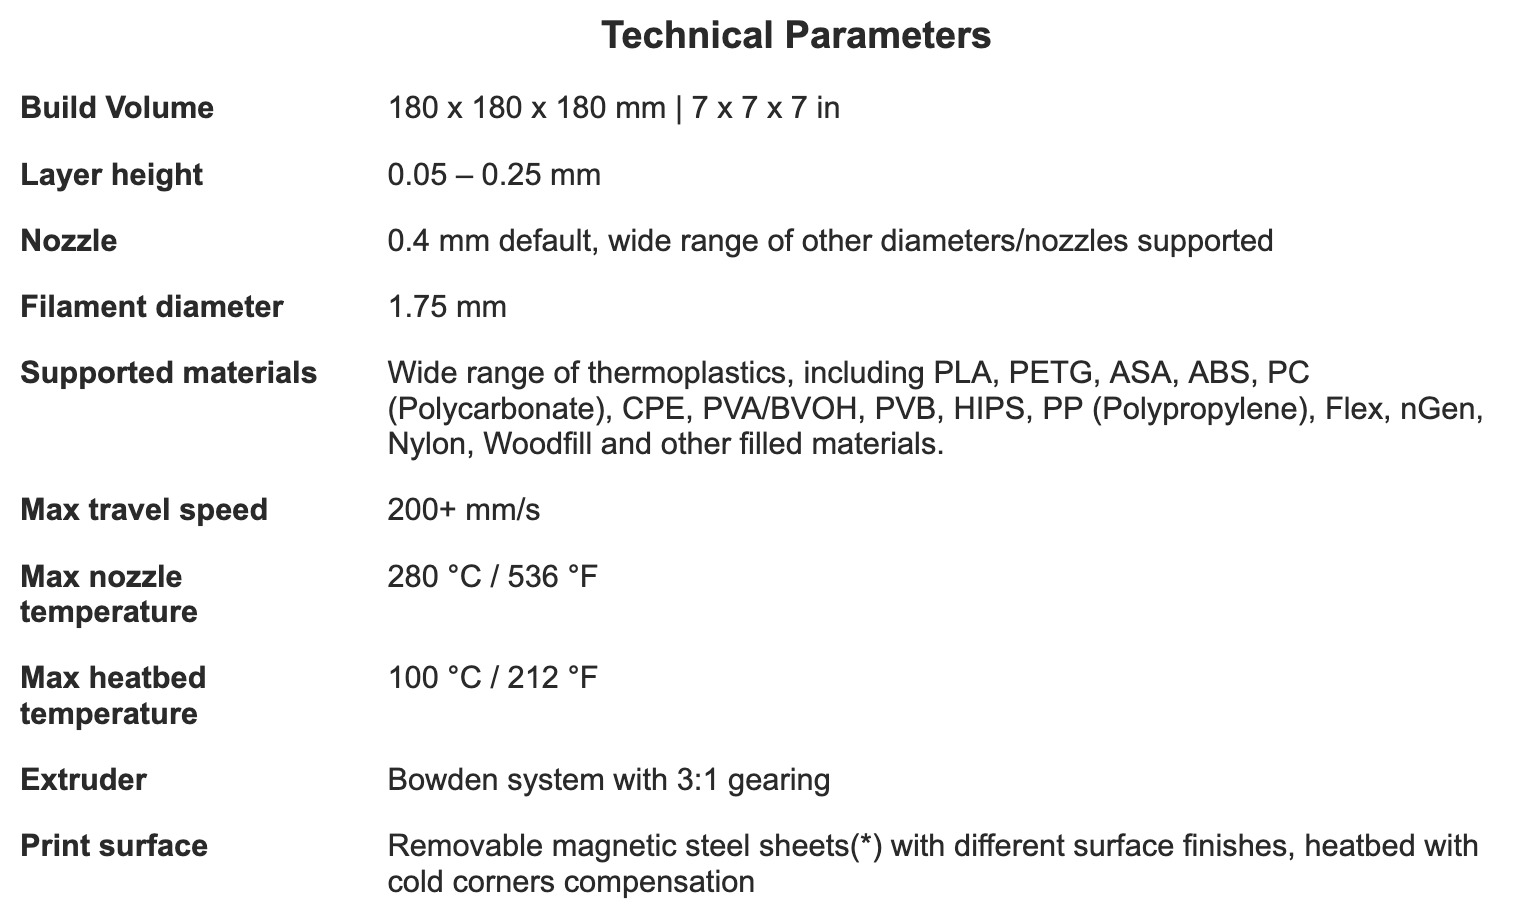
Prusa Mini Design Parameters
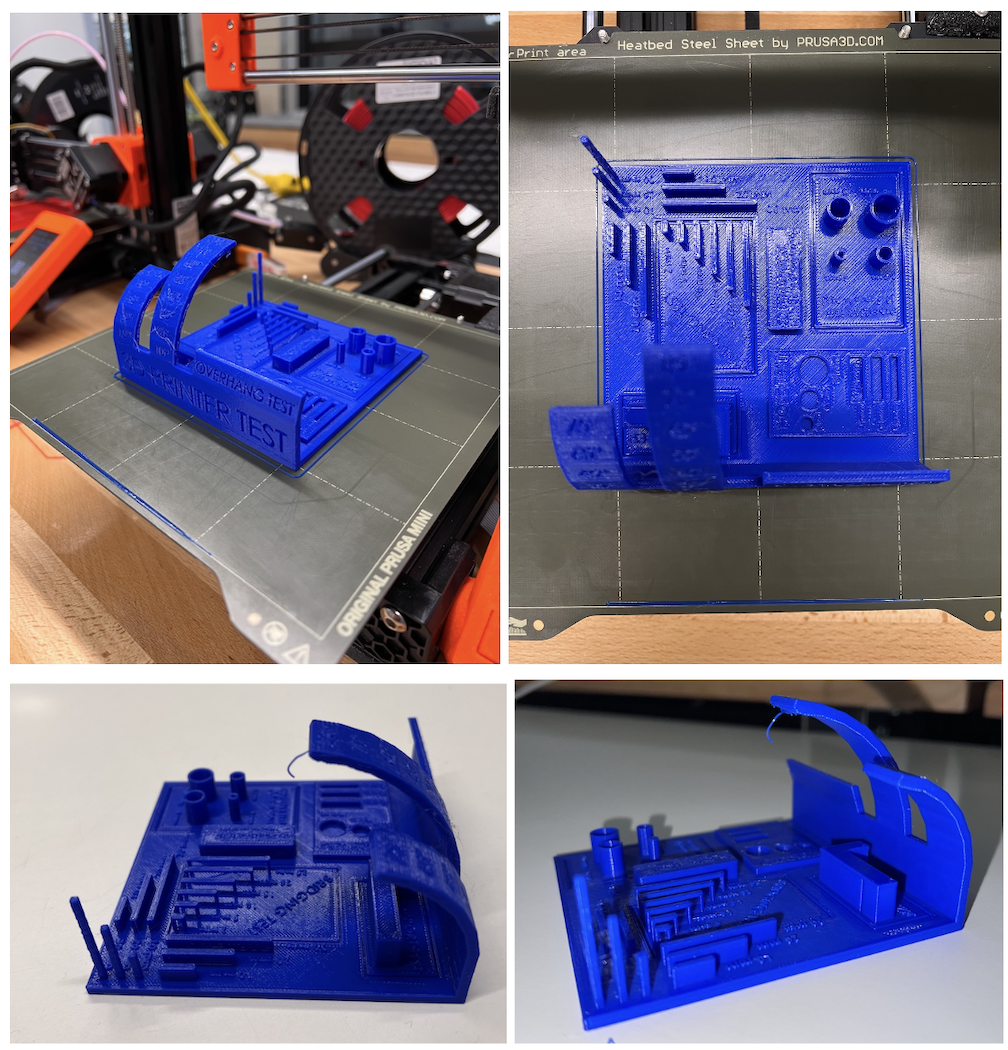
Test Print
You need these programs:
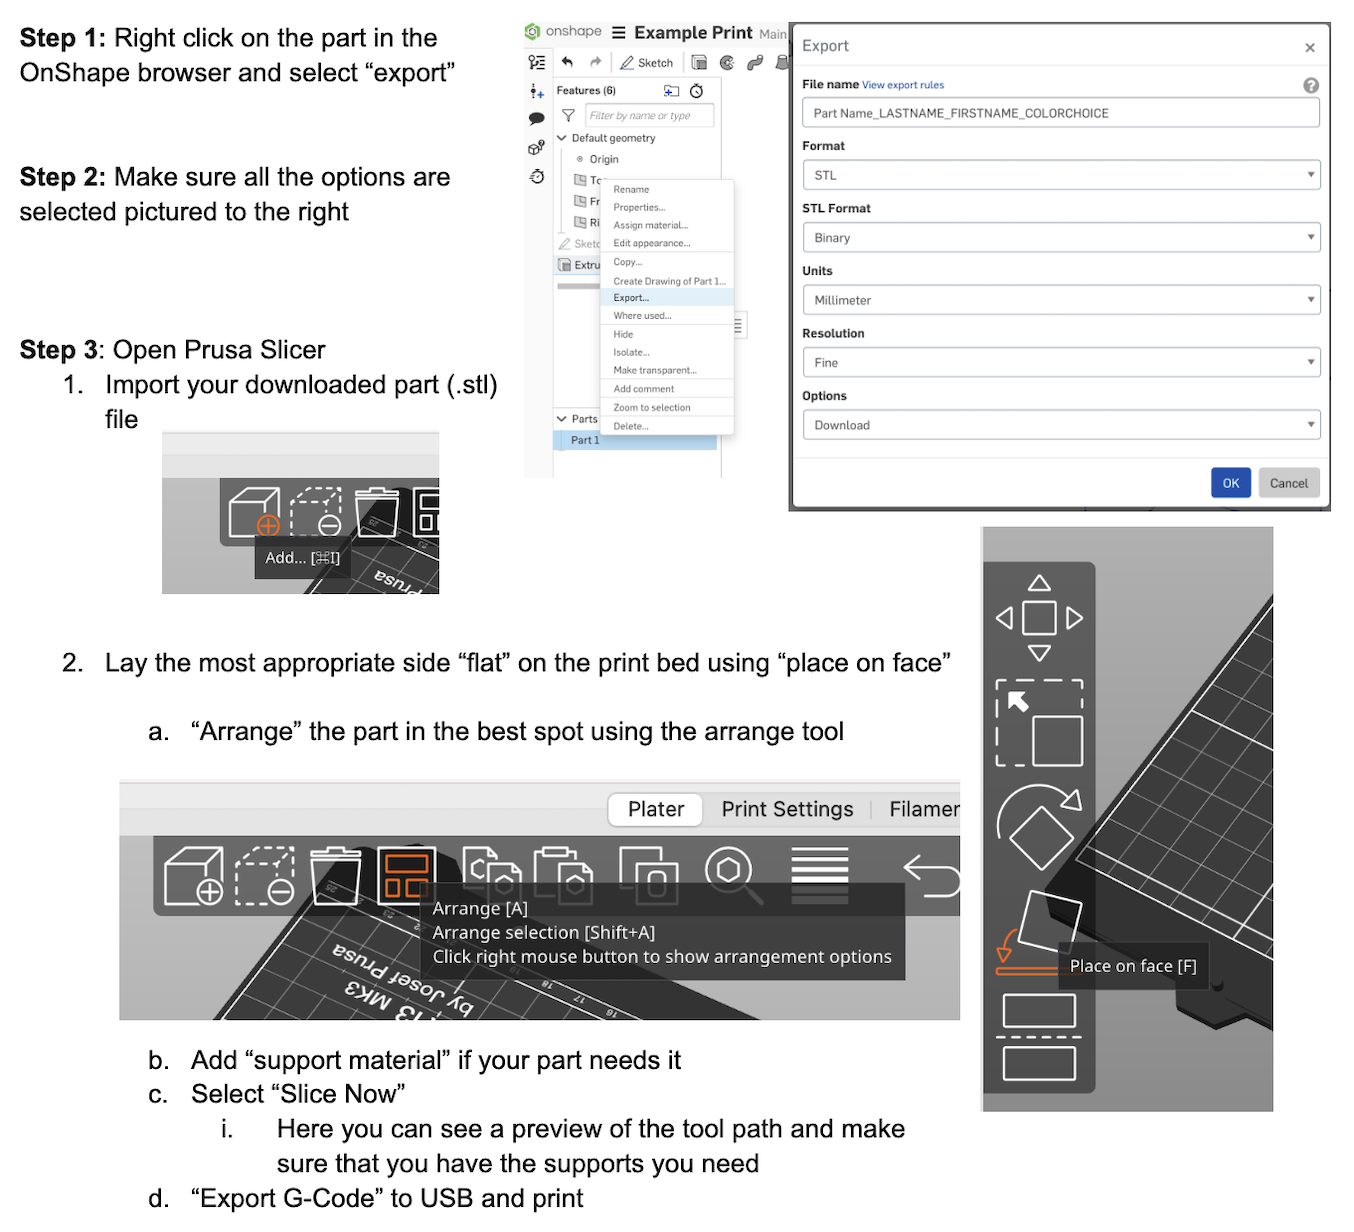
Preparing Your Print / Using Prusa Slicer
You need these programs:
Using the 3D Scanner:
You need these programs:
Getting Started:
Our current scanners are not the appropriate size for the iPad models that we have so we are awaiting a new scanner.
Individual Assignment
Design and 3D print an object (small, few cm3, limited by printer time) that could not be easily made subtractively. 3D scan an object (and optionally print it).
Additive Model
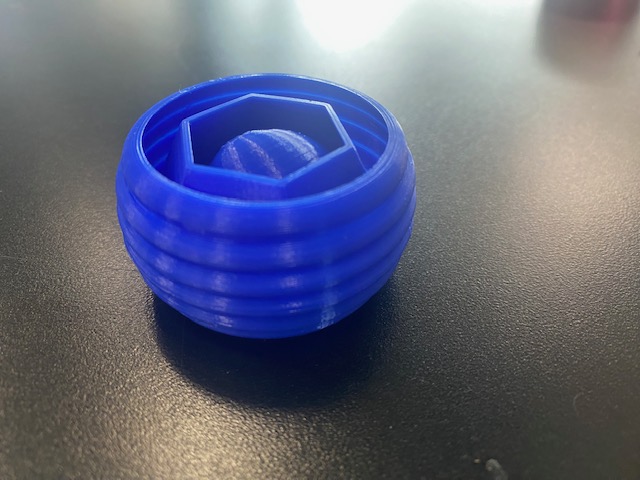
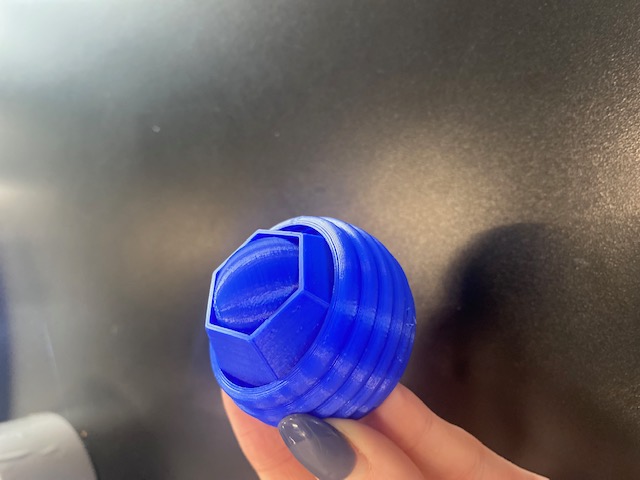
My Project: Design and print a fidget device that can only be made through an additive process.
Benefit of the Additive Process: Designing a fidget device with OnShape CAD for additive manufacturing involves considerations for layer-by-layer construction. The additive manufacturing process, facilitated by 3D printing, allows for intricate designs, especially those with nested pieces and overhangs that might pose challenges in traditional manufacturing. OnShape's parametric design capabilities enable the creation of complex geometries, and when paired with additive manufacturing, it ensures the feasibility of interlocking parts and intricate structures.
Modeling Process:
I started with the sphere on the inside using the revolve tool. I then sketched the hexagon on the same initial plane and used the loft tool so it would taper to a smaller hexagon on an offset plane. I then used the mirror feature to avoid having to repeat the same process on the other side. I used the shell feature to remove the material, and cut out the remaining side of the hexagon so that it would fully envelop the circle with both ends open. Lastly, I created a series of semi-circles and used the revolve tool around the entire object to create some texture on the outside.
I used OnShape to design my fidget device. Below are photos of the finished product.
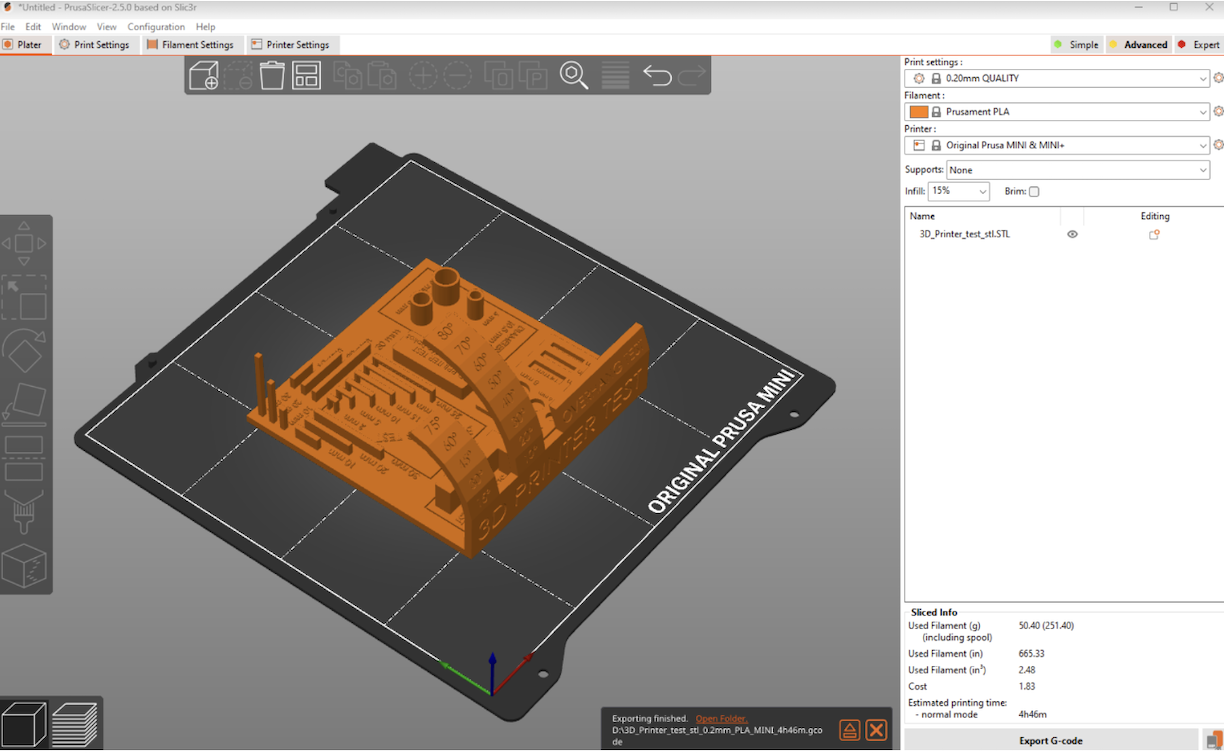
The video below demonstrates the breakdown of the prusa slicing process. I added support material on the build plate only.
Files
Below is my OnShape design.
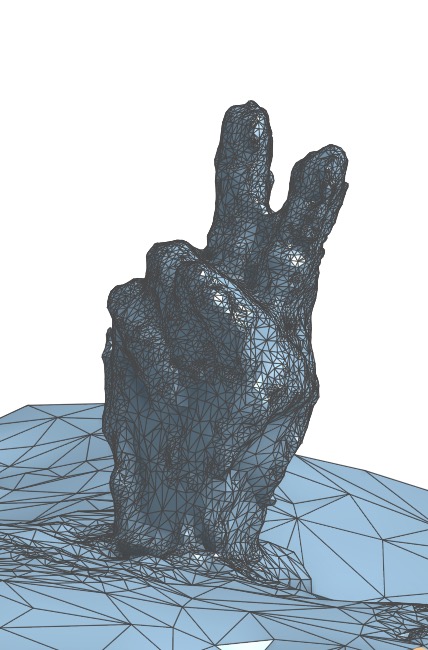
3D Scanning
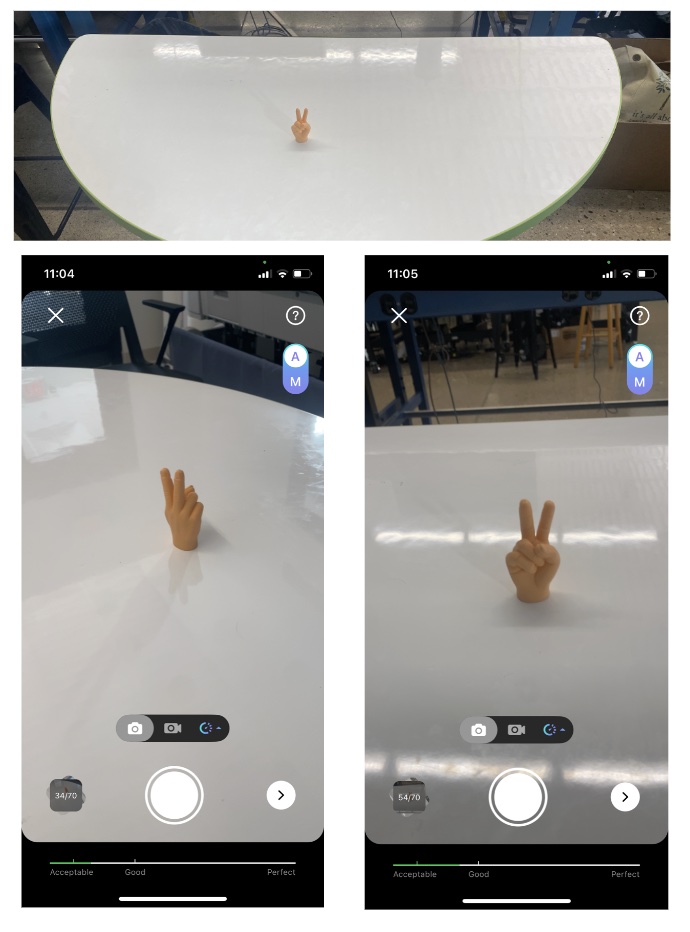
My Project: Use the 3D Scanner
I chose to use the app "KIRI Engine" for my 3D scan. It was a simple and straightforward process once I got the background and lighting set up.
I had to upload a minimum of 70 photos for the most accurate 3D scan. Here are the photos of the process:
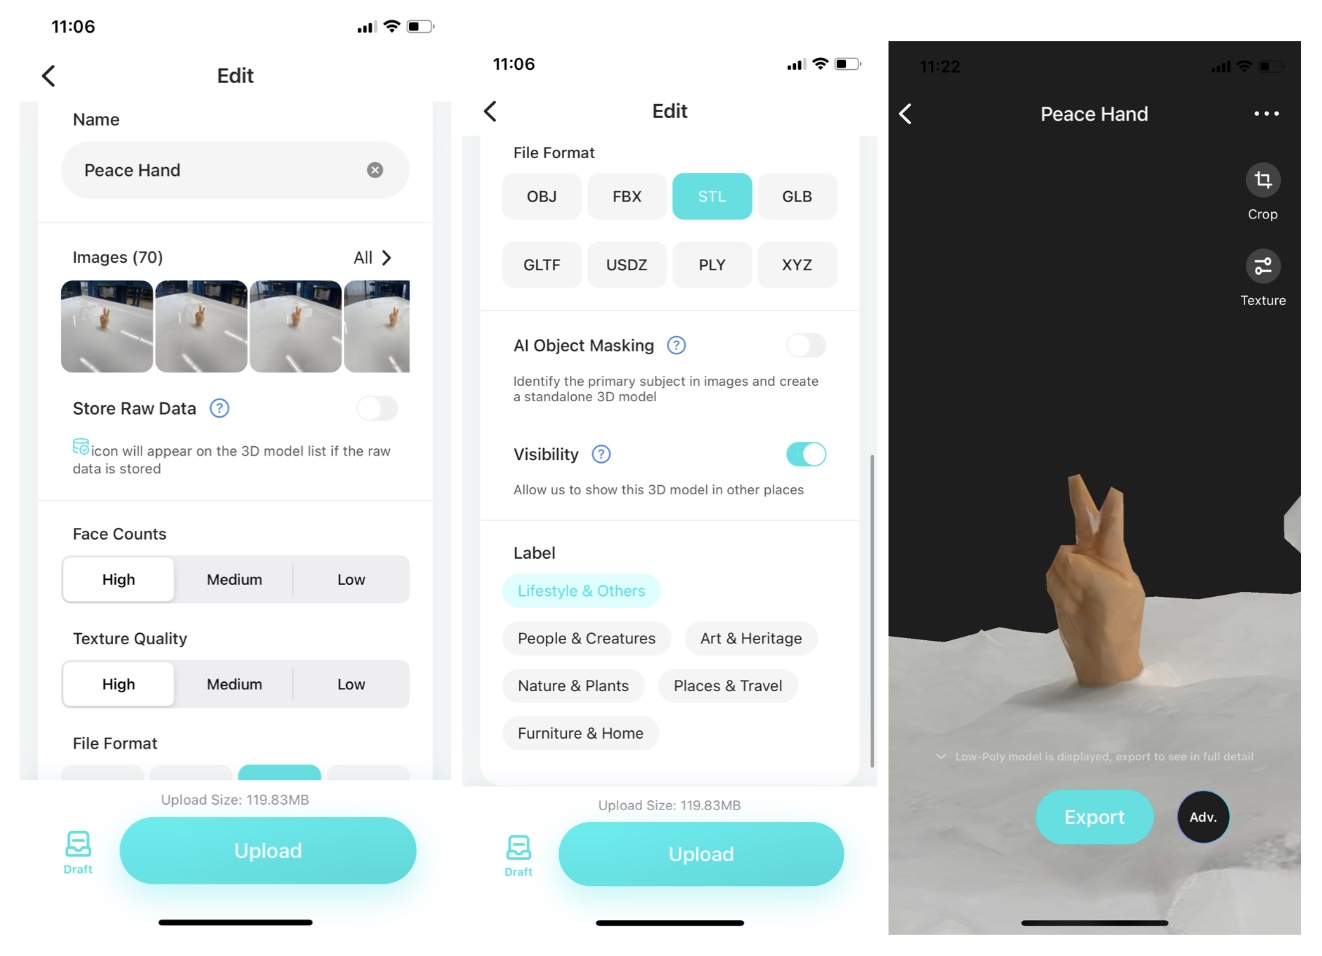
Here is the STL File loaded in OnShape:
Files
Here is the STL File of the scanned object:
Peace Hand Scan STL