Week 13: Molding and Casting
Week 13: Molding and Casting
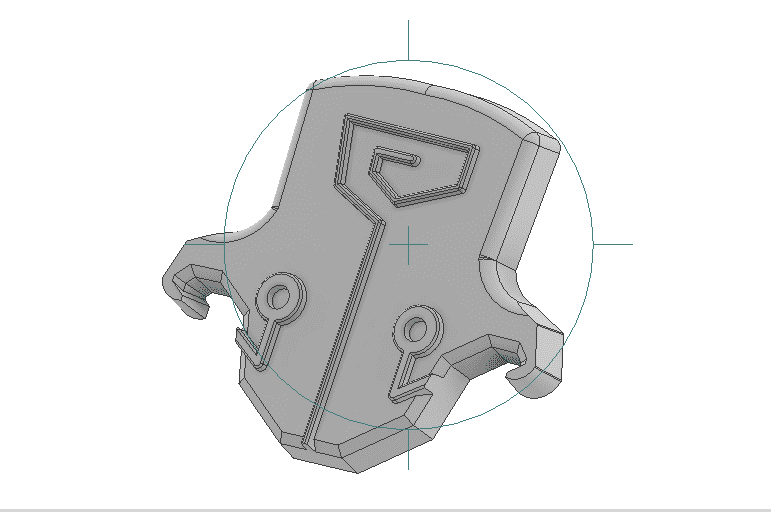
For this week, I made a design based on the mask of a character from one of my favorite games
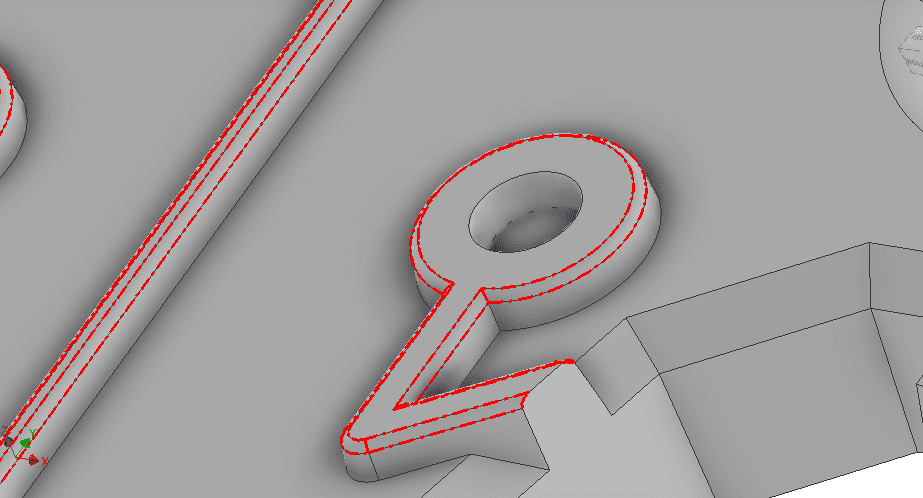
I inserted an image into Autodesk Inventor software, added dimensions to scale the image, and proceeded to make a sketch following the lines of the image.
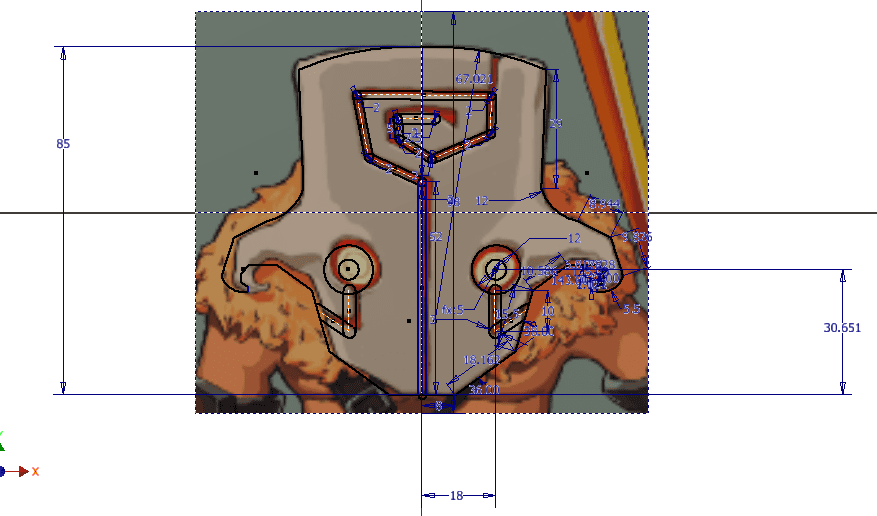
Then I extruded the sketch with a -8º taper.
Finally, I added details by applying the fillet and chamfer tools.
Final design:
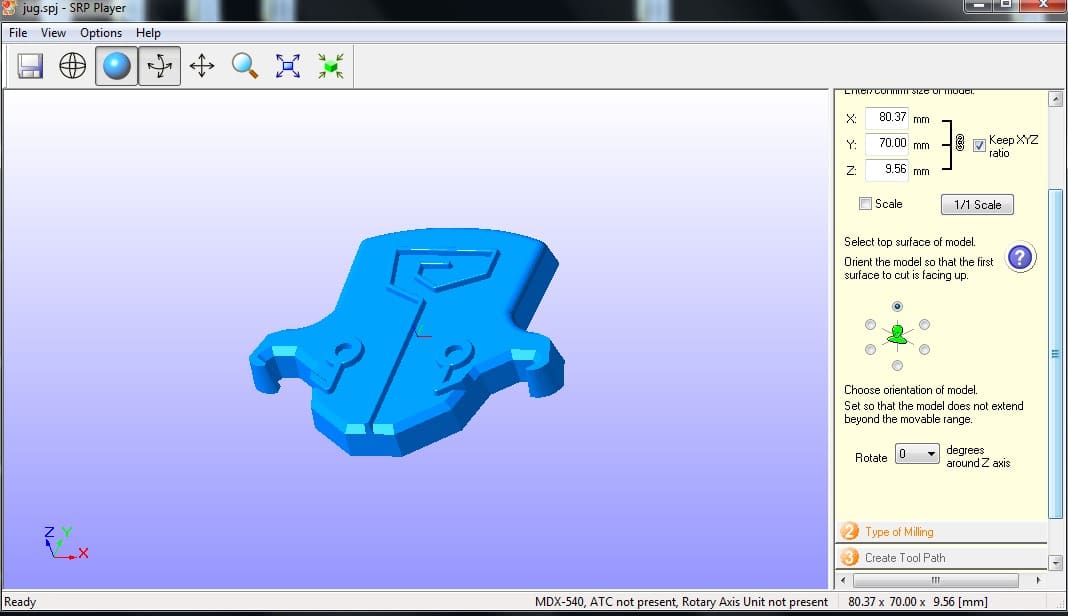
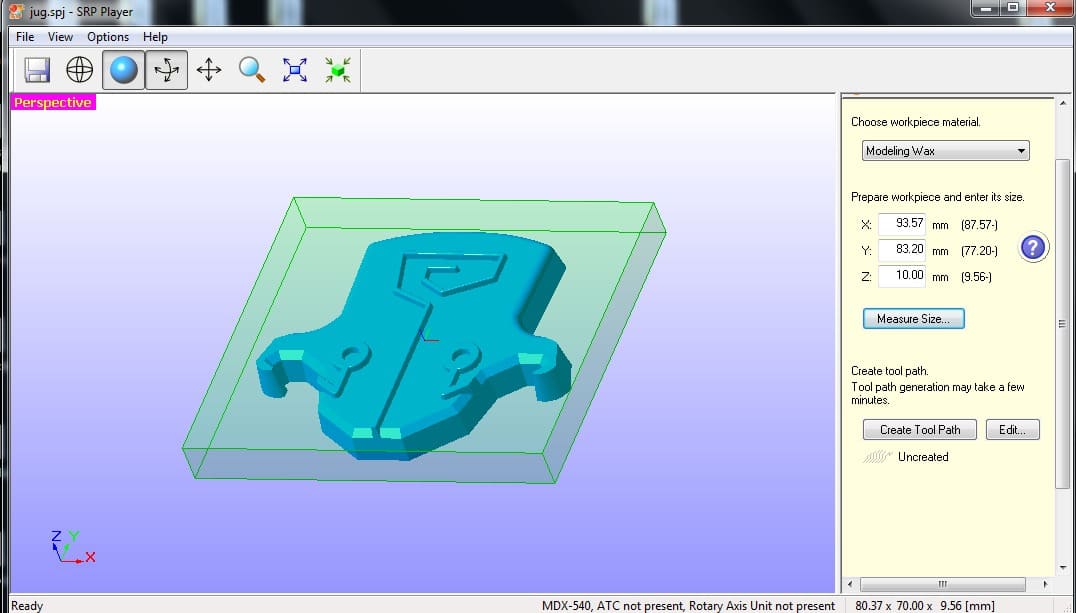
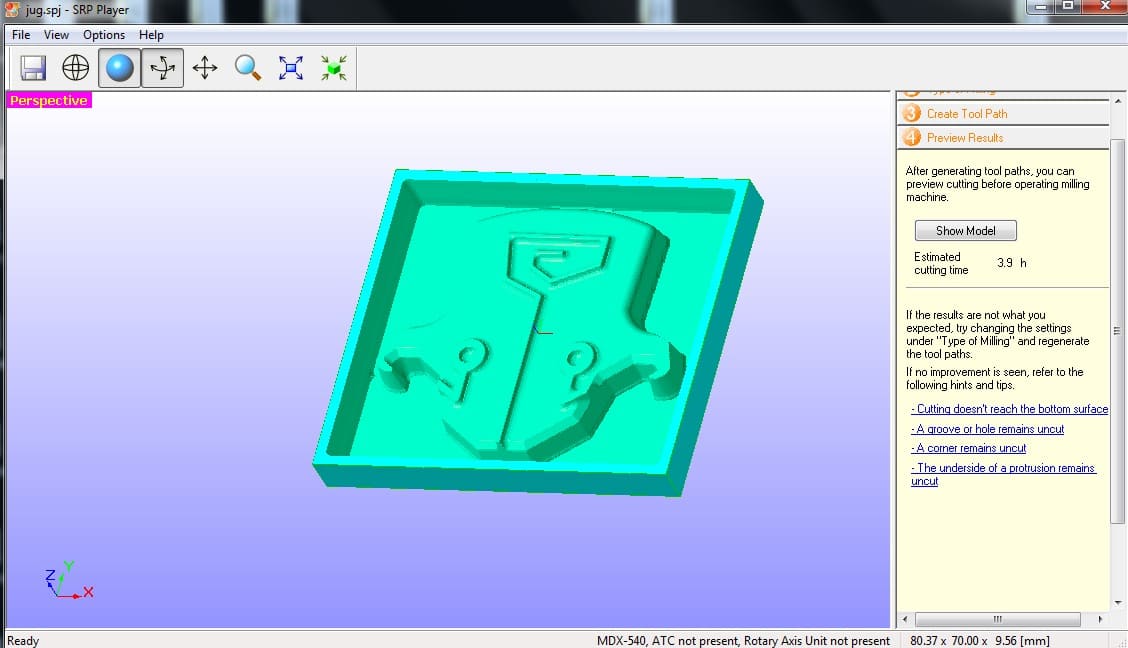
With the file in STL format, we can do CAM on the Roland MDX-540 using SRP Player software.
First, we can scale the model if desired.
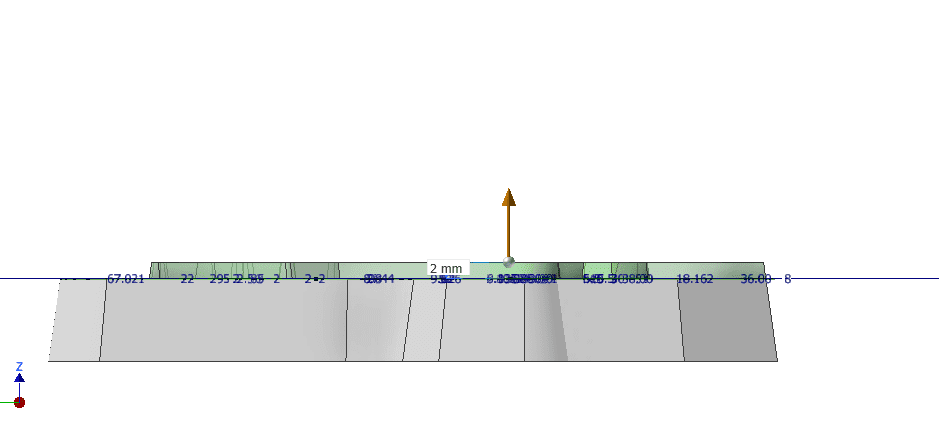
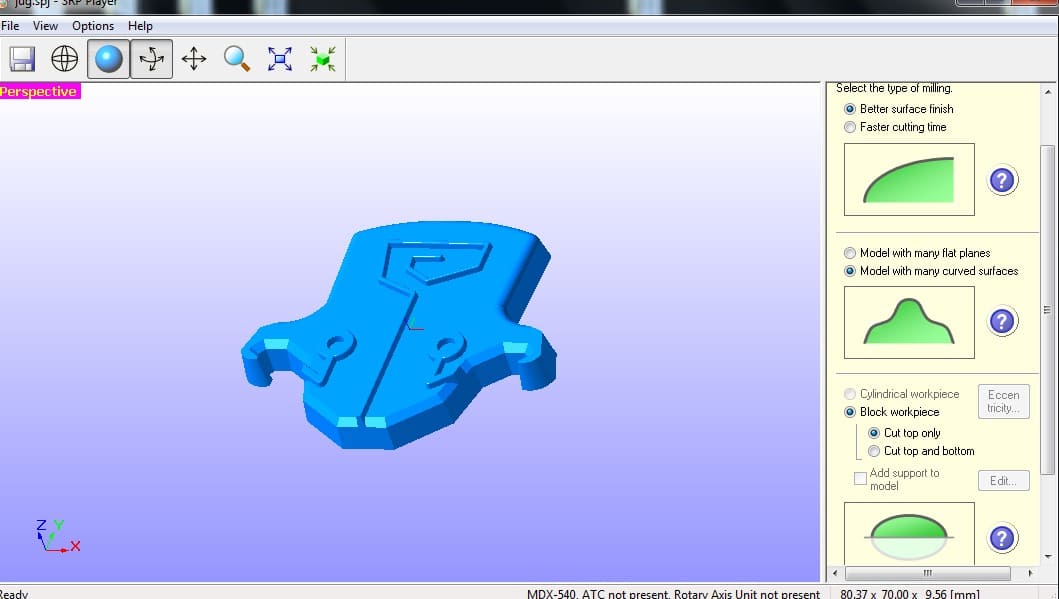
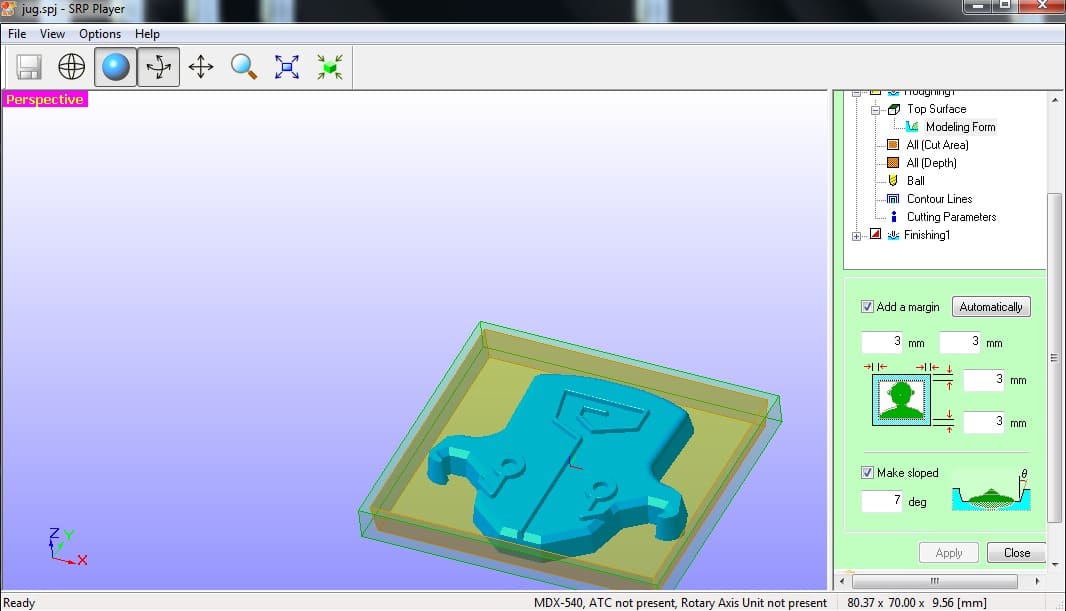
We use a specific type of milling process to achieve a superior surface finish, particularly for models with numerous curved surfaces, whereby we only cut the top portion.
I made a mistake here by giving it very little dimension in the Z-axis, which caused problems in the molding process.
Add a 3mm margin, which is sufficient.
Select the flat mill, I will use 3mm diameter for roughing.
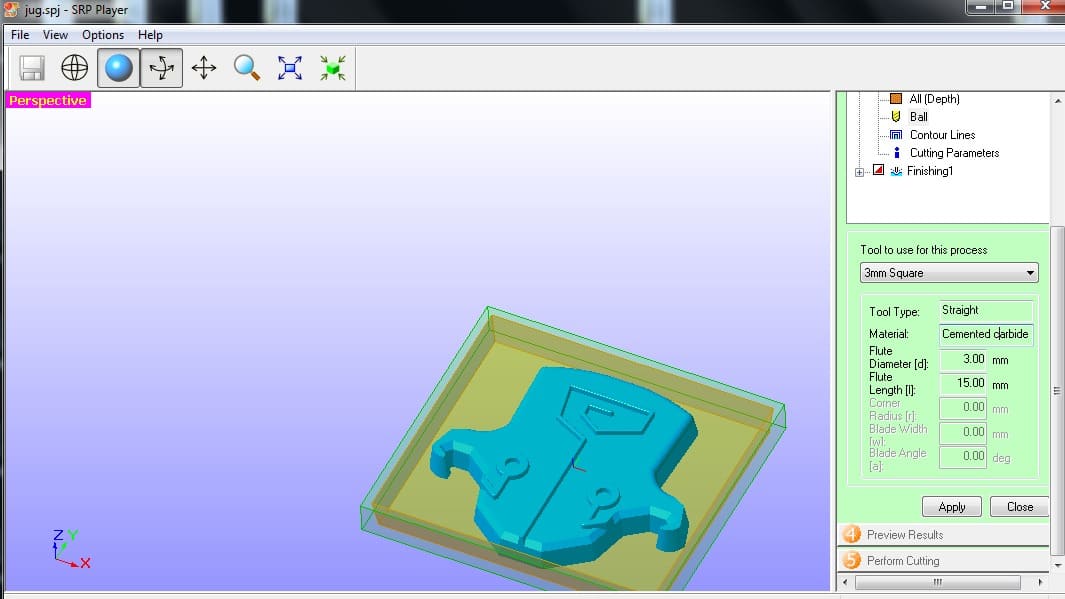
Setting parameters for roughing
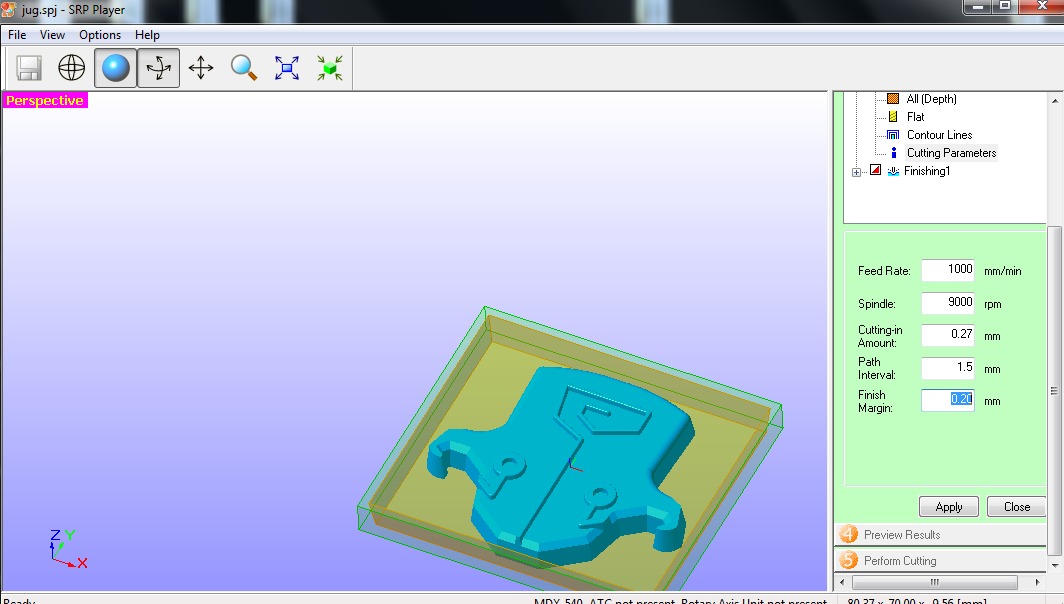
Next is the finishing parameters. I use a 3mm mill ball and Feed rate: 800 mm/min, Spindle: 9000 rpm, Cutting in amount: 0.1mm, Path interval: 0.1 mm, Finish Margin; 0.0 mm.
The preview indicates that the anticipated duration for the cutting process will be approximately 3.9 hours, and it is important to remember that an endmill change and a new Z setting will be necessary during the process:
Similar to the production of all boards, we establish the zero position; however, in this scenario, it will be positioned at the center of the wax since the center of the design in the software is located in the middle. Here is a small video of the process:
It's important to remove the unnecessary material with a vacuum cleaner during the process. If the software dont let you start the cutting it's probably because you need to change from NC to RML, for this just reboot the machine and enter Vpanel software and change the mode.
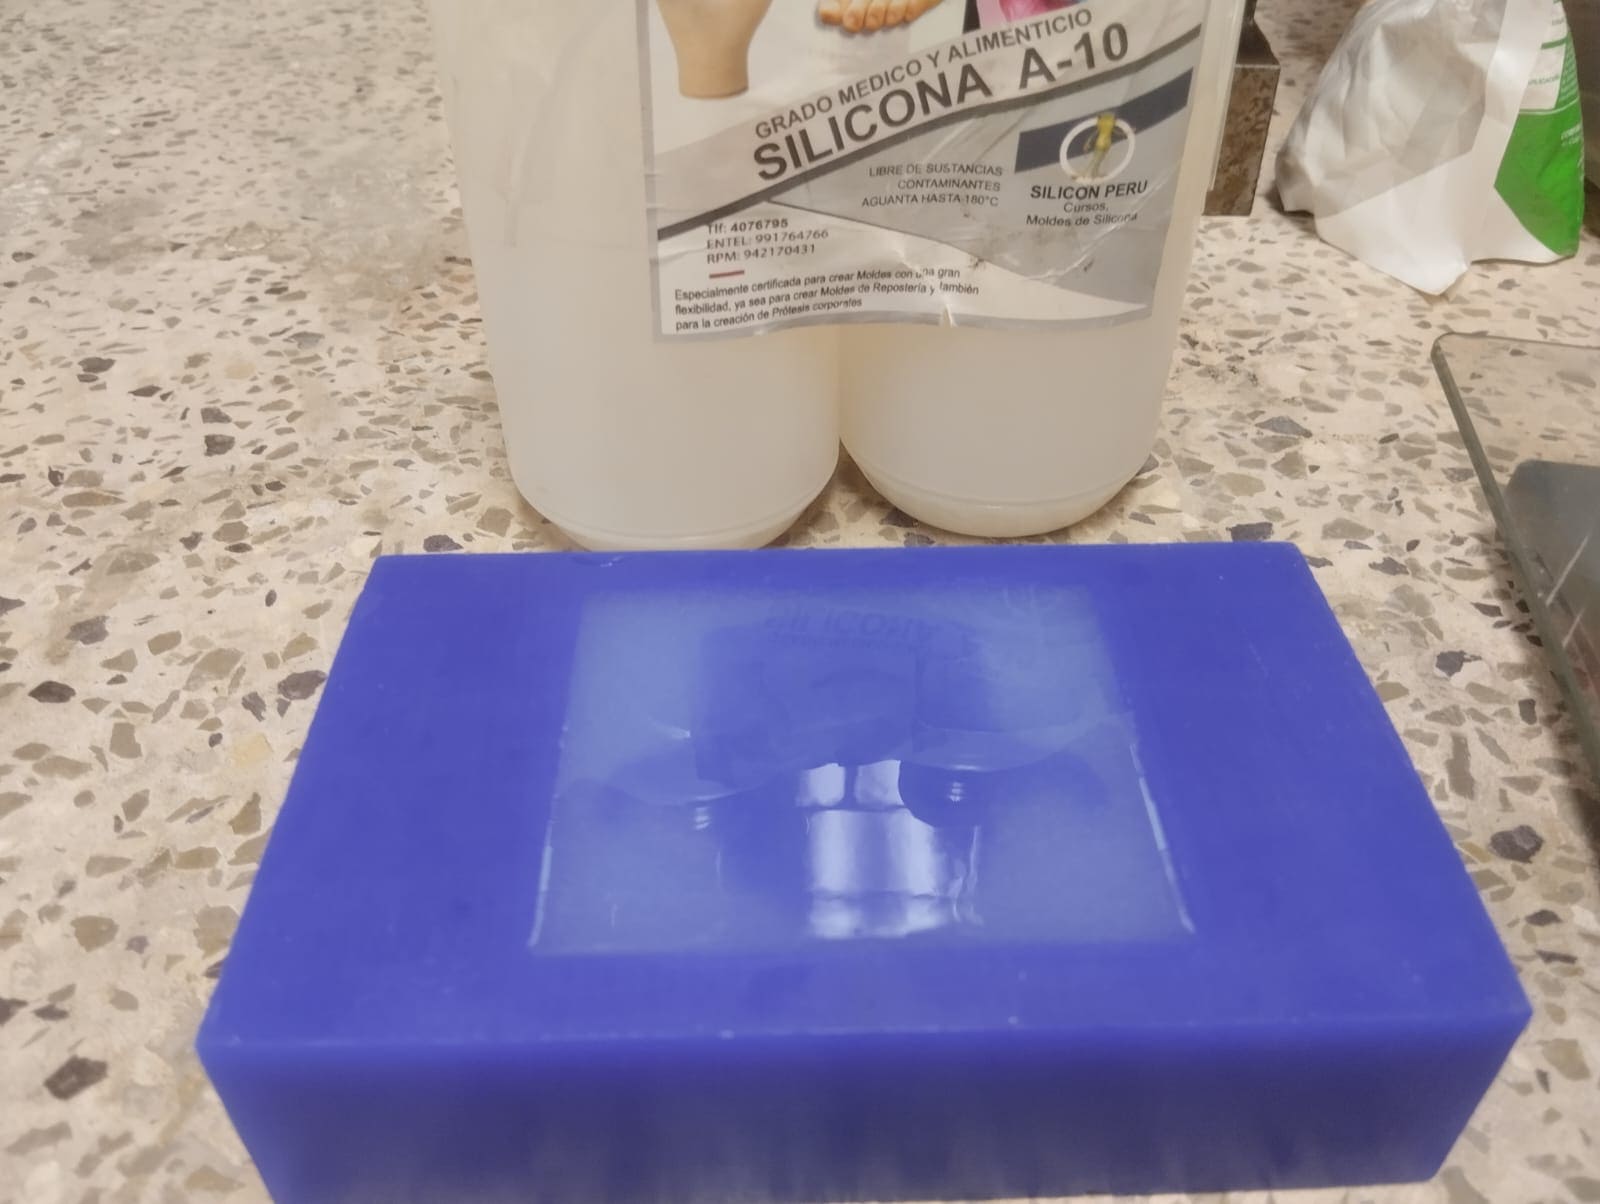
I use 4 types of materials for molding: Silicone A-20, Silicone A-10, silicone rubber, and polyurethane rubber. Here are some features of these materials:
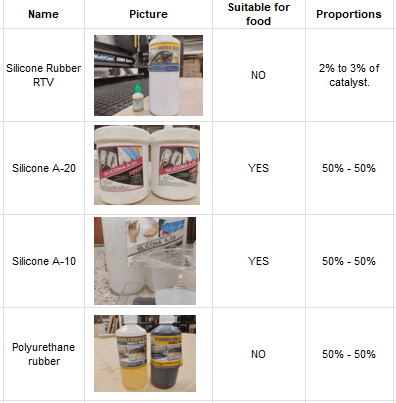
You can find more information on it`s data sheet.
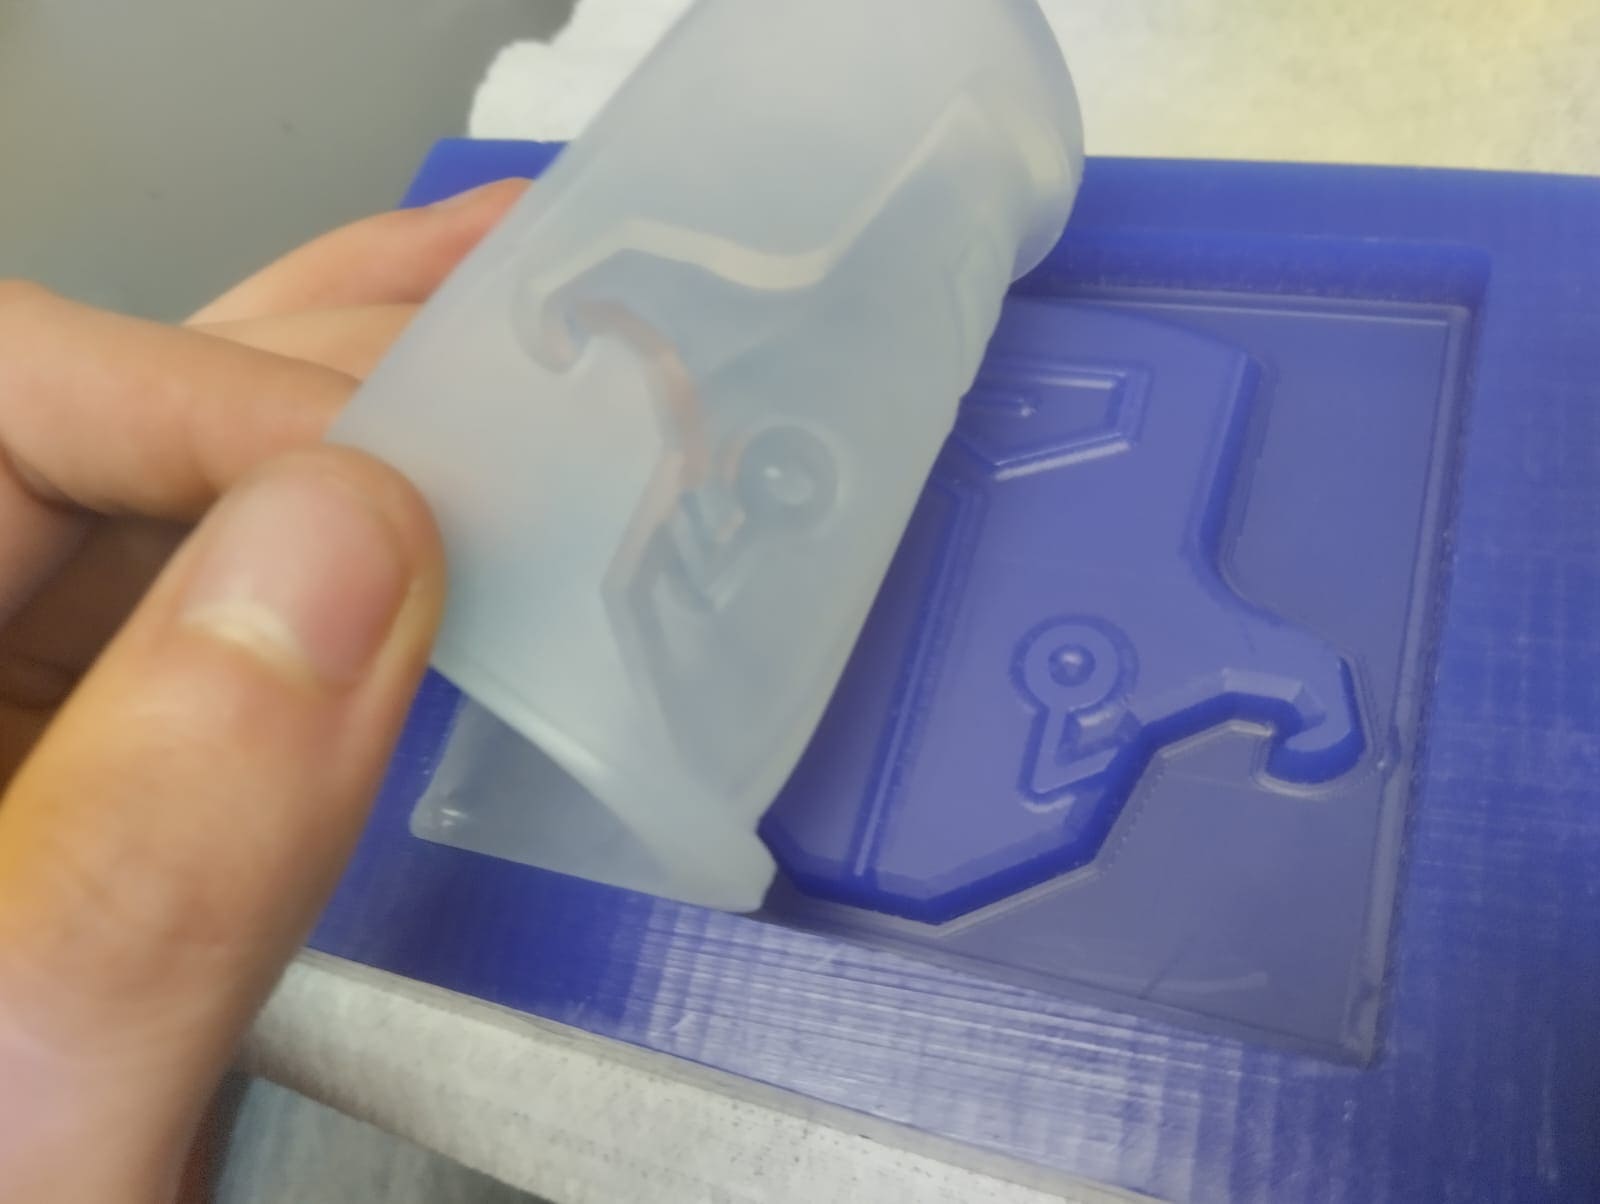
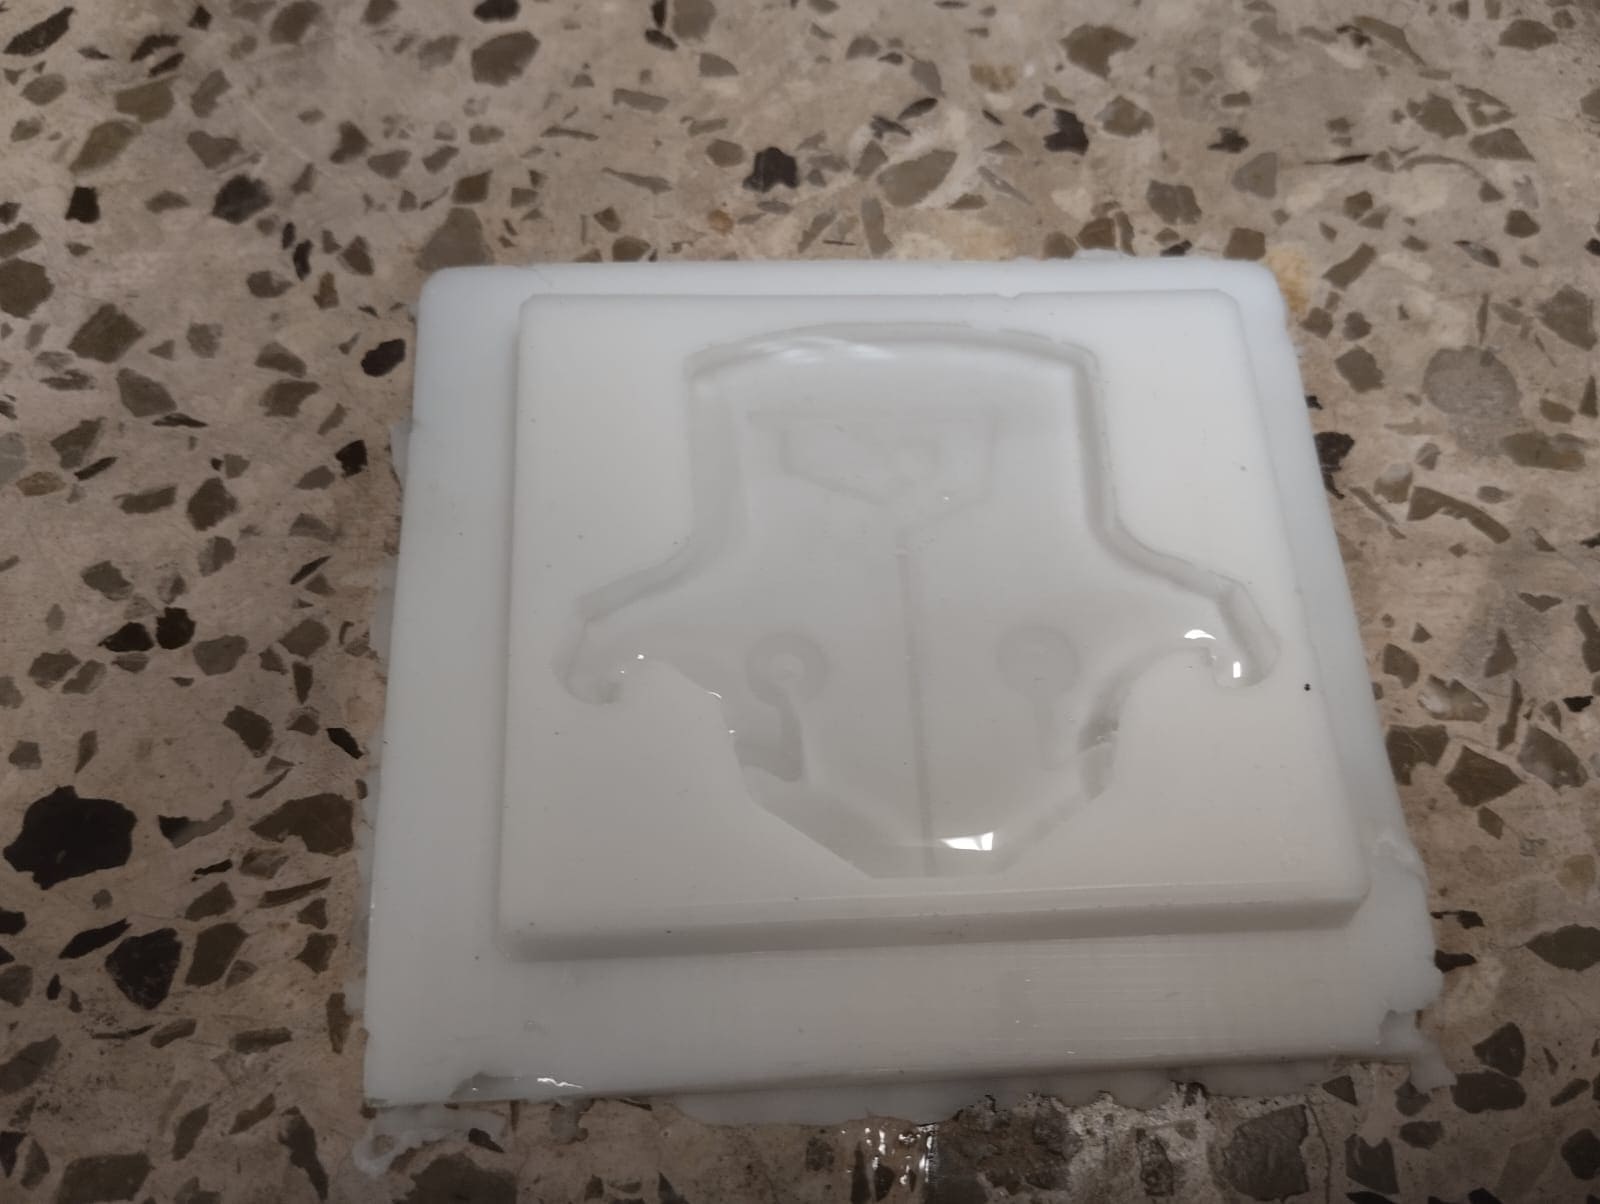
The first mold I made was using silicone rubber.only a single catalyst will be required, whereas for the subsequent molds, they will not require any catalyst.
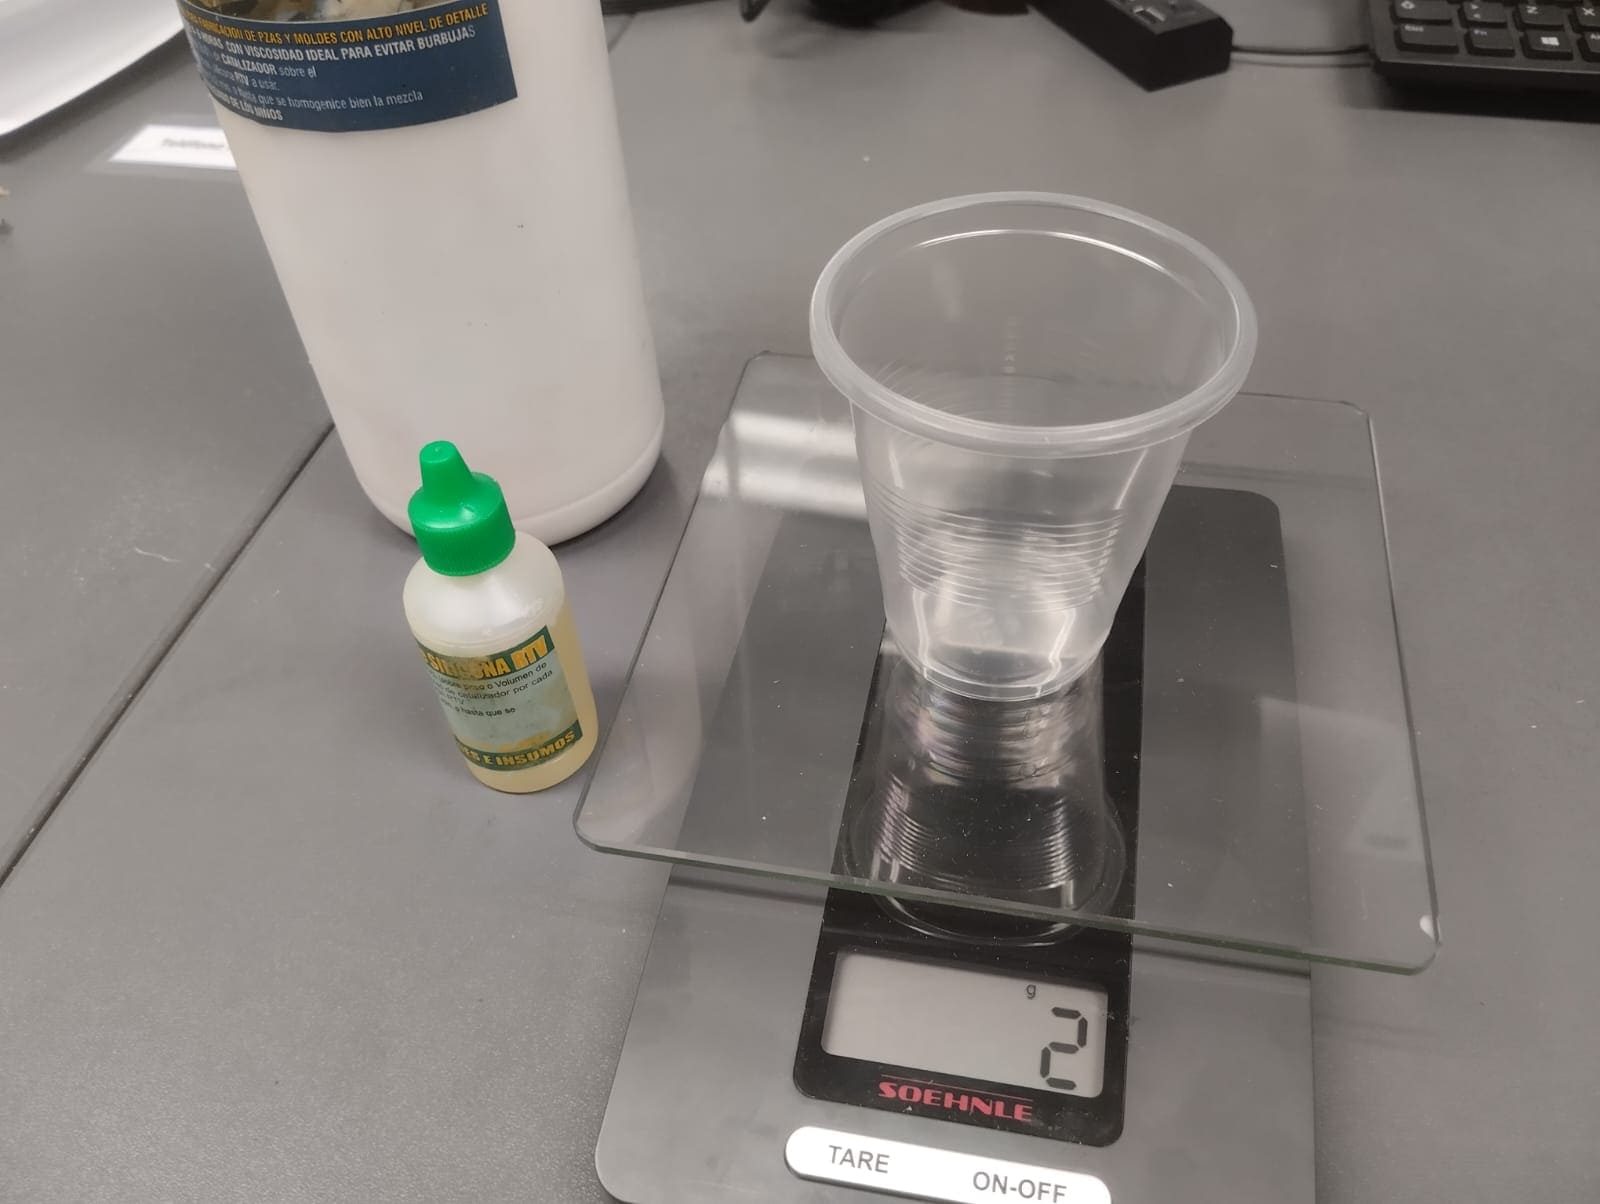
In this instance, a combination of 78 g of silicone rubber and 2 g of catalyst is utilized to create the mixture, which is then thoroughly stirred until it achieves a consistent composition. Following this, the mixture is poured into the positive side of the mold, stirred gently and gives small blows to the mold to remove any remaining bubbles.
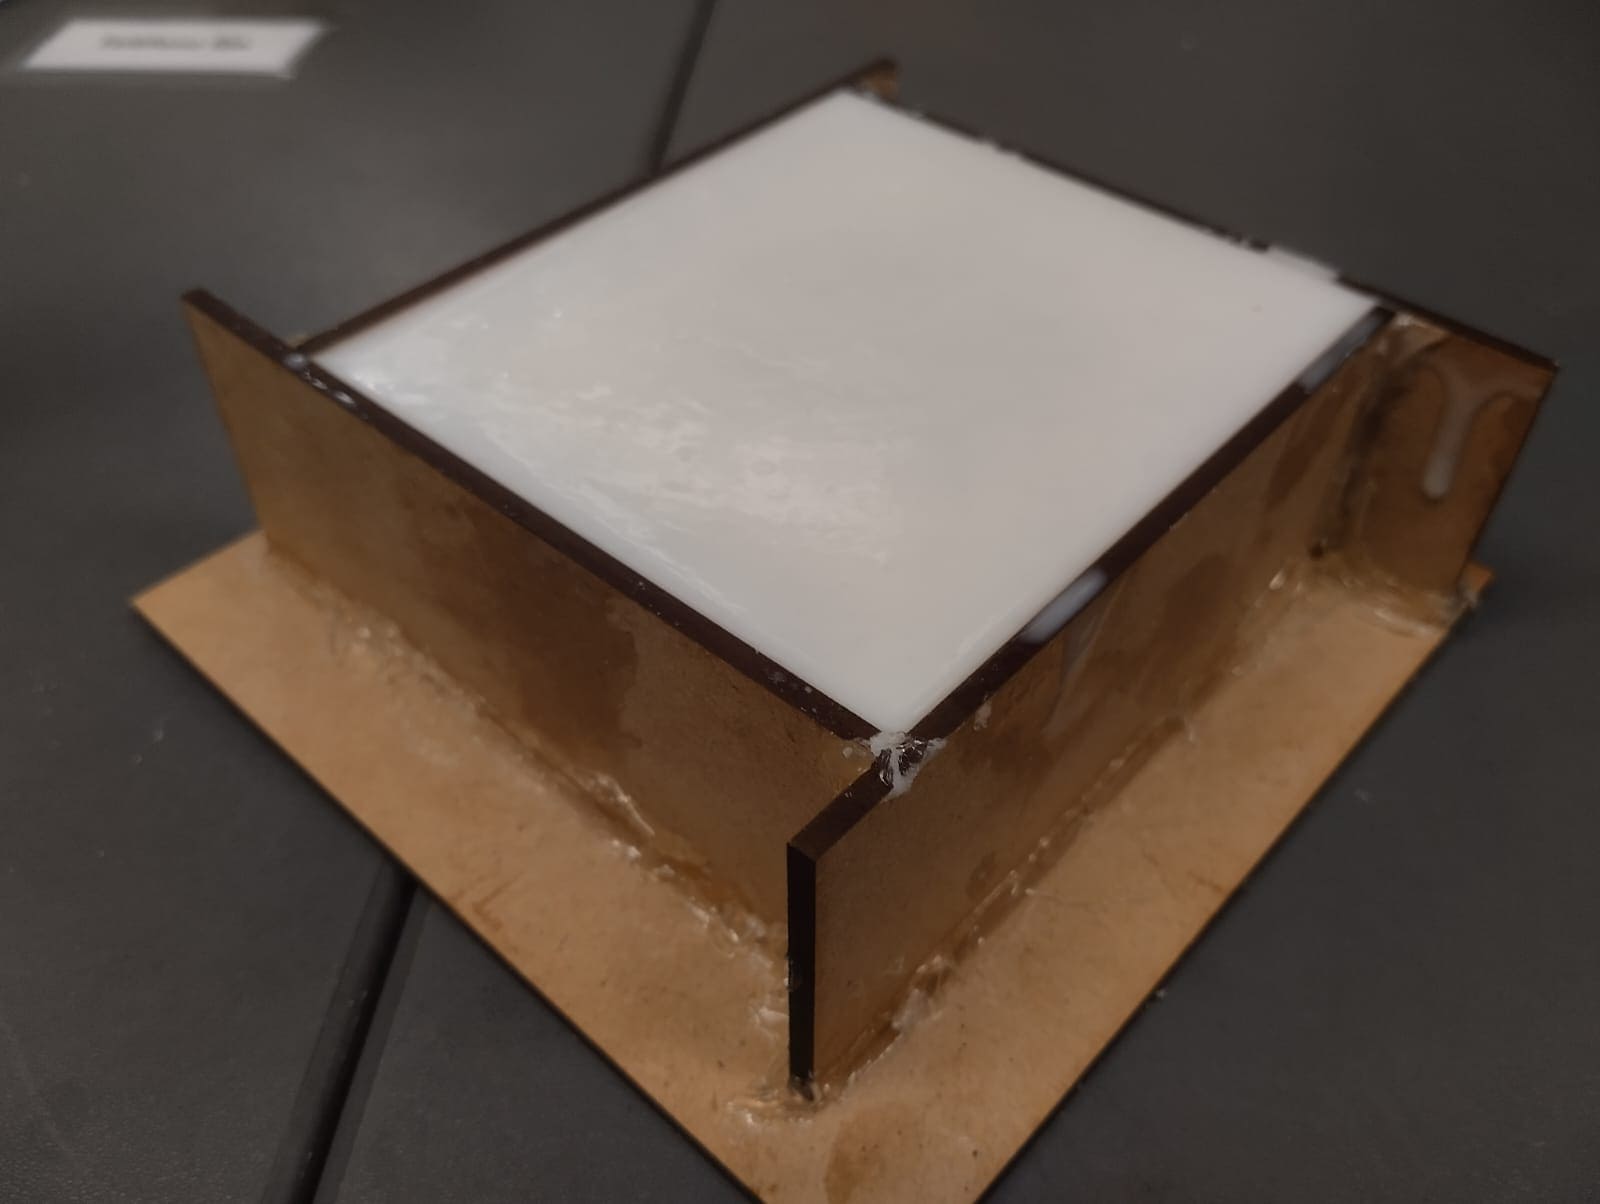
Here is the result:
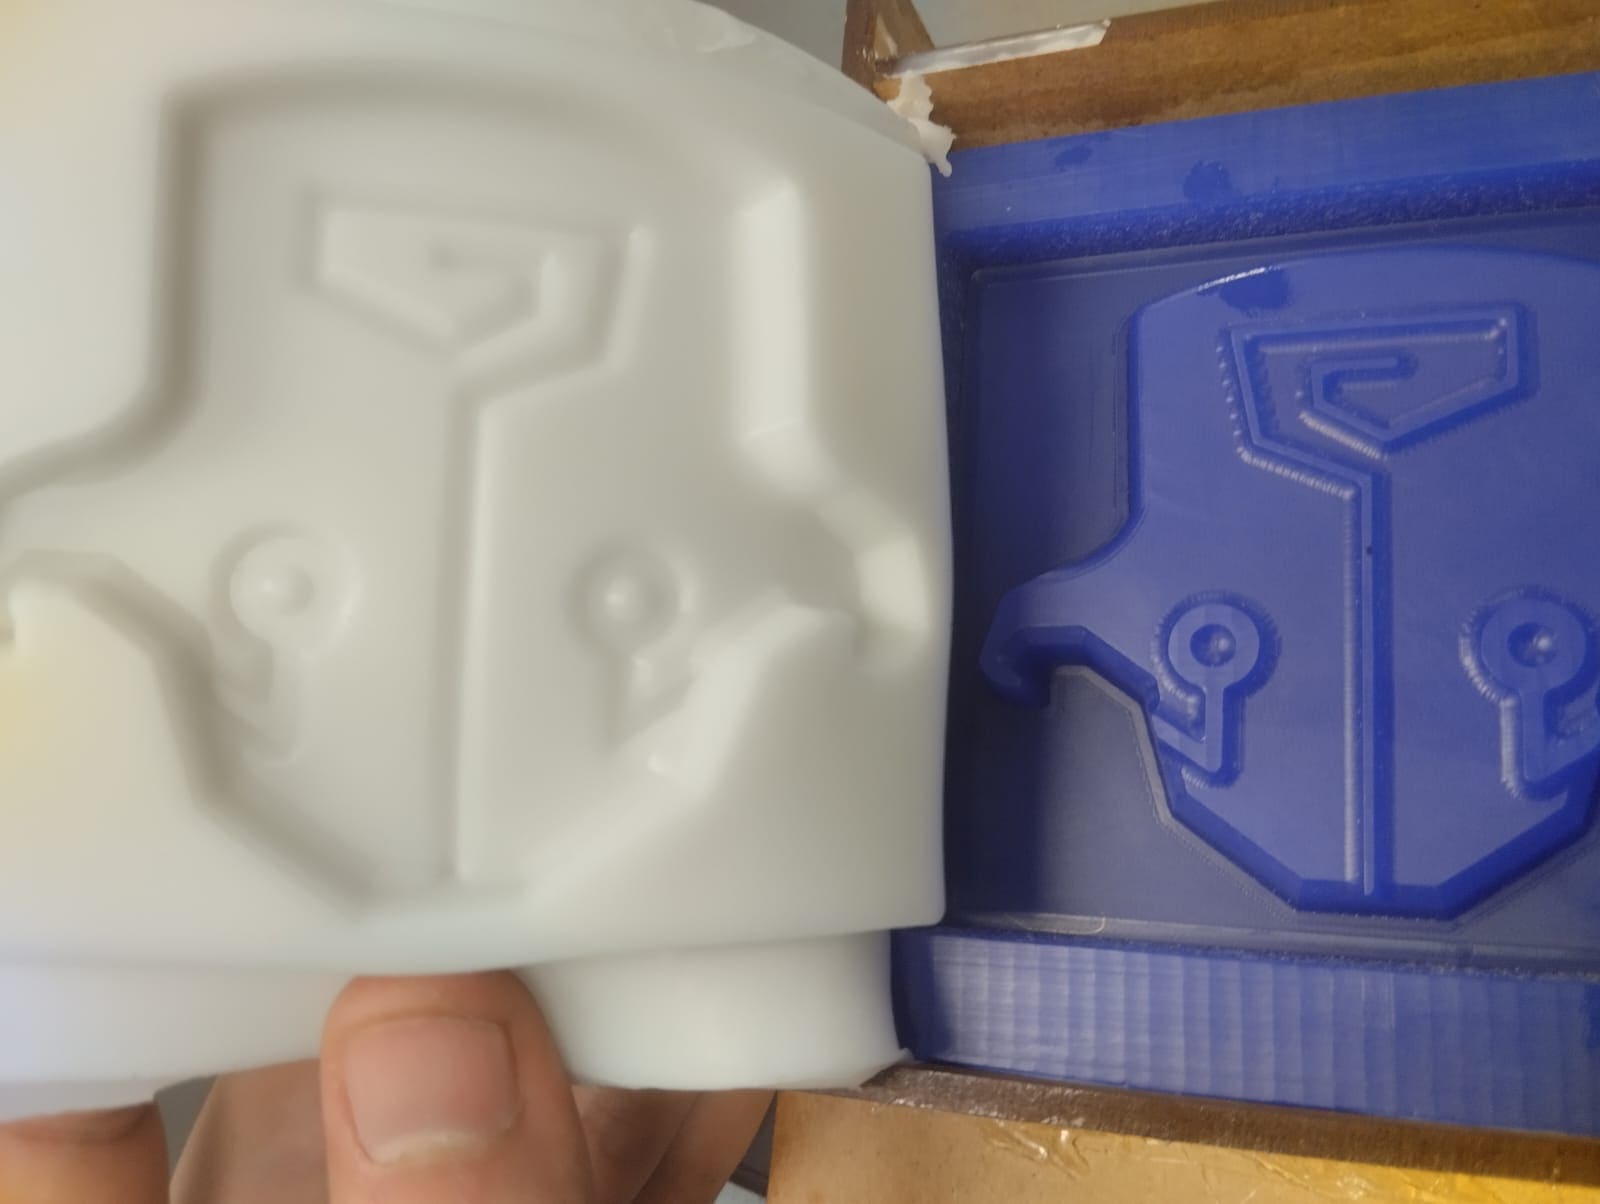
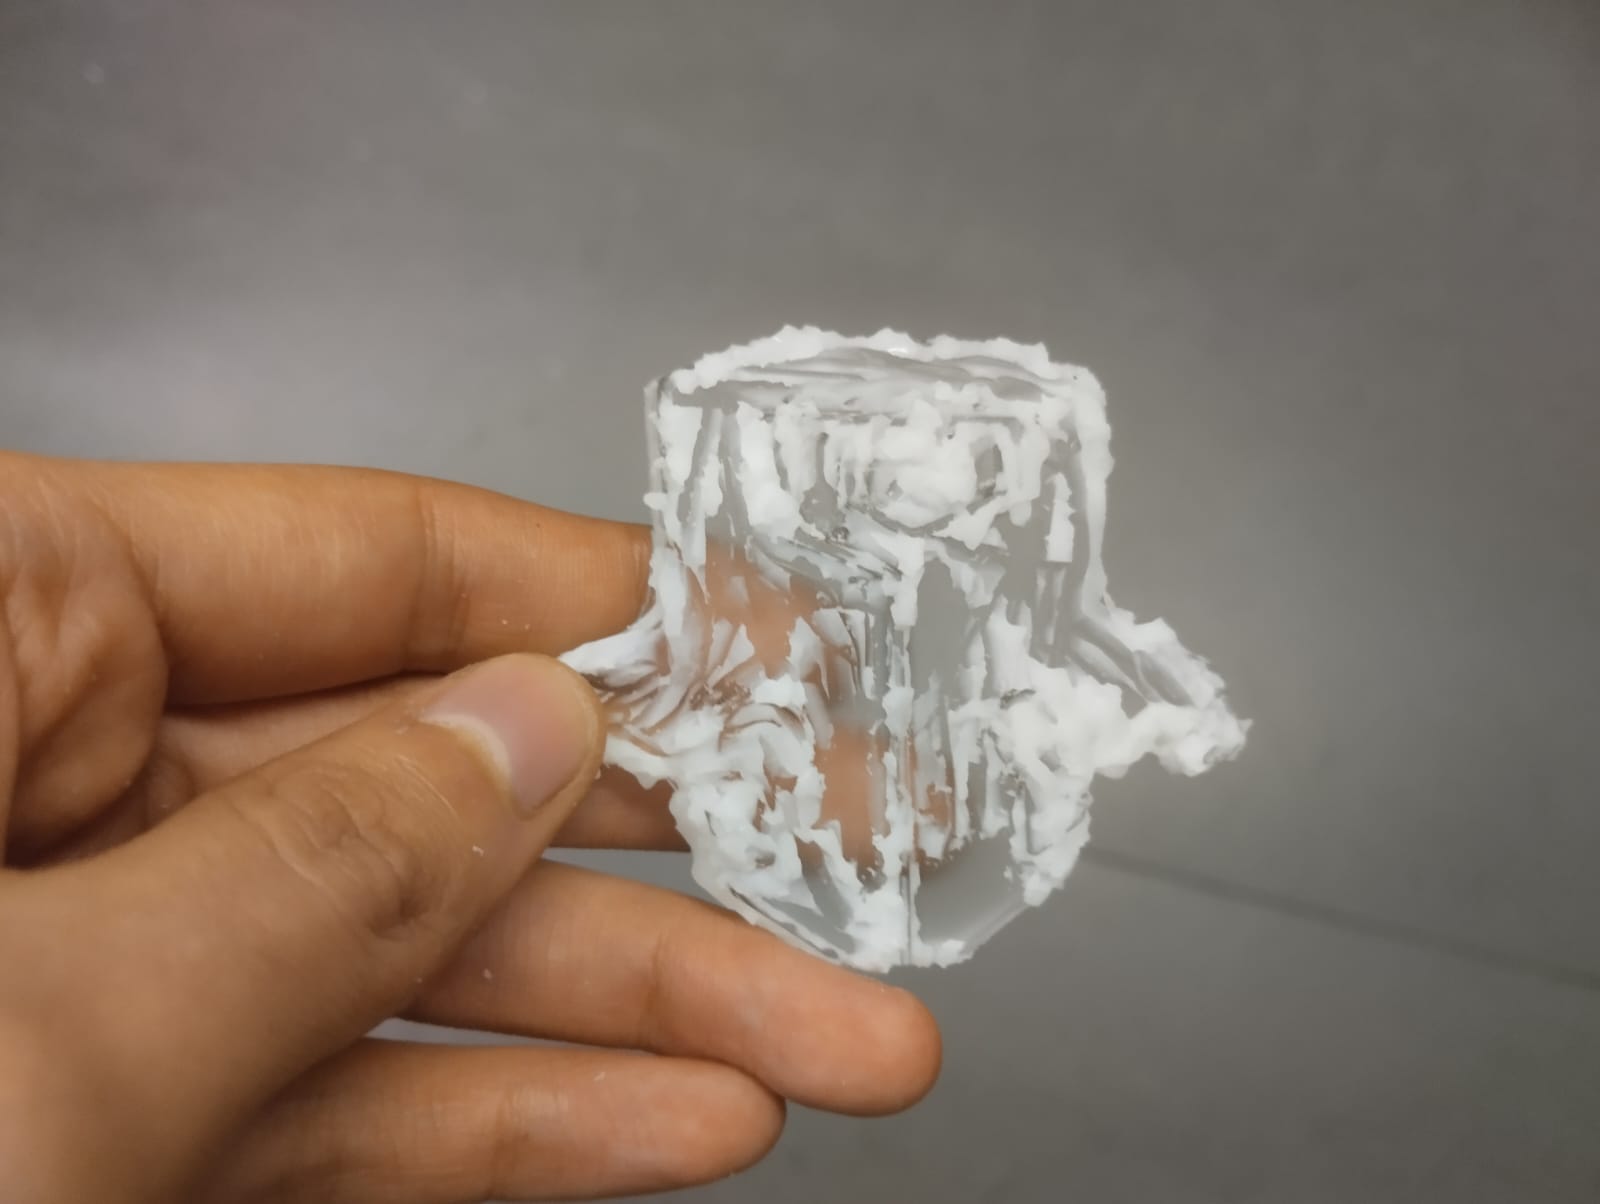
This was my first mold. I needed to use an MDF box because I forgot to add some space for the silicone during the CAM settings. Afterward, I machined a new wax for the remaining molds.
Here is the result:
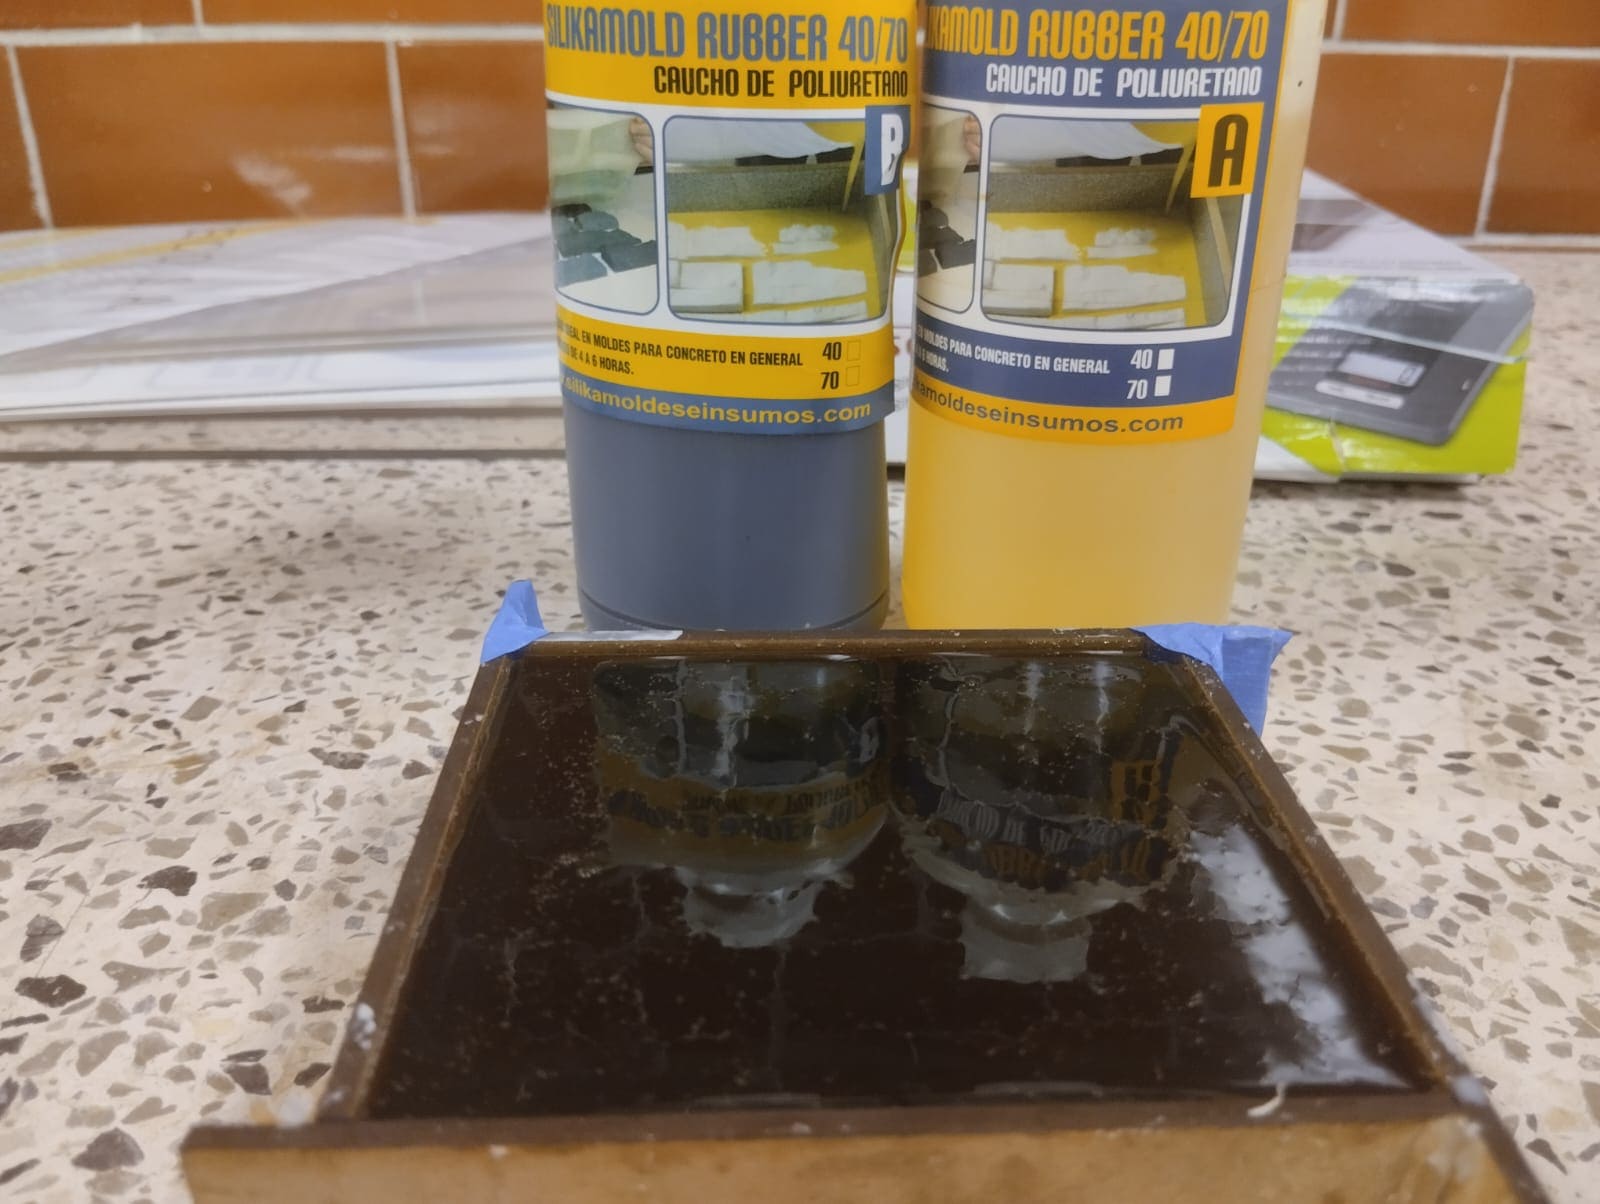
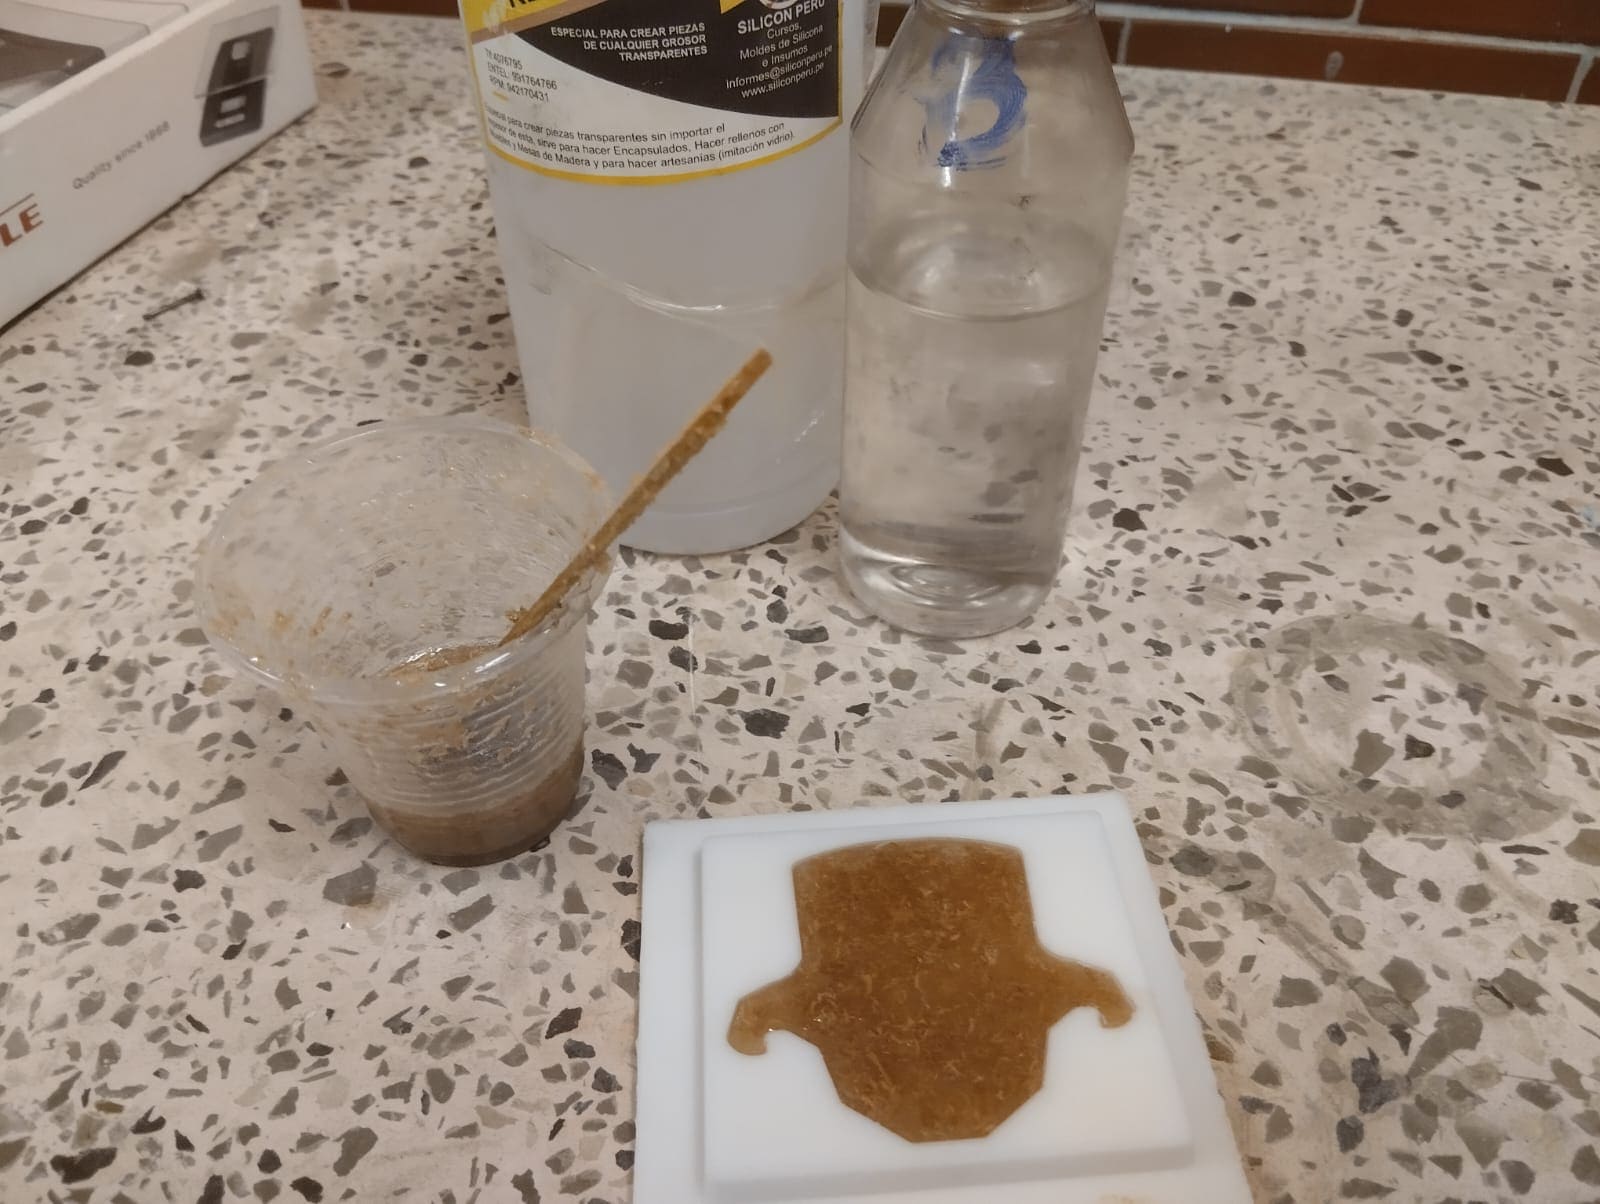
Polyurethane rubber:
you can find more information of this product here.
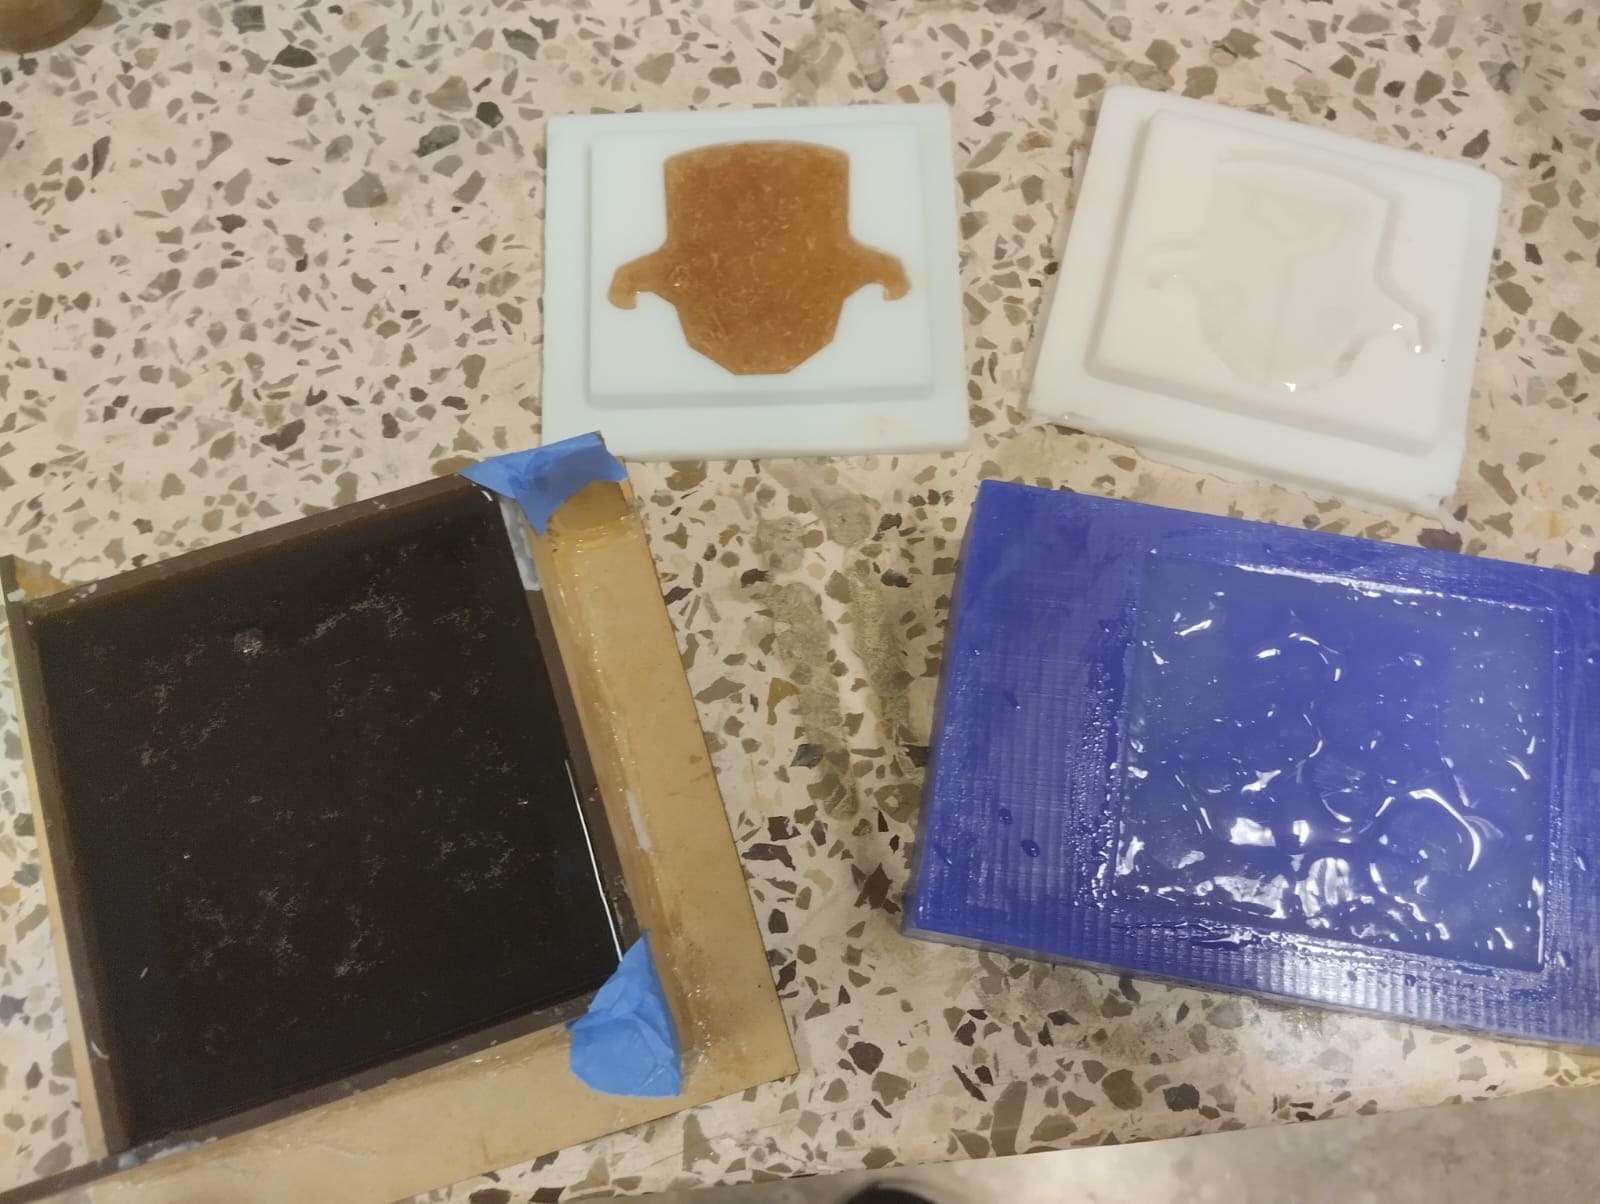
Here is the final result:
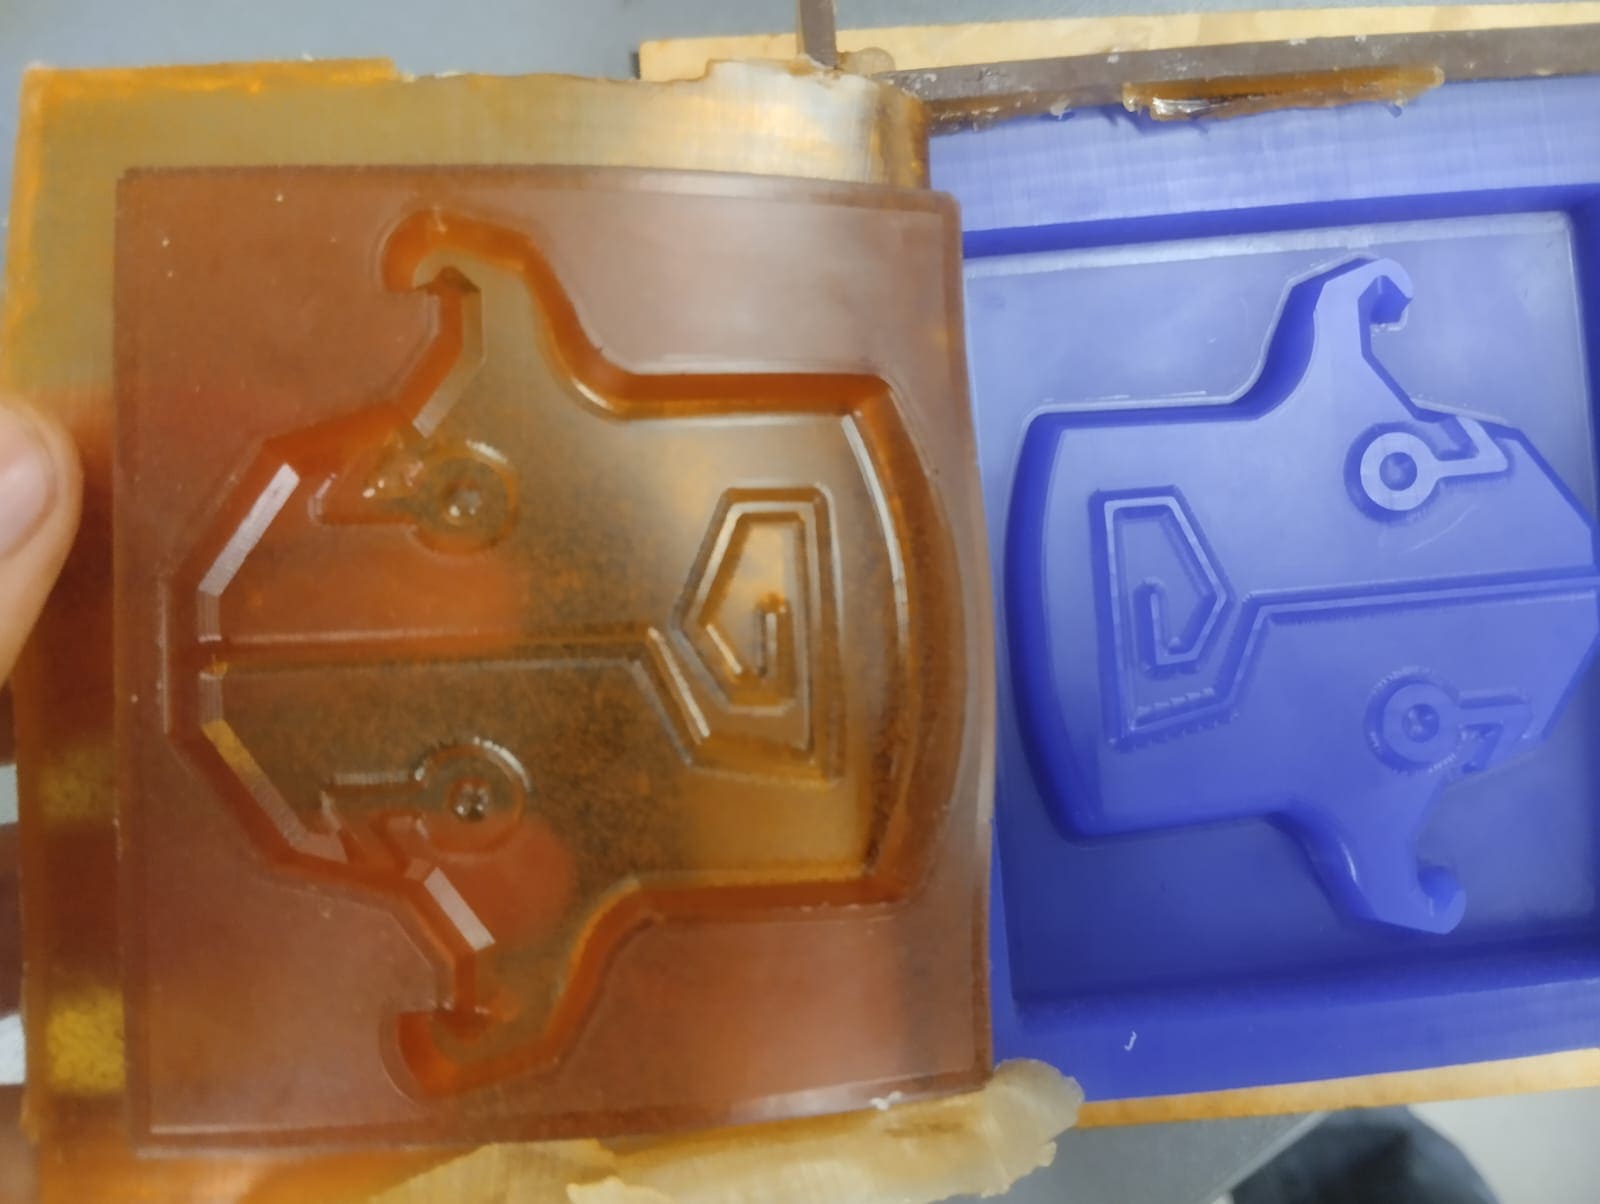
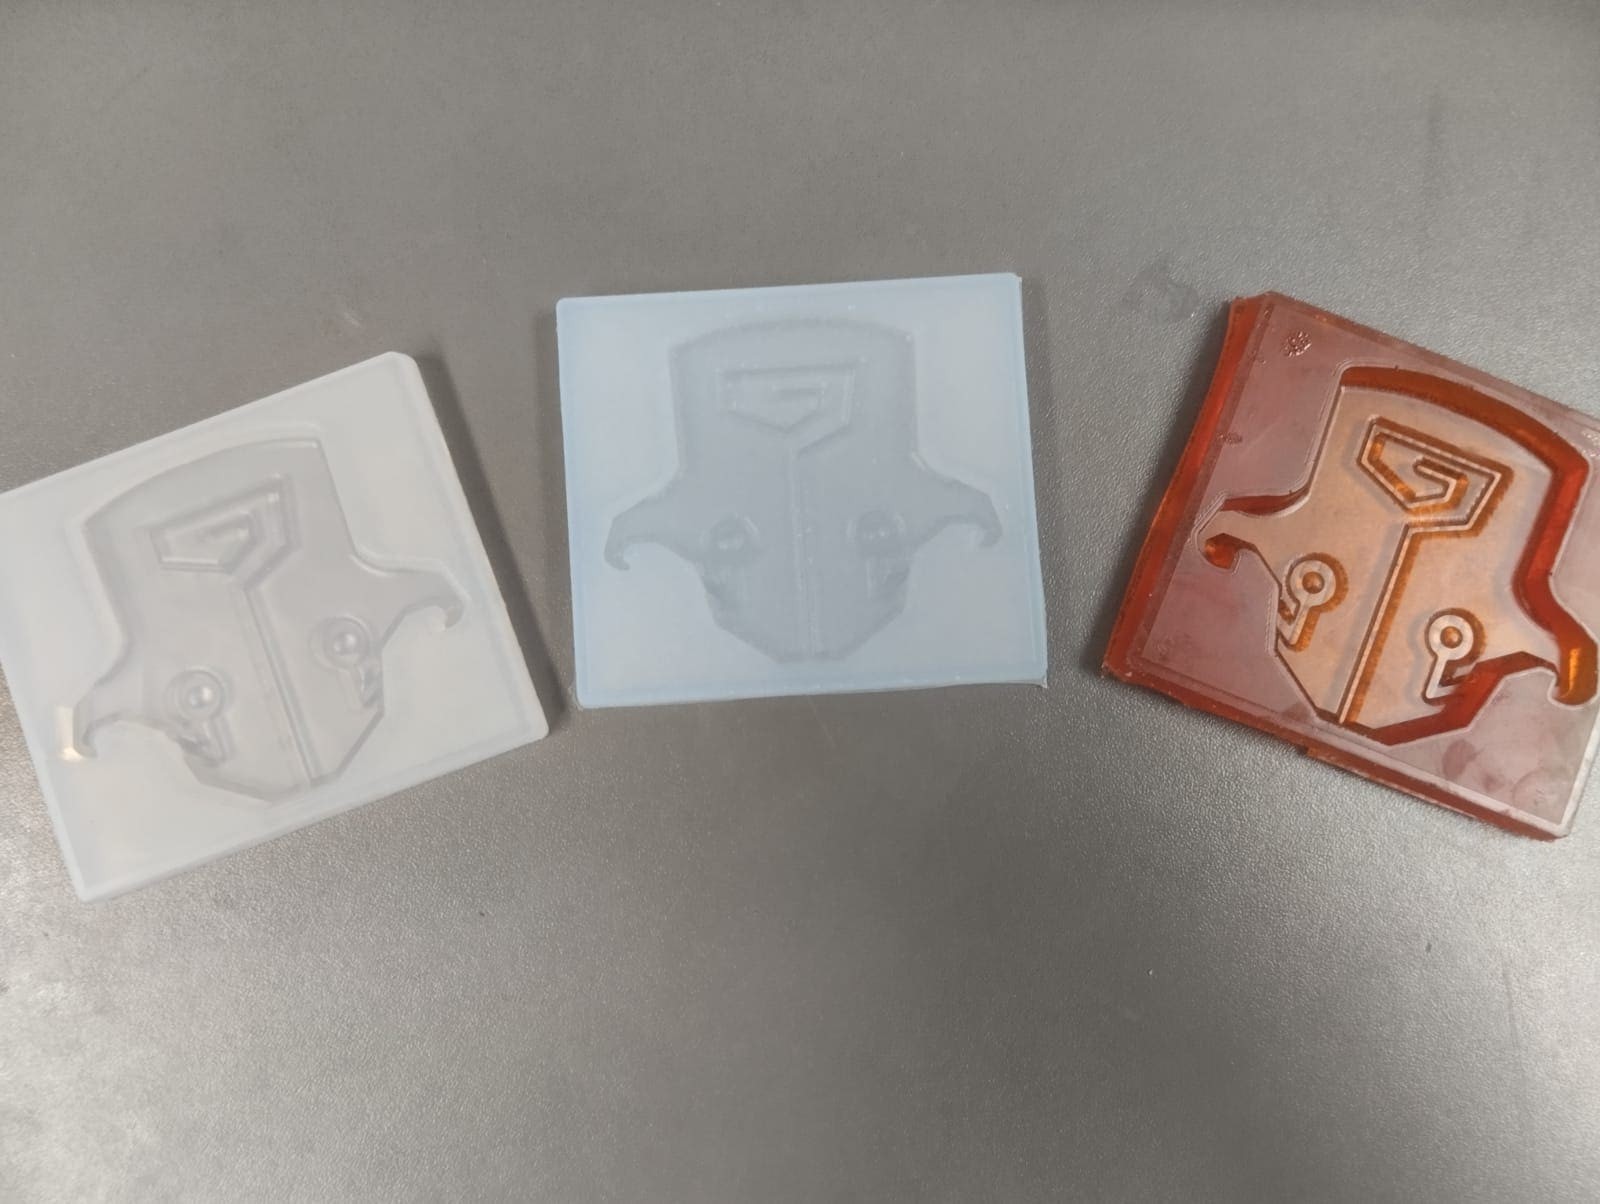
The white and blue molds are made of A-20 and A-10, respectively, and can be used for food, while the brown one is made of Polyurethane rubber.
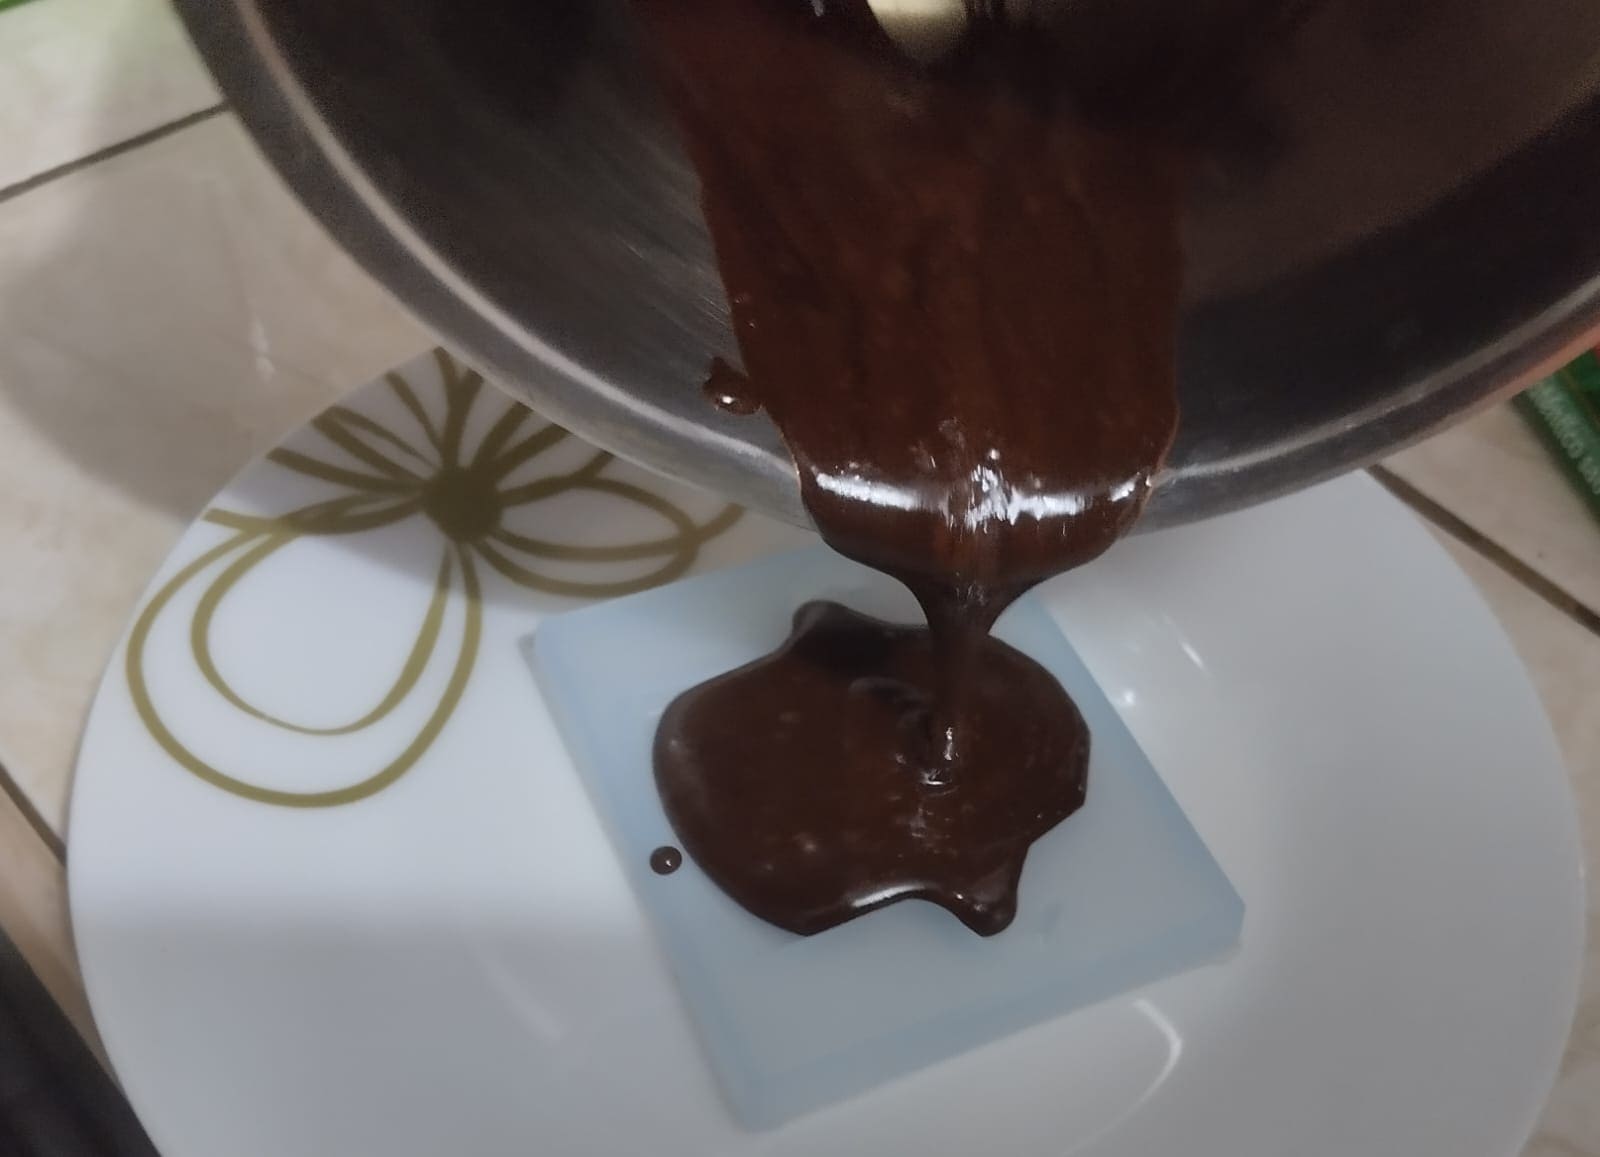
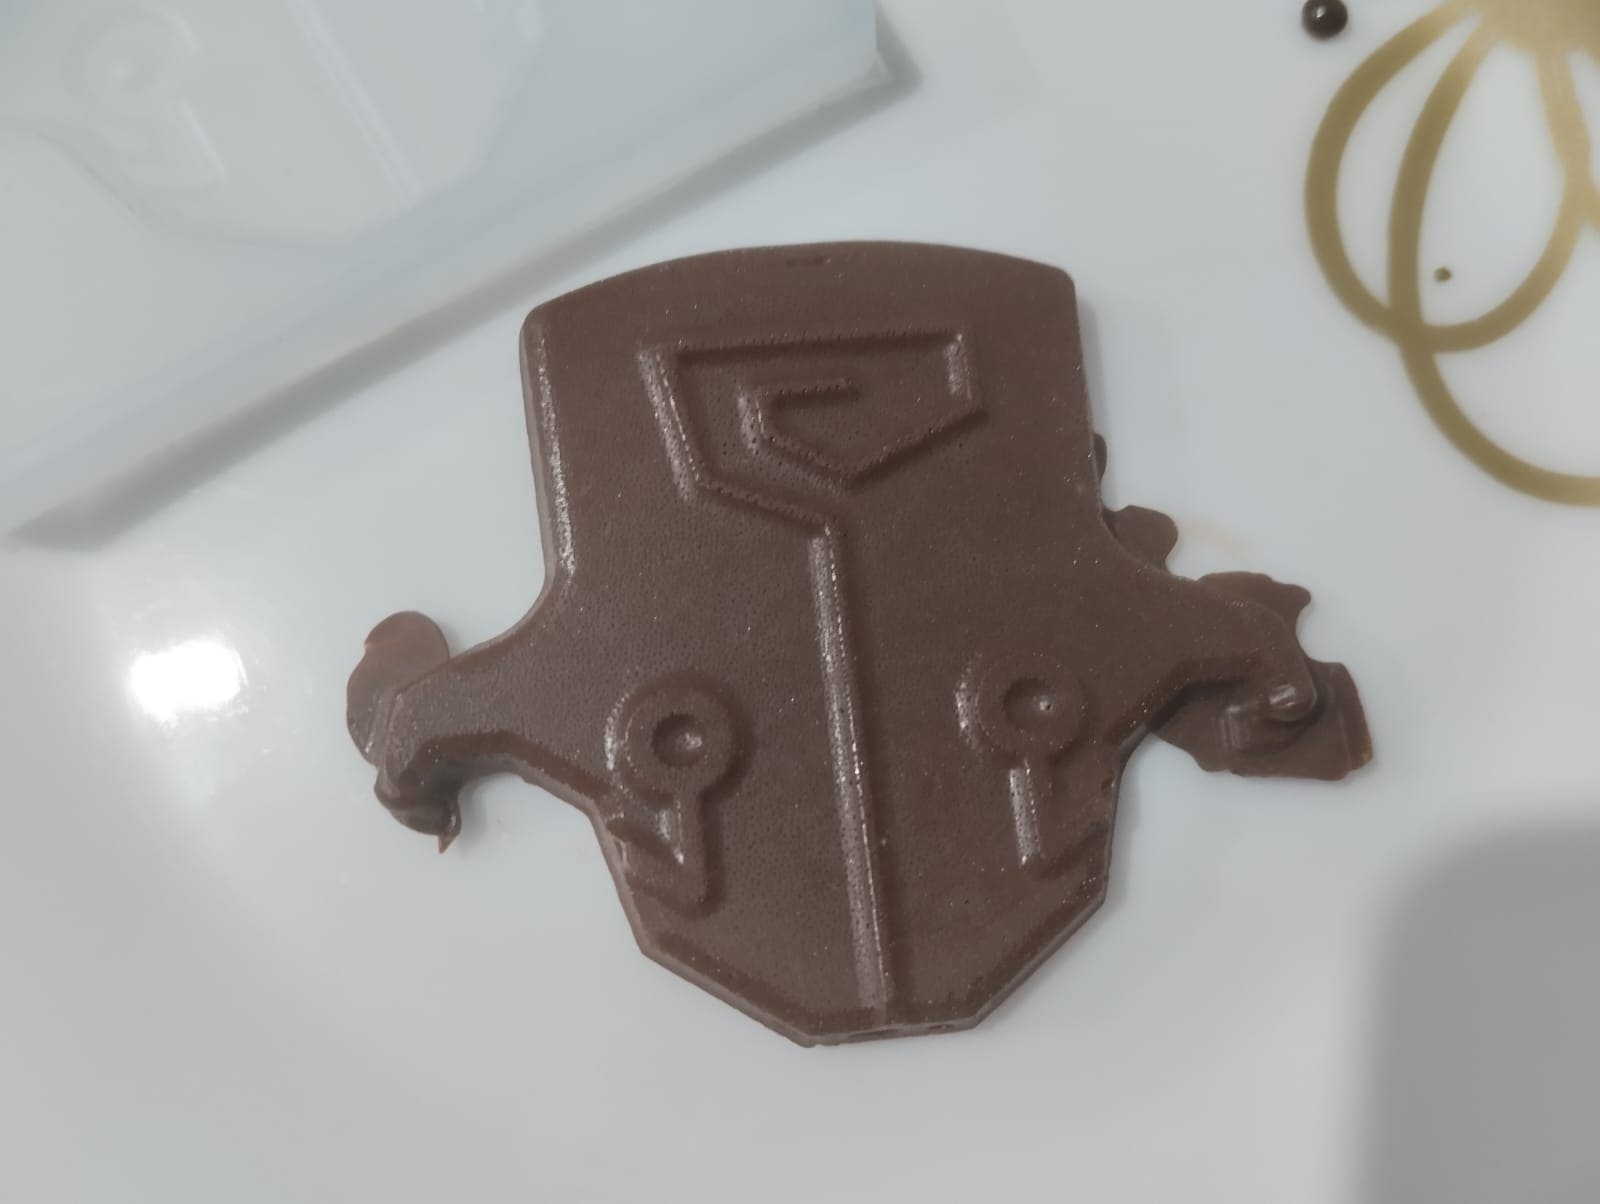
For the casting process, I used the A-10 mold to cast chocolate.
Here is the final result:
This time i decided to use the remaining molds for casting with epoxy resin93:
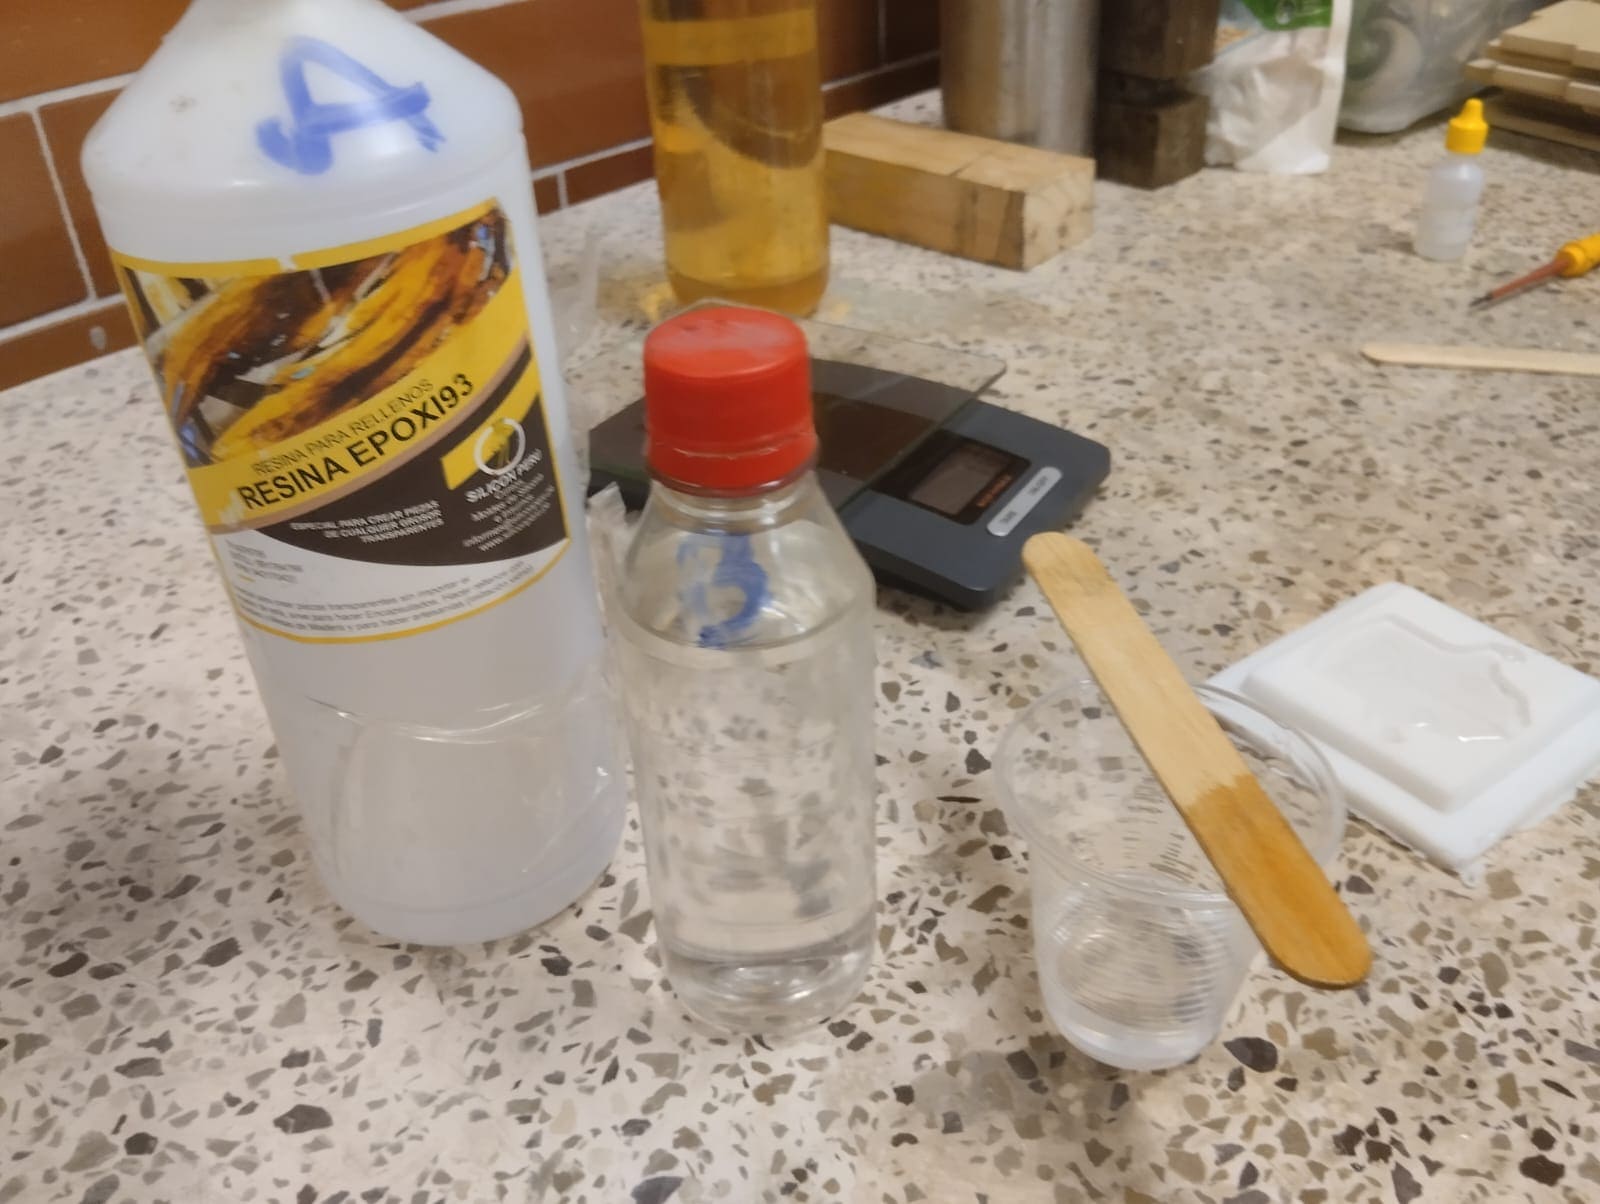
This resin works in a proportion of 3 to 1, (you can find more information here.) and datasheet.. I mixed and add the mix to the mold:
Also, I made a mixture of resin with wood shavings.
The curing time of epoxy resin is considerably longer, typically ranging between 24 to 36 hours.
Do not forget to add a release agent, this is what happens when you dont use it: