Week 10: Mechanical Design and Machine Design
Week 10: Mechanical Design and Machine Design

The dates highlighted in red indicate weekends and holidays in my country. On these days, the laboratory is closed, so I need to optimize my time as much as possible.
This week I decided to build a delta robot. The delta robot is a machine that bases its movements on inverse kinematics, which involves calculating the positions and angles of the joints necessary for the end of the robot or mechanical system to move to a position or perform a specific task. This technique is very useful in the programming of robots and automated systems, as it allows engineers and programmers to specify desired movements and positions and then calculate the necessary joint movements to achieve them.
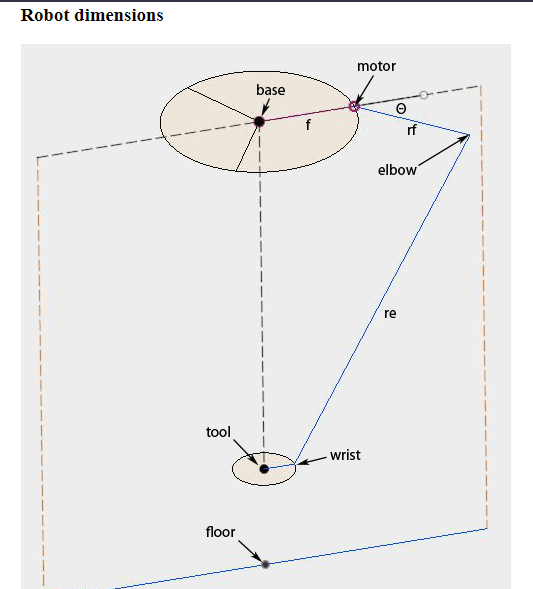
To calculate the dimensions of the delta robot parts, I used the following tool . On this page, you can optimize the dimensions of the robot to obtain the area in which the robot can work. The image below shows the dimensions that matter in a delta robot:
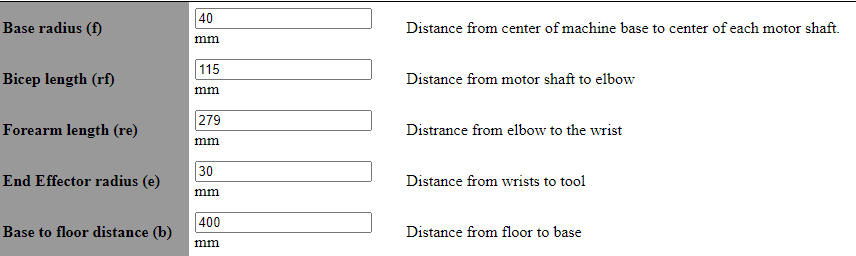
The final dimensions I decided to use were the following:
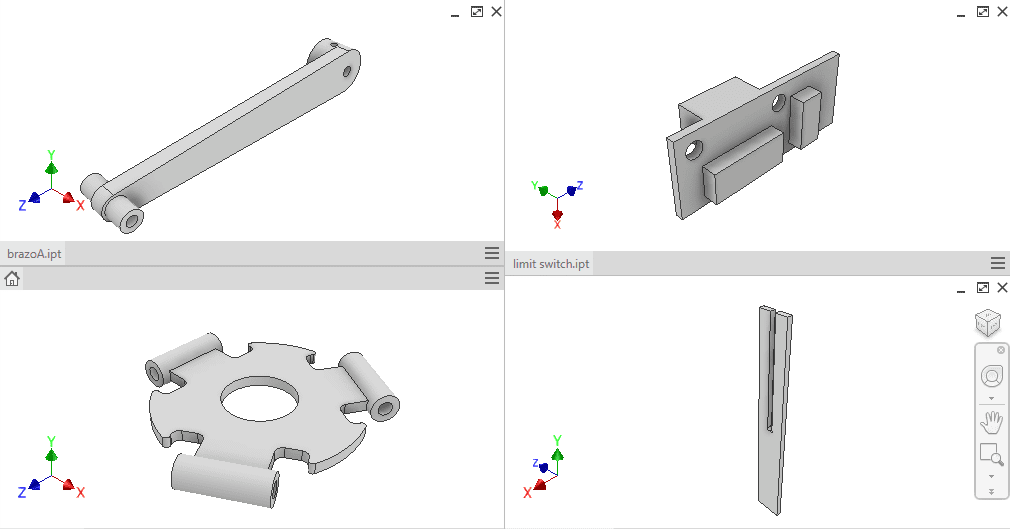
I started by designing the base where the motors will be placed:

Then I proceeded with the other parts:
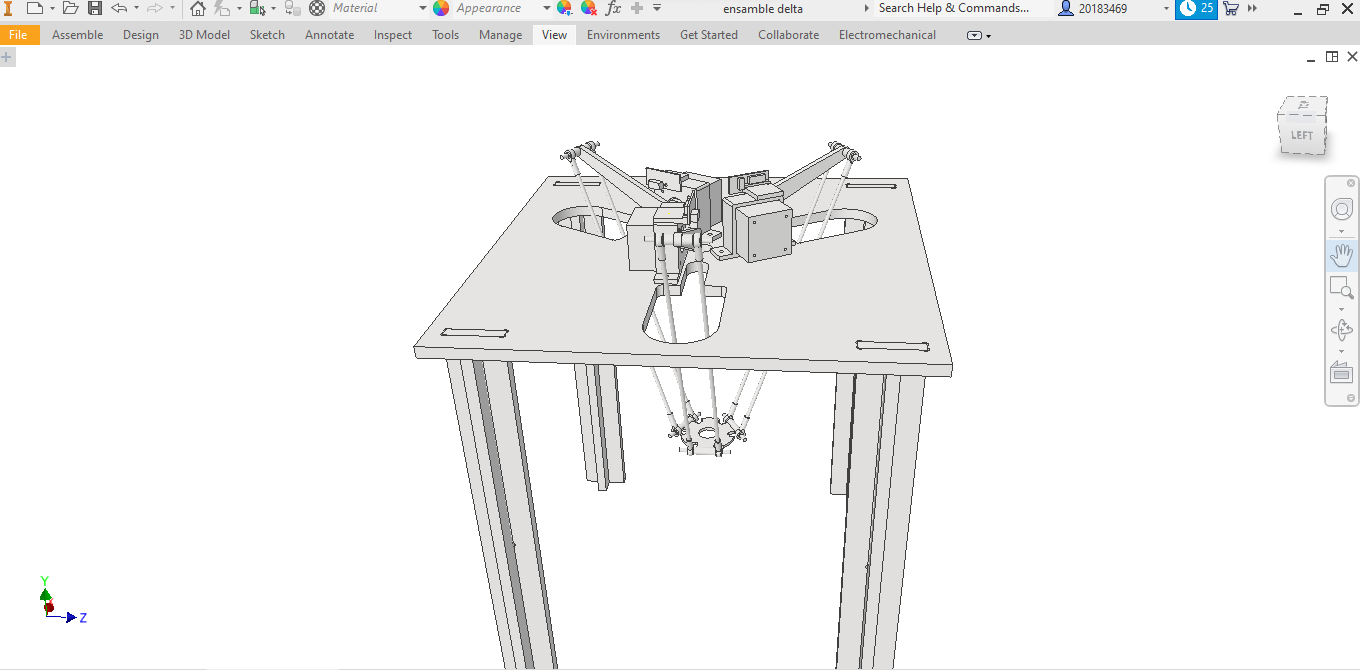
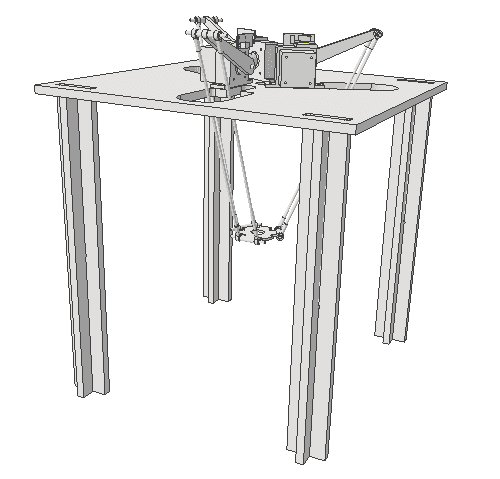
Here is where the final assembly can be seen:
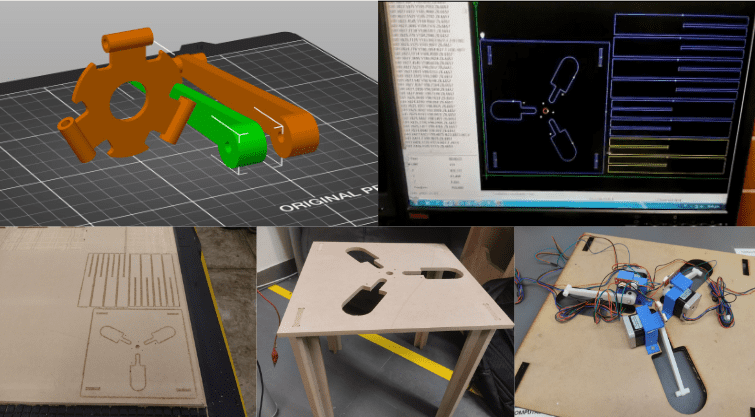
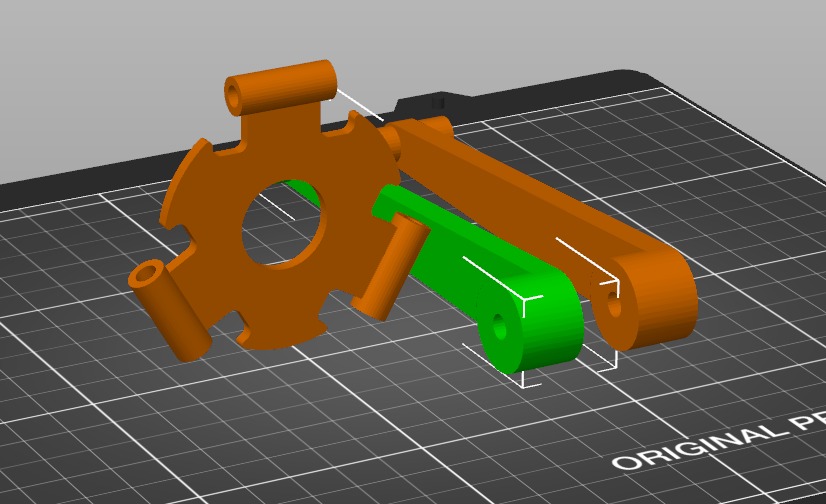
The parts were manufactured with 3D printing and CNC, to later assemble them and test the mechanism:
I used two types of printers to fabricate the parts using different materials. For smaller parts, I required a higher resolution that was not provided by FDM printers. Therefore, I utilized other printers capable of achieving the required level of precision and detail.
Pieces printed in ABS using FDM:
Pieces printed using Polijet technology:
For the structure of the machine, I used MDF:
Here you can see a video operating the machine manually:
Once we have the machine fabricated, we proceed to implement the control: To program the control i found a well documented final project where they make a similar machine. Here is the link so you can see it.
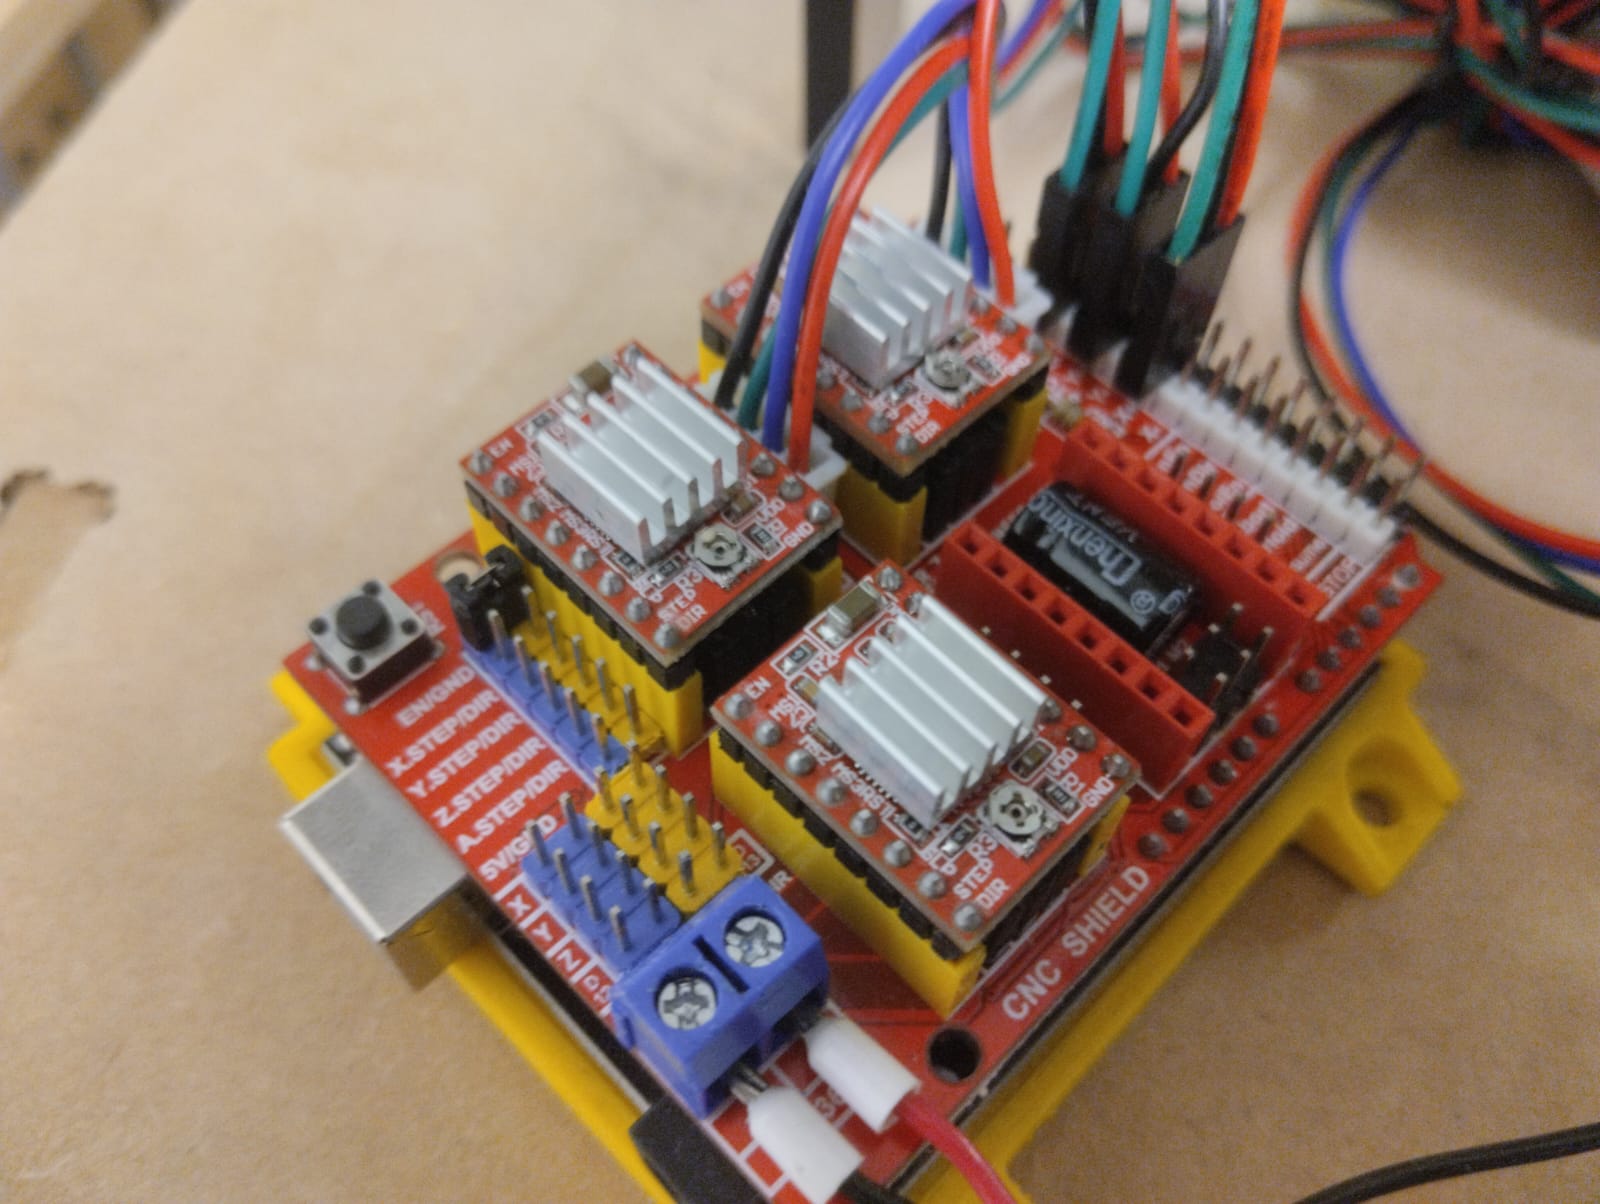
For the electronic setup, I utilized an Arduino UNO microcontroller board and a CNC shield, along with Pololu drivers. The Arduino UNO served as the brain of the system, providing the necessary processing power and I/O capabilities. The CNC shield acted as an interface between the Arduino and the various components, enabling smooth communication and control. The Pololu drivers were employed to regulate the stepper motors, ensuring precise movement and positioning. This combination of Arduino UNO, CNC shield, and Pololu drivers formed a robust electronic foundation for the project, allowing for efficient control and coordination of the robotic system.
The A4988 utilizes microstepping to achieve smooth and accurate movements, making it ideal for projects that require high precision and detailed motor control.
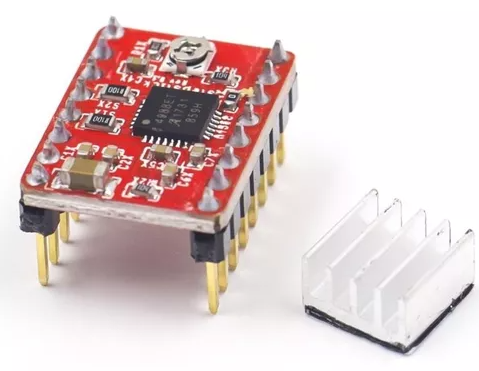
To assemble the Arduino UNO with a CNC shield and Pololu A4988 drivers, start by securely placing the Arduino UNO board on a stable surface. Align the pins on the CNC shield with the corresponding headers on the Arduino, ensuring a proper connection. Insert the Pololu A4988 drivers into the designated slots on the CNC shield, making sure they are oriented correctly. Press down firmly to ensure secure insertion. Verify all connections and then connect the necessary power supply and establish wiring connections between the drivers and the motors. With the assembly complete, the electronic system is ready for programming and motor control.
It was programmed in Arduino IDE using the libraries: “Accelstepper” y “DeltaKinematics”. The Accelstepper library allows us to control stepper motors, based on steps. While the DeltaKinematics library is responsible for transforming the coordinates in space into angles for the motors. The key to understanding how these libraries interact in the code is that the Mix() function returns a trajectory of points, in the setMotors() function the inverse() class of the DeltaKinematics library is used to transform the three-dimensional coordinates into angles for the motors, these angles are stored in DK.a, Dk.b and Dk.c. Before ordering the motors to go to that position with the moveTo() and run() classes of the AccelStepper library, it is necessary to transform the angles into steps, so we need how many degrees 1 step represents. Therefore, it is multiplied by a “Multiplier” factor, in our case we use a microstepping of 1/16, so: Multiplier = 16 steps / 1.8º = 8.889. It is important to use microstepping since it allows greater precision and fluidity in the movement, for example: if we use full step we have 1.8º per step, which gives us a resolution of +/- 5.192 mm, while with 1/16 steps , 0.1125º per step and +/-0.323 mm of resolution. Here you can find a video where microstepping is explained. It should be noted that since we do not have encoders, we do not have a closed loop, so we use a limit switch to achieve homing and from there count the steps. The speed and acceleration variables have to be calibrated based on the process you want to perform.
Here is the code:
                    #include <DeltaKinematics.h>
                      #include <AccelStepper.h>


                      const int centerX = 0;  // Coordenada x del centro del círculo
                      const int centerY = 0;  // Coordenada y del centro del círculo
                      const int radius = 45;   // Radio del círculo
                      const int numPoints = 40; // Número de puntos a generar
                      const int z = -285;
                      #define Multiplier 8.889 //8.889//91.02222222
                      #define HomeAngle -30 //80 degrees from vertical or 79 degrees from horizontal


                      #define mSpeed 2000
                      #define Acceleration 500000
                      #define Speed 1000

                      #define XStepPin 2
                      #define YStepPin 3
                      #define ZStepPin 4

                      #define XDirPin 5
                      #define YDirPin 6
                      #define ZDirPin 7

                      #define XLimitPin 9
                      #define YLimitPin 10
                      #define ZLimitPin 11

                      // #define enablePin 8

                      DeltaKinematics DK(115,279,30,40);

                      AccelStepper stepperA(1,XStepPin,XDirPin);
                      AccelStepper stepperB(1,YStepPin,YDirPin);
                      AccelStepper stepperC(1,ZStepPin,ZDirPin);

                      void setup()
                      {
                        delay(3000);
                        Serial.begin(115200);

                        pinMode(XLimitPin, INPUT_PULLUP);
                        pinMode(YLimitPin, INPUT_PULLUP);
                        pinMode(ZLimitPin, INPUT_PULLUP);
                        // pinMode(enablePin, OUTPUT);
                        // digitalWrite(enablePin,HIGH);

                        stepperA.setMaxSpeed(mSpeed);
                        stepperA.setSpeed(Speed);
                        stepperA.setCurrentPosition(0);
                        stepperA.setAcceleration(Acceleration);

                        stepperB.setMaxSpeed(mSpeed);
                        stepperB.setSpeed(Speed);
                        stepperB.setCurrentPosition(0);
                        stepperB.setAcceleration(Acceleration);

                        stepperC.setMaxSpeed(mSpeed);
                        stepperC.setSpeed(Speed);
                        stepperC.setCurrentPosition(0);
                        stepperC.setAcceleration(Acceleration);


                        Serial.println("START");
                        Serial.println("Enabling");

                        // Enabled();
                        Serial.println("HOME");
                        HomeMachine();
                        Serial.println("Rady, set, go!");
                        // Espera un momento antes de generar el siguiente punto
                          DK.x = 0;
                          DK.y = 0;
                          DK.z = z;
                          SetMotors();  // call of inverse Delta Kinematics is done inside SetMotors()
                          delay(3000);
                      }

                      void loop()
                      {
                         if (Serial.available() > 0) {
                          char inputChar = Serial.read();
                          if (inputChar == '1') {
                             for (int i = 0; i < 30; i++) {
                               Mix();


                                  }

                             }


                          else if (inputChar == '0') {
                            stepperA.stop();
                            stepperB.stop();
                            stepperC.stop();
                            Serial.print("stop");
                          }
                          else if (inputChar == '3') {
                            HomeMachine();
                            Serial.print("homming");
                          }
                          }
                        }


                      void Mix(){
                        // Genera los puntos de la circunferencia


                        for (int i = 0; i < numPoints; i++) {
                          // Calcula la coordenada x
                          int x = centerX + radius * cos(i * 2 * PI / numPoints);
                          // Calcula la coordenada y
                          int y = centerY + radius * sin(i * 2 * PI / numPoints);
                          // Imprime las coordenadas en la consola serial
                          Serial.print("X: ");
                          Serial.print(x);
                          Serial.print(", Y: ");
                          Serial.println(y);
                          Serial.print(", Z: ");
                          Serial.println(z);
                          // Espera un momento antes de generar el siguiente punto
                          DK.x = x;
                          DK.y = y;
                          DK.z = z;
                          SetMotors();  // call of inverse Delta Kinematics is done inside SetMotors()
                          delay(10);
                        }
                      }


                      void SetMotors()
                      {
                        Serial.println("SetMotors");
                        DK.inverse(); // cal inverse Delta Kinematics
                        double A = DK.a*Multiplier;
                        double B = DK.b*Multiplier;
                        double C = DK.c*Multiplier;
                        Serial.println(DK.a);
                        Serial.println(DK.b);
                        Serial.println(DK.c);
                        Serial.println(DK.x);
                        Serial.println(DK.y);
                        Serial.println(DK.z);
                        Serial.println();
                        stepperA.moveTo(A);
                        stepperB.moveTo(B);
                        stepperC.moveTo(C);

                        while(stepperA.distanceToGo() != 0 || stepperB.distanceToGo() != 0 || stepperC.distanceToGo() != 0)
                        {
                          stepperA.run();
                          stepperB.run();
                          stepperC.run();
                        }
                      }
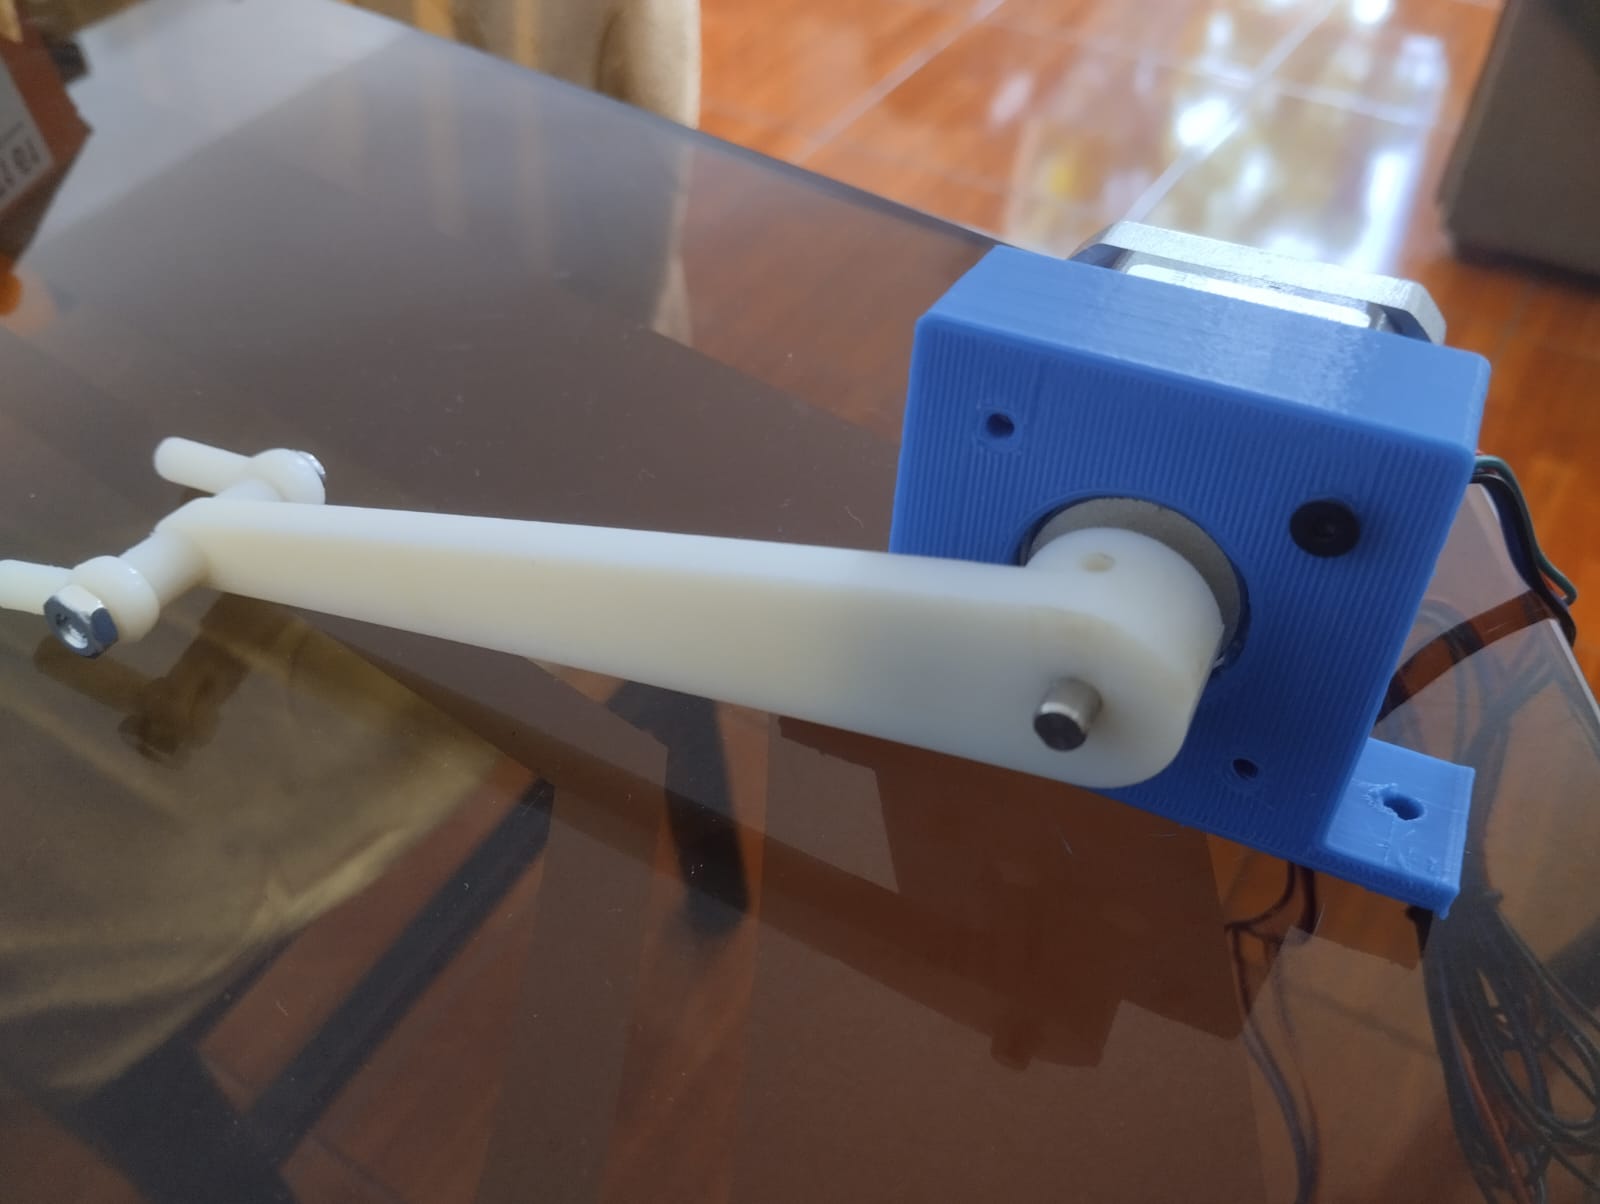
I started by assembling the 3D-printed parts with the motors and steel rods.
We assembled the cut pieces:

We added the electronics:
We added the limit switches and attached the motors to the machine's base.

Finally, we made the required connections and performed testing.
Here is a video of the machine working, when the machine is turned on it automatically starts homing, then the command is sent through the serial monitor to carry out the sequence. This time it is used to make a homogeneous mixture of coffee:
These are the components that were needed:
There a some improvements in the machine that comes to my mind: