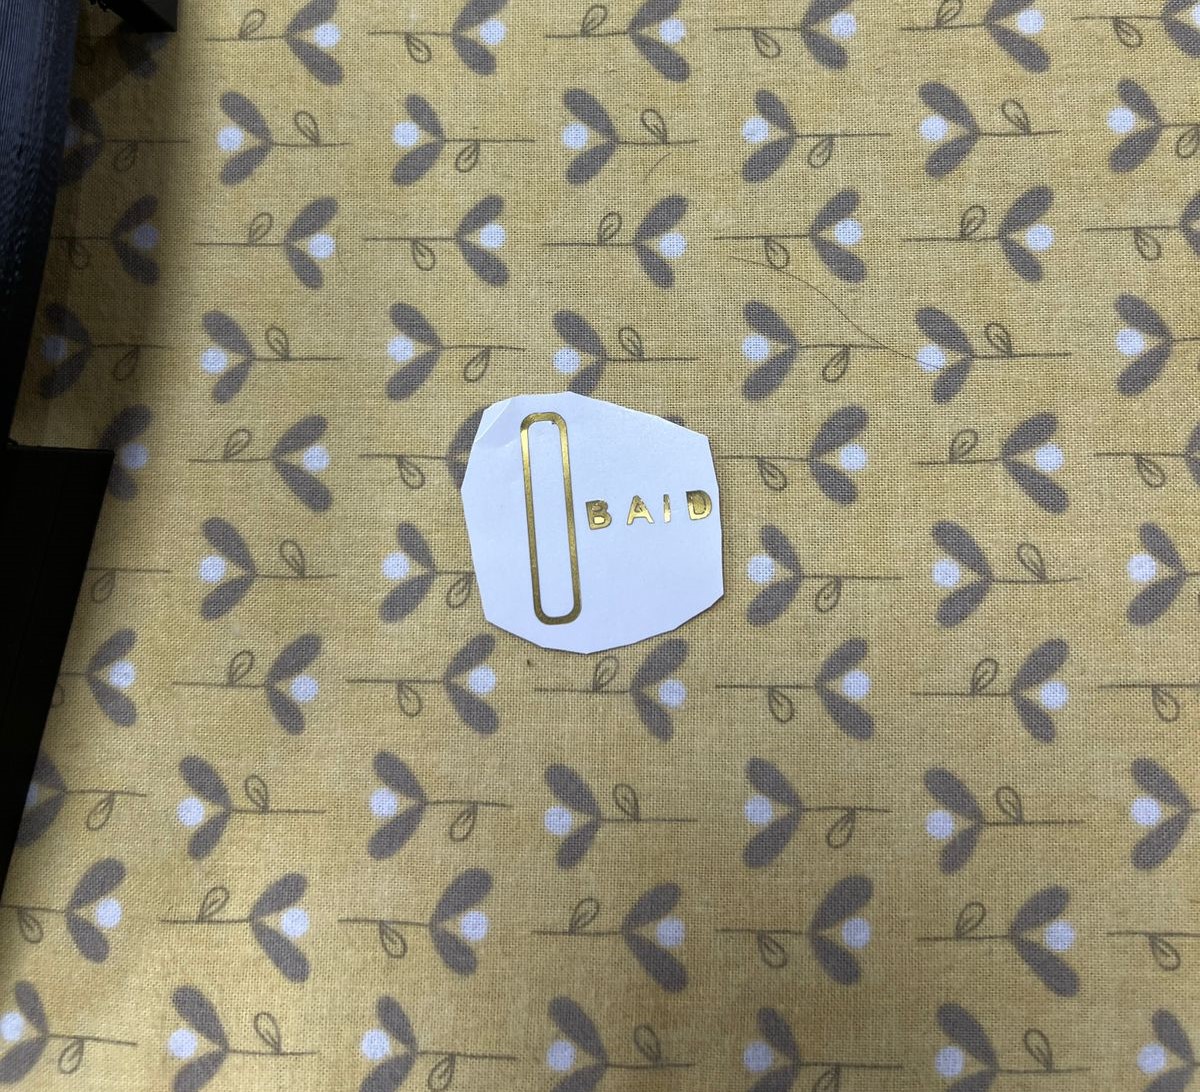
The E – farmer (Obaid)
I do a lot of indoor and outdoor farming and I’m constantly traveling between the 7 emirates of the UAE. Sometimes I need to leave the plants for weeks. Hence, I wanted to come up with an idea to make sure that my plane stays healthy. The first idea that came to my mind is to create a device that monitors the plants’ conditions. Unlike humans and animals, plants are the only living creature that relies on others to live. It’s time to make these creatures more independent!!
According to my research, plants have so many needs to stay alive including sunlight, water, air, nutrients, growing medium, and temperature. However, according to chat GPT, the top 4 things the plant needs are temperature, sunlight, water, and nutrients. The percentage of each varies from one plant to another.
The objective:
I do a lot of Indore planning and I’m constantly traveling between the emirates of the UAE. Sometimes I need to leave the plants for weeks. So, I wanted to cam up with an idea to make sure that my plane stays healthy. It’s like a pet feeder except it’s for a plant, the only living creature that relies on others to live, especially those who produce fruits. It’s time to make these creatures more independent!!
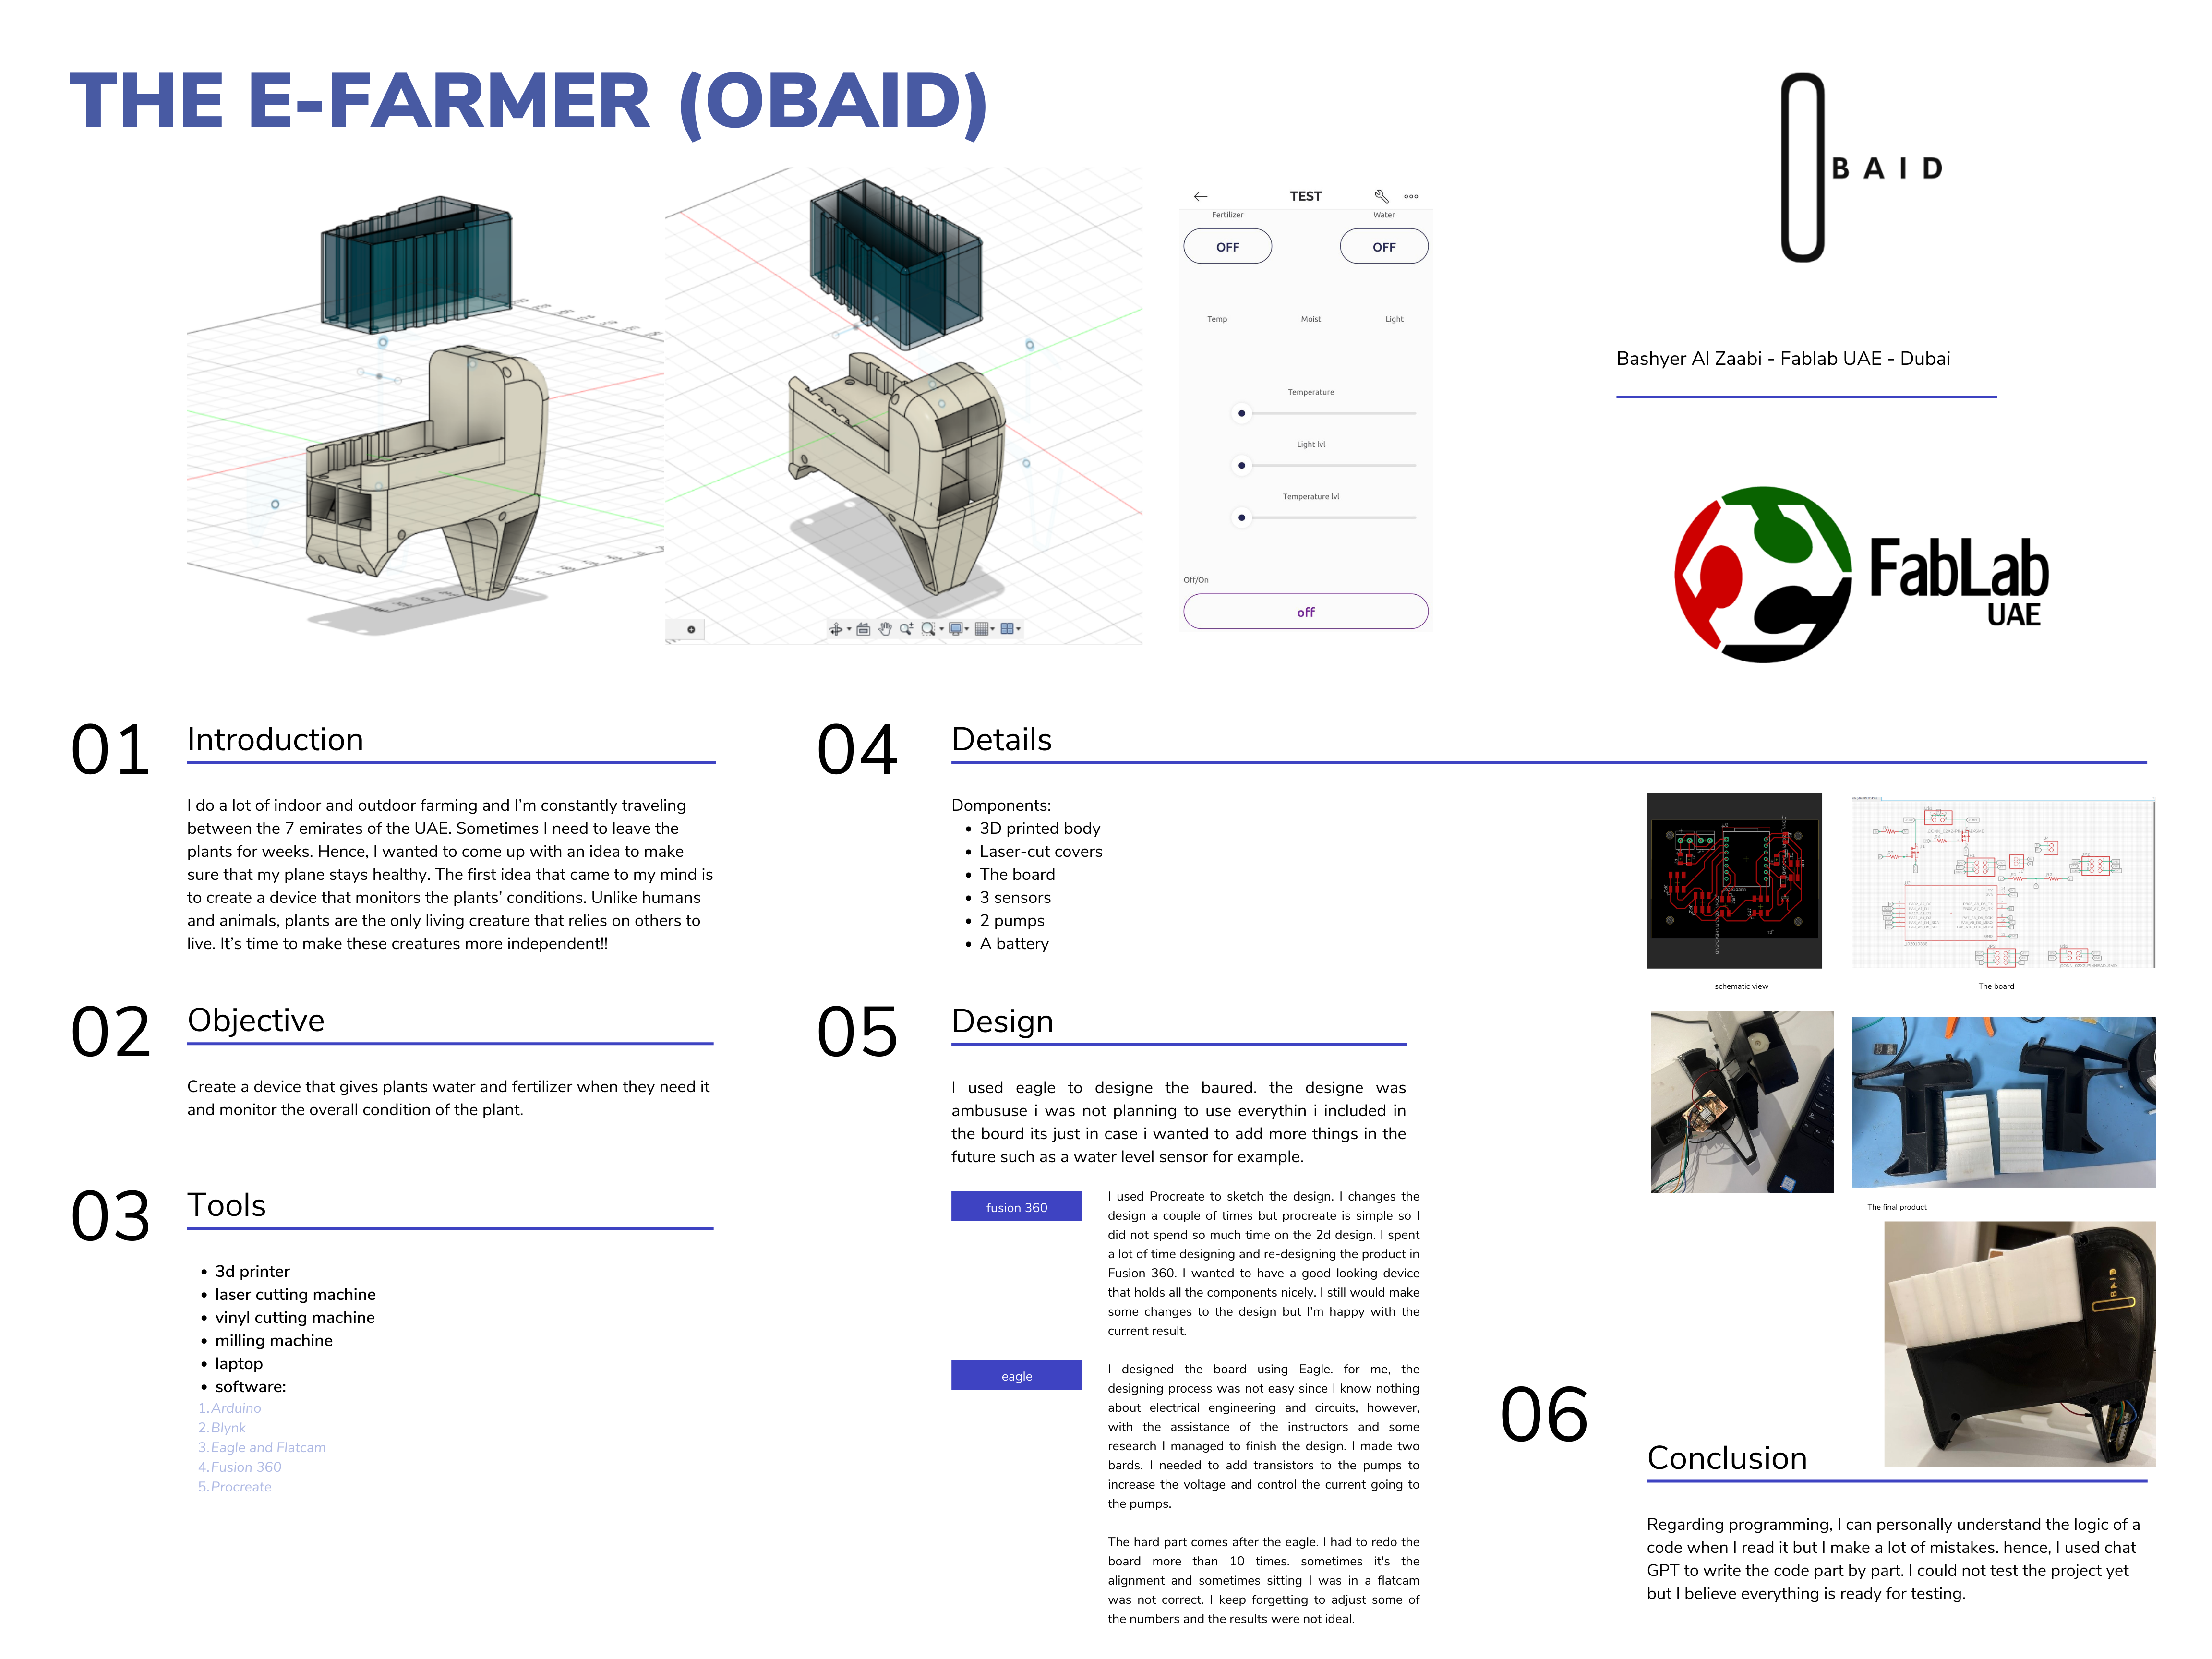
The objective of the project is to create a device that gives plants water and fertilizer when they need it and monitor the overall condition of the plant.
Simply, this project will be all about building a device that does the following:
1- Water the planets when to maintain a certain soil muster.
2- Give the plants fertilizer on a regular basis.
3- Notify me when the temperature exceeds the ideal temperature the plant needs.
4- Notify me when the plant is exposed to direct light for too long.
I will focus on three totally different plants as examples in this project.
| Plant | Temperature | Soil moisture | light |
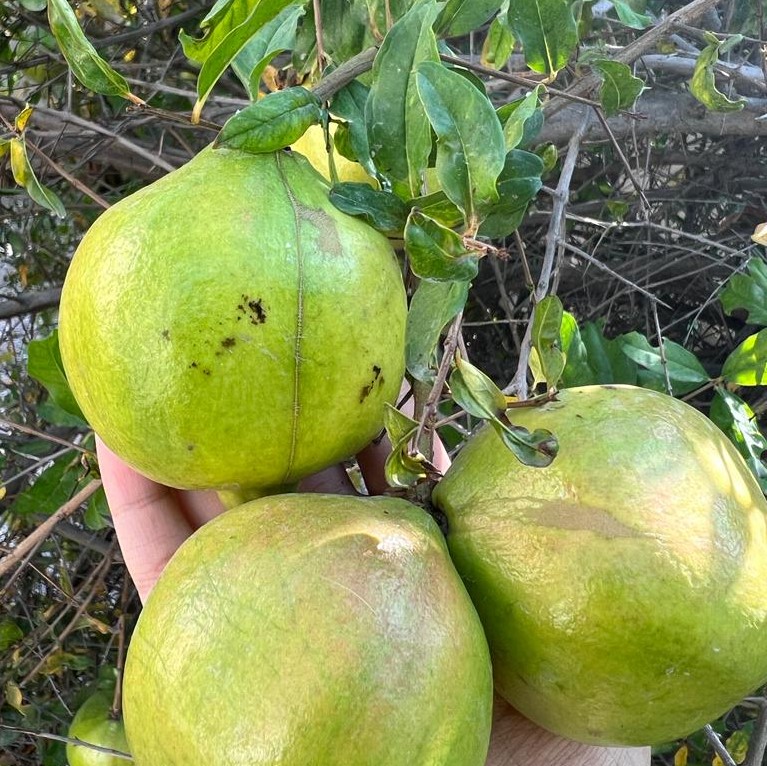
| Pomegranate | 68°F (20°C) and 86°F (30°C) | 30% to 50% | More than 6 h\day |
| Tomato | 70°F (21°C) and 85°F (29°C) | 50% to 70% | 6 to 8 h\day |
| Watermelon | 75°F (24°C) and 90°F (32°C). | 70% to 90% | 6 to 8 h\day |
The previous numbers are obtained from references published by the University of Georgia and the University of California.
The project:
Why Obaid?
Obaid is my grandfather’s name. He is working in farming since he was a kid. He taught me a lot about farming and he is the only farmer I personally know. Below you can see his farm during tomato season.

Why is it important???
For me, farming is about knowing exactly where everything you eats comes from. Many fruits and vegetables nowadays are being genetically modified. Companies are using inorganic substances to help increase the size of their fruit and vegetable. Moreover, farming is fun. It teaches us patience. Also, we need to consume more healthy products since so many foods are being genetically manipulated. Processed food is everywhere nowadays.
Some people do not have the time to take care of their planes. The existing solutions are rather expensive or limited. One of the best solutions I found is this
https://www.mhubchicago.com/blog/farmbot-automation-farming-cnc-machiningit’s a CNC machine that moves to monitor the plants however it is still limited. It covers a certain area and height and can’t be used in houses. It just douses not look good. Personally, I will probably not use it for my plants especially since they are the first thing you see when you enter our front yard. Also, it might be a bit complicated for an average farmer that has no background in such technologies.
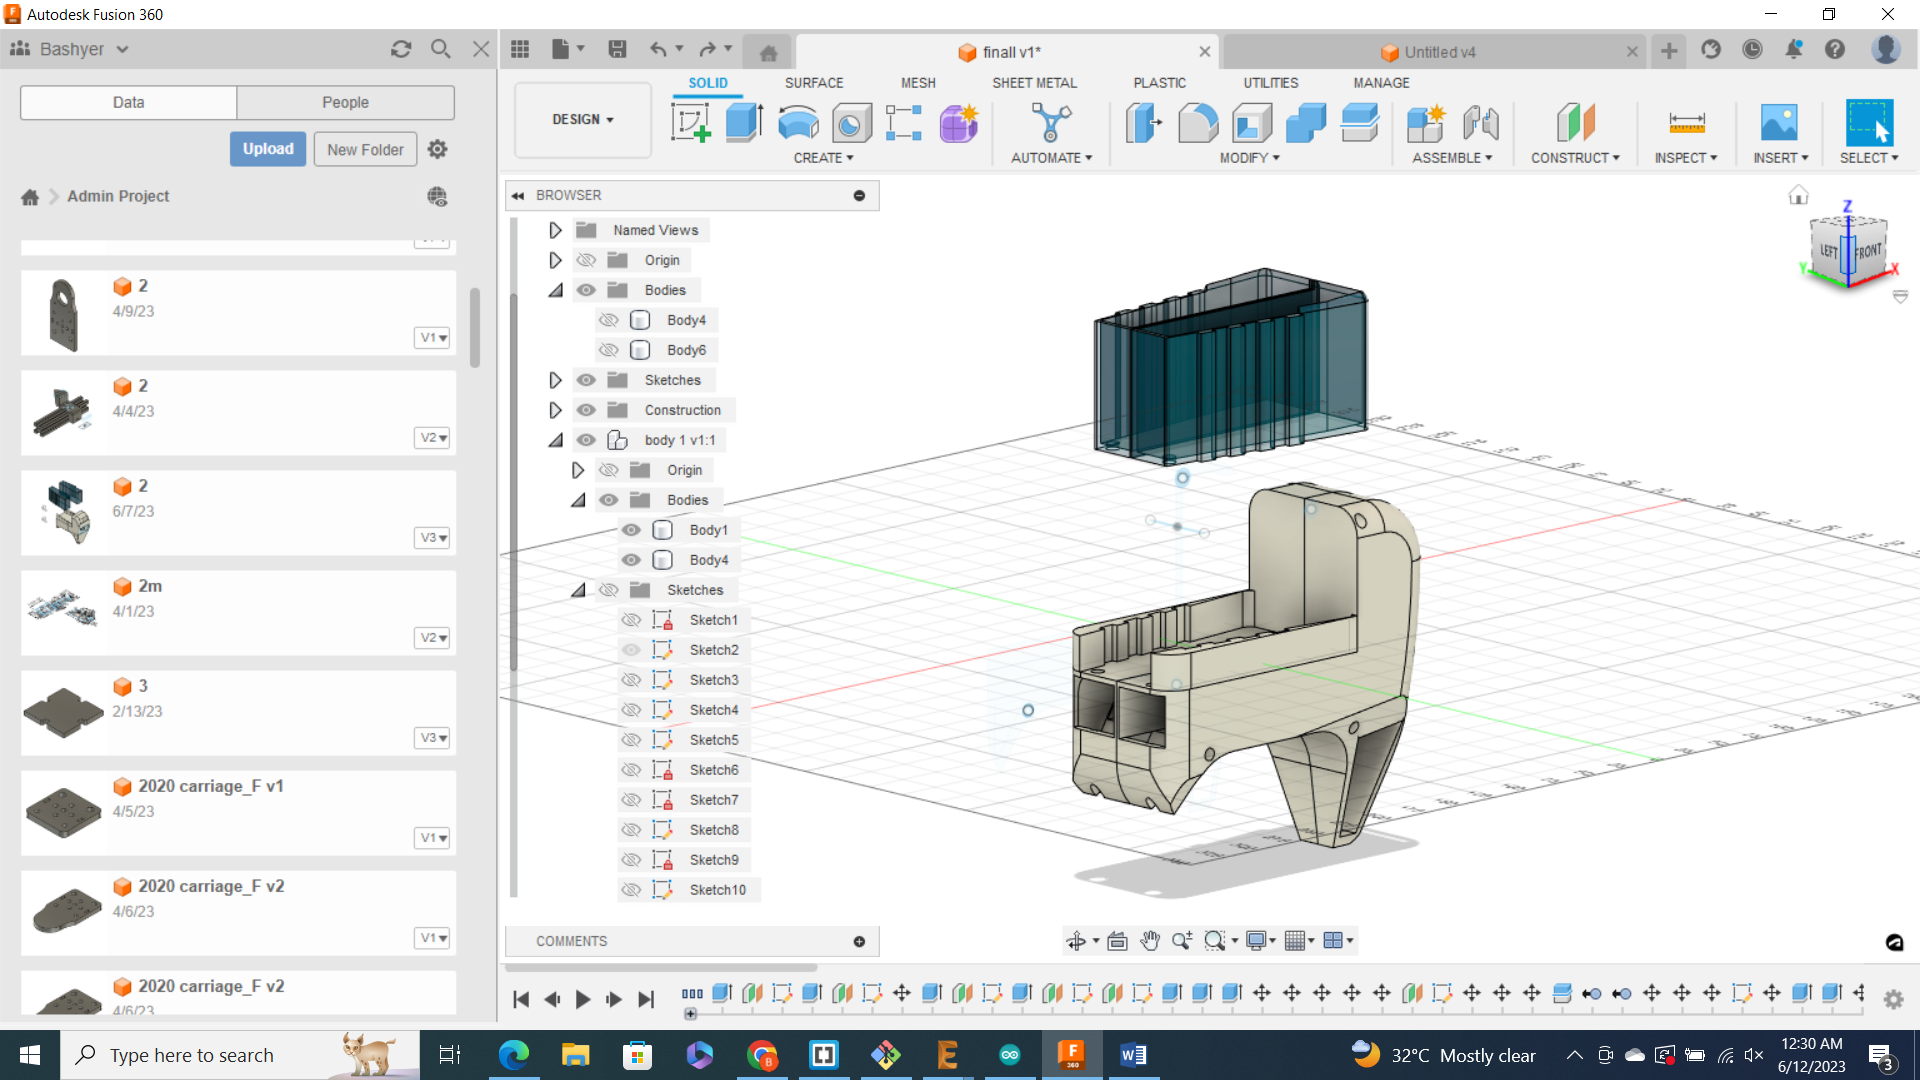
Hence, when designing the product, I tight to take these ideas into my consideration. This was the first design I thought of
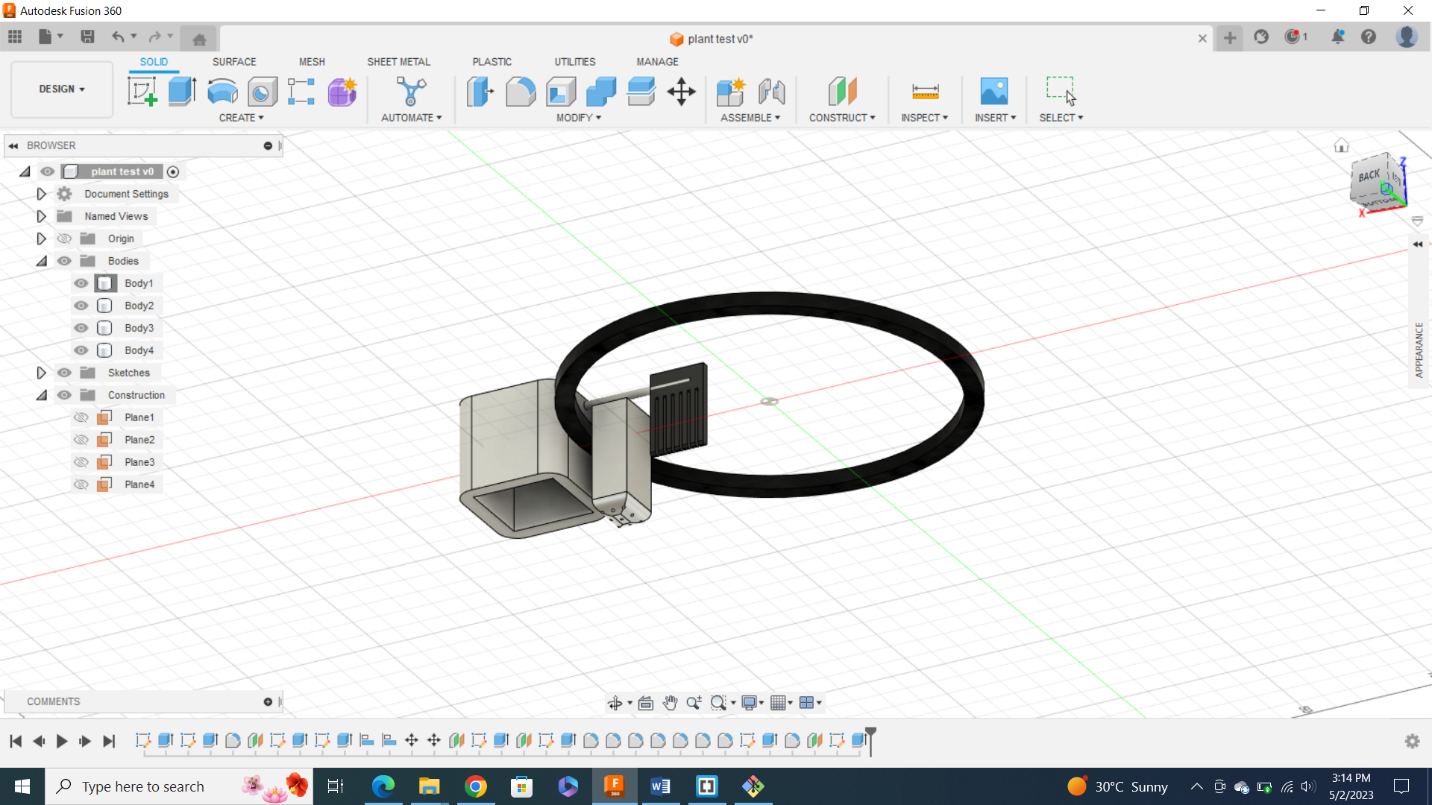
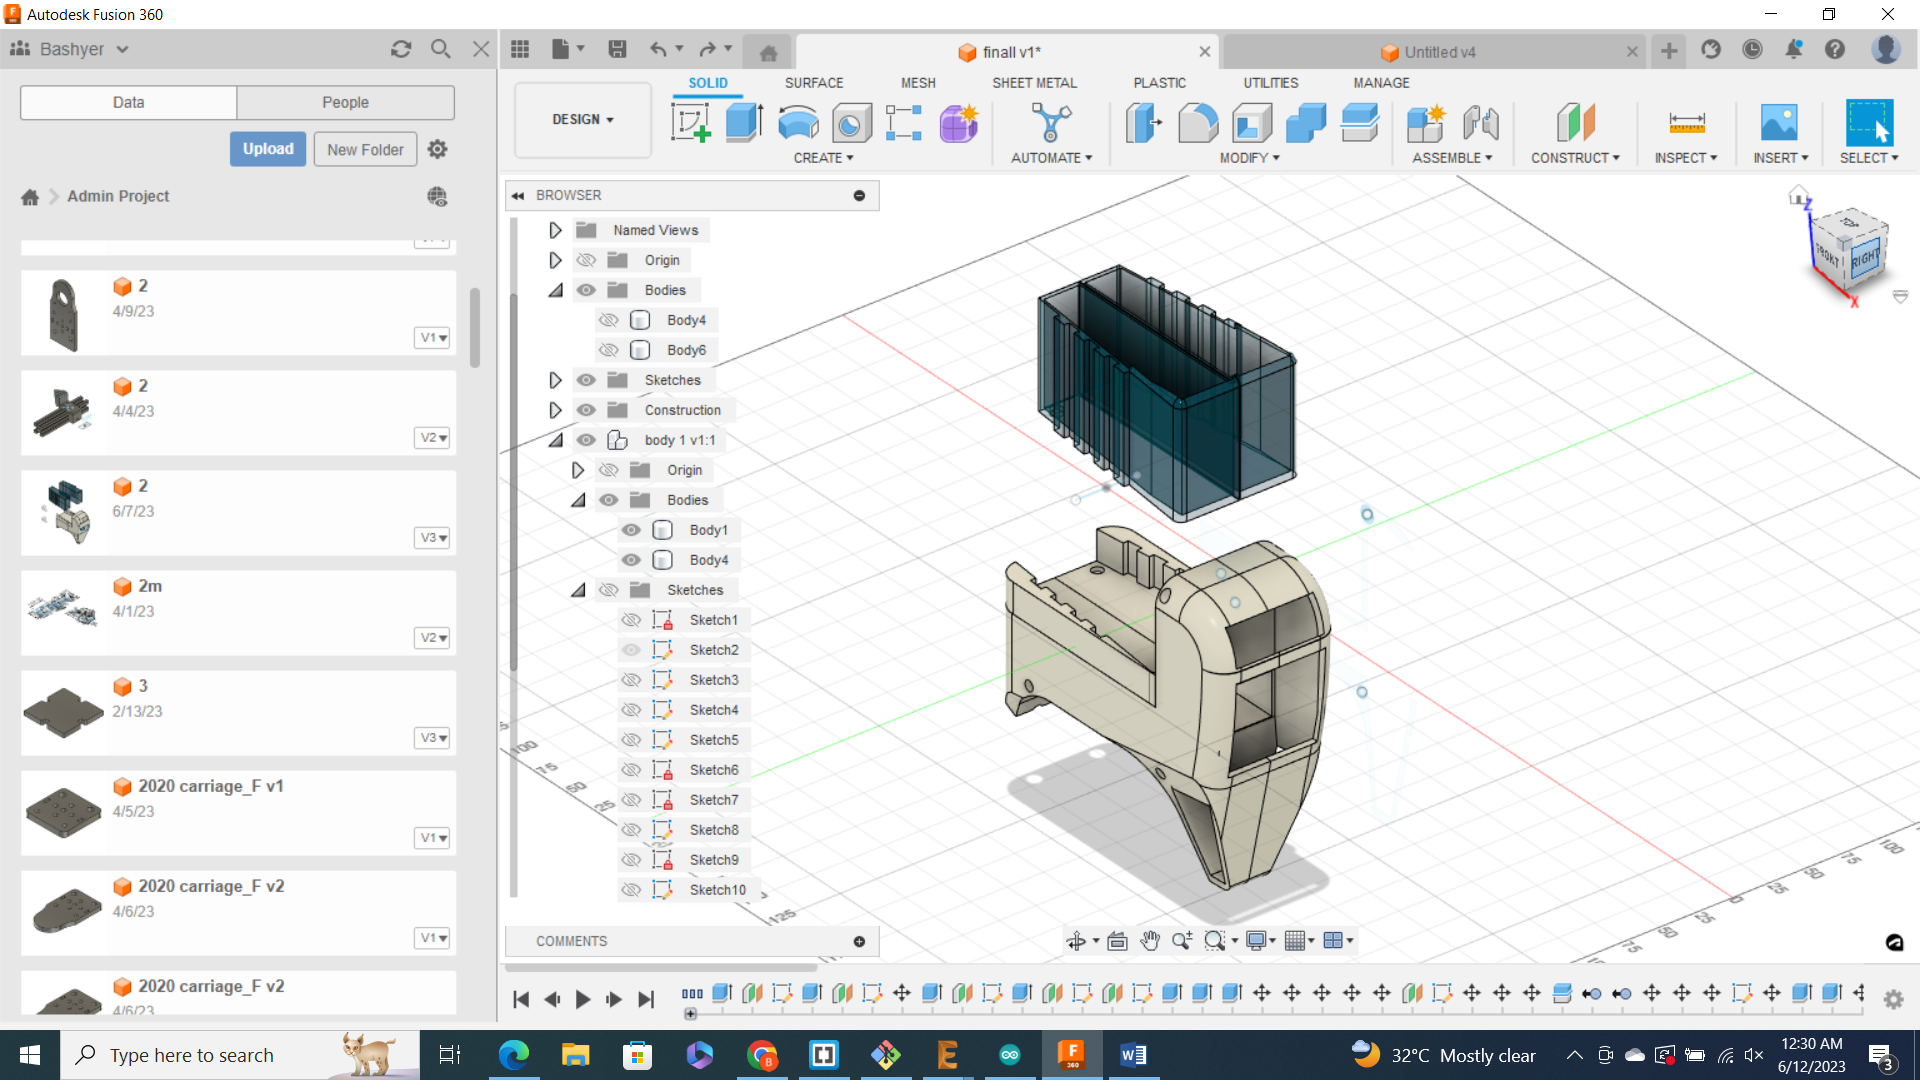
This device is good for indoor farming. This track helps the device moves around the plant. But then I thought why can I make it for indoor and outdoor farming? So I changed the design to this:

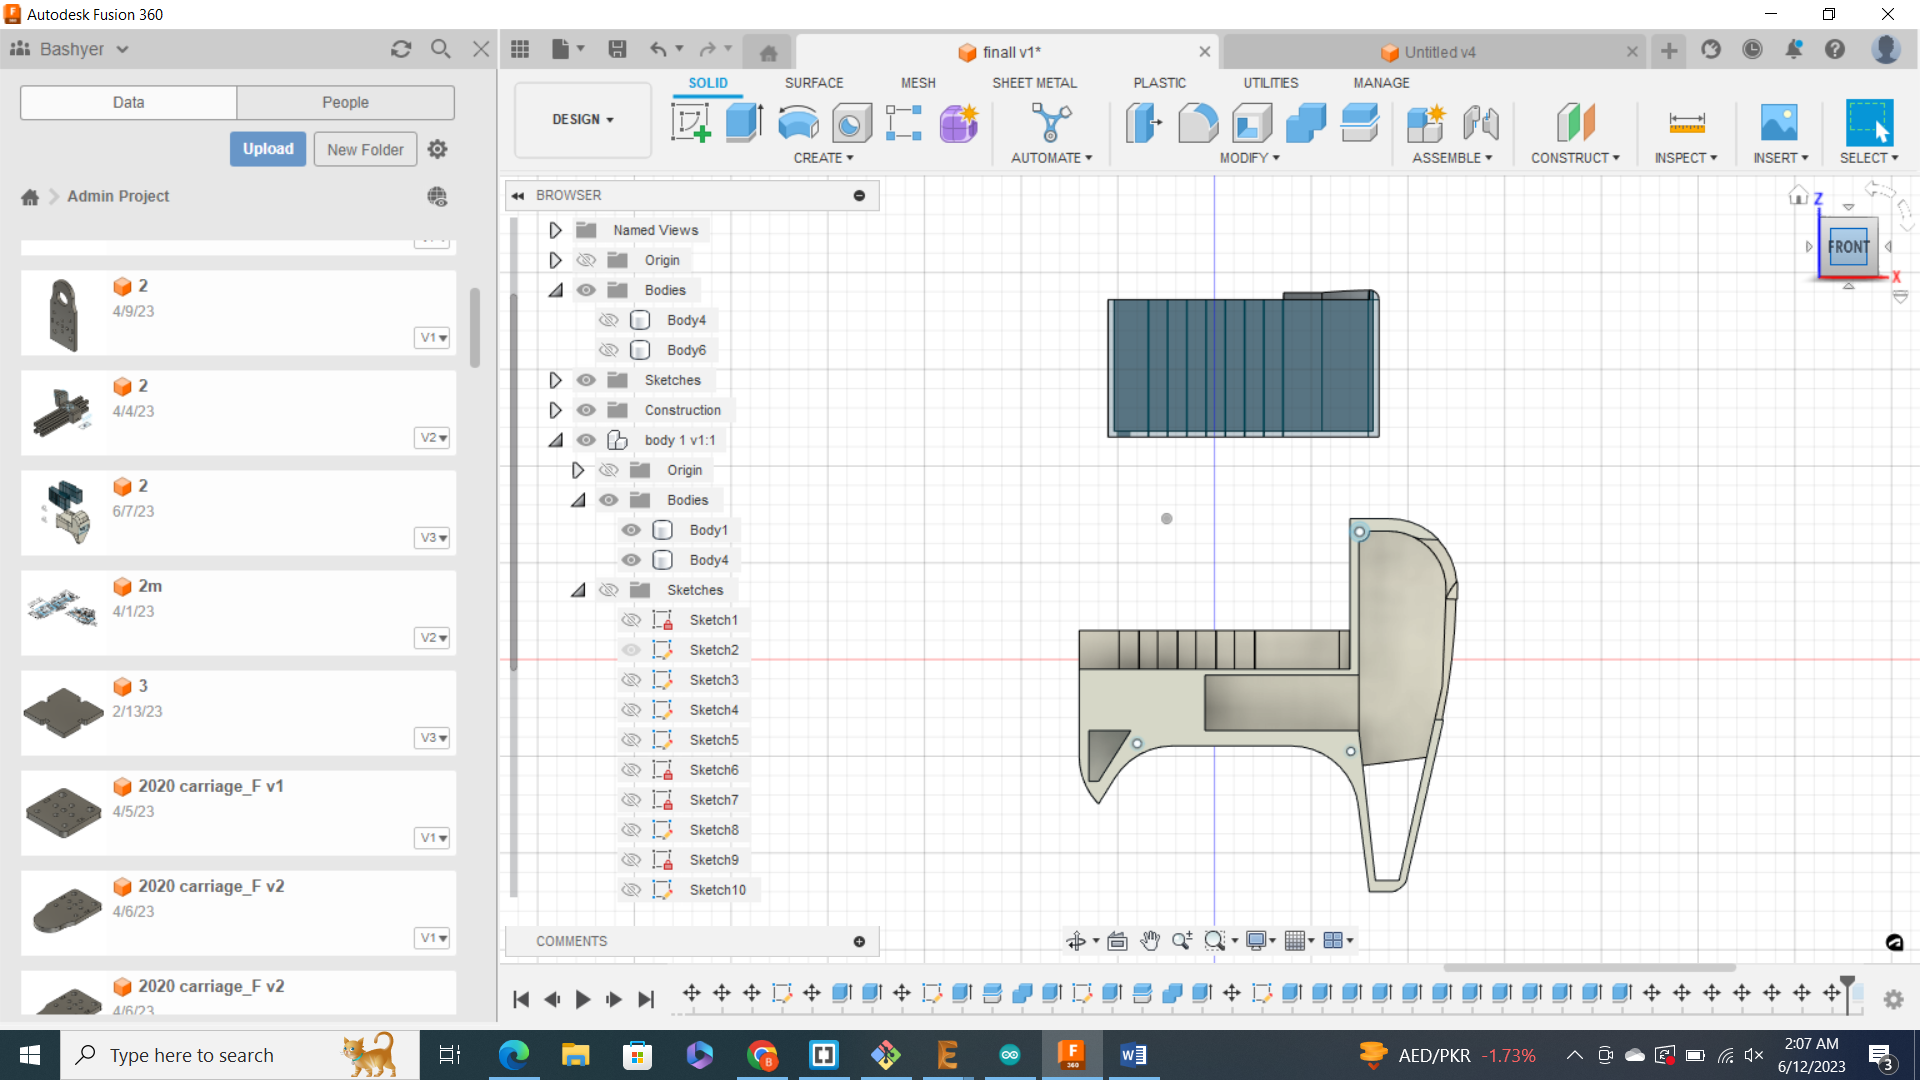
After knowing all the components, I will add to the device and measuring them I end up with this:
Development plane:
I’m planning to finish the project in five weeks. Hence, the project will take 4 weeks and I added two extra weeks for preparation and finalizing and documenting the project. These two weeks can be considered as additional time in case I needed some. The project should be submitted by 14th June 2023.
Preparation week:
Collecting the needed information, documents, tools, and materials for the project.
Timeline:
Week 1: Design the physical parts of the project.
Week 2: Design the electronic parts of the project. (Took me 2 weeks, unfortunately)
Week 3: visite the lab three times to use the machines.
Week 4: finishing the digital part of the project. (The application) + testing the final product.
Last 2 days for documentation.
Working on the final video and finalizing the project page on the website.
The design details:
My design includes:
1. 3 sensors:
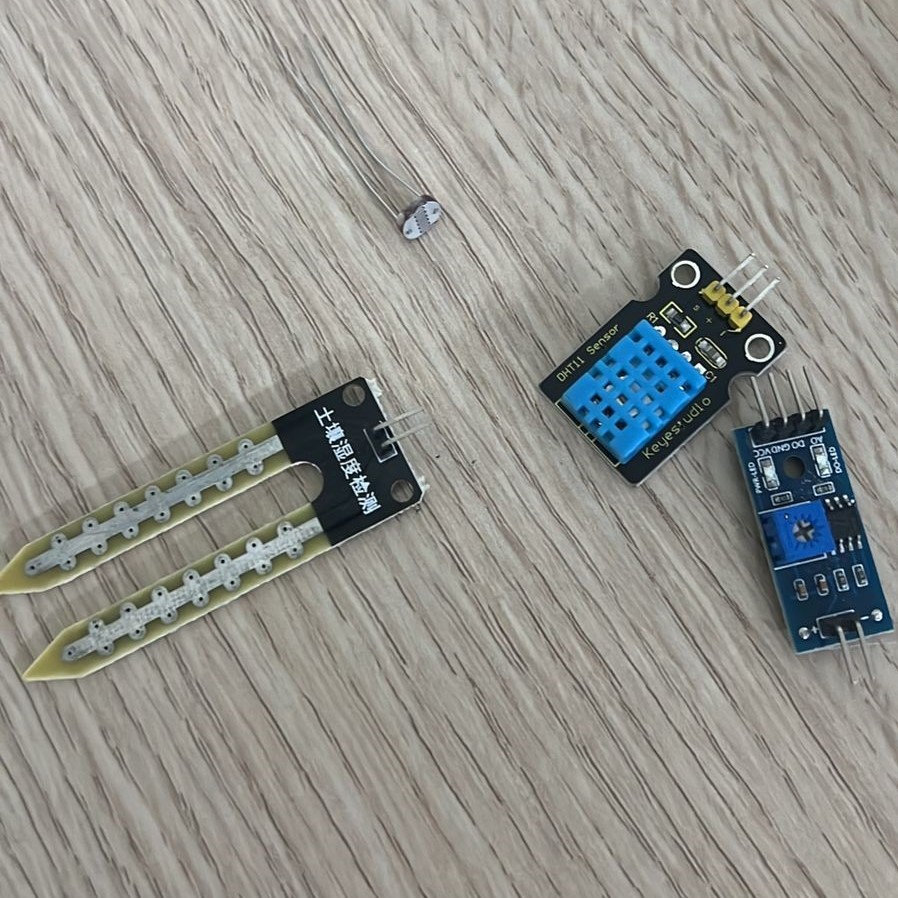
- Light.
- Temperature.
- Moist sensor.
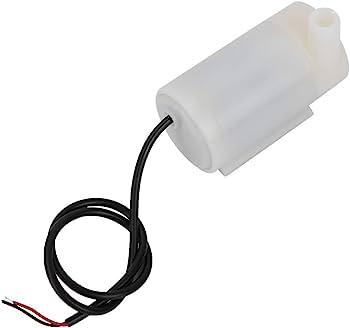
2. 2 pumps.
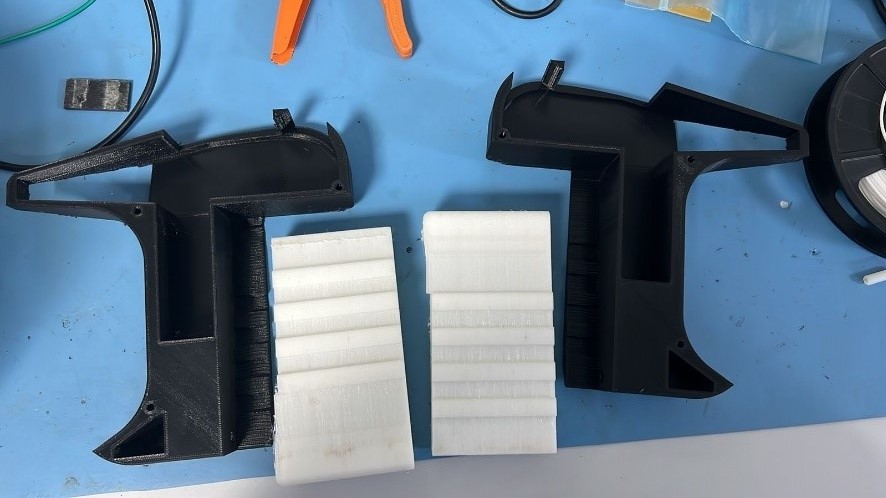
3. 3D printed body.
4. The Board.
The first thing I did is choosing a suitable microcontroller for my project so I chose Seeed Studio Xiao esp32c3. What makes it different from the ones I chose before is two things. it connects to wifi and Bluetooth and it has an extra port to link it to the battery.
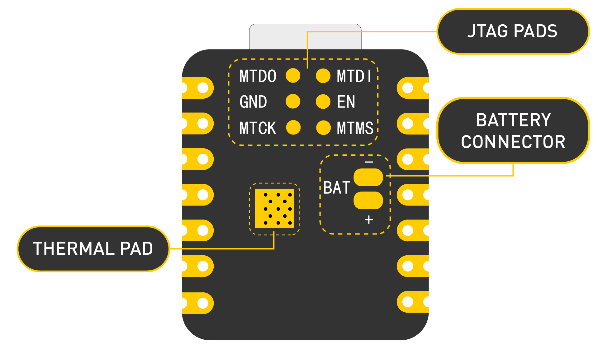
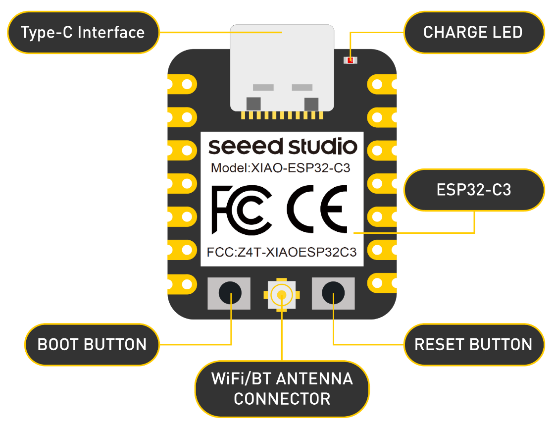
To design the board, I will probably only need this picture
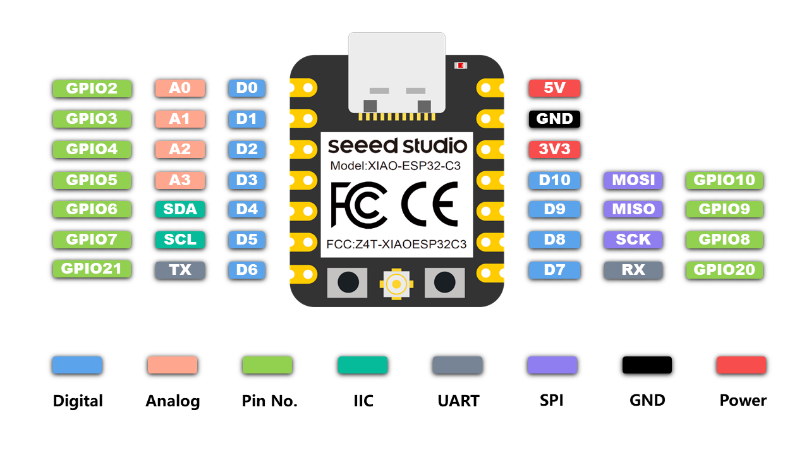
All the details are in the link below. Getting Started with Seeed Studio XIAO ESP32C3 | Seeed Studio Wiki
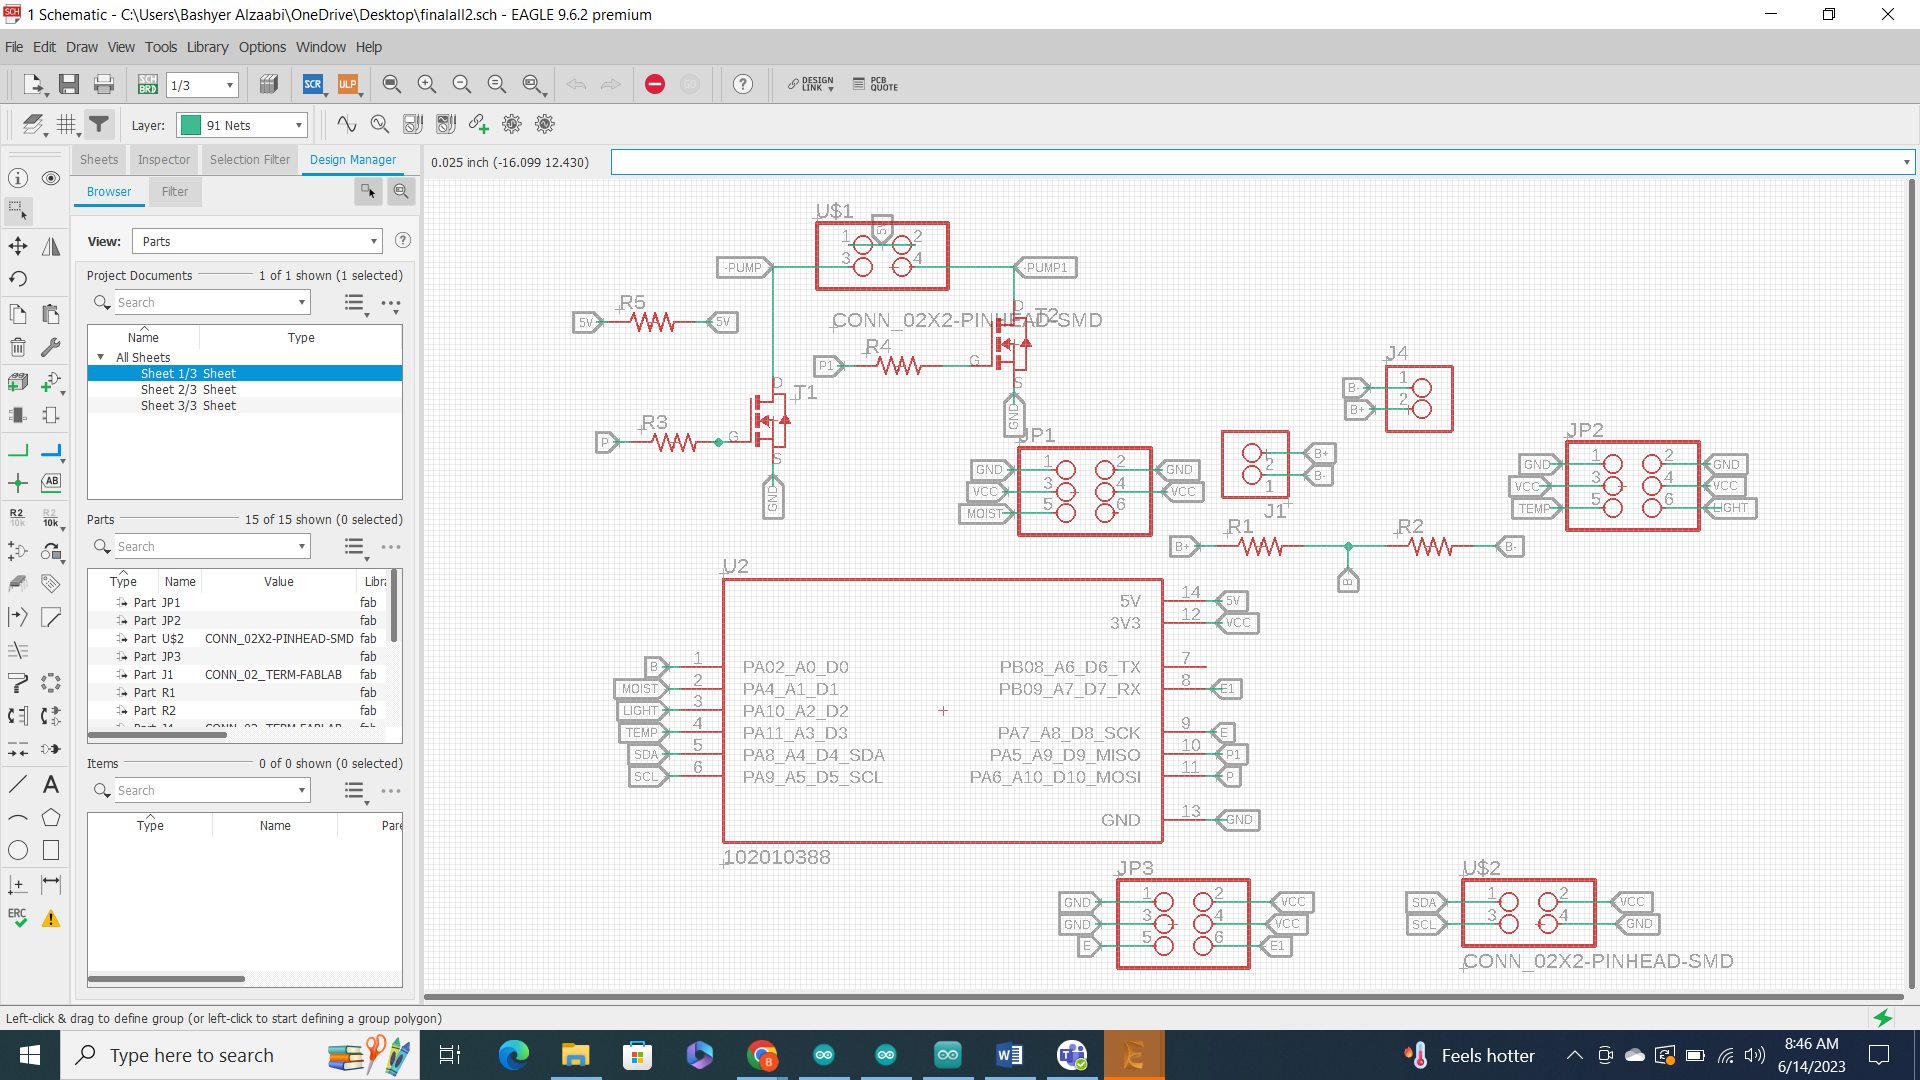
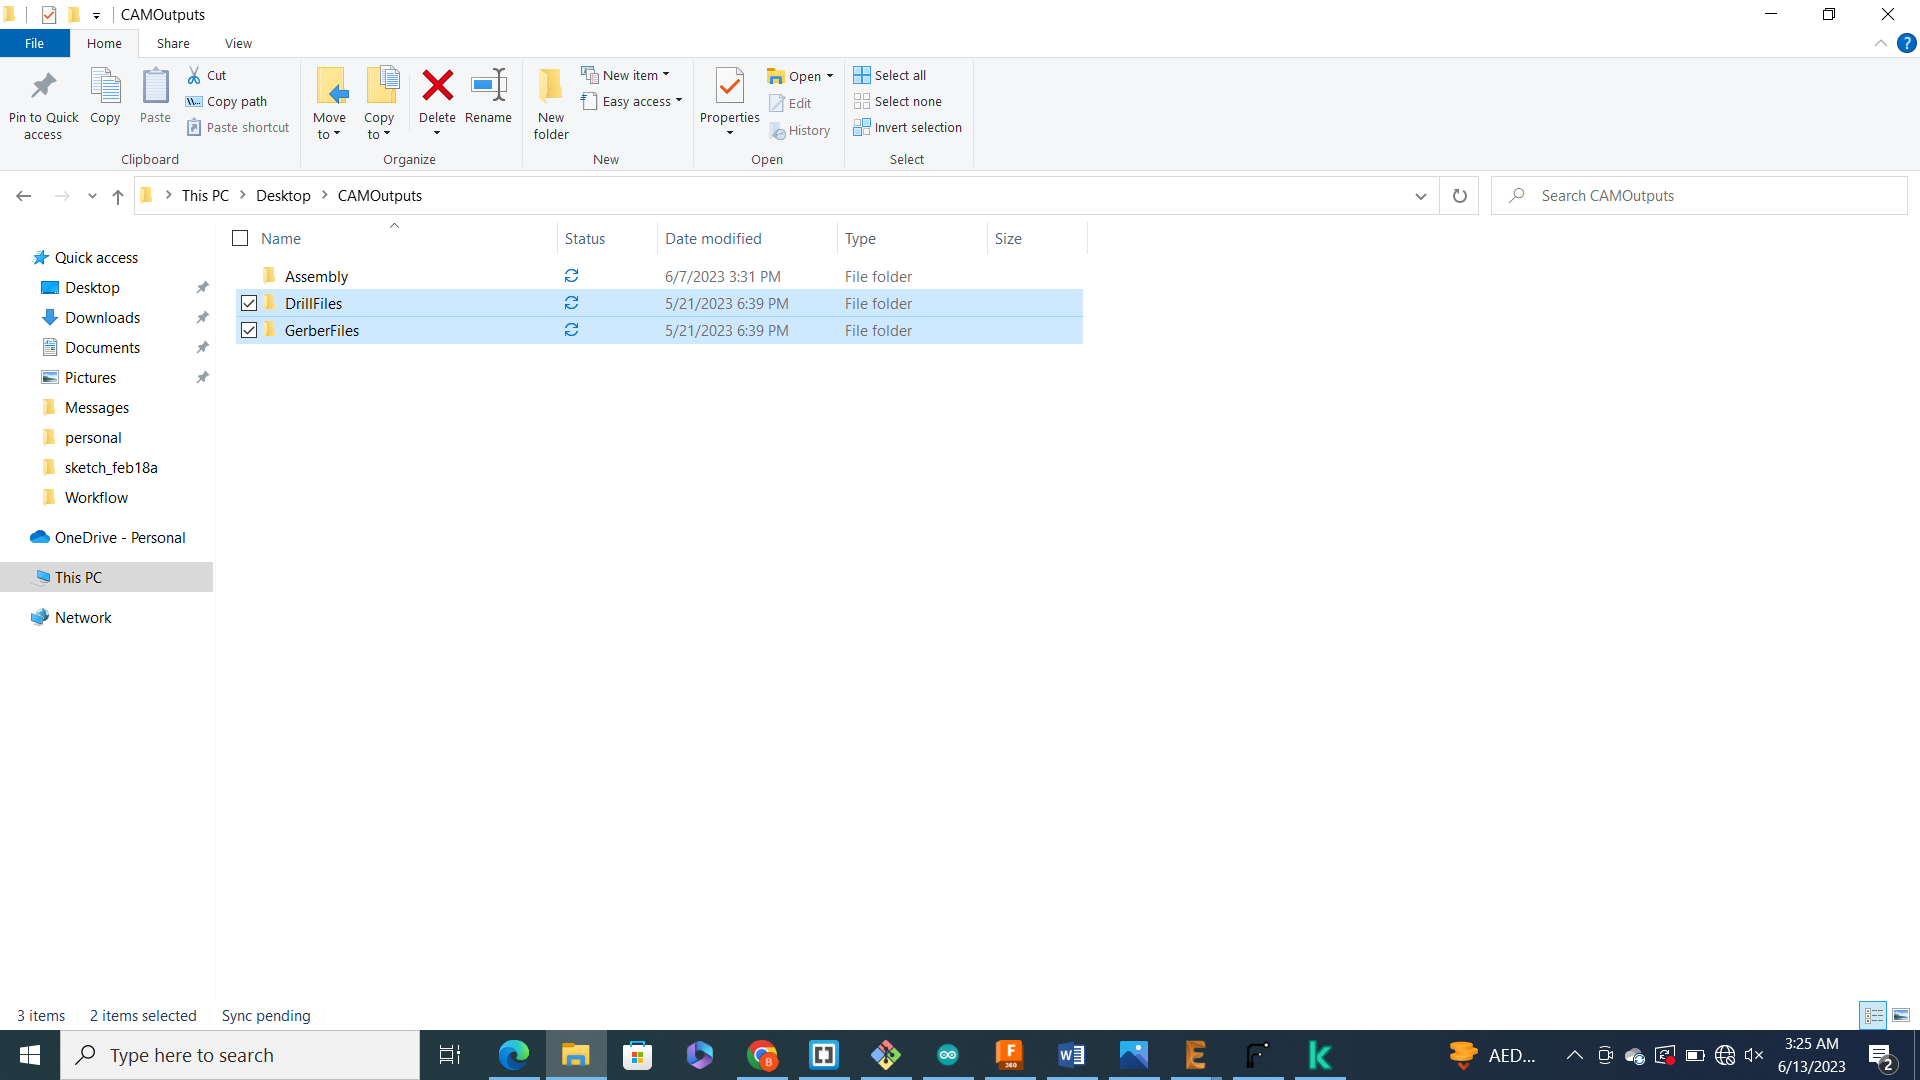
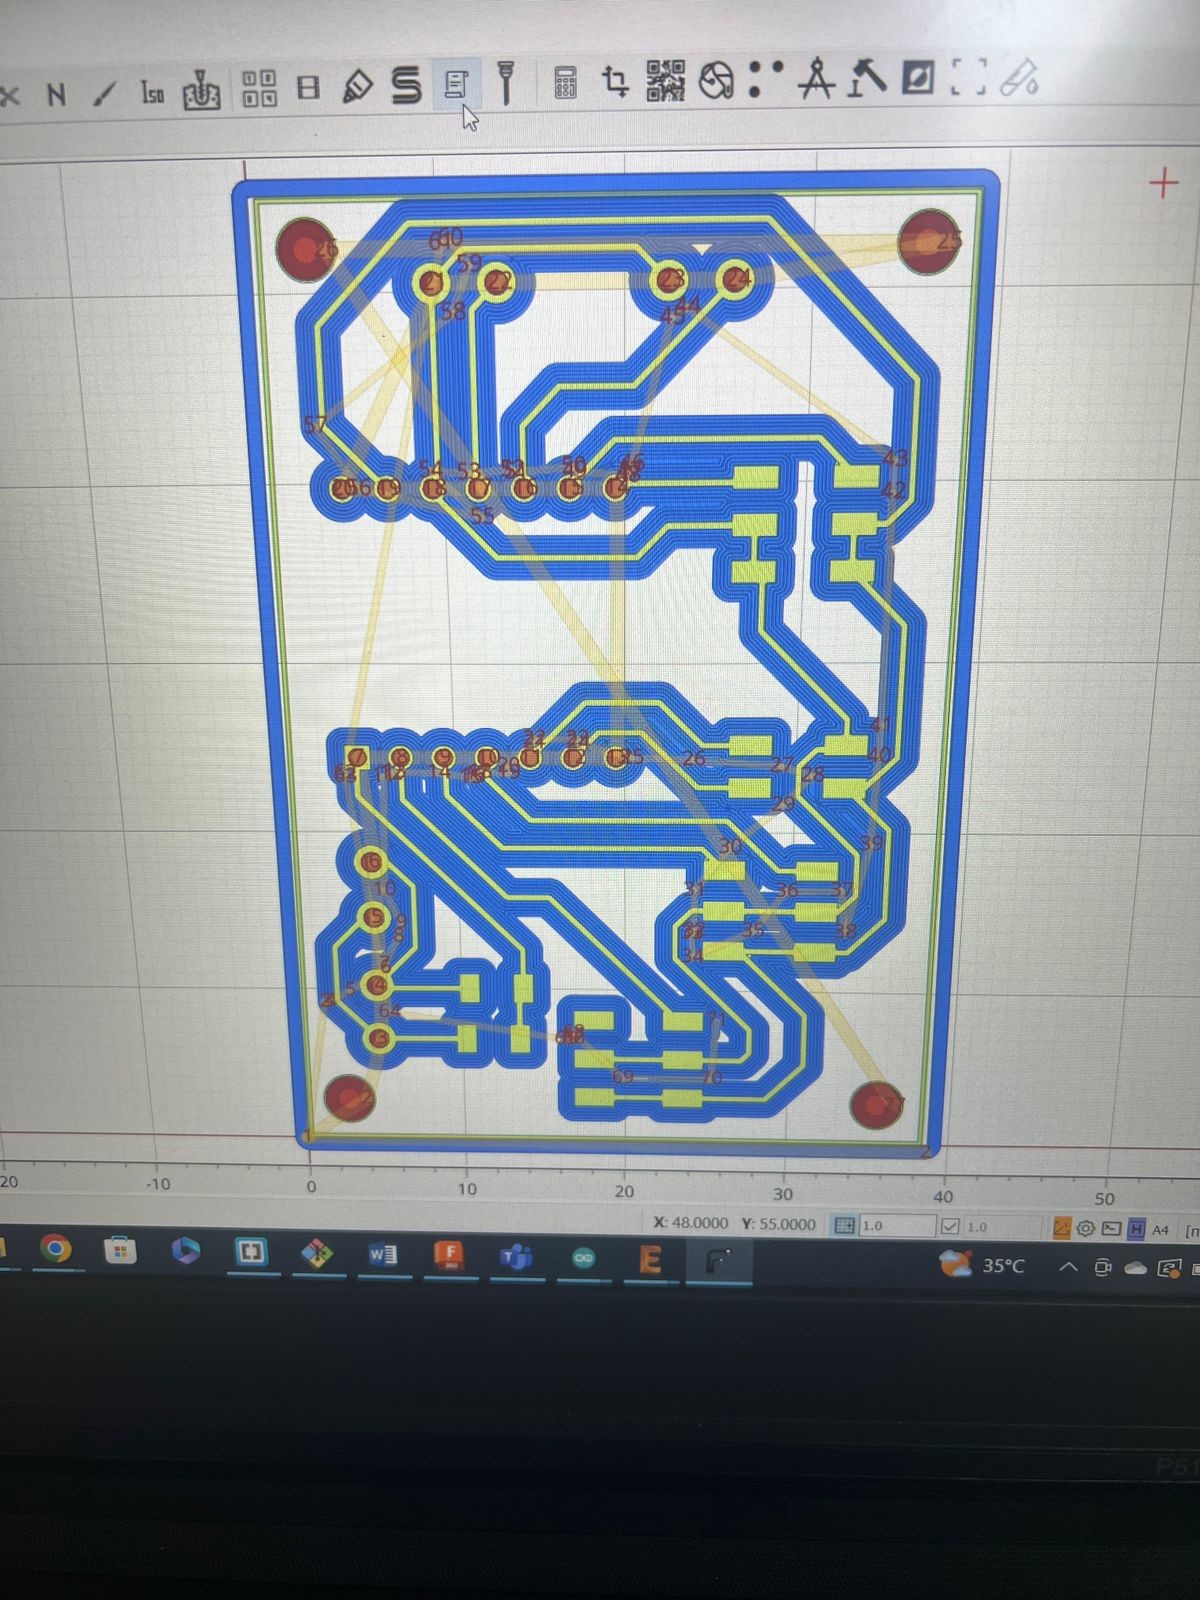
I designed the board using Eagle and it included all the electronic parts. you can see that I added more things to the board. I want to add more features to the device in the future such as a water level sensor.

However, the pumps are still not working. I tested the bared using a multimeter a couple of times and everything looked fine. After asking specialists about the potential problem, they suggested that the pumps need more voltage. I looked for solutions online and I found out that I can do that by simply adding transistors. I stared googling Mosfet transistor as recommended by the specialists and I finally understood how does it work

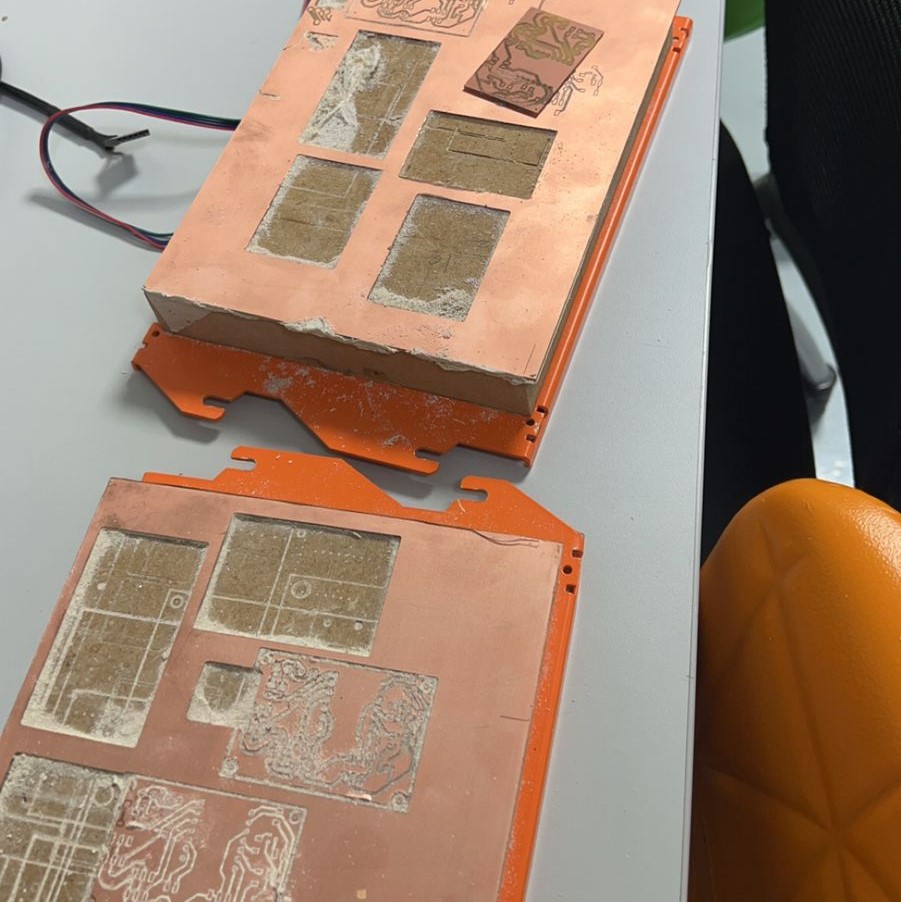
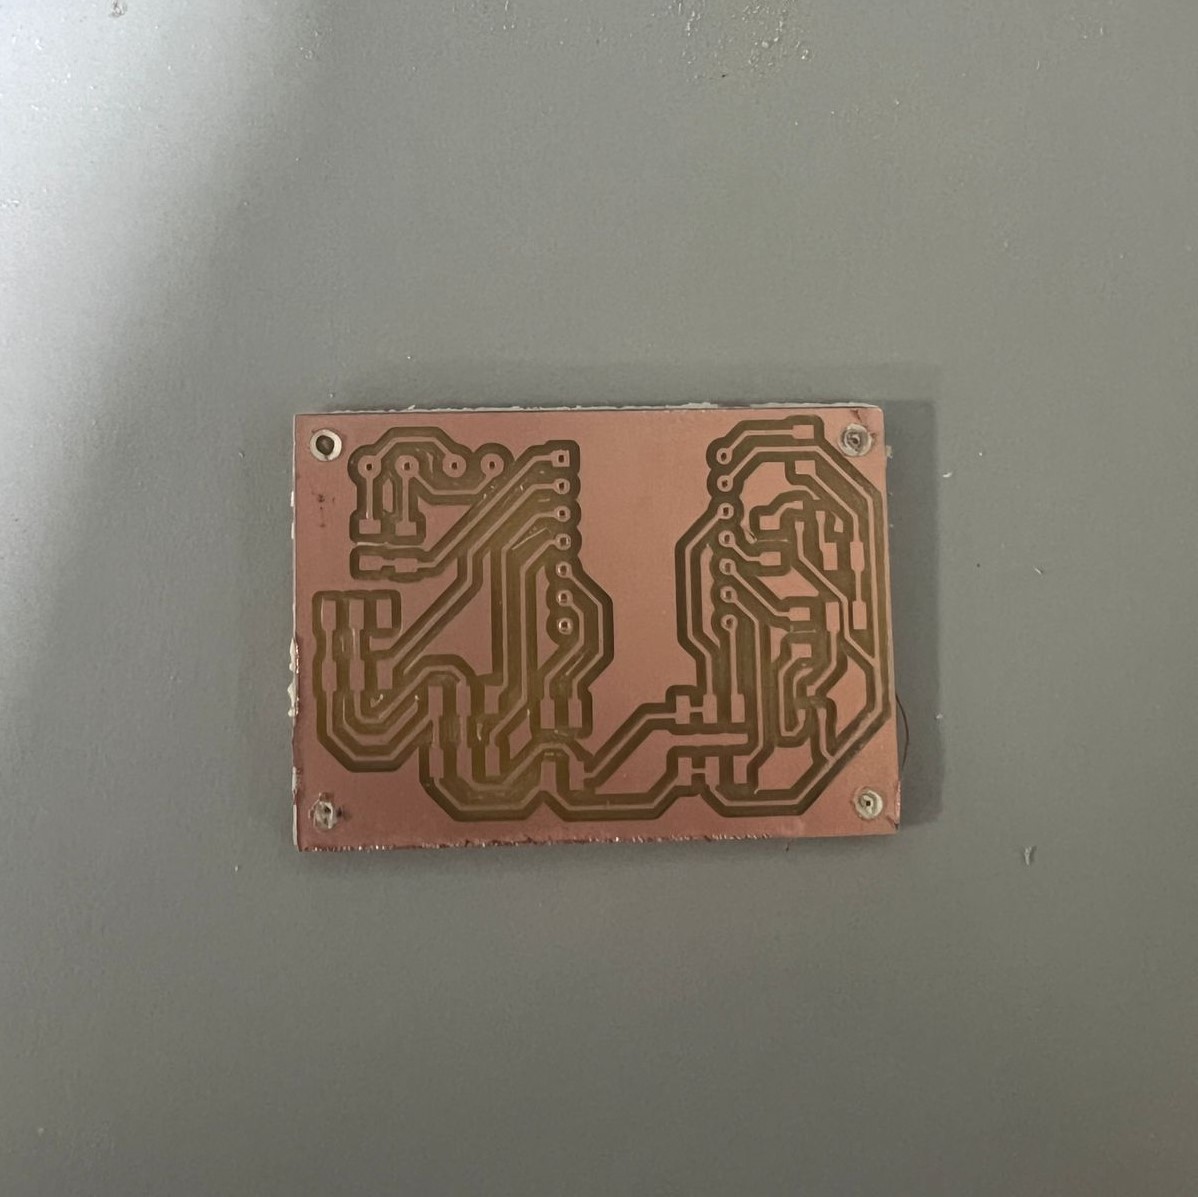
I started cutting the board using a monoFab milling machine:
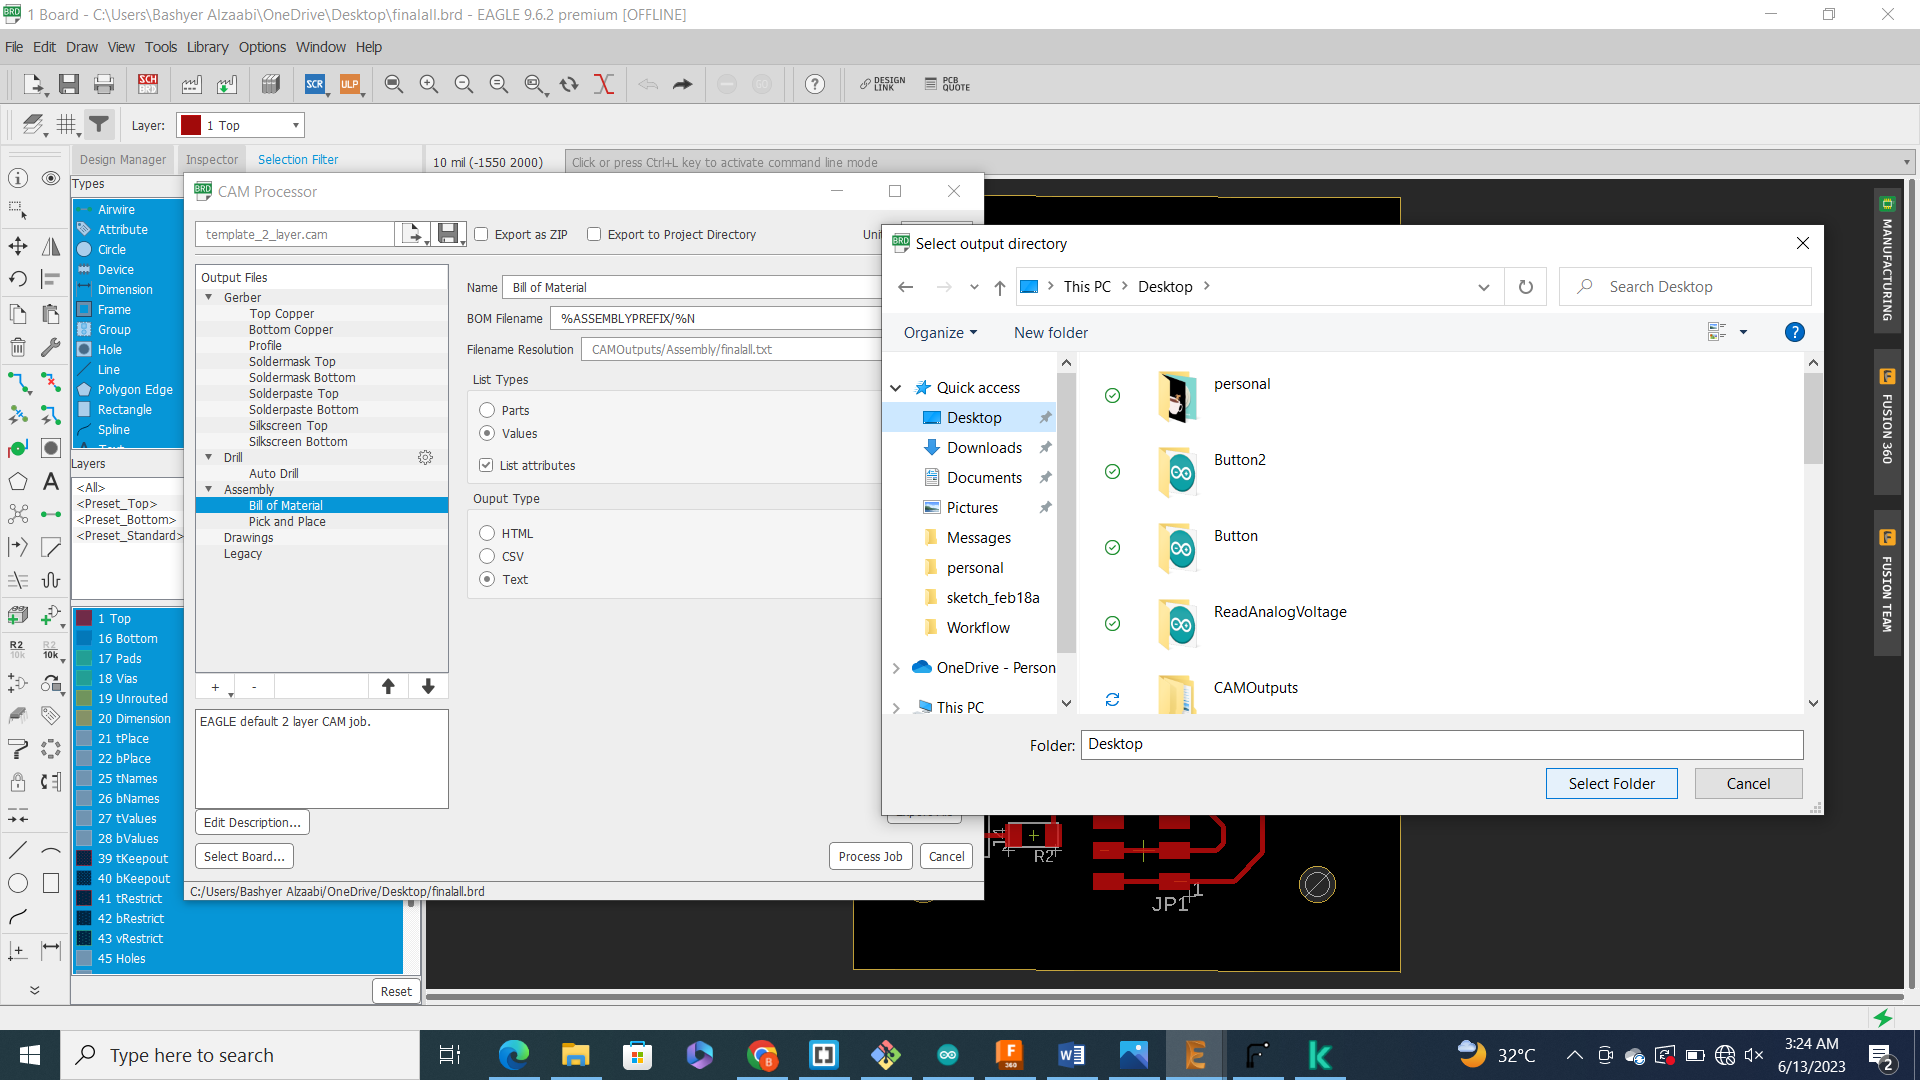
I had to redo the board more than 10 times. Sometimes it's the alignment and sometimes sitting I was in a flatcam was not correct. I keep forgetting to adjust some of the numbers and the results were not ideal.
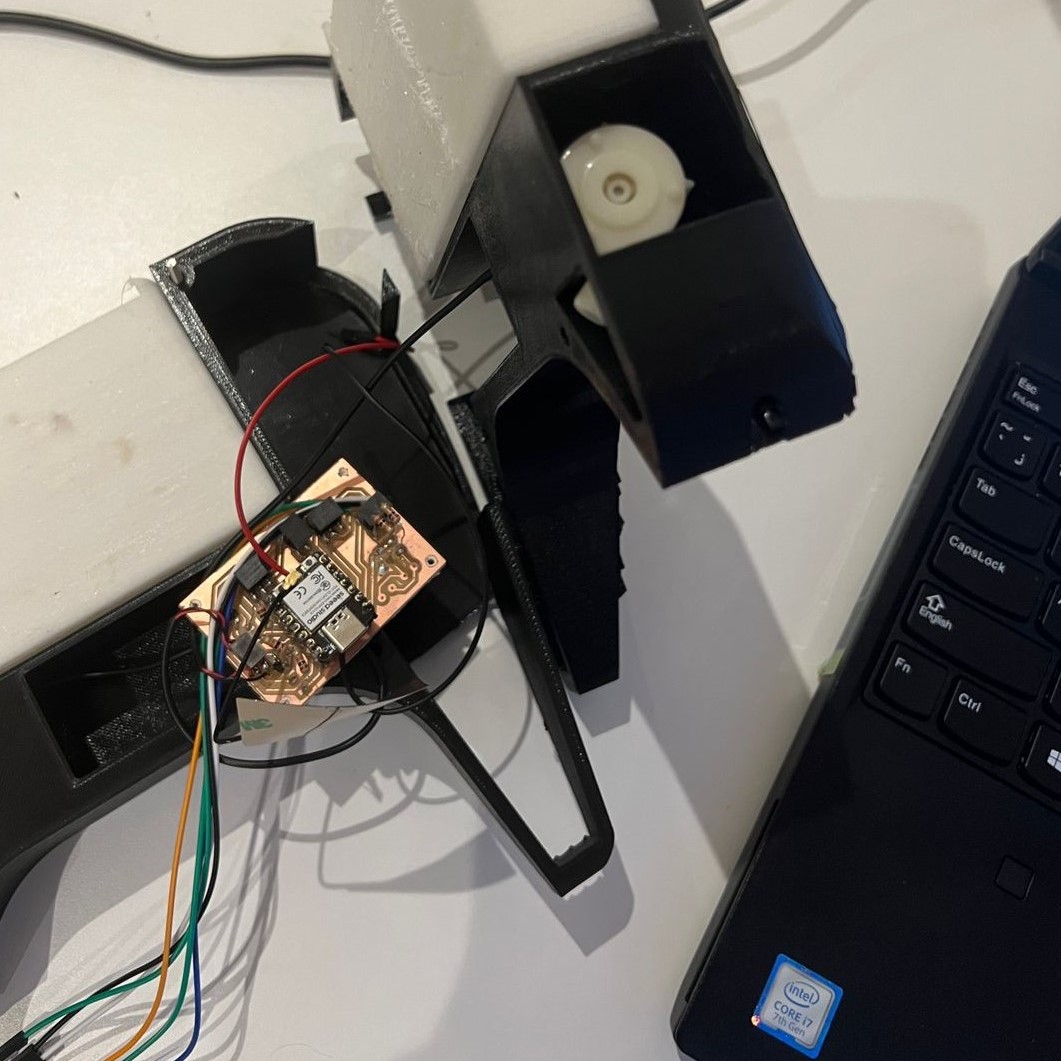
The first prototype:
The device should look like this.
Note: I might as a small umbrella that also moves to cover the plant in case of the planet was exposed to light more than needed.
How to dose it works?
It does three things. it gives measurements, sends messages, and it accepts commands.
- Measure:
• Light .
• Temperature
• • Soil moist level. .
- Massages:
The device must send the user a notification.
- Accepts commands such as:
Water and feed.
Programming the device and creating an application:
I have been learning coding for the last month to be able to understand the codes I would use. However, I cant write the code myself from scratch. hence, I decided to use chat GPT to make my code for this project. This is what I came up with:

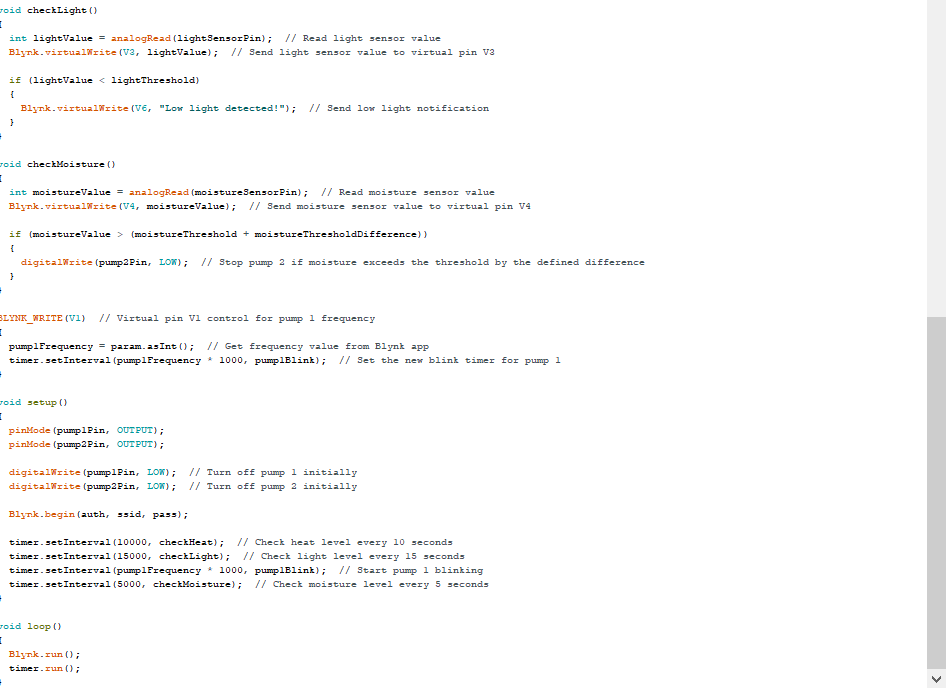
I understand the logic behind this code since I’m the one who asked cat get to create every part of this code So here is a breakdown of the code:
Library Inclusions:
BlynkSimpleEsp32.h: Library for connecting to the Blynk IoT platform.
WiFi.h: Library for connecting to a Wi-Fi network.
WiFiClient.h: Library for creating a Wi-Fi client.
DHT.h: Library for working with DHT temperature and humidity sensors.
Blynk Template and Authentication:
BLYNK_TEMPLATE_ID: The ID of the Blynk template.
BLYNK_TEMPLATE_NAME: The name of the Blynk template.
BLYNK_AUTH_TOKEN: The authentication token for accessing the Blynk project.
Wi-Fi Configuration:
ssid: The name of the Wi-Fi network.
pass: The password for the Wi-Fi network.
Pin Definitions:
pump1Pin: The pin connected to pump 1 relay.
pump2Pin: The pin connected to pump 2 relay.
heatSensorPin: The pin connected to the heat sensor.
lightSensorPin: The pin connected to the light sensor.
moistureSensorPin: The pin connected to the moisture sensor.
Variables and Thresholds:
pump1Frequency: The frequency of pump 1 blinking in seconds.
heatThreshold: The threshold value for heat detection.
lightThreshold: The threshold value for light detection.
moistureThreshold: The threshold value for moisture detection.
moistureThresholdDifference: The difference threshold to stop pump 2.
BlynkTimer Object:
timer: An instance of the BlynkTimer class for managing timed events.
Functions:
pump1Blink(): Toggles the state of pump 1 pin.
pump2Blink(): Toggles the state of pump 2 pin.
checkHeat(): Reads the heat sensor value and sends it to virtual pin V2. Sends a notification if the heat exceeds the threshold.
checkLight(): Reads the light sensor value and sends it to virtual pin V3. Sends a notification if the light level is below the threshold.
checkMoisture(): Reads the moisture sensor value and sends it to virtual pin V4. Stops pump 2 if the moisture exceeds the threshold by the defined difference.
BLYNK_WRITE(V1): Callback function for handling changes to virtual pin V1.Sets the new pump 1 blink frequency based on the value received from the Blynk app.
Setup Function:
Initializes the pump, sets initial pin states, and starts Blynk connection. Sets up timed events for checking heat, light, pump 1 blinking, and moisture.
Loop Function:
Runs the Blynk and timer processes.
You will notice that the code includes the parts that link my device to an application created by blynk. I created an account. Then I linked the template I have been working on to my phone. This is how the application looks like.

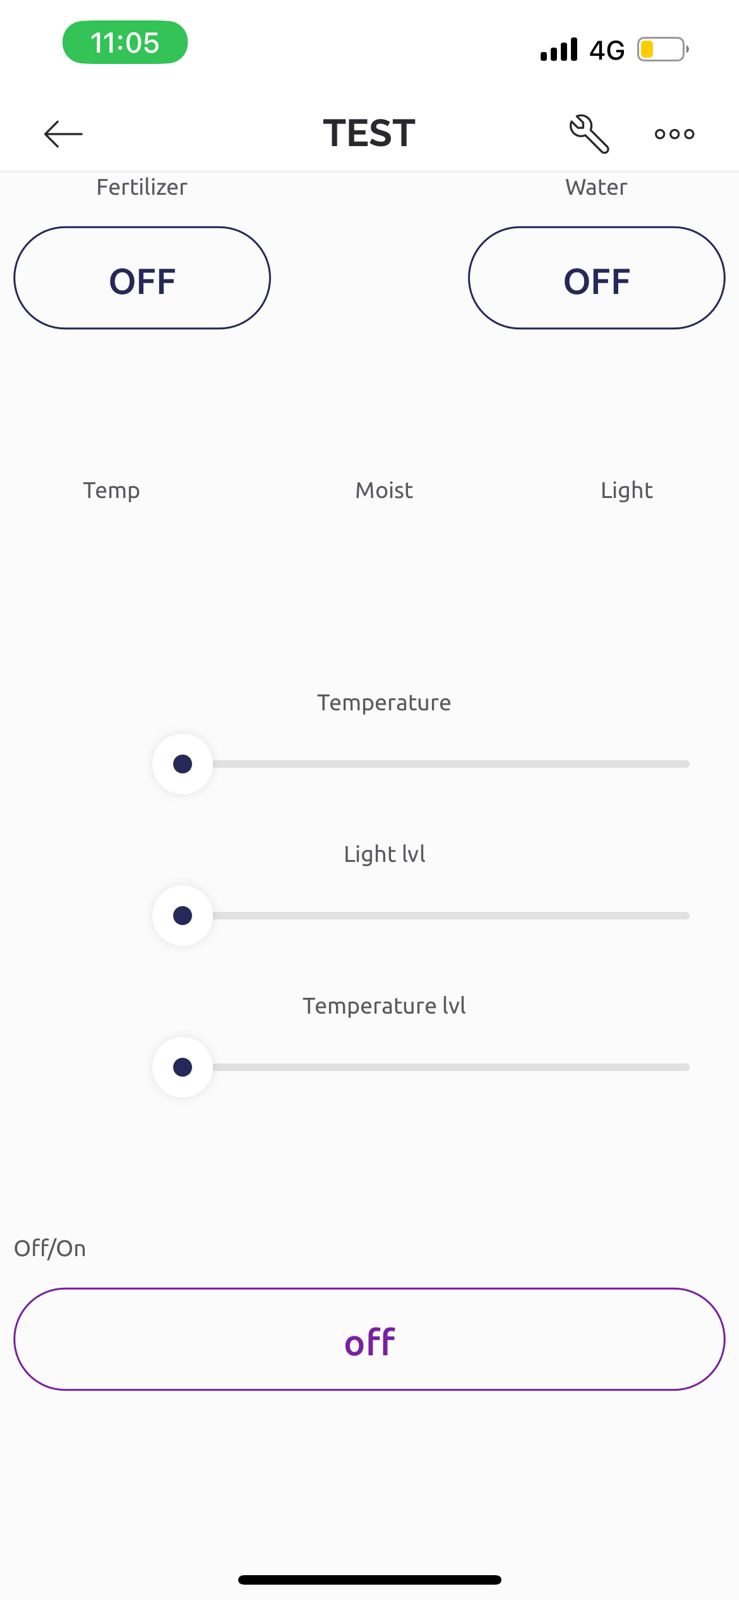
Final details: