Programs:
Arduino IDE
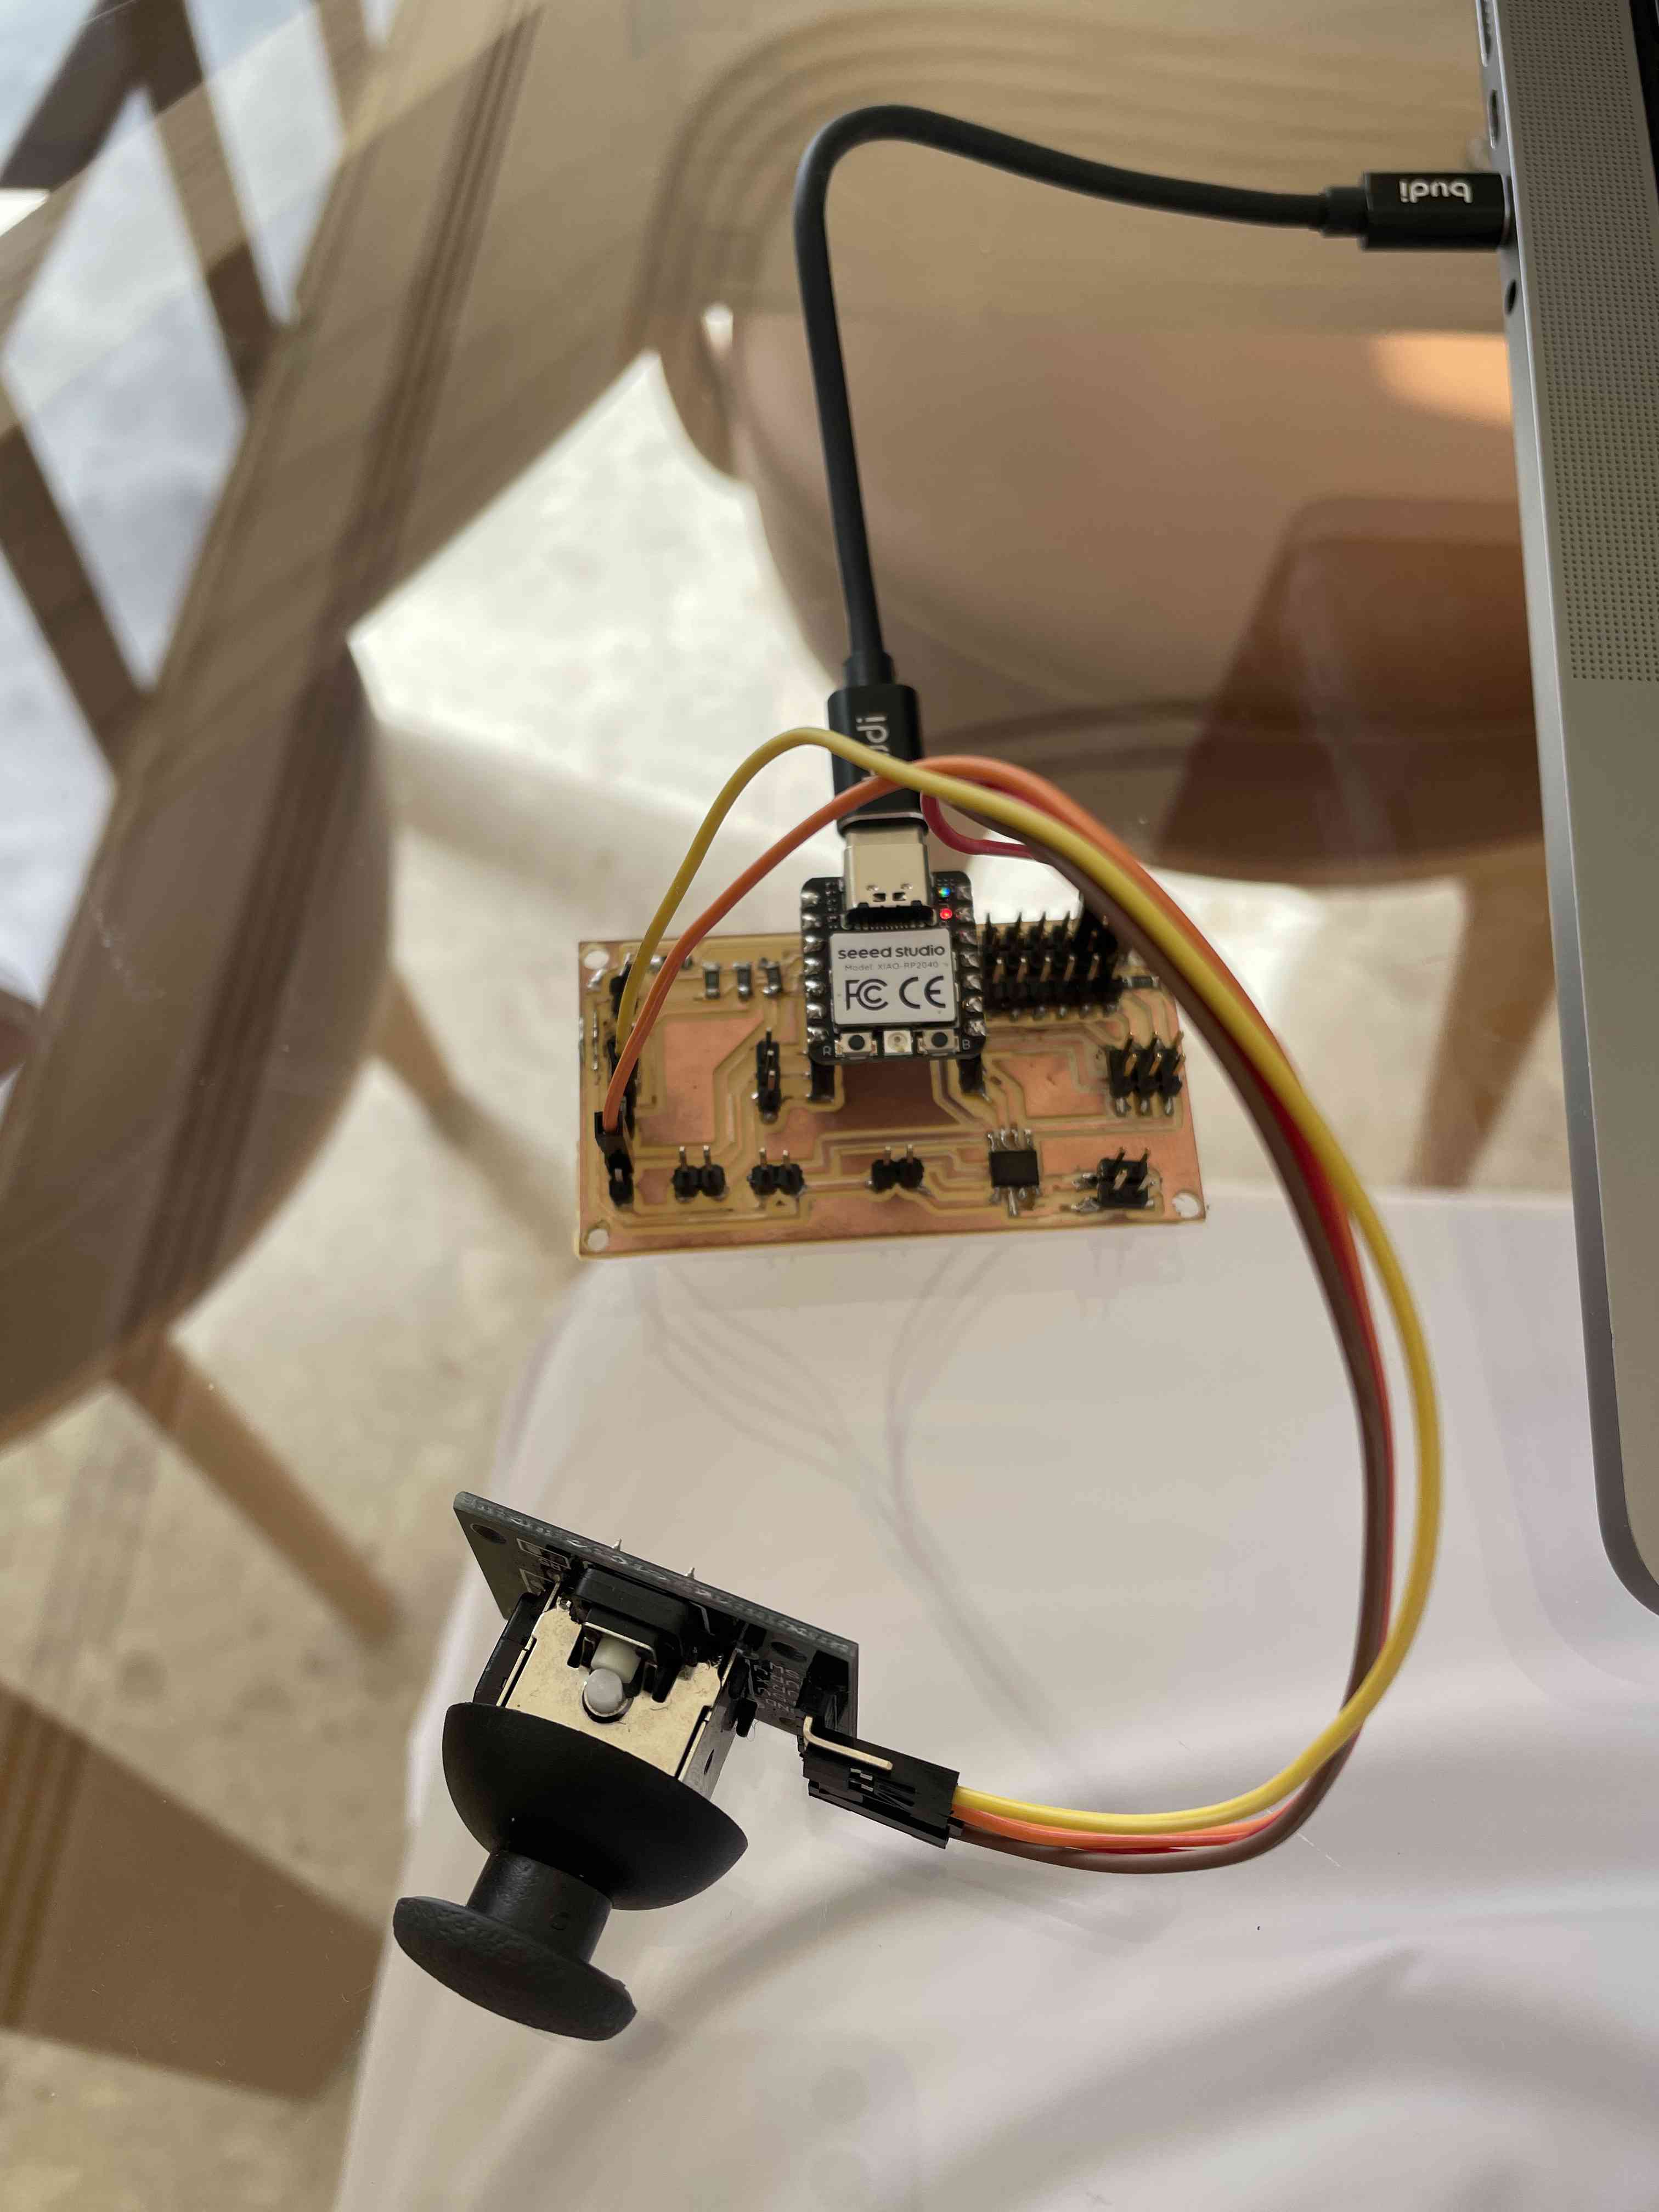
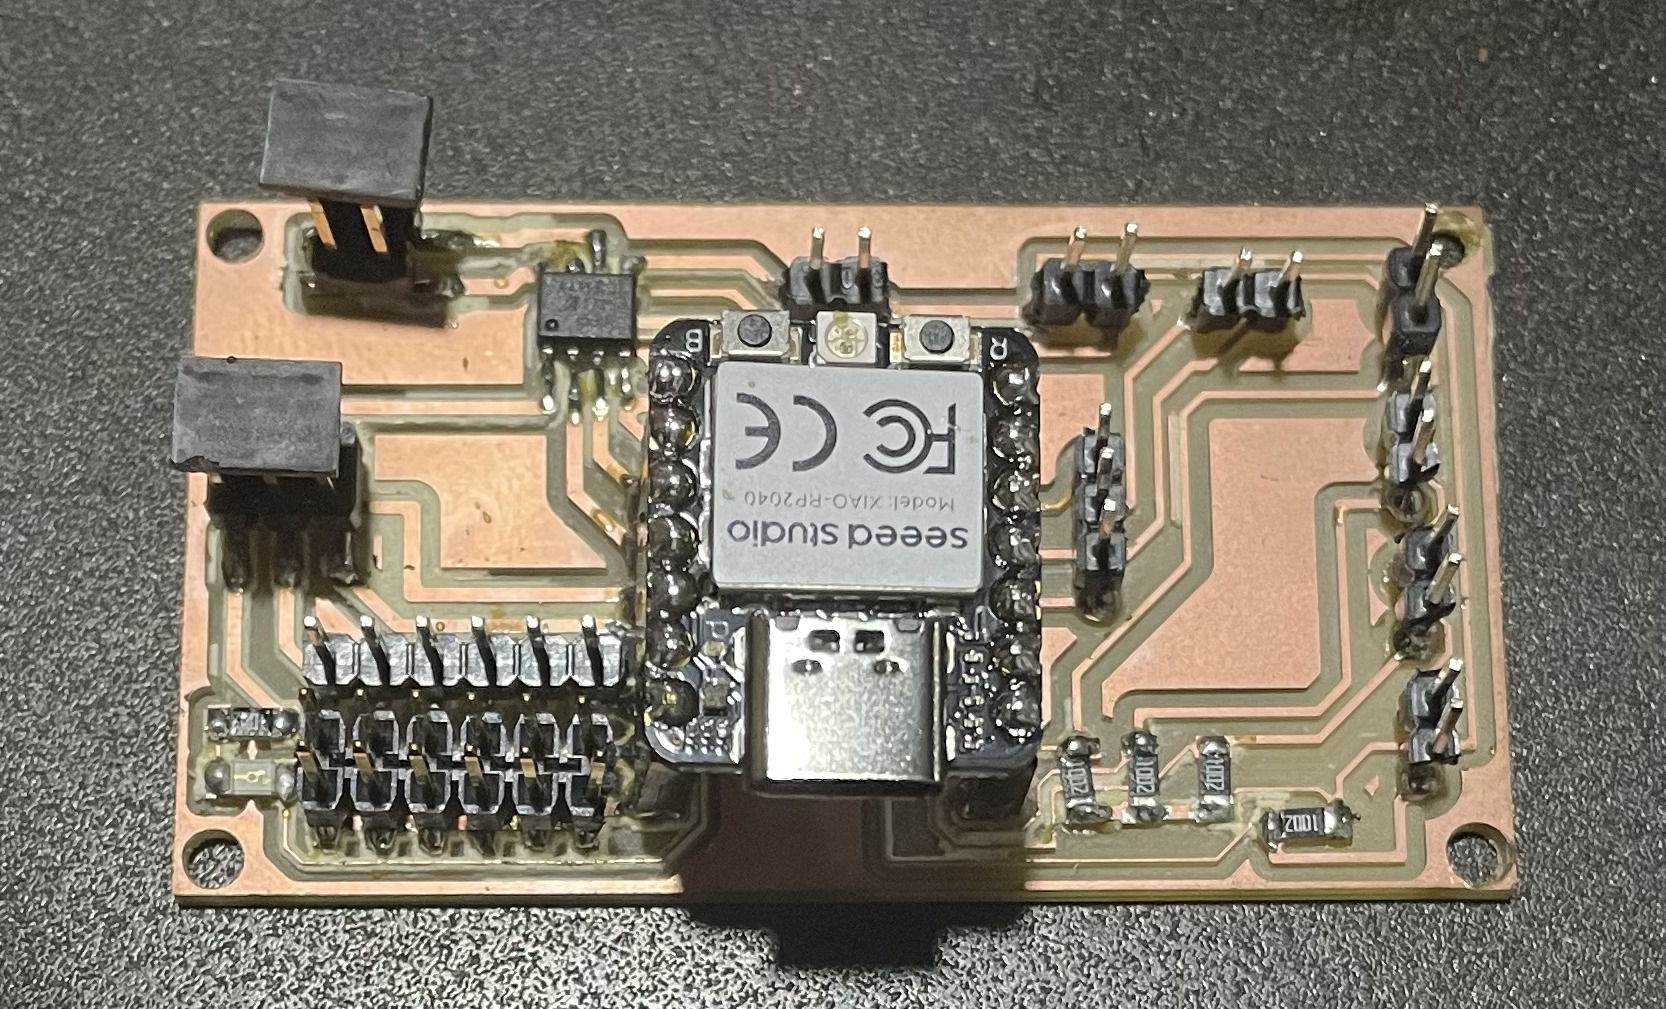
We're currently utilizing our custom board built upon the Seeed Xiao platform. This board was created during our Electronics Design assignment 7. I'll provide the code shortly, but I'd like to explain a few aspects of it first.
Run the code to the board then quit Arduino IDE so you can use the same serial port in "Processing"
// Initialize variables to store X and Y positions, and a button state
int X_Pos = 0;
int Y_Pos = 0;
int b;

// Set up the serial communication and configure pin D2 as input with pull-up
void setup() {
  Serial.begin(9600);
  pinMode(D2, INPUT_PULLUP);
}

// Continuously read analog values, print them along with the button state over serial
void loop() {
  X_Pos = analogRead(A1);
  Y_Pos = analogRead(A2);

  // Transmit X and Y positions, and the inverted button state separated by commas
  Serial.print(X_Pos, DEC);
  Serial.print(",");
  Serial.print(Y_Pos, DEC);
  Serial.print(",");
  Serial.print(!b);

  // Start a new line to delimit the end of the data for each iteration
  Serial.print("\n");

  // Introduce a short delay for stability
  delay(10);
}
In the code, we transmit DEC data, denoting numbers in base 10. This implies that the information being sent consists of numerical values. Additionally, the presence of "Serial.print(',');" indicates that we are separating the data with commas. This is a crucial aspect as the data is transmitted through the Serial port, and the comma serves as a delimiter to preserve order during reception.
It is essential to emphasize this separation in the processing phase. The program needs to be informed that the data is segmented by commas. Therefore, when processing the incoming data, the program should recognize and interpret the comma as the boundary between individual data points.
Furthermore, the "Serial.print('\n')" statement holds significance as it marks the end of each cycle's reading. This newline character ("\n") aids in delineating the termination point of data in a cycle, facilitating the proper interpretation of data chunks during reception and processing.
Begin with the acknowledgment that, similar to Arduino, Processing operates with two primary functions: "void setup" and "void draw." These functions parallel Arduino's "void setup" and "void loop," with the distinction that, in Processing, the "void draw" function is akin to the looping mechanism for drawing graphics.
For clarity, let's break down the code into discernible parts, allowing a step-by-step understanding of its functionality.
// Import the Serial library for communication with external devices
import processing.serial.*;

Serial port;    // Create a Serial port object to facilitate communication

// Variables to store coordinate values for drawing
int x;
int y;

int Switch; // Variable to store the state of a switch or button
PFont f;    // Variable for defining a font for text display
String portName;    // String to store the name of the serial port

String value;   // String to store received data value from the serial port
// Set up the initial configuration for the Processing sketch
void setup() {
  // Define the size of the canvas
  size(512, 512);

  // Initialize a new Serial port with the first available port and a baud rate of 9600
  port = new Serial(this, Serial.list()[0], 9600);

  // Specify the character to trigger the buffer update when received over serial
  port.bufferUntil('\n');

  // Create a font object using Arial, with a size of 16, and enable anti-aliasing
  f = createFont("Arial", 16, true);

  // Set the text font and size for the sketch
  textFont(f, 16);
}
In the `void setup`, we initialize our canvas with the "size" function, setting it to 512x512 pixels. Two crucial steps follow: first, we open the serial port, selecting the first element from the list (index 0) since we only have our board connected. The communication baud rate is then established at 9600. Additionally, we define the reading endpoint using `port.bufferUntil('\n')`. This is analogous to Arduino's `Serial.print("\n")`. Here, our Seeed Xiao transmits this information, and Processing, configured with `port.bufferUntil('\n')`, precisely identifies where to conclude each data reading.
// Drawing function: Set the fill color to black, clear the screen, and set the fill color to white.
void draw(){
  fill(0); // Set fill color to black
  clear(); // Clear the screen
  fill(255); // Set fill color to white

  // Draw a line based on the joystick switch state. If the switch is pressed (Switch == 1), draw a line from the joystick position to (100, 100). Otherwise, draw a line to (25, 25).
  if (Switch == 1){
    line(x/2, y/2, 100, 100); // Draw a line to (100, 100) when the switch is pressed
  }
  else{
    line(x/2, y/2, 25, 25); // Draw a line to (25, 25) when the switch is not pressed
  }

  // Display analog values on the screen
  text("AnalogX=" + (1023 - x) + " AnalogY=" + (1023 - y), 10, 20);
}

// Serial event handler: Read data from the serial port until a newline character is encountered.
void serialEvent(Serial port) {
  value = port.readStringUntil('\n'); // Read data from the serial port until a newline character is encountered

  if (value != null){
    value = trim(value); // Remove leading and trailing whitespaces from the received data
    int[] values = int(splitTokens(value, ",")); // Split the received data into an array of integers using ',' as the delimiter

    x = values[0]; // Assign the first value to the variable x
    y = values[1]; // Assign the second value to the variable y
    Switch = values[2]; // Assign the third value to the variable Switch
  }
}
Then we have to define our drawing structure, I draw a line in two cases, when the jostick switch is pressed and when not, and also the data, let’s not forget the data.
We received 3 data from the Seees XIAO, which were sent in series separated by a comma with the command: splitTokens(value, “,”), the data comes in 3 parts, remember that the first data or value comes from the pisicion reading 0, then 1 and then 2, there we have the 3 data. with the lines of code, x = values[0]; y = values[1]; Switch = values[2];
import processing.serial.*;
Serial port;

int x;
int y;
int Switch;
PFont f;
String portName;
String value;

void setup(){
  size ( 512 , 512 ) ;
  port = new Serial(this, "/dev/cu.usbmodem1101", 9600);
  port.bufferUntil('\n');
  f = createFont("Arial", 16, true);
  textFont ( f, 16 ) ;
}

void draw(){
  fill(255) ;
  clear() ;
  fill(125) ;

  if (Switch == 1){
    line(x/2,y/2,100, 100);
  }
  else{
    line(x/2,y/2, 25, 25);
  }

  text("AnalogX="+(1023-x)+" AnalogY="+(1023-y),10,20);
}

void serialEvent( Serial port) {
  value = port.readStringUntil('\n');

  if (value != null){
    value = trim(value);
    int[] values = int(splitTokens(value, ","));

    x = values[0];
    y = values[1];
    Switch = values[2];
  }
}