4. Embedded programming
My key take-aways and notes of the session this week:
Different types of programmming languagues can be mapped depending on the "distance" from the HW.
High level languages are very "far" from the HW while low-level languages are very "close" to the HW.

We can distinguish two main types of programming languages: compiled and interpreted.
Interpreted languages are compiled into an intermediary form and not machine code.
Programs compiled into machine code have a speed advantage over interpreted languages, as there is no intermediary step required before instructions execute on the processor
Different types of programming_languages:
In the scale, the highest level would be a fully natural language and the lowest language would look like a sequence of 0 an 1.
During the sessions with our instructor, we went through three main languages for the embedded programming:
The Arduino language follows a structured programming approach, where code is organized into functions.
The main function in an Arduino Sketch is the setup() function, which is executed once at the start of the program.
The loop() function is the core of the Arduino program and is executed repeatedly.
Arduino language is created with a subset of C macros and it offers a straightforward and accessible programming environment for controlling Arduino boards.
After creation of some Arduino code, push on the "uplaod" button and following events occur:
Python language:
Nowadays, Python is one of the most popular high-level programming language. Python is an opensource language with a pretty straightforward syntax and an extremely vast field of applications.
The growing number of free libraries (actually around 137,000 !!) and the communities and ecosystems build around python make it a very simple and attractive language to cope with programming and creation of applications in a huge variety of fields:
Weekly assignments
Individual assignment:
Browse through the data sheet for your microcontroller:
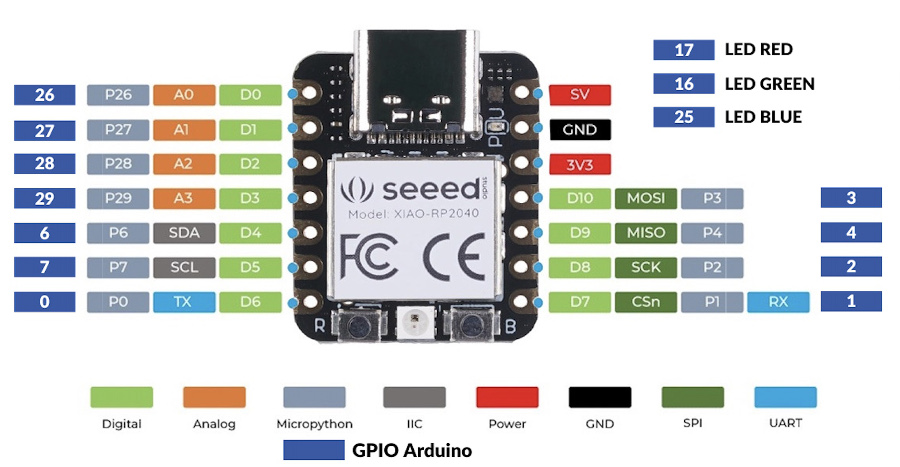
The microcontroller that I have used for this week assignments is the XIAO-RP2040 from Seeed Studio company.
Seeed Studio XIAO RP2040 is compatible with the Raspberry Pi RP2040 ecosystem as they share the same RP2040 chip
XIAO-RP2040 supports multiple languages including C / MicroPython / CircuitPython.
Overview of the Module_XIAO-RP2040 PINs:
 Datasheet of the RP 20-40
Write program for a microcontroller development board to interact (with local input &/or output) and communicate (remotely).
Extra credit: use different languages &/or development environments
Extra credit: connect external components to the board
First individual assessment: make 2 LEDs blink using Arduino UNO:
port and Board screenshots.
codice arduino
explanations on set-up of the bredboard, led and resistor
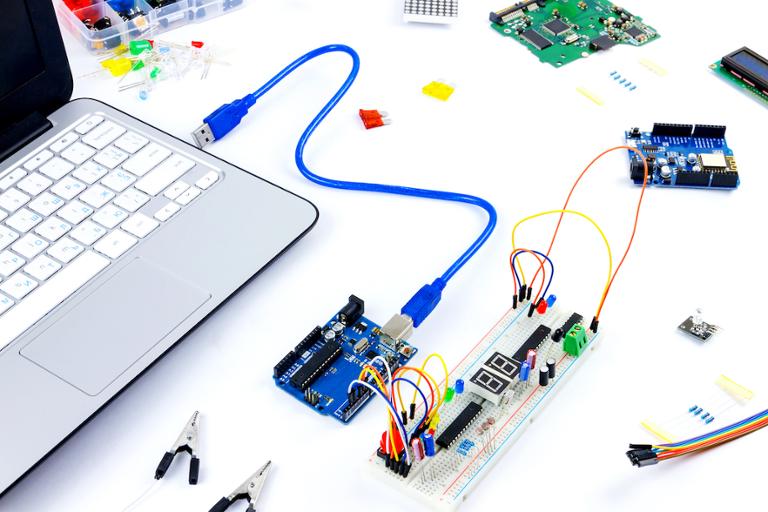
For this first assignment, I have used following elements:
Initial steps:
Connection of the Arduino UNO to one USB Port of the Mac.
Start the IDE SW (previsouly installed on the MAC)
Check that the right board is connected, Menu, Tools, Board, selection of Auduino Uno

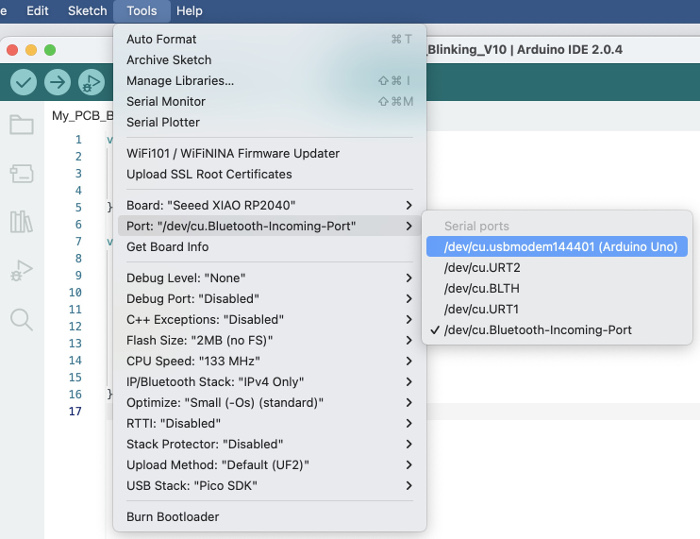
Check that the IDE is correctly configured for the right port of the computer:
Coding step using Arduino IDE:
 Arduino UNO code
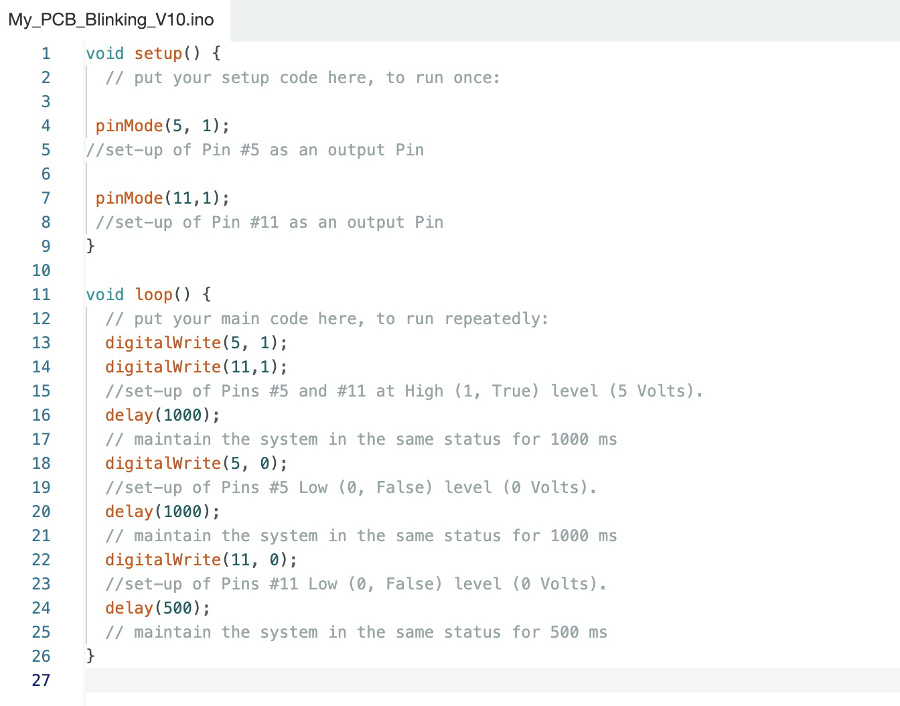
Breakdown of the code within the loop() function:
I have selected the Pin 5 and 11 to handle the two LEDs
digitalWrite(5, HIGH) sets the digital output of pin 5 to a high voltage level (logic HIGH or 1). This turns on any connected device or component that is connected to pin 5.
digitalWrite(11, HIGH) sets the digital output of pin 11 to a high voltage level (logic HIGH or 1). This turns on any connected device or component that is connected to pin 11.
delay(1000) pauses the program execution for 1000 milliseconds (1 second).
digitalWrite(5, LOW) sets the digital output of pin 5 to a low voltage level (logic LOW or 0). This turns off any connected device or component that is connected to pin 5.
delay(1000) pauses the program execution for another 1000 milliseconds (1 second).
digitalWrite(11, LOW) sets the digital output of pin 11 to a low voltage level (logic LOW or 0). This turns off any connected device or component that is connected to pin 11.
delay(500) pauses the program execution for 500 milliseconds (0.5 seconds).
This sequence of code turns on the two LEDs connected to pins 5 and 11 for 1 second, then turns them off device connected to pin 5 for 1 second, and finally turns off device connected to pin 11 for 0.5 seconds.
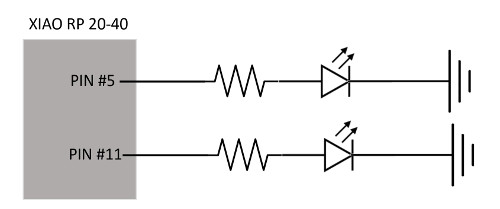
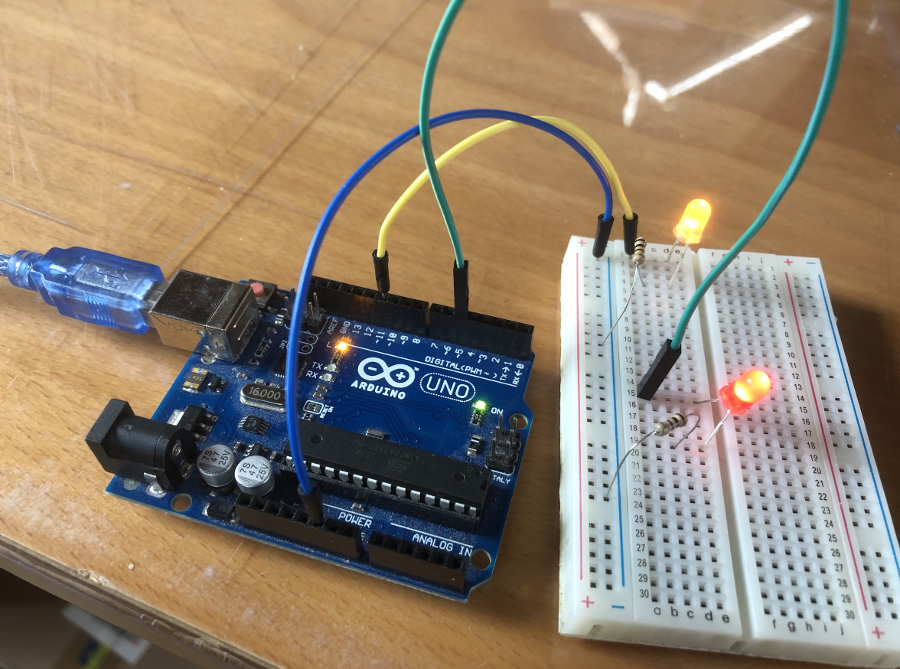
Bredboard set-up and test:
Logical schema used for the set-up of the bredboard
Successfull test execution:
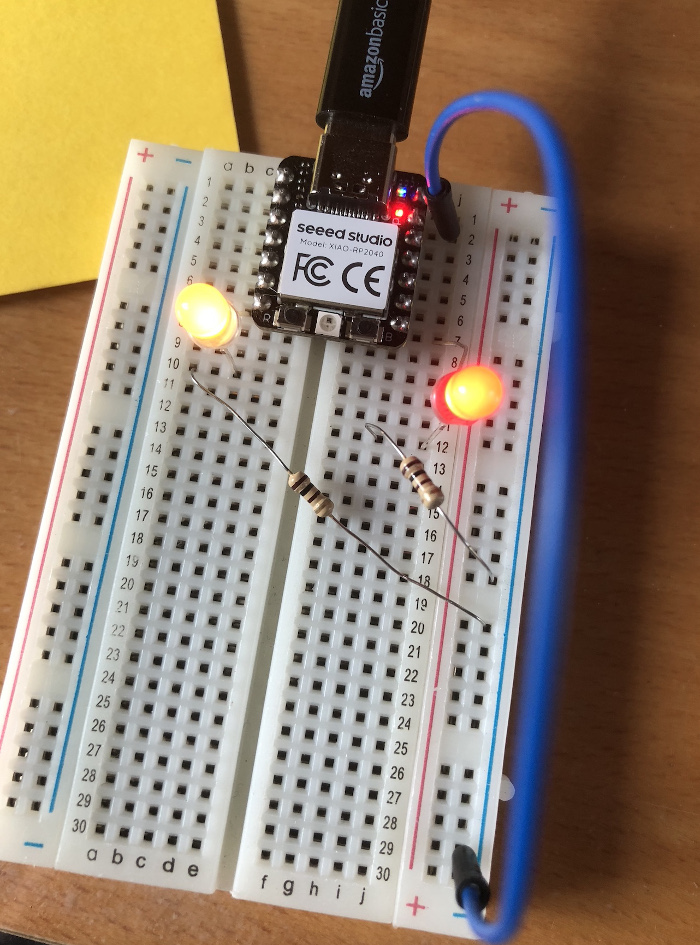
Second individual assessment: make 2 LEDs blink using XIAO-RP2040 micro-controller
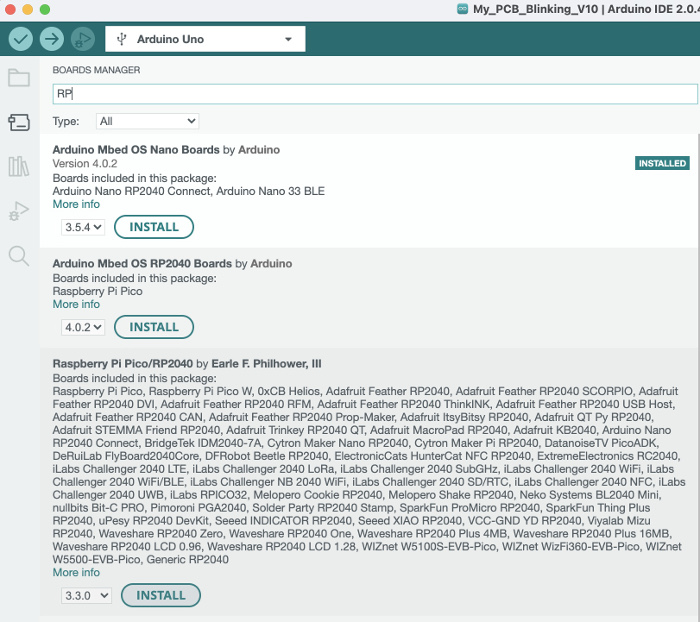
Firstly there's a need to install the right SW packages so that XIAO-RP2040 is supported by the Arduino IDE.
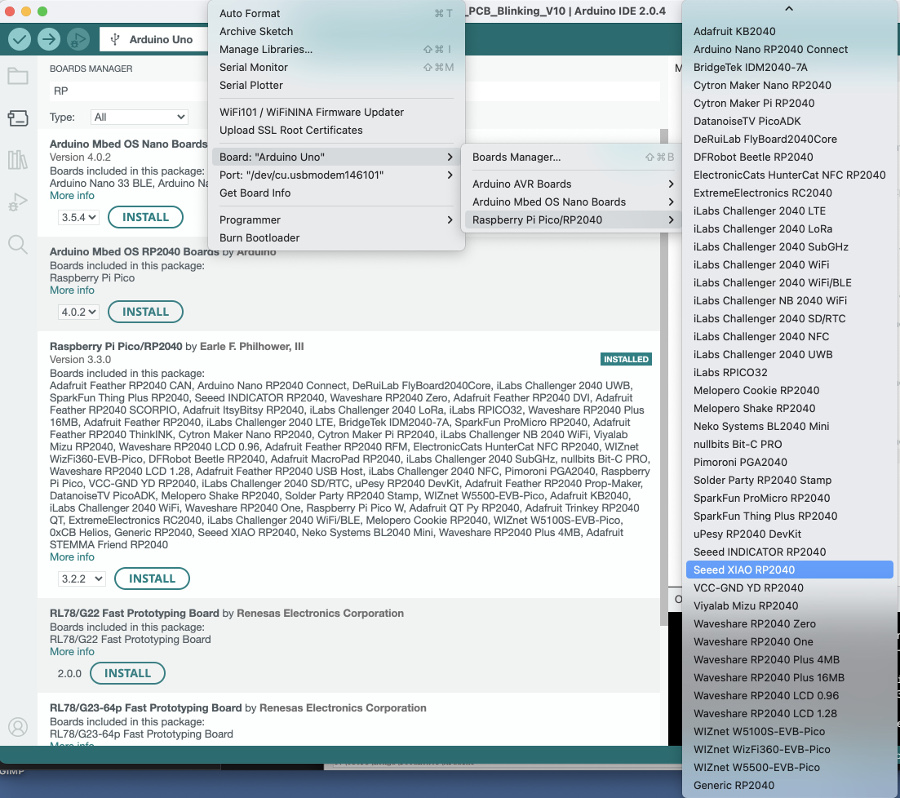
Go to the main Menu "Tools", then "Boards manager"
In the reasrch area type "RP" to narrow-down the search.
The correct package to be installed is the following: Raspberry Pi Pico/RP2040"
Click on "Install" to proceed.
At this point we can select the XIAO board going to the main Menu, "Tools", "Board" and select the board Seeed XIAO RP2040 in the list.
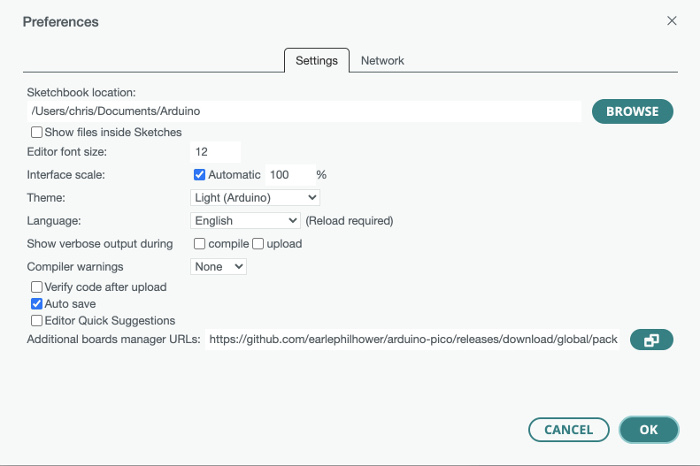
Verification of the correctness of the deployment of this package.
Go to main menu, "Arduino IDE", "Preferences"
The additional boards manager URL has been correctly populated with this URL:
https://github.com/earlephilhower/arduino-pico/releases/download/global/package_rp2040_index.json
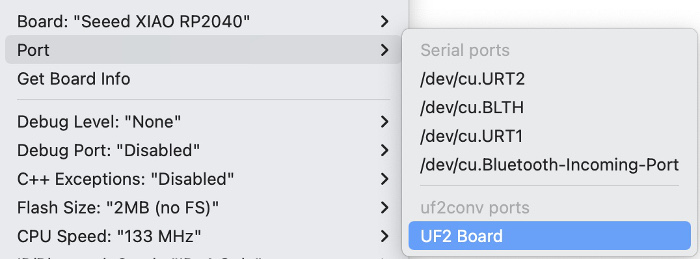
Selection of the right port: UF2 port need to be selected to enable bootloading communication protocol between the microcontroler and the computer.
SW Code in the Arduino IDE editor:

The code is similar to the one written for the Arduino UNO except for the PINs selected this time: Pin 1 and 0.
Bredboard set-up and test:
Same Logical schema used for the set-up of the bredboard
Successfull test execution: