Week 15: Wildcard Week
Wildcard Week
Individual assignment: Machine Embroidery Design and produce something with a digital fabrication process (incorporating computer-aided design and manufacturing) not covered in another assignment, documenting the requirements that your assignment meets, and including everything necessary to reproduce it. In this week we use Embroidery Machine In this week, I have decided to learn how to use an embroidery machine. I never thought that one day I would be using an embroidery machine, nor had I ever worried about inserting a thread into a needle. It all became interesting to me when I learned that such machines existed, especially when all you have to do is design something, prepare the requirements, and the machine takes care of the rest. What is An embroidery machine An embroidery machine is a type of sewing machine that is specifically designed to create intricate and decorative designs on fabric or other materials using thread. Embroidery machines typically have multiple needles and use computerized technology to stitch complex patterns, logos, lettering, and other designs onto textiles.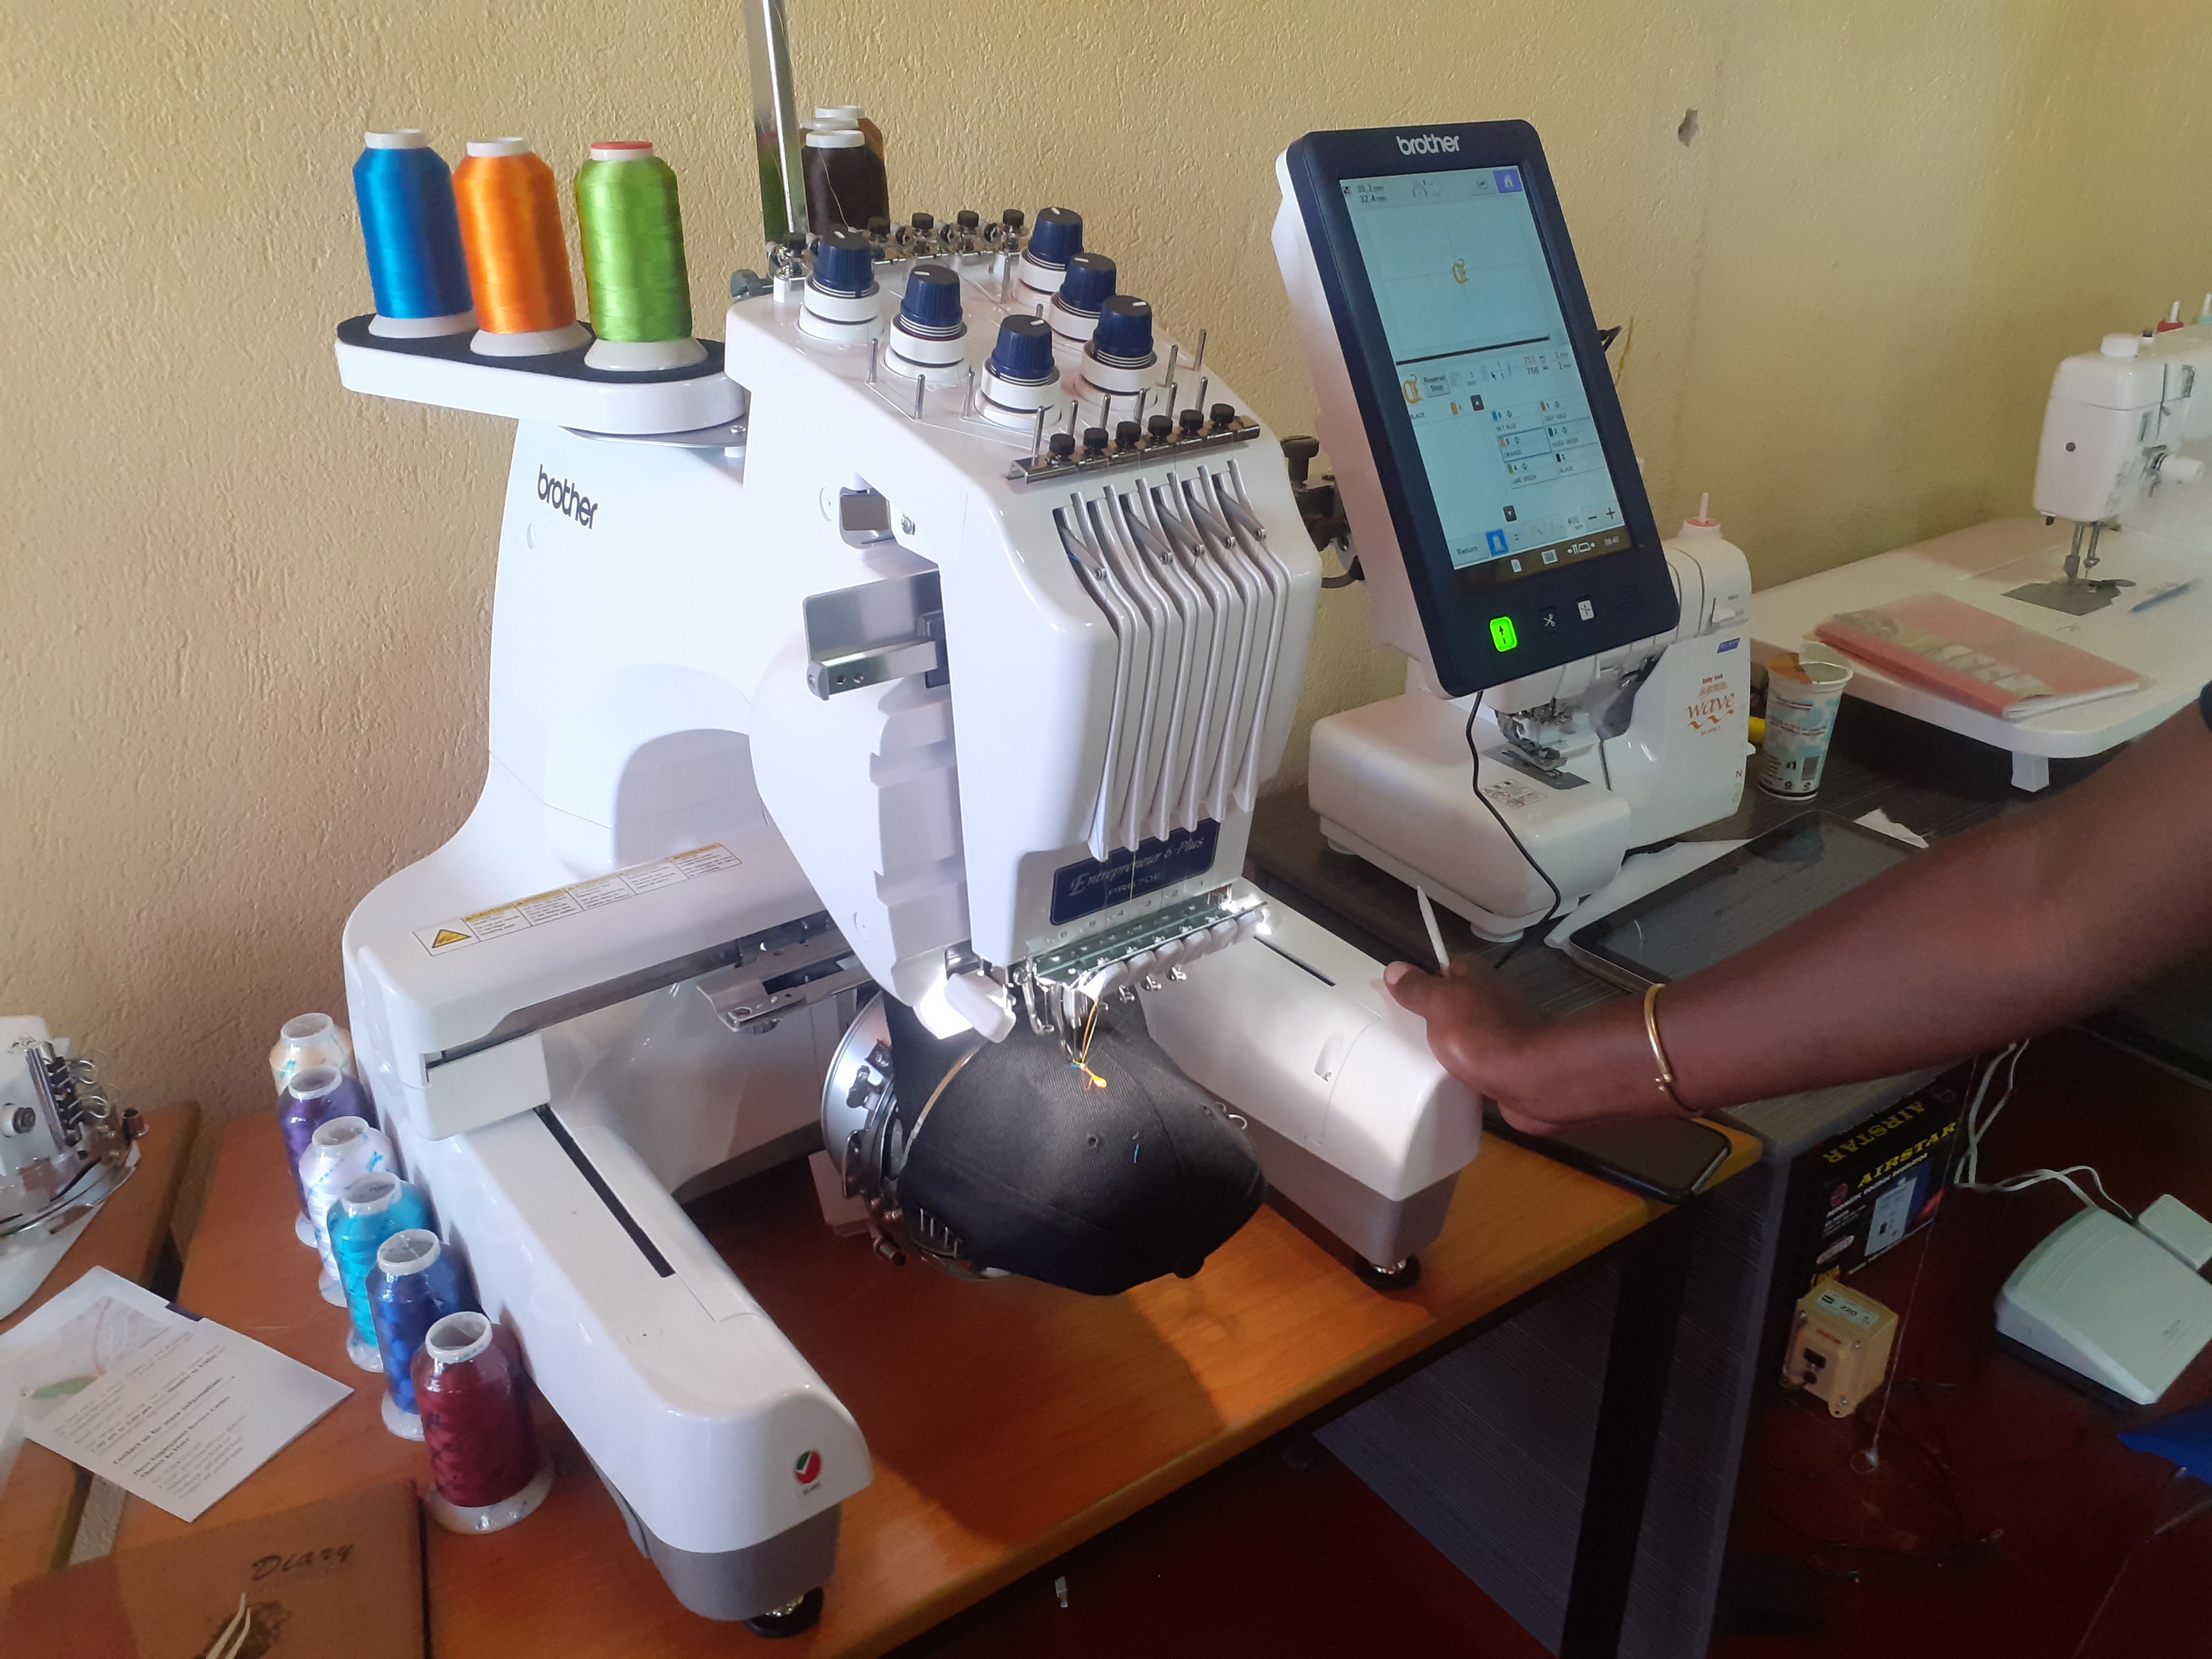 Embroidery Machine Accessories
Flatbed embroidery machine: Flat bed embroidery machines have a flat working surface, similar to a table.
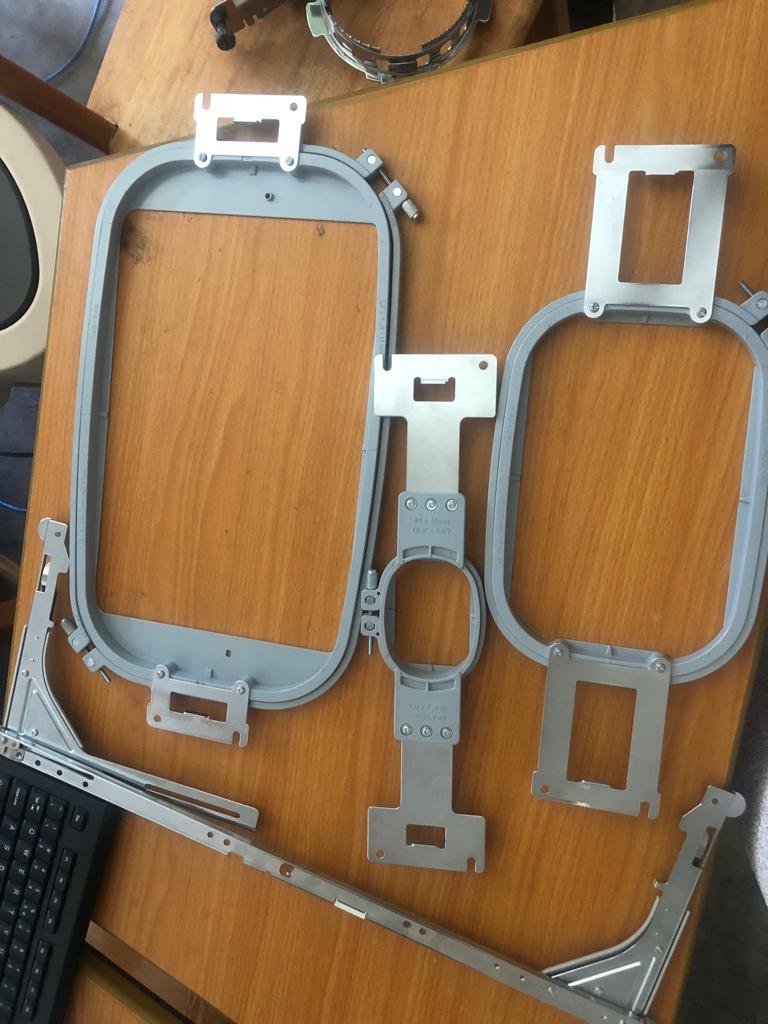
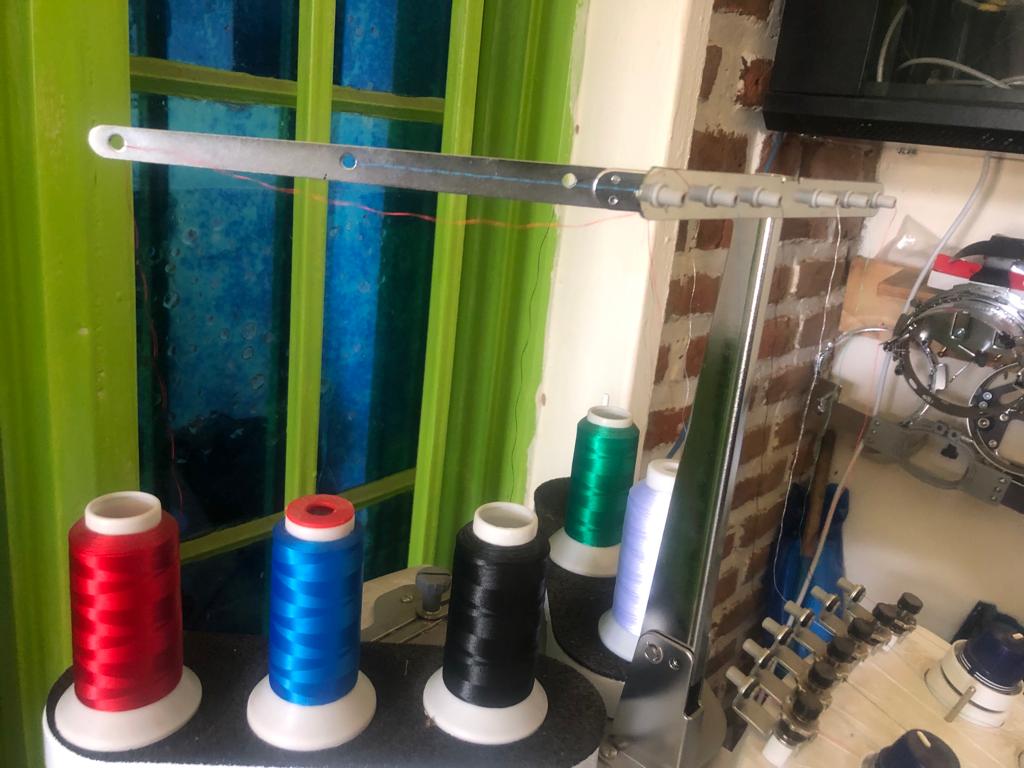
Embroidery Machine Accessories
Flatbed embroidery machine: Flat bed embroidery machines have a flat working surface, similar to a table.
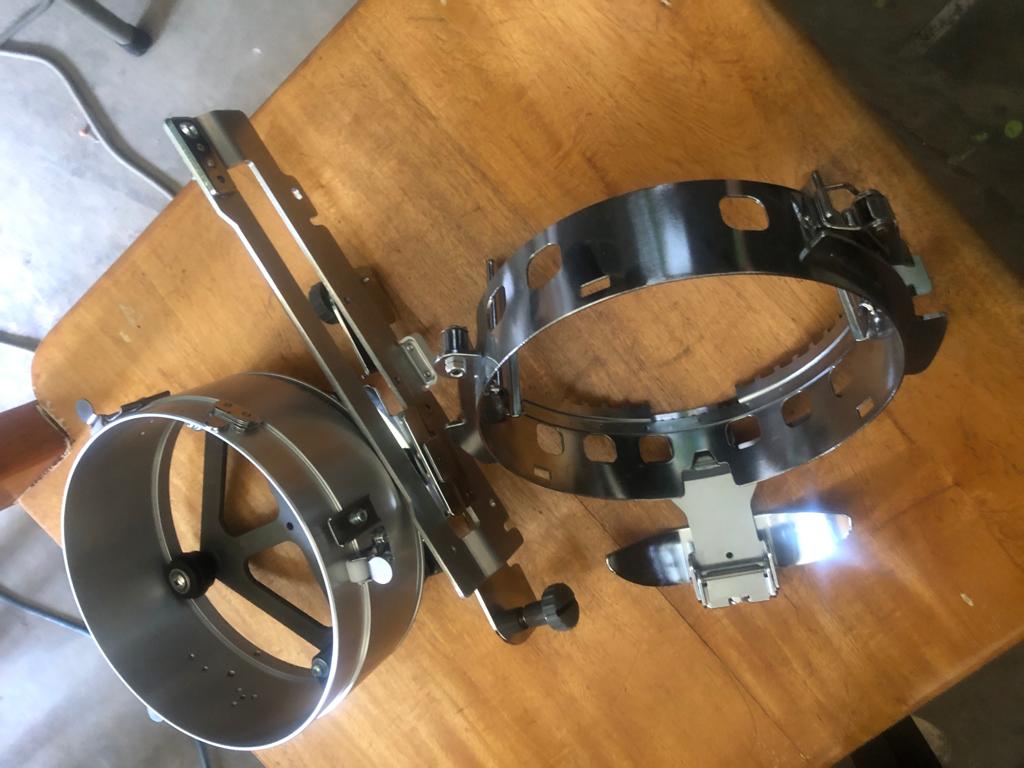
 Cylinder Bed:Cylinder bed embroidery machines feature a cylindrical-shaped bed, allowing for embroidery on cylindrical or tubular items such as hats, sleeves, cuffs, and other small, curved surfaces. The fabric is wrapped around the cylinder, and the machine embroiders on it as it rotates.
 Needle bar
 Software
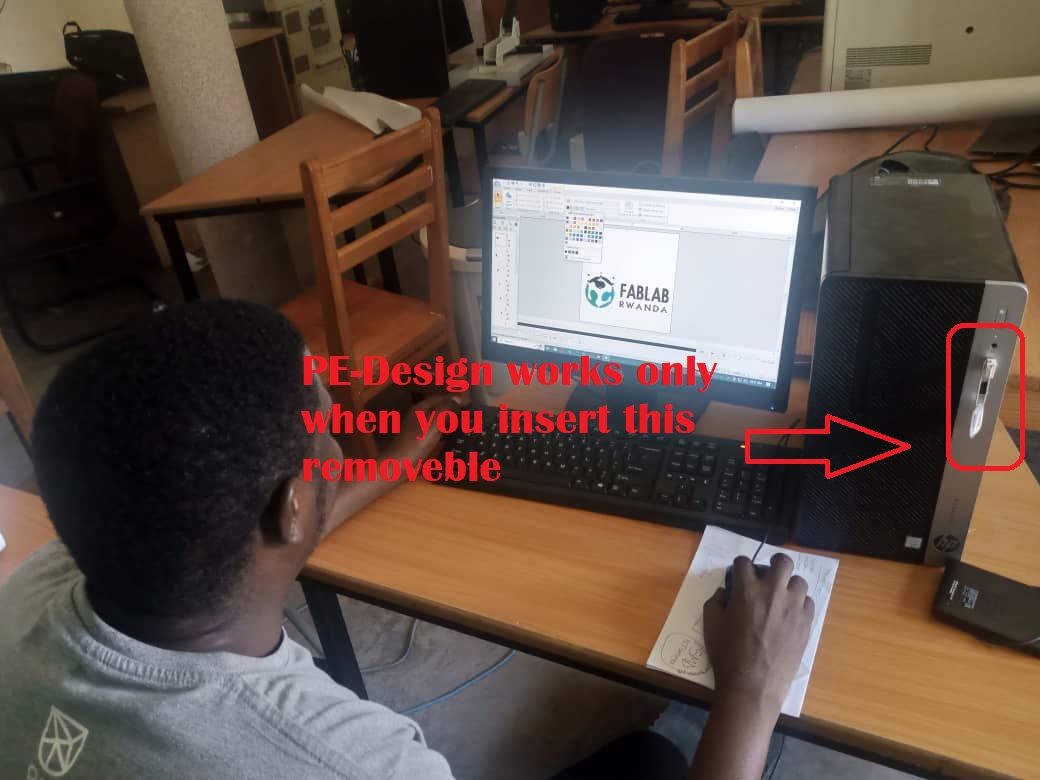
There are several softwares that allow it feasible generate designs for embroidery machines. For instance, PE-DESIGN 11 is an open-source design platform based on Inkscape. Although it is a free software, depending of the precision required for the image, it might not be suitable.
Design
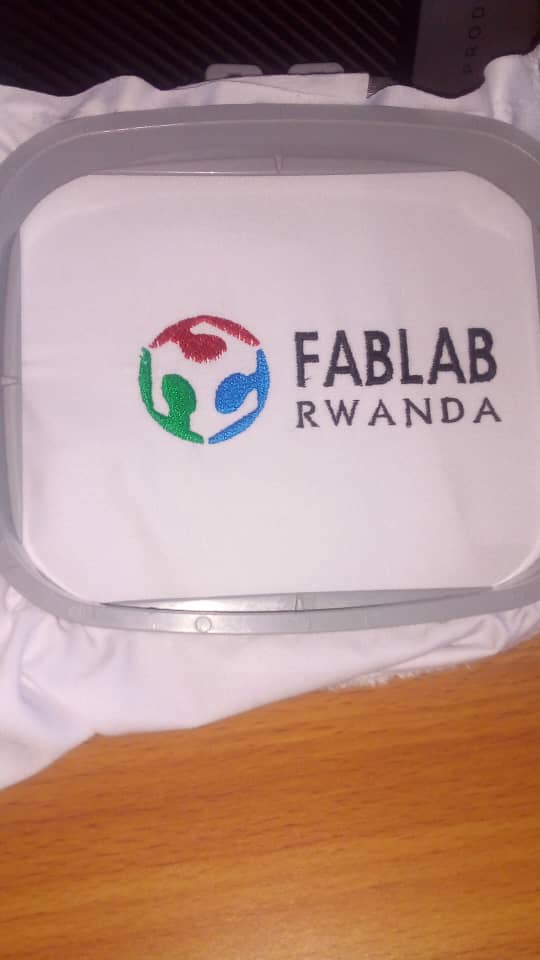
In this week I decided to design FabLab Rwanda Logo
Software
There are several softwares that allow it feasible generate designs for embroidery machines. For instance, PE-DESIGN 11 is an open-source design platform based on Inkscape. Although it is a free software, depending of the precision required for the image, it might not be suitable.
Design
In this week I decided to design FabLab Rwanda Logo
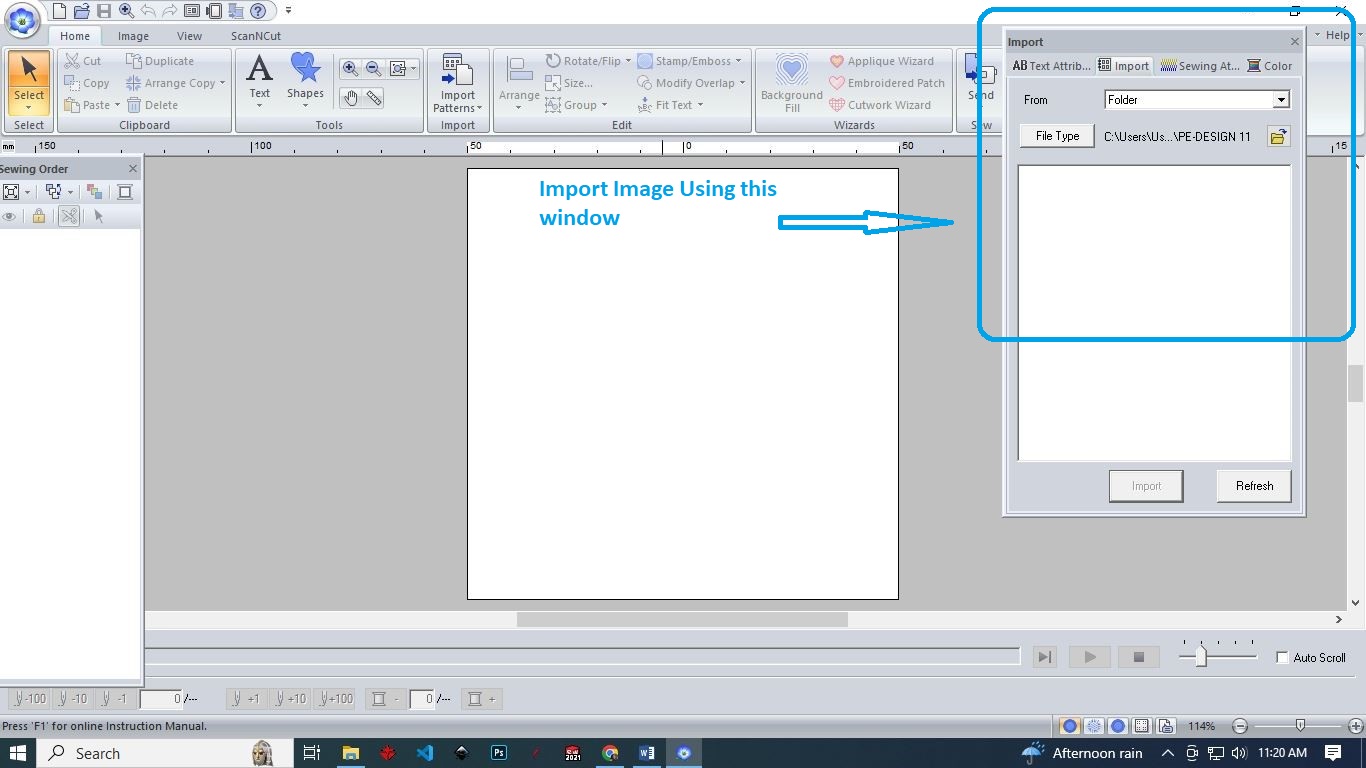
 Open the image in PE-Design: Launch the PE-Design program and open the image you want to edit by clicking on "File" > "Open".
 Start Adjust the image: Adjust the image by resizing, rotating or cropping it as required. Use the toolbar options to carry out these functions.
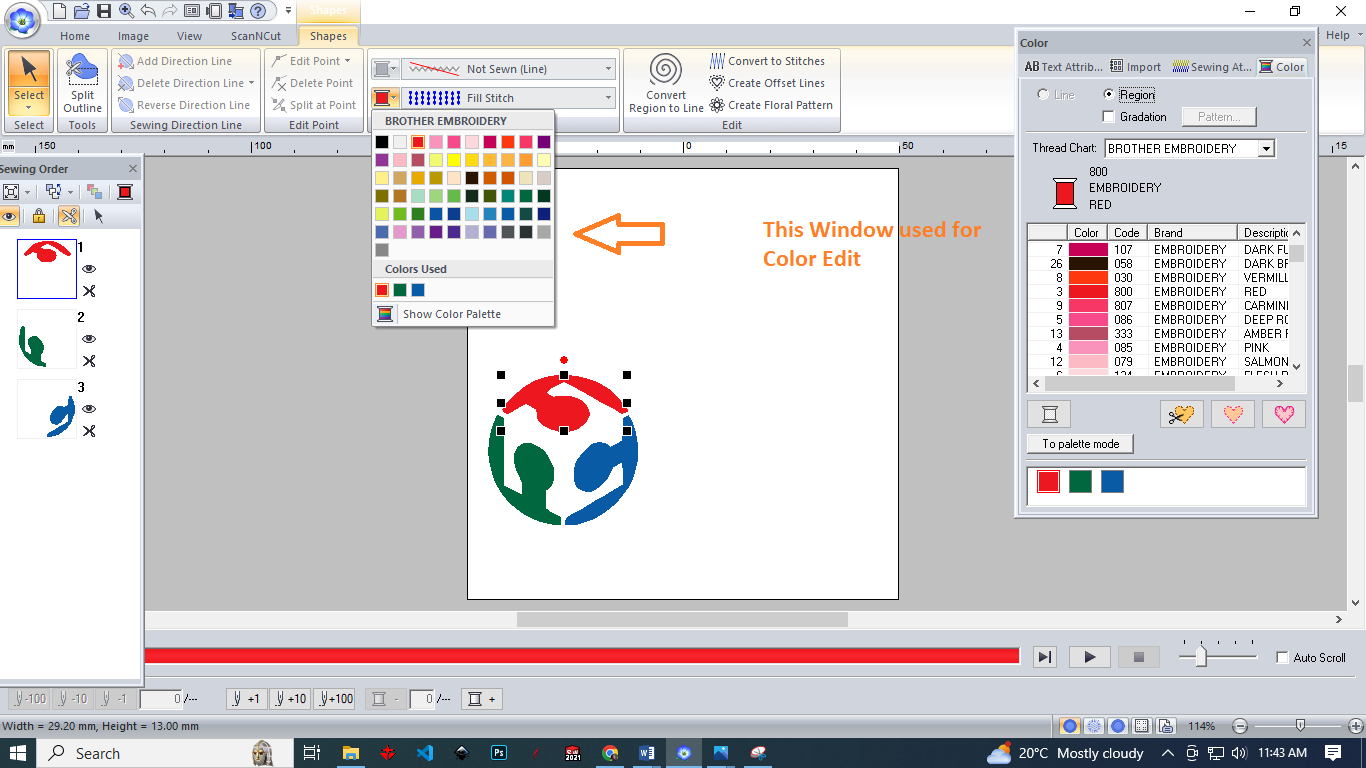
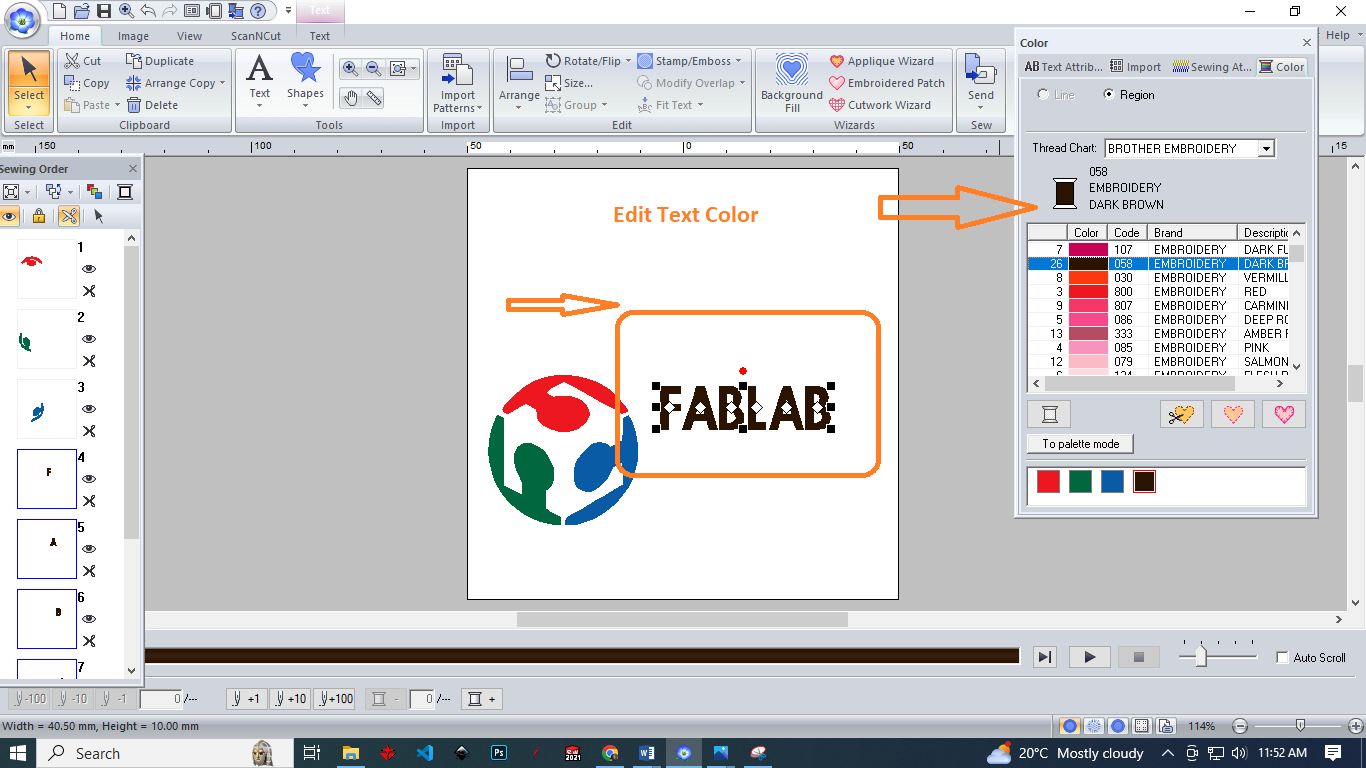
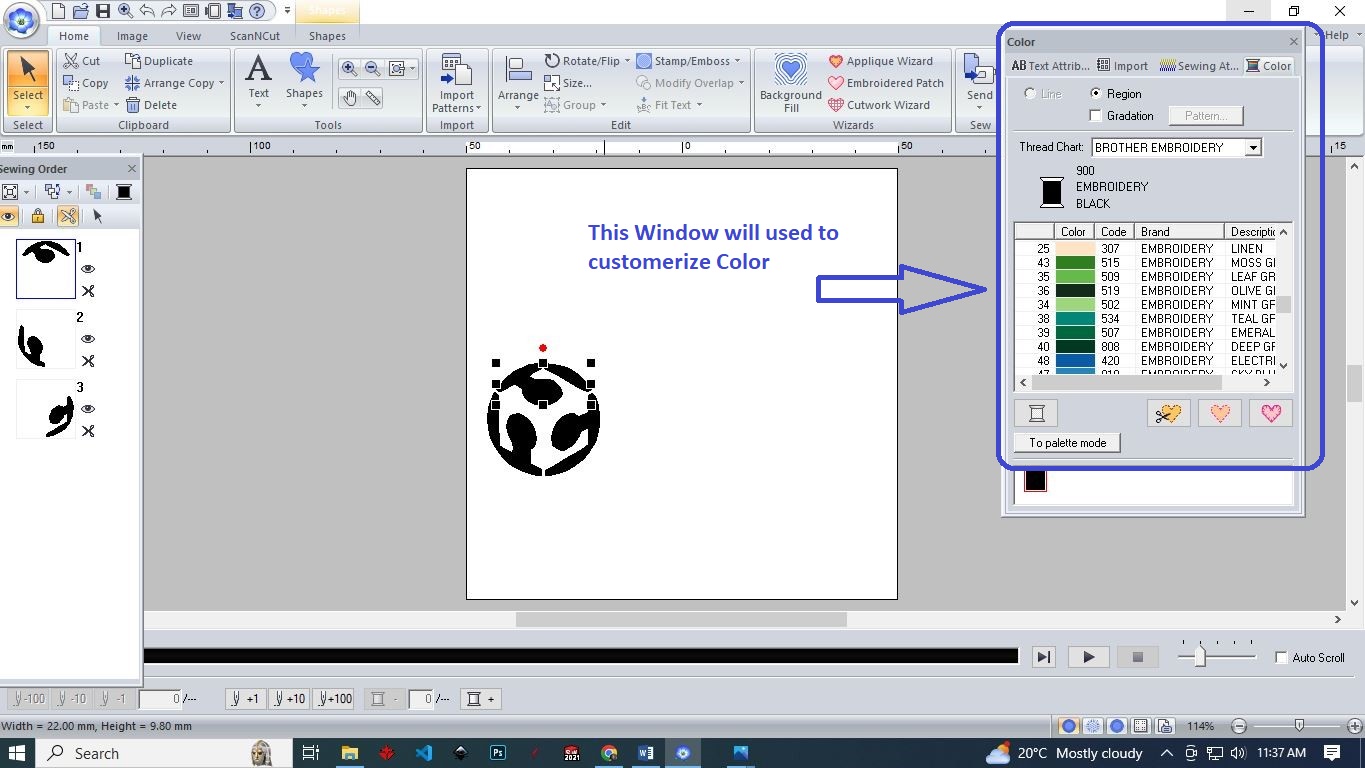 Edit the colors: Use the "Thread Palette" to change the color scheme of the image. You can also change the thread type, stitch type and density to suit your requirements.
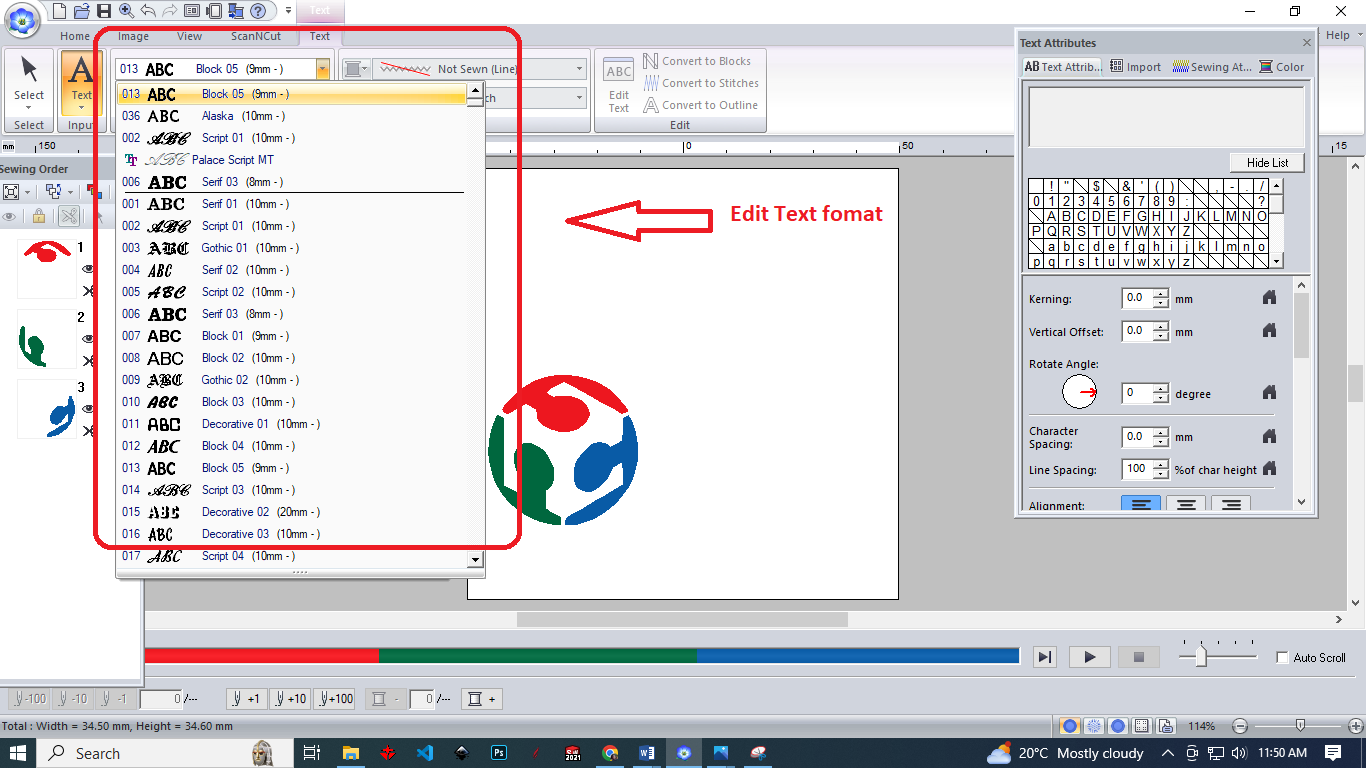
 Use Text fomat to edit text: In this window, you can make changes to the text format such as font type, size, style, and alignment.
 Add text: Use the "Text Tool" to add text to the image. Choose the font, size, and style of the text to match the design.
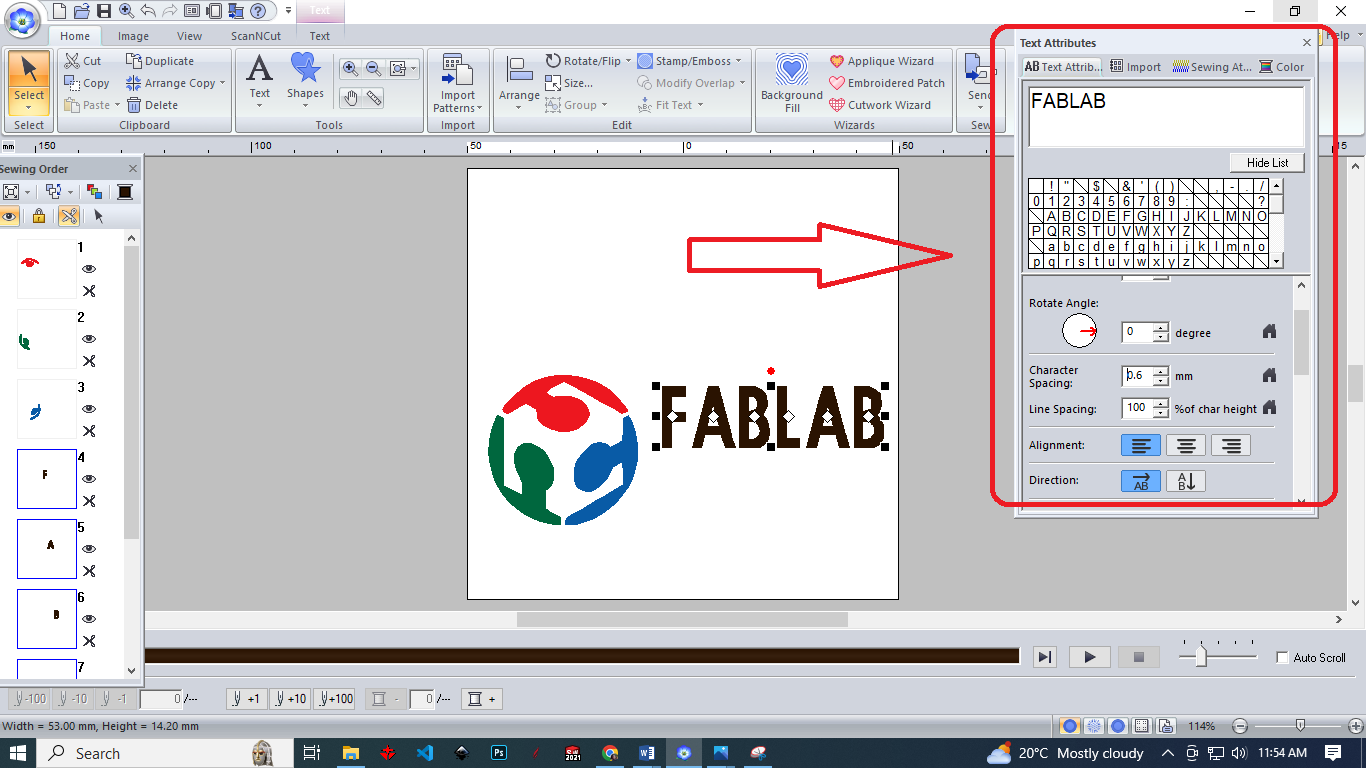
 Edit text Attribute: Rotate angle, Character and line spacing, alignment and direction
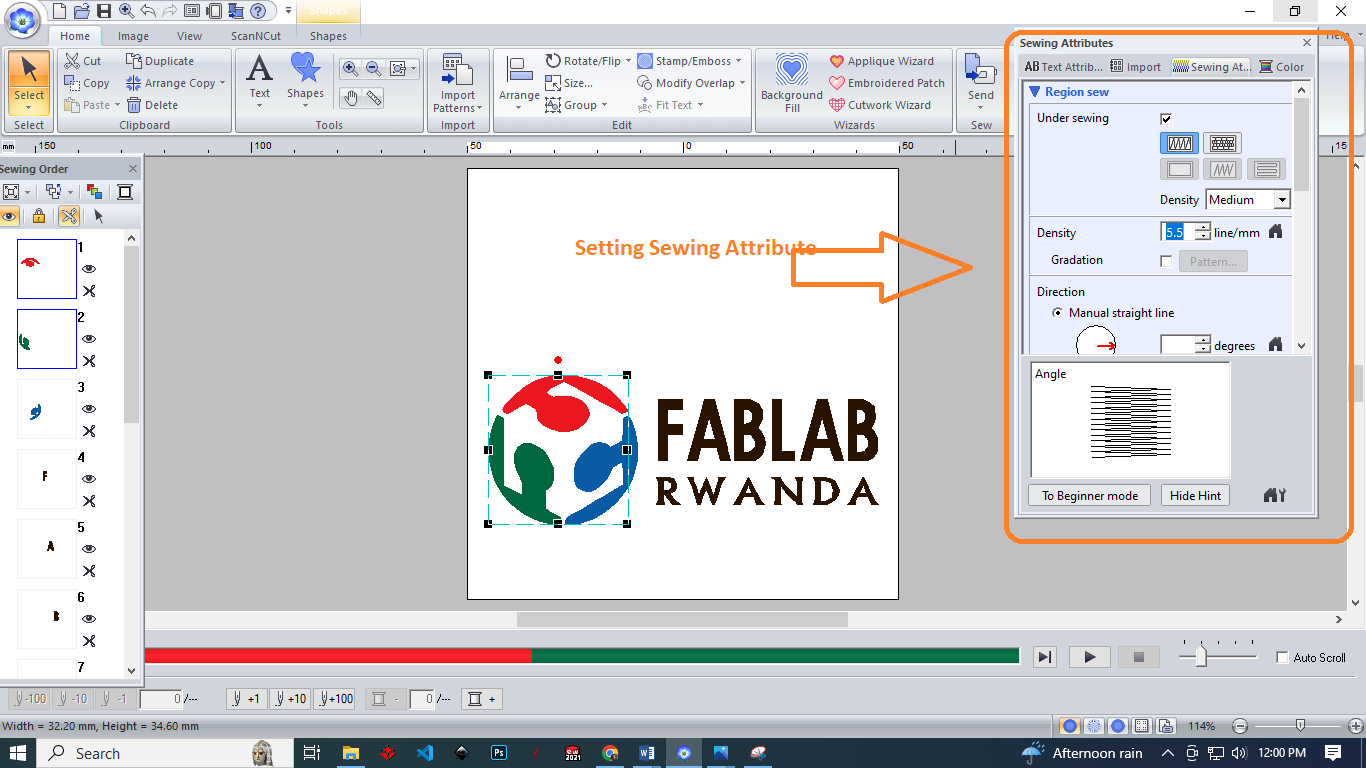
 Setting Sewing Attribute: In the "Sewing Attributes" dialog box, you can set the stitch type, stitch length, density, angle, and color for the selected elements. You can also set the stitch direction and stitch order
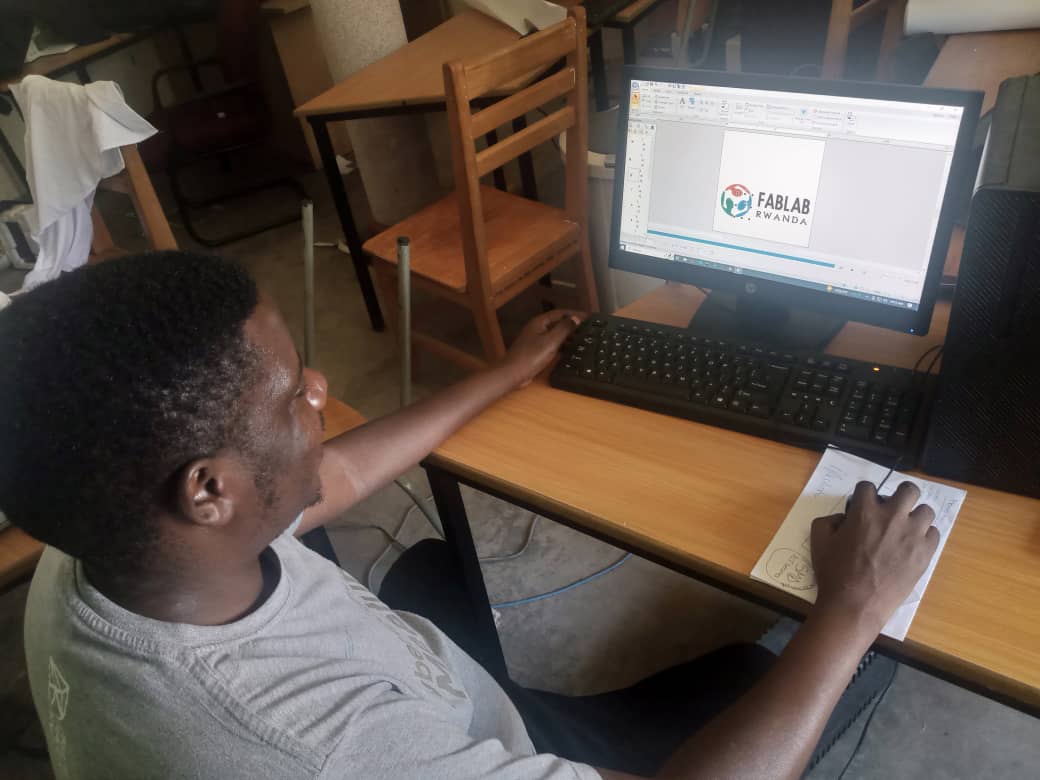
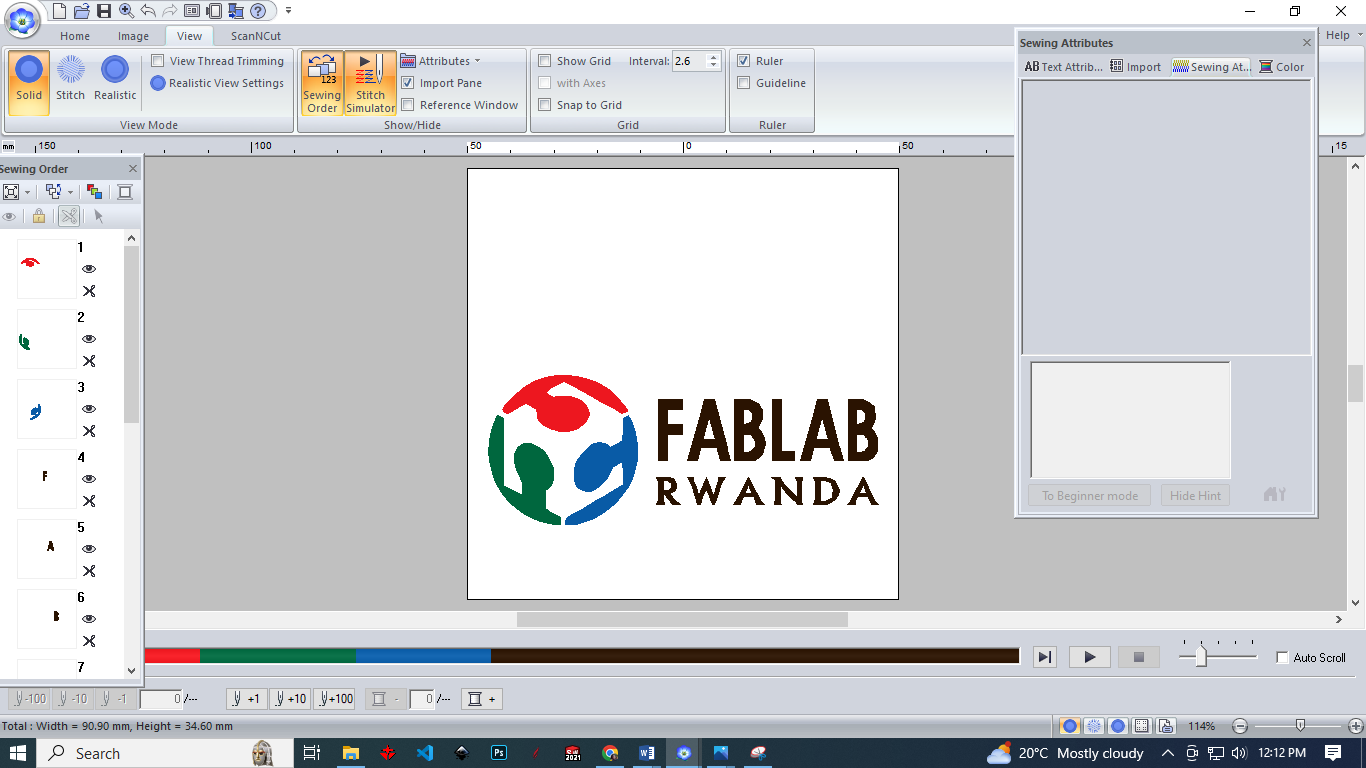
 This image shows how I designed FabLab Logo using PE-DESIGN Software
 Here is final Design
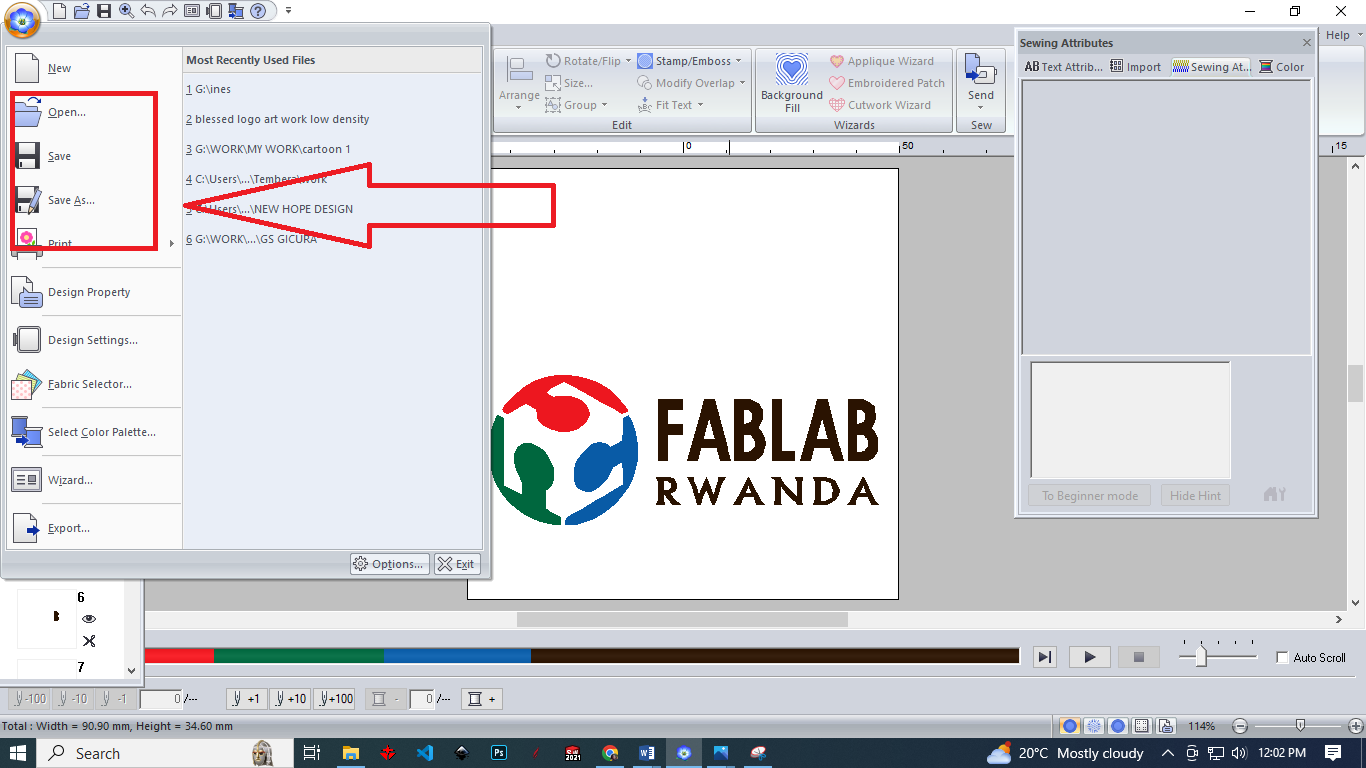
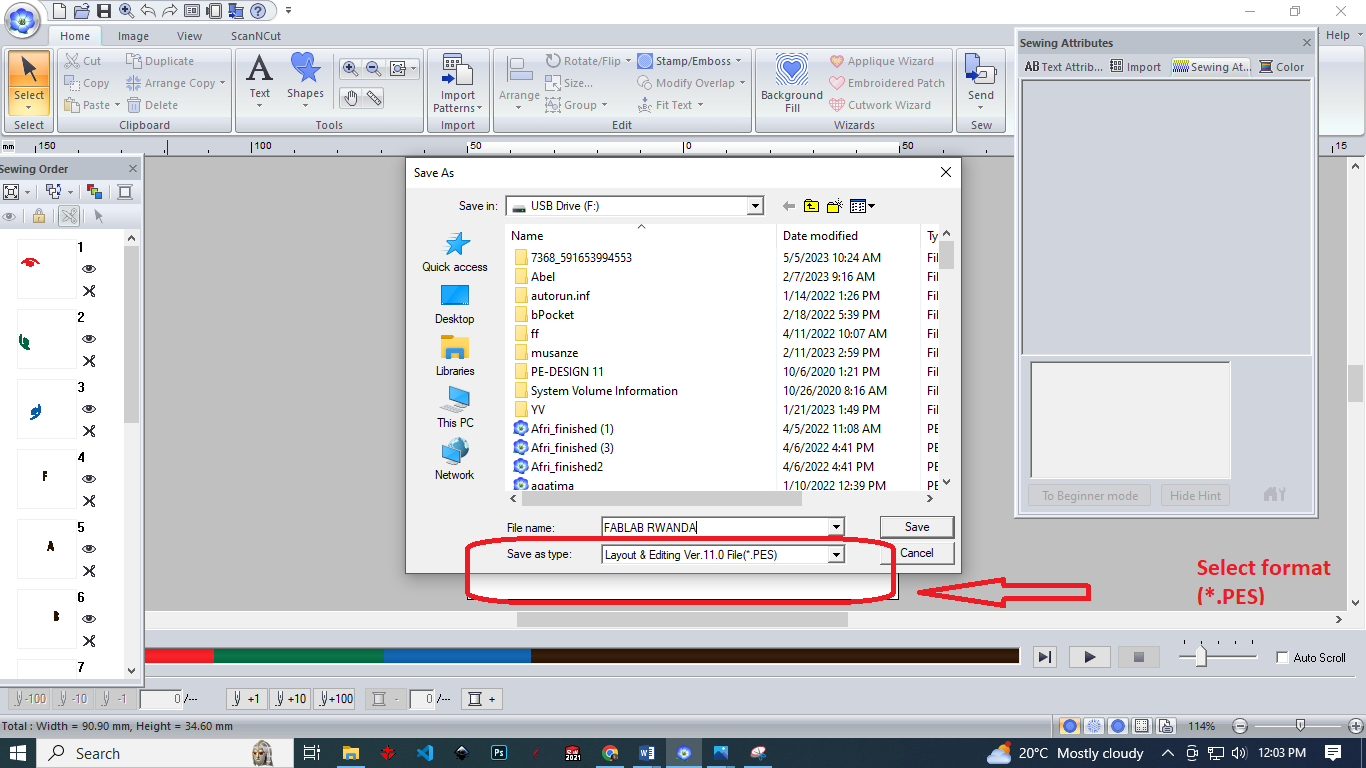
 Save the design: Save the edited image in the required file format.
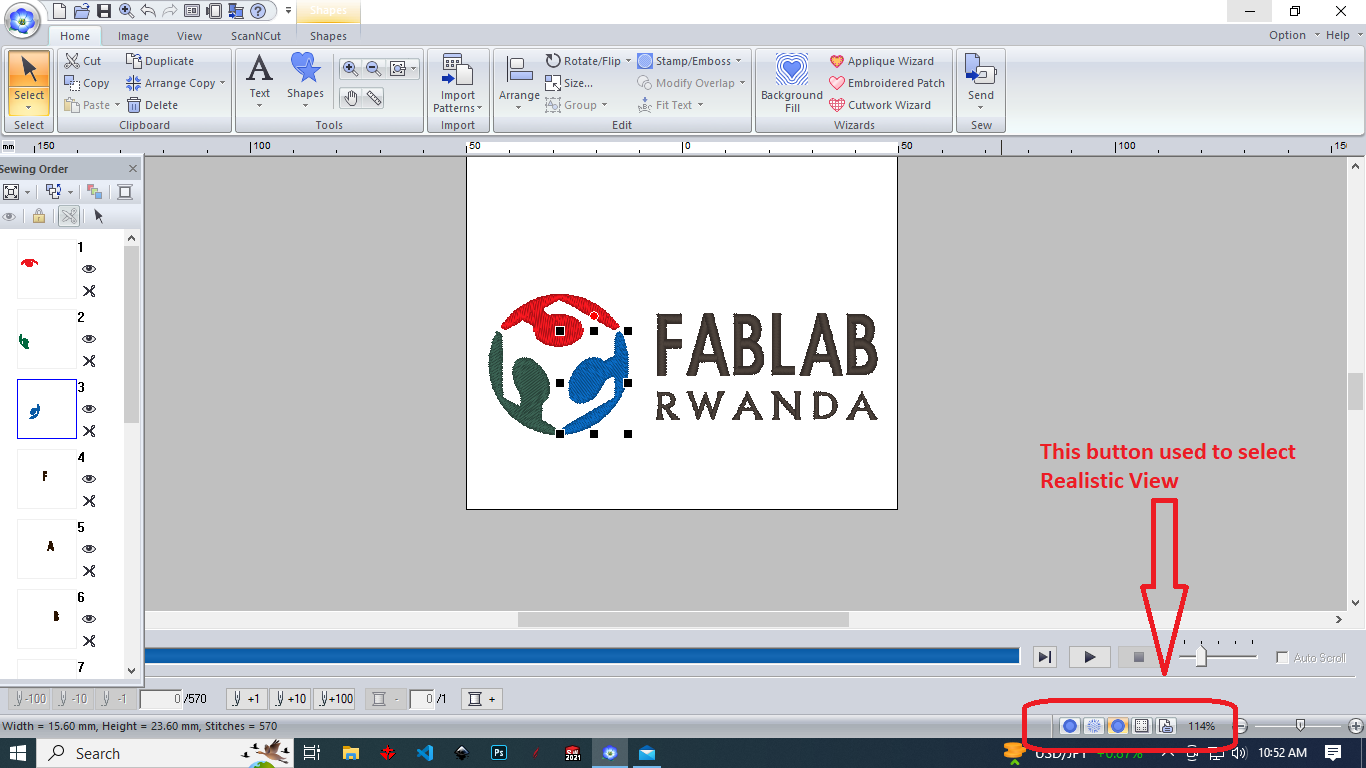
 This Image shows how the embroidery design will look when it is stitched onto a fabric
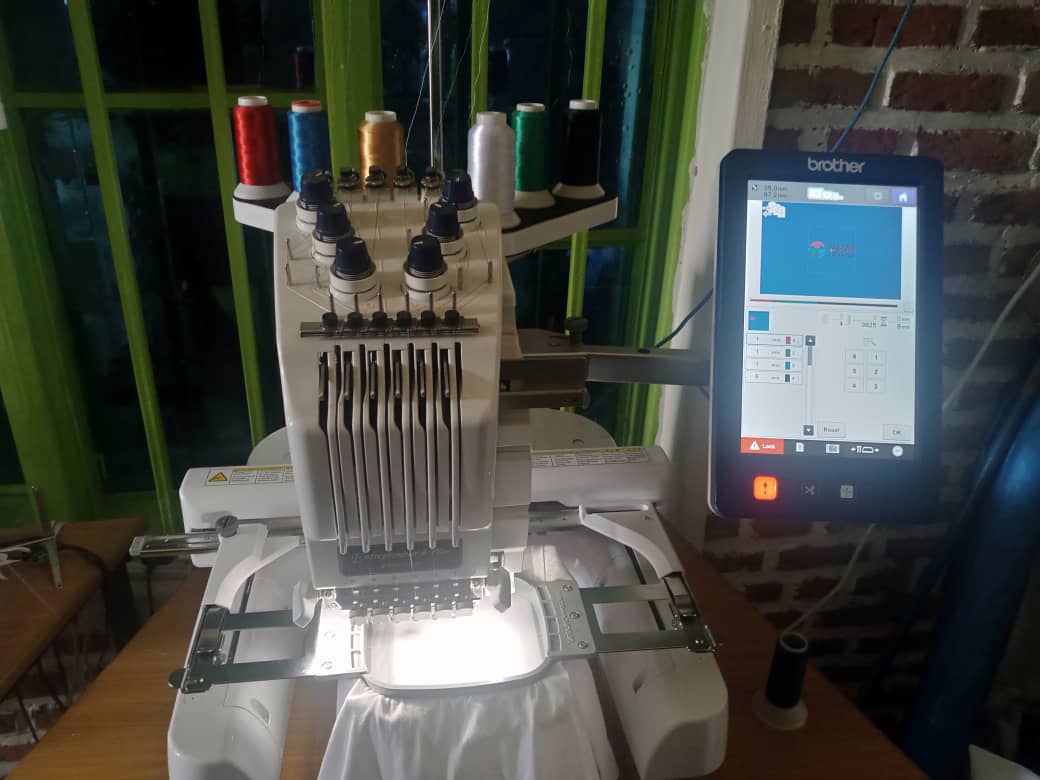
 Setting Up Embroidery Machine
The following video shows how to import a designed Image to Embroidery Machine
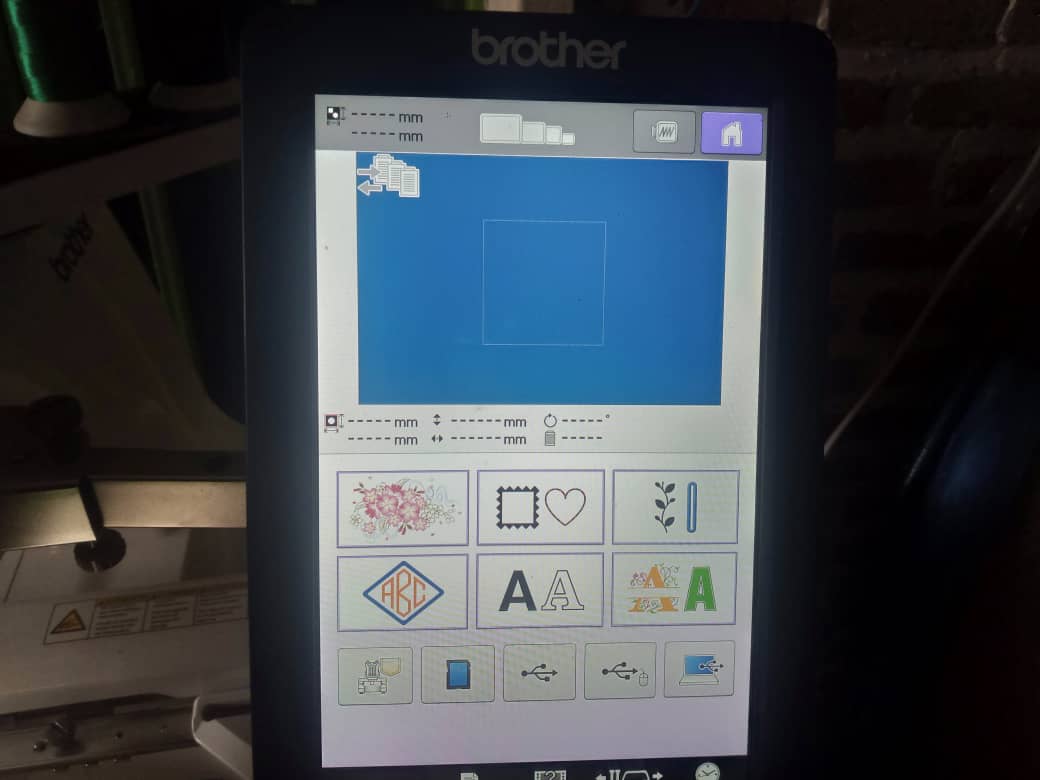
1. Prepare the embroidery machine: Turn on the machine and make sure it is in good working condition. Check the needles, bobbin, and thread for any damage or defects.
Setting Up Embroidery Machine
The following video shows how to import a designed Image to Embroidery Machine
1. Prepare the embroidery machine: Turn on the machine and make sure it is in good working condition. Check the needles, bobbin, and thread for any damage or defects.
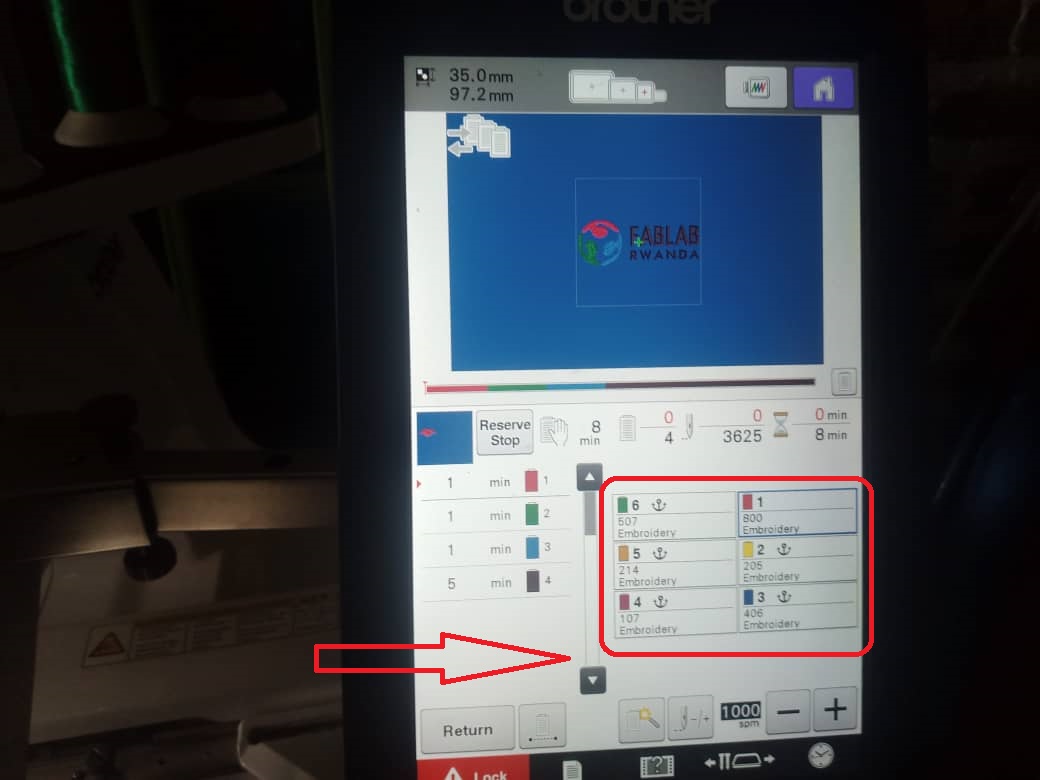
 2. Start Setting all parameters of Embroidery Machine
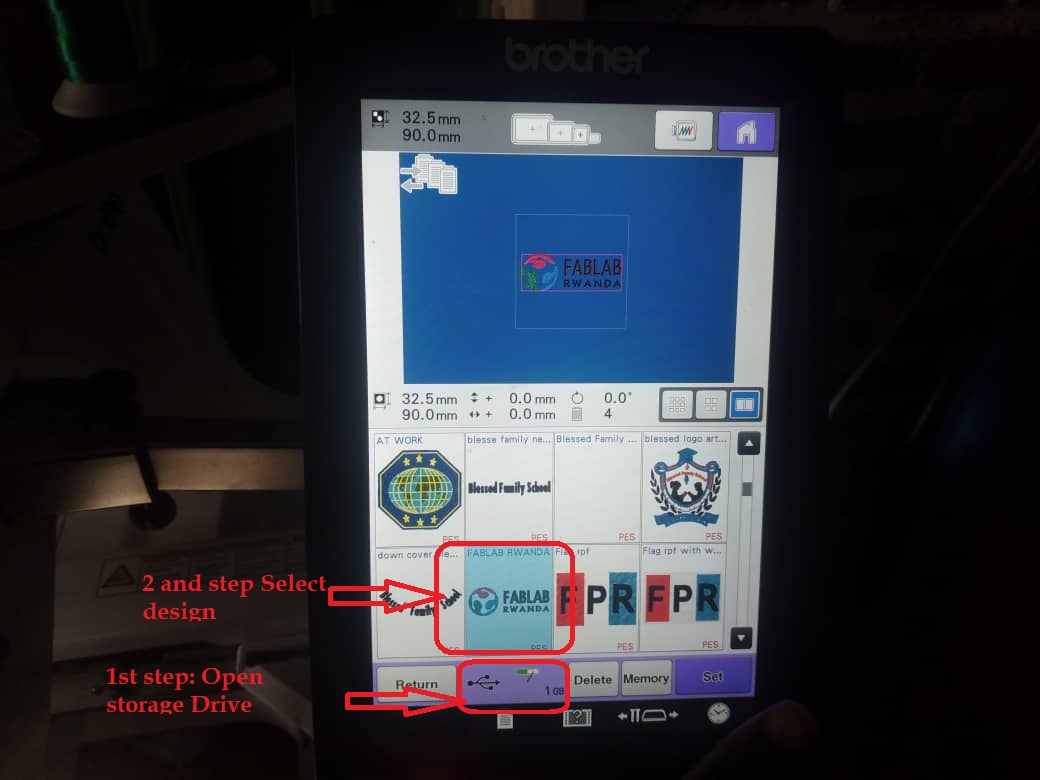
 3. Select the design: Choose the embroidery design you want to stitch onto the fabric.
 4. Edit imported design: Size, Rotate angle, Character and line spacing, alignment and direction
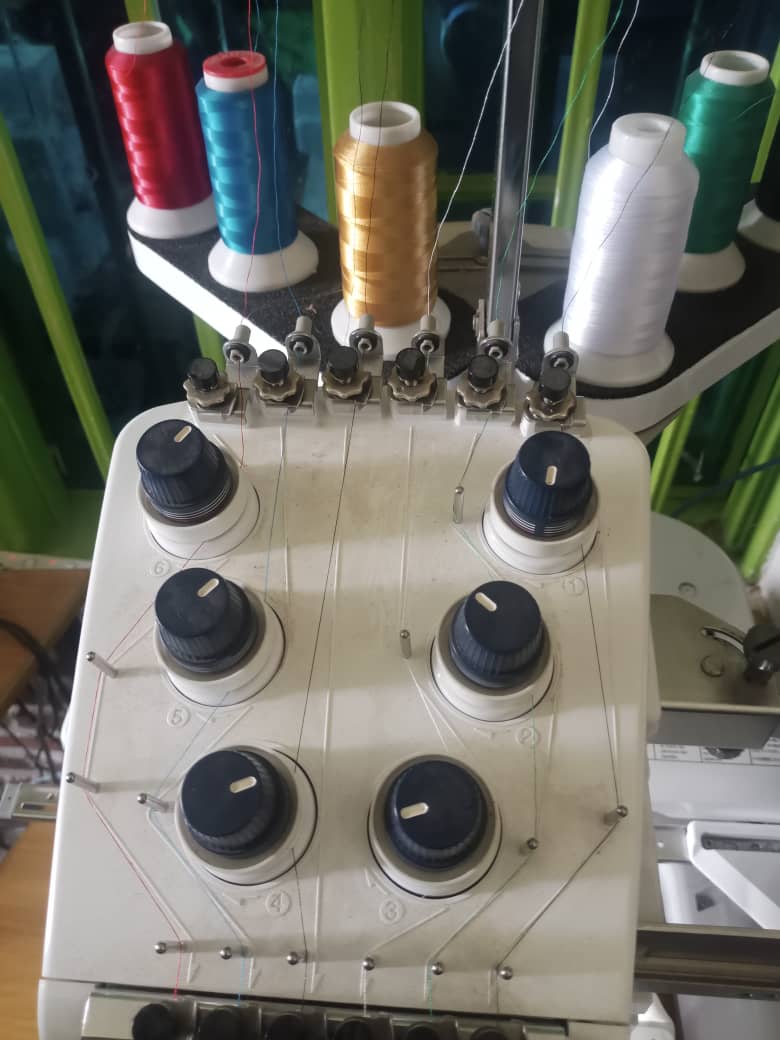
 5. Thread the machine: Thread the machine with the appropriate thread color and set the tension according to the machine's instructions
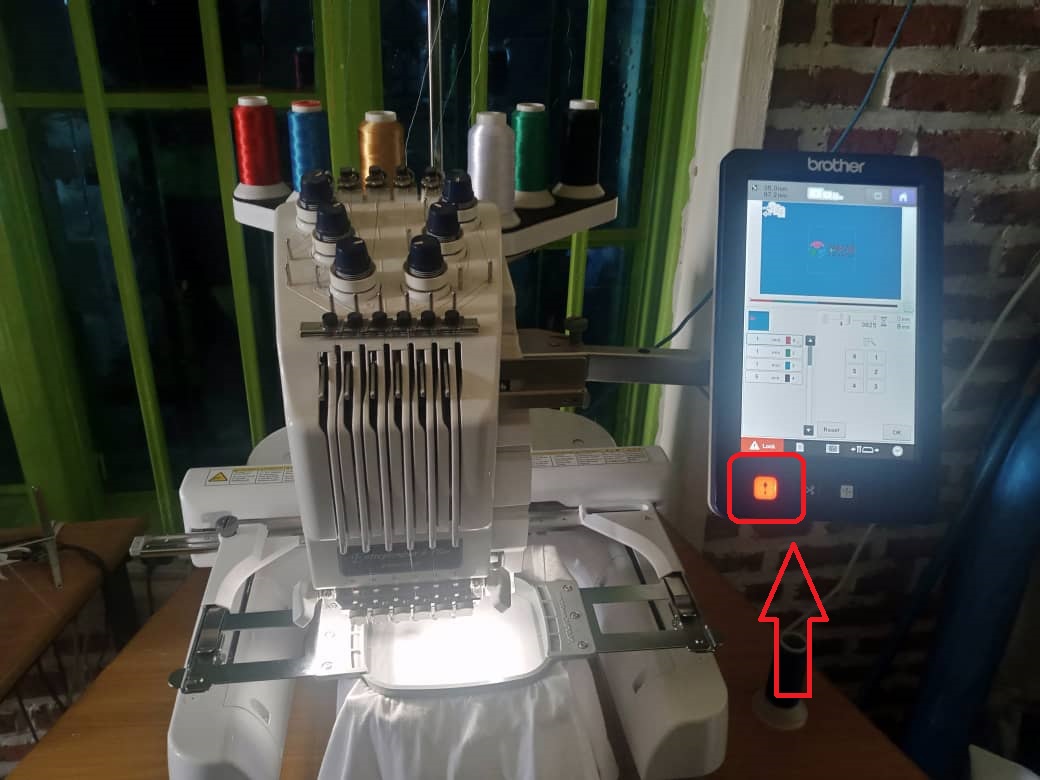
 6. Press Unlock and the start embroidery Machine
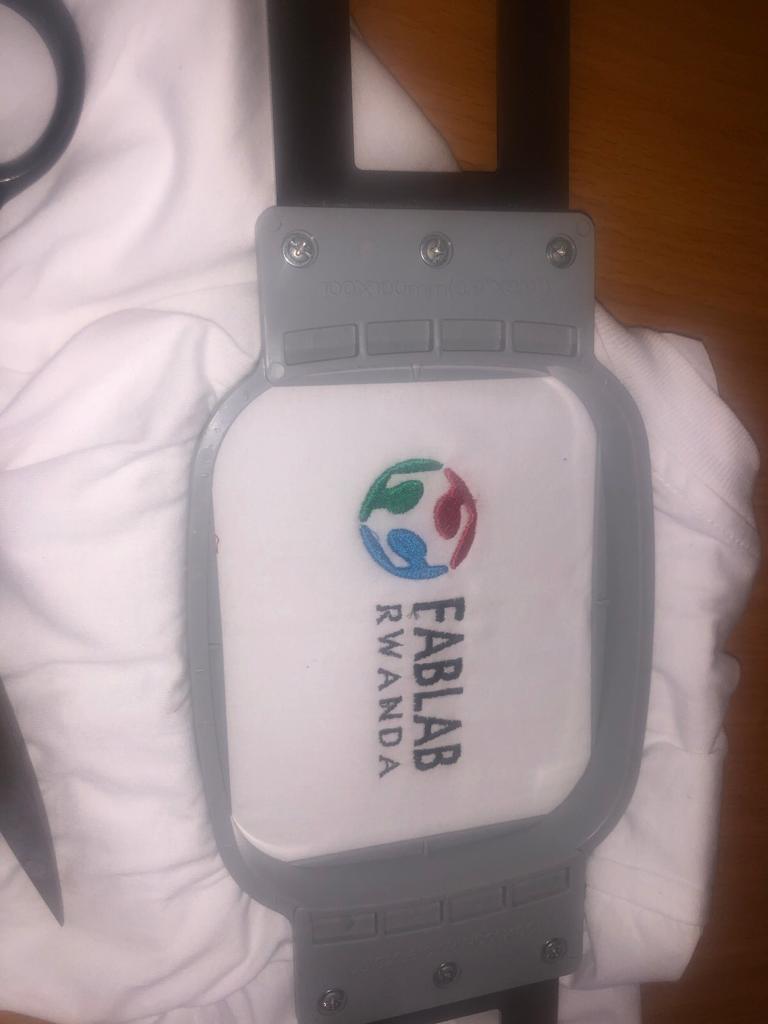
 . Here is final Results
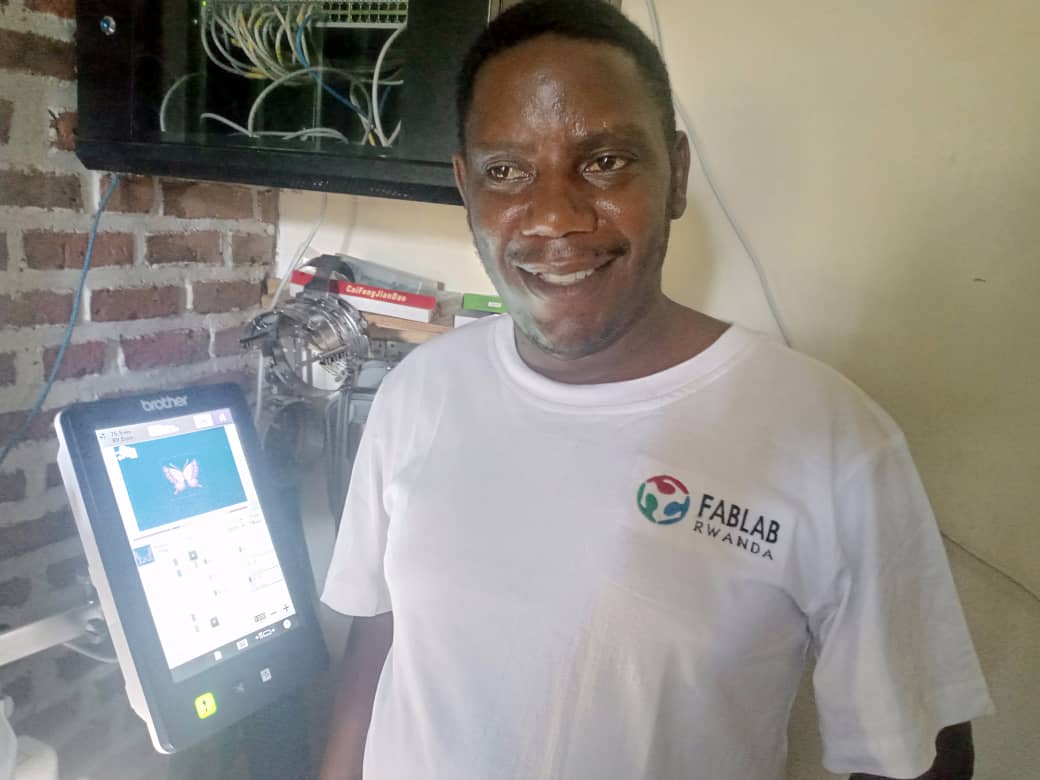 The following video shows how to import a designed Image to Embroidery Machine
If you want to learn about my code, kindly click here