16. Applications and Implications
This week we have to work on our final project. The detailed documentation of the final project can be viewed here:
Final Project Masterpiece
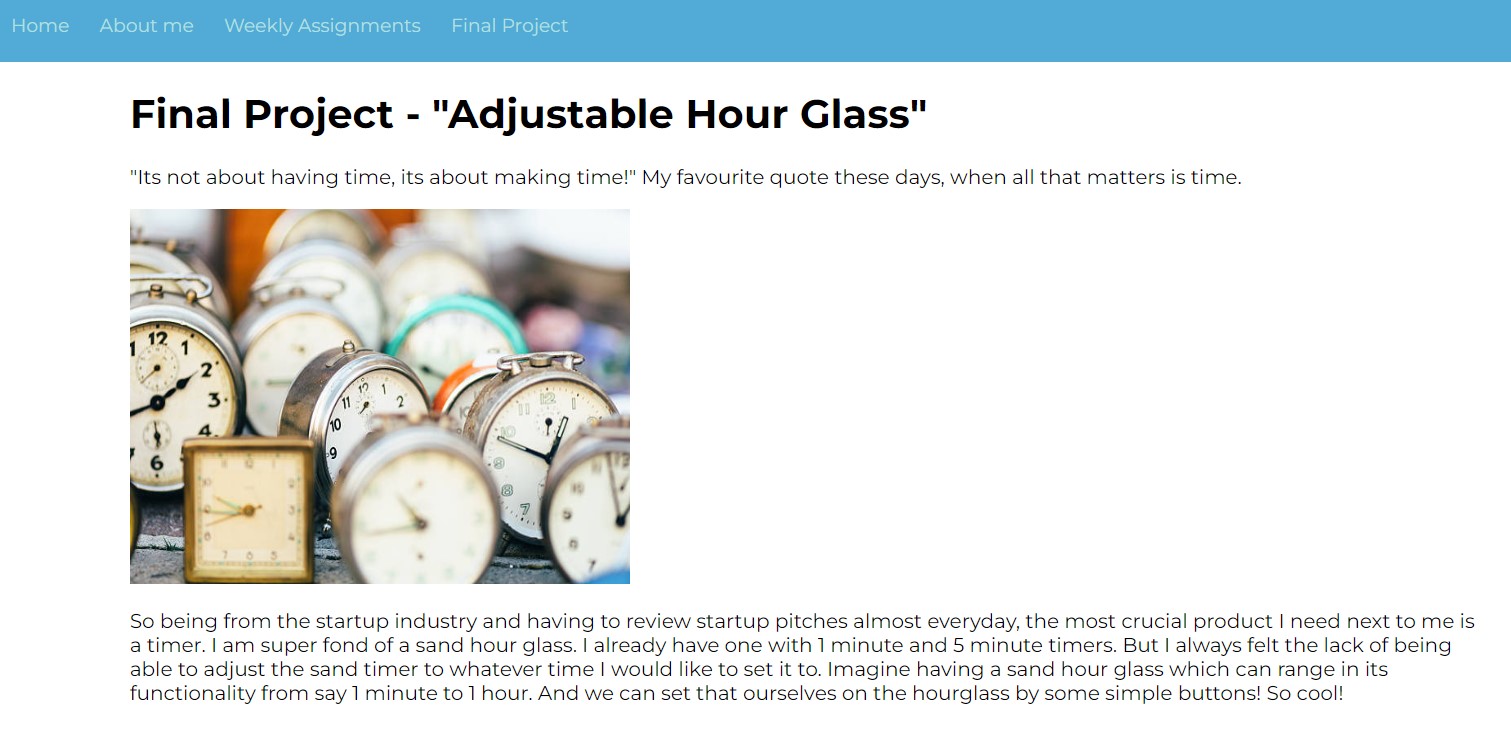
The details of the concept for the final project masterpiece is as follows:So the final project is supposed to be an adjustable hour glass which can be used as a timer during startup pitches. I have answered all the questions below in two different
What will it do?
It is an hour glass it is supposed to function as a timer that can be adjusted to 3 or more variations ideally for startup reviews So the final MMP product should ideally be able to switch between any minute and not just few variations. But considering the scope of the final project for the FabAcademy, I have decided that my MVP will have 3 variations only.Who's done what beforehand?
Upon research, yes it does exist in the international market. Here's one shown in the image below from Tempo, but it is adjustable to 3 settings, 5 min, 15mins, 25mins. My plan is to make it more free to adjust. I haven't figured out exactly how but maybe some servo? I don't know, need some time to brainstorm in detail. Coming weeks it will be!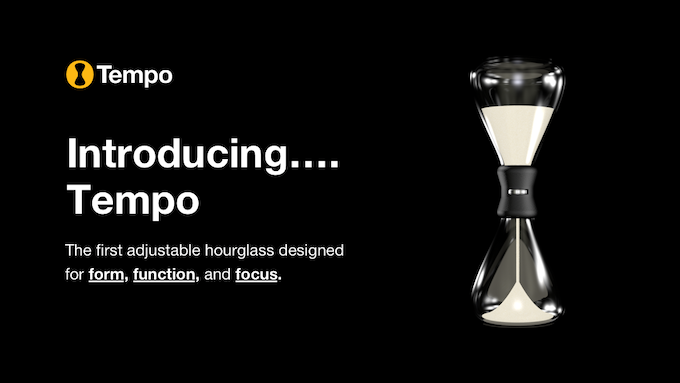
What will you design?
So, I will be designing this MVP product, i.e. the prototype model which can demonstrate the functioning of a adjustable hour glass. The design will include the actual engineered product which means the mechanism of the functioning of the product, the outerbody in general, the PCB design for the electronics of the device, the mounting unit(chassis) that will hold all the above elements together.What materials and components will be used?
So the components both hardware wise and electronics wise are described in the list below:So the hardware has following elements:
1. One that holds it all - 3D printed holder/mount
2. Glass itself - The two glasses of the hour glass (flasks to be used for the prototype)
3. The main element - Sand itself
4. The body - The outer casing of the hour glass
So the electronics has following elements:
1. Decision Maker - Arduino Uno or Arduino Nano
2. Input Devices - DPST buttons/switches
3. Output Devices - LEDs
4. Actuators - Servo motor
The material I will be using for 3D printing most of the attachments will be PLA, whereas the material I will be using to experiment with 2D prototypes like lasercut components, I will using acrylic 3mm or 4mm or 5mm. Apart from that, for the transparent glass, I am thinking to use the chemistry flasks for the prototype stage.
Where will come from?
So the electronics, I am going to buy servo motor, arduino nano or the atmega chip from my pocket. The most common electronics like resistors, LEDs are available in plenty in our FABLAB inventory so I am planning to borrow some from there. Anywhich ways these components would hardly cost anything.How much will they cost?
So the electronics - I have already had a quote for the components I need. It would cost around 2000 rs on an average including the arduino nano or atmega chip, servo motor, switches, etc The cost for the acrylic is almost nothing as I will be using the leftover materials from the fablab inventory. On the other hand, if I have to use in access quantity then the quotes for acrylic per awuarefeet per mm thickness rate is mentioned below For the 3d printing components, I have bought a 1kg reel of PLA which should be more that sufficient for the whole project. The reel costed me 1200 indian rupees The chemical flask I will be borrowing from our BioLab onlyWhat parts and systems will be made?
So I would divide the design into 4 parts:1. the working mechanism
2. the glass and sand
3. The electronics (inlcuding output and input)
4. The body design
What processes will be used?
1. CAD design - 3D design on Solidworks.2. Subtractive fabrication - Laser cut 2D components.
3. Additive fabrication - 3D printing holders/attachments.
4. Embedded program - programming microcontroller.
5. Electronics design and production - designing PCB for all the components needed.
6. i/p devices - Using switches as input devices.
7. o/p devices - using leds and servo motor as output devices.
What questions need to be answered?
List of mechanical design constraints needed:1. Holding the flasks over eachother
2. Holding the disk at it's place (i.e. between the two flasks)
3. Making sure there is no gap between the two flasks so as to not let the sand leak.
4. Mechanism for the disks to rotate (most likely servo motor)
5. Mounting of the disks over the servo
6. Mounting of the servo motor in the casing
List of Electronics needed:
7. Servo motor or Stepper motor and driver
8. Microcontroller to automate the servo movement
9. Input devices - button to switch between 3 modes
10. Output devices - LEDs to indicate which mode it is
List of Aesthetic, Ergonomic and User friendly design requirements:
11. The outer body i.e. the casing of these above mentioned components
12. Balance the weight of the hour glass throughout.
How will it be evaluated?
1. Evaluating the right sand substituteSo the exact sand of the hourglass was a bit costly for me to invest and didn't felt like investing that much. So I had looked for various alternatives through trial and error version to finally find the right course stricture that would work exactly like a hourglass sand. The details of the trials are explained in the Iteration 1 section of the Final project page. I used things like Salt, course Salt, dry soil from the football ground, black sand from the lab, and few edible items from the kitchen to finally settle with Semolina.
2. Evaluating the disc diameter
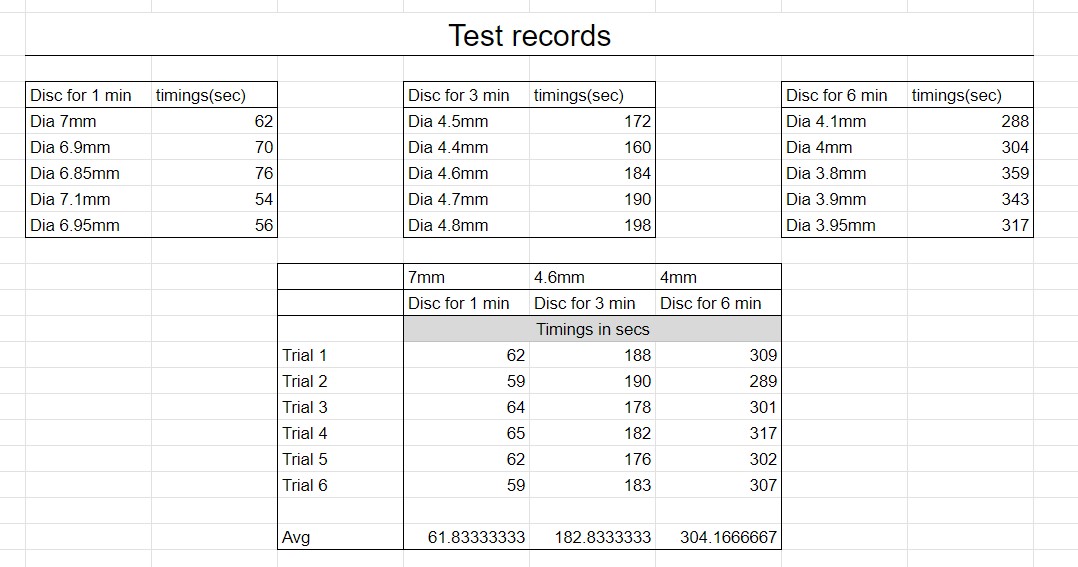
THe disk diameter hole is the very first and crucial thing to evaluate and finalise for each of the variations i want. So to evaluate that, the best way is to do trial and error as the coarse Semolina(Rava in local language) is very fine and thus hard to do it mathematically. The way it was done is explained in the Iteration 1 section of the Final project page. The image of the records and analysis over excel is shown below for quick view:
3. Evaluating the combined disk design distance between the 3 variations
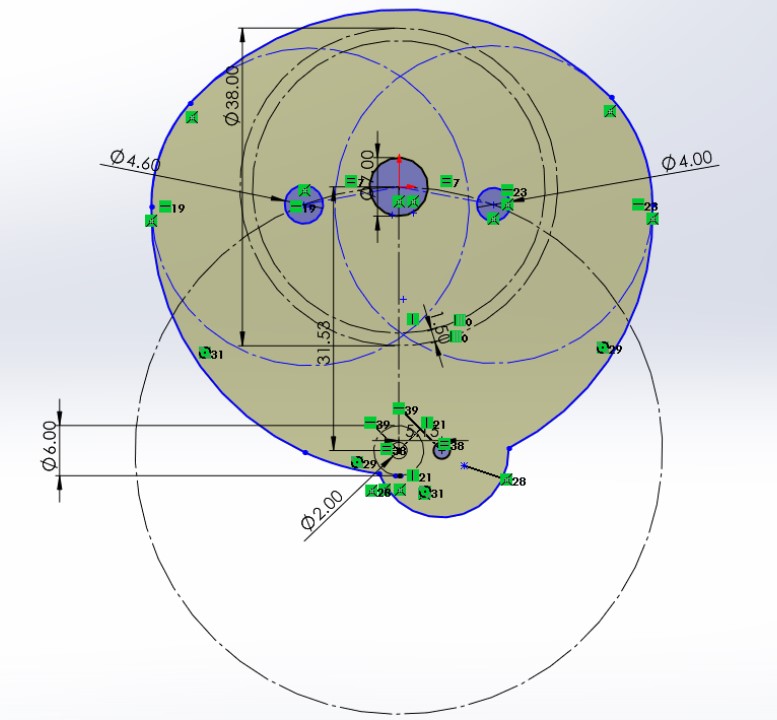
The next important evaluation if the design was the combination of the 3 variation diameters on one disk that is to be mounted on the servo and needs to function according to specific angles the servo is going to be programmed to. For this, before even laser cutting, I used my engineering skills and took hours to just determine the right curvature and the distance between the diameter hole using the evaluate -> measure features in solidworks and the sketch constraints in solidworks. The design details are again explained in Iteration 3 of the Final project page. But, for quick view here's the sketch of the disks:
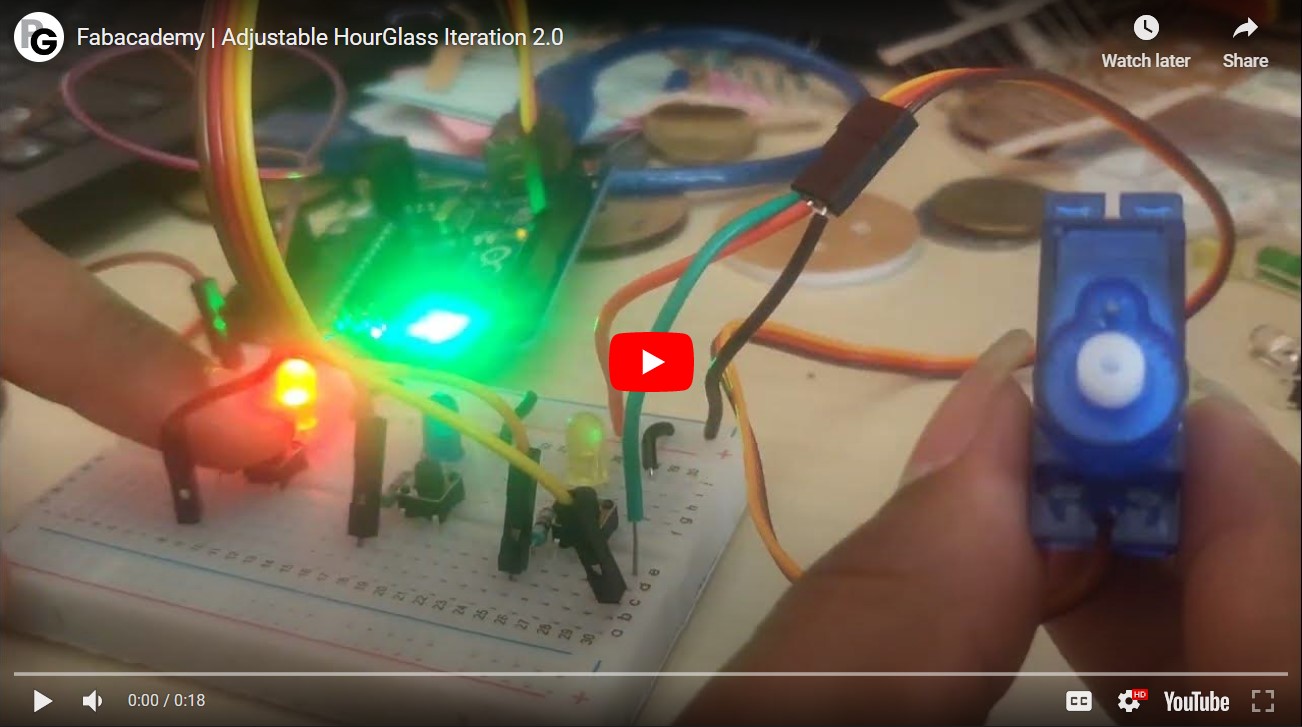
4. Evaluating the electronics & code
For electronics check I first tried it out on simple breadboard to check both the electronic component choices and also the electronic basic circuit i had designed. The same breadboard test also helped me get my code furnished The design details are again explained in Iteration 2 of the Final project page. For quick view, the Iteration 2 video is linked below:
Applications of the product
Given the time and scope of the final project for the FabAcademy, the adjustable hour glass will only be prototyped i.e. till TRL 3. It will ideally be used only by me or maybe my office collegues for startup reviews that we anyways have to do almost on daily basis being a startup incubator.But in future, if this product is developed the product would be more of a fancy item in the market than a super functional item. Because in real sense, nowadays digital timers are available for the said function. But only to old style lovers like me or people who are into antiques and prefer using such products.