12. Molding & Casting
Molding and casting is a time consuming process, actually not consuming but time killing process. The wait time for the mold to form and then failures in it when not doing it professionally is just time killing.
I have previously used and made silicon molds using 3D printed casings. So this time due to time constrain and also based on availability of the materials, I decided to use alginate gel which dries up in like 30 mins.
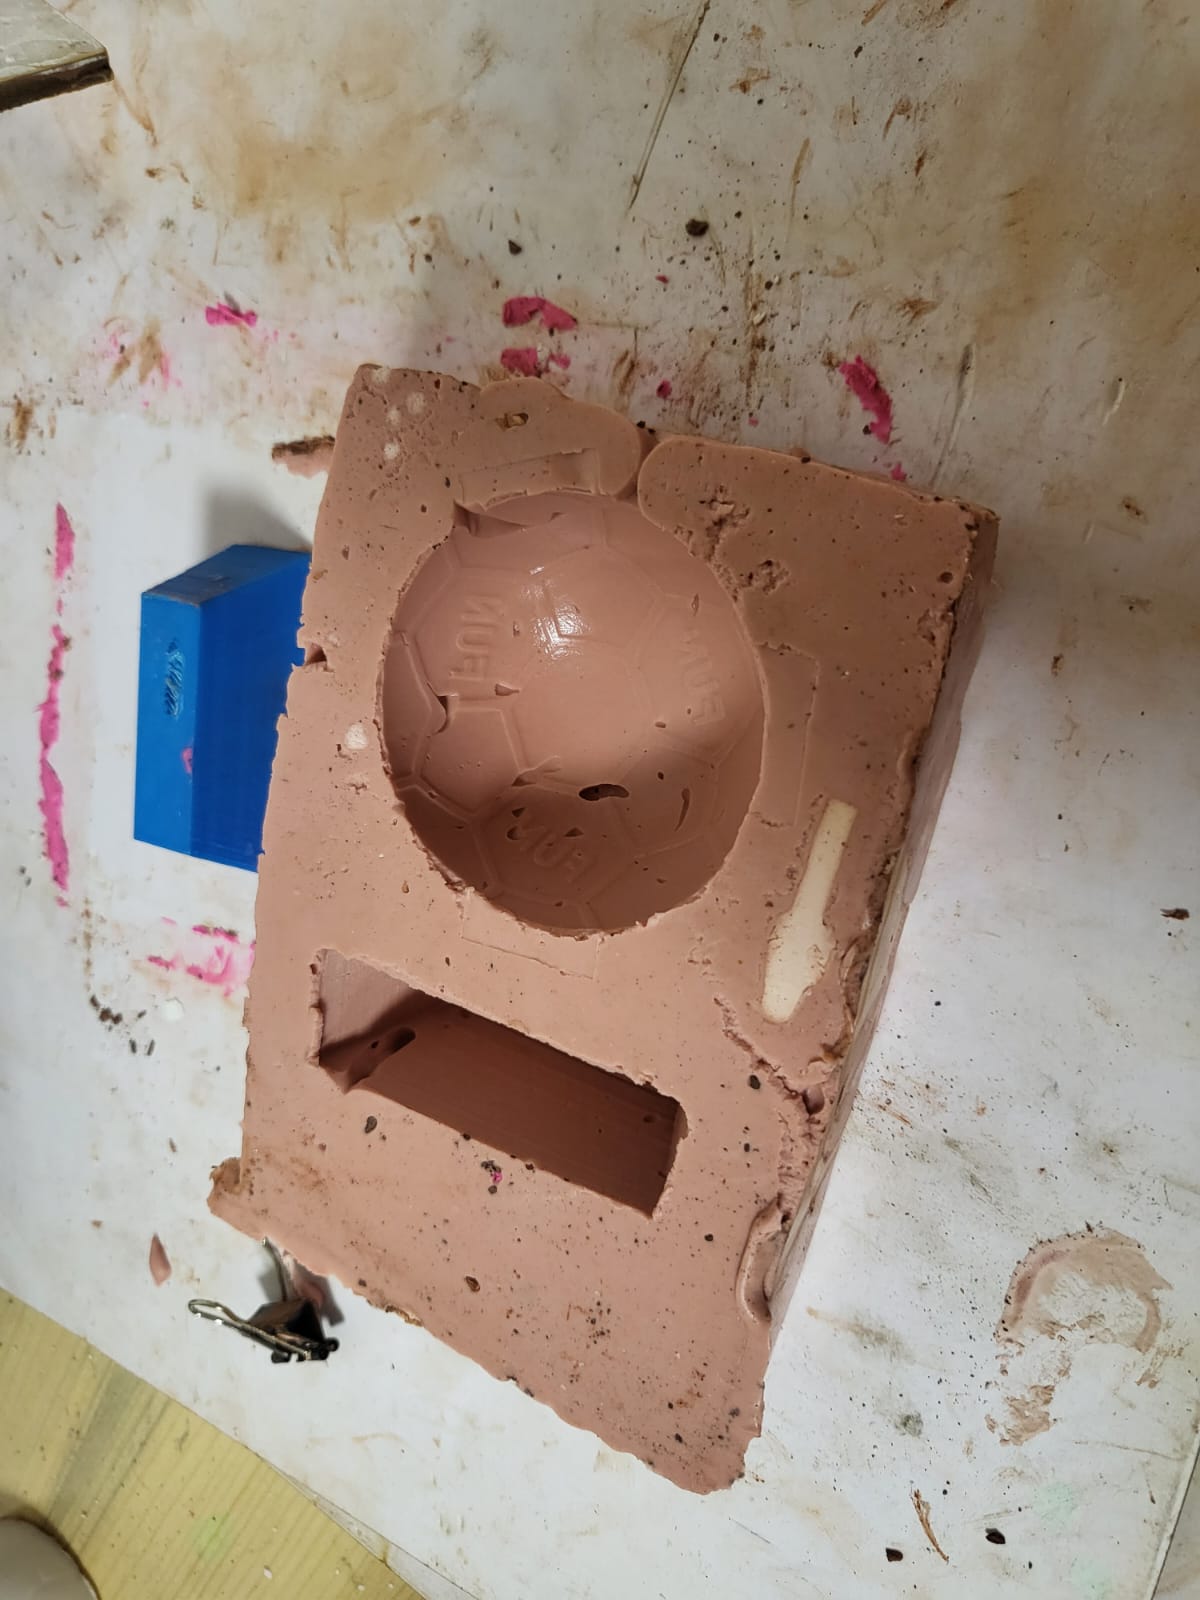
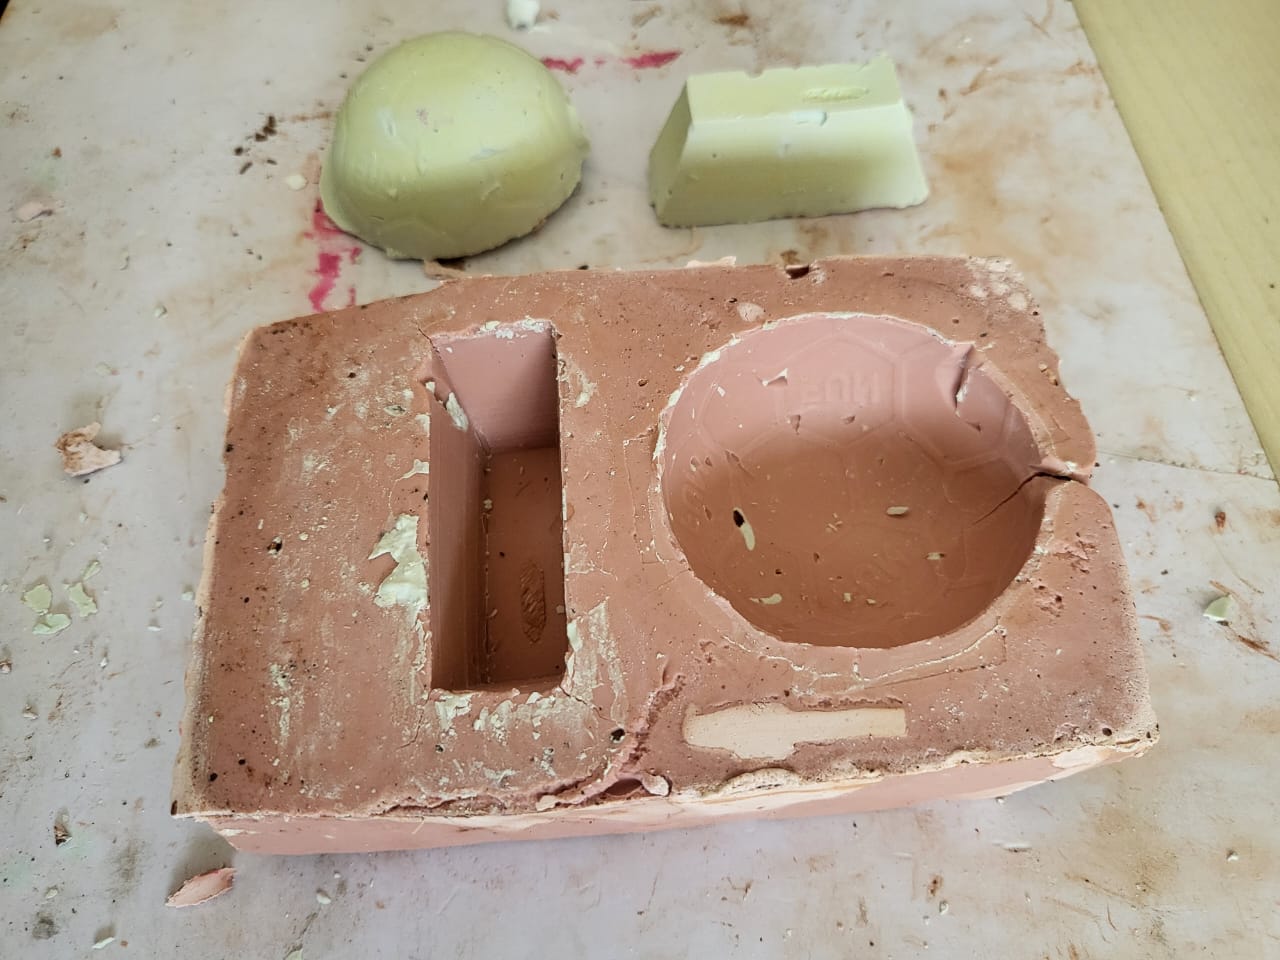
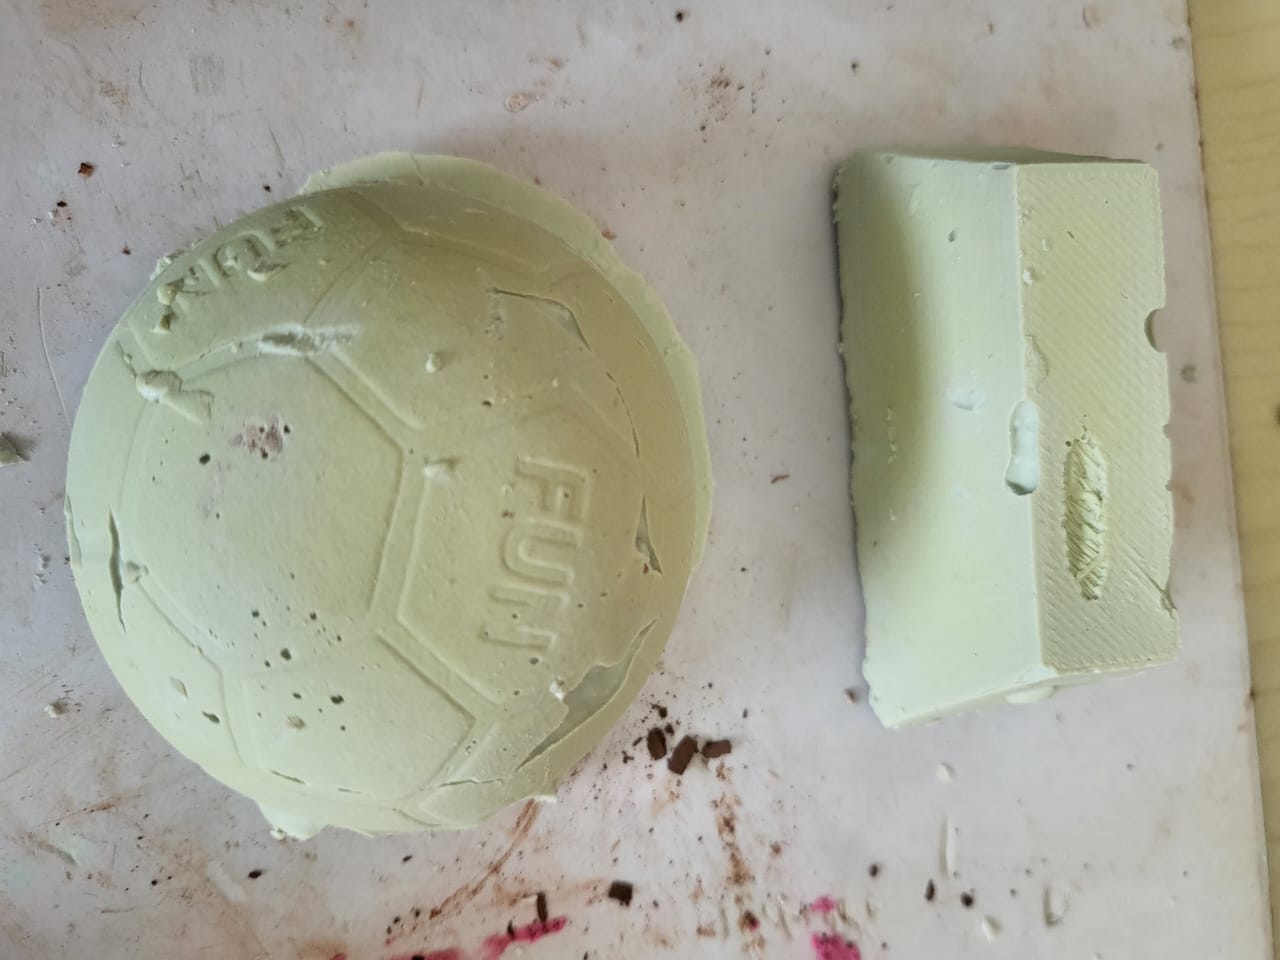
The object I chose is a half cut plastic ball with a semicircular boundary on one end and hollow end on the other. The reason I went for such an object was to check out the bubble formation, and explore how alginate gel would work around the cavity.
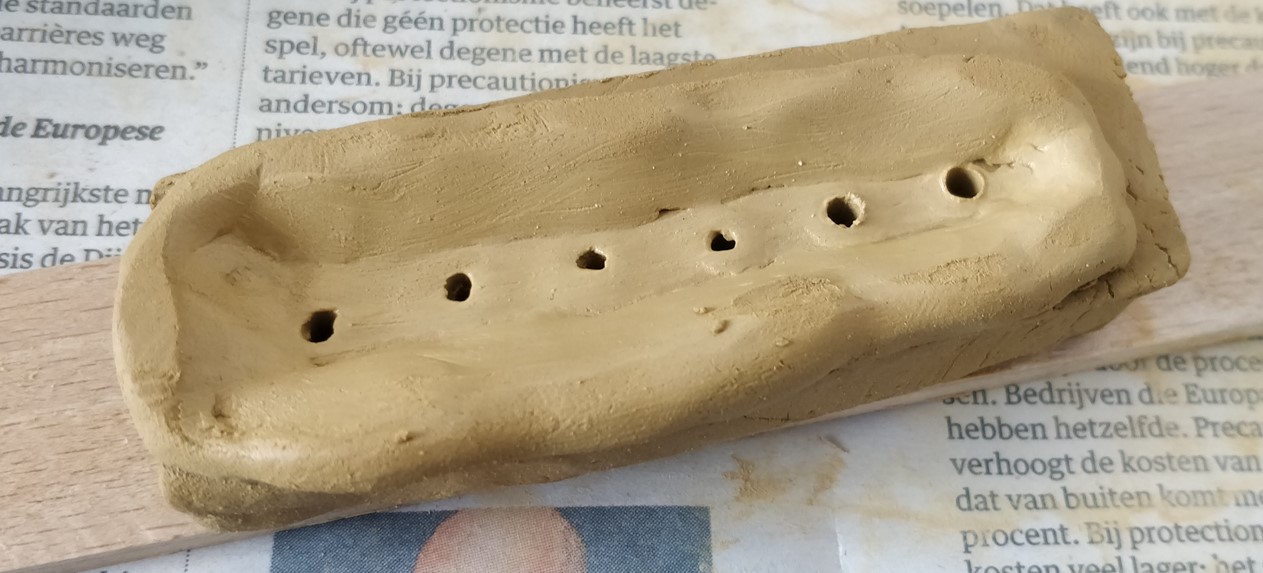
Another object I chose is a trapezoidal shapped 3D print part which is actually a part of my another project as I anyways had to print and cast it for experimentation.
Using Alginate gel
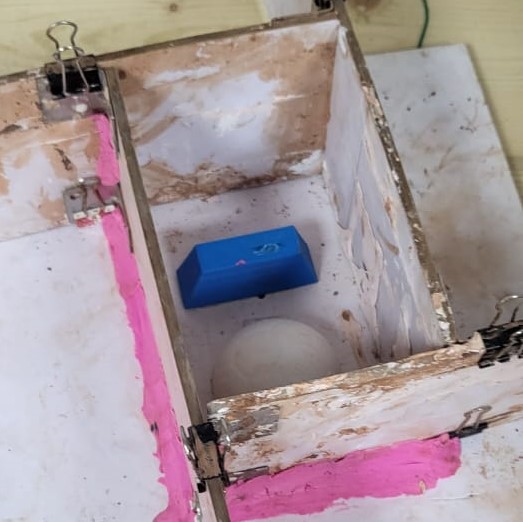
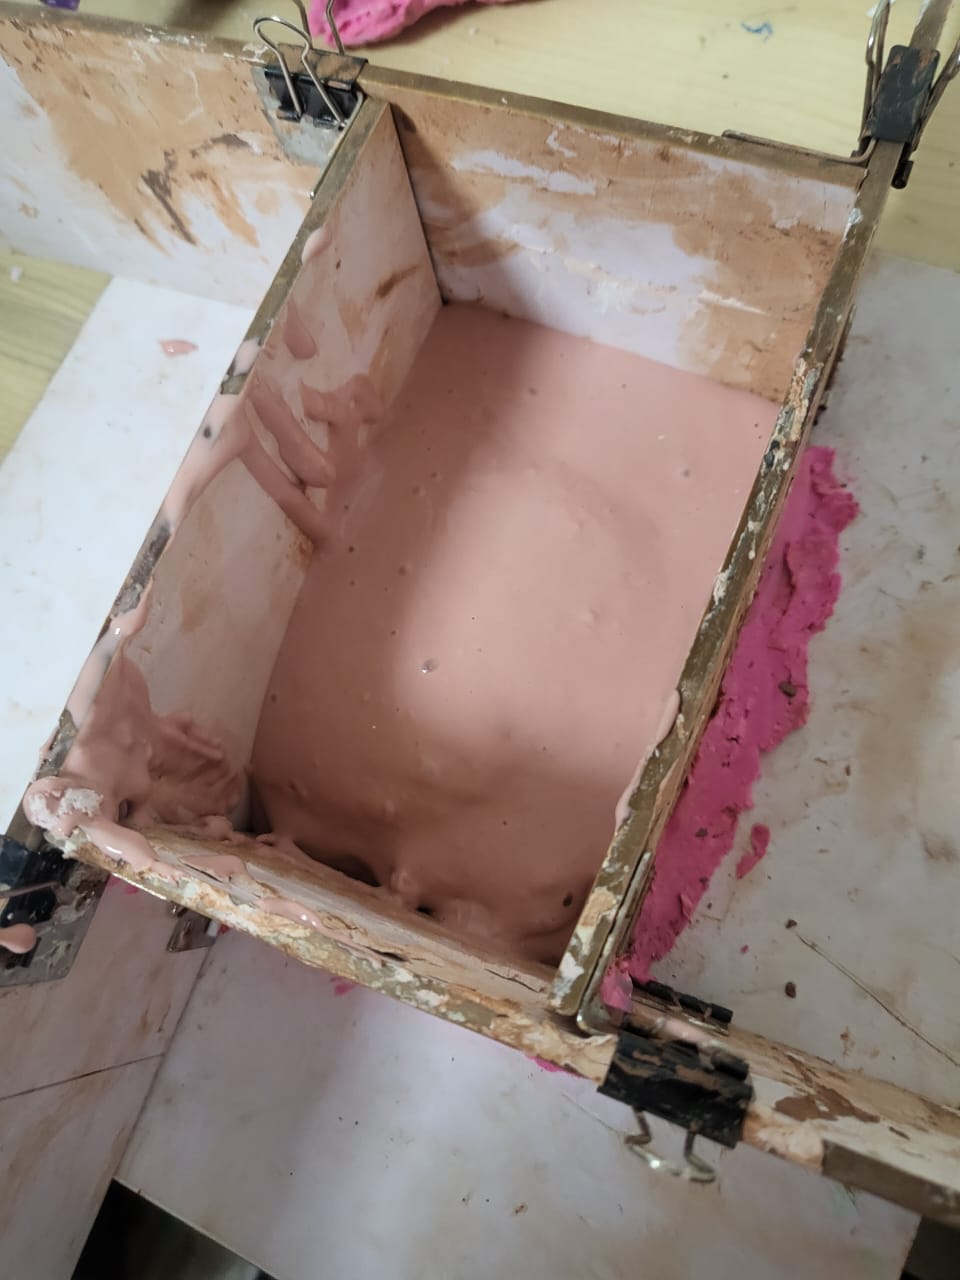
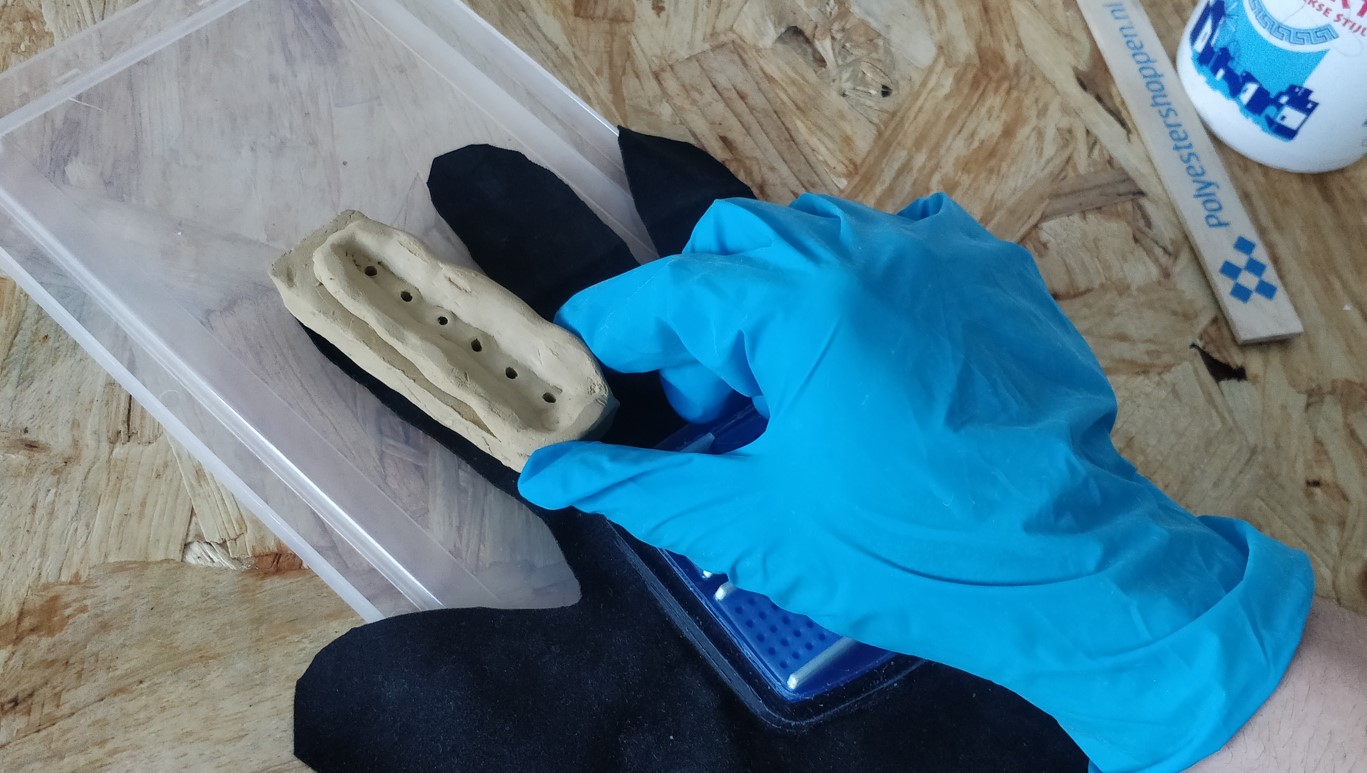
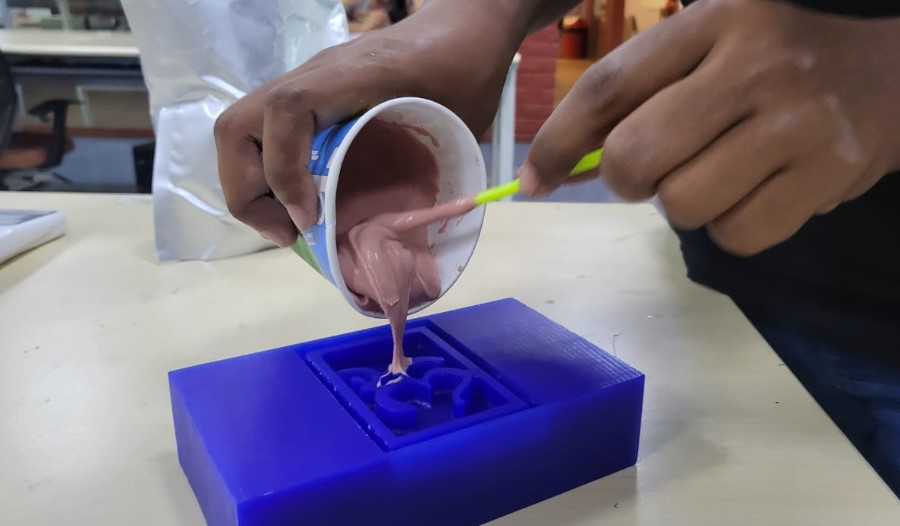
The first step is to have a boundary set up once we have decided the object and the material as defined above. The setup shown below is a pretty DIY style setup, but still works efficiently well. It is made up of Cardboard sheets(hard ones) and they are attached to each other using clips. The edges are sealed using clay as shown. Fixing the arrangement to the bottom sheet is also primarily done using clay on the edges as it can be seen. Then we place the objects inside the setup using double sided tapes at the bottom surface of the object. For the hollow semicircular ball, we still used tape at the edges although clay from the inner end would have helped avoid cavity. It was difficult to do so actually.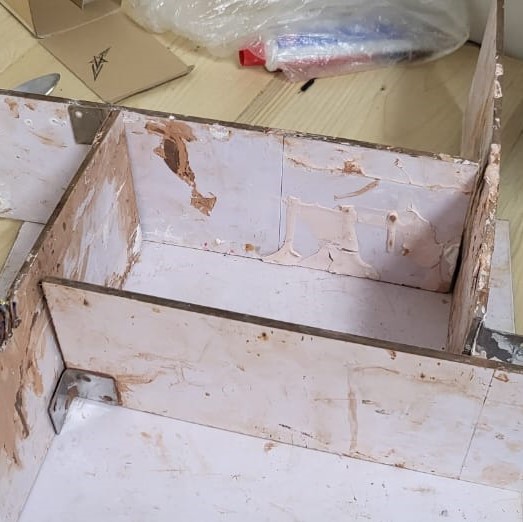
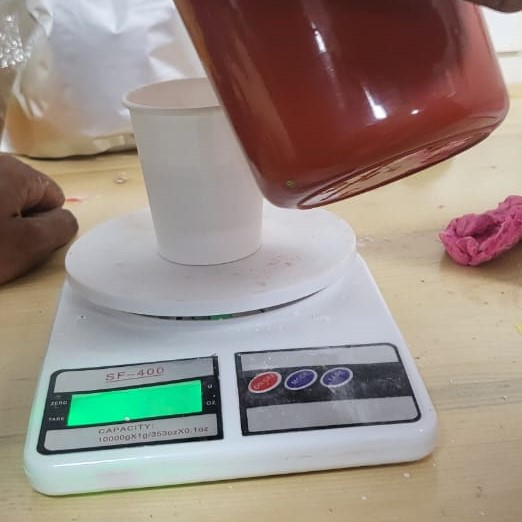
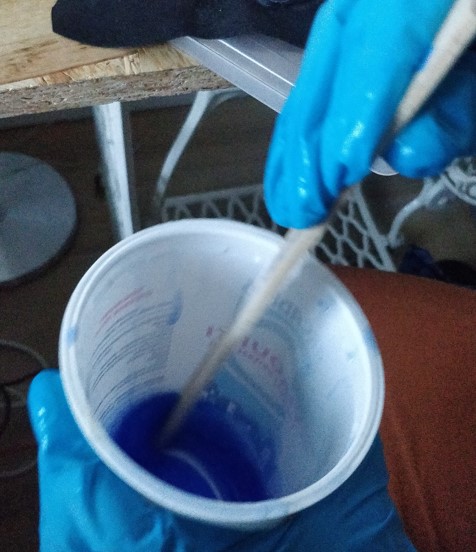
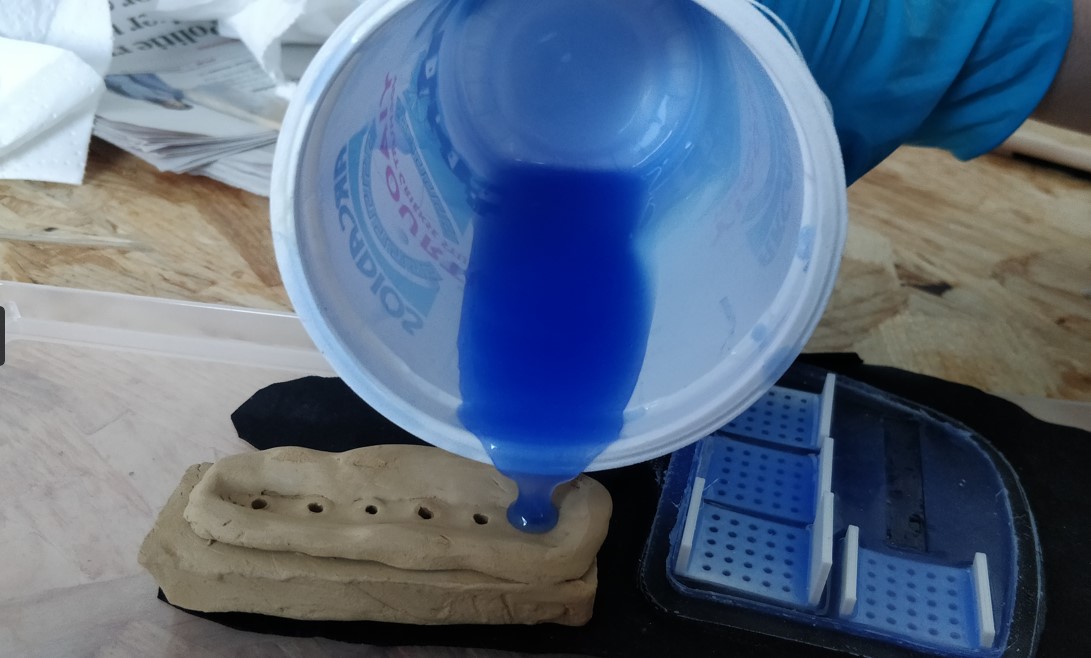
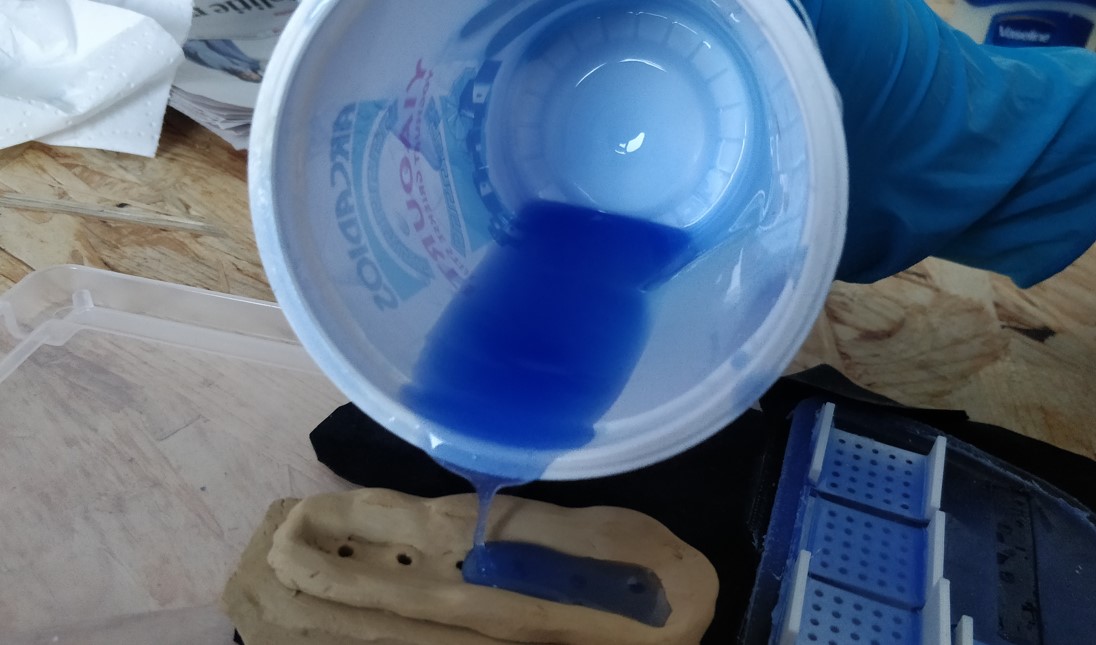
Next step was to make the mixture of alginate gel. You can buy the alginate gel online. It comes in small packs as well. FOr the one I made the mold for, I used 150gms Alginate and water in the ratio of 1:2. So for 100gms Alginate, you use twice the water. This ratio is often ideal, but practically a little bit intuitiveness is needed to just make sure that the mixture is consistent thoughout. You get an understanding while pouring it as shown in the figures below.
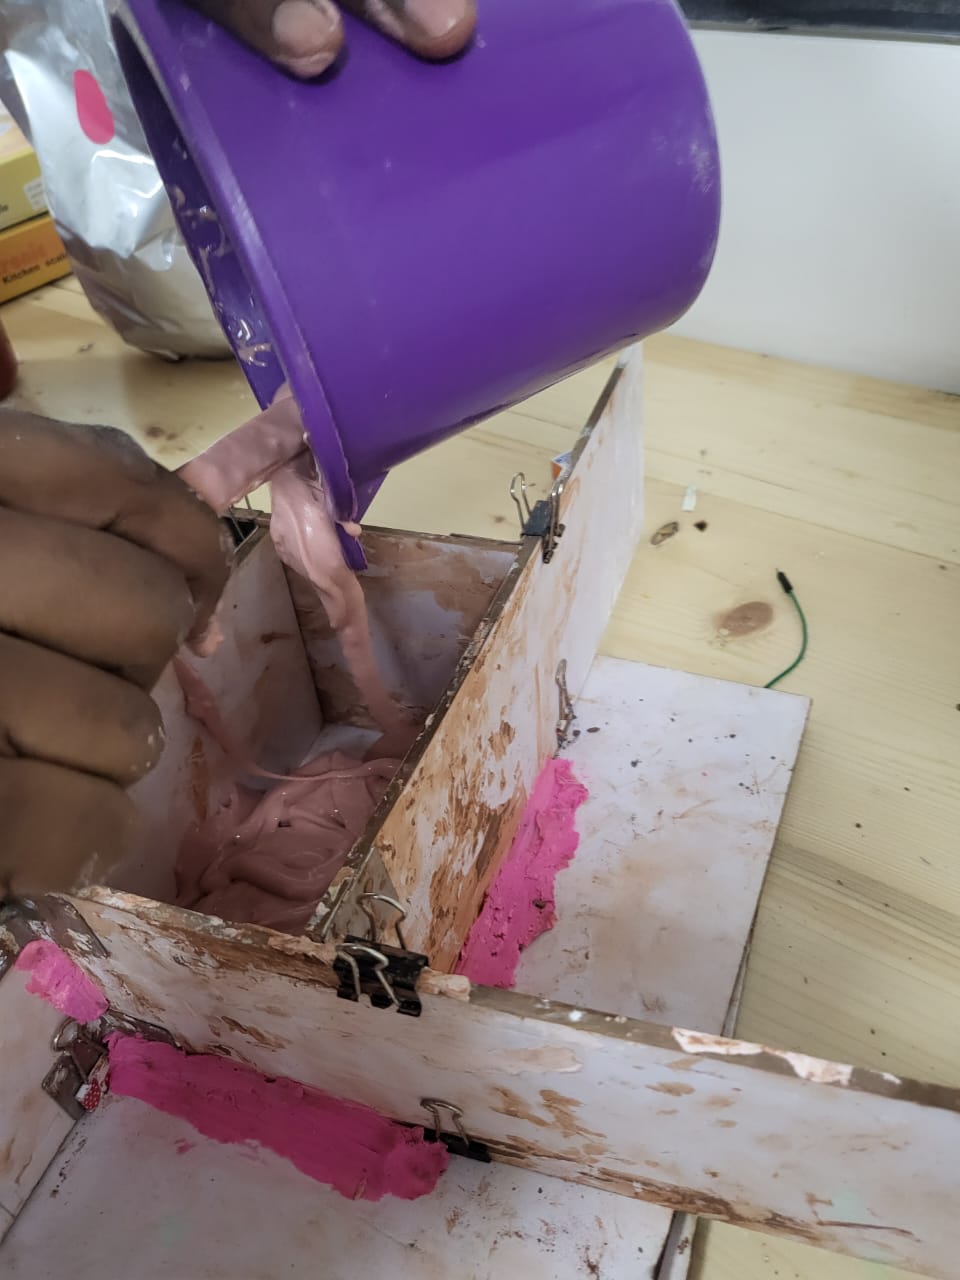
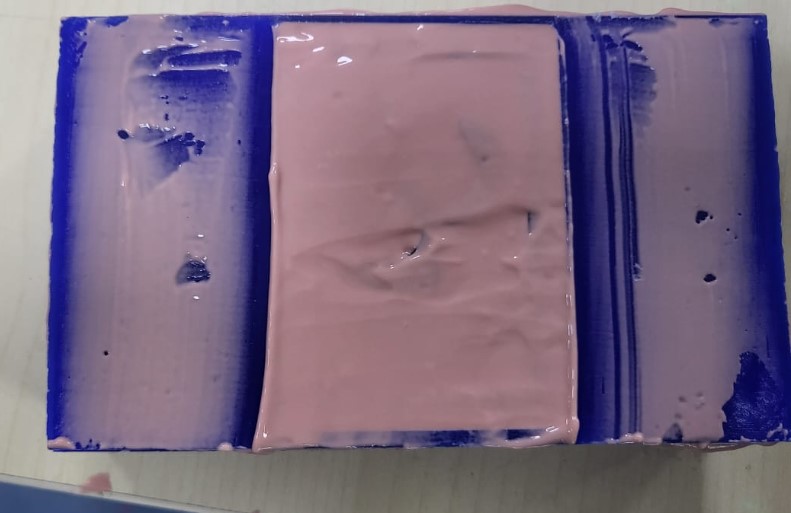
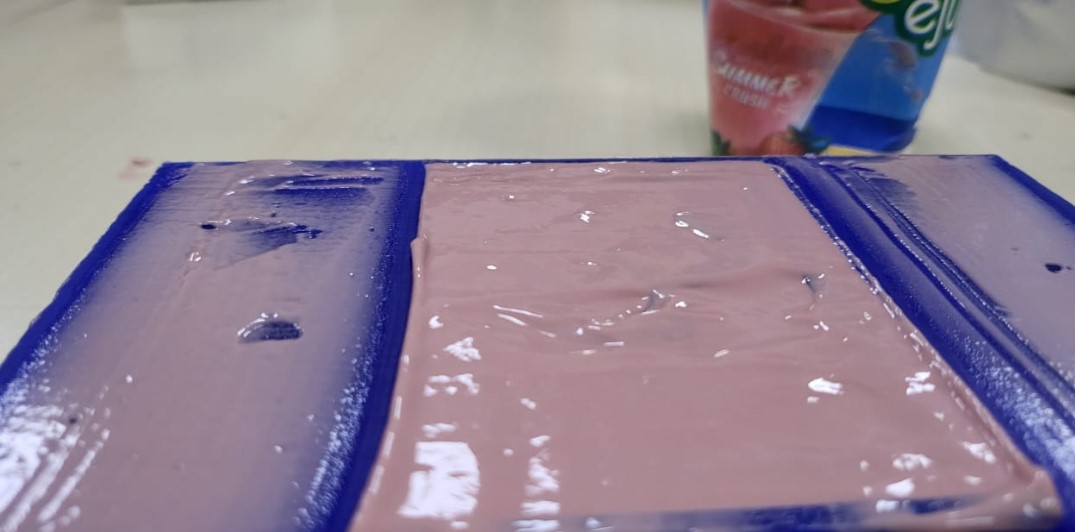
Once you pour the mixture over the object, make sure the top layer is flat. Don't do the mistake I did as shown in the figures below. Alginate gel takes approximately 30 mins to dry up. And if pouring consistency is not achieved, then bubbles are bound to form. Alginate once dried, you can steadily remove the boundaries and get the mold ready. So I forgot to flatten the top surface, so I am most likely going to try this again in a bit more professional manner. But for now, you can see how it looks like as shown in the figure below.
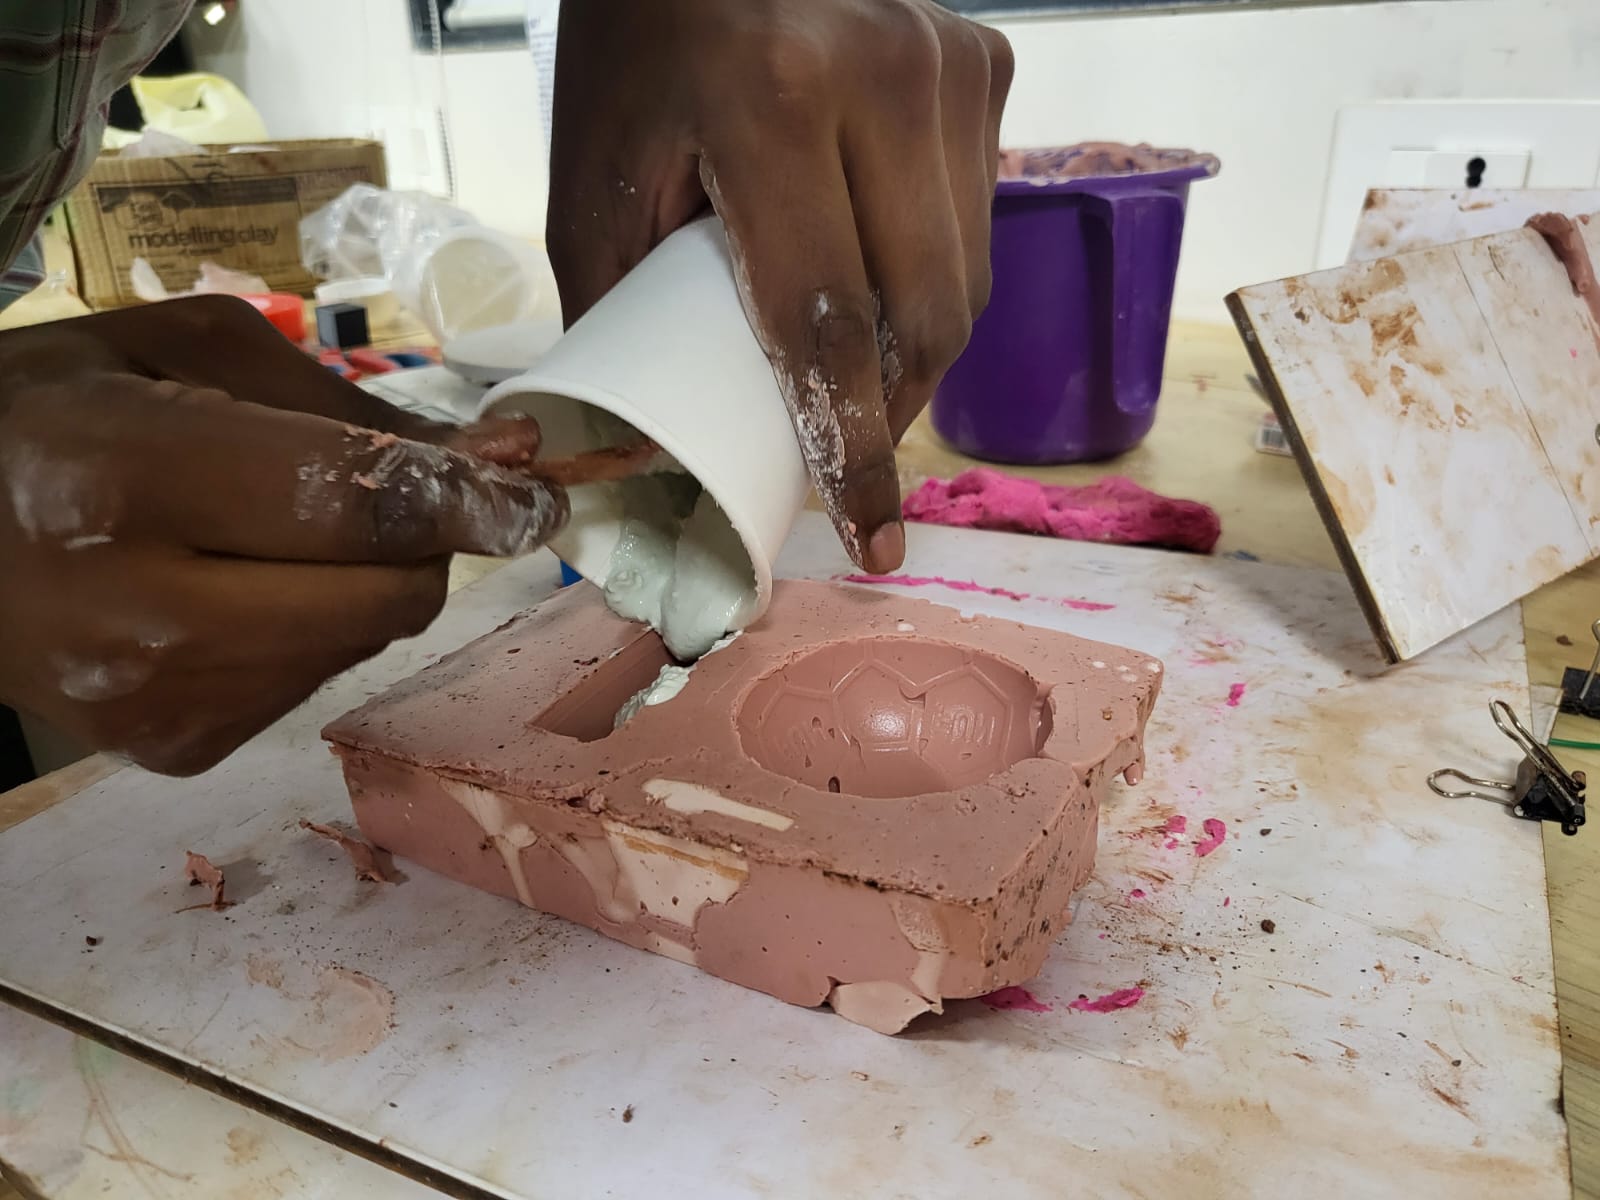
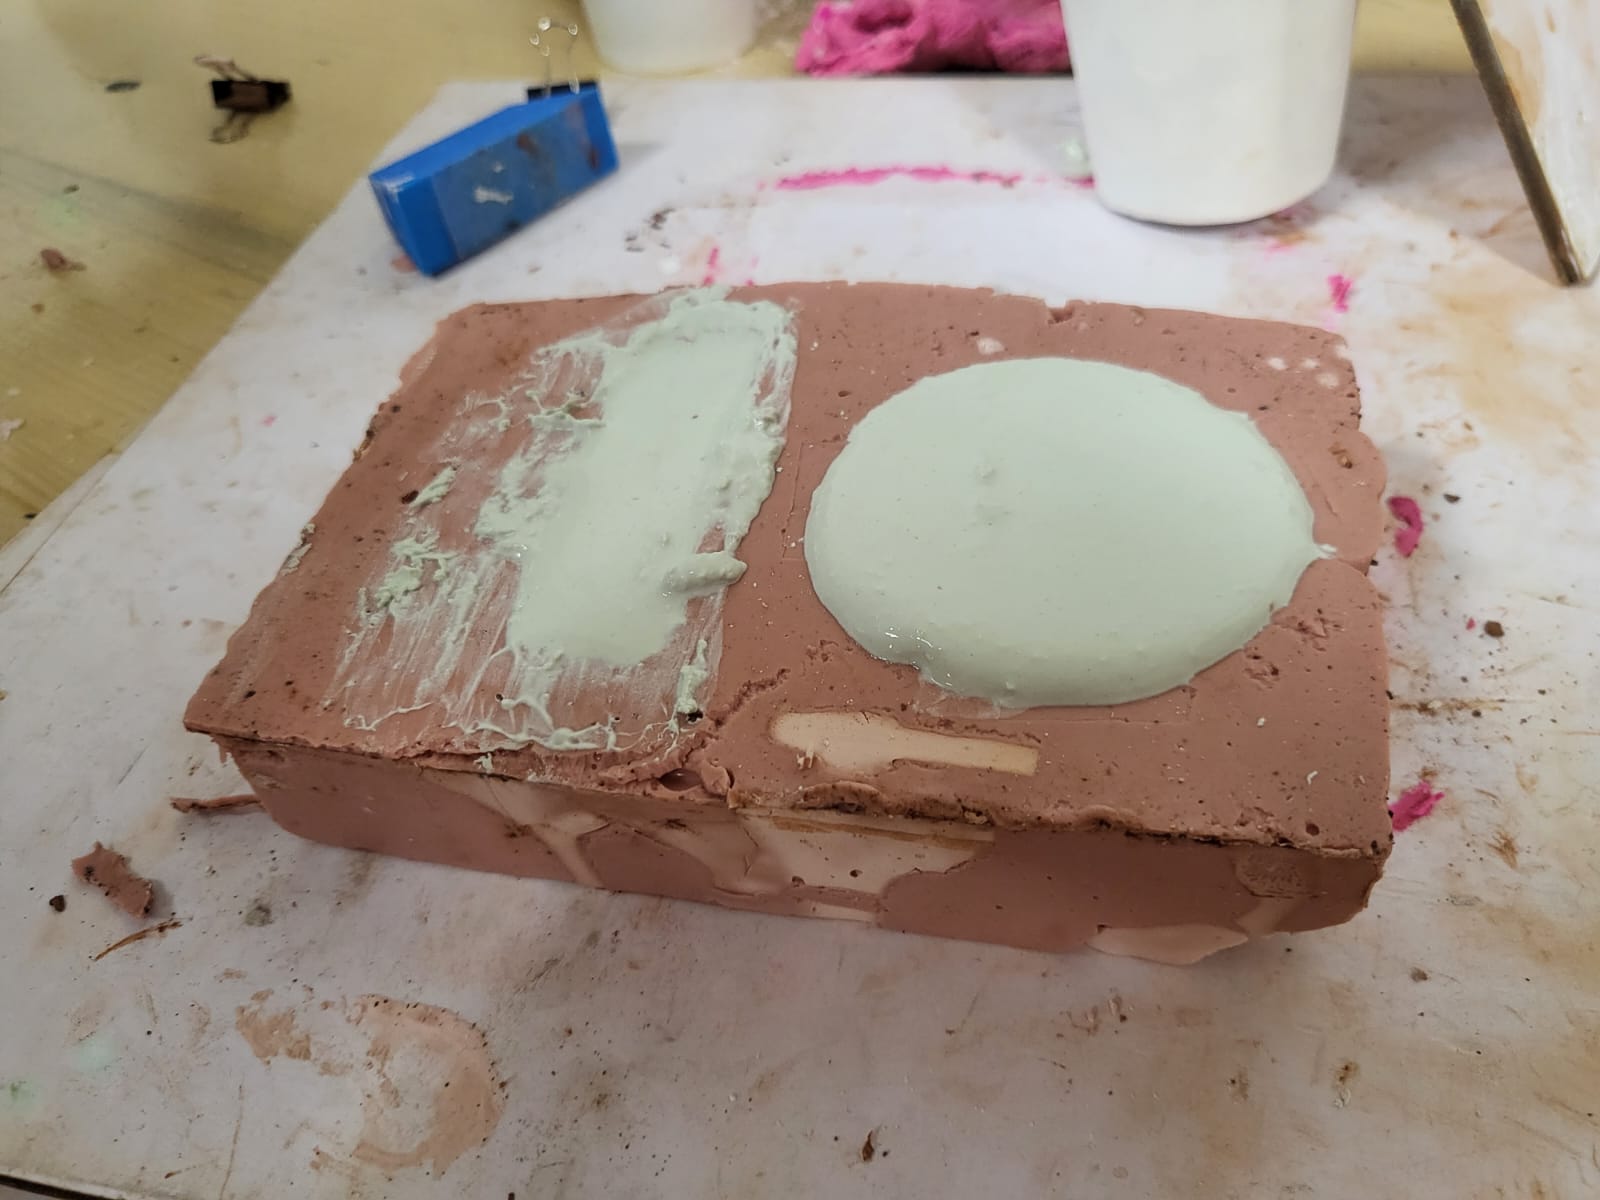
Now its time to pour our actual material of which we want the product to be. So I used white cement here. The mixture is again made based on guess, but ideally 1:1 ratio is good enough for white cement. White cement takes over 3 to 4 hours to dry up properly. I had kept it overnight as shown below. Again the top surface needs to be flattened if needed.
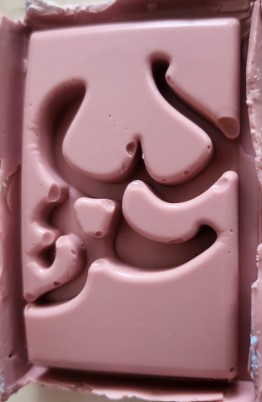
The Alginate gel mold is usually a one time use mold and you often need to break the mold to get the product out. The same has happened here, if you see the cracks in the images below. The final product has some errs as expected since the mold had bubbles as seen above. The final products are shown below.
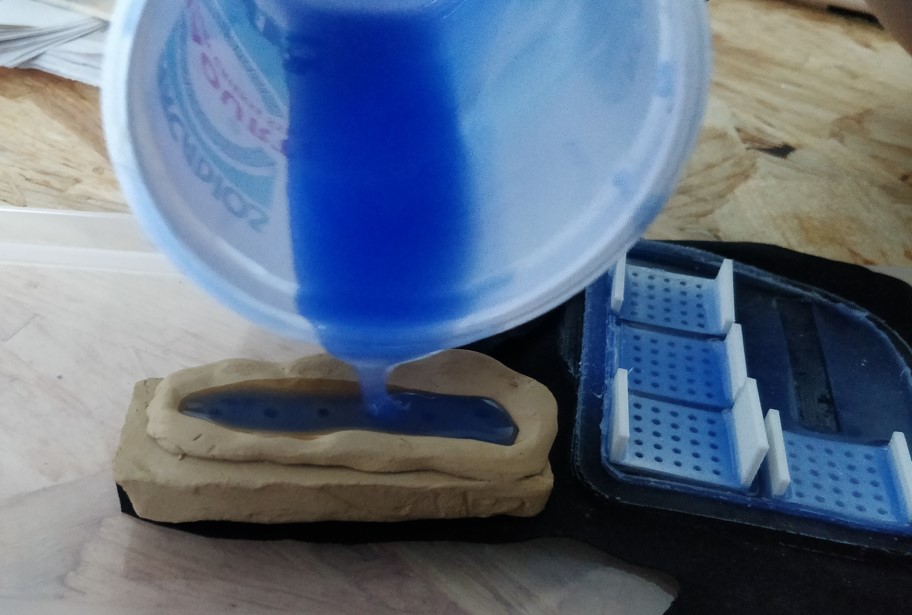
Using Silcone
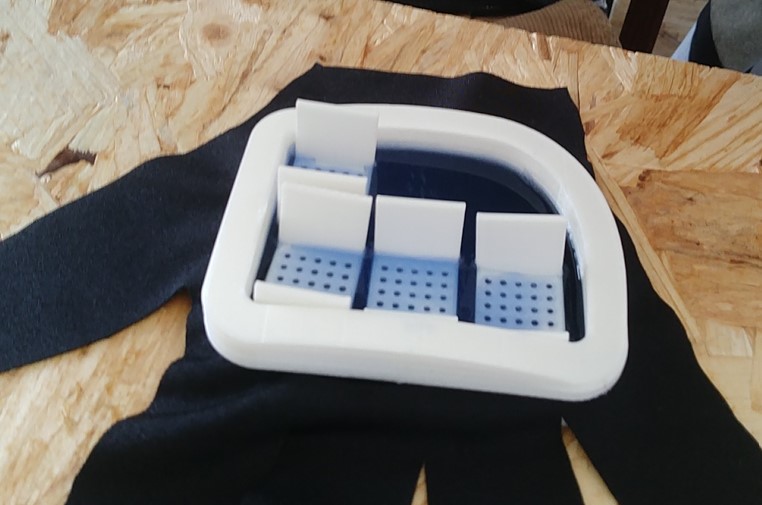
For my Senseglove project, I have used silicone. The details of the same molding and casting are explained below: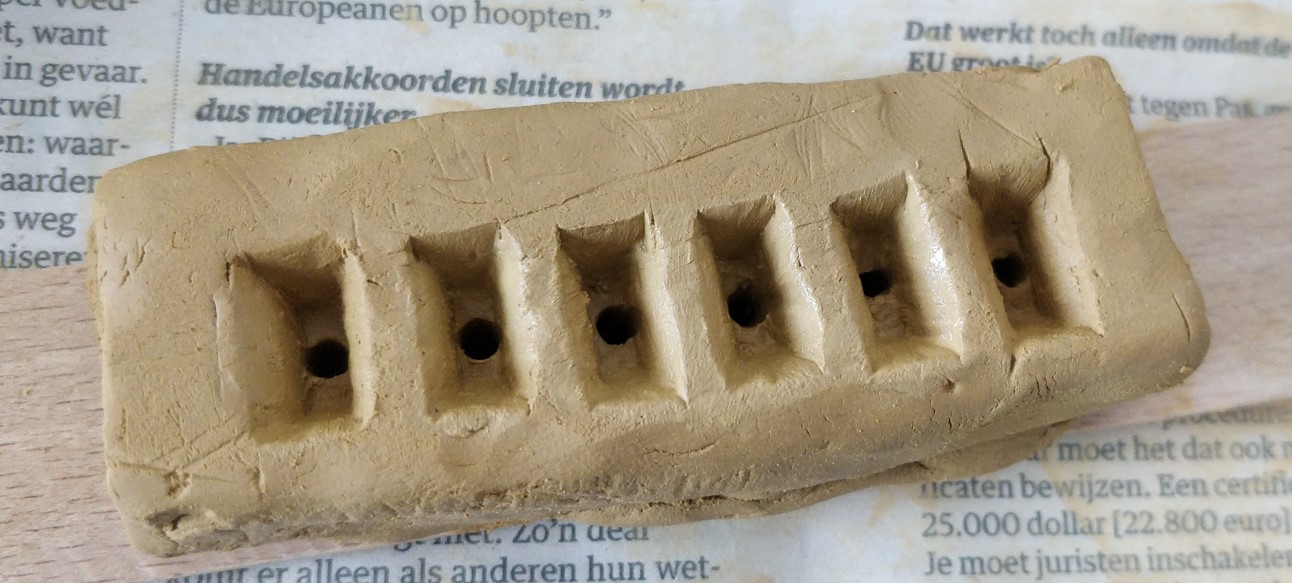
The mold was made using 3D printed parts. And then we added thin threads
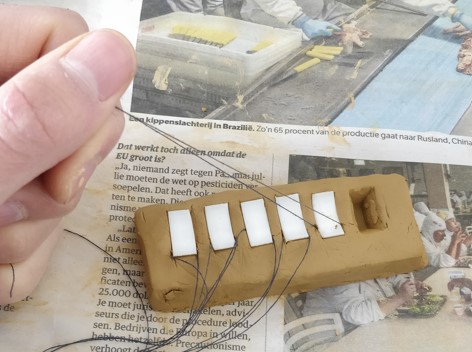
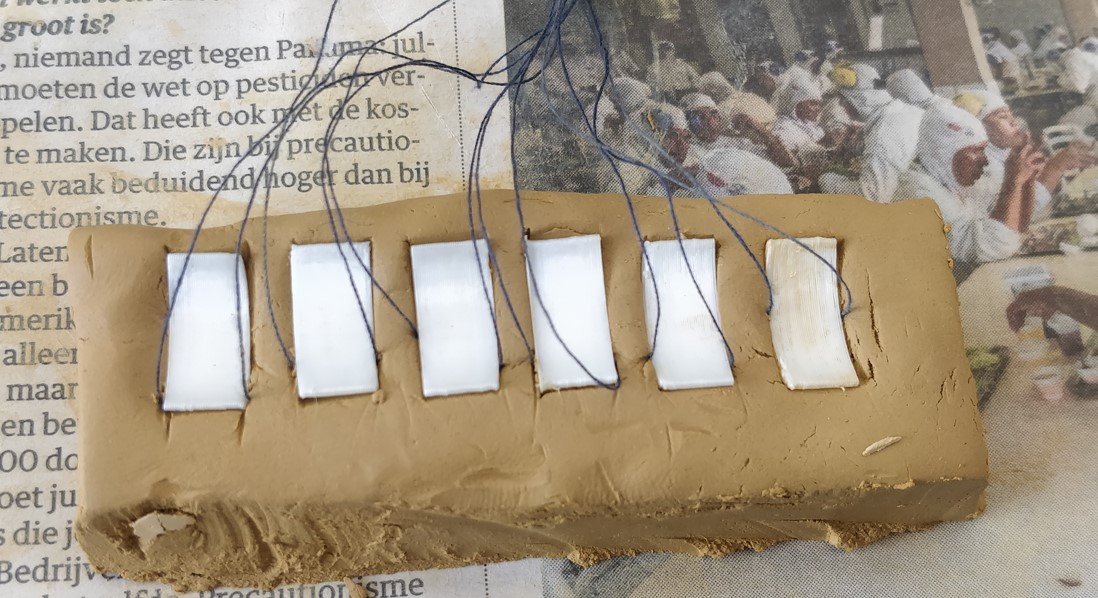
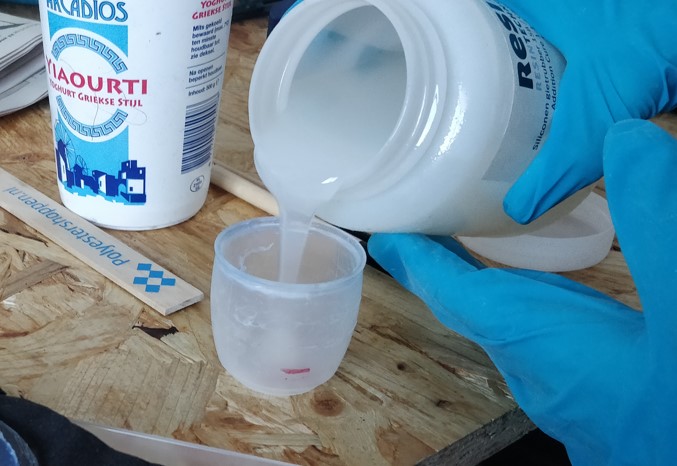
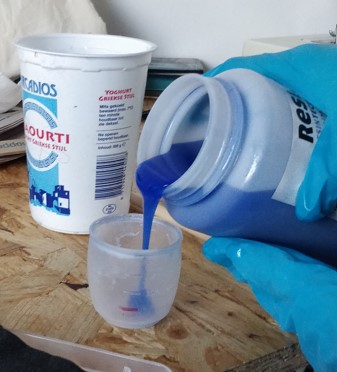
Next step is mixing the resin and silicon

Next step is fixing the mold to the location and pouring the mix
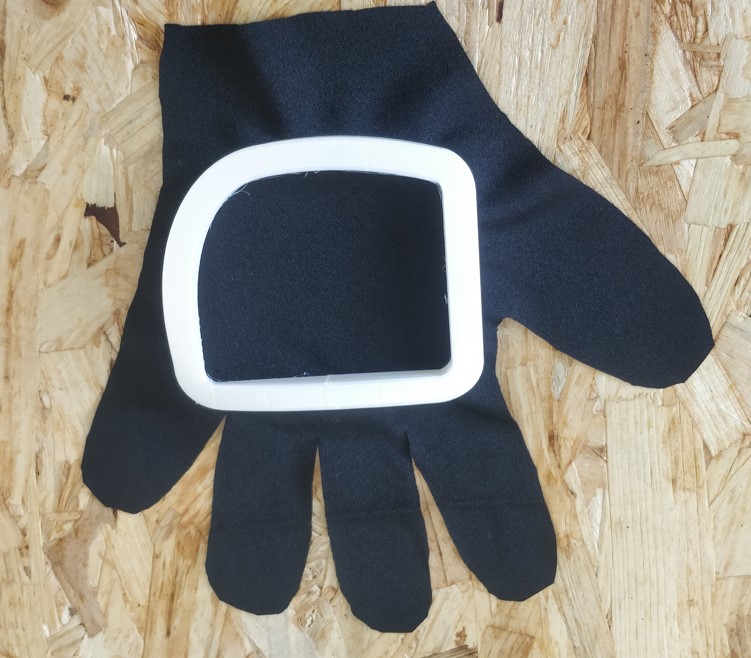
Final Outcome:
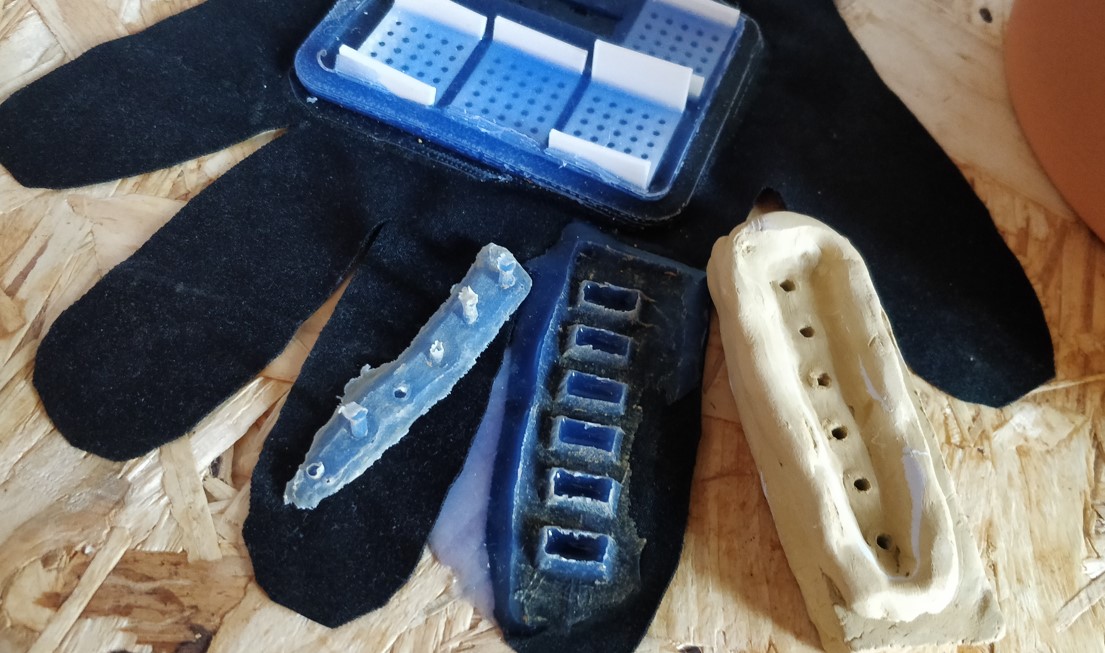
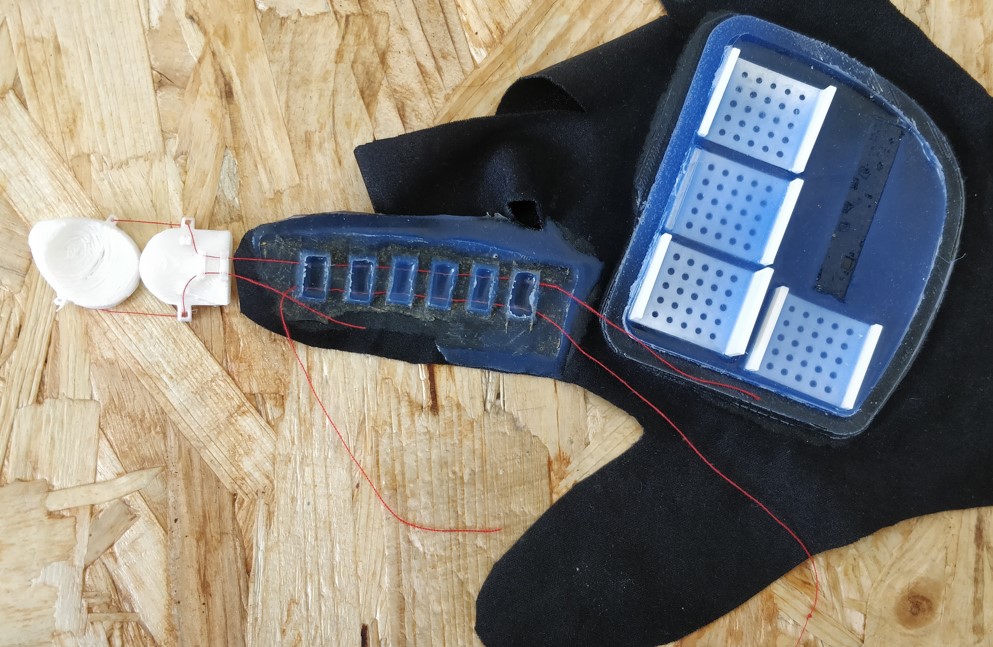
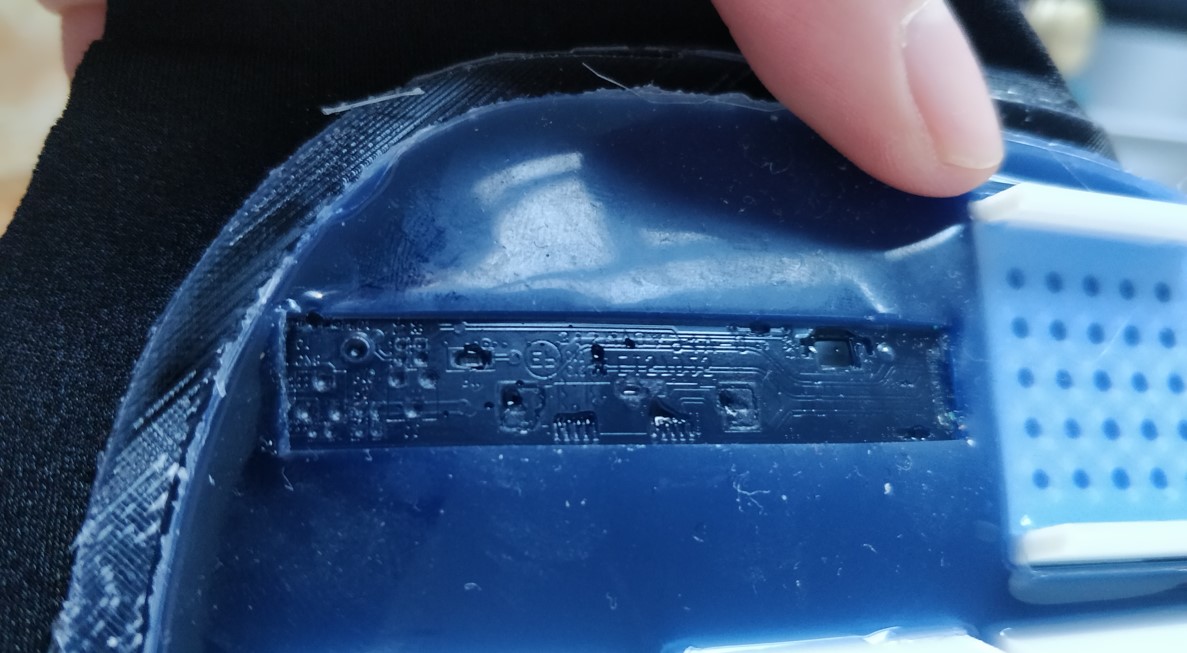
Similar mold for the motor mounting and the electronics is shown in images below:

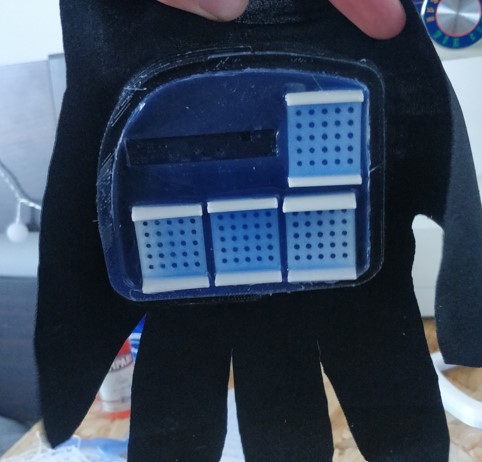
The quality of the imprint using silicon and resin is super good as shown below:
Molding Casting 2.0
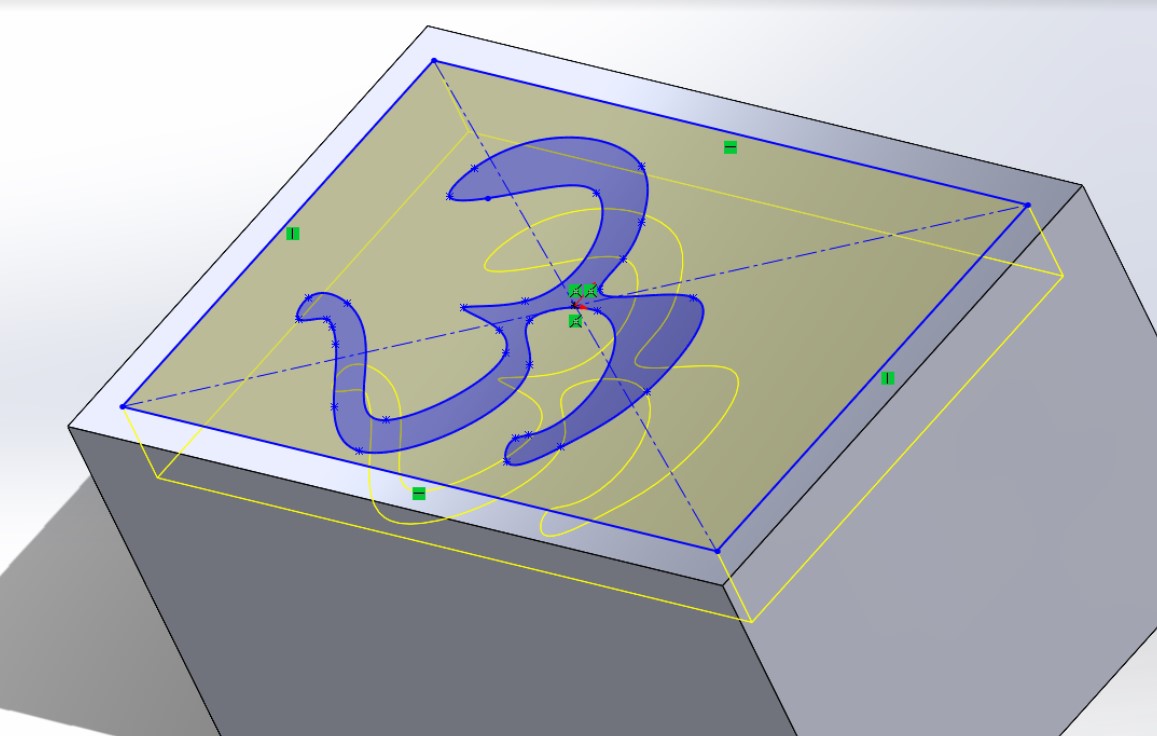
After regional review, I realised that for this assignment to succeed, I need to mill a wax block or similar material for the casting. So basically not use 3D printed version like previous one but use subtractive manufacturing i.e. milling.So inorder to do that, I used the symbol OM which is the Hindu God symbol.
Step 01: Getting image ready
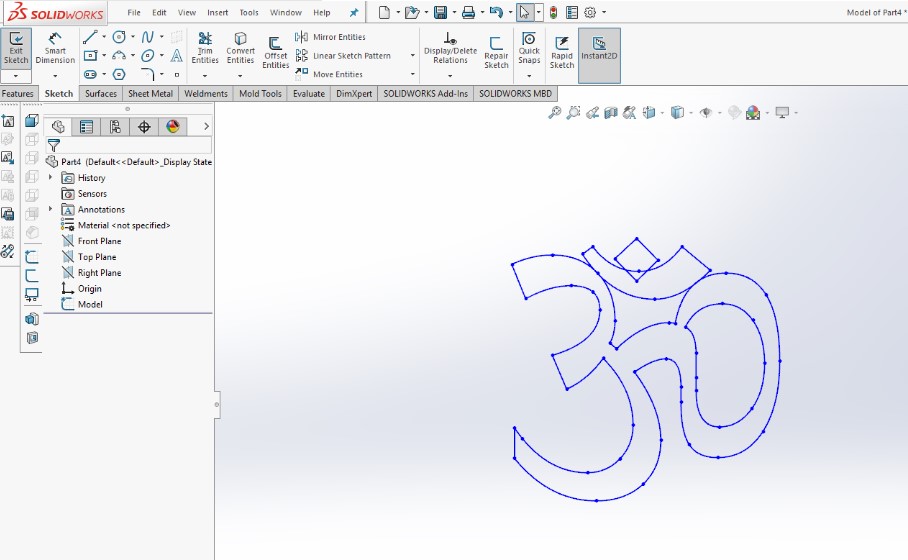
For this I used coreldraw software to import the image. The image was then converted into a dxf format. I could have done the same using solidworks, but the top portion of the image could not be shifted down in solidworks since, it was a fontstyle that could not be edited.
I used a font style "vindings" in coreldraw to make the symbol.
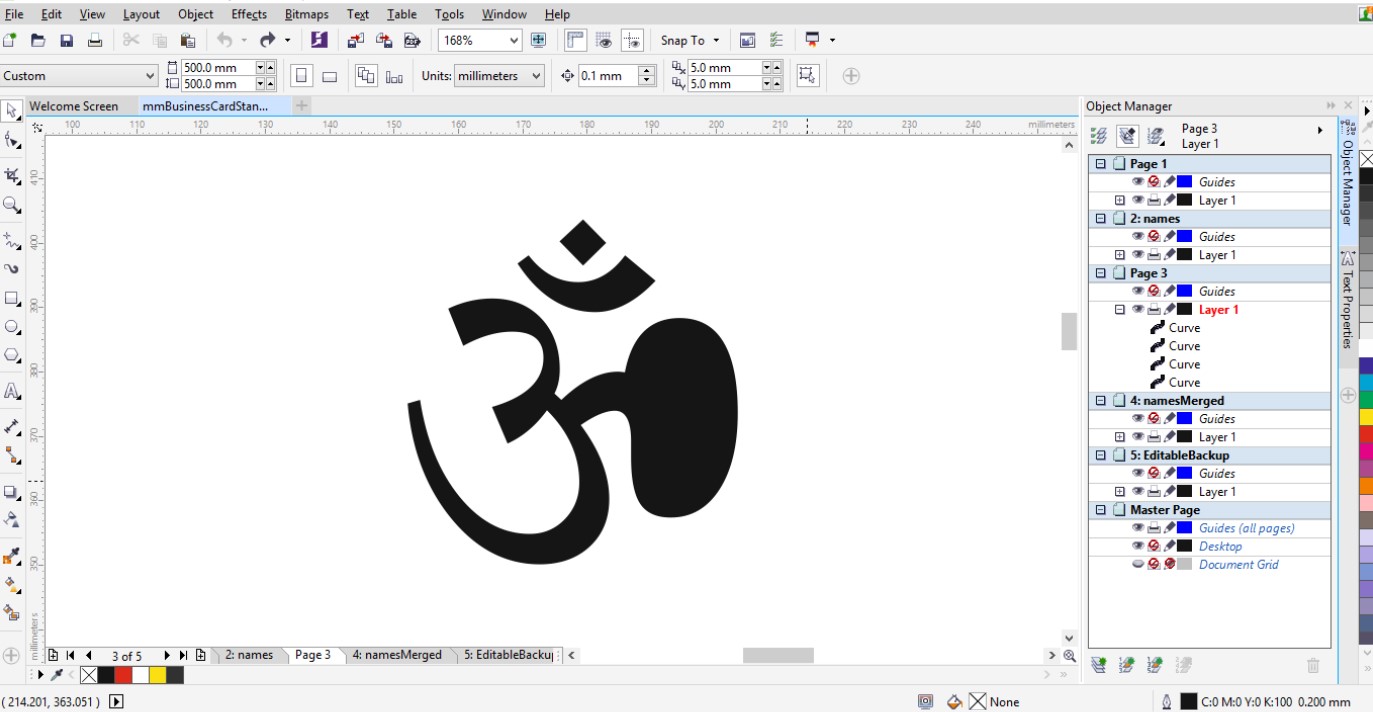
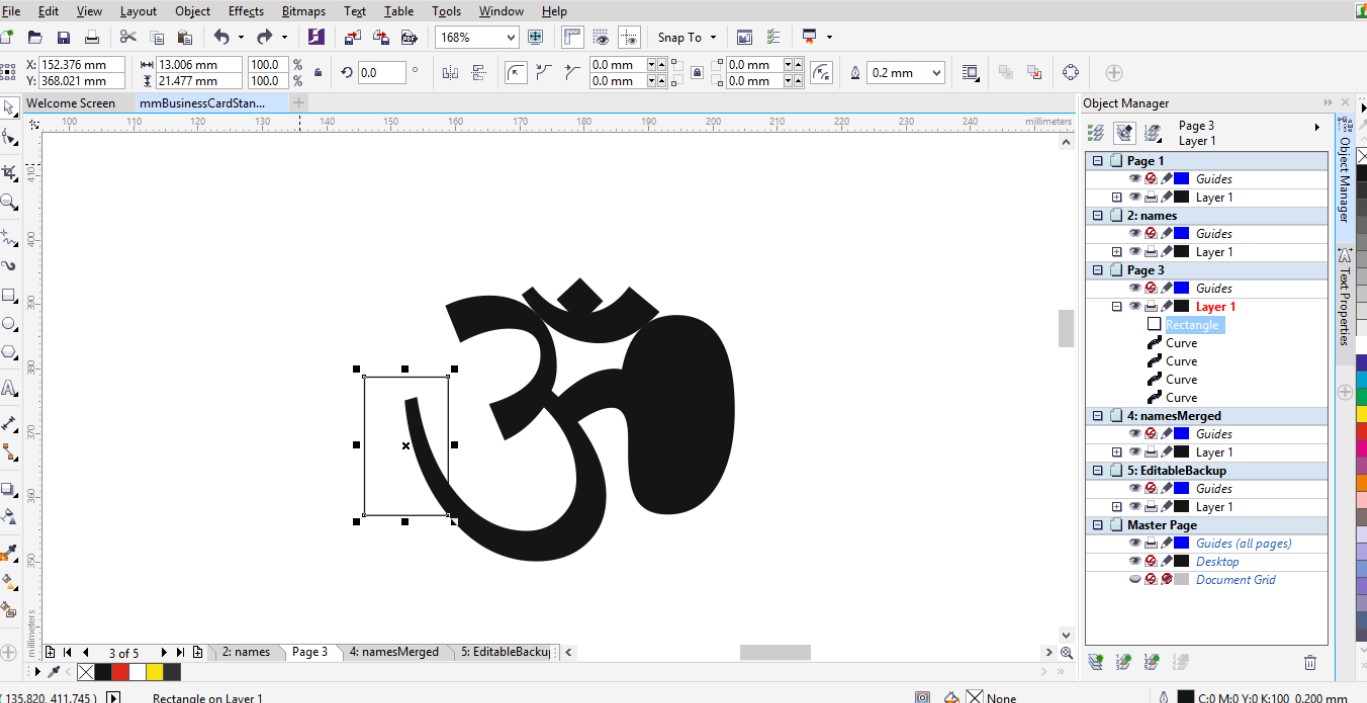
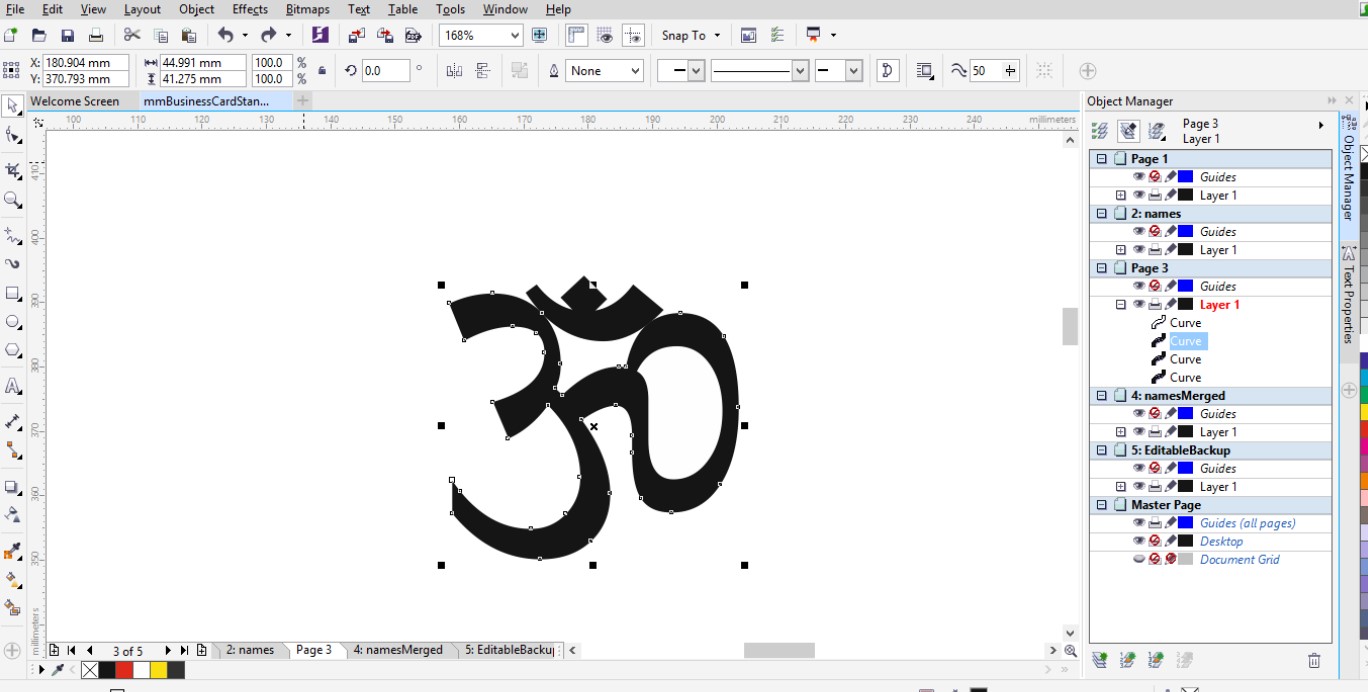
After getting the symbol, I converted the image into two curves so that the parts can be separated. I rearranged the top part and the bottom of the image using the select tool
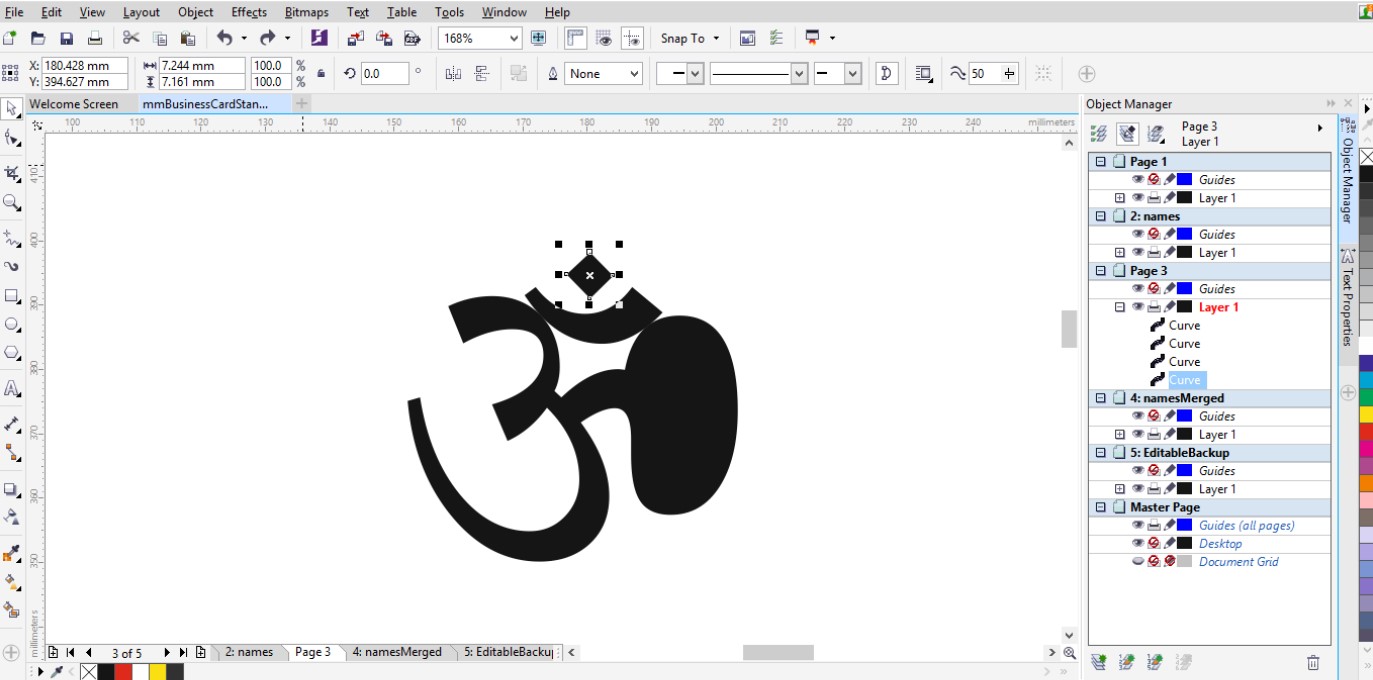
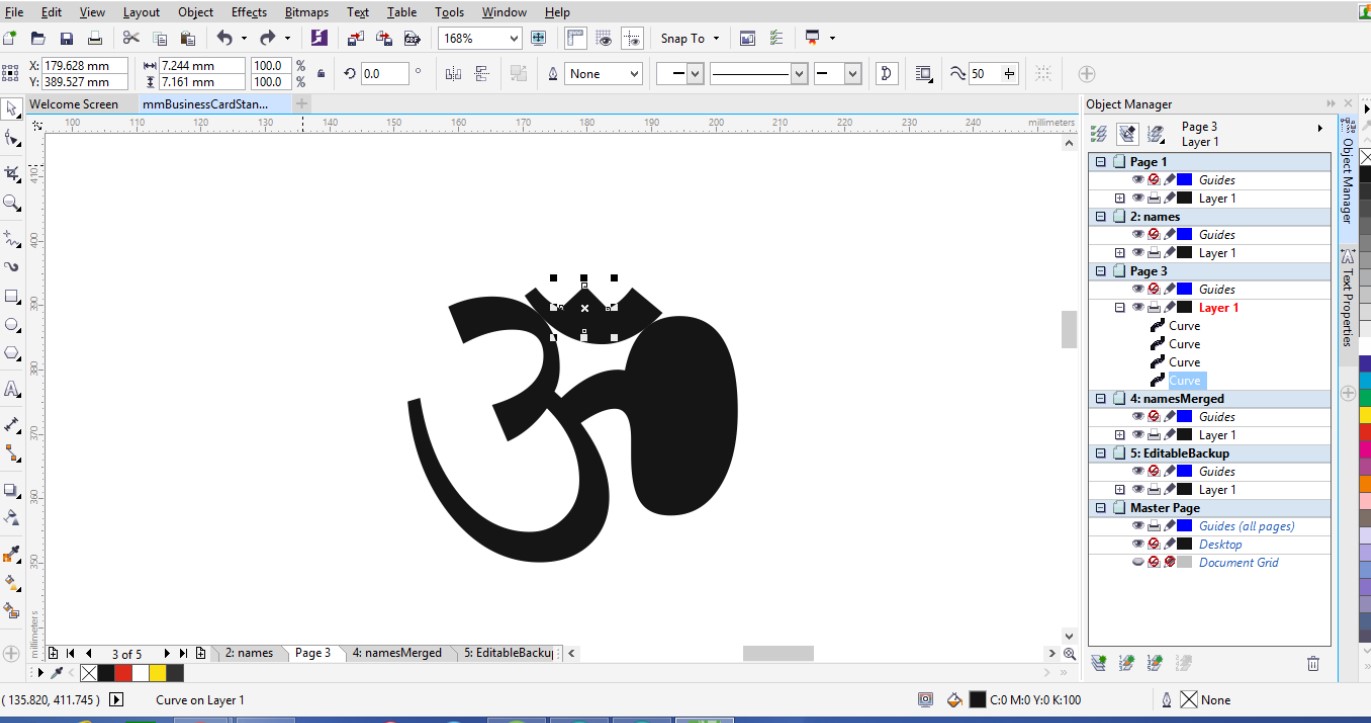
I wanted to create a hollow part in the oval shaped ring, which is attached to the 3 symbol. I selected the curves on the right side tool bar, to white as shown in the image below:
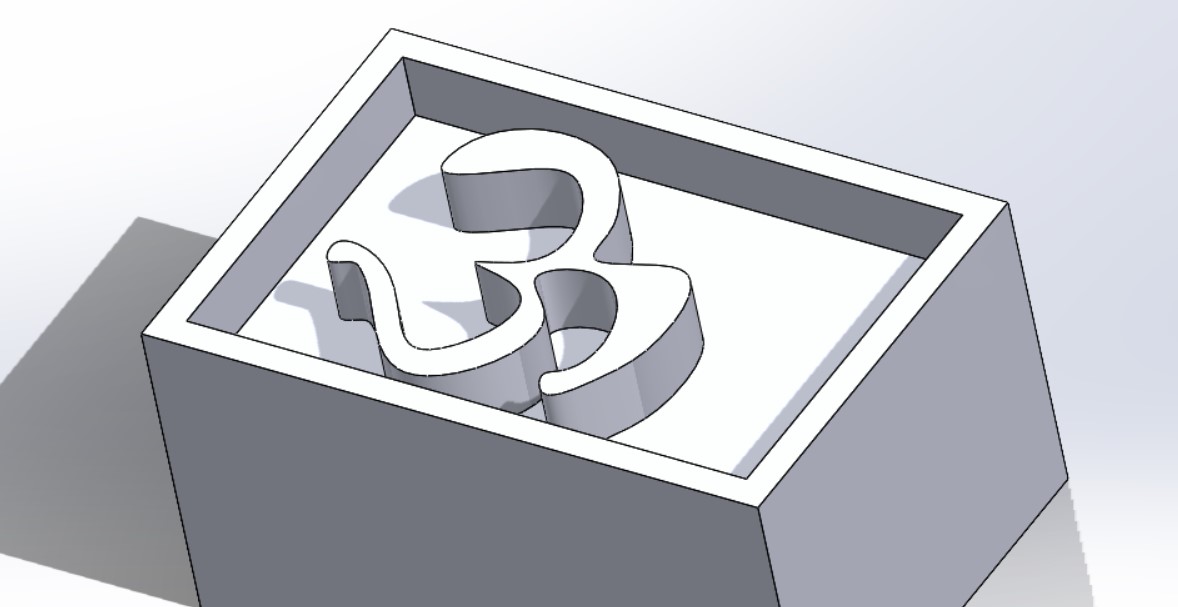
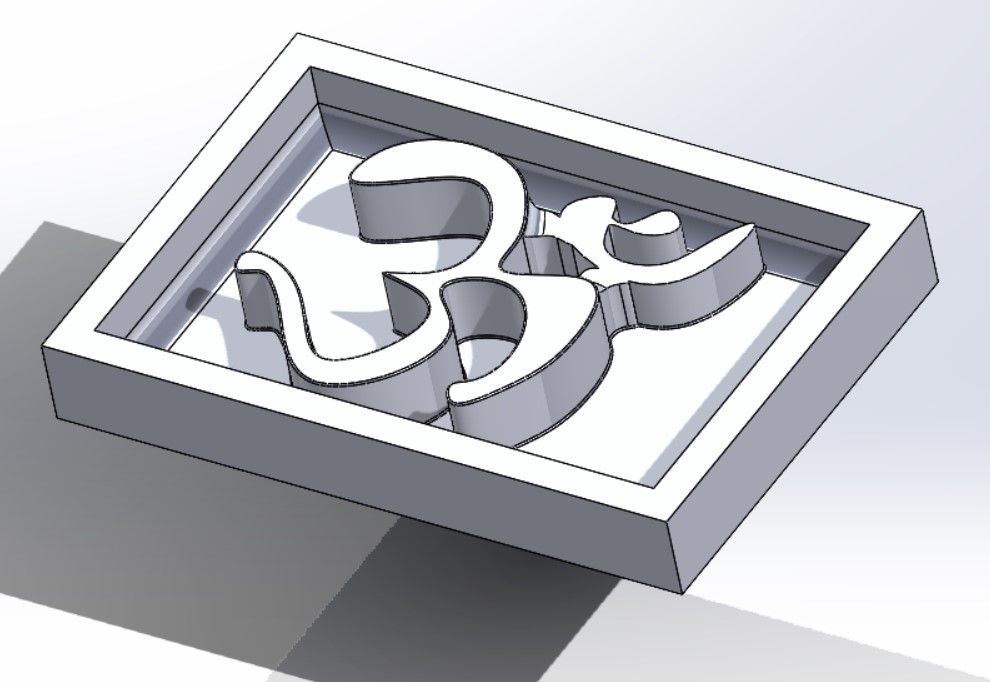
Step 02: Getting 2D to 3D
I exported the file in dxf format once the desired shape was obtained. I imported to file to solidworks after this.
Sketch file from DXF in solidworks
Boss extrude thickness to the OM structure
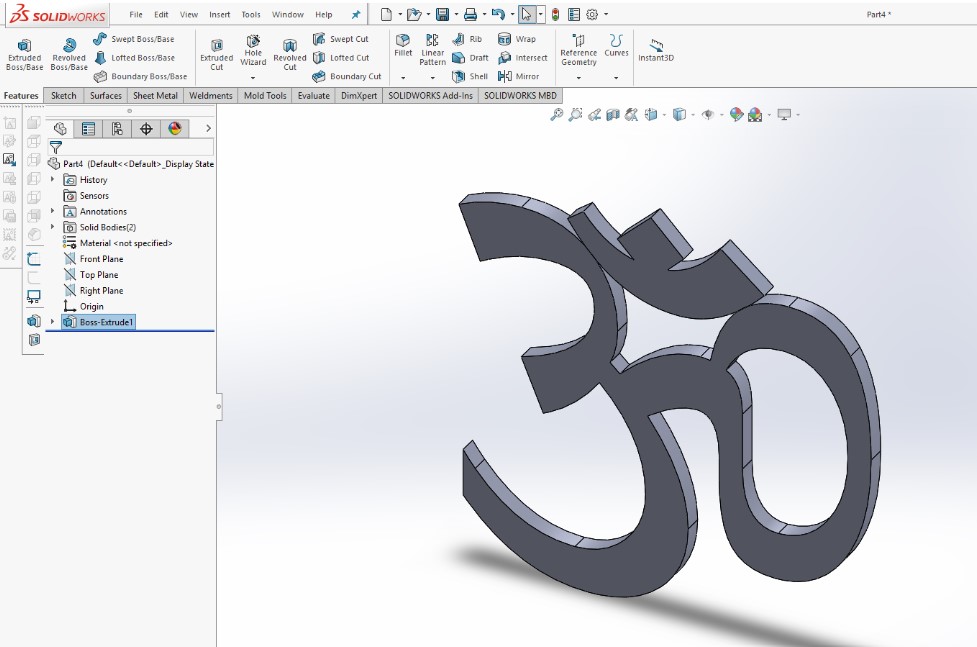
Covert the shape into a block toexport as stl file.
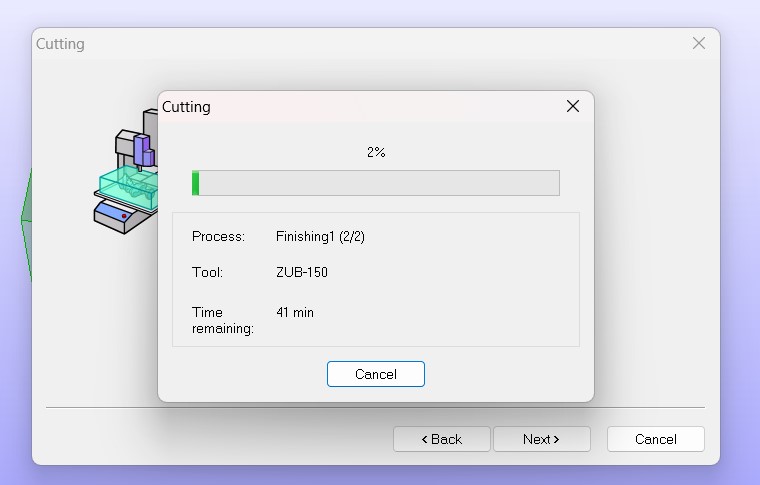
Step 03: Milling
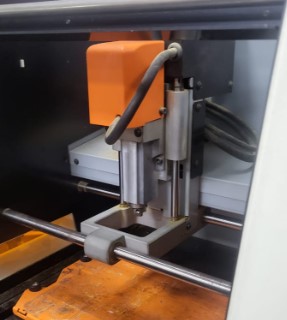
Pathfile for the roland machine.
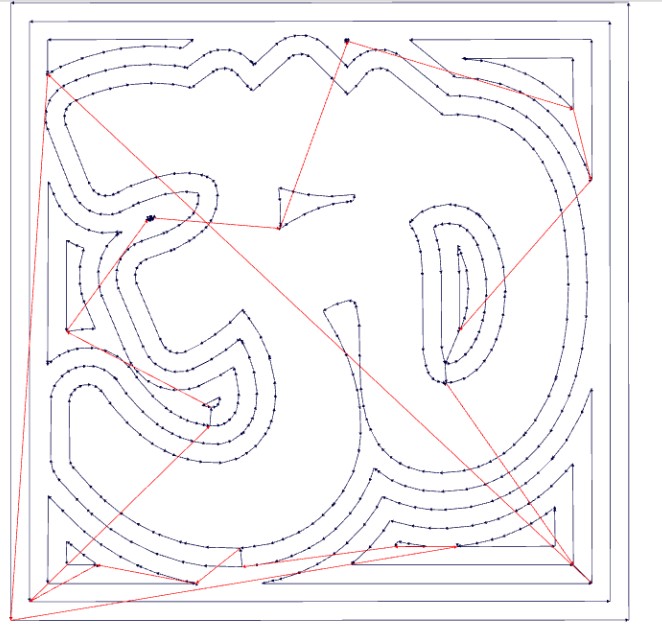
Milling process.
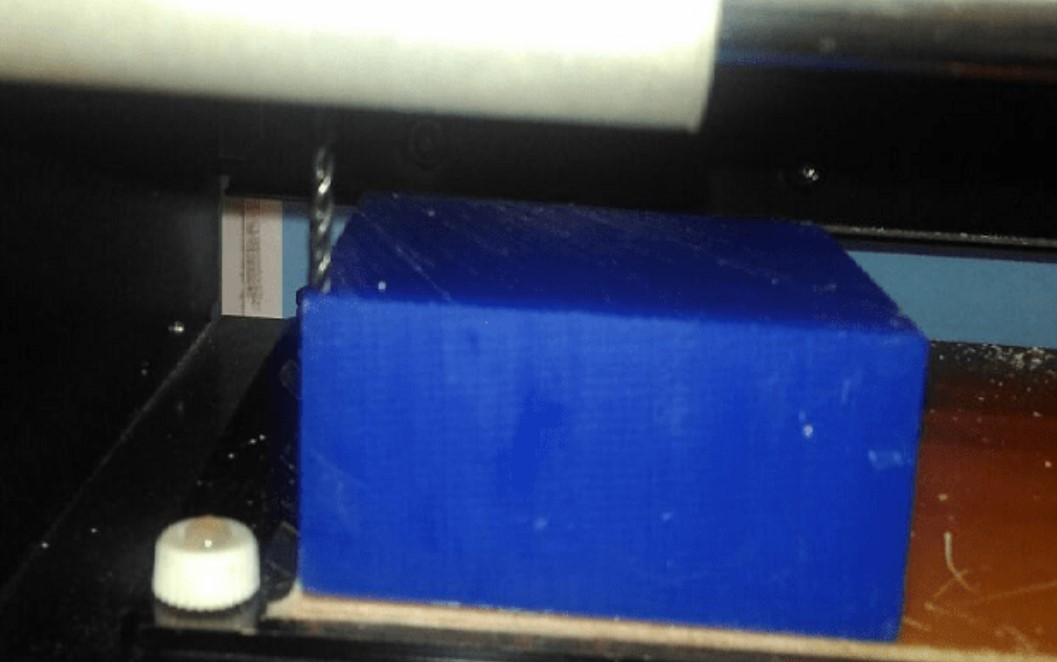
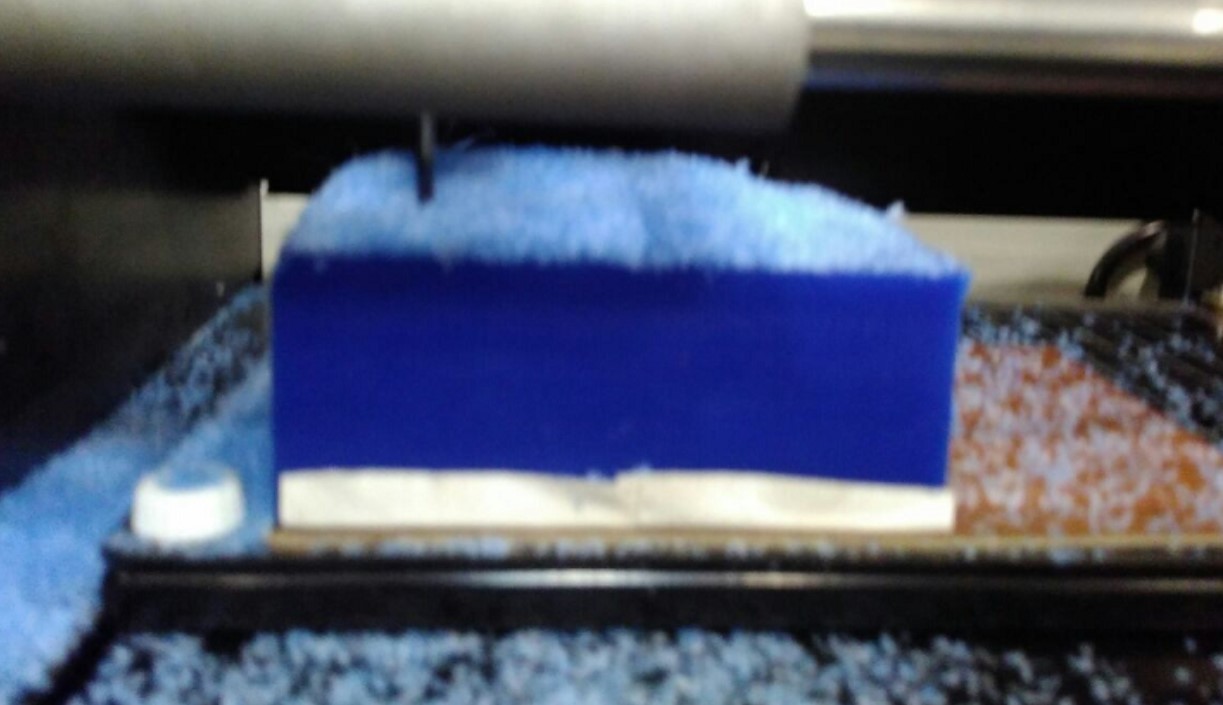
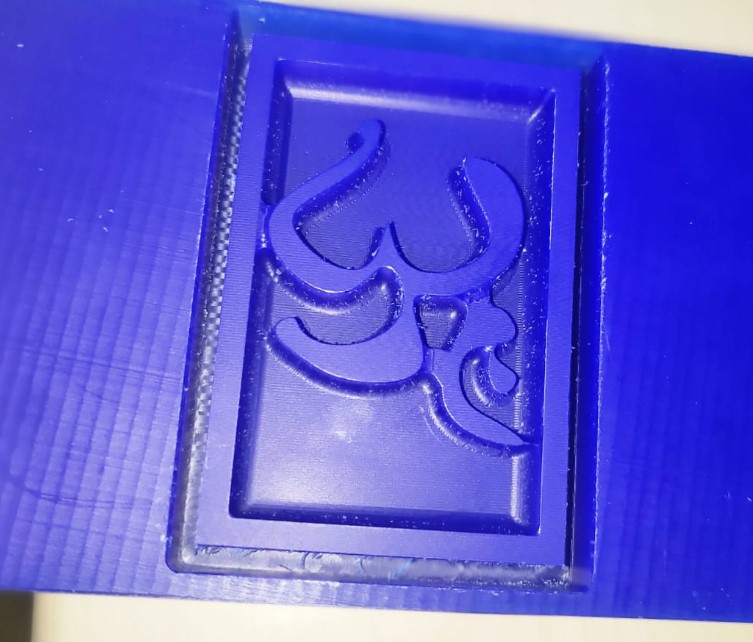
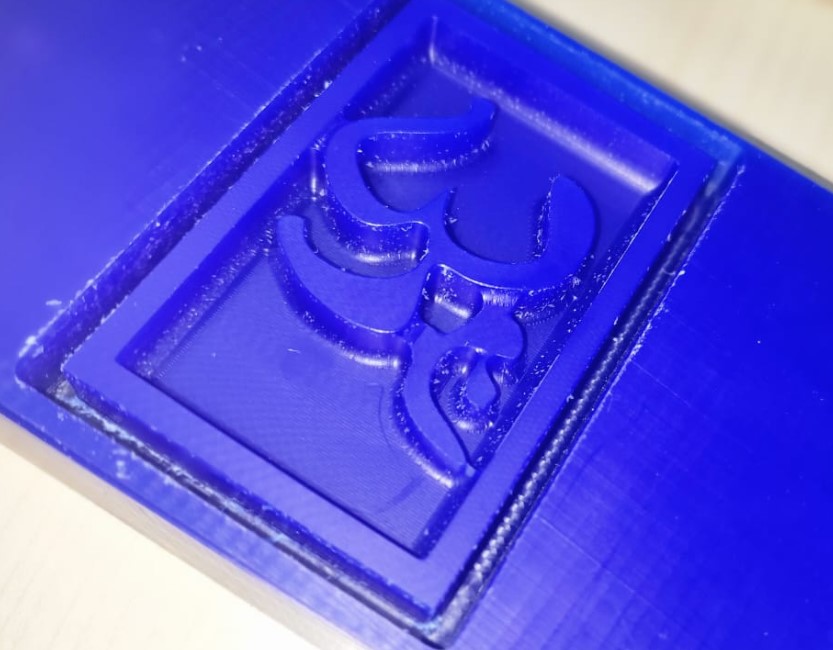
How it looks after the milling process.
Step 04: Making Mold
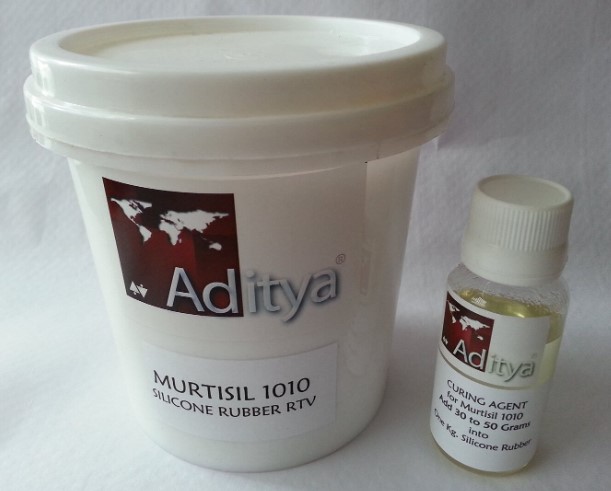
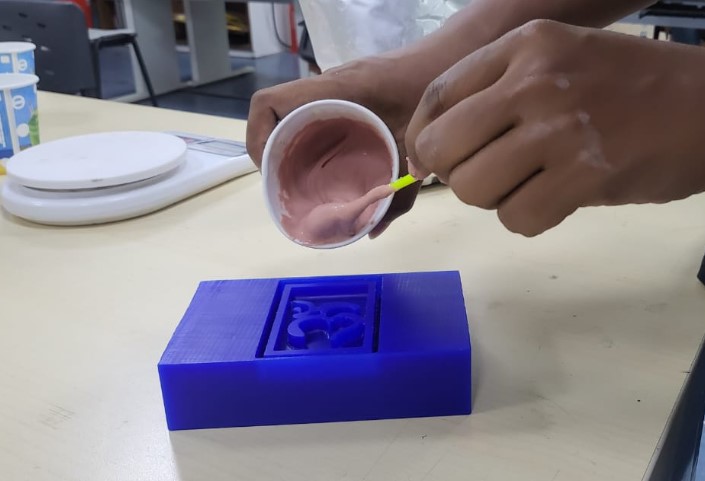
I added 10% of the hardener. The pot life of this compound from Murtisil is around 10 mins. So take care that you don't take long time in mixing and pouring the rubber liquid into the mold. I used a hardner and resign to cure the silicon. If silicon is 100% then we can add 10% of the hardner to cure the silicon. The ratio of this can be approximately 1:10
Mixing procedure:
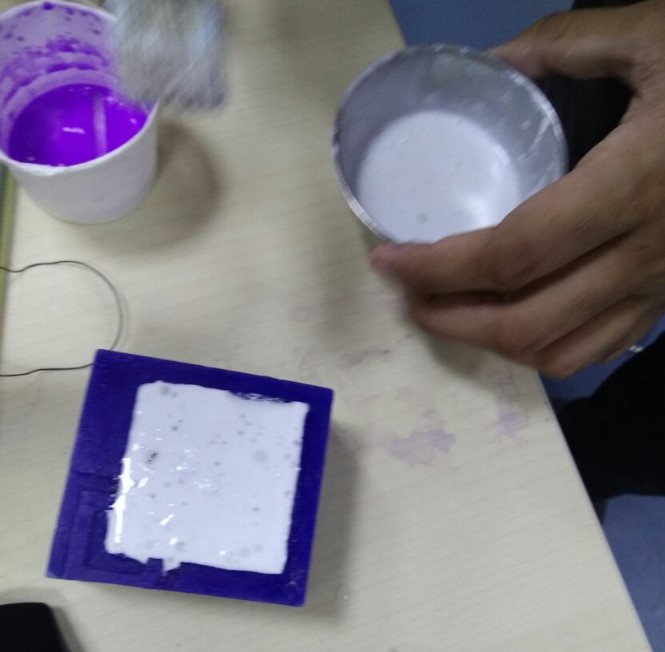
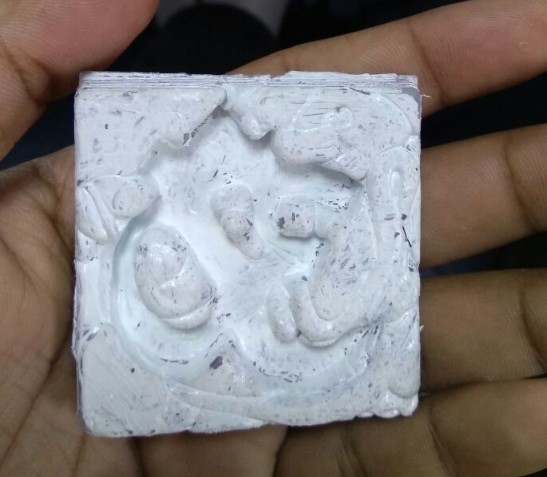
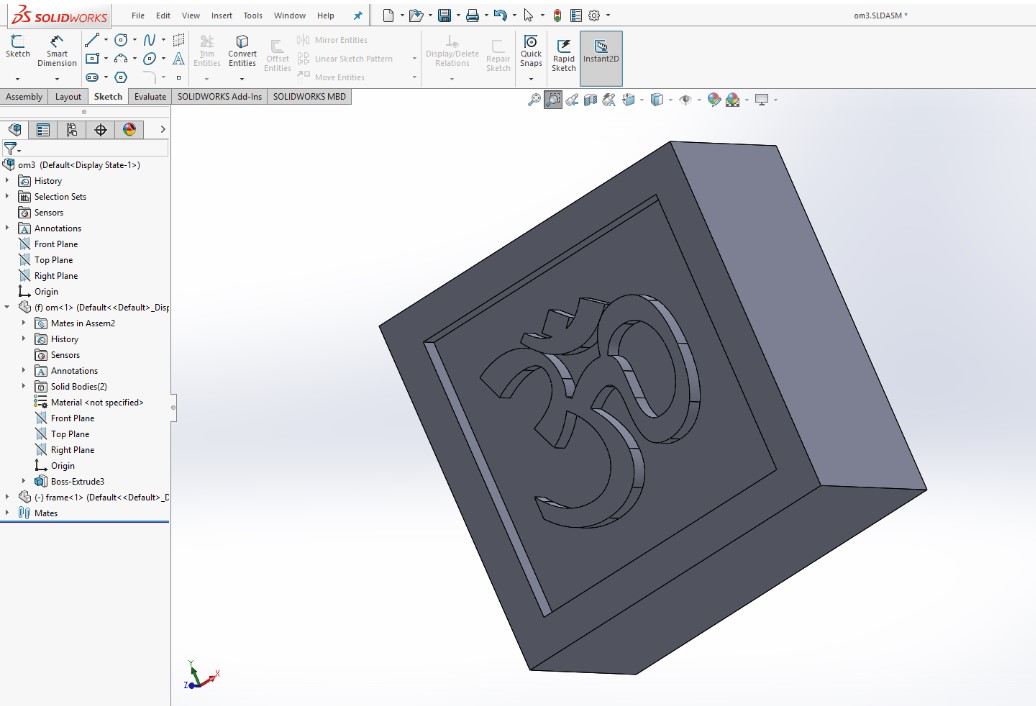
Step 05: Casting
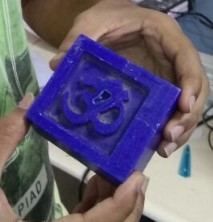
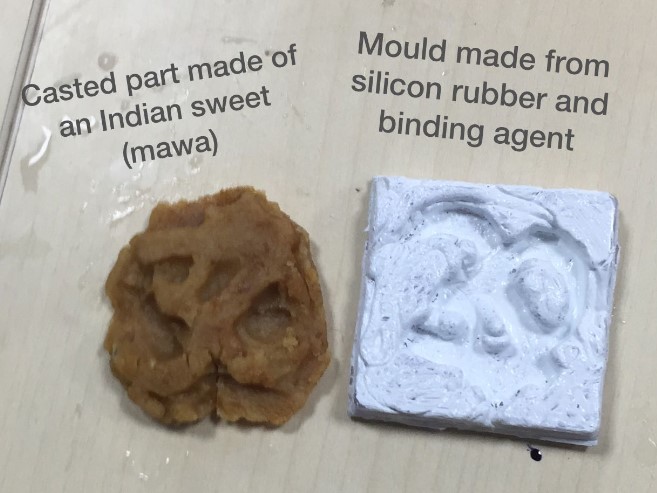
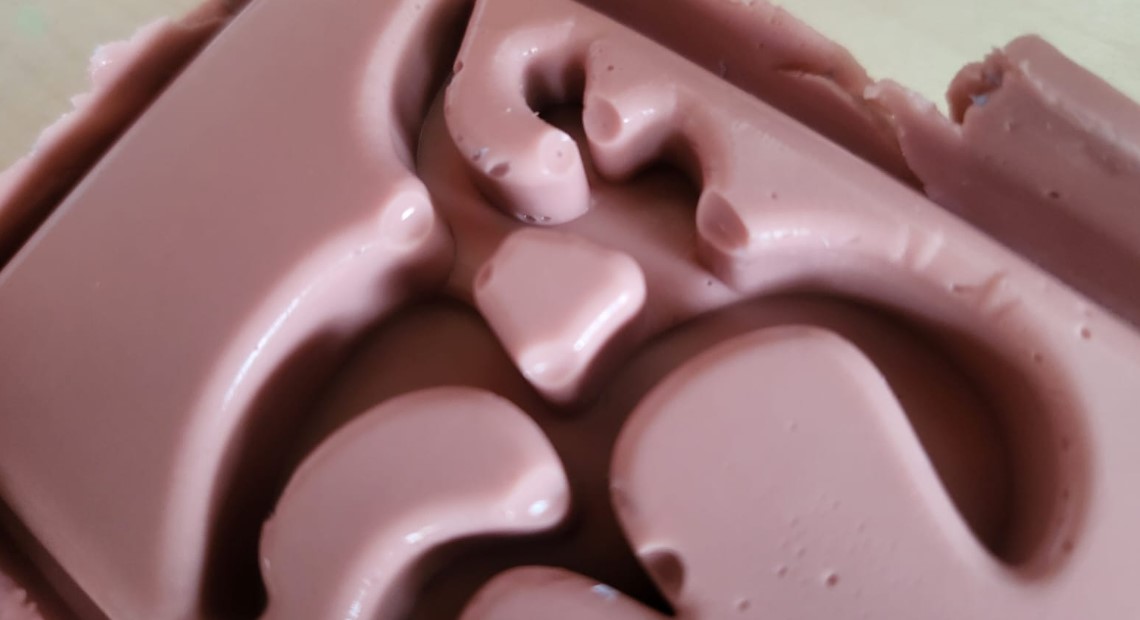
I casted an indian sweet called Khoa out of my mold.
A bit about Khoa
Khoa is a dairy product widely used in the cuisine of the Indian Subcontinent, encompassing India, Nepal, Bangladesh and Pakistan. It is made of either dried whole milk or milk thickened by heating in an open iron pan. It is lower in moisture than typical fresh cheeses such as ricotta Khoa is made by simmering full-fat milk in an iron karahi for several hours, over a medium fire. The gradual vaporization of its water content leaves coagulated solids in milk, which is khoa. The ideal temperature to avoid scorching is about 80 °C (180 °F).
As shown in the image below, you can see the tasty Khoa in the shape of OM. In temples, this can be distributed as an offering to the devotees. Something like this has not been tried in my local temple. "Sweets shaped in religious symbols to be distributed during festivals."
Molding Casting 3.0
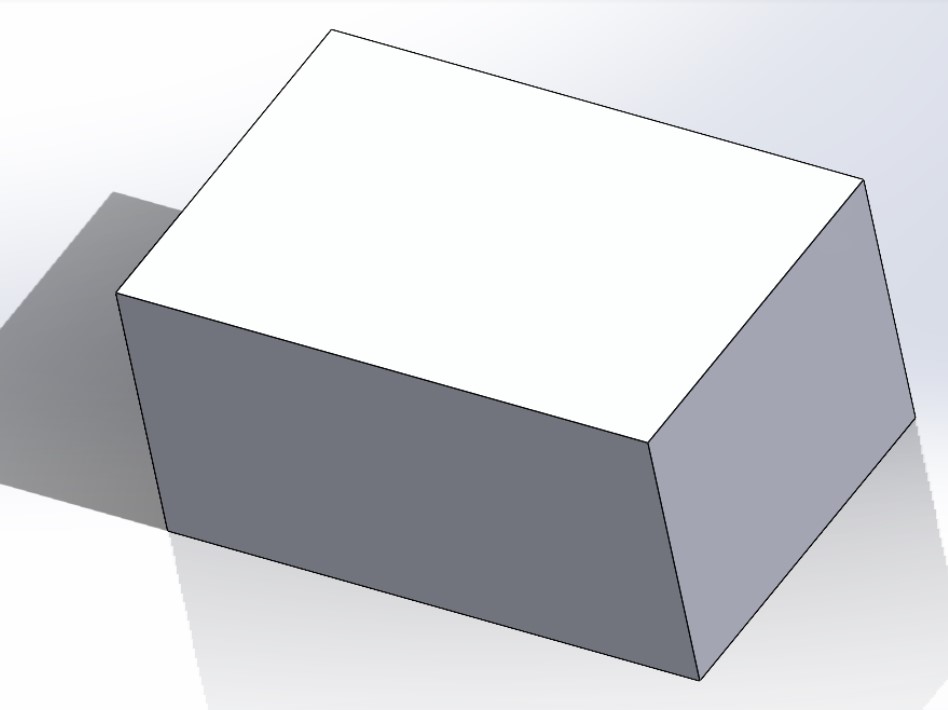
After global review, I realised that I have to have varying Z axis depths to actually able to get the 3axis milling done in real sense. So here's my 3rd attempt.This time just like the last version, I used blue molding wax and thanks to this push from my global evaluator Szily, that I tried another attempt. Because the SRM20 machine from Rolad at riidl's FABLAB was not functioning and this push to get the assignment done made me work on the machine and get it working.
Here's the steps I followed in images: Step 01: Design the file in Solidworks
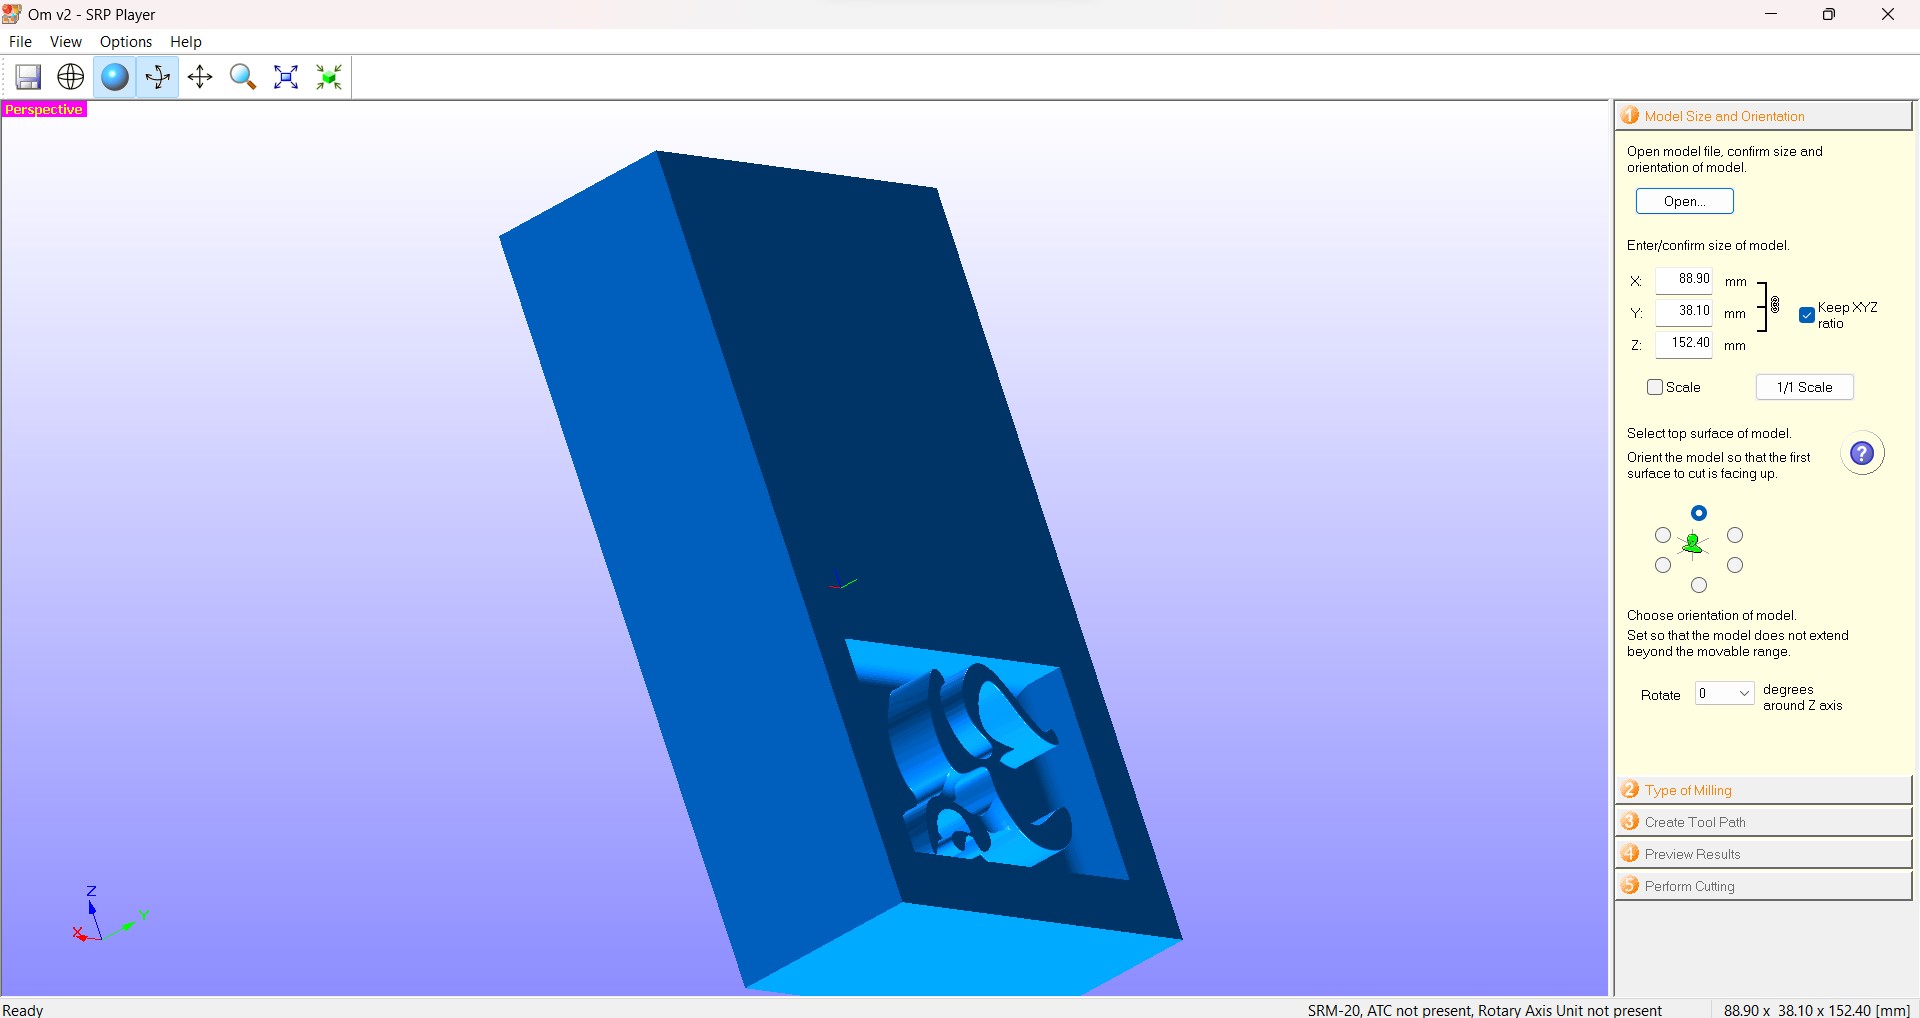
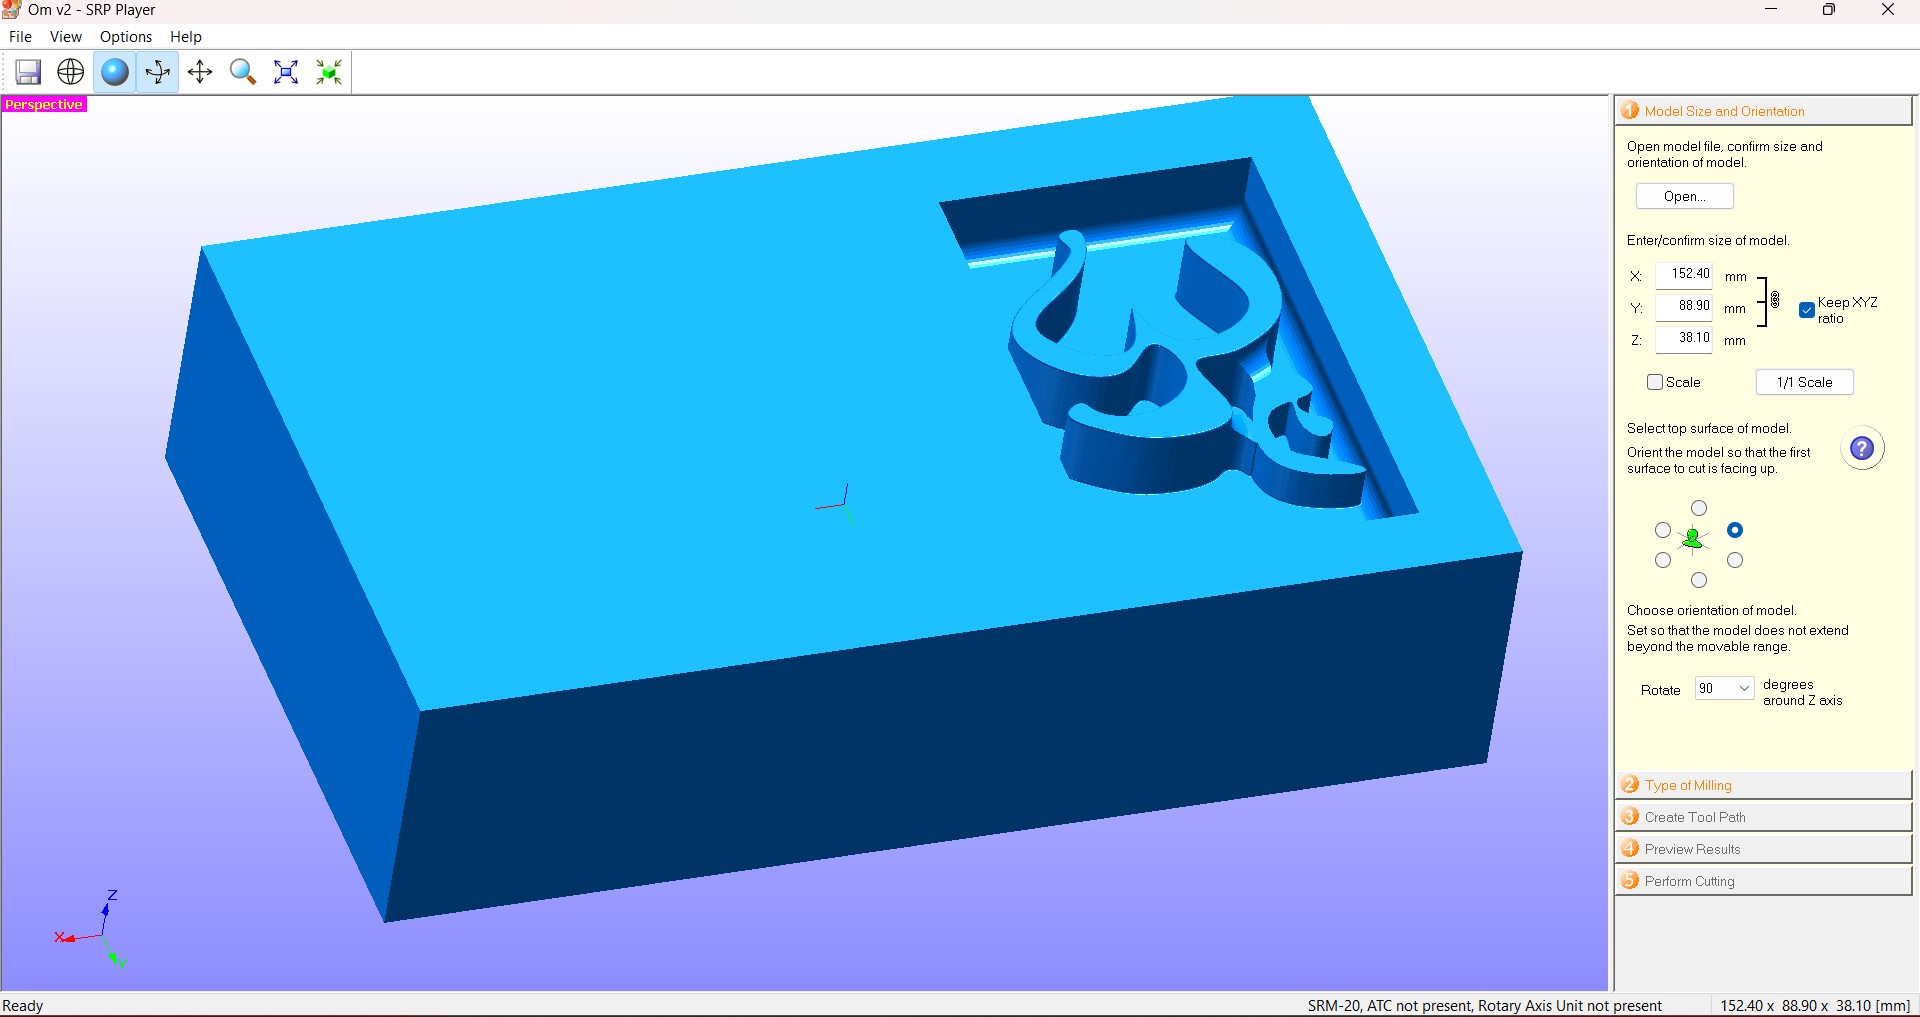
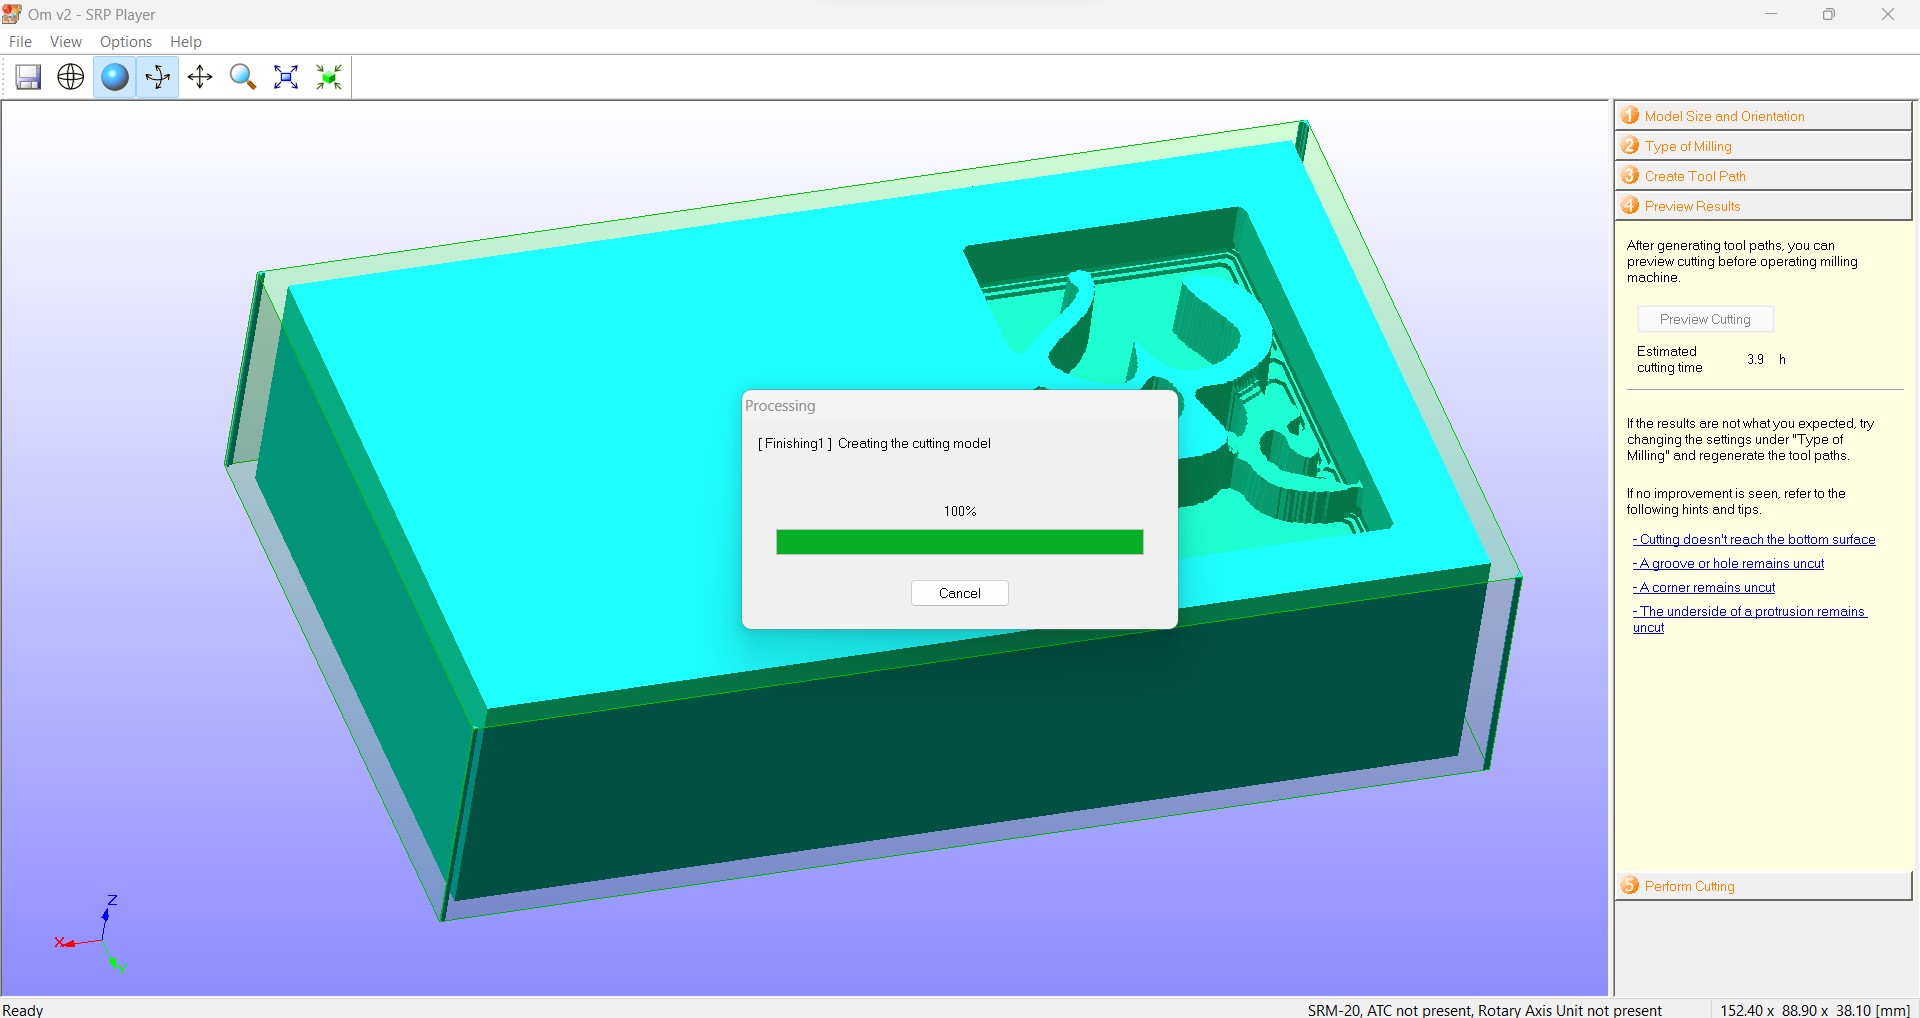
Step 02: Setting the file on SRM Player software
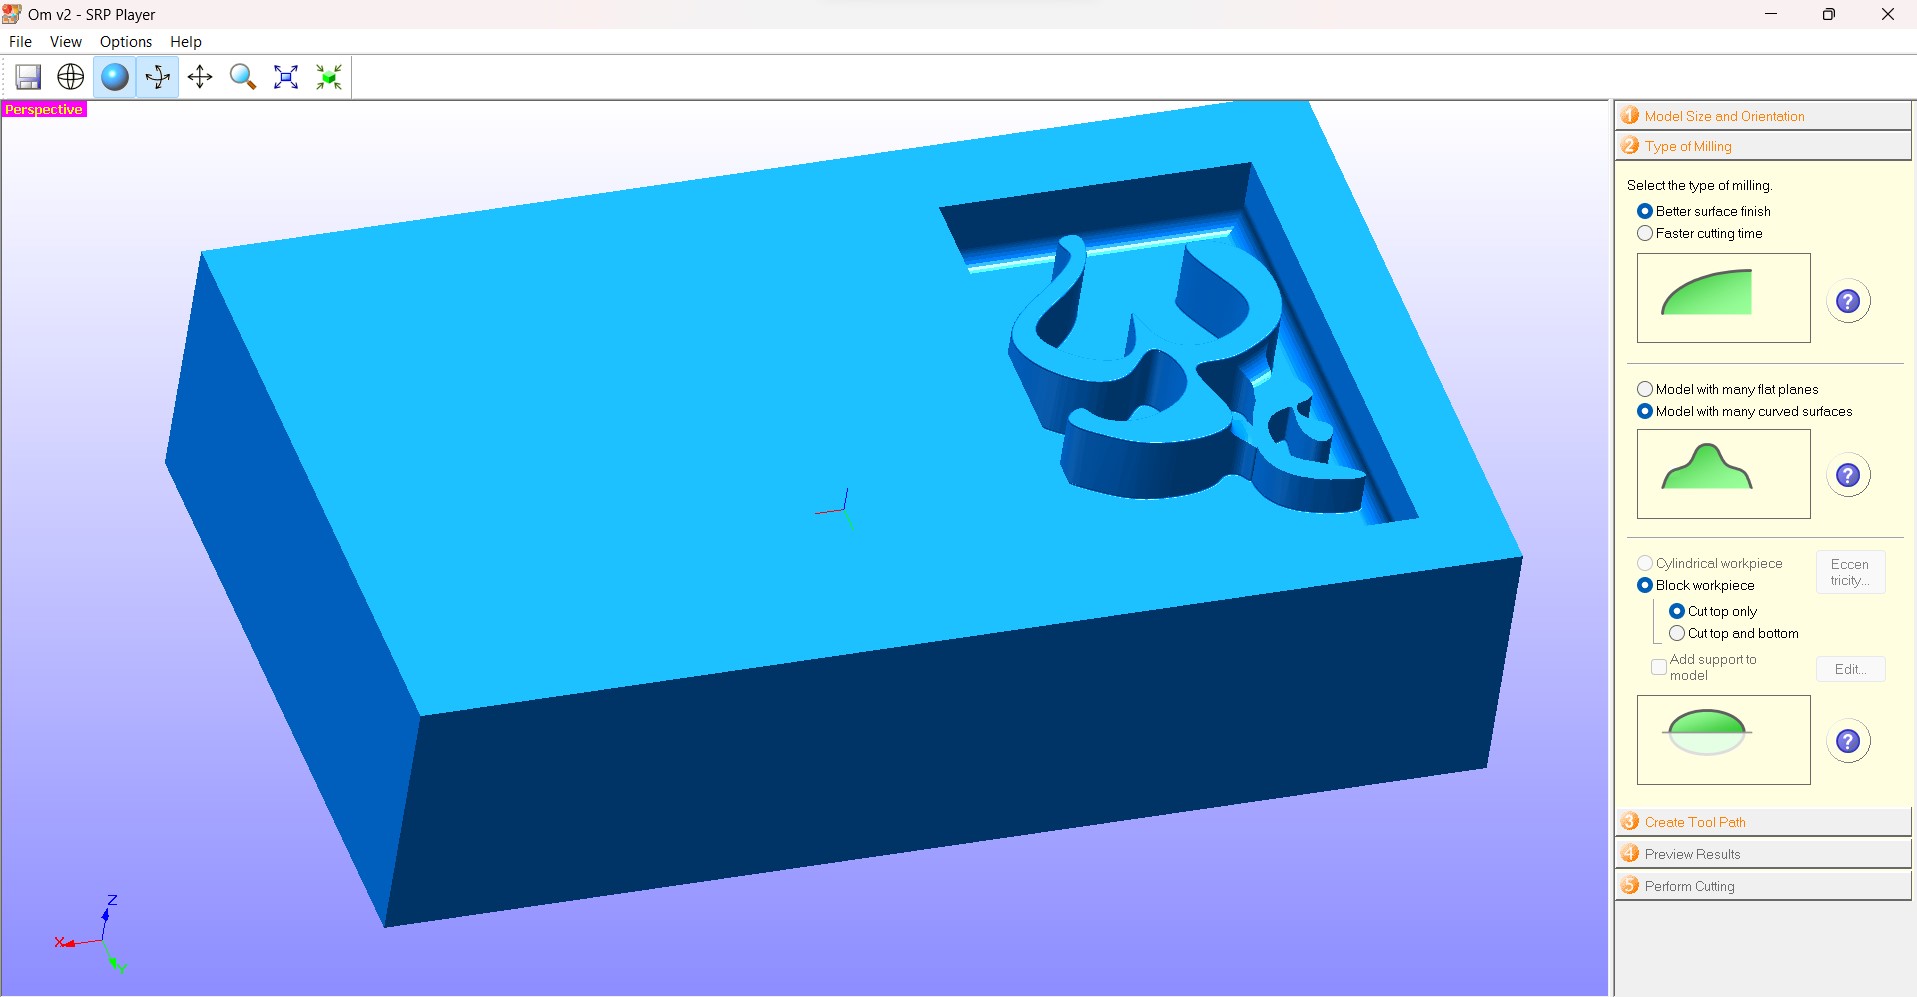

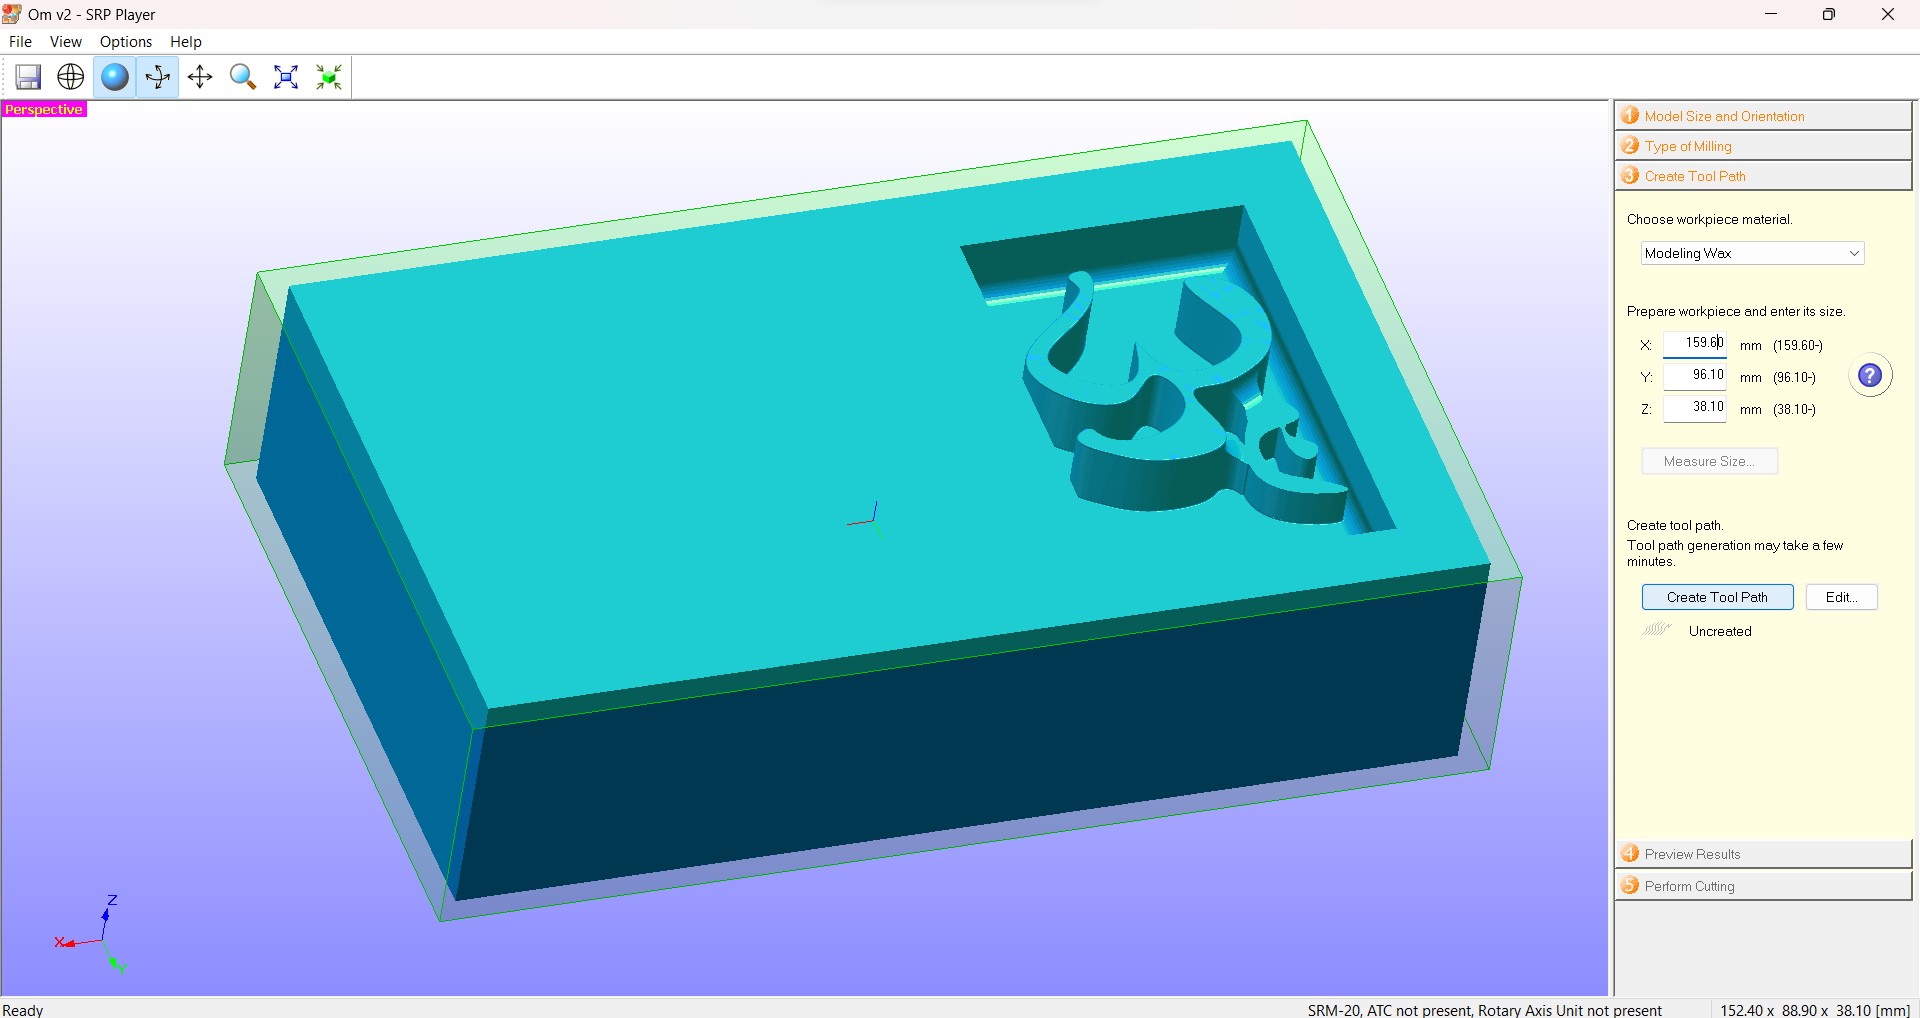
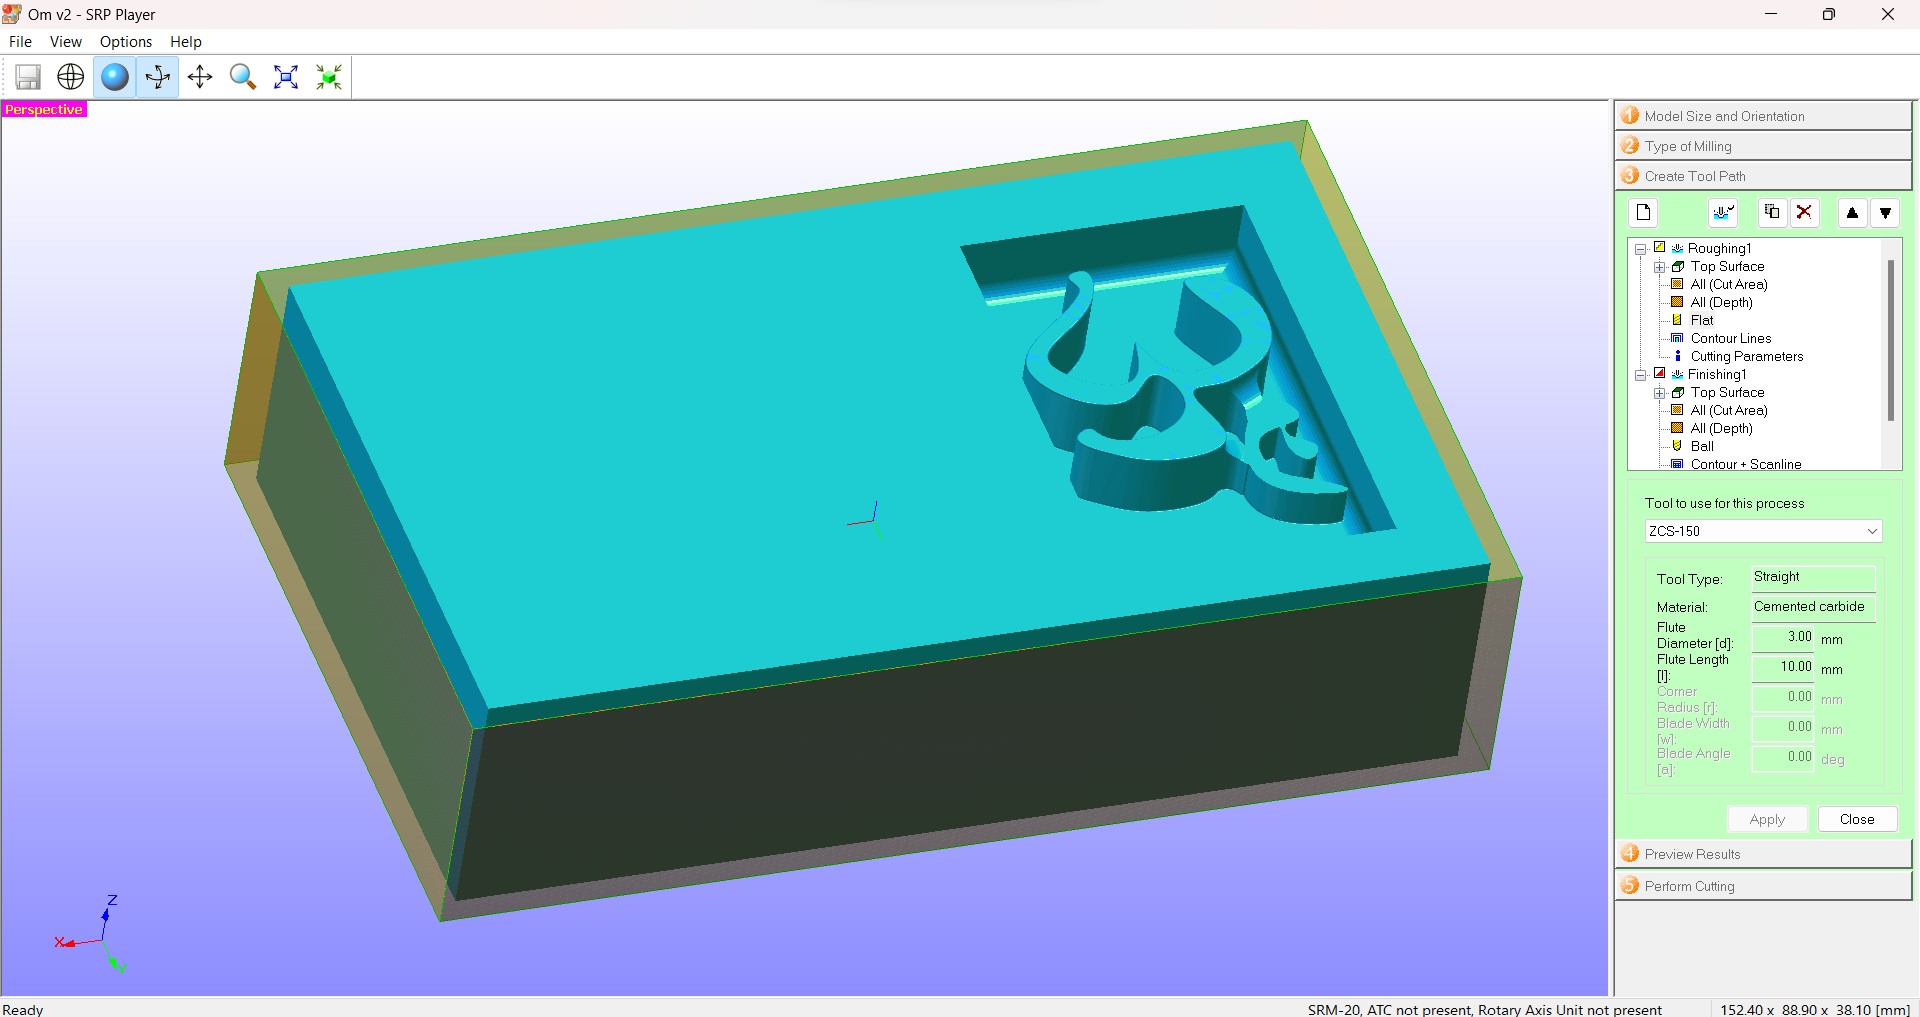
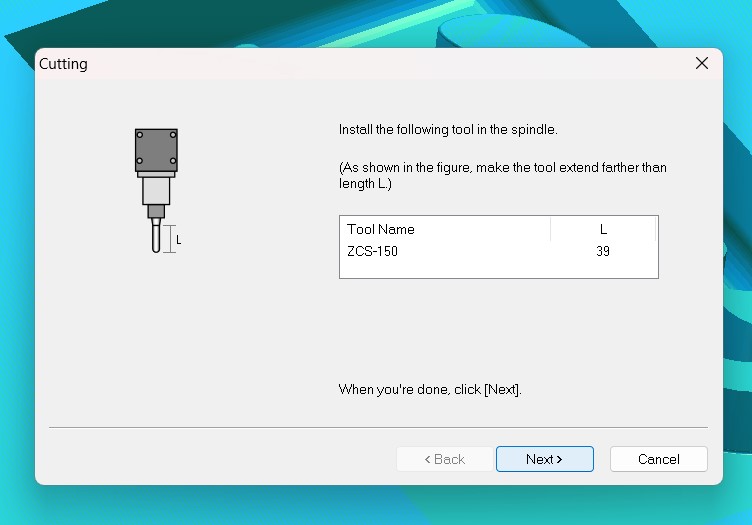
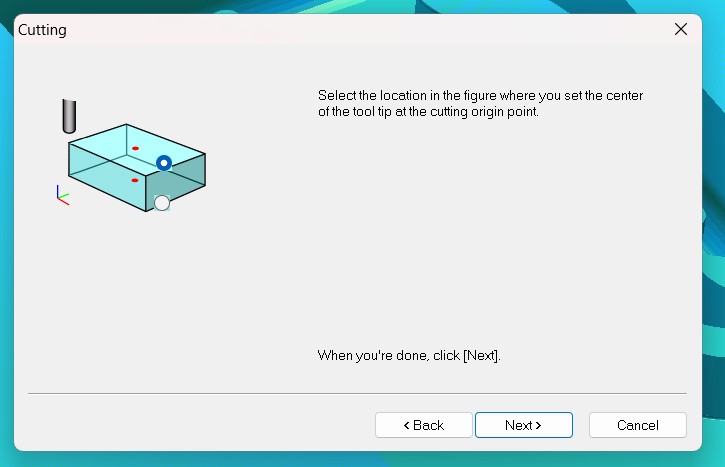
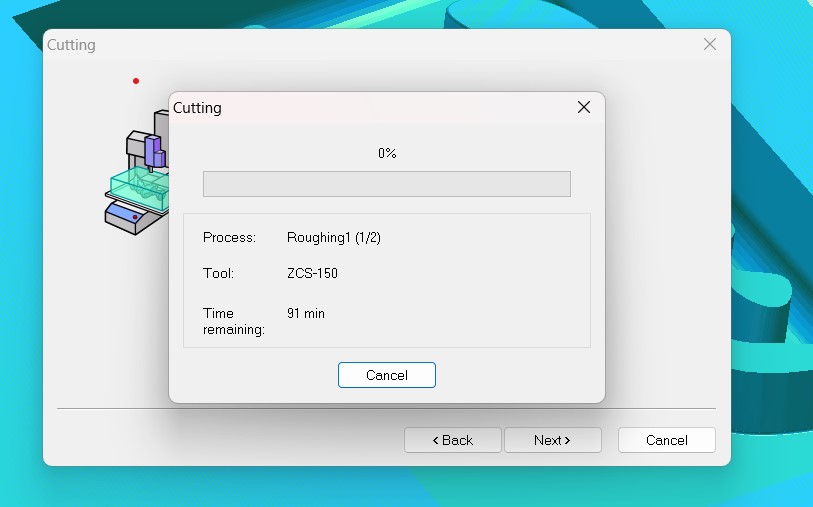
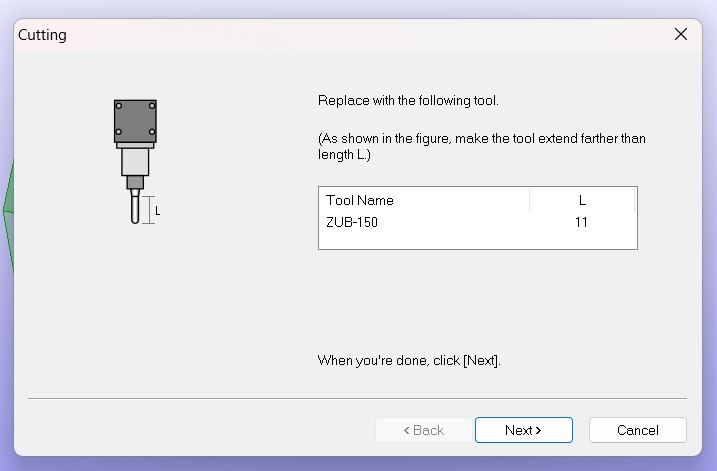
Step 03: Setting cutting tool parameters and tool itself
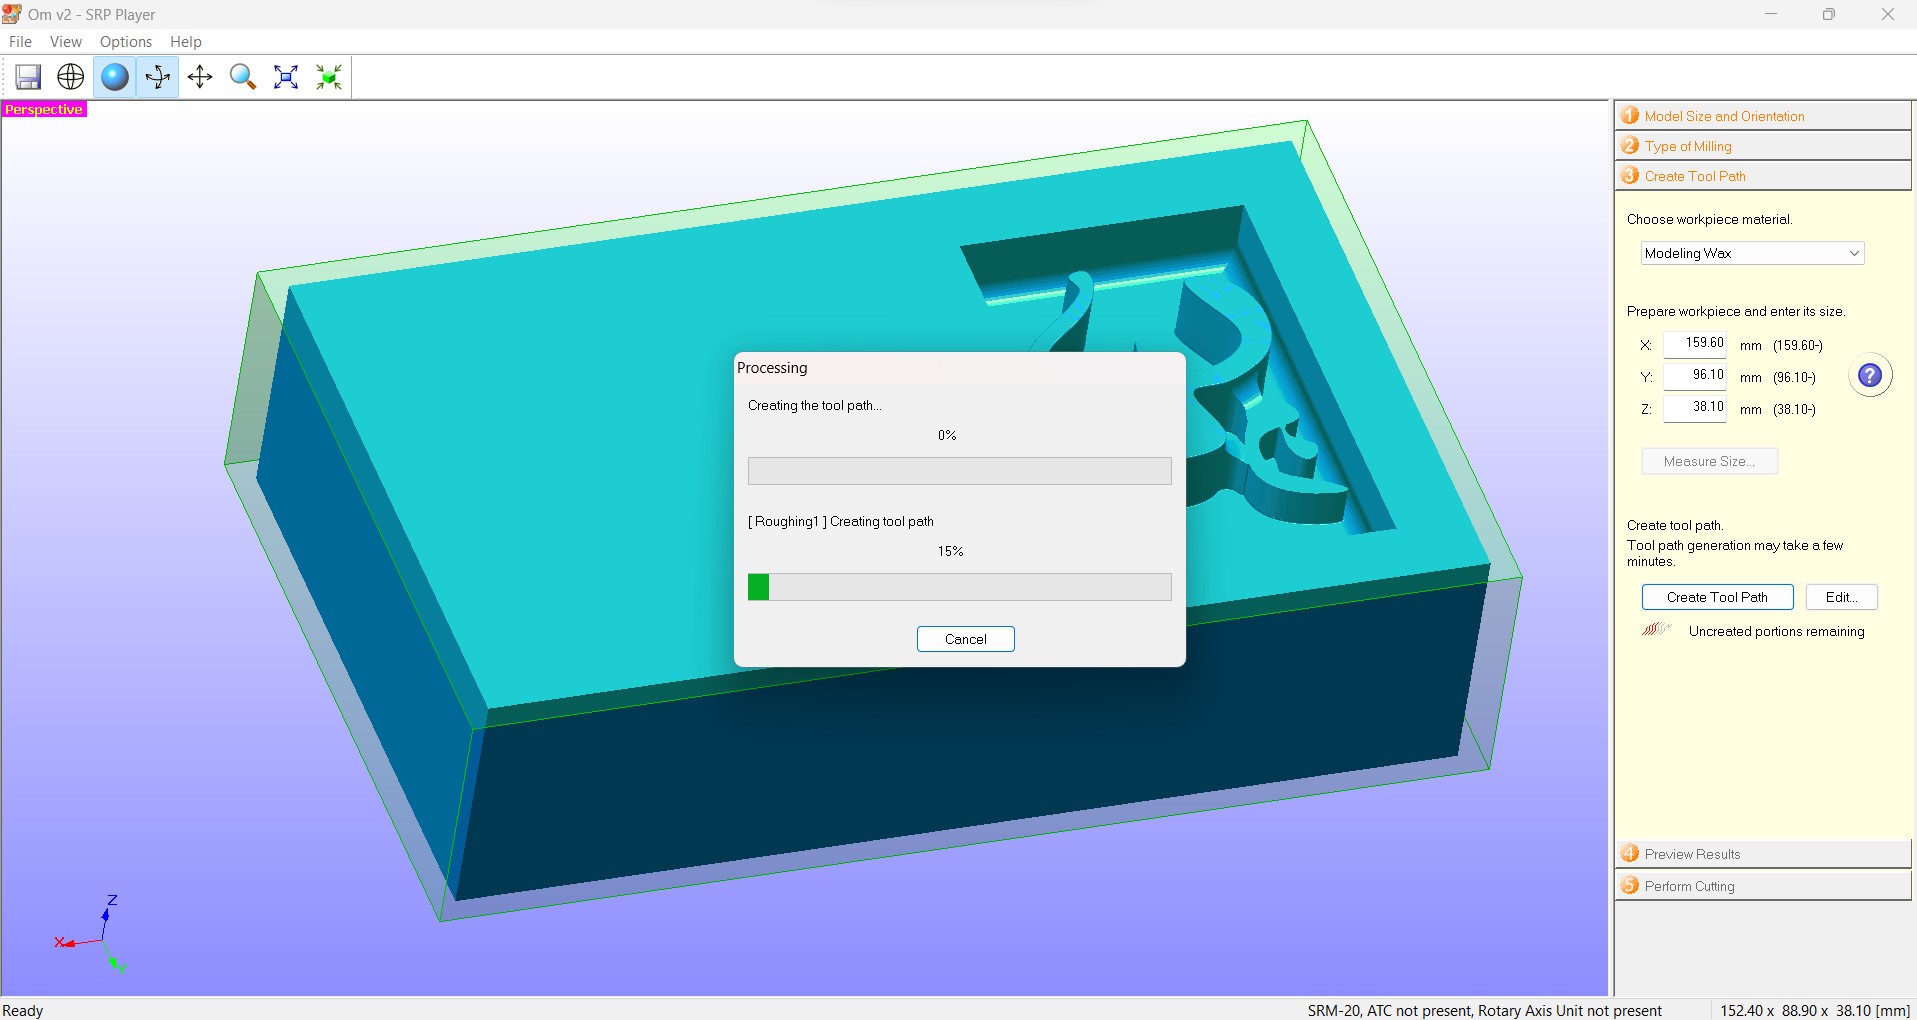
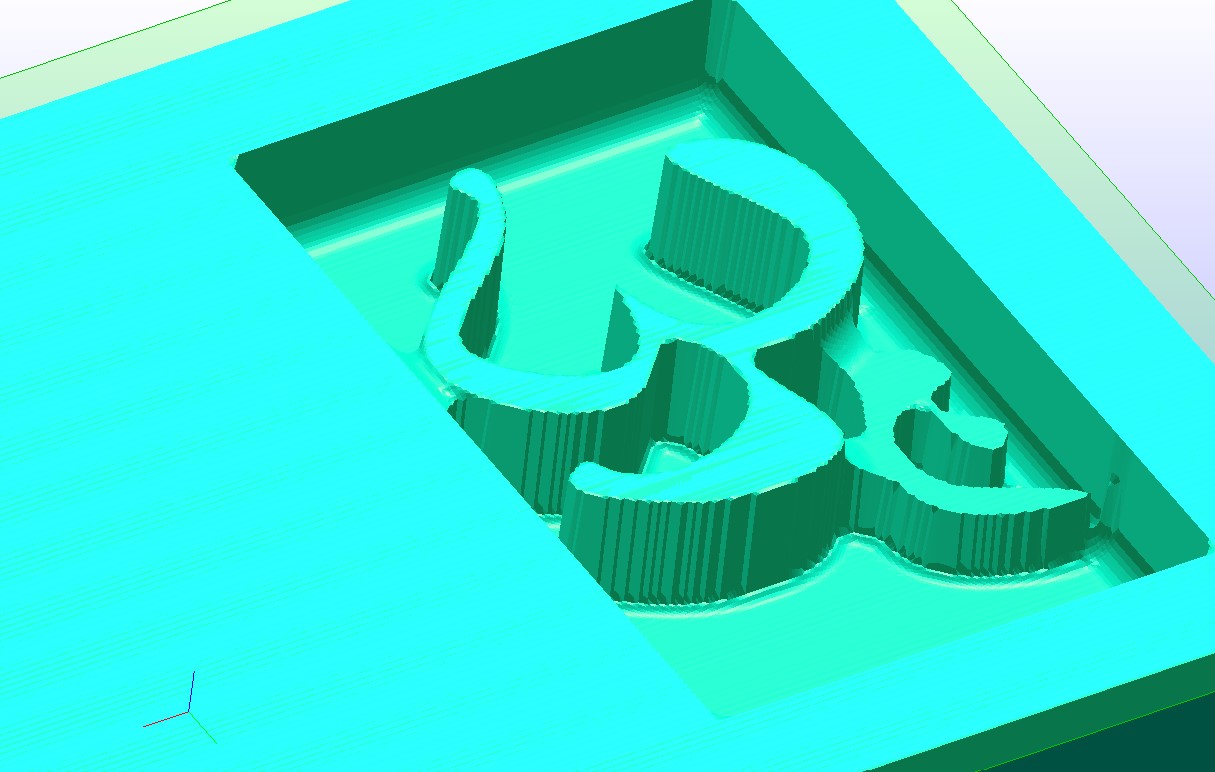
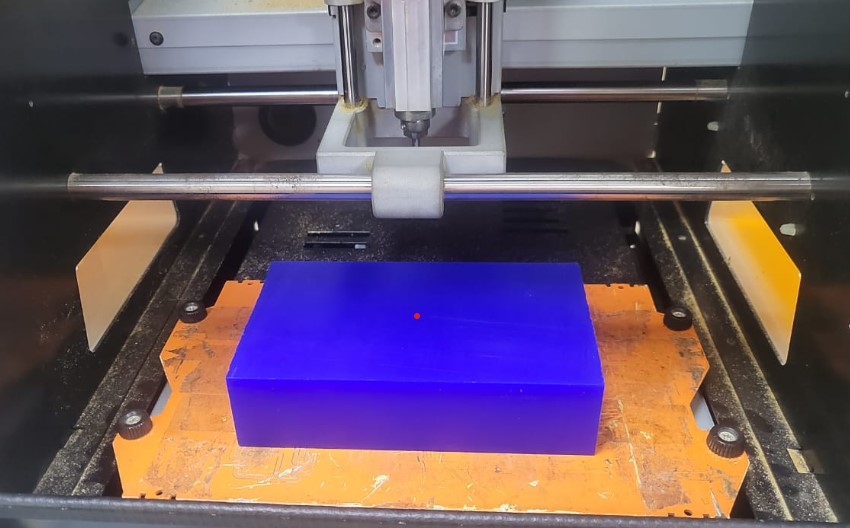
Step 04: Preview cutting
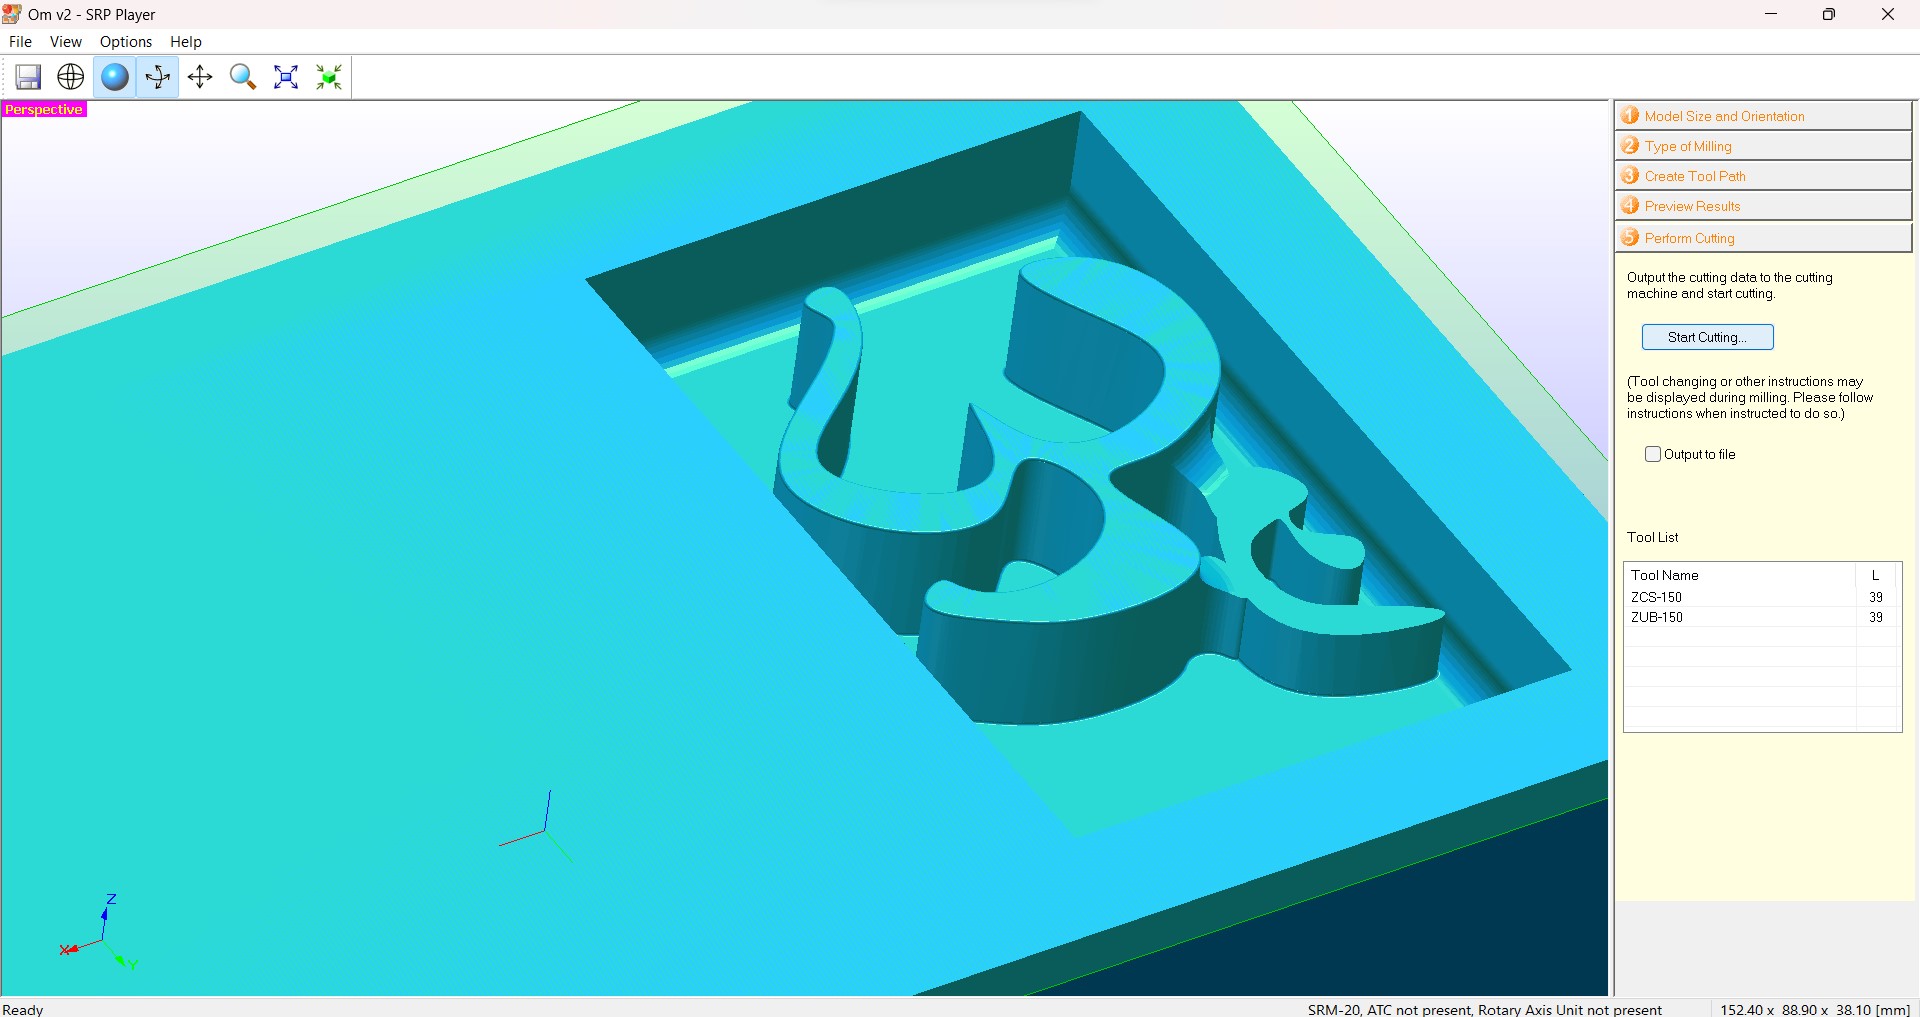
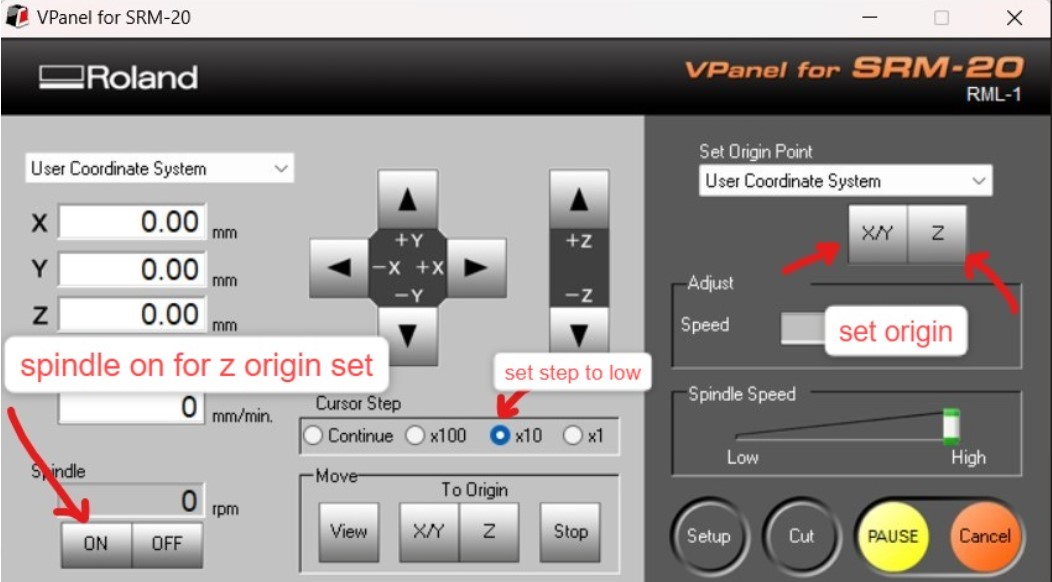
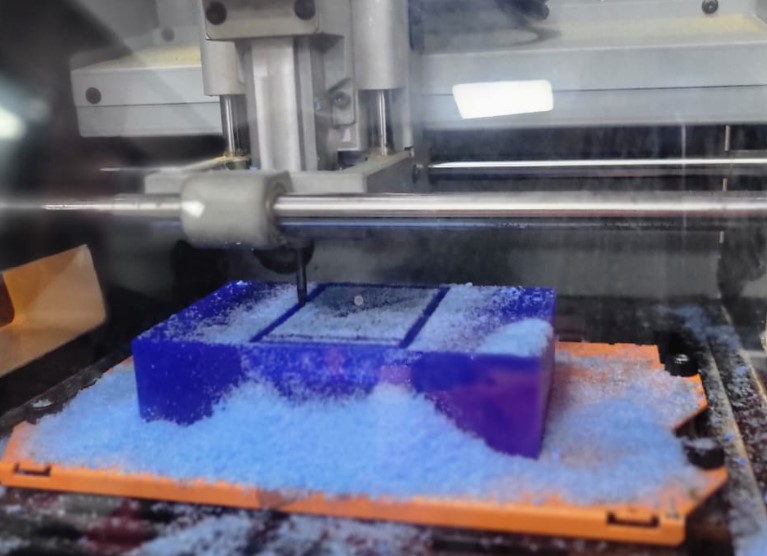
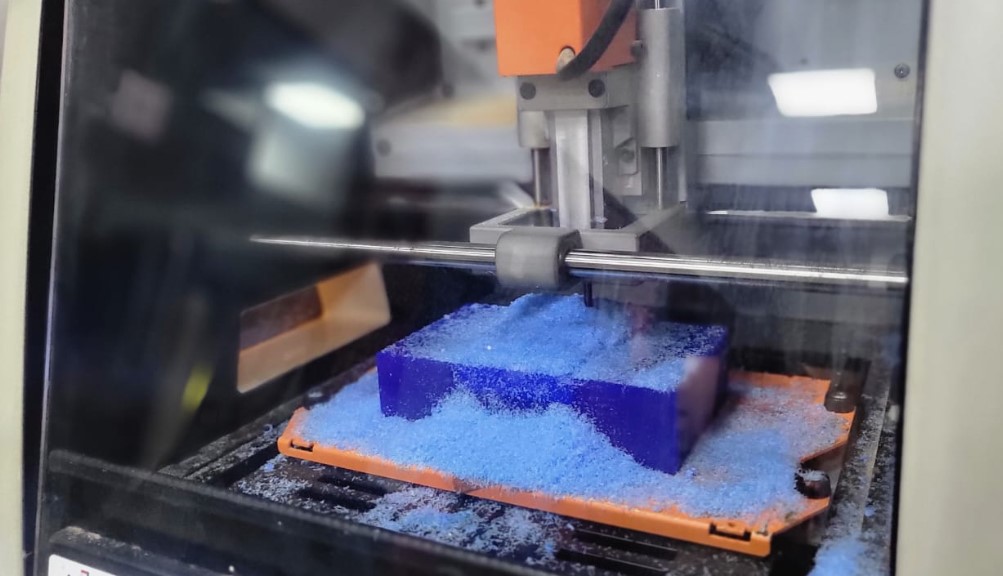
Step 05: Cutting process
For the actual cutting, I realised it is taking a lot of time to just roam around the block as per the design so I modified the design for less time consuption. All the design version files are linked to download at the end of this page.
Step 06: Final milled part:
Step 07: Making mold
Step 07: Algenite mold outcome
Group assignment
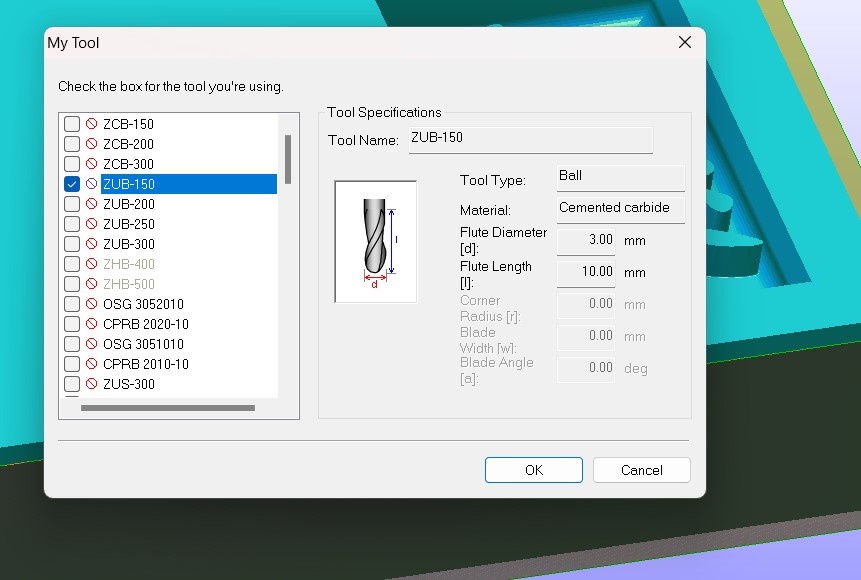
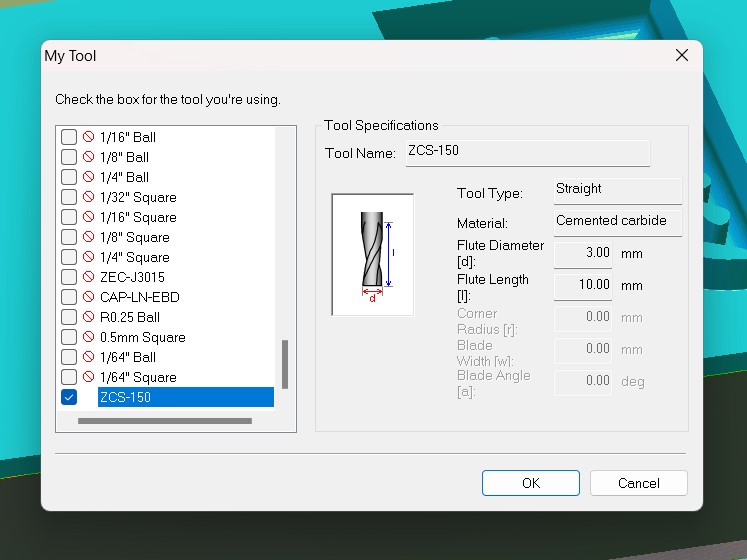
The group assignment for this week was to review the safety data sheets for each of your molding and casting materials and test and compare casts with them.Reviewing datasheets for the materials
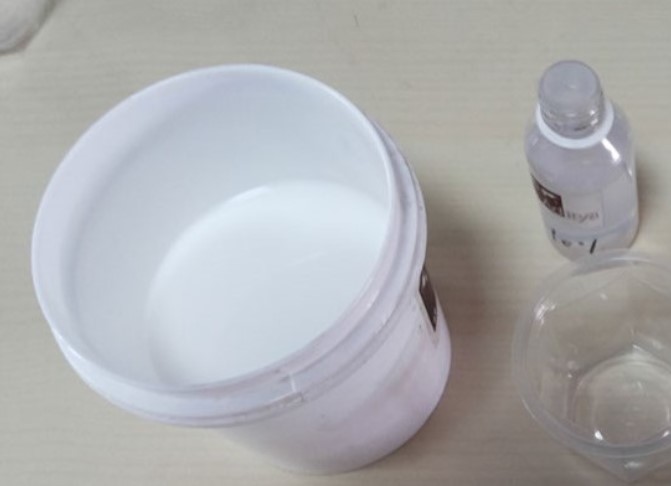
We need to review the safety data sheets of the materials we are using for the molding as well as the casting. So in my case, I have used Alginate and White cement as the molding and casting materials respectively. Since both the materials were locally available for me in the design lab of our Somaiya School of Design, the material is ordered in huge quantities as shown in the figure below.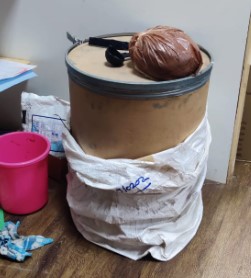
The datasheet I referred to for Alginate is the one from a US based supplier but the safety measures and instructions should more or less be the same.
Alginate Datasheet The datasheet I referred for the white cement I used also not based in India, but should do the job. The sheets are linked below if needed.
White Cement Datasheet
Alginate Safety datasheet
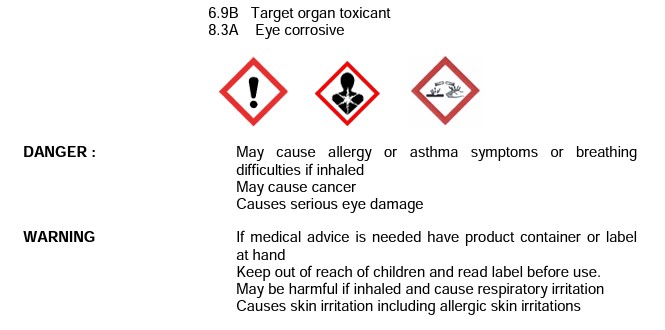
The safety measures for the Alginate gel is not much more than the usual precautionary steps you would take. It is body friendly, but yes has some effects when in contact with eyes, mouth, etc. The details of the same are shared in the form of screenshots below under the sector of Hazards Identification.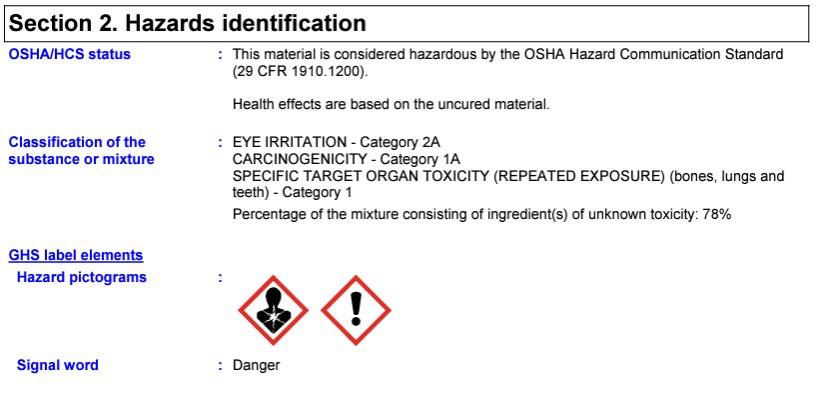
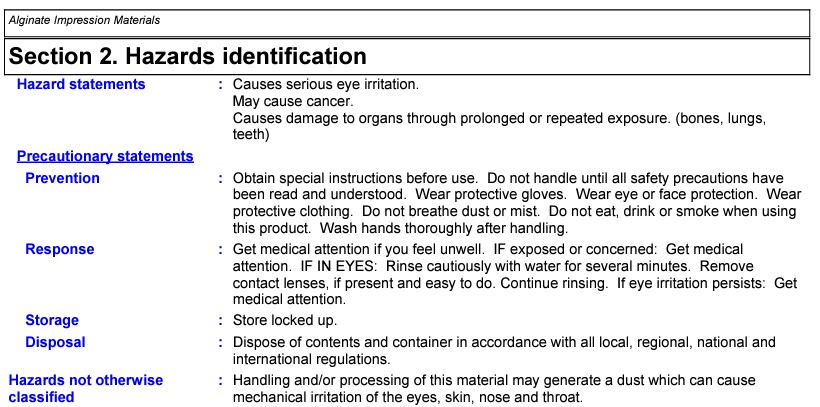
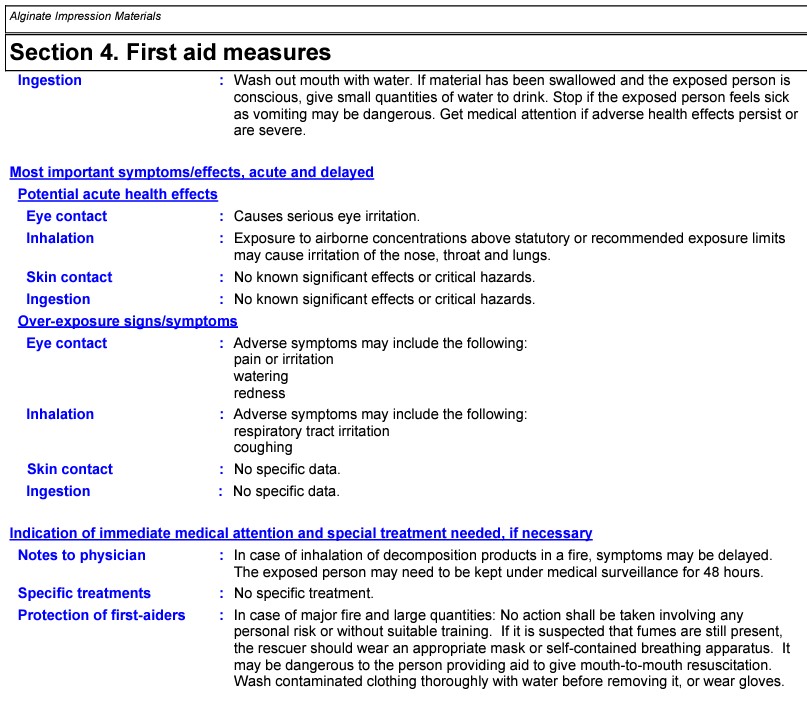
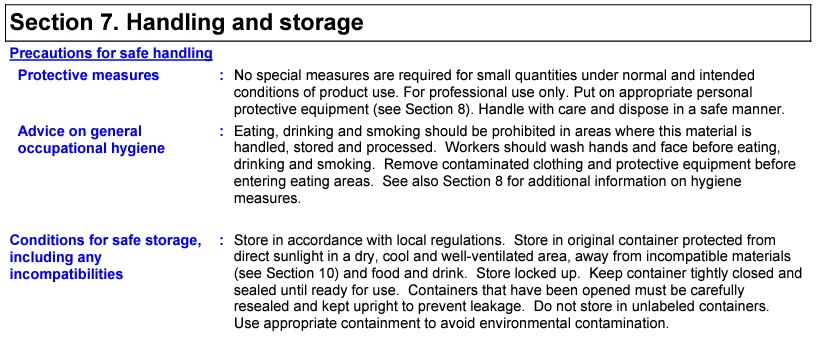
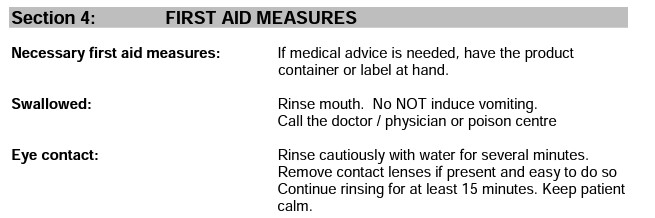
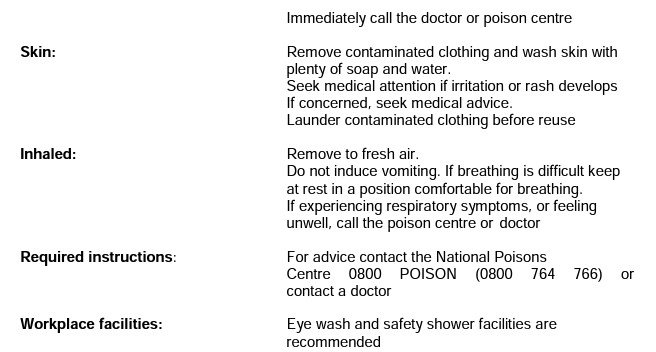
The first aid measures in cases of contacts with the sensory organs(primarily) are noted below. Along with it, the measures for handling and storage are explained in the screenshot below.
White Cement Safety datasheet
Similarly for the white cement, the important safety measures are noted as follows,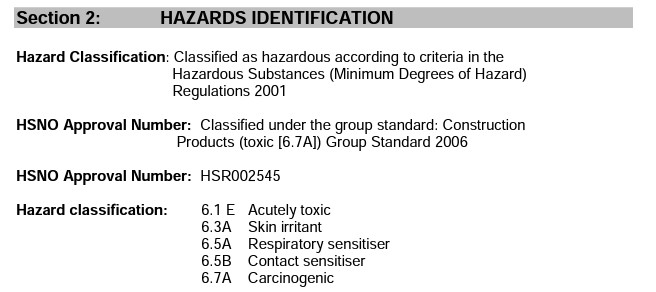
The first aid measures in cases of contacts with the sensory organs(primarily) are noted below for white cement.
The materials my partner used are Silicone and clear art resin. Also plaster of paris for casting.
The datasheets for the same were also studied for the same points, Hazards identification, First Aid measures and Handling and Storage Instructions.
The links to these datasheets are attached below:
Silicone Datasheet
Clear Art Resin Datasheet
Hardener Datasheet
Plaster of Paris Datasheet
Download design files
STL filesSRM files
CAD files