My 3d printing
I have an Ender 5-Pro printing. Here I show some of its general Parameters.
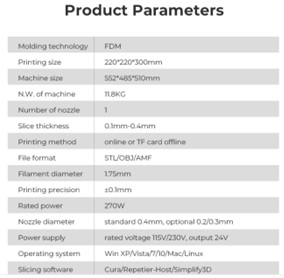
Source: https://www.creality.com/products/ender-5-pro-3d-printer
The printing was relatively easy to ensemble. However, I have some problems to making it work properly. The first issue I experimented was that I could not preheat the PLA. When I was trying to do that the matching was making a sound after 130 grades and sending an error into the screen:
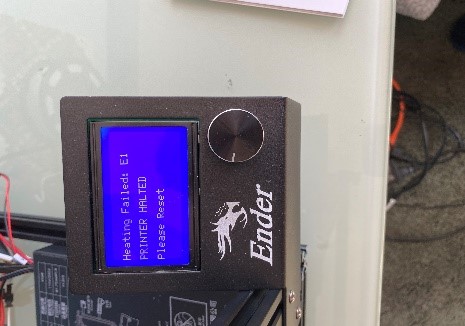
After a while I understood that I did a wrong connection since I mixed up two white cables that look very similar, and actually both are for heating, whoever, one heat the nozzle-PLA and the other the bed.
Then I tried my first 3d printing with the example provided in the micro-USB card coming with the 3D printing. However, I experimented another issue, since the bed was not right leveled.
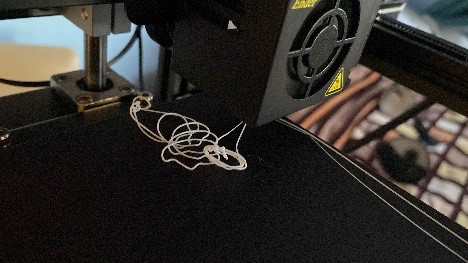
Finally, I understood you have to do this by hand, first disabling the steppers and then moving the nozzle front/left leveling screw and adjusting the platform height by turning the knob underneath making sure that the nozzle lightly scratches the paper. Then you have to use a piece of paper to be sure thar the right side is settled on 4 corners.
I. Characterization of the rules of design of my 3D printing
Tolerance of printing: It is very important to make the characterization of the printing because depending on that I will know the possibilities of my printing. For example, what are, the limits in angles and joints, all this is very important to understand by making the characterization of the 3D printing. In the case of assemblies the characterization will help me to understand what type of assemble is need it to joint two pieces or what are the limits of the 3D printing without having the necessity to make different parts and using a joint.
How to characterize a 3D printing? We can make use of different pages with models that takes to the limit to the printing. For example: Mattershackers In this page they offer you some 3D models to make the following test:
- Vertical Surface Test
- Horizontal Finish Test
- Dimensional Accuracy Test
- Overhang Test
- Bridging Test
- Negative Space Test
- Retraction Performance Test
- Support Material Test
- Full Bed Dimensional Accuracy Test
- Z Wobble Test
- Squareness Test
- Download Calibration Models
II. To print an object which is not possible to reproduce using subtractive methods
First is important to understand some general information about software and files to operate a 3D printing. The general file type for 3d printing is STL. This type of file stores all the information about your 3D model. The format represents the raw surface of a model in triangles. The more complex and detailed the structure is, the more triangles will be used to represent the general model. Those triangles represent the X, Y and Z axis of the printer. If we open an STL file in a text archive, we will notice this pattern.
This is very important because if we work in some software and we import it to STL sometimes we lost some triangles. This happens with Rhino. Also, with some scanners. We need to be very careful to do not wholes are lost information when passing from one program to another, otherwise out printing will low quality.
III. 3d Scanners.
There are different methods and each has different capabilities and results. For example, photogrammetric is very practical but not so good to print solids, for this is better to use lases #D printing. What happens is that with photogrammetric you lost a lot of triangles or information. **We have to check which is better for scanning and printing, it is no clear*. For example, to use laser to scan very old and important objects is not a good idea because we can damage the piece. Other type of scanner is structural light. Here a characterization:
Photogrammetric:
Laser scanning:
structural light:
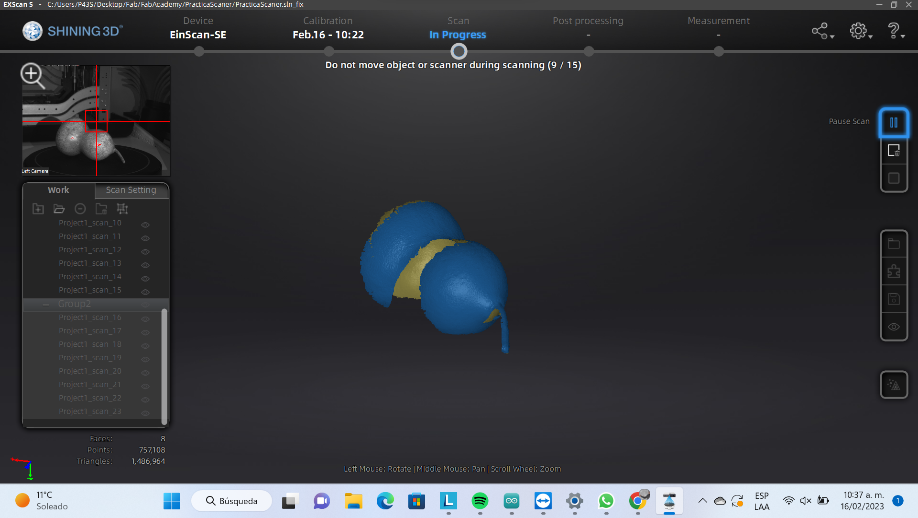
To make this practice I used a Shinni 3D desktop scanner. The model was EinScan-SE. And to operate the scanner I used the software EXScan-S. Fist thing you have to do in order to operate this scanner is a calibration. This process is quite automated. The scanner has a board with some dots that you have to put in different positions in order to make the right calibration. To finish the calibration, you have to use a white sheet.
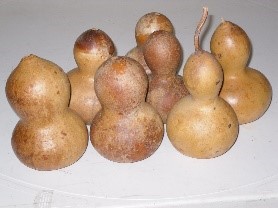
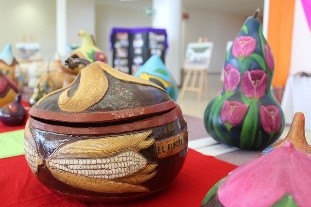
What dis I scanned? It was a seed of the three called Guaje (Leucaena leucocephala), Leucaena, Lead Tree or White Tamarind. The tree grows in the south of México and the north of Central America. Since prehispanic times some seed of this tree were used to make objects such as bowls or spoons. Nowadays some indigenous groups are still using it, mainly to store beverages, food and for decoration purposes.

Once the scanner is calibrated you can star using it just by placing the object over the plate and start making shootings on all sides until you are sure that all is covered. You understand that all is covered because in the previsualization you don’t see yellow dots. When all is painted in blue means all surfaces are covered. Then you unify the model and save it in STL file which is ready to be 3d printed.
The result of the 3d printing with the Ender 5 Pro
*Insert example:
After scanning is very important to clean the moder out of the imperfection.