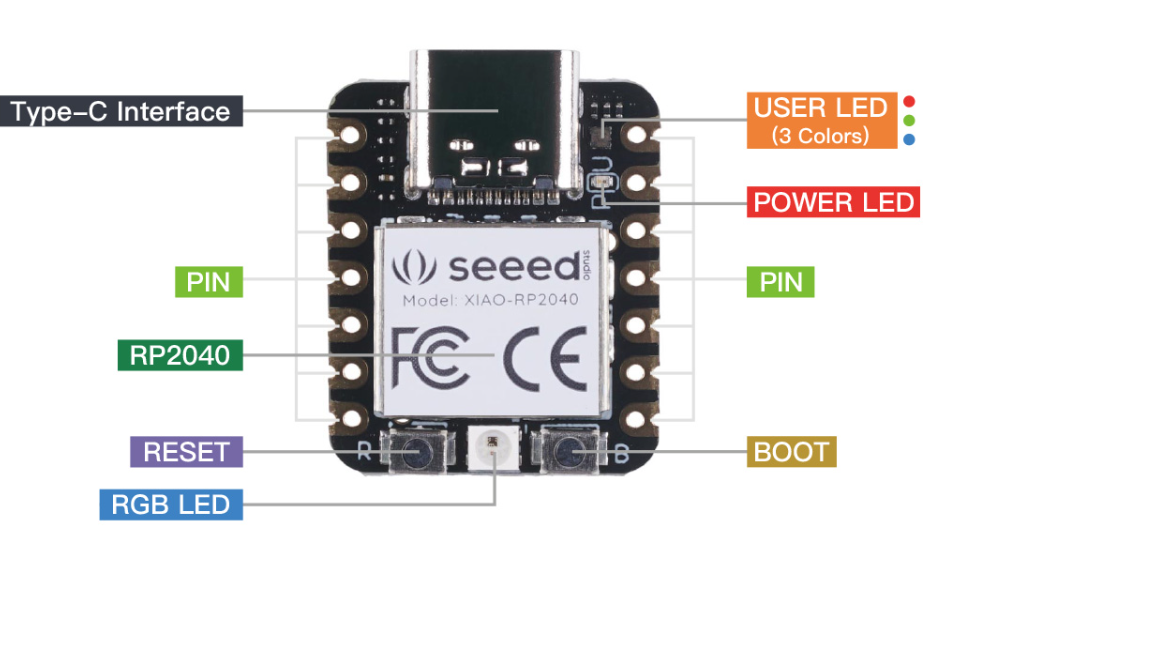
To do this practice I choose the microcontroller XIAO RP2040 and the ESP 32.
 alt="prod_parameters" class="center">
Source: https://www.seeedstudio.com/XIAO-RP2040-v1-0-p-5026.html
The data sheet of the microcontroller: https://files.seeedstudio.com/wiki/XIAO-RP2040/res/rp2040_datasheet.pdf It is 646 pages long. It is divided in V chapters and II appendixes. They go as follow: 1: Introduction, 2: system description, 3: PIO, 4: Peripherals, 5: Electrical and mechanical 6. Appendix 1: Register field types, appendix 2: errata. Since is a quite long data sheet, I decided to have a general overview of the Data sheet and then to have a deeper view on the Introduction chapter. Introduction: This is a Raspberry Pi product. The documentation of the RP2040 was launched on 2020 under a creative commons license. In the introduction the RP2040 is described as follow: “RP2040 is a low-cost microcontroller device with the quality, cost and simplicity of the Raspberry Pi. Much like the Raspberry Pi is an accessible computer, the RP2040 is an accessible chip with everything you need to build a product. The RP2040 is supported with both C/C++ and MicroPython cross-platform development environments, including easy access to runtime debugging. It has UF2 boot and floating-point routines baked into the chip. The in-built USB can act as both device and host. It has two symmetric processor cores and high internal bandwidth, making it useful for signal processing and video. The chip has a large amount of internal RAM but uses external flash, allowing you to choose how much memory you need (Data sheet, 2020: 15). Now I understand that the RP2040 is an accessible cross-platform microcontroller with everything I need to build a product. Its high internal bandwidth makes it useful for signal processing and video. From the introduction of the Data sheet I also learned that the name of the microcontroller says a lot about its capabilities:
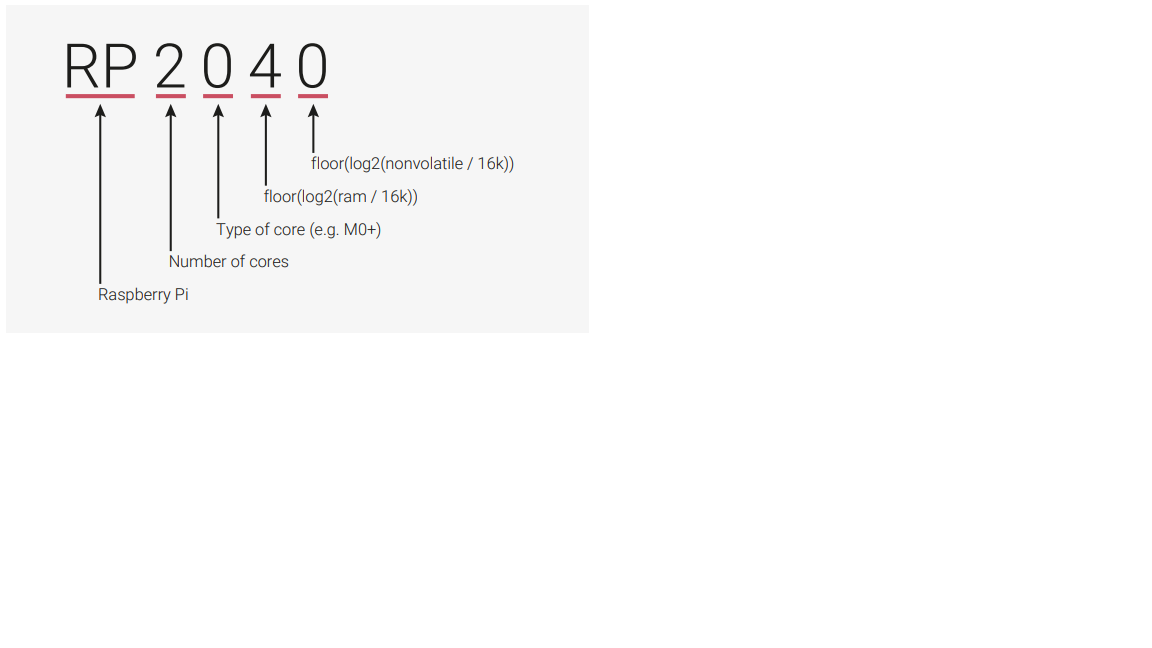
(Data sheet, 2020: 15)
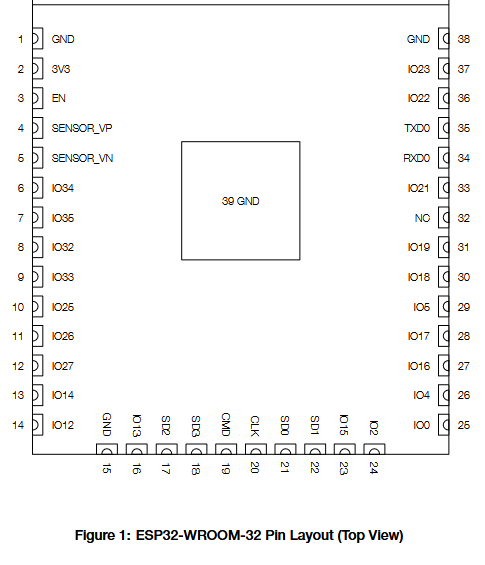
The next section is the Pin Reference and its functions. In the photo of the pin location is possible to observe that there are 56 positions. However, some of them have repetitive names and colors. I guess this is the reason because at the description it is explained the meaning od function of each name: “Each individual GPIO pin can be connected to an internal peripheral via the GPIO functions defined below. Some internal peripherals appear in multiple places to allow some flexibility. SIO, PIO0 and PIO1 can connect to all GPIO pins.” (Data sheet, 2020: 18).
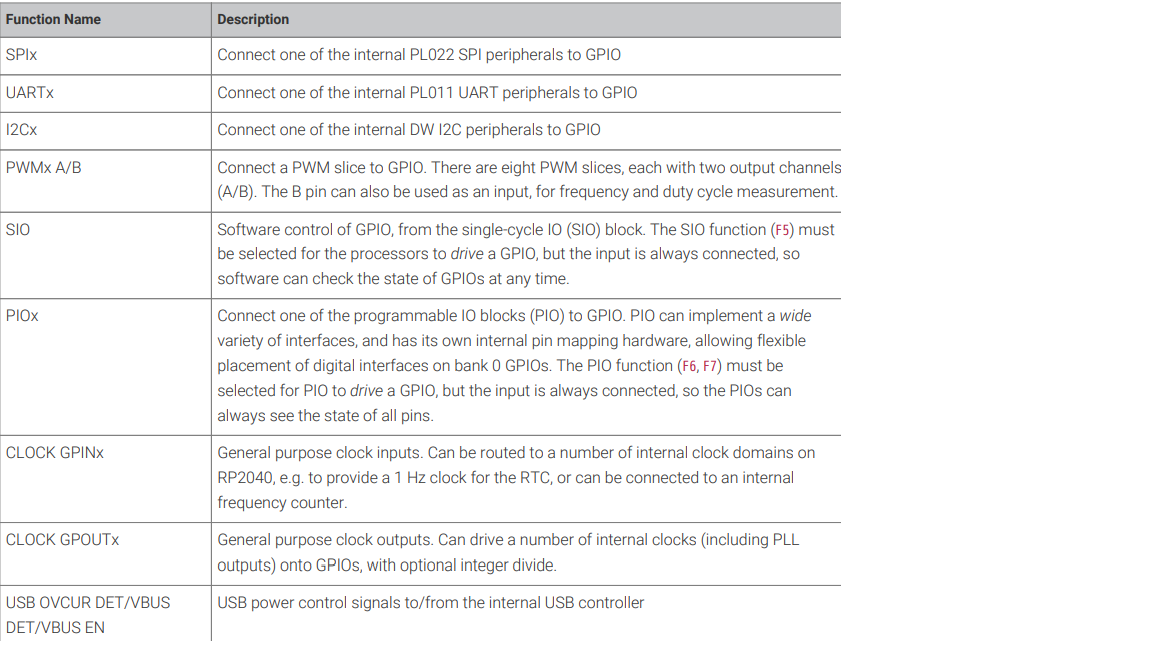
GPIO Function description: (Data sheet, 2020: 15).
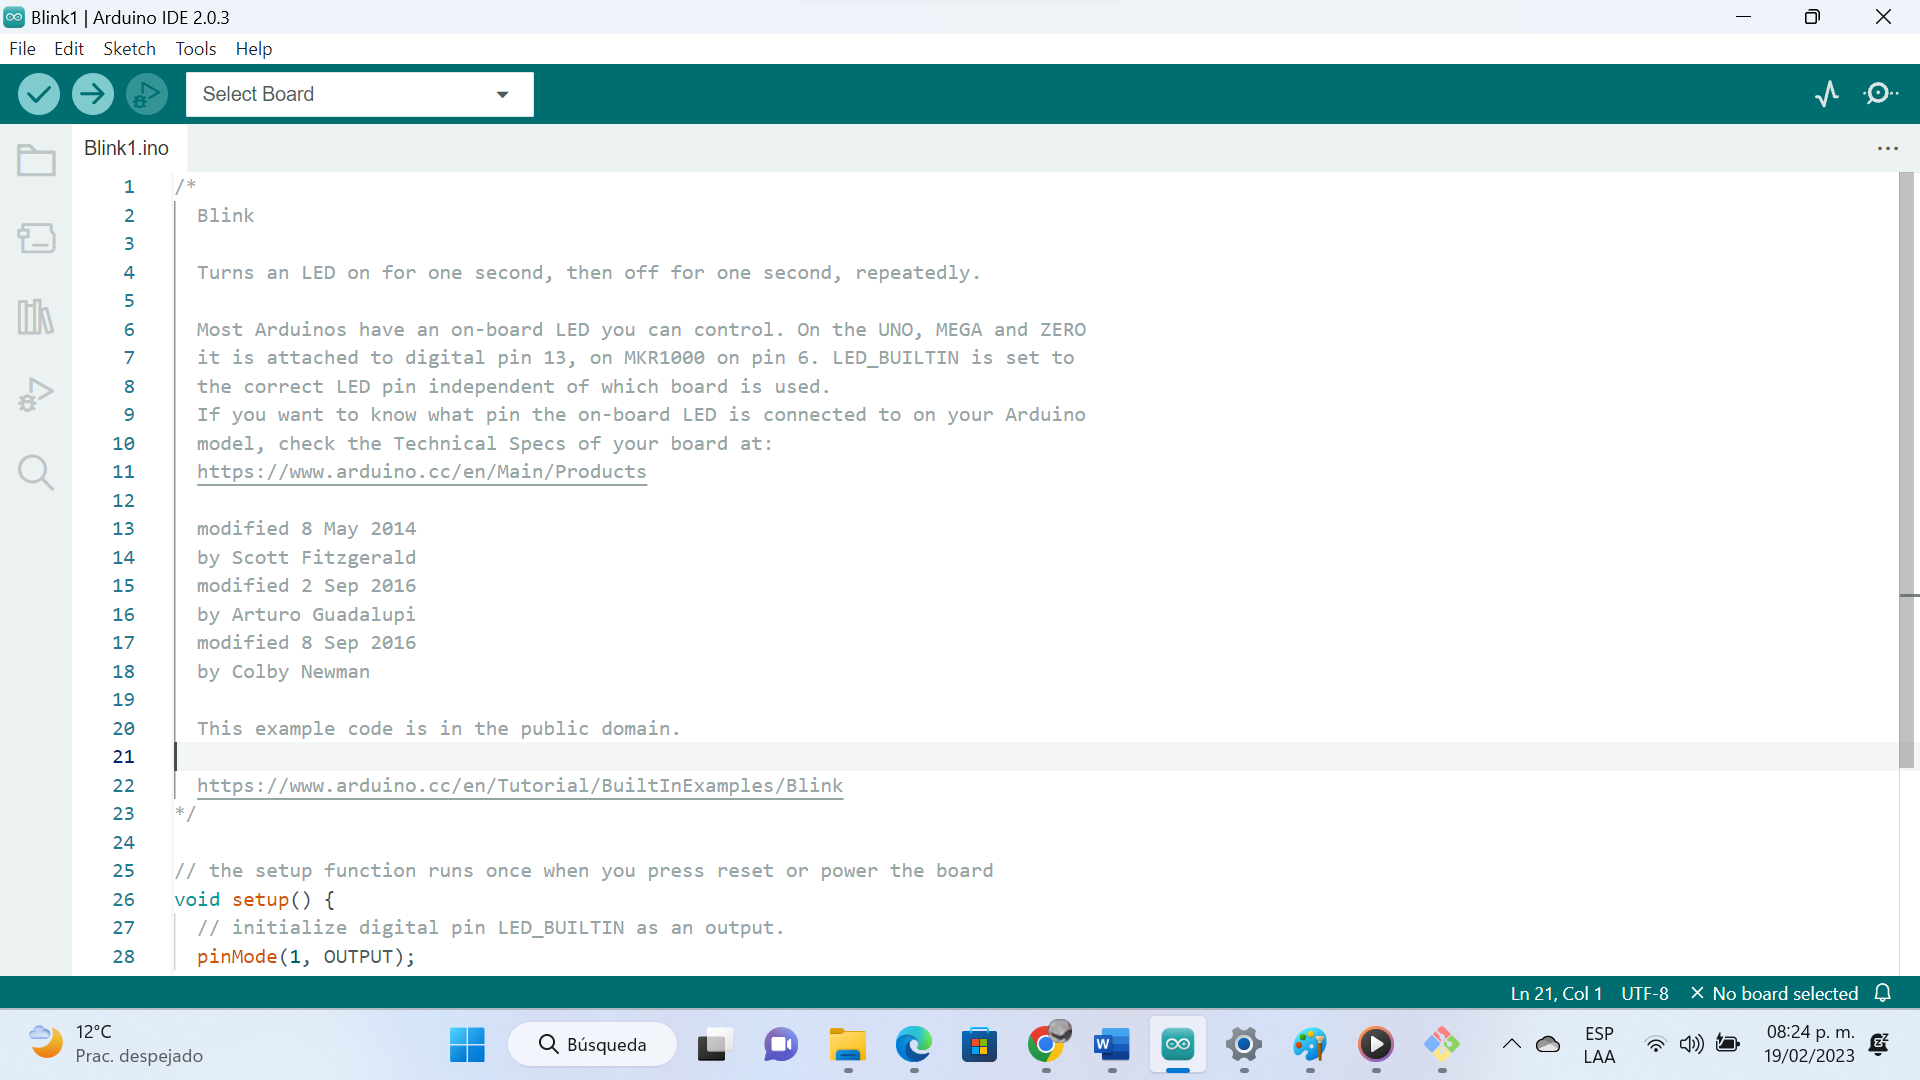
To make this practice I used the XIAO RP2040. First, I connected the boards into my computer using a type C data cable. The recommendation is that if I cannot see the board then I have to unplugged, press to button B (boot) and plug it again. Then I choose and IDE environment. IDE means Integrated Development Environment, which is a software for building applications that combines developer tools into a single graphical user interface or GUI. In this case I decided to work with the latest version of Arduino IDE 2.0.3. This IDE is to program in C. First thing you have to do to work in the IDE is to look for your board in the tools section:
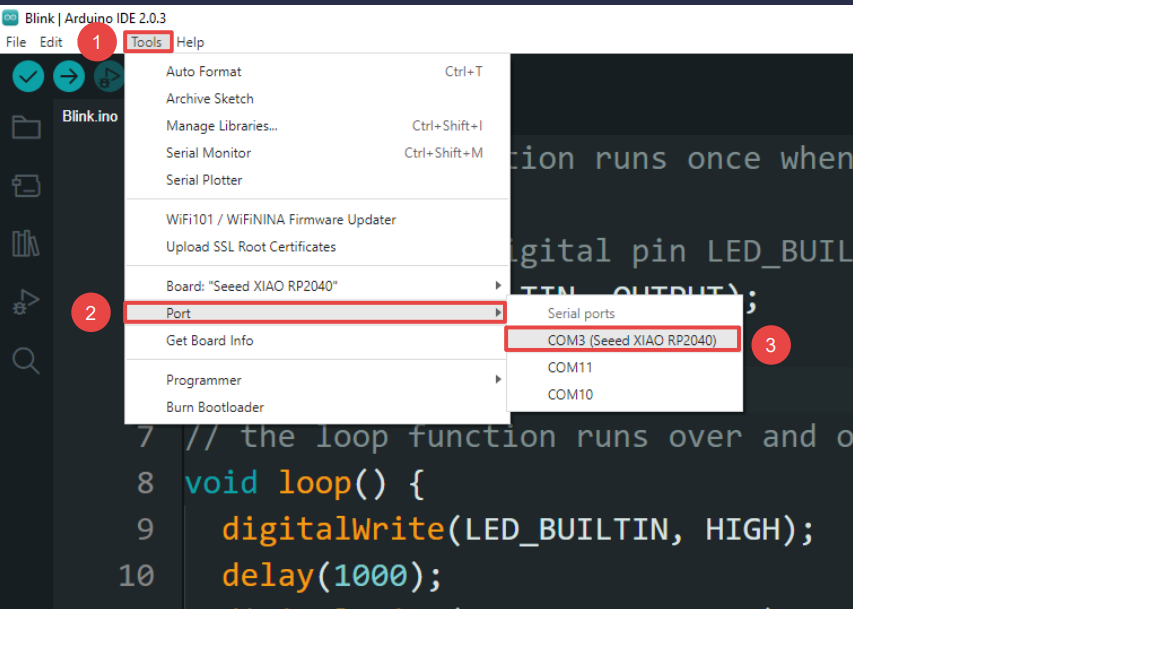
Since the XIAO RP2040 board is not native to this environment, I had to make a configuration in order to make possible for the Arduino IDE to recognize the board. So, you have to go to file, then to preferences, then look for the window settings, board manager and then click into the double blue icon on the right side to add a new one. Once you added the new one you repeat the process: tools, boards, board manager, and we look for our board on the left side and we have to installed. Then we are going to be able to fin it as an optional board. This happens thanks to the use of the boot loader in order to program in C. When I was able to watch the RP2040 I has to look for the COM of my board. Since I has not sure which was it, I had to go first to the Por and then look for the COM. There were a couple of COM. To recognize mine I unplugged the board, so I was able to recognize which port disappeared from the IDE. The I plugged in again and select it. Programing the board: Since this was my first practice, I used an example provided by the IDE.
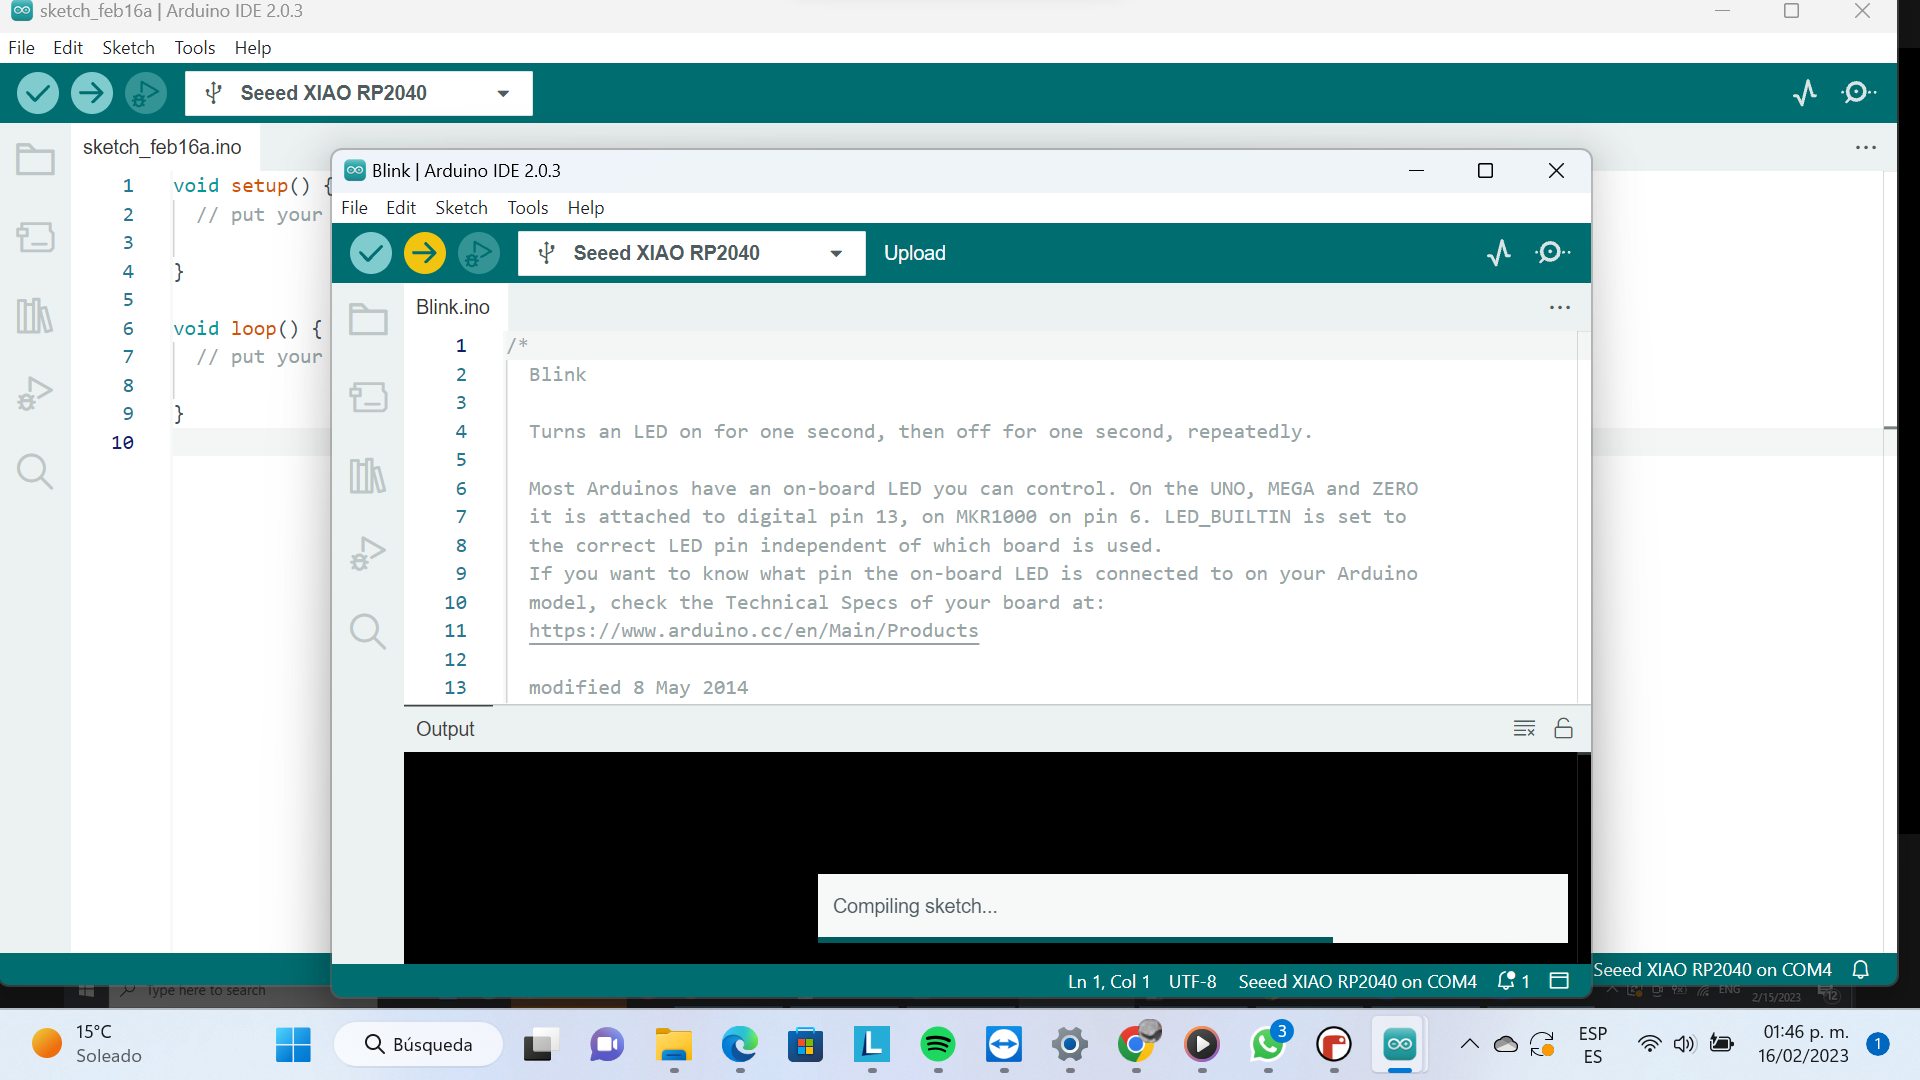
For this example I had to go to file, examples, basic and then I choose the basic blink example. The program was uploaded automatically and then I was able to modify some of the blinking parameters, for example to slow down or make the blinking faster going from 1000 to 100. To do so I had to compilate, so I when to the tool, board, and then to the COM, once there I click on the arrow to compilate.
According to the Datasheet of the SP32-WROOM-32 is a powerful, generic Wi-Fi + Bluetooth® + Bluetooth LE MCU module that targets a wide variety of applications, ranging from low-power sensor networks to the most demanding tasks, such as voice encoding, music streaming and MP3 decoding [...] The integration of Bluetooth, Bluetooth LE and Wi-Fi ensures that a wide range of applications can be targeted, and that the module is all-around: using Wi-Fi allows a large physical range and direct connection to the Internet through a Wi-Fi router, while using Bluetooth allows the user to conveniently connect to the phone or broadcast low energy beacons for its detection (Darasheet ESP32-WROOM-32: 2023, 1). in principle I was thinking to use the ESP32 for my finalproject becuse the wi-fi and bluetooth facilities wich makes easy communication for the deveices I am planing to develop. However I am still trying to understand what is the best option since my devices will be thousands of kilometers away one from eachother.