Install the library with the terminal
First we check the Python version and create a new folder to store our files. Then we create a virtual environment (python3 -m venv venv)(sourse venv/bin/activat). To install the library is (pip install PyQt5").


This week we work with interfaces so that we can work with sensors in our final project. We work with PyQT, QT is C++ that can work for the Python language through libraries. We also saw the part of the graphical interface and the structure.
First we check the Python version and create a new folder to store our files. Then we create a virtual environment (python3 -m venv venv)(sourse venv/bin/activat). To install the library is (pip install PyQt5").
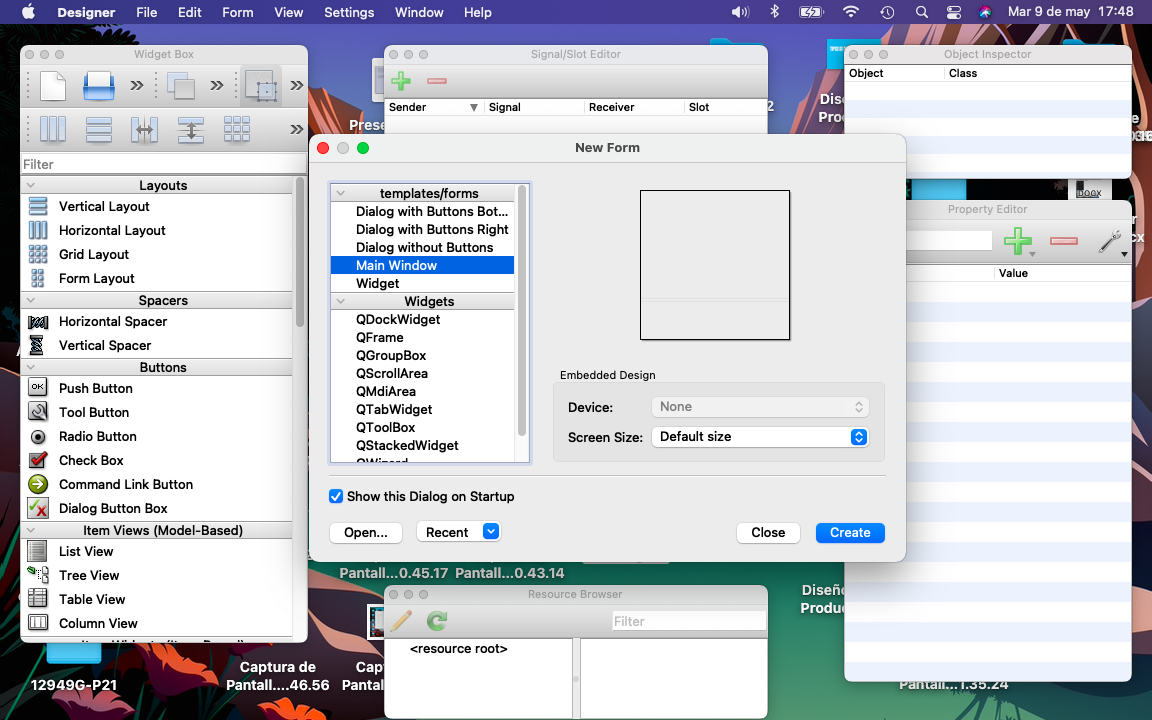
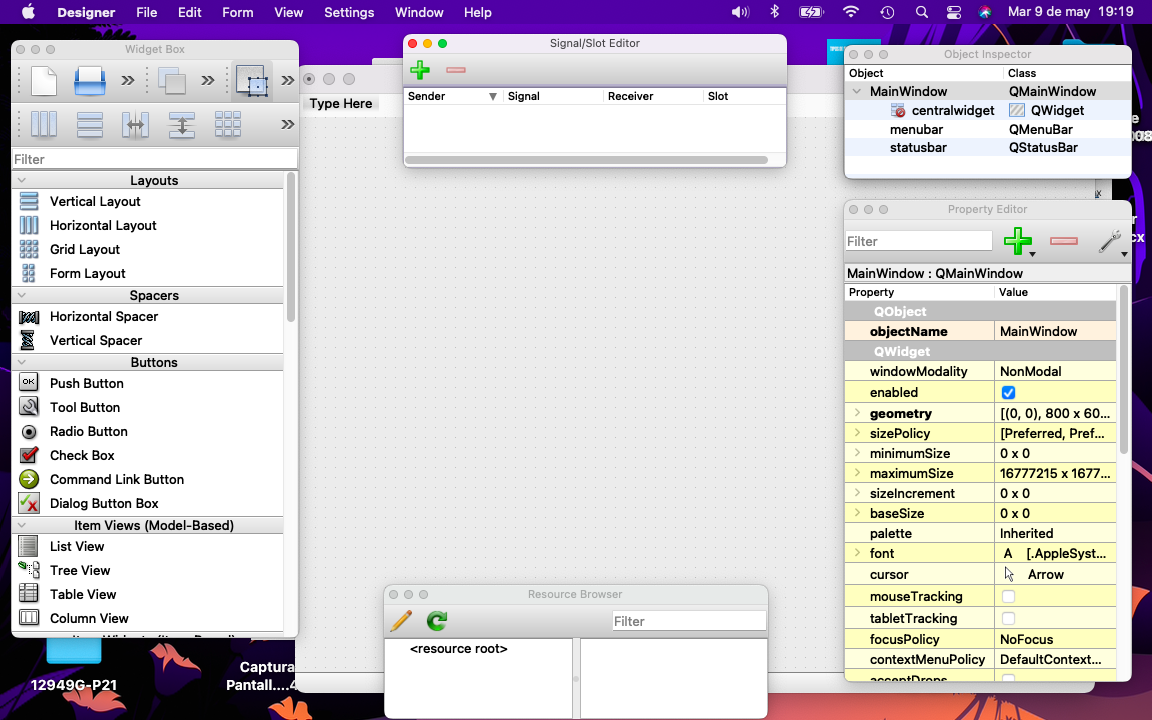
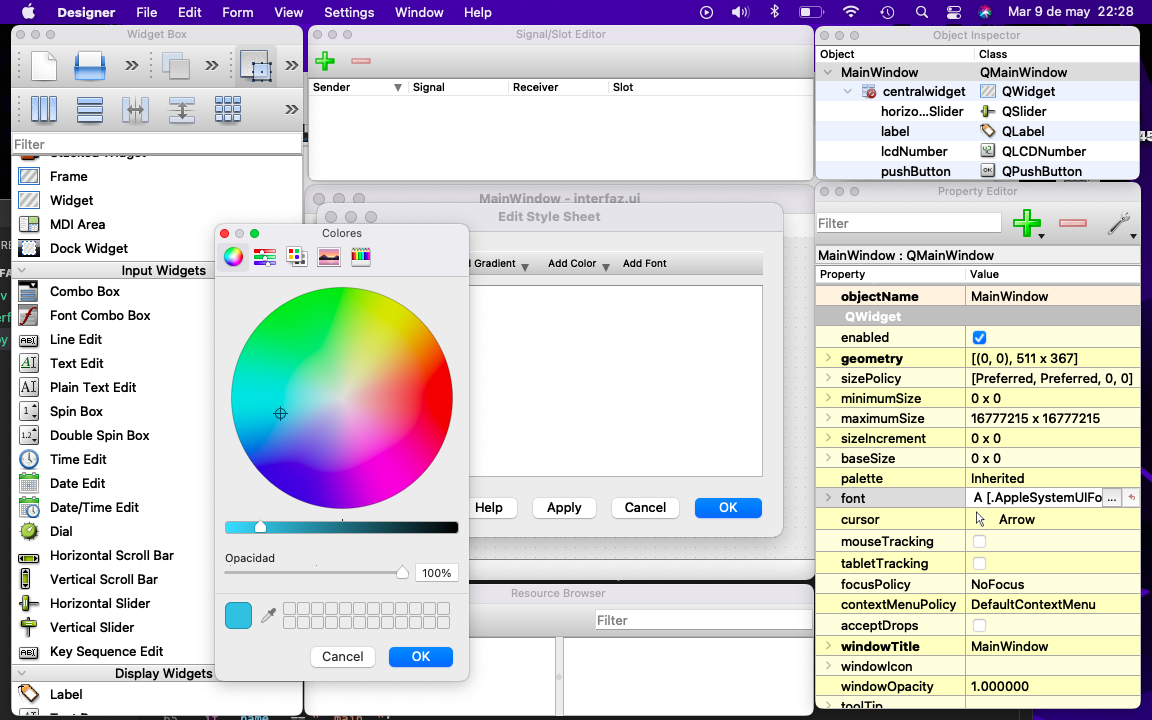
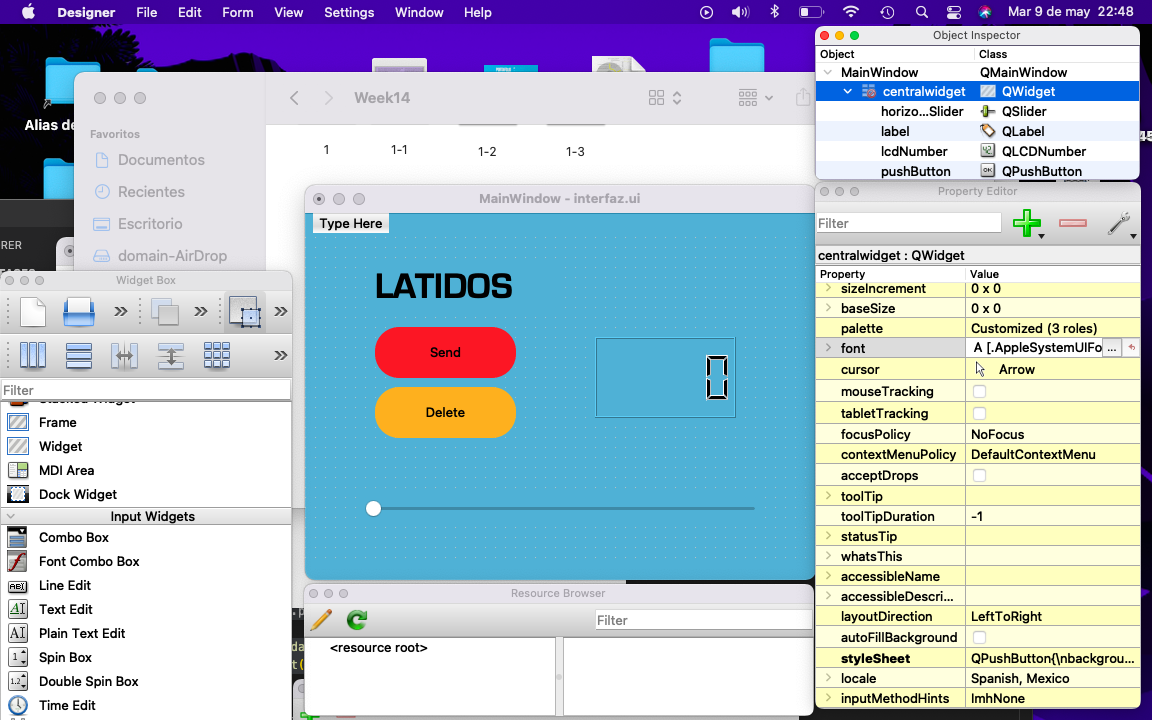
Qt is a software that creates interfaces, which due to its interface allows us to use "widgets" like buttons and other prefabricated tools. To start a new project it is important to use "Main Window".
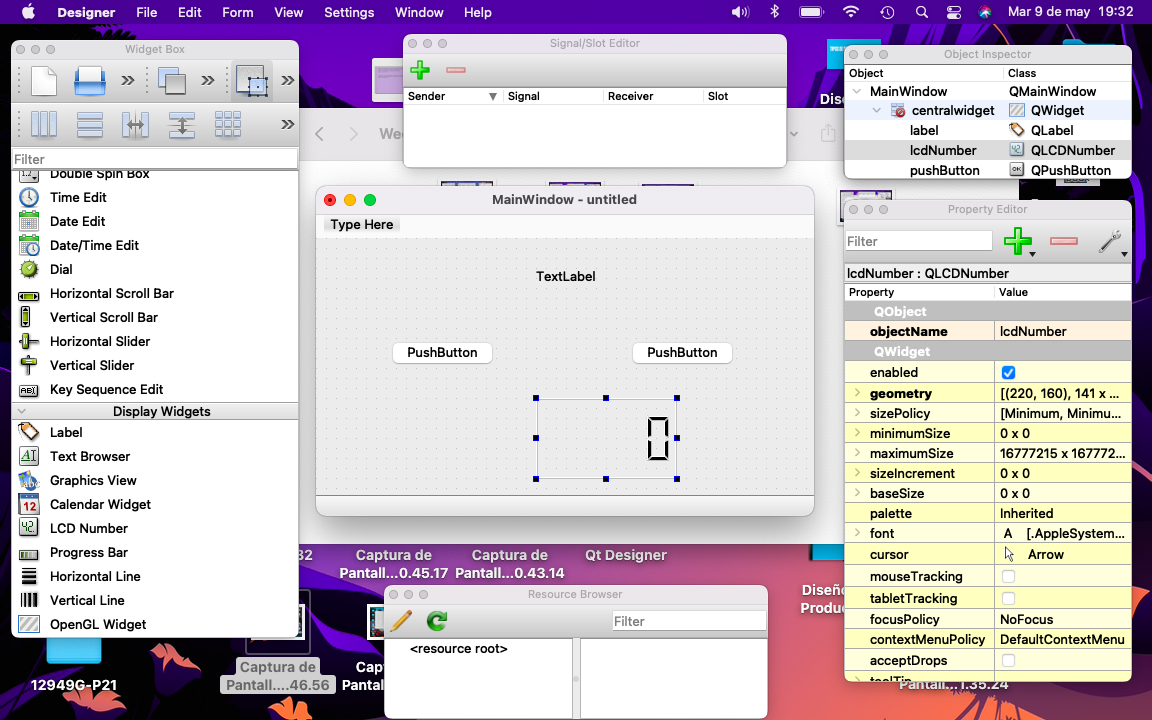
I started with the example our instructor taught us, we use buttons, labels and other widgets.


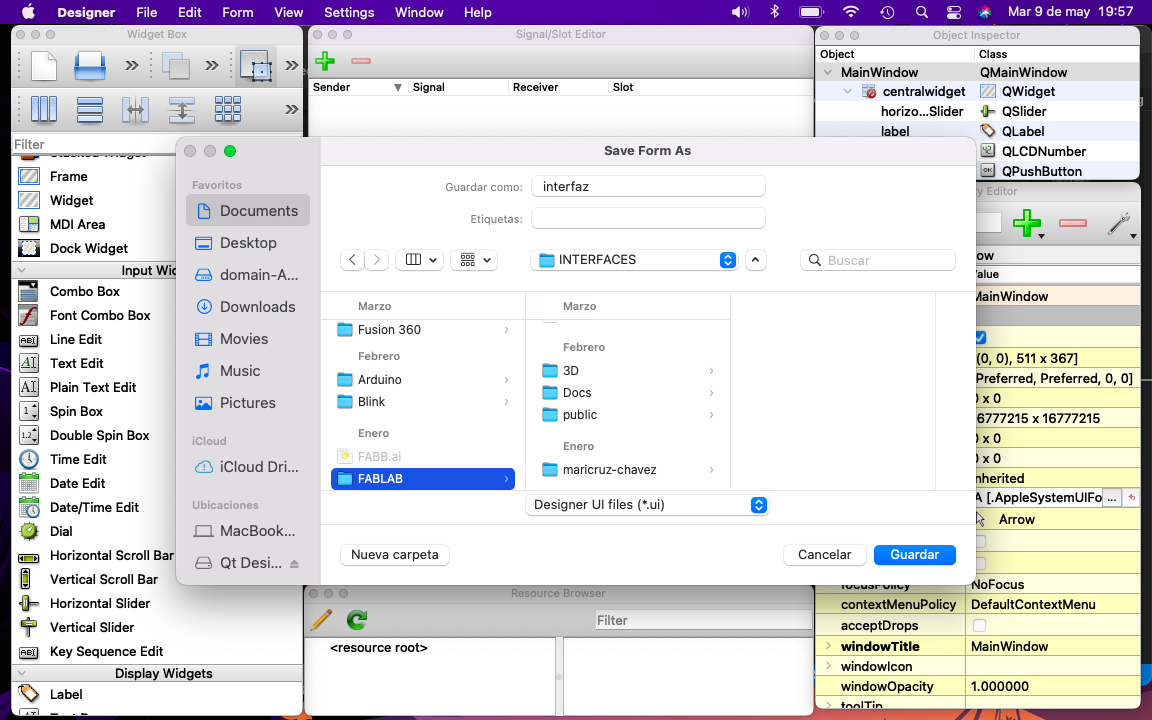
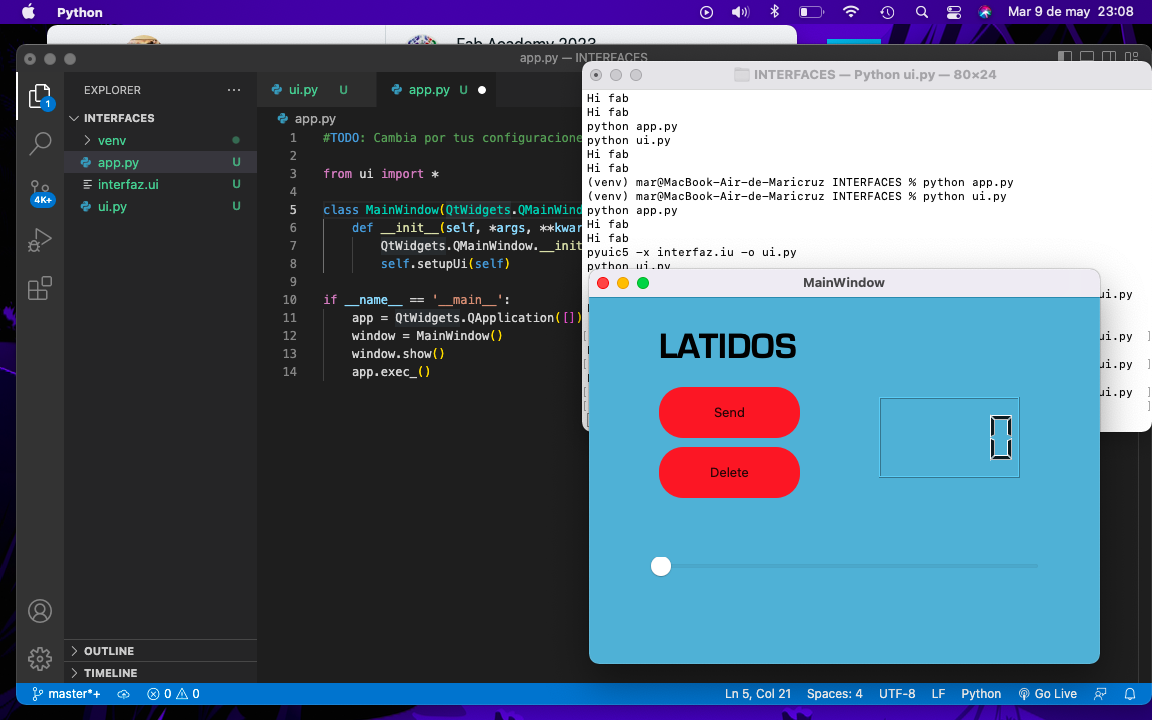
To preview our work, we use "cmd+R" for mac. Save my project for the next steps.
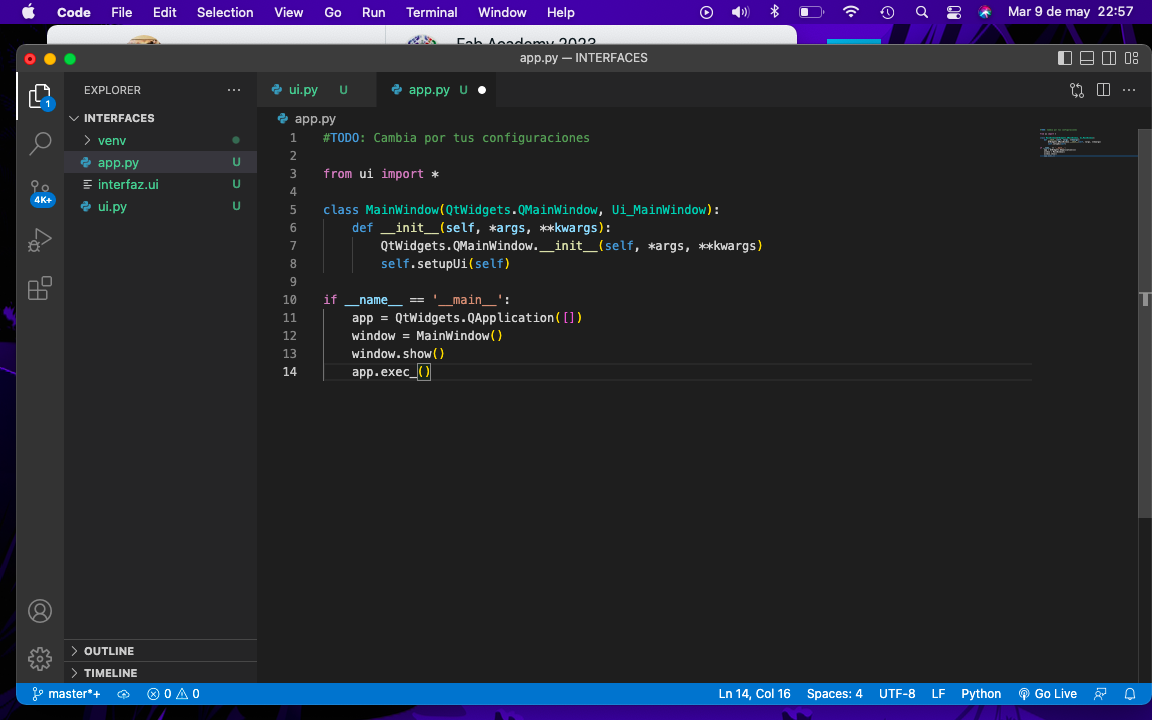
I opened my project folder in Visual Studio Cove, where the "xml" language was visible. To use it in the Python language, I go back to my terminal and enter the following command: (pyuic5 -x "name".ui -o "new name".py).
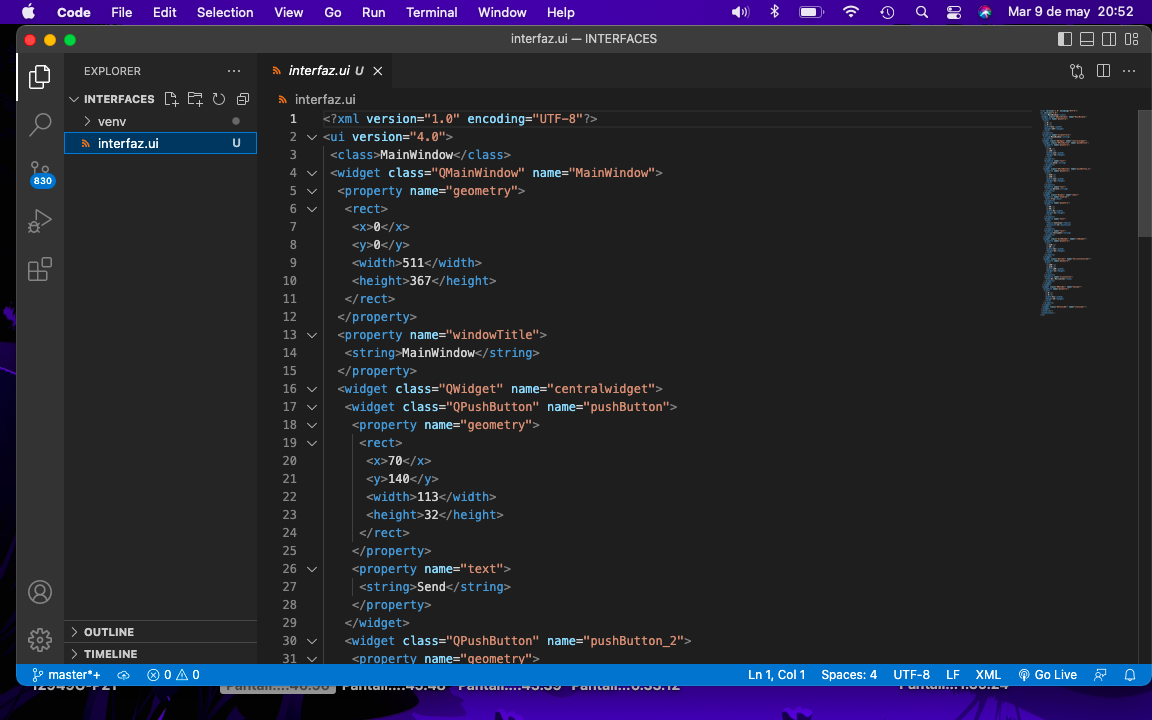
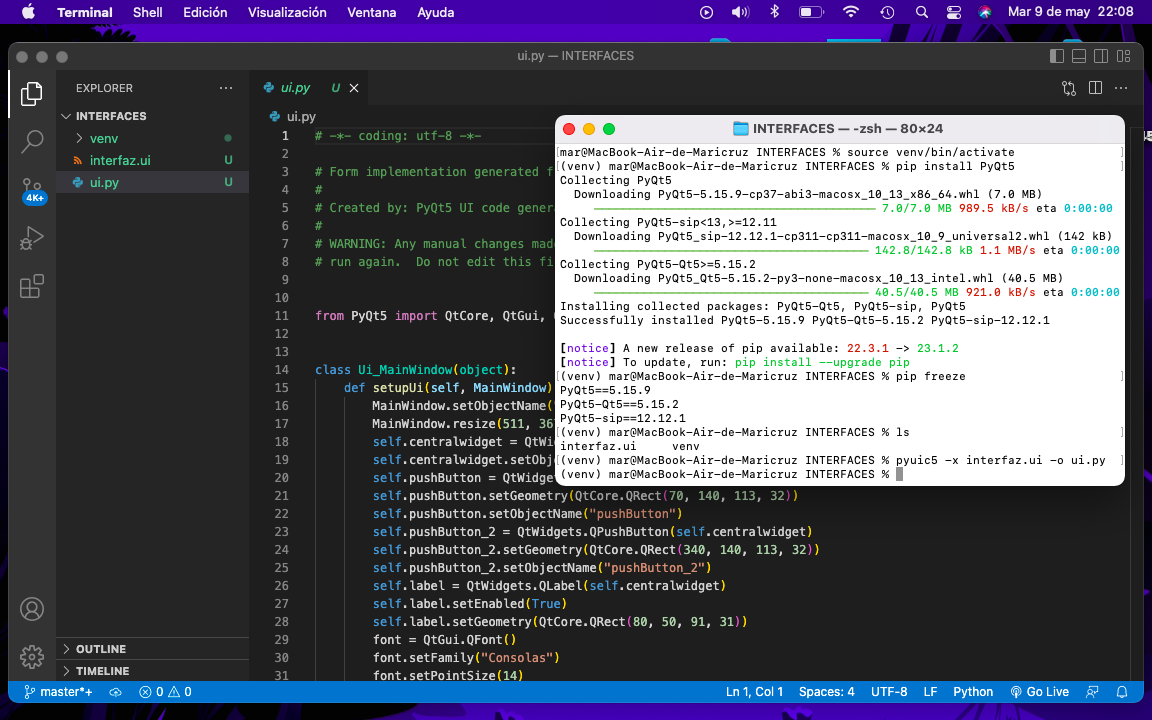
To run my project from the terminal, use the following command: (pyuic5 -x "name".ui -o "new name".py) (python ui.py). To test the language with python, we made some changes.


I gave a new format to the design of my project with colors and shapes.

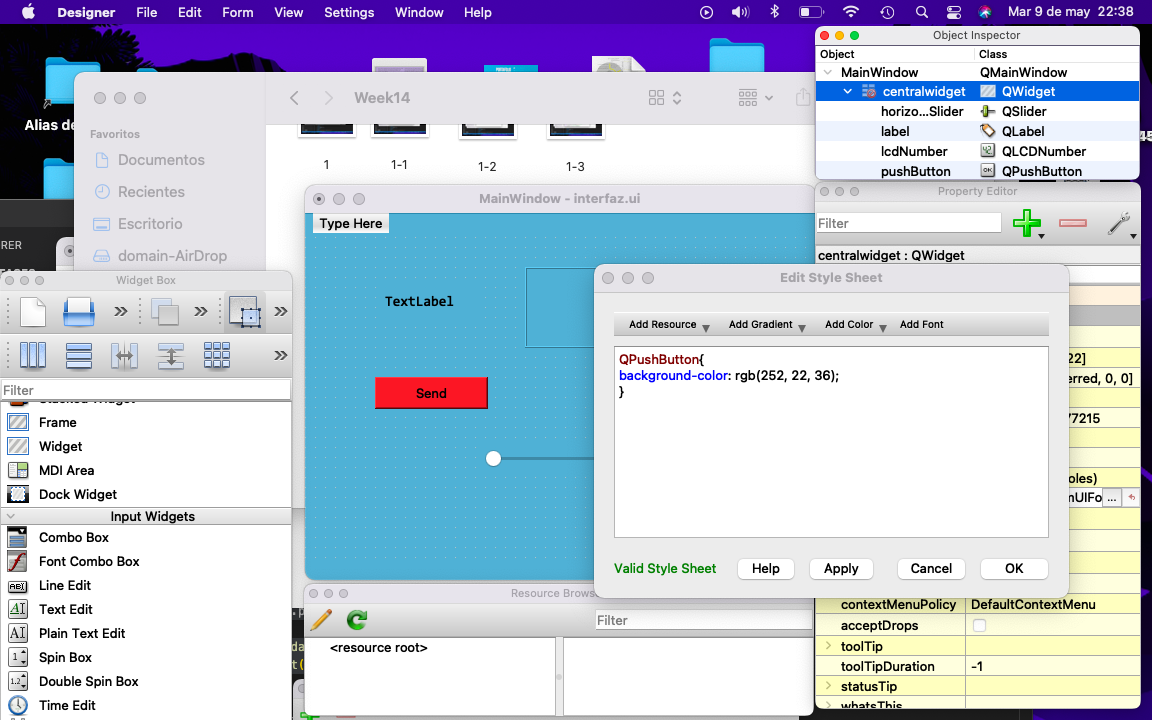
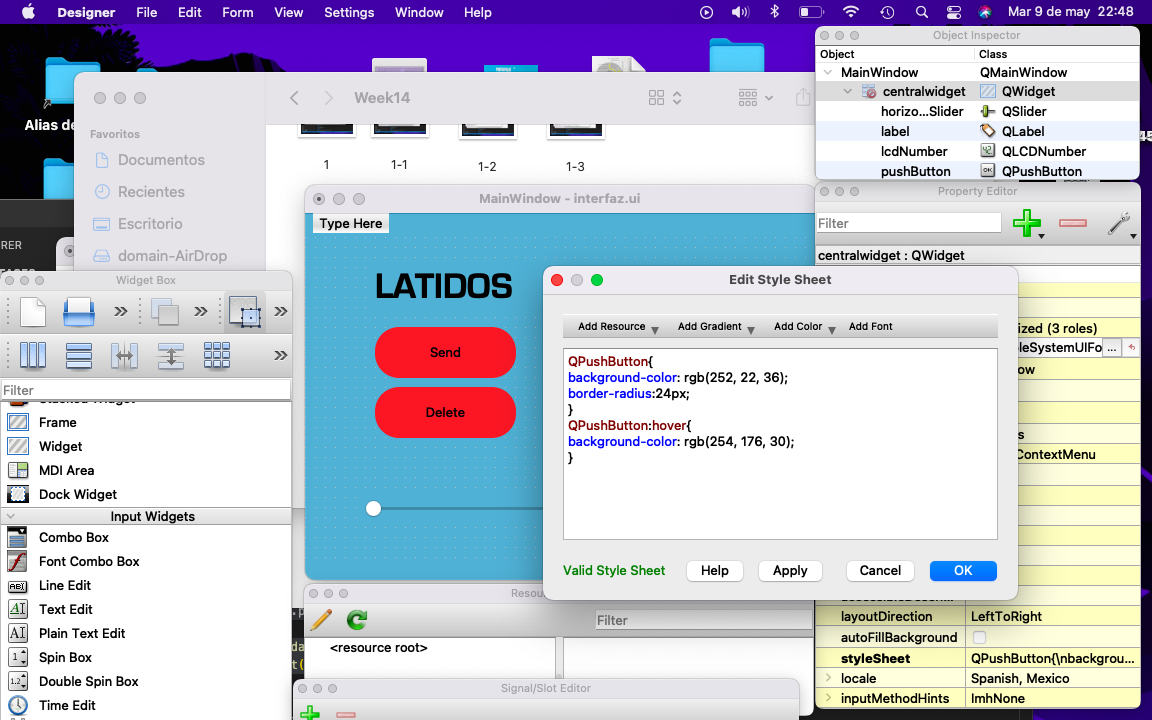
In order for QT changes to be updated, it is important to have a separate file for the design logic and another for the format.
Taking into account the data of my program, I made a base program in Visual Studio Code with the support of my instructor Rafa, this program has the data of my USB port as well as my Serial, it also has the data of the range of 9600, which I had already programmed in week 11 (Input devices).
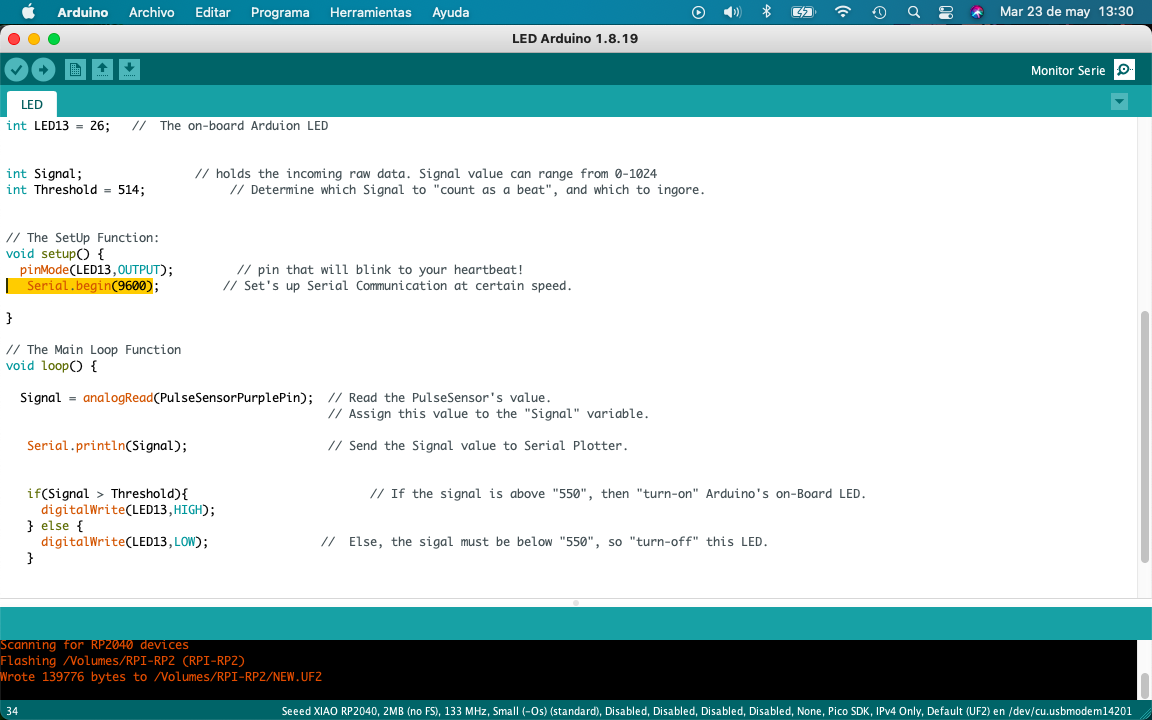

I had quite a few errors, when I already passed my data to my app.py program.
It is important to check the data and if the libraries to be used exist, the important one in this case is: pip install pyserial.
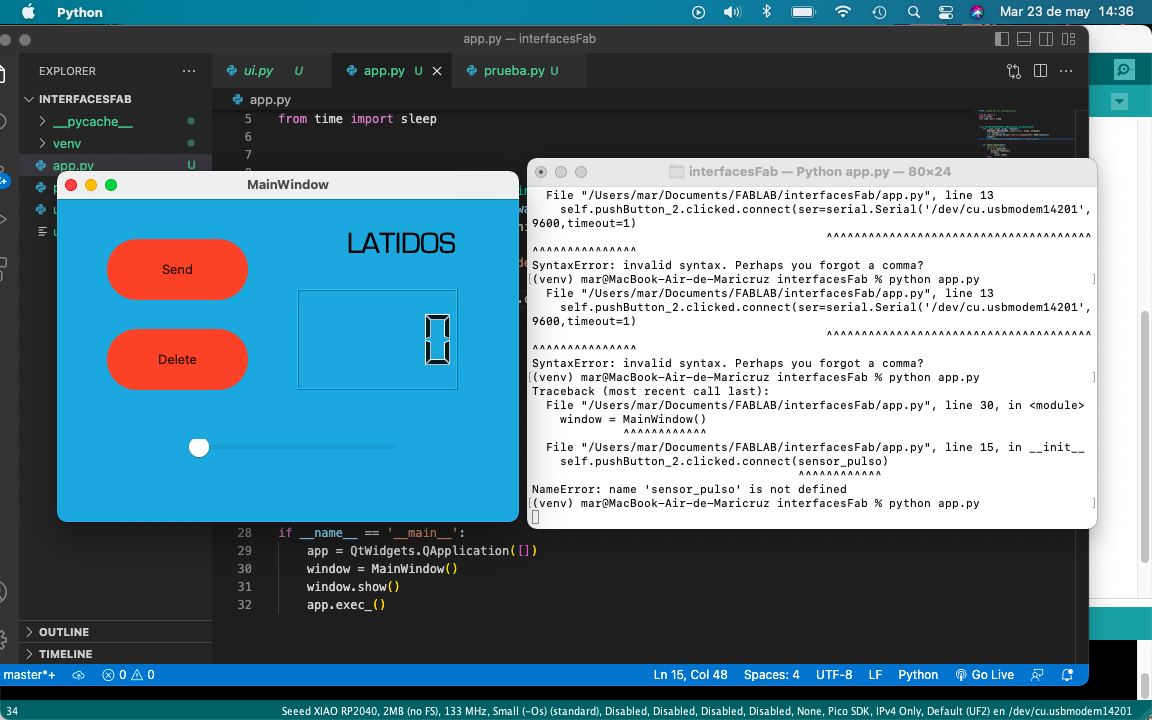

Lastly, my instructor told me that the read had other data from using my USB port, so I had to add the command: data.decode.

I added new instructions in my file to activate the buttons and the slider in real time with my heart rate sensor.
| Add new instructions. |
|---|
| from ui import * |
| import serial |
| from time import sleep |
| from PyQt5 import QtWidgets, QtCore |
| Add new variants. |
|---|
| self.setupUi(self) |
| self.anterior = 0 |
| self.tope = 500 |
| self.ser=serial.Serial('/dev/cu.usbmodem14201',9600,timeout=1) |
| sleep(2) |
| self.pushButton_2.clicked.connect(self.activate) |
| self.pushButton.clicked.connect(self.desactivate) |
To link my "receive" button I established its connection with the sensor and the arduino id.
Button 2 will be activated to deactivate the action of receiving data.
| def activate(self): |
|---|
| self.timer = QtCore.QTimer() |
| self.timer.setInterval(50) |
| self.timer.timeout.connect(self.sensor_pulso) |
| self.timer.start() |
| def desactivate(self): |
|---|
| self.timer.stop() |
I added an "if" to show if the value is greater than 510, the horizontal will "supere umbral" and trigger.
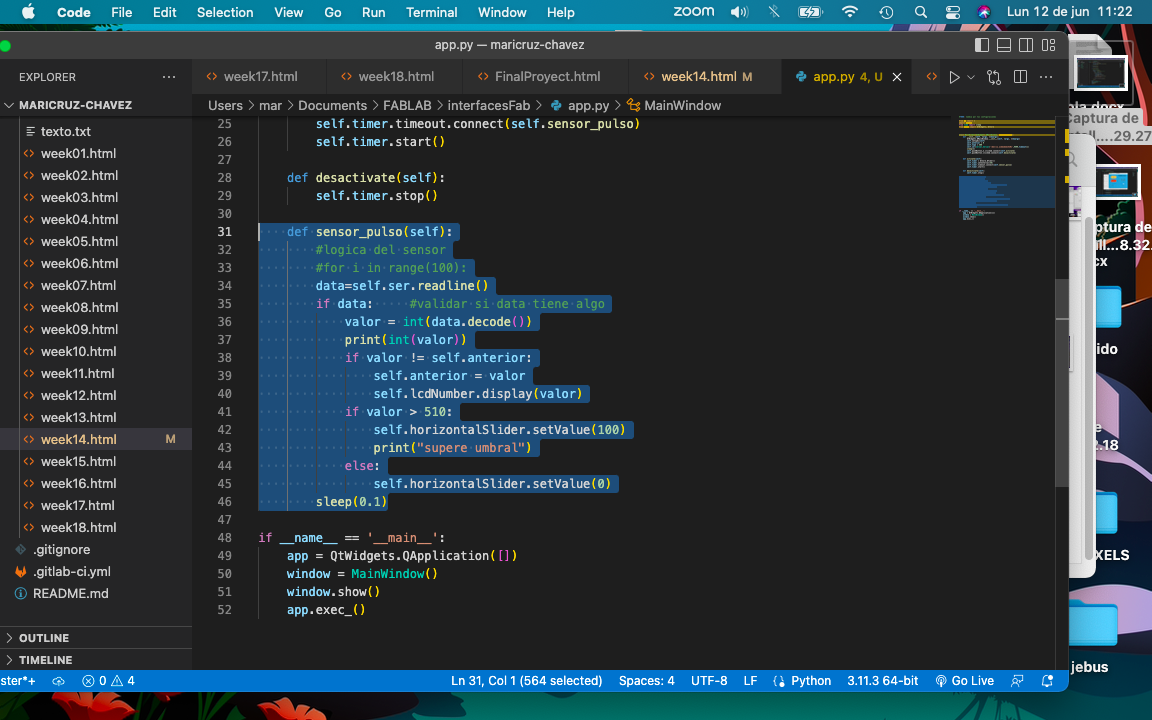
Lastly, my instructor told me that the read had other data from using my USB port, so I had to add the command: data.decode.
This was quite a challenge, I really appreciate the patience of Rafa, my advisor, but the interface design is very broad.