Networking and Communications
Week 13 - Documentation
This week we are working with networks and communications. The idea is to connect our projects to the rest of the world, one step forward to robot domination! Although, a very super tiny step, because in here we are just turning a led with Wi-Fi… jajaja but it is still progress.
Individual Assignment
“Design, build, and connect wired or wireless node(s) with network or bus addresses.”
My microcontroller to go through this Fab Academy has been the esp32, and given its specifications, its logical to use Wi-Fi as the communication protocol, and that's exactly what I'm going to do.
My warmup program will be the inevitable turn on-off led, but with a spicy variation, we will use Wi-Fi!
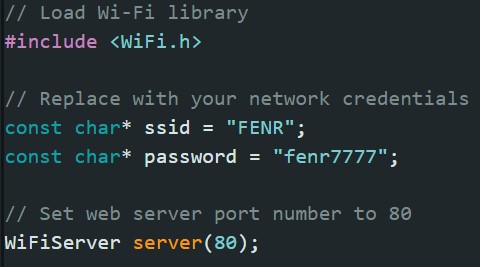
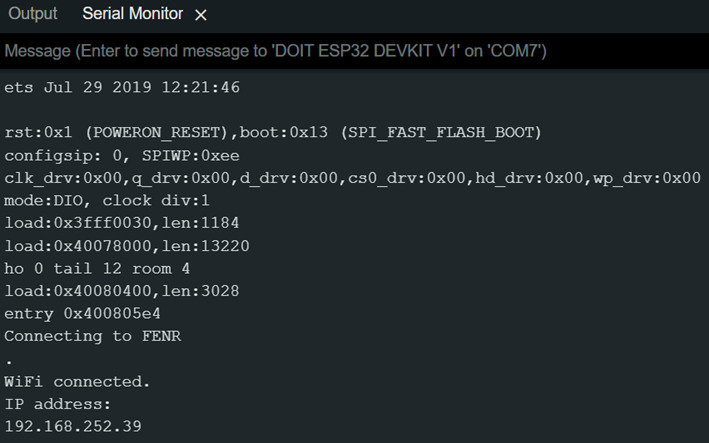
Next, we will discuss a bit of the code use to turn on and off a led by creating a web server. You need to include the Wi-Fi library and set the network name and password.
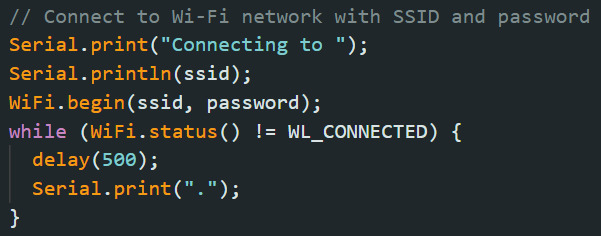
In the setup you will initialize Wi-Fi connection.
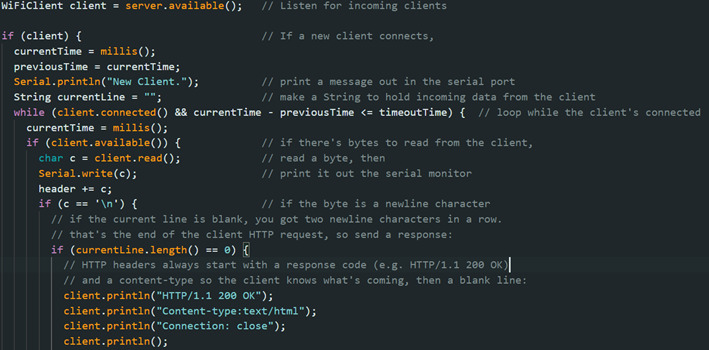
In the loop, send and get the data established in the network connection.
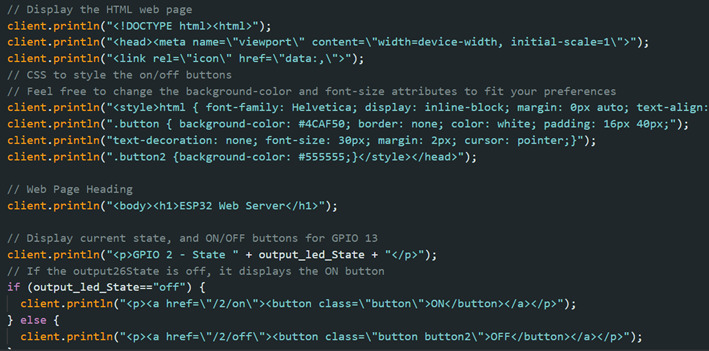
You can also set your web page:
After downloading the code, we get the IP address of the web page:
This is the resulting web page:
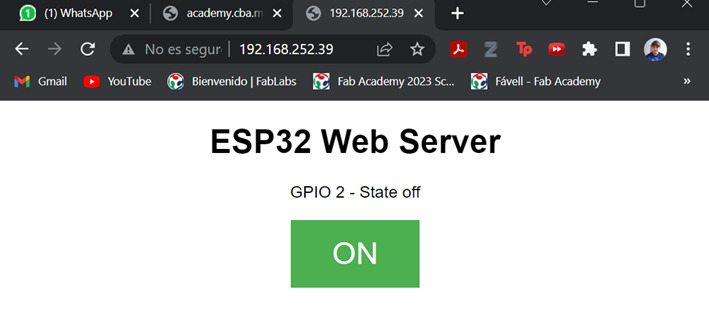
And here we have the network working:
Group Assignment
“Send a message between two projects.”
Ok… we have a problem here. I'm in Honduras and my classmates are in México. So, I can't connect with them. So that's it for this week folks…
I wish it was like this, but Fab Academy won't have me have a relaxed week, right? No!

Well, I can't connect with my classmates' projects, so I will connect with the world (evil laughter) and give Terminator the power of a finger. Literally…
My group assignment will consist of being able to move a finger of the pianonator through Whatsapp, so that anyone around the world can connect with it.
Steps
Here we have the step-by-step to run the Whatsapp reading code in my circuit.
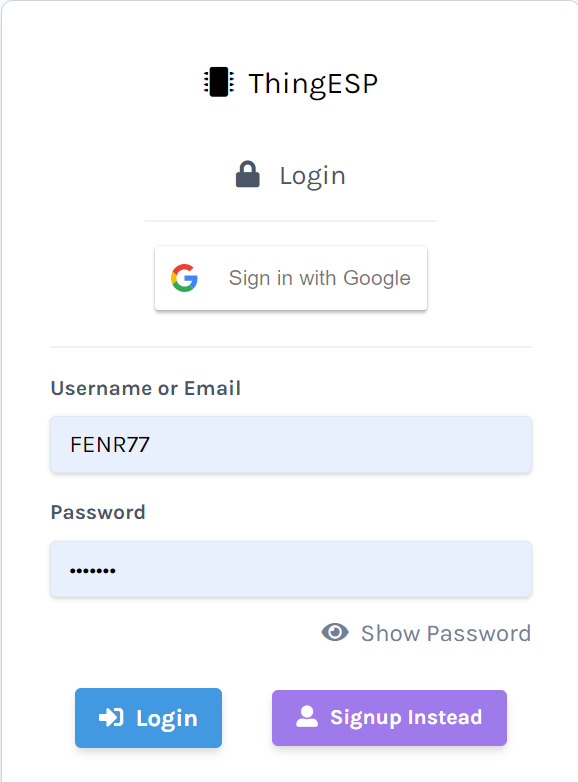
Step 1: Create an account on ThingESP and login.
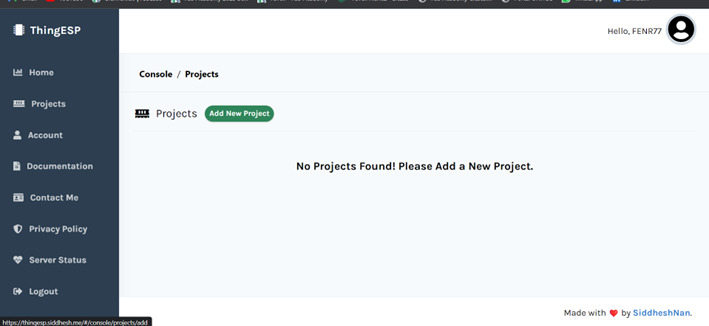
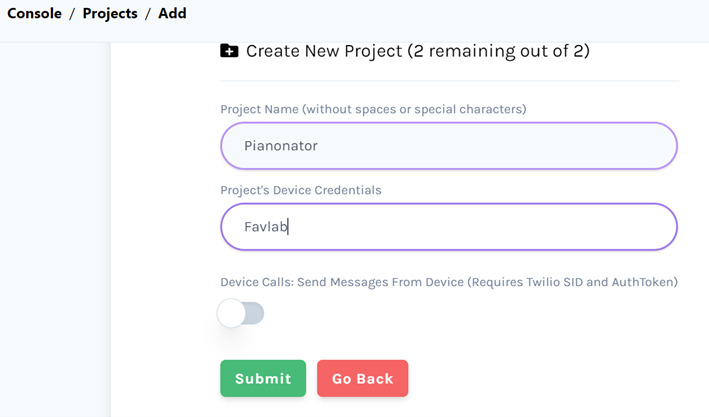
Step 2: Go to Projects and add a new project.
Step 3: Create your Project.
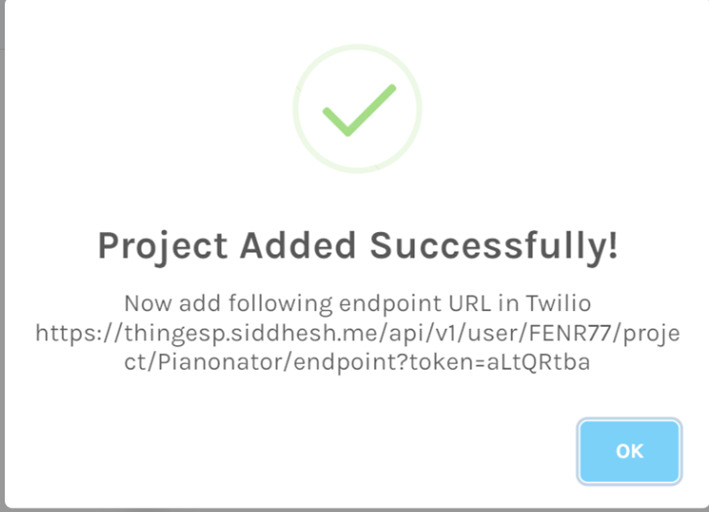
After clicking in Submit the project will be added successfully.
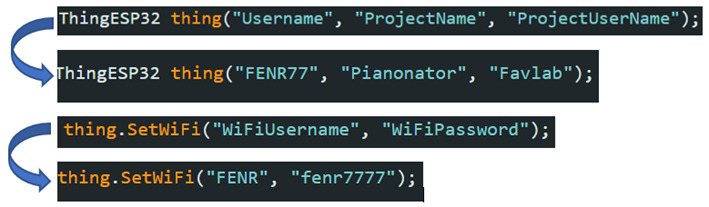
Step 4: In your code define the network parameters:
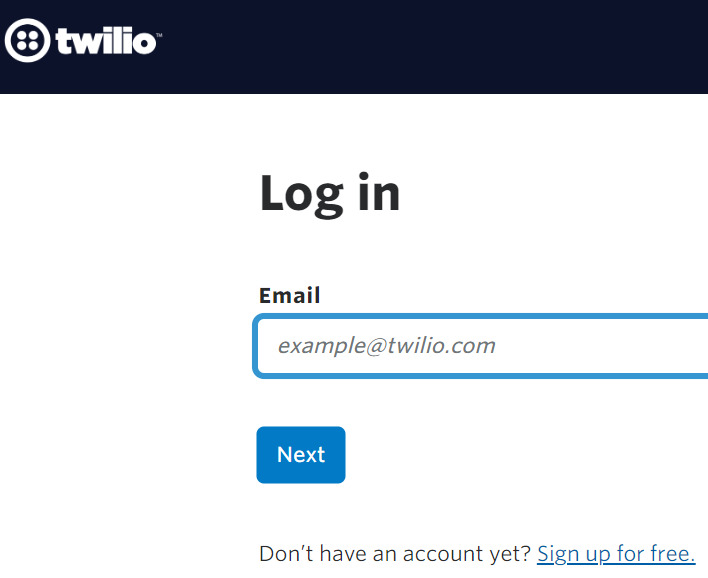
Step 5: Create an account on twilio and login.
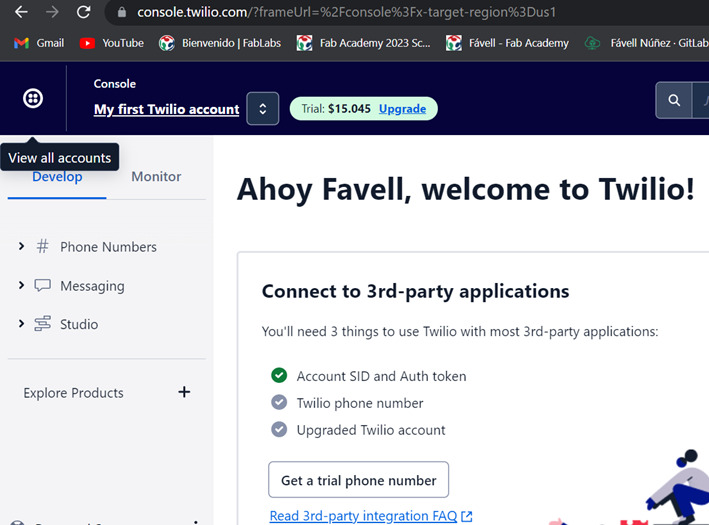
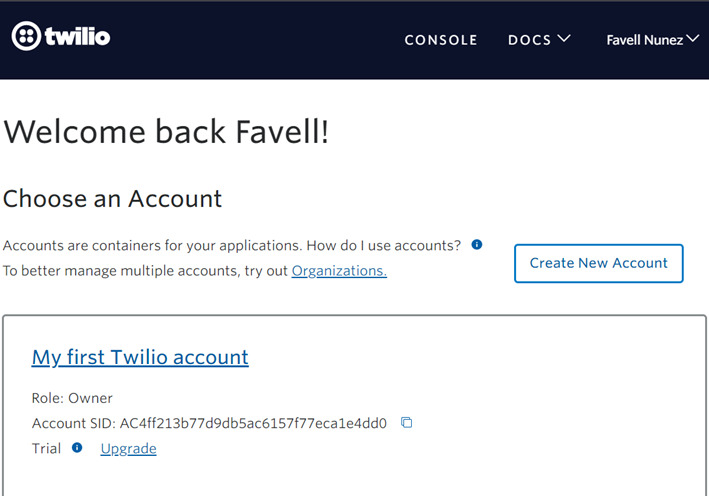
Step 6: Go to “View all accounts”.
Step 7: Create a new account.
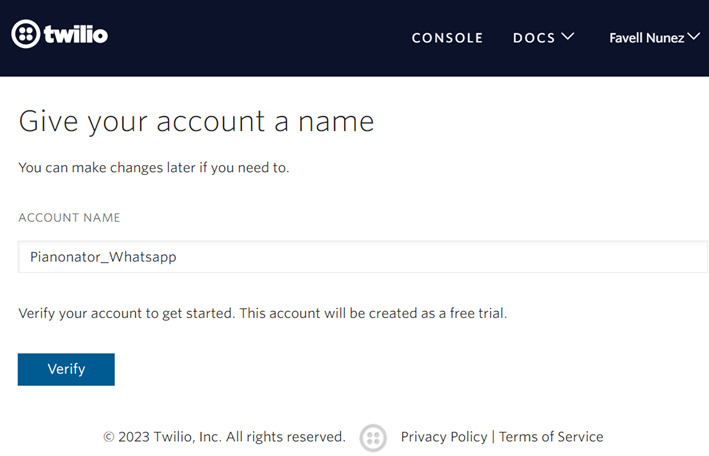
Step 8: Give your account a name and verify it.
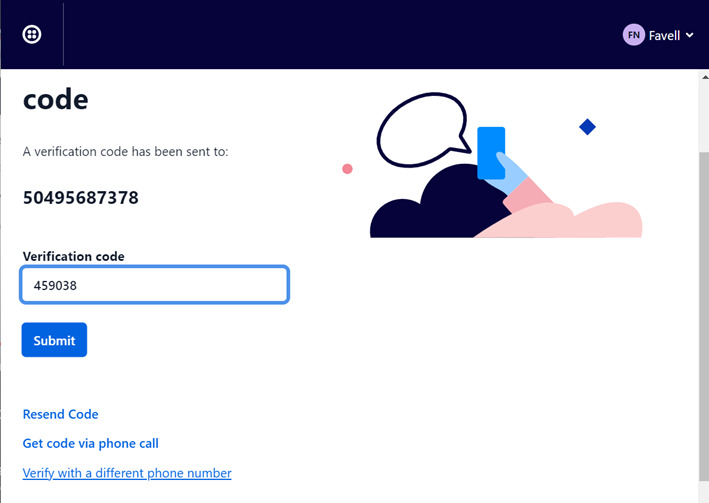
Step 9: Enter your phone number to get a verification code.

Step 10: Enter the verification code you received in your phone.
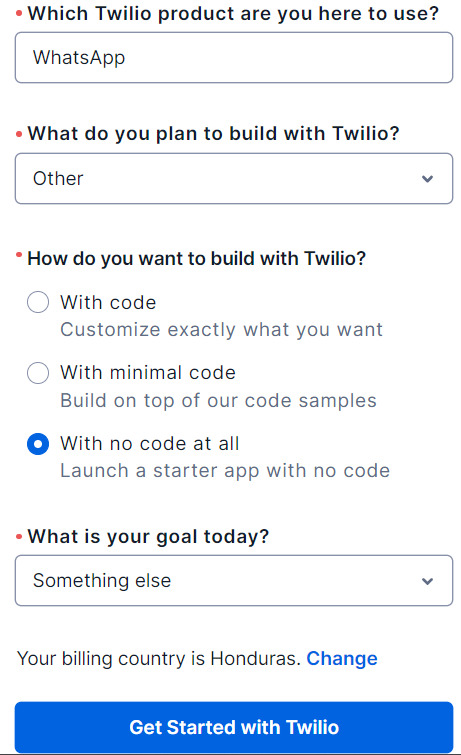
Step 11: Select Whatsapp as the Twilio product to use.
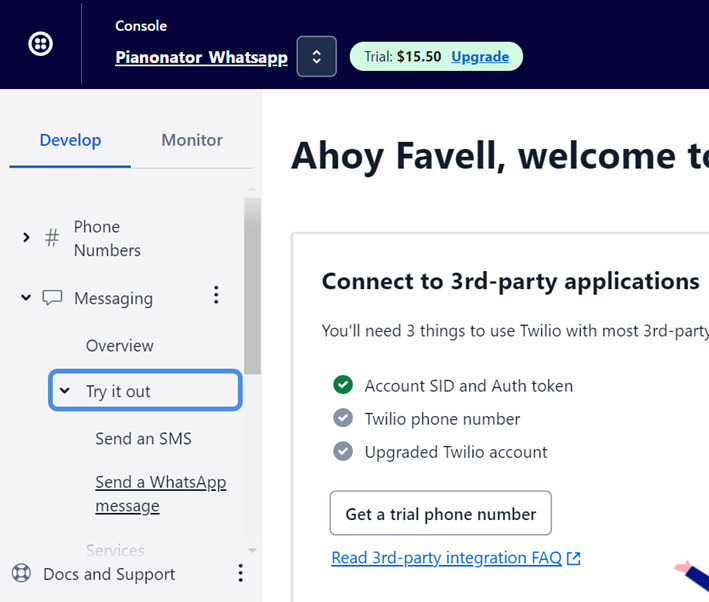
Step 12: Go to Messaging > Try it out > Send a WhatsApp message.
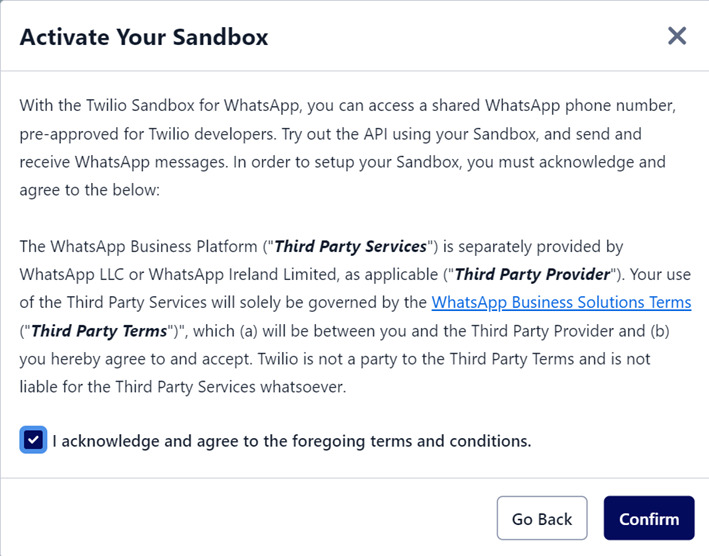
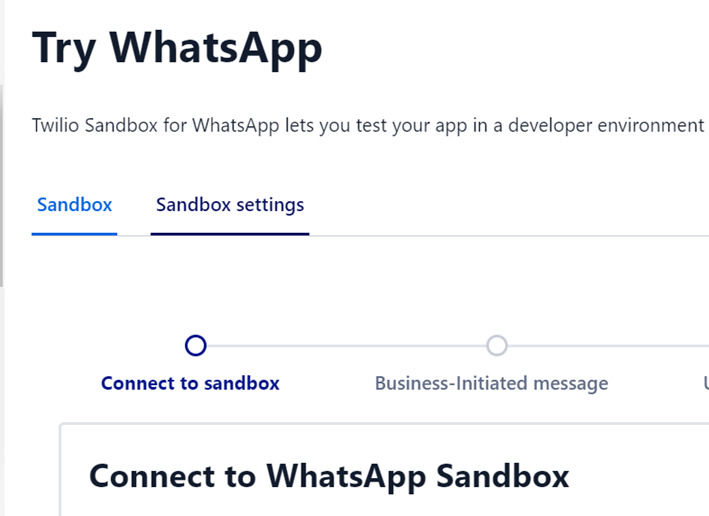
Step 13: Activate your sandbox.
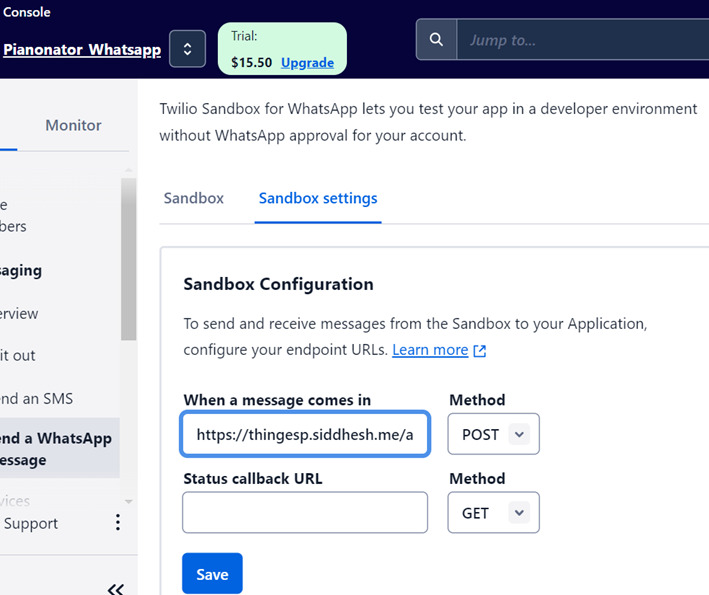
Step 14: Go back to THINGESP and copy the Endpoint URL for Twilio WhatsApp from your project.

Step 15: In Twilio go to Sandbox settings.
Step 16: Paste the previously copied URL in the sandbox configuration “When a message comes in”.
Step 17: In Sandbox you can get the contact number to text in WhatsApp. The first message you need to send is the code.
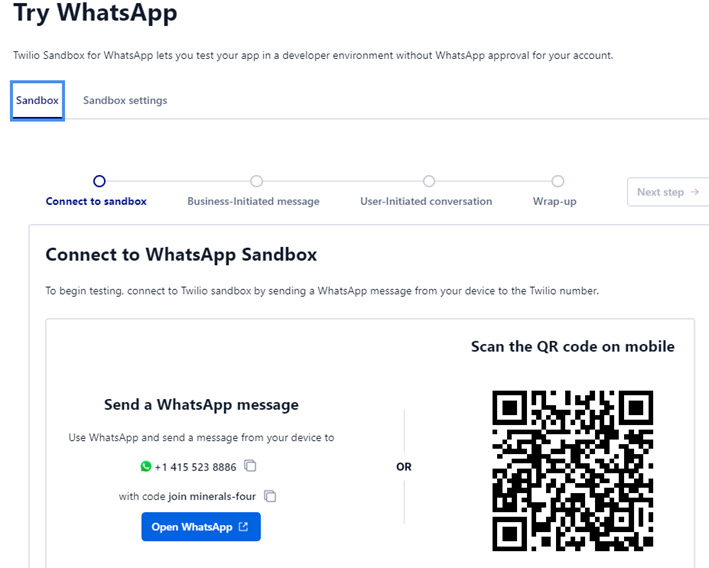
Step 18: The connection is done, now you can process the messages in your circuit!

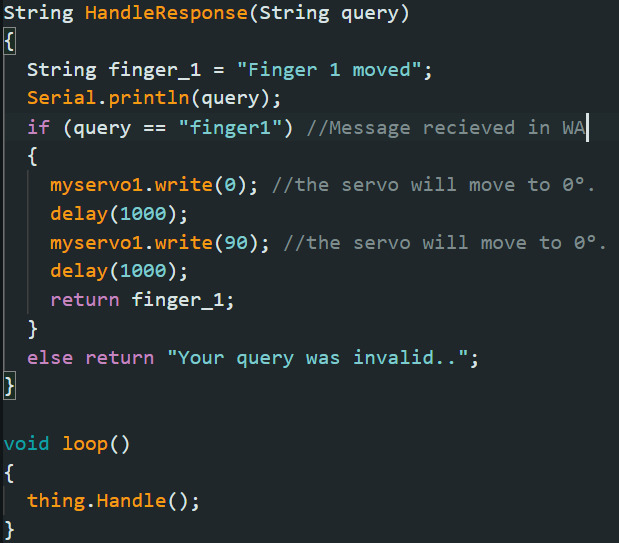
Step 19: This a sample of my code to move a servo when the message received is “finger1”.
This is a video of the modern connected pianonator:
Connecting two boards
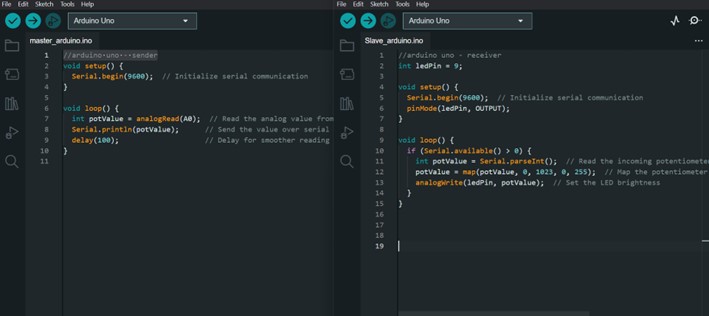
First, I'm going to connect two Arduino uno and use ad potentiometer in one of them two change the fade of a led in the second one all through UART communication.
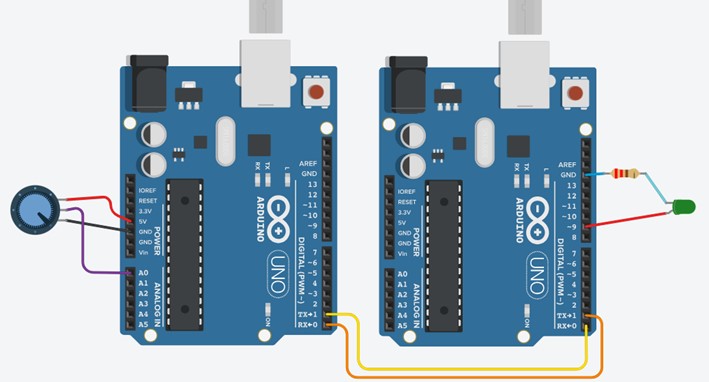
The programs:
Results:
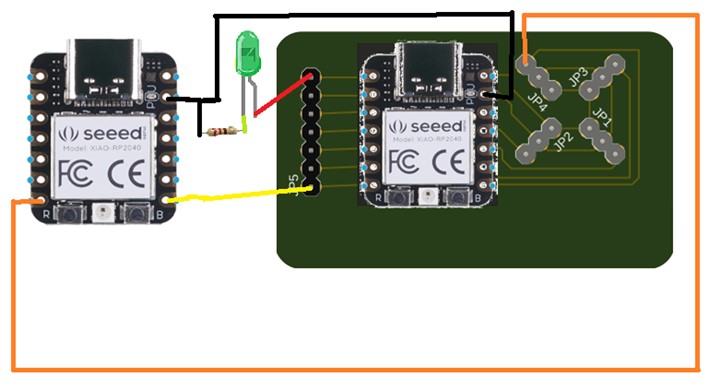
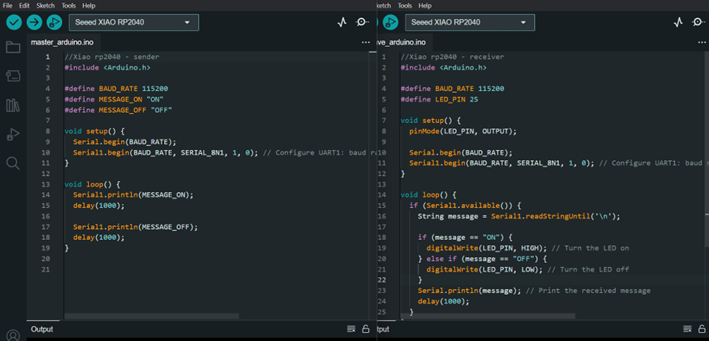
Now, I'm connecting two xiao RP2040 (one of them is my circuit board). One of them sends a message to turn on and off a led in the second board, all through UART communication.
The programs:
Results:
Here, you can download the :