Week 5 - 3D Scanning and Printing
3D Printing
Design rules for my printer
- Printer: Prusa MK3S+
- 32KB Flash
- Nozzle: 0.4mm
- Material: PLA 1.75mm
Thickness
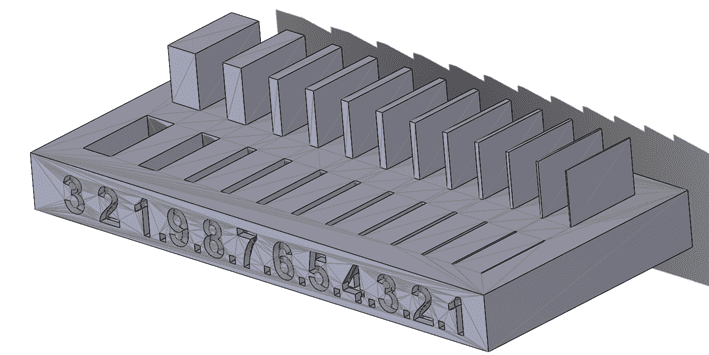
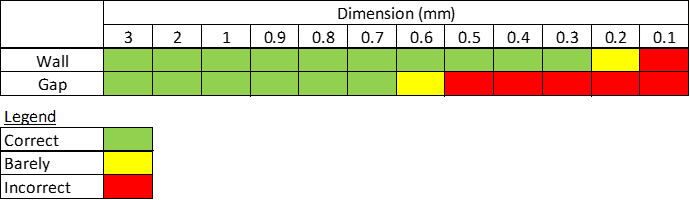
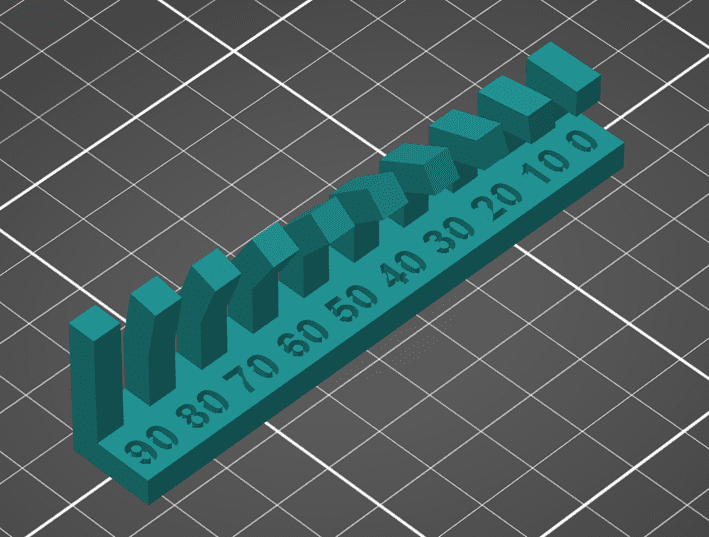
We are going to measure the capabilities of the 3D printer and determine how well it does with different wall thickness. The part will have walls and gaps with varying dimensions, as the following table:

The next figure shows the solid we are going to print, taken out from the examples from the Fabacademy.
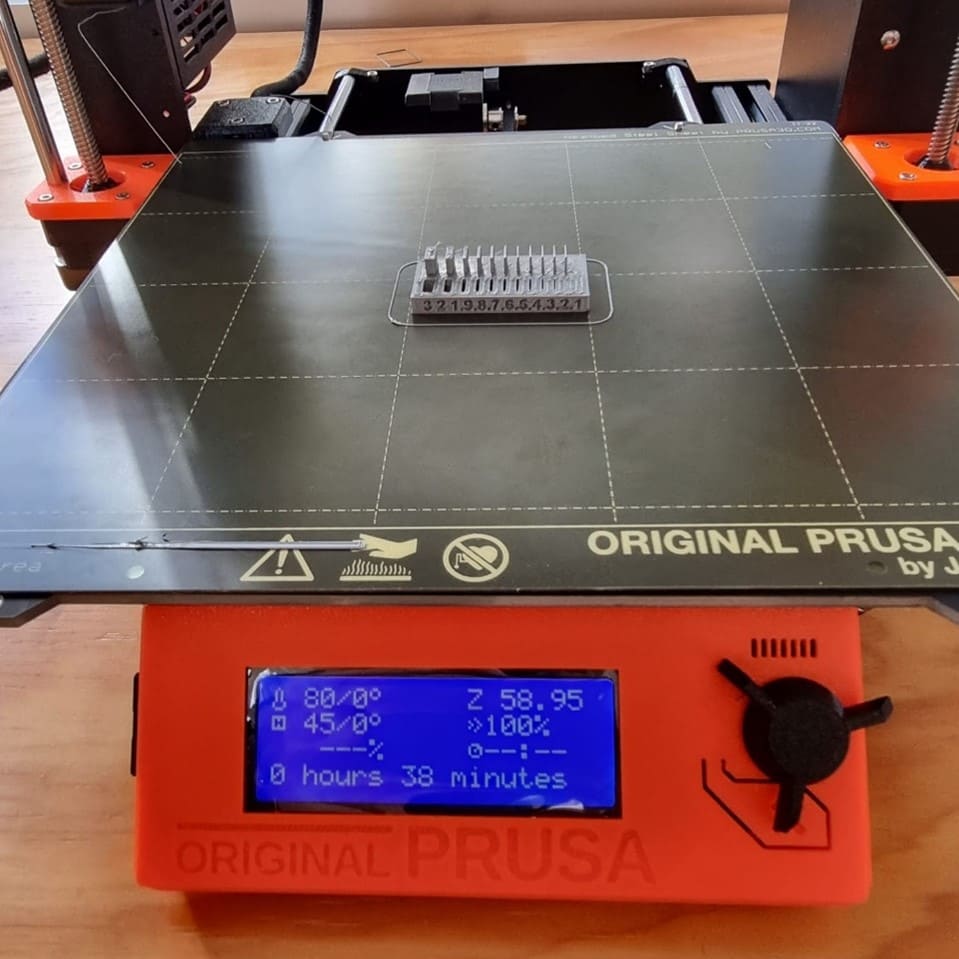
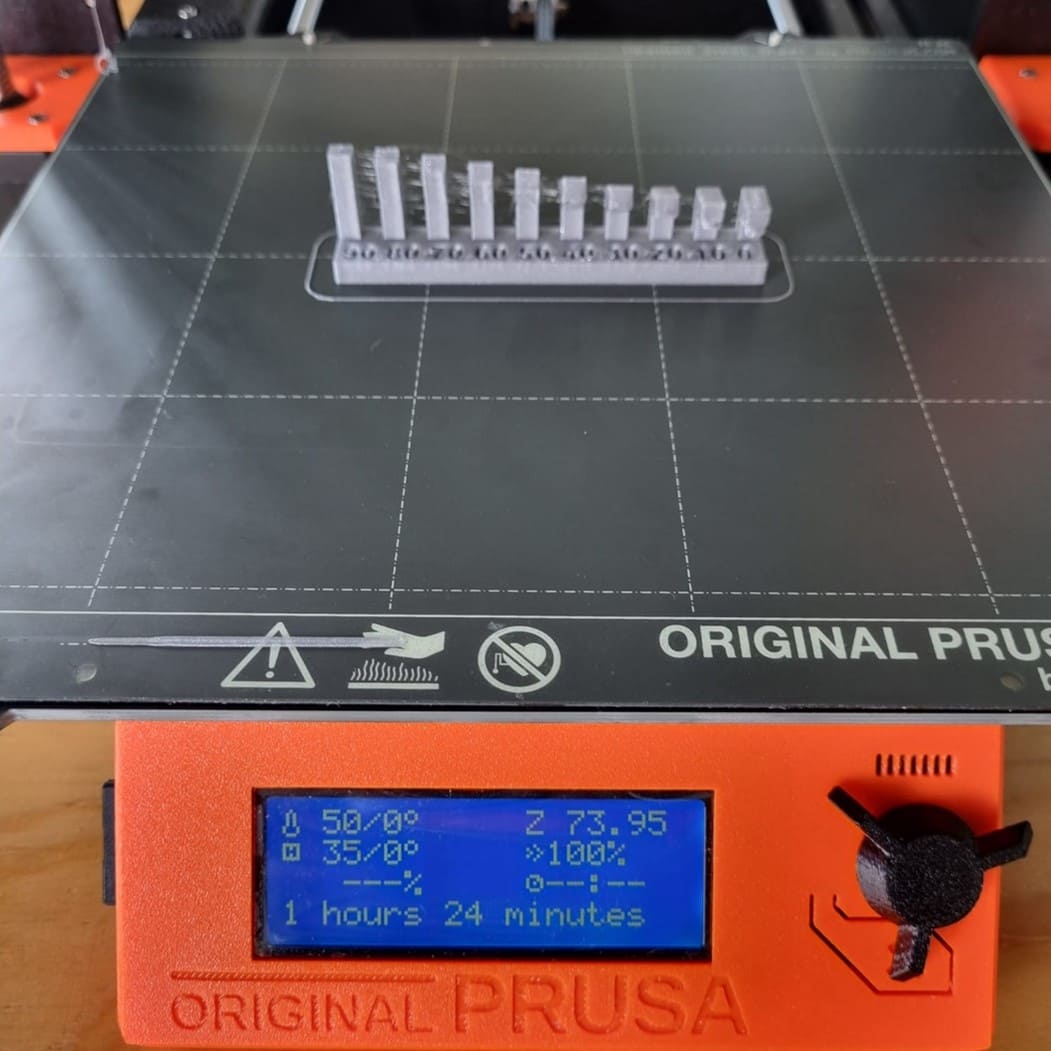
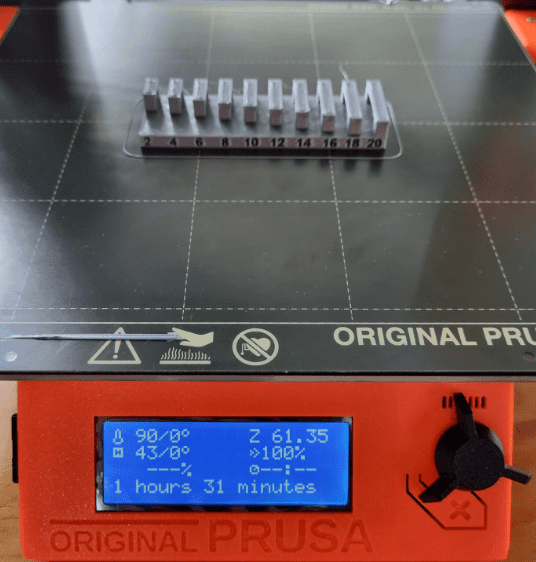
Printing process:
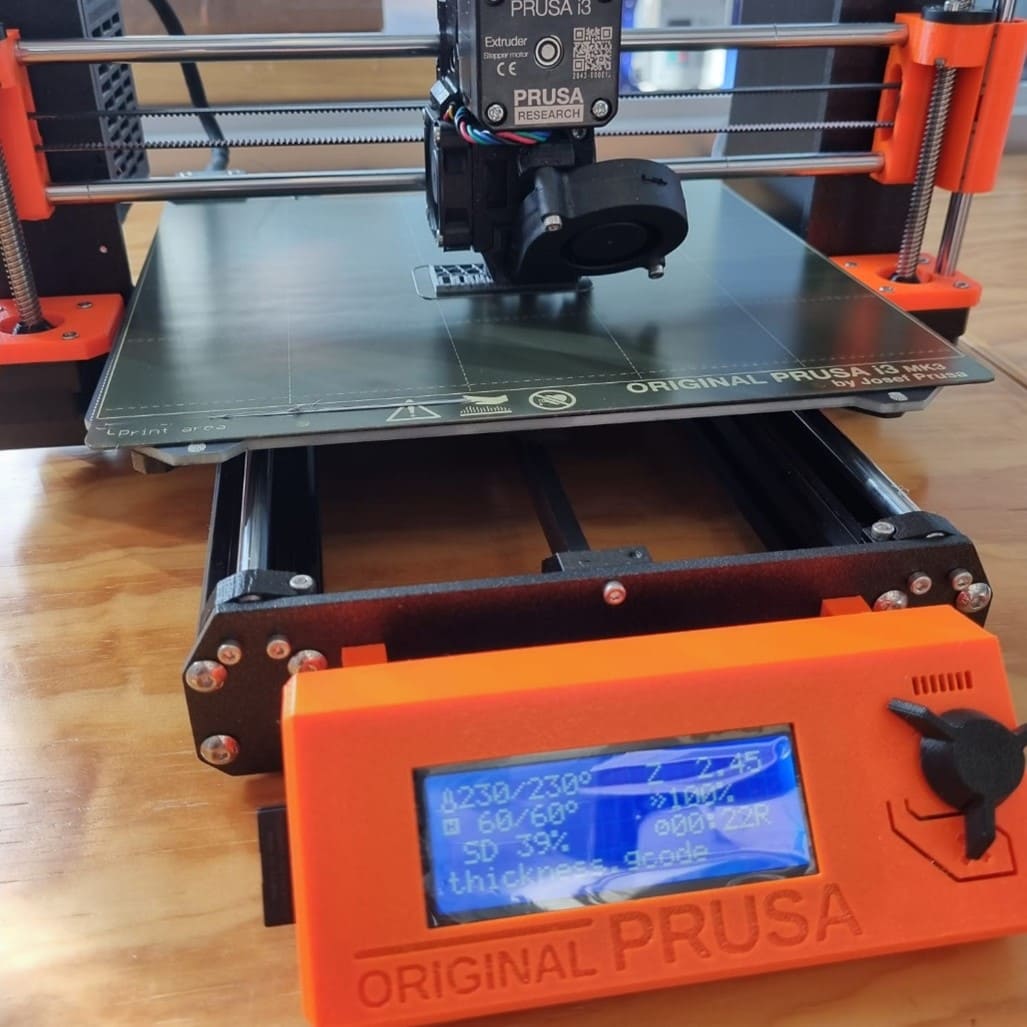
The printing time took 38 minutes.
This is the printed part:
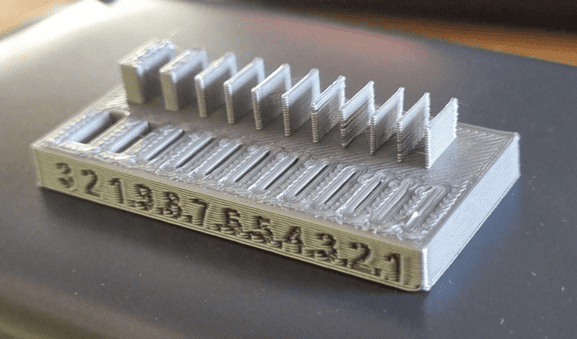
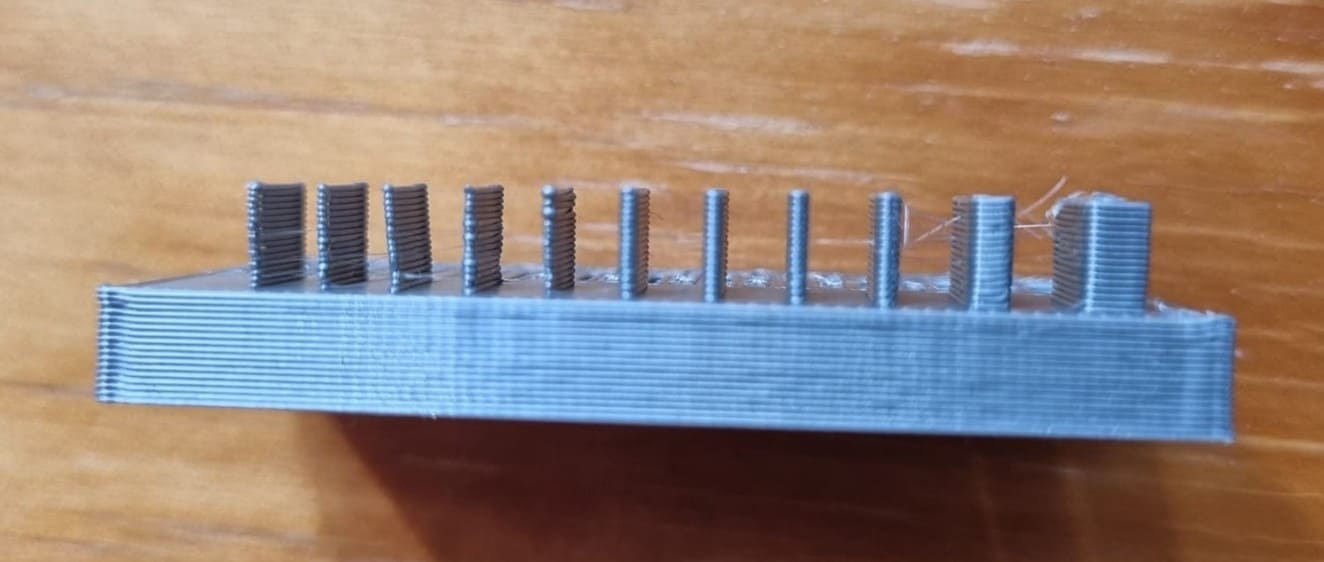
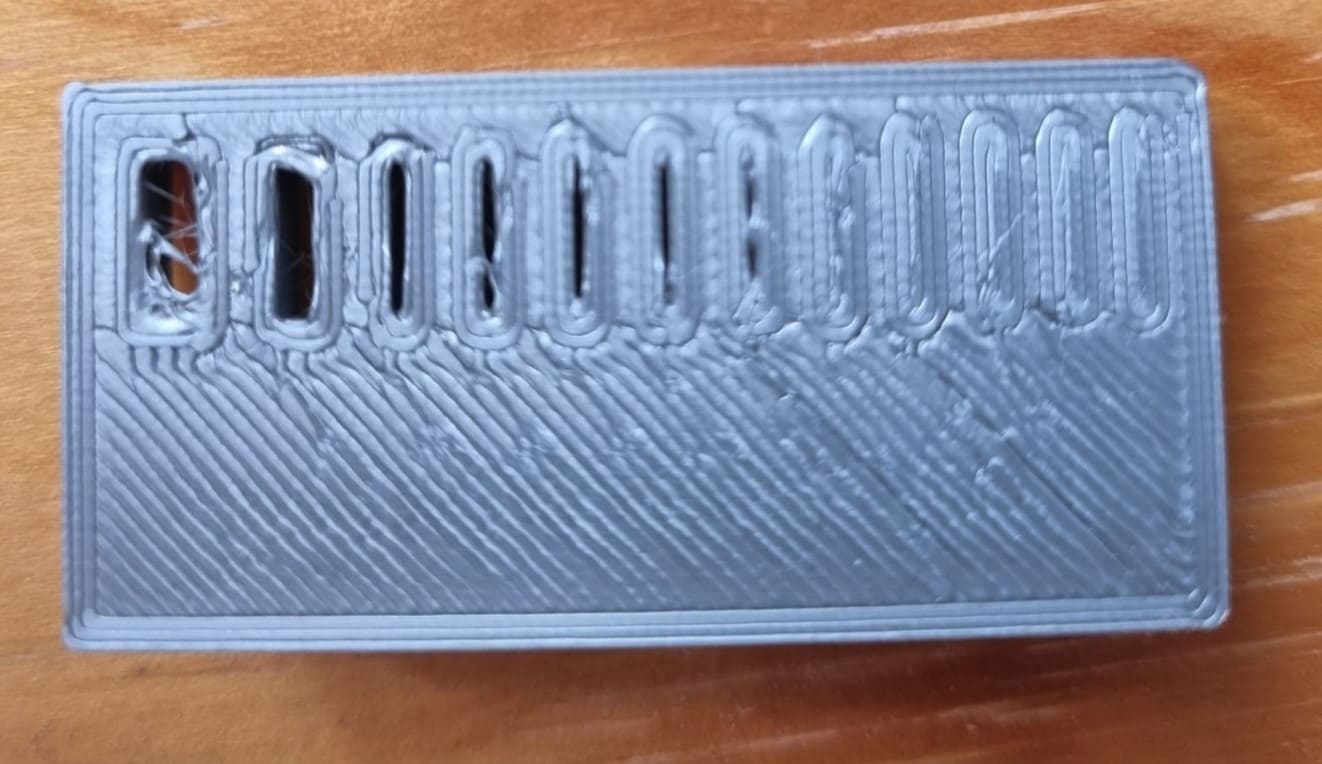
The thickness of the wall and gap table results in the following:
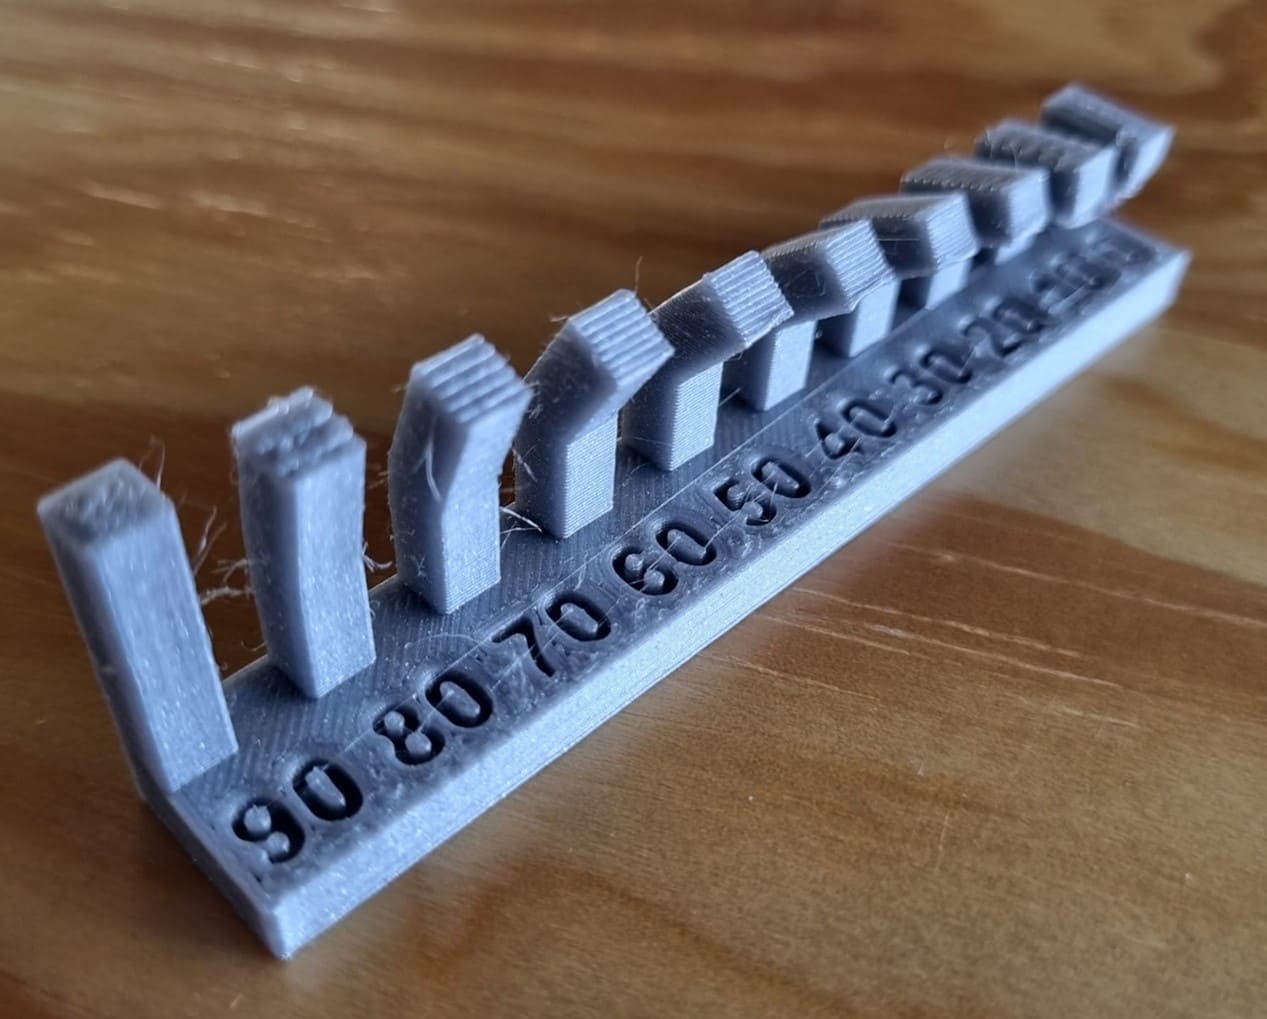
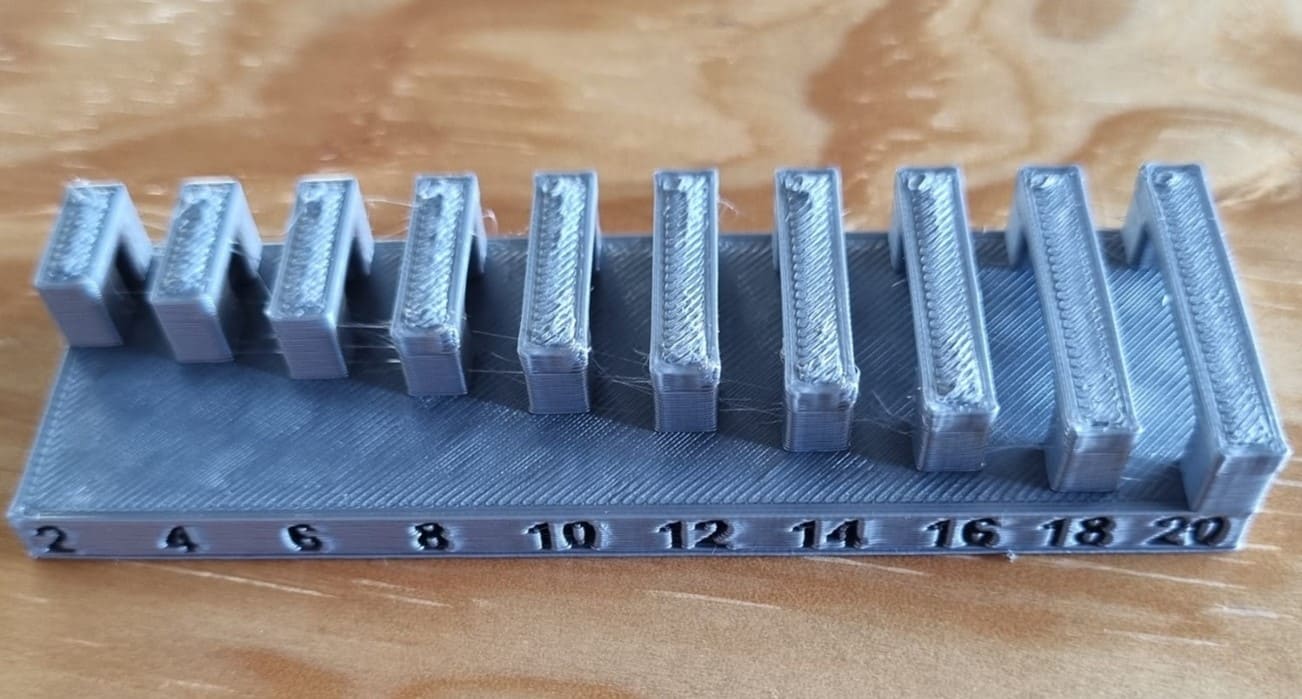
Angle
Now, we are going to determine how well it does with different angles without supports. The part will have varying dimensions, as the following table:

The next figure shows the solid we are going to print, taken out from the examples from the Fabacademy.
Printing time:
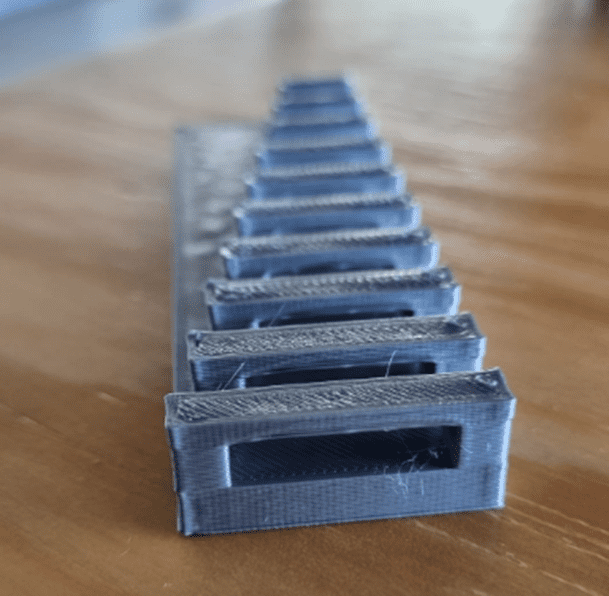
This is the printed part:
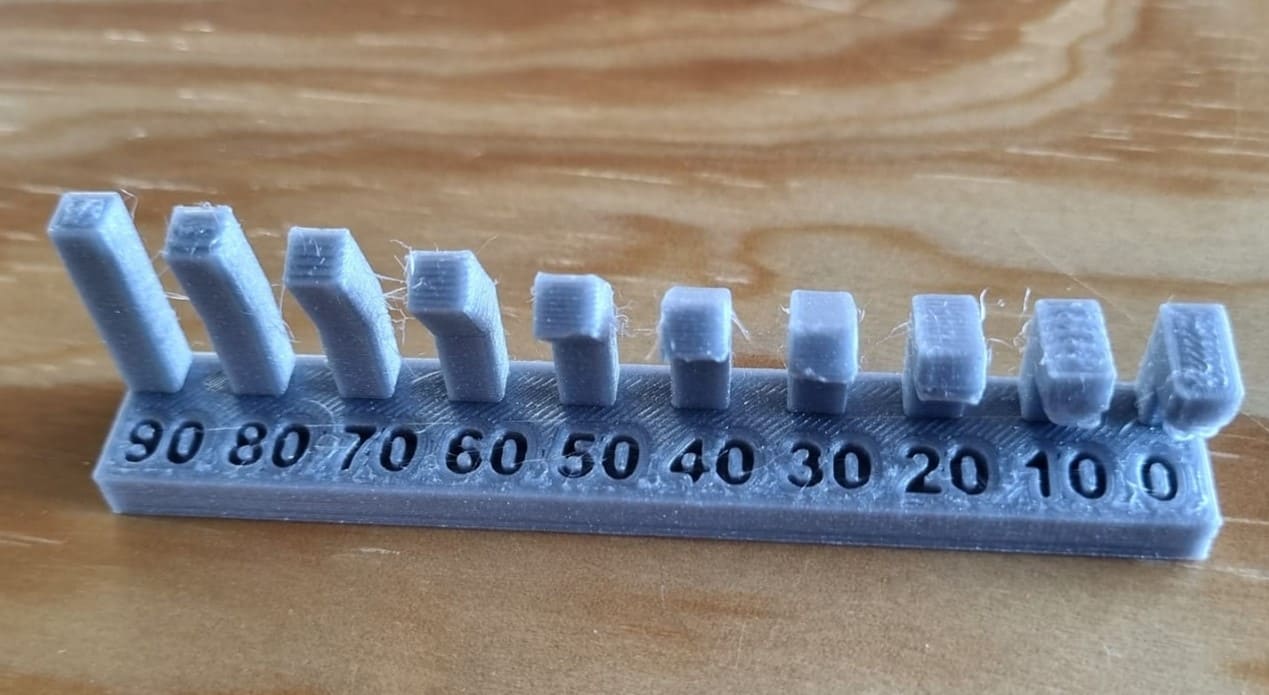
Performance table:

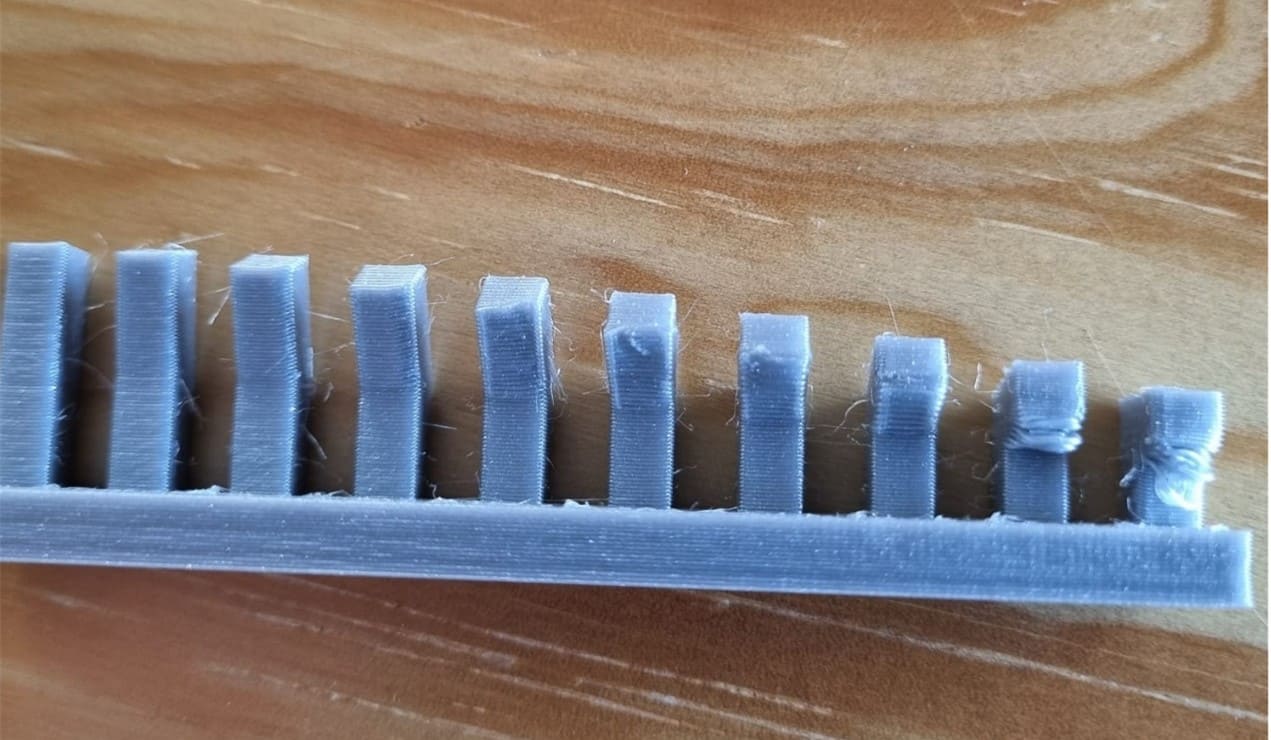
Bridging
Now, we are going to determine how well it does with bridges of different sizes. The part will have varying dimensions, as the following table:

The next figure shows the solid we are going to print, taken out from the examples from the Fabacademy.

Printing time:
This is the printed part:
Performance table:

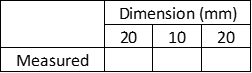
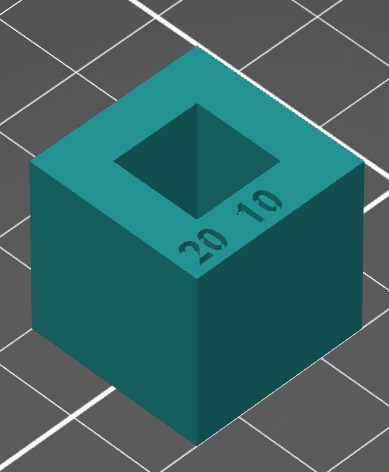
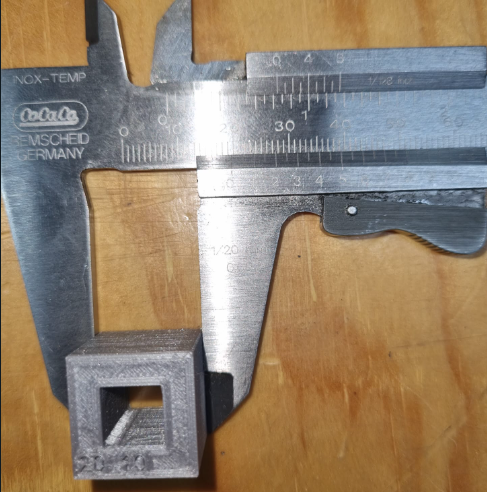
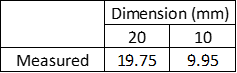
Dimension
Now, we are going to determine how well it does respect sizes. The part will have varying dimensions, as the following table:
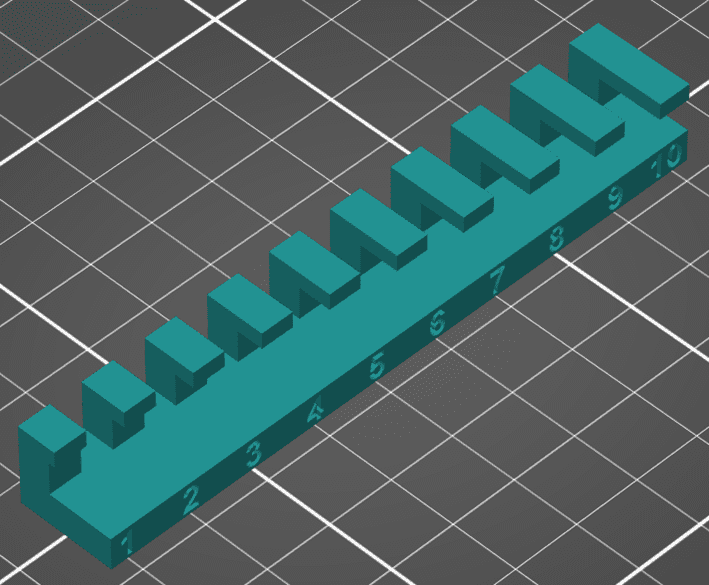
The next figure shows the solid we are going to print, taken out from the examples from the Fabacademy.
Printing time:
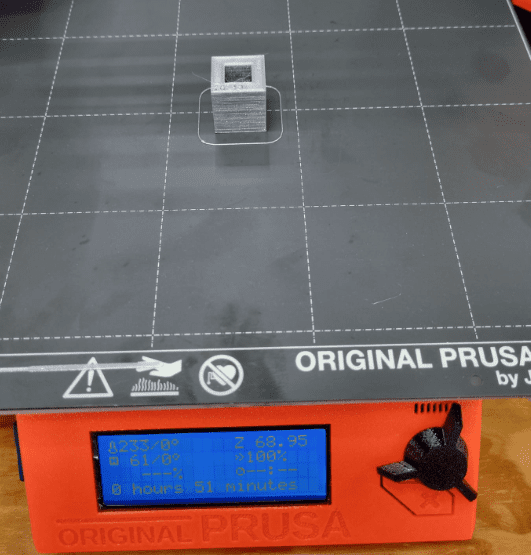
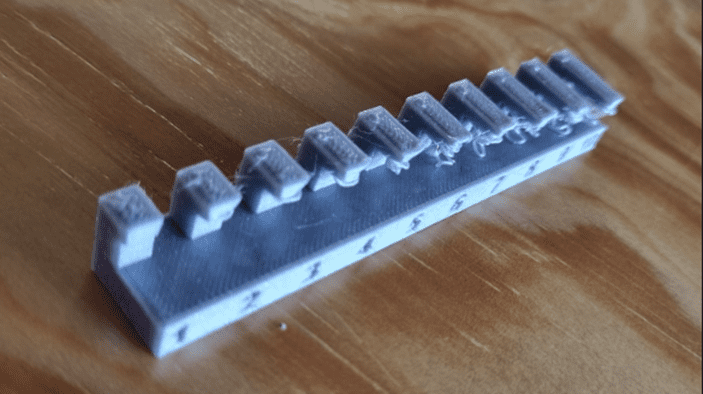
This is the printed part:
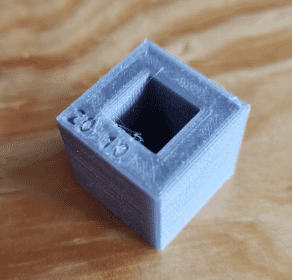
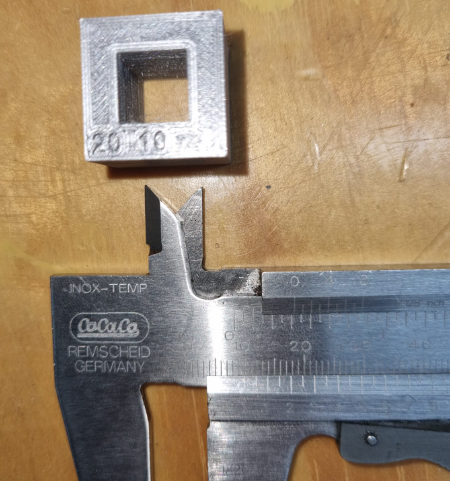
Performance table:
One support beam
Now, we are going to determine how well it does with beams of different sizes with a single column at one end. The part will have varying dimensions, as the following table:

The next figure shows the solid we are going to print, taken out from the examples from the Fabacademy.
This is the printed part:
Performance table:

Surface Finish
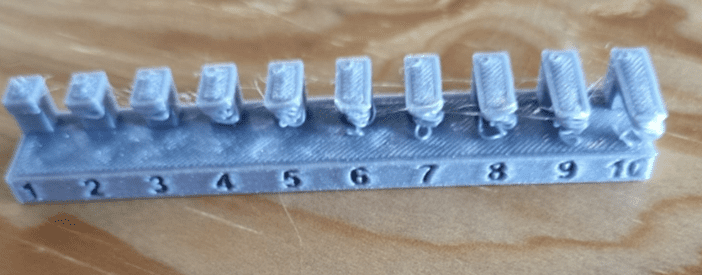
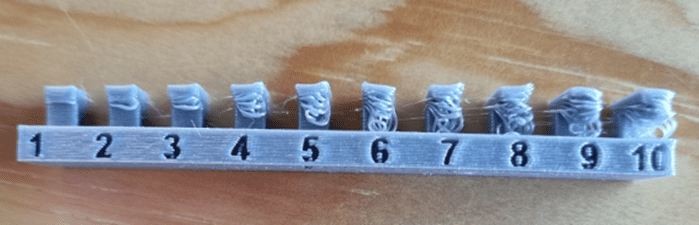
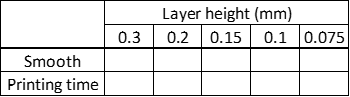
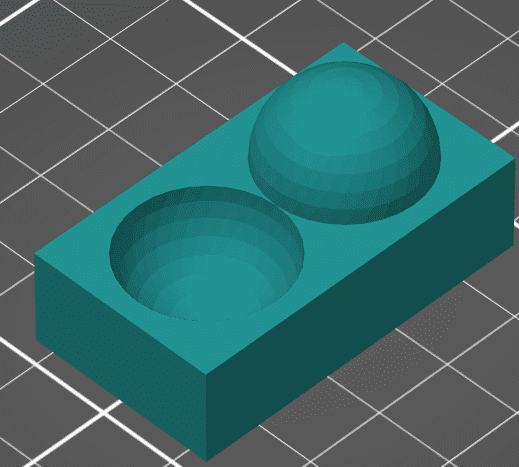
Now, we are going to determine how well the surface finish looks with different layer heights. We will print the same object different times, varying the layer height, comparing the surface quality, as the following table:
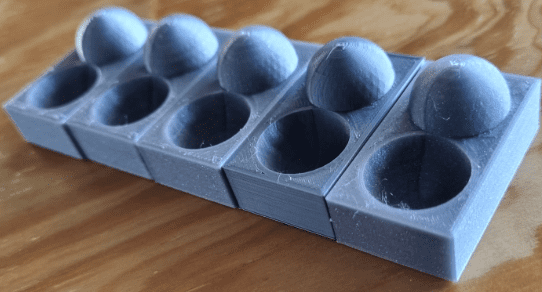
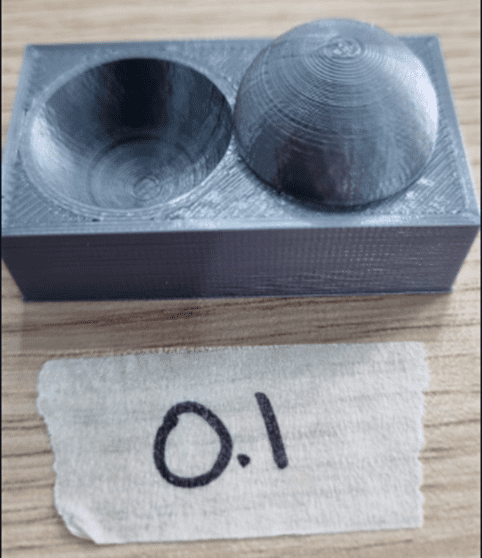
The next figure shows the solid we are going to print, taken out from the examples from the Fabacademy.
Comparison:
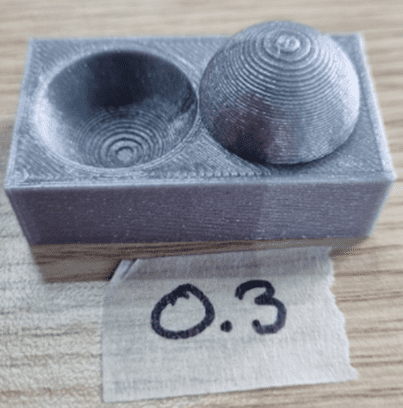
Layer height - 0.3mm
Printing time:
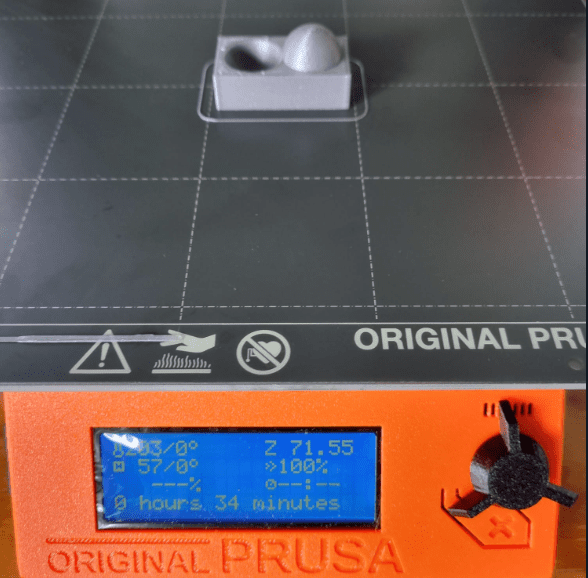
This is the printed part:
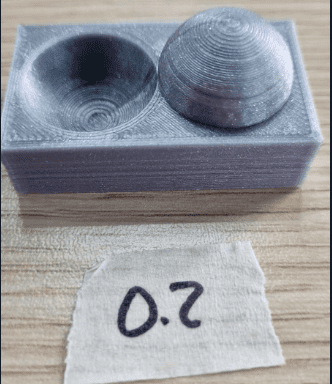
Layer height - 0.2mm
Printing time:
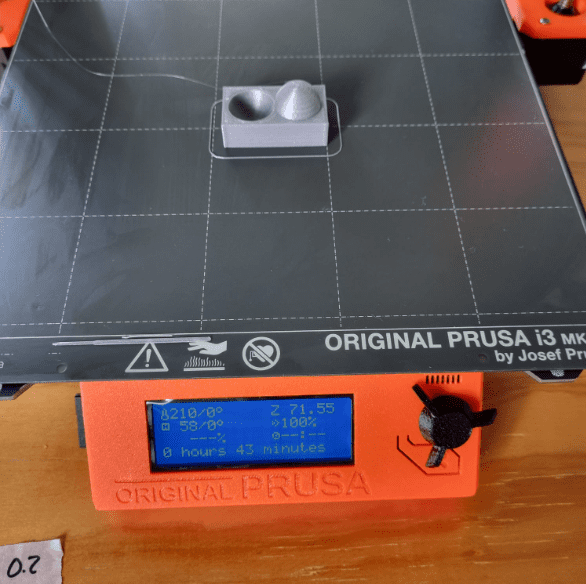
This is the printed part:
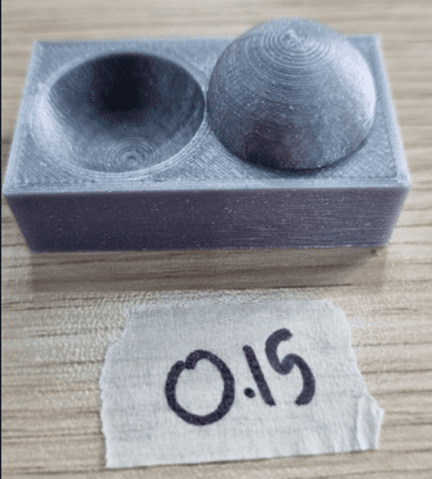
Layer height - 0.15mm
Printing time:
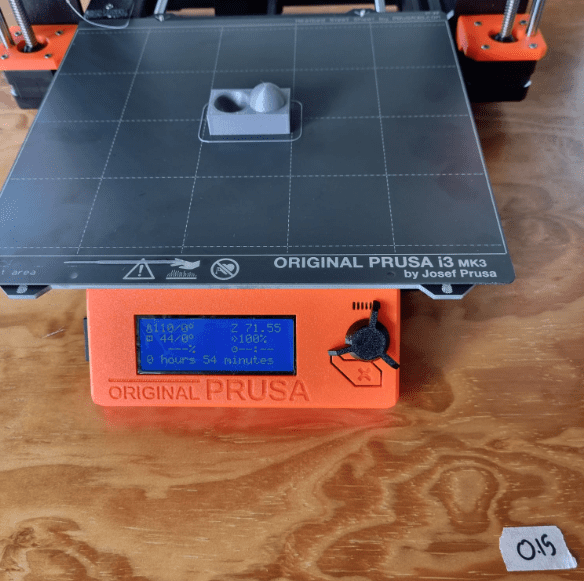
This is the printed part:
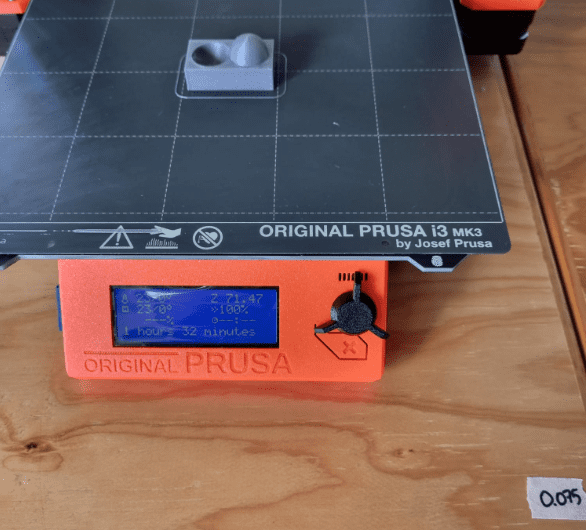
Layer height - 0.1mm
Printing time:
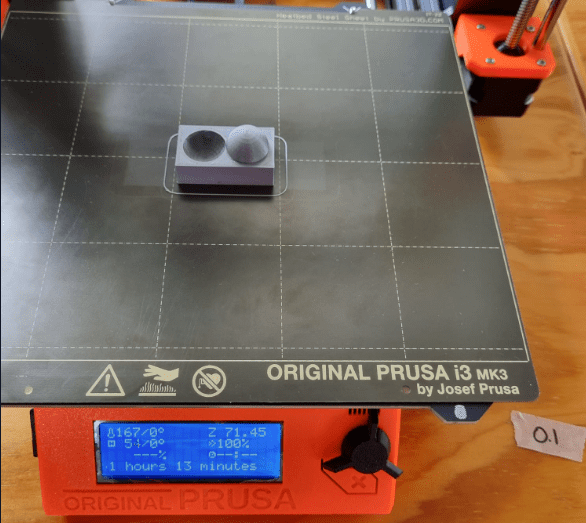
This is the printed part:
Layer height - 0.075mm
Printing time:
This is the printed part:

Performance table:
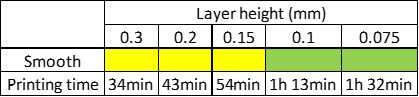
Touching all the printed parts you can fell that the bigger the layer you can feel it more, making the small layer smoother.
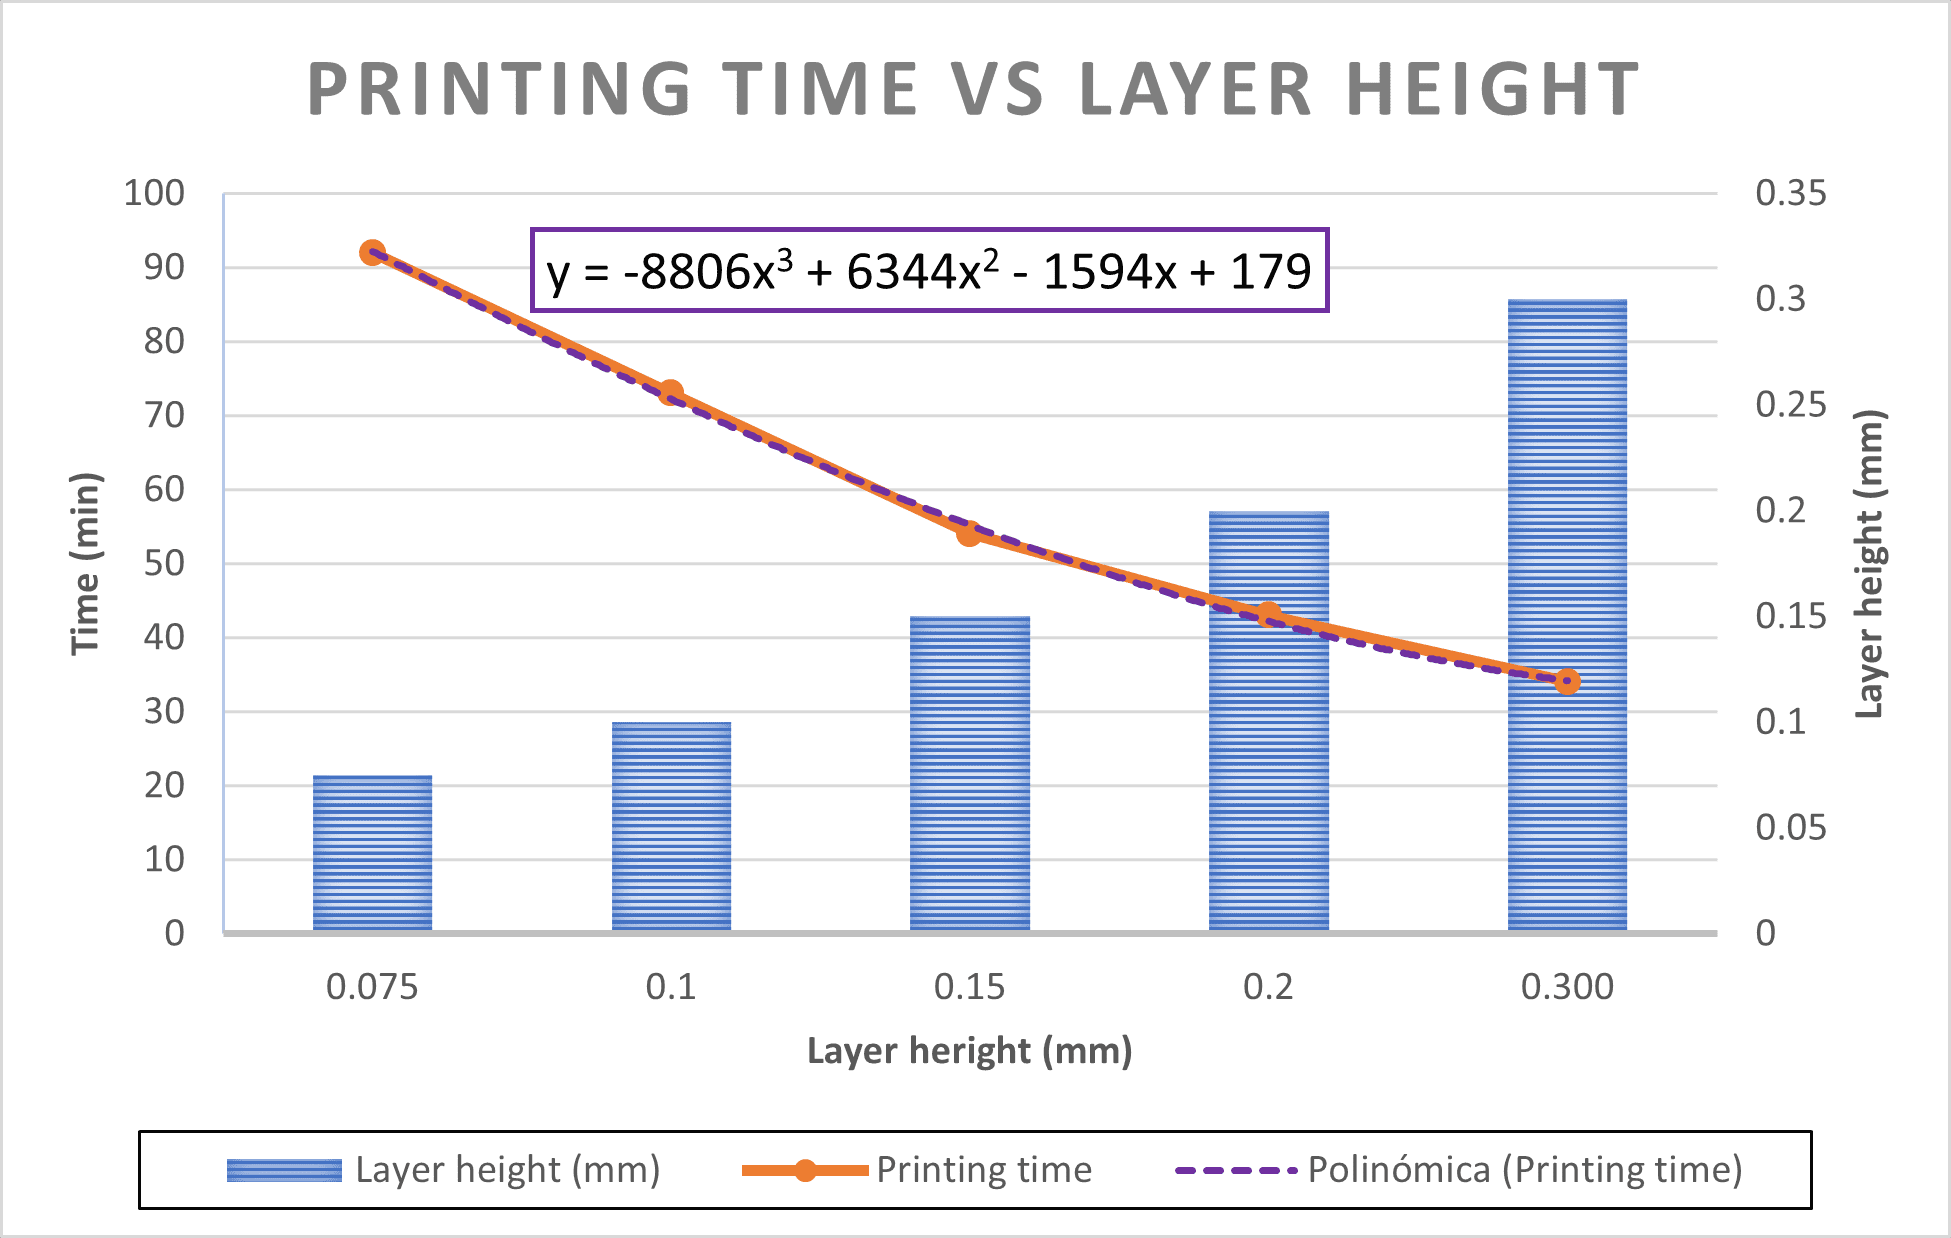
Next, you can see a graph showing the behavior of the printing time vs the layer height. As you can see, it has cubic tendency being variable “y” the time taken to print and “x” the layer height (y = -8806x3 + 6344x2 - 1594x + 179). You could also see it as a linear tendency if you are okay with some margin error (y = -242x + 99.1).
3D Printed Object That Could Not Be Made Substractively
I wanted to print a trophy for the best tennis player on the Engineering Faculty (me), so I designed the following object:
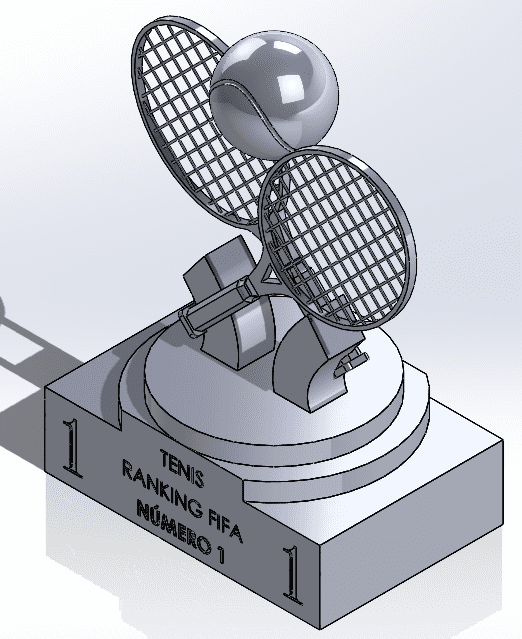
Trophy 1 design process:
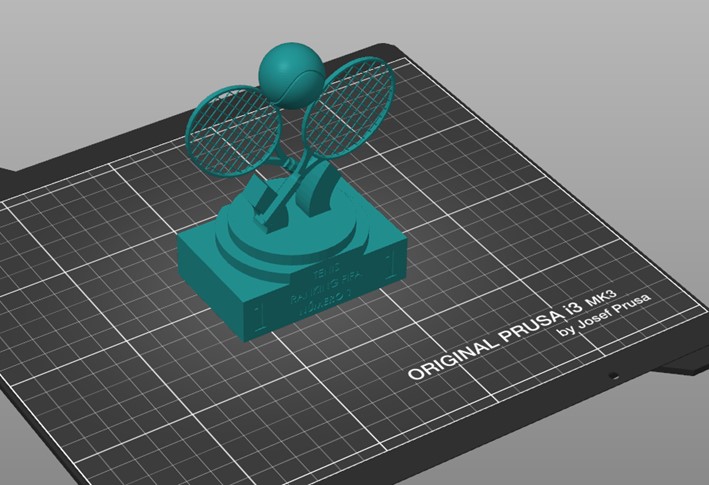
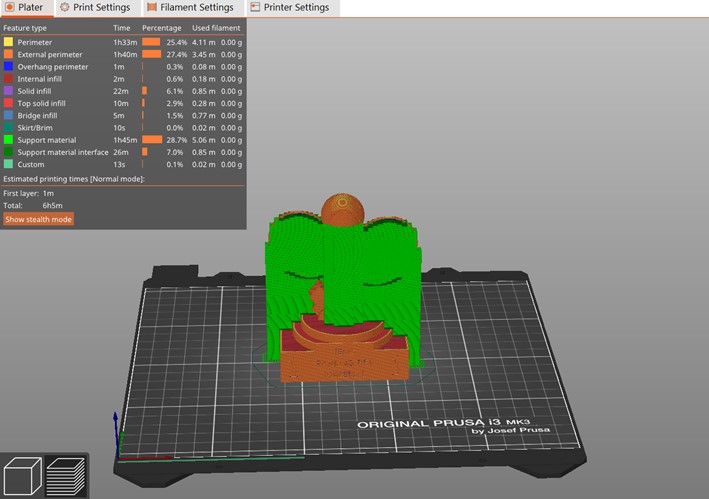
I thought that supports would be a good idea, So I tried to print with them. First, I opened the project in PrusaSlicer.
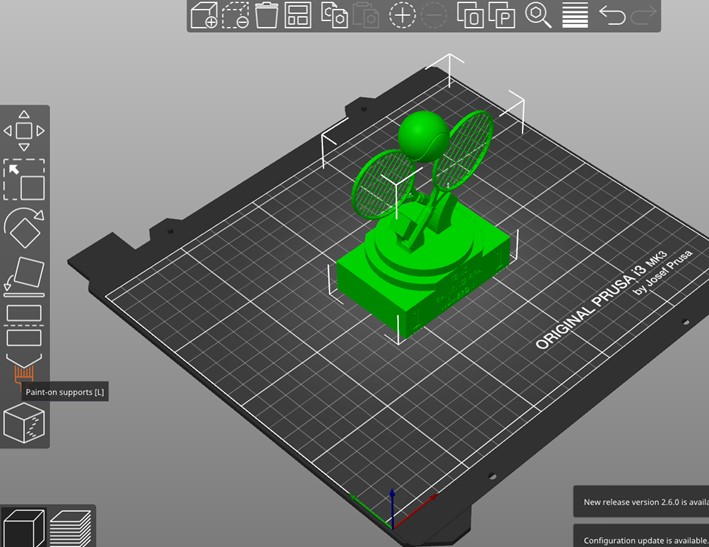
Then, I selected the part and went to Paint-on supports.
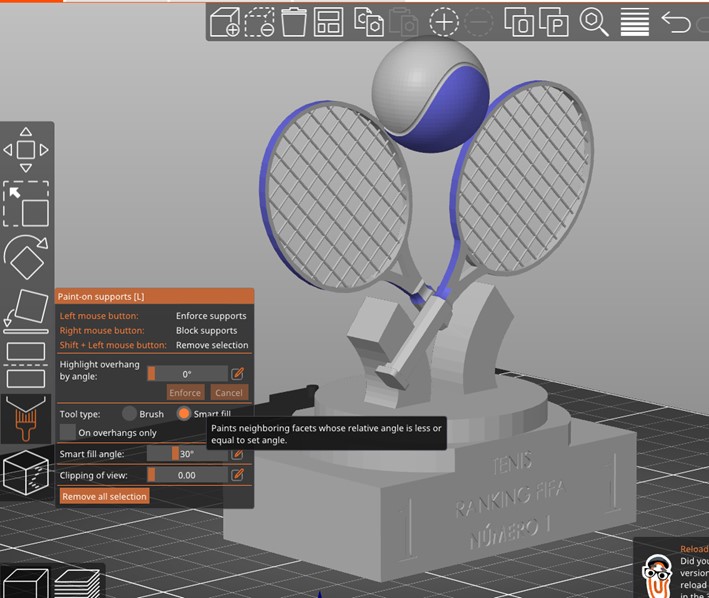
I chose Smart Fill as the support type and selected the blue parts where I want the supports to be included, in the image you can see them in blue.
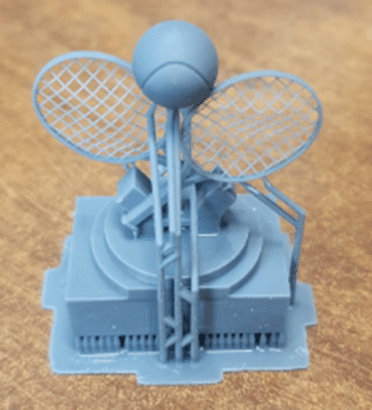
I generated the slices, and this is how it looked.
Results:

But when I was trying take out the supports this happened:
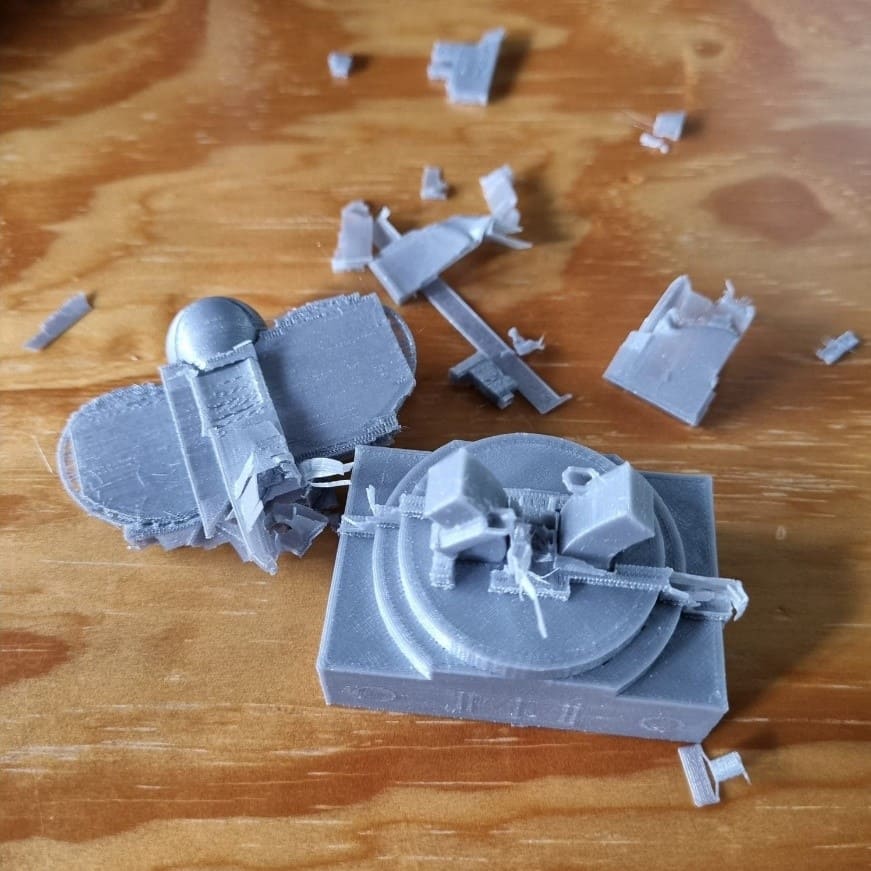
The printed object was to small and it had too detailed parts, so it made it very difficult to take off the supports without ruining the whole thing!
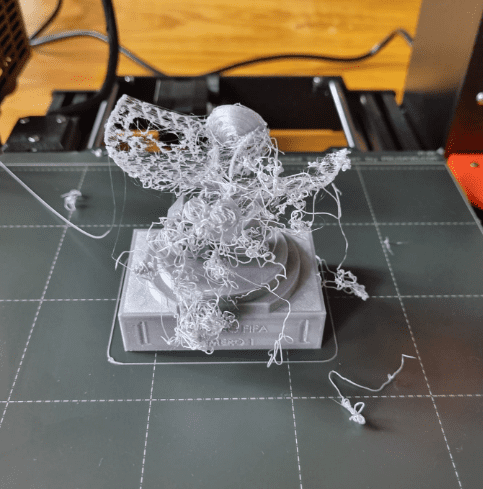
Therefore, I decided to print the trophy without supports. It was late at night and I wanted to go home, so I left the printer working with just one hour left. The printing was coming very well, so what was one hour of unsupervised working, right? Well…
The printer decided to go on strike and that wanted to rest too so it ruined the whole thing.
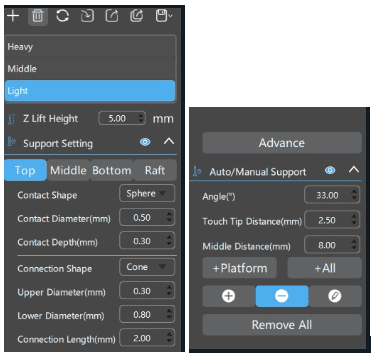
This time, I'm going to use a different software, Chitubox, to create better supports.
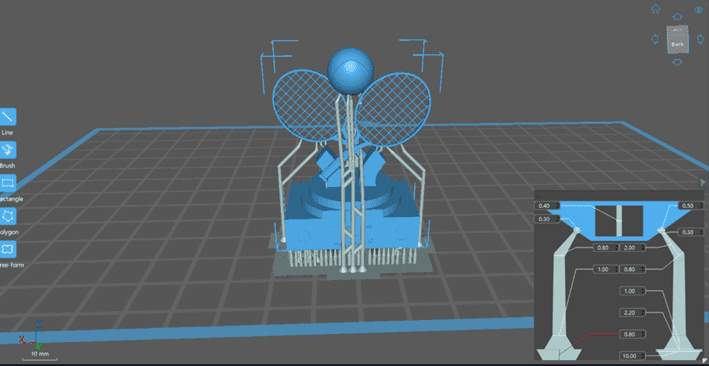
Configuration in Chitubox for the supports:
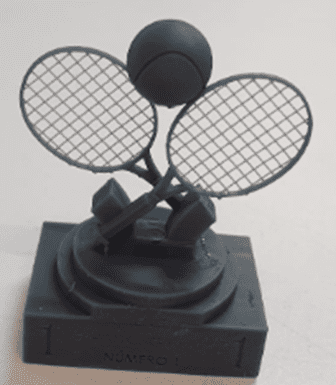
Printed Part:
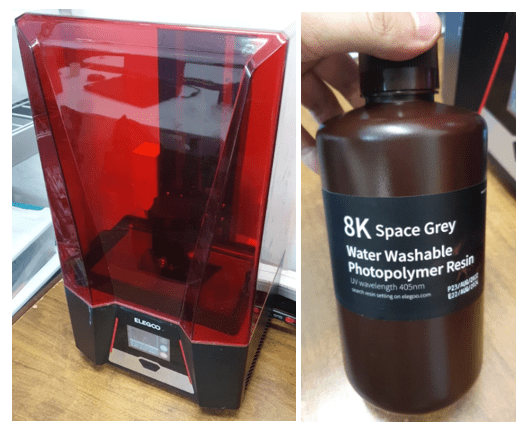
Tennis Trophy in a Resin 3D printer (Saturn 2 Elegoo).
Printed Part:
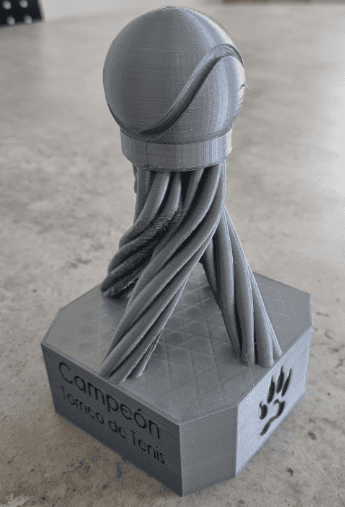
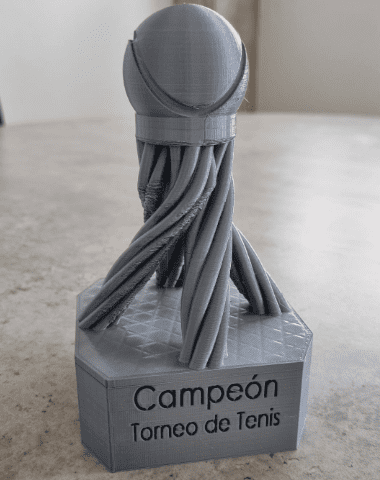
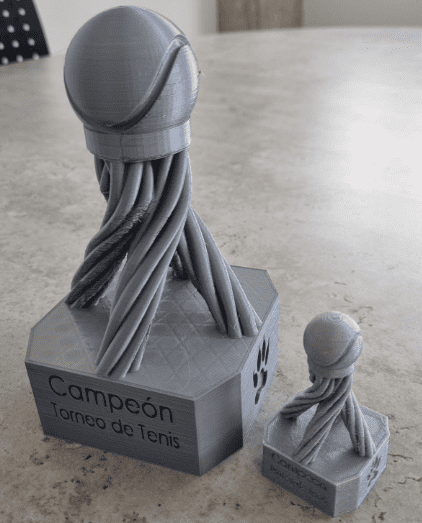
I also did a trophy for the tournament, at least it was the idea. People didn't like the design, but it was something that couldn't be done substractively, so it works for me.
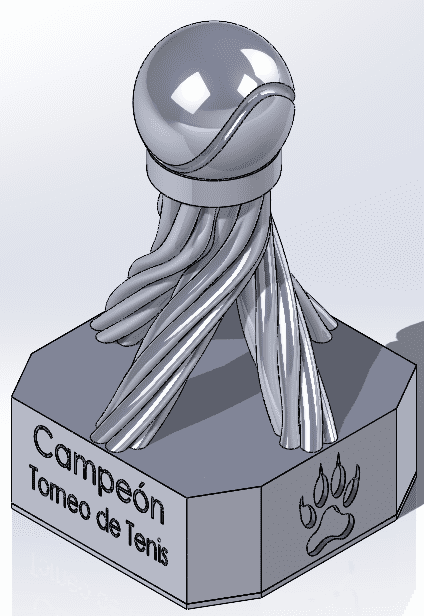
Trophy 2 design process:
First, I did a smaller version, because the original one was going to take 27 hours.
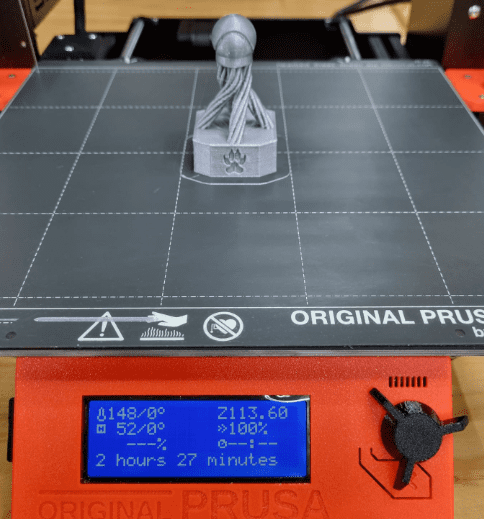
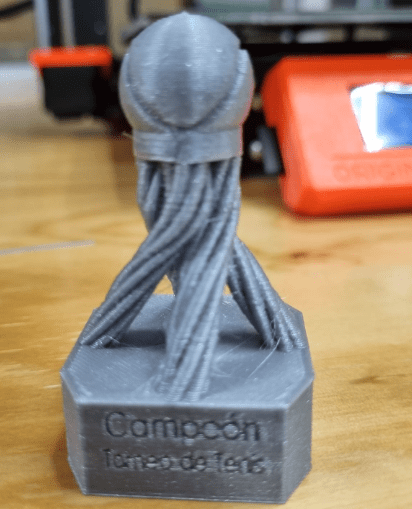
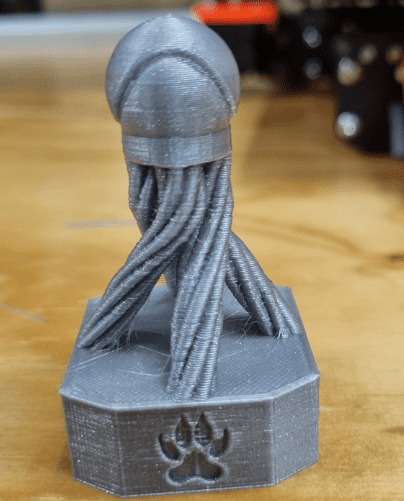
The big version (I left it printing the whole weekend!):
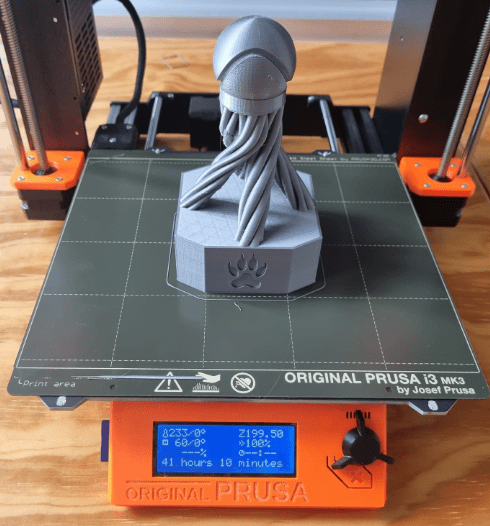
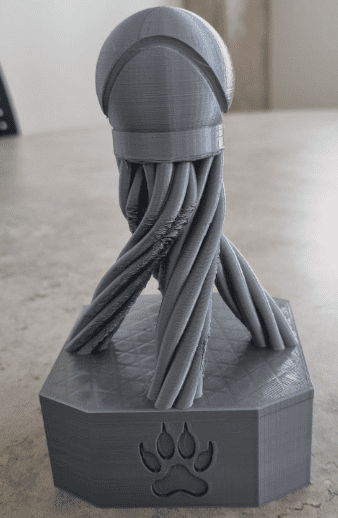
The big trophy is for me, because, obviously, I'm the best. The rest can fight for the small one... jaja
3D Printing Opinion
3D printing is very versatile and is one of the favorite manufacturing techniques of everyone. I remember when I first used a 3D printer, about 10 years ago, when it was something not as common as it is today. I don't remember the process that we had to do to print something, but I'm pretty it was not as simple as it is nowadays. The difficult part of 3D printing is designing and that says a lot, because you can print about anything. I think 3D printing is very useful, but you have to understand some limitations of it, they are great for creating models and prototypes, but not for mass production! As seen in one of my printed trophies it can take 40 hours or more printing, depending in the object, and that trophy wasn't even that big. It looks great, for a one-time production, but I would reconsider my production strategy if I would try to print everything.
3D Scanning
- Machine: Android
- Software: Polycam
I have an Einscan Shining 3D scanner, but I don't know how to use it, yet. So I decided to try Polycam.

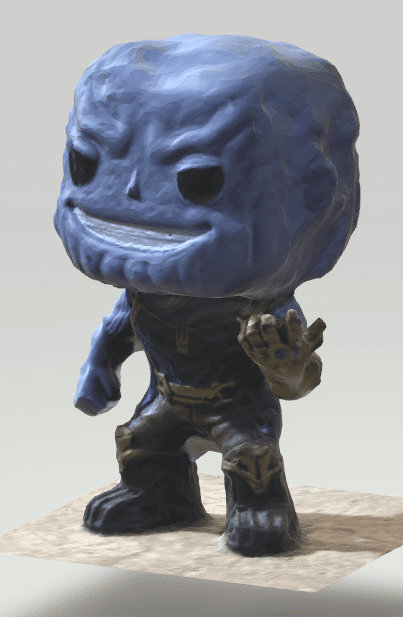
I downloaded the app from the Playstore at no cost, they give you up to five projects, so it works for me. I took 77 pictures of the mad titan, a Funko Thanos, a Christmas present I got some time ago.

As it was my first time using it, I tried the medium detail setting, the default one. The options are:
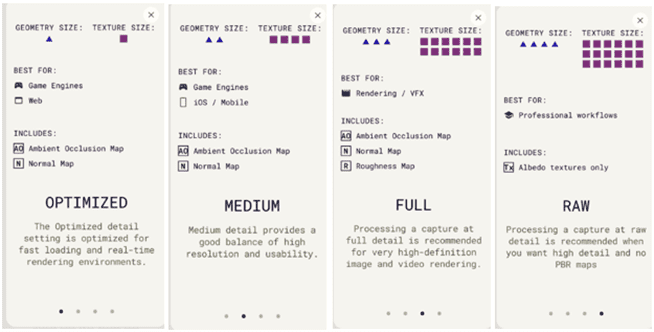
After some minutes of processing I got the following 3D scan:

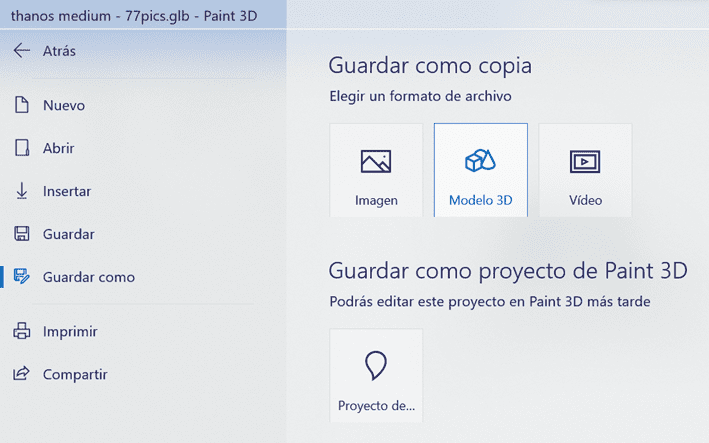
The free version doesn't allow you to download it in different formats, but I used Paint 3D from Microsoft to open the GLB file.
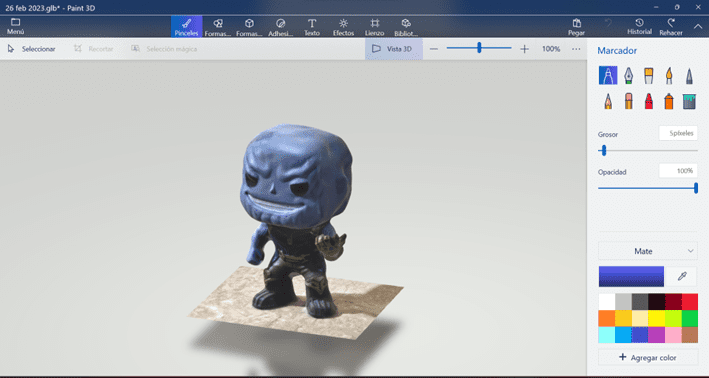
Then, I took more pictures to get the dataset to 139 pictures and used the raw detail settings.
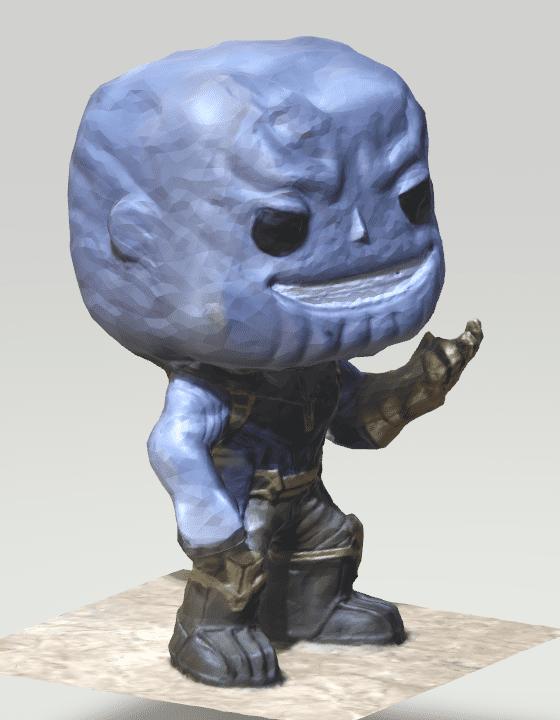
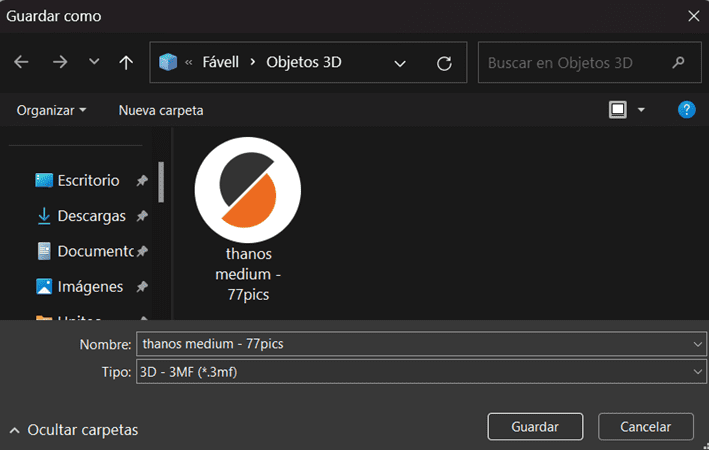
It kind of looks better with the medium detail setting, right? I think so. So, I'm going back to the previous scanning and will save it as .mf3 so I can use it with the PrusaSlicer to print the Mad, well, the almost-not-exactly-deformed version titan.
Apparently, Thanos is really small, only 13mm tall, should've not been a problem to The Avengers, not even to Ant-man. So let's scale him up.
There you go:
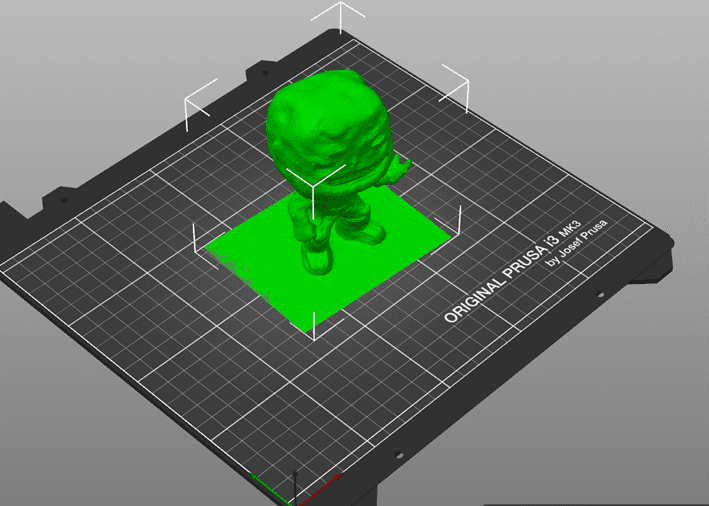
I will print it with a 0.1mm layer height and 0% infill.
The first printed version didn't go as well as expected, should have expected that without supports in the hand would not work.
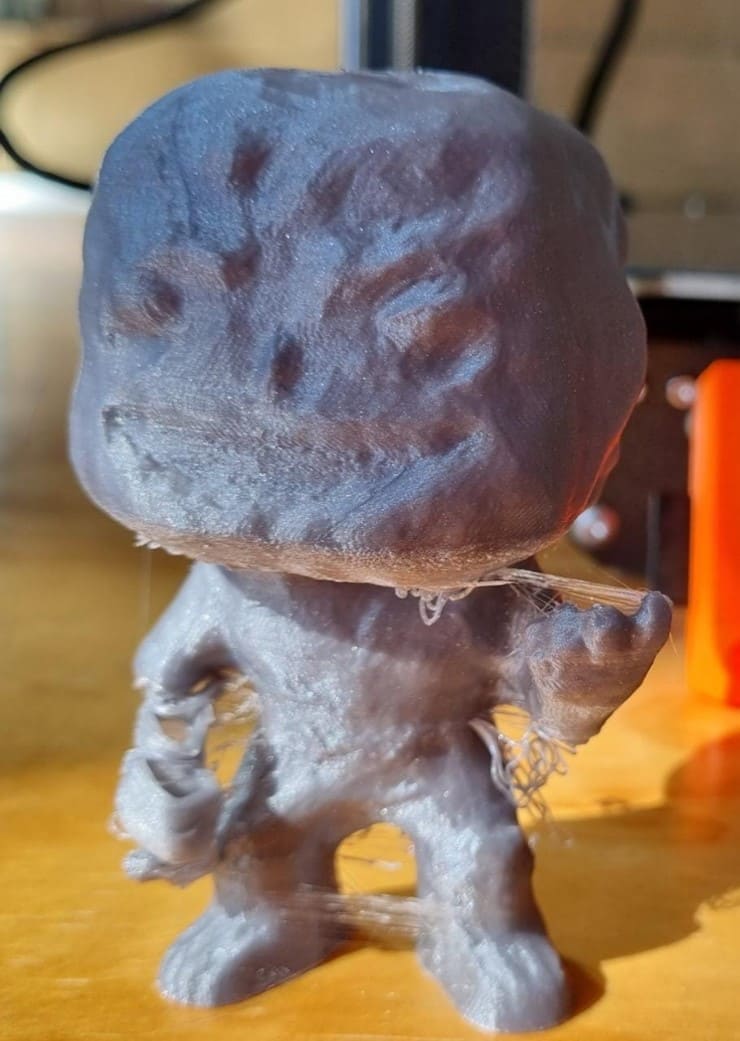
So, then I added supports.
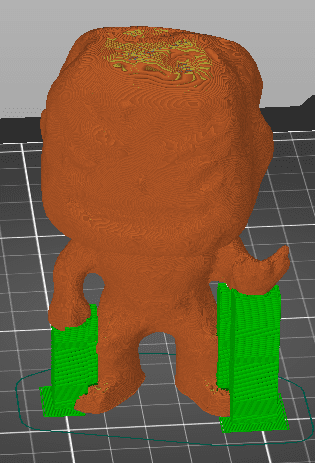
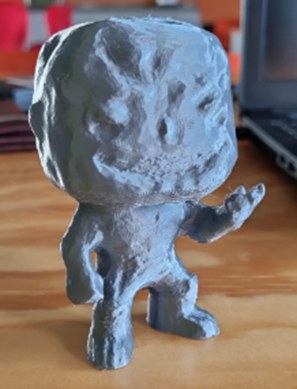
This is the printed Thanos:
I had to do the spiderverse meme, sorry (not sorry jaja):
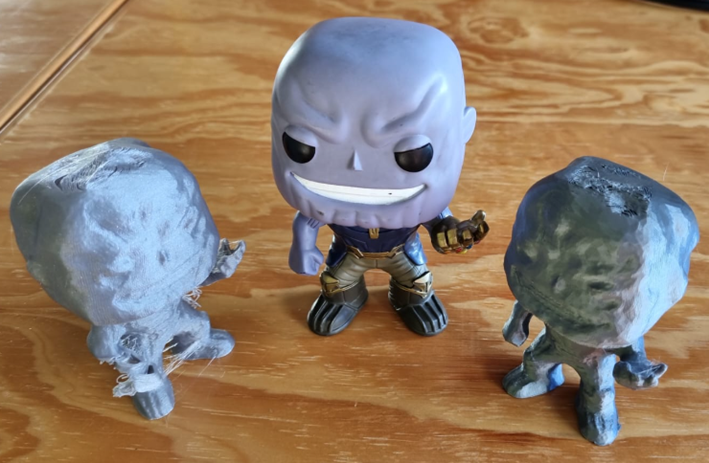

Meme taken from here.
You can download all the files used in this week: