Appearance
Build & manage your own website with Github+Hexo
This page documented the process of using Github with Hexo to build your own page.
What are GitHub Pages and Hexo
1. GitHub Pages
GitHub Pages is a static site hosting service provided by GitHub. It fetches HTML, CSS, and JavaScript files directly from a GitHub repository, runs them through a build process, and publishes the site.
- GitHub Pages is a free web hosting service for static websites, such as personal blogs.
- You can use tools like Hexo to convert Markdown files into static web pages and upload them to GitHub.
- Once deployed, people can access your site using GitHub’s subdomain (xxx.github.io).
2. Hexo
Hexo is a static blog framework built on Node.js that quickly converts Markdown files into HTML and generates a complete website.
- Hexo allows you to write blog posts in Markdown and generate a static website with a single command.
- It supports various themes to make your blog visually appealing.
- With just a few steps, you can write articles locally and publish them online using GitHub Pages.
Steps for build your site
Before start you need to do some environment setups.
- Install Git
- Install Node.js
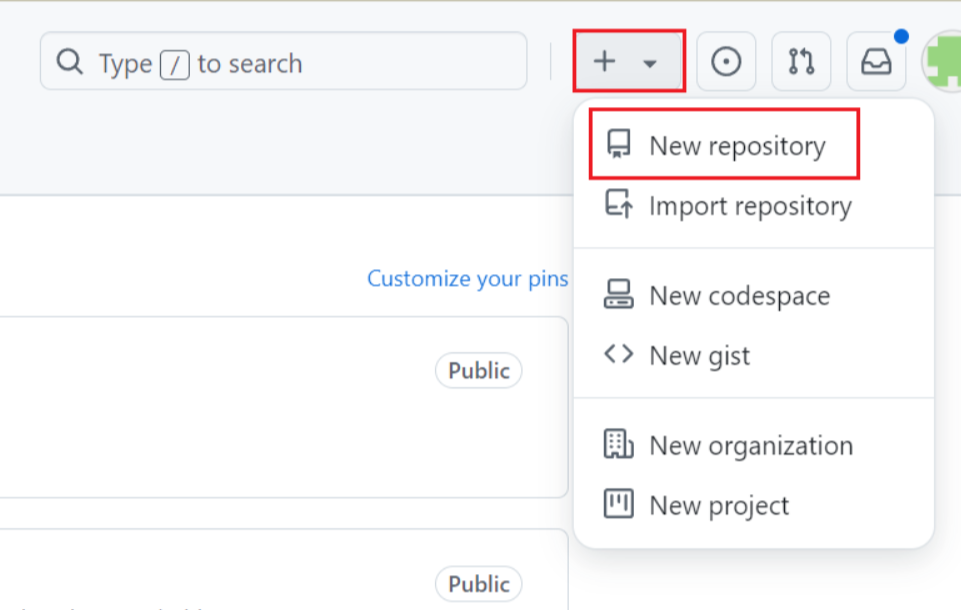
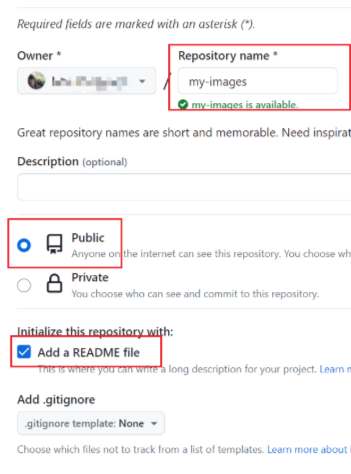
Step 1: Create a GitHub Repository
Create a personal repository on GitHub.
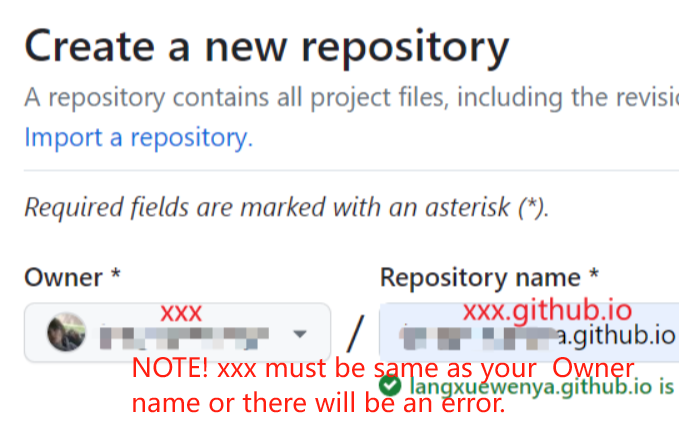
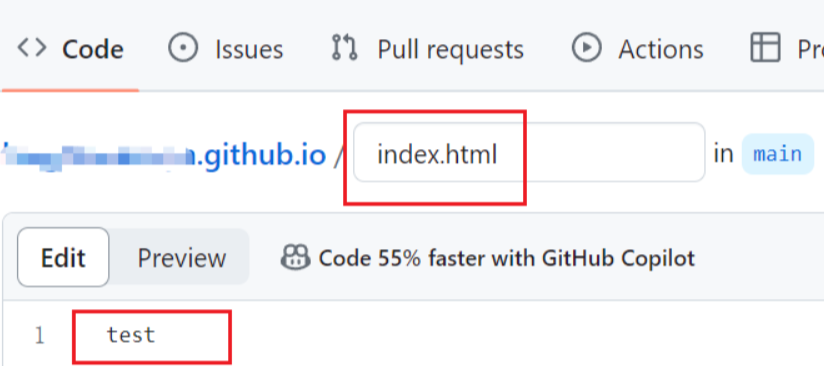
Then select public to create a public repo. Next create a new file and test it.
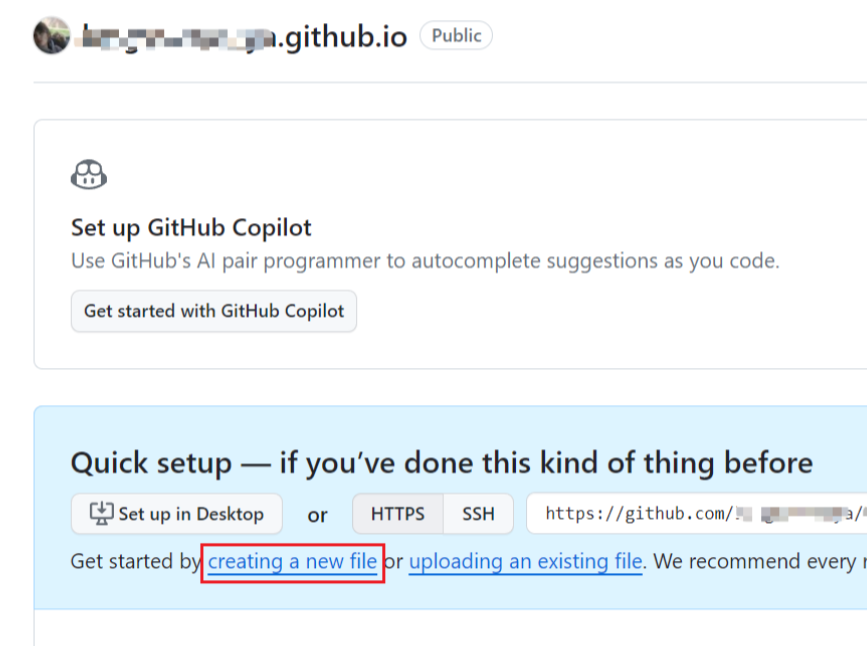
Then deploy your page.
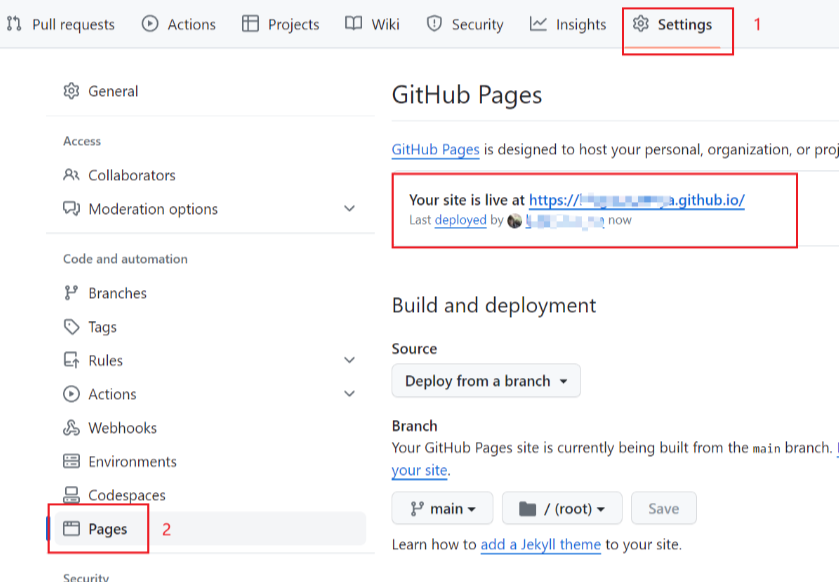
Access the page at https://xxx.github.io/ to view it.
Step 2: Install Hexo
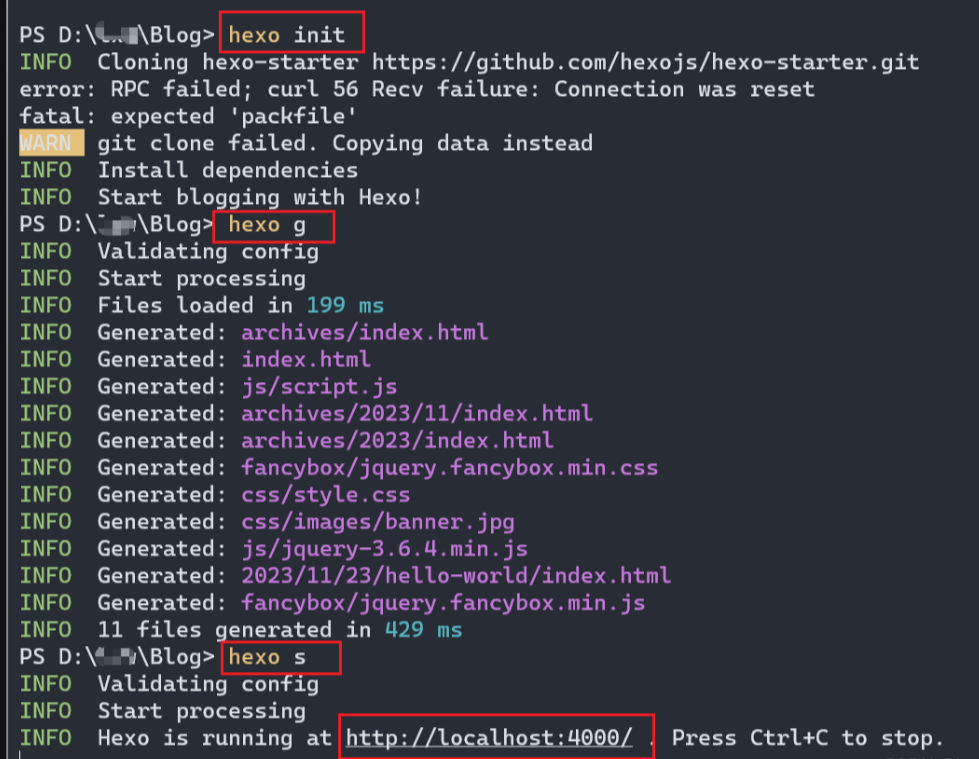
Create a folder on your computer for your web project and enter it. Then, right-click and open the CMD terminal in it. Then run the following commands to install Hexo:
npm install -g hexo-cli hexo init // Initialize
hexo g // Generate static files
hexo s // Start local service and preview
After start local server, you can visit http://localhost:4000/ in a browser.
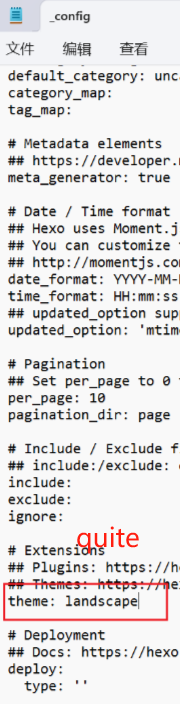
Step 3: Change Theme
Select a theme from Hexo themes. I chose the simple "quite" theme.
Run this command to download the theme:
git clone https://github.com/79e/hexo-theme-quiet.gitUpdate _config.yml to reflect the theme.
Then run the command to see the changed theme:
hexo clean
hexo g
hexo s
You can visit the quite repo to see how should you edit the content.
Tips: When you want to disable the comment function in this quite theme, you can try edit the themes/quiet/_config.yml file as follow.
gitalk:
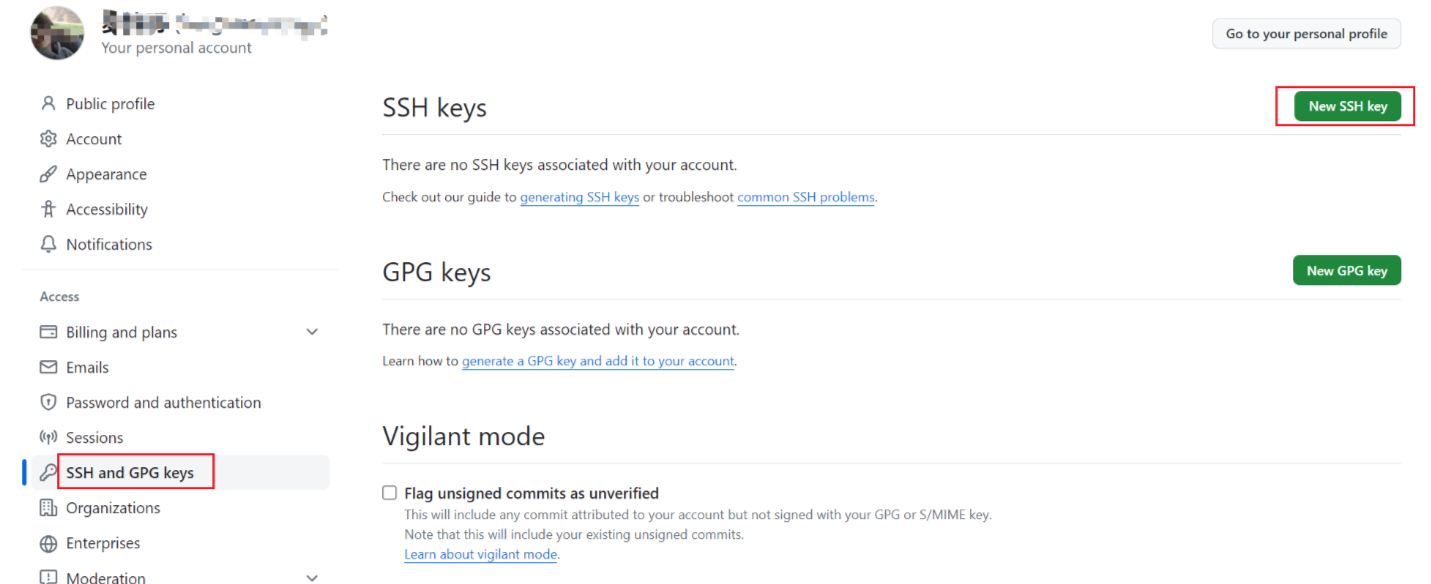
enable: falseStep 4: Configure SSH Key
Open Git Bash in your project folder and set up Git credentials if necessary:
git config --global user.name "YourGitHubUsername"
git config --global user.email "YourGitHubEmail"
Generate SSH key with:
ssh-keygen -t rsa -C "YourGitHubEmail"Copy the content of id_rsa.pub to GitHub SSH keys page.
Then test SSH setup by running:
ssh git@github.comTips: When you have more than one SSH key, create and edit your SSH configuration file so that SSH automatically uses the correct key. Open the ~/.ssh/config file. If the file does not exist, create it:
Host github.com
    HostName github.com
    User git
    IdentityFile ~/.ssh2/id_rsa
Step 5: Connect Hexo to GitHub
Get HTTPS from github.
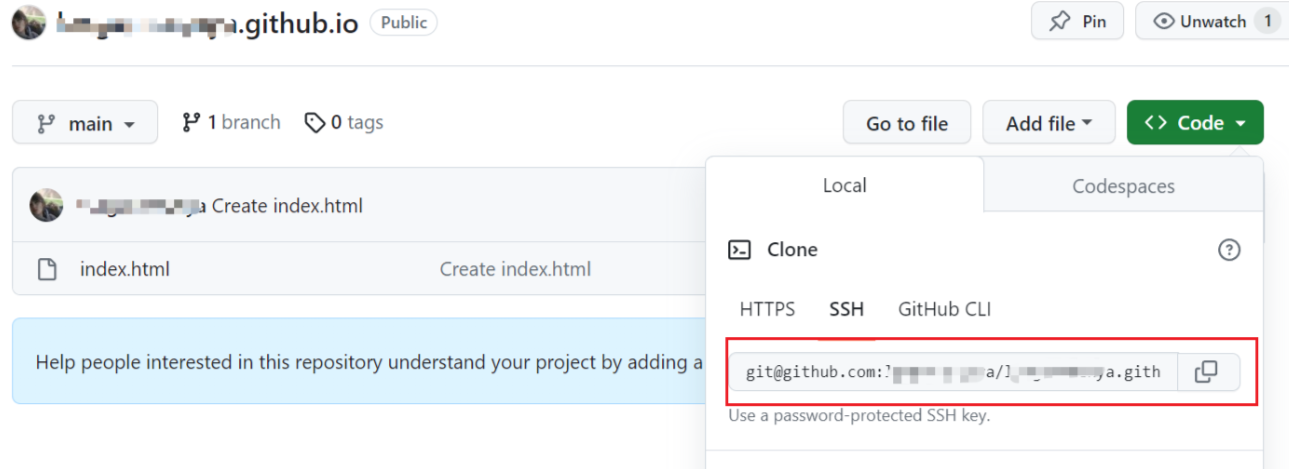
In _config.yml, configure deployment:
deploy:
type: git
repo: Your HTTPS URL
branch: main
Install the Git deploy plugin:
npm install hexo-deployer-git --saveRun the following commands to deploy:
hexo clean
hexo g
hexo d
Step 6: Solve Image Upload Issues
Create a GitHub repository for images and upload them.
Copy the image URL and use it in markdown as:
https://github.com/YourUsername/YourRepo/raw/main/images/yourimage.pngStep 7: Publish an Article
Create a new post using:
hexo n "YourArticleTitle"Edit the markdown file in /source/_posts, then run:
hexo cl
hexo g
hexo d