
We were asked to start thinking and sketching a final project that has our personal brand, and that solves a problem. Immediately after class, I heard the meowing of my cats asking for food, and I thought of the following proposal.
As an owner of adult cats, I know firsthand that the health of our pets is sometimes a mystery as they don't have a direct way to communicate a nuisance, but several signs can give us clues that something is wrong with them. In the case of cats, one of the first warning signs is that they do not eat. When one is constantly serving food on their plate, it is not easy to discern this.
Among the existing products on the market, there are many Smart feeders [Link] (Figure 1A) or DIY projects [Link](Figure 1B) of the exact nature, but in general, they focus on giving food at a specific time and with exact portions but never monitoring food consumption.
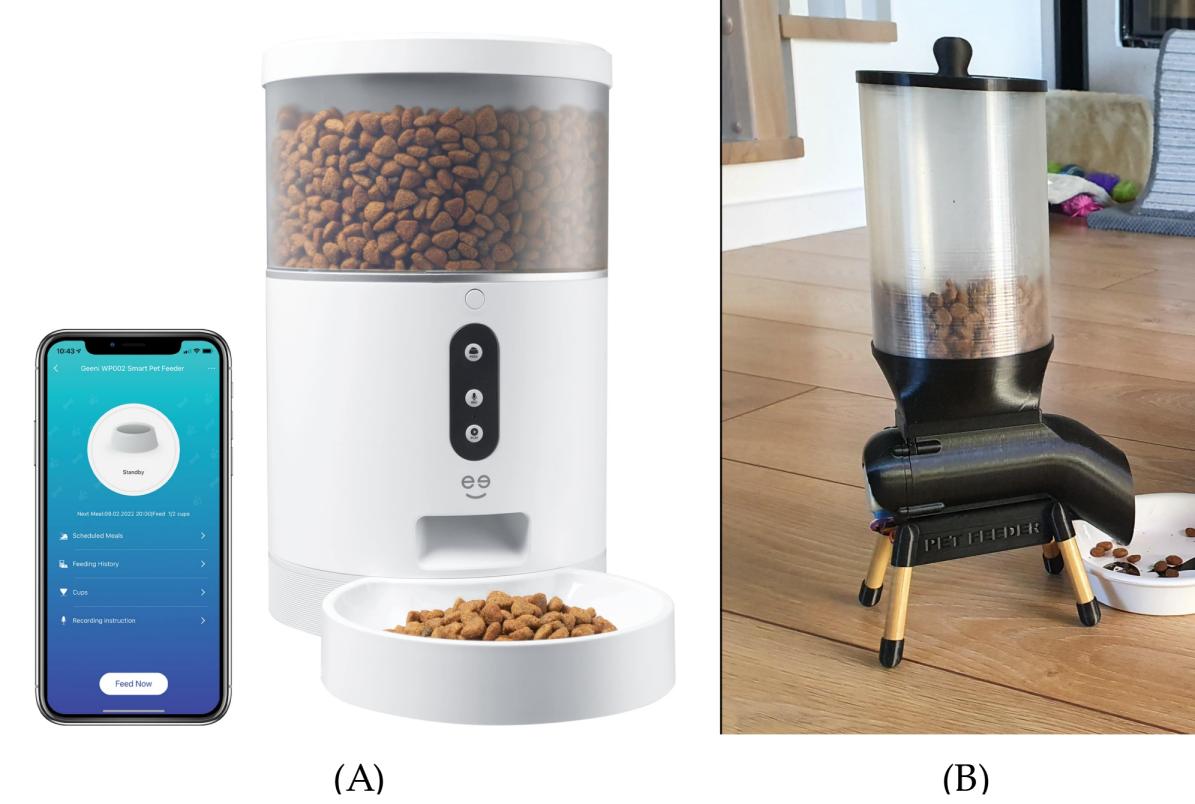
Figure N°1: Cat feeders (A) Commercial product (B) DIY project
For this reason, the first part of this proposal is focused not only on giving the correct portion of food at the right time but also on monitoring the state of the dish monitoring the number of grams consumed per day because if we have a record of this parameter, we can know if there is an appetite problem in the pet that can be an indication of diseases.
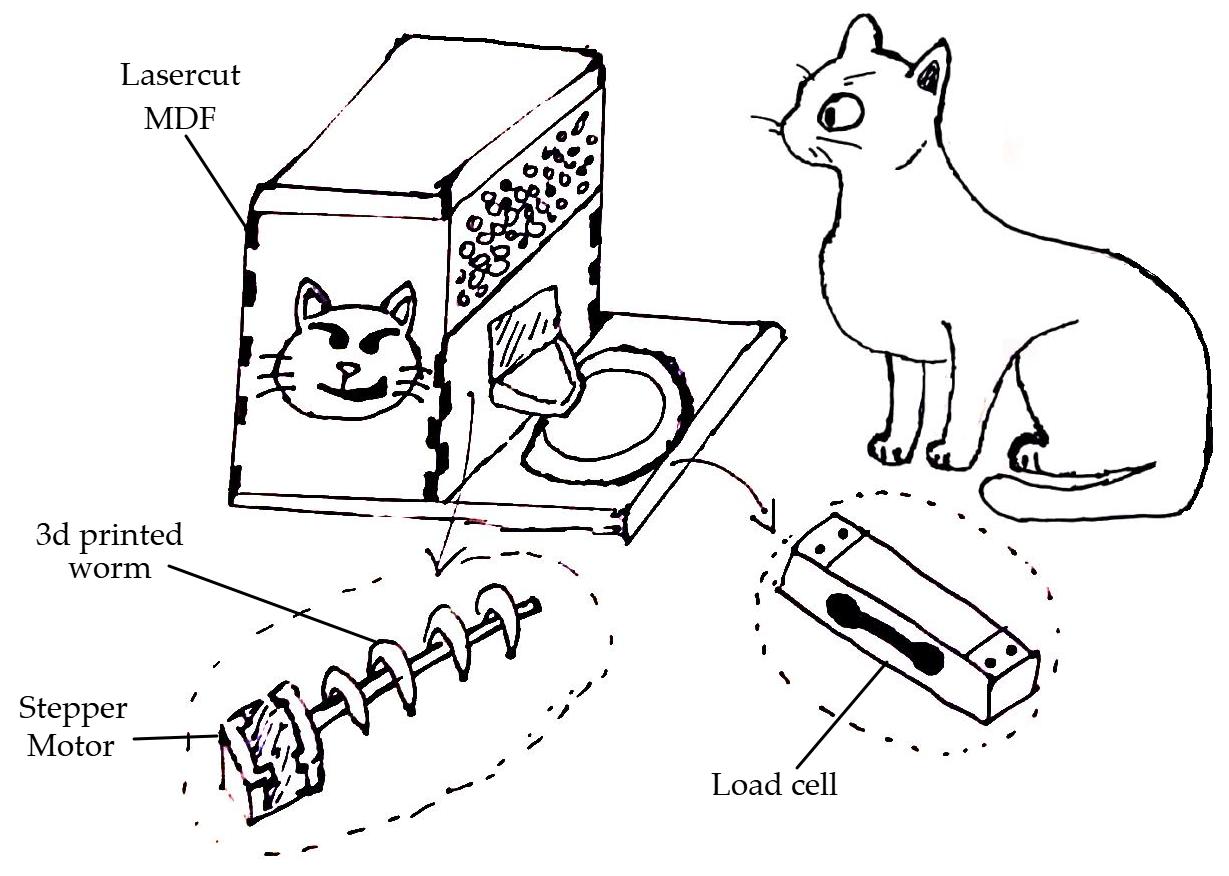
Figure N°2: Sketch of the first part of the final project
To measure the state of the dish we will use a load cell, to move the food a stepper motor with a 3D-printed worm, all in a casing made of laser-cut mdf.
For the second part, the matter is a little more complicated; another vital sign in cats is the heart rate; an adequate bpm range according to the minimums age, and values outside that range would denote a health problem.
The gold standard with which veterinarians measure this parameter is using a stethoscope. In the case of owners, they must put their hand on their cat's chest, count how many pulsations they find in 15 seconds, and then multiply that value by 4.
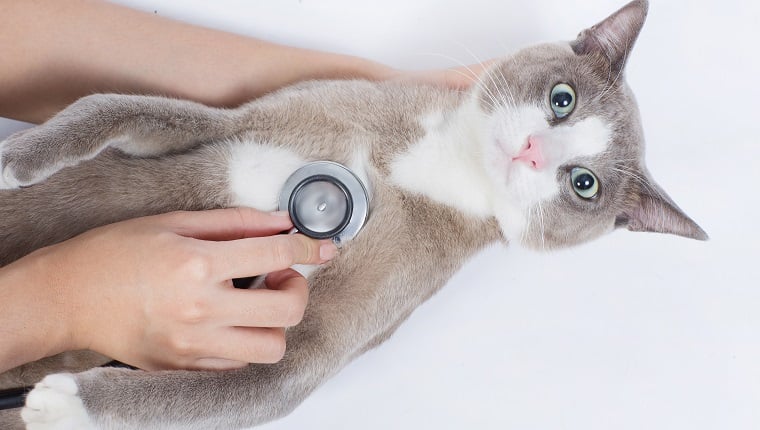
Figure N°3: Measuring heart rate in cats
For this reason, the idea is to monitor this parameter while the cat is resting; as we know that cats love boxes, the idea is to create a rounded cube with cardboard and MDF that has all the necessary components for this measurement at the bottom.
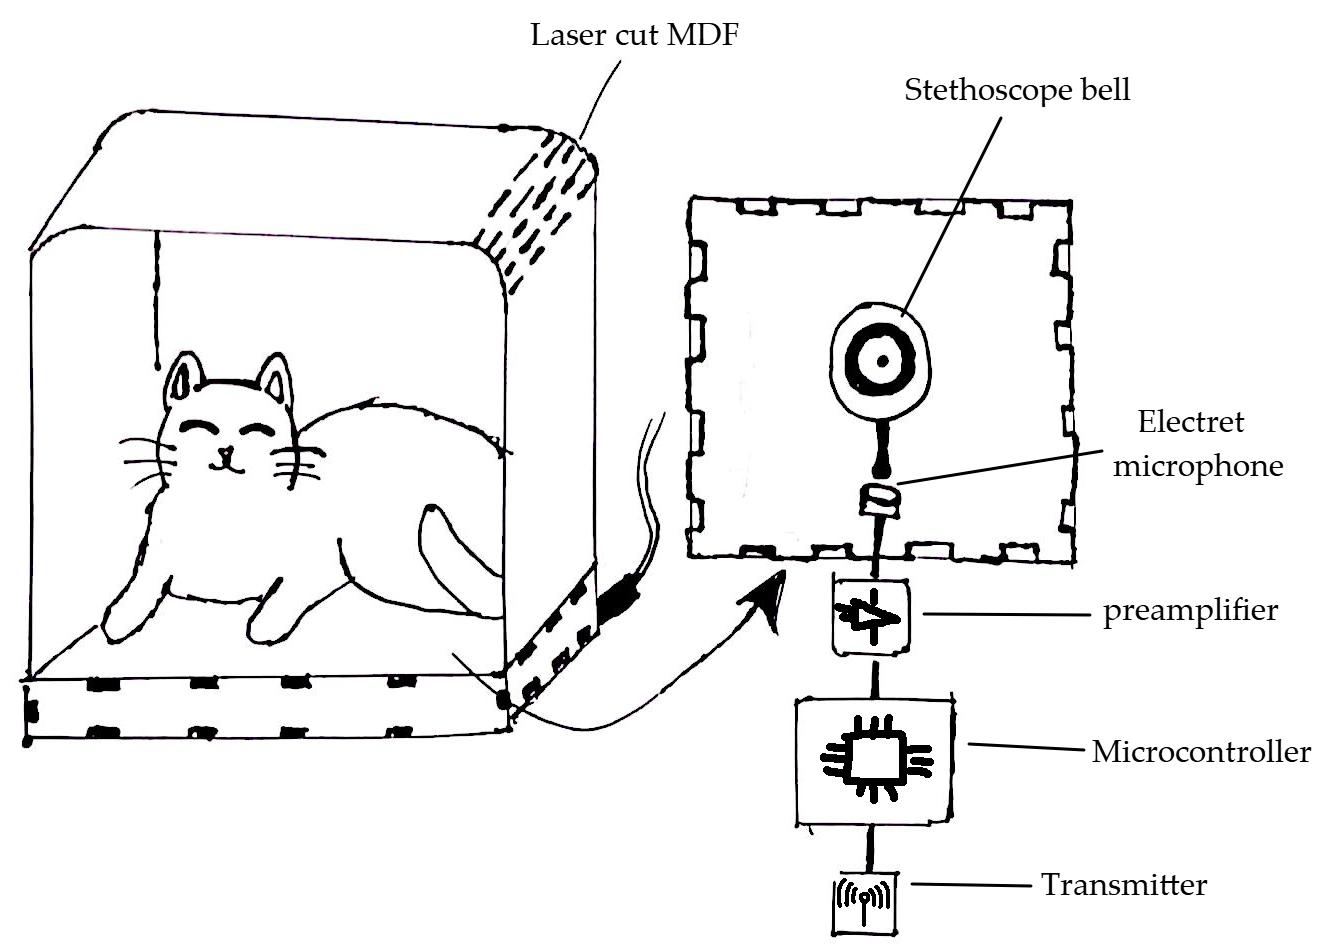
Figure N°4: Sketch of the second part of the final project
The main element is the bell of a stethoscope, adapting the sound output tube to an electret microphone with a preamplifier to send the signal to a microcontroller and later send it via WiFi to a server. Subsequently, this signal must be cleaned and processed to find the amplitude peaks and, therefore, the bits per minute.
This proposal has the approval of potential users (Figure 5). See you next week.
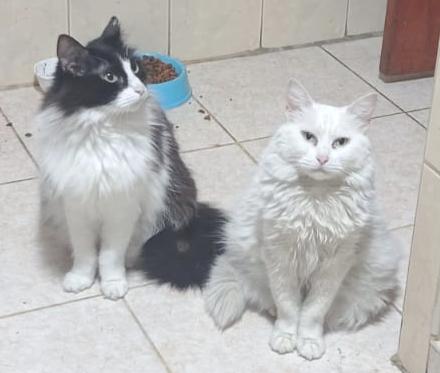
Figure N°5: The potential users
The objective of this week was to create a personal page where we will document the assignments week by week.
This page will be hosted on GitLab [1], a Version Control System (VCS) platform; this is the practice of tracking and managing changes to software code. [2]
To perform this task, we will need to install different tools on our computer; the main ones are the following:
Already having bash installed, we must configure it with the following steps:
git config user.name "FIRST_NAME LAST_NAME"Set up email
git config user.email "MY_EMAIL@example.com"
To establish proper authentication with the server, it is necessary to create a key. This is created using the ssh-keygen -t rsa -C "$jp.tincopa@gmail.com" command; we can see this in Figure 1B.
When it has created the key immediately after, it creates a key's randomart image like the one we see in Figure 1C.
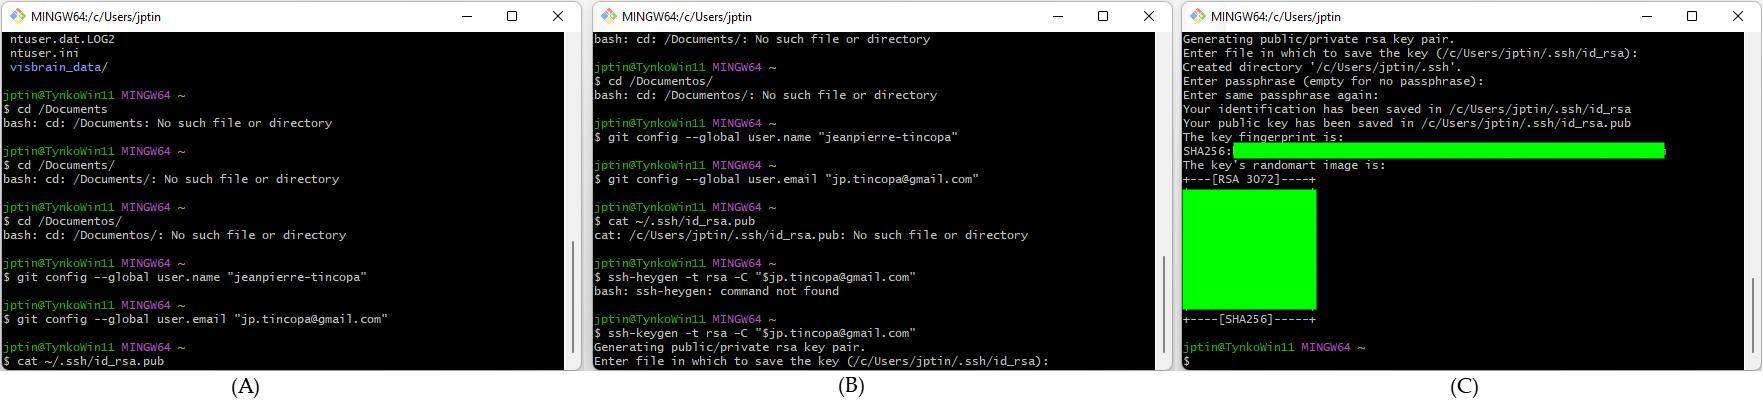
Figure N°1: Git bash outputs (A) user configuration (B) key creation (C) key's randomart image
Later we must save this key within our GitLab account (Figure 2).

Figure N°2: Section "SSH Keys" inside the "user settings"
One mistake I made was confusing the key format (Figure 3A), but it mentioned what the initial characters should be below the form. So I had to use the cat ~/.ssh/id_rsa.pub command to access the properly formatted key (Figure 4).
Now, if having it in the correct format, we enter it into our account and give it a name; when we add it, we can see how it should appear in the interface (Figure 3B)

Figure N°3: Section "SSH Keys " (A) wrong key (B) key entered correctly
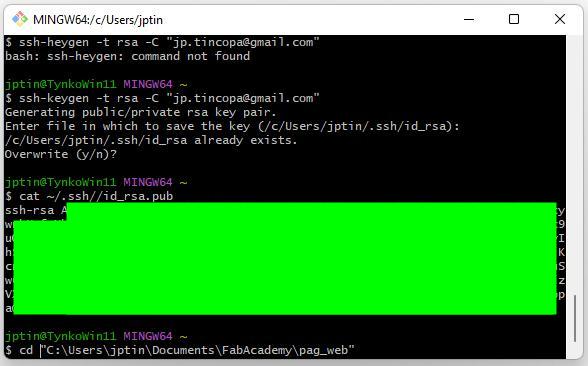
Figure N°4: Correct key format
Once we complete all the steps, we can use the git commands to clone the repository to our computer; the commands are as follows:
$ git clone https://gitlab.fabcloud.org/academany/fabacademy/2023/labs/esan/students/jeanpierre-tincopa
We can see in Figure 5 our local folder with the cloned repository.

Figure N°5: Local repository with the copied content
As we now need to edit our page files, we will use Visual Studio Code; to work optimally, we will add an extension [8] that allows us to see a real-time preview of how the page is looking. (Figure 6)

Figure N°6: Extension for Visual Studio Code
For the creation of this new page, we will use a public access template called "Minimal" designed by Bootstrapious [Link](Figure 7)
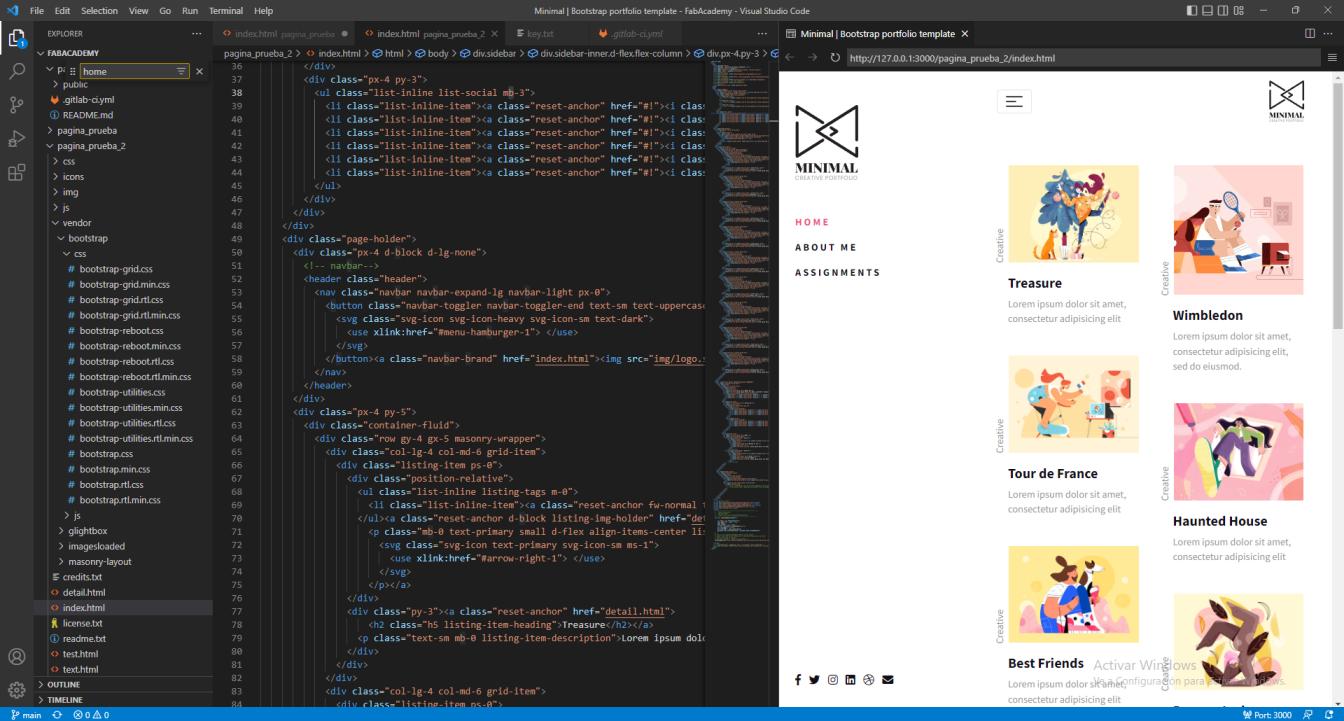
Figure N°7: Template opened from visual studio code
It is necessary to optimize each image we add to the page; this can be done by changing the format (from PNG to JPG) or resizing them. This can be done with the program called Kolourpaint. (Figure 8)

Figure N°8: Scaled image on Kolourpaint
We can see a big difference in the size of the images with a before (Figure 9A) and after (Figure 9B), where we have obtained almost half the size.
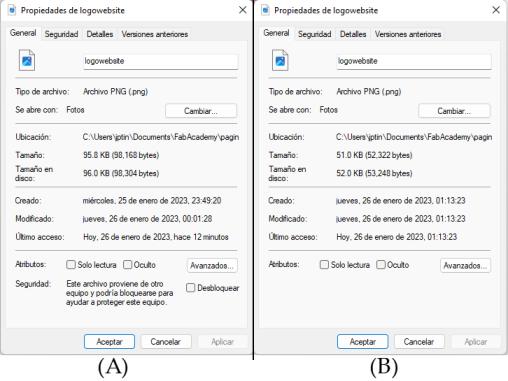
Figure N°9: Size comparison (A) before (B) after
Getting a little more into HTML layout language, we can create the main menu where the "Home," "About you," "Assignments," and the "Final Project" will be. An example of editing the "About you" page is in Figure 10.
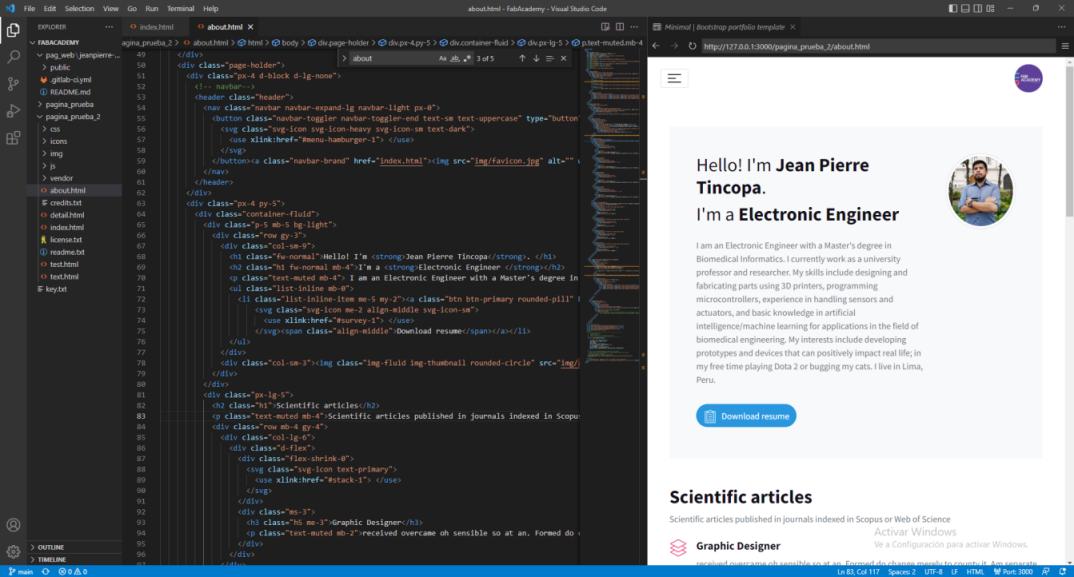
Figure N°10: First changes in the html template
Another relevant point to mention is that when trying to upload the files to fabcloud using Git Bash, a module will appear to log in to GitLab (Figure 11).

Figure N°11: Authentication from Git Bash
If we try to authenticate with a key, this will generate an error (Figure 12A) since the only viable option is to obtain a token. This token must be created in our GitLab account in the "User Settings --> Access Tokens" section (Figure 12B). Once we have this token and log in, we can upload our local files to the cloud.
The commands that we must use to do this action are the following:
git pullAdds content to our work page.
git add .Make shape changes instant and can be viewed as secure versions of our website.
git commit " "We send them to the server.
git push
In Figure 12C, we can see the bash with a successful result message after following these steps.

Figure N°12: (A) Failed authentication (B) Obtaining token (C) Successful output from Git Bash
Now with all this, we can finally see our page in the cloud (Figure 13)
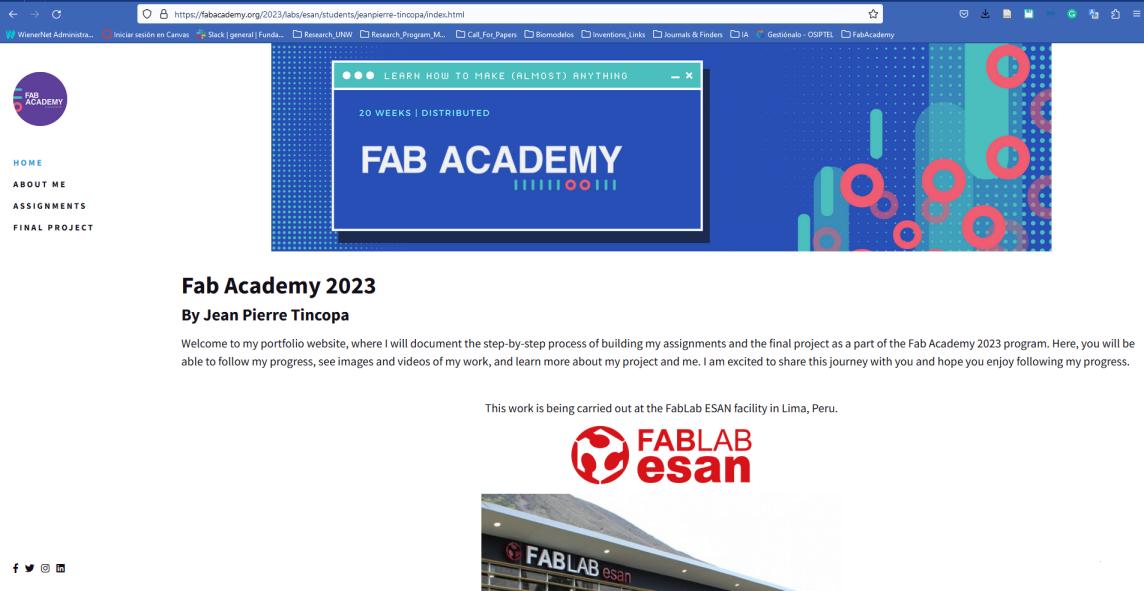
Figure N°13: Page updated successfully
Last but not least, we must have the "Student Agreement" section signed with our name on our page. (Figure 14)

Figure N°14: Adding the student agreement