Project Development
Ideation
After my great journey in Fab Academy, I have decided to change initial project idea. I want to make
something to have fun
with, enjoy the process & also try something new.
after a little bit of brain storming & walking through some great projects
documentations stumbled upon
this project "Paper Airplane Launcher By Dano Wall" which inspire me to build
a Paper Airplane
Launcher.

Planning
| Time | Task |
|---|---|
| 20 May to 23 May |
Cardboard prototyping.
Prepare my bill of materials & sorce the needed components. |
| 24 May to 29 May |
Working on the bluetooth communication code.
Working on transmit and receive multi-Value serial data code. Write the whole code that will control the motors and test it. |
| 30 May to 7 June |
Design the Pan/Tilt mechanism and The launcher it self.
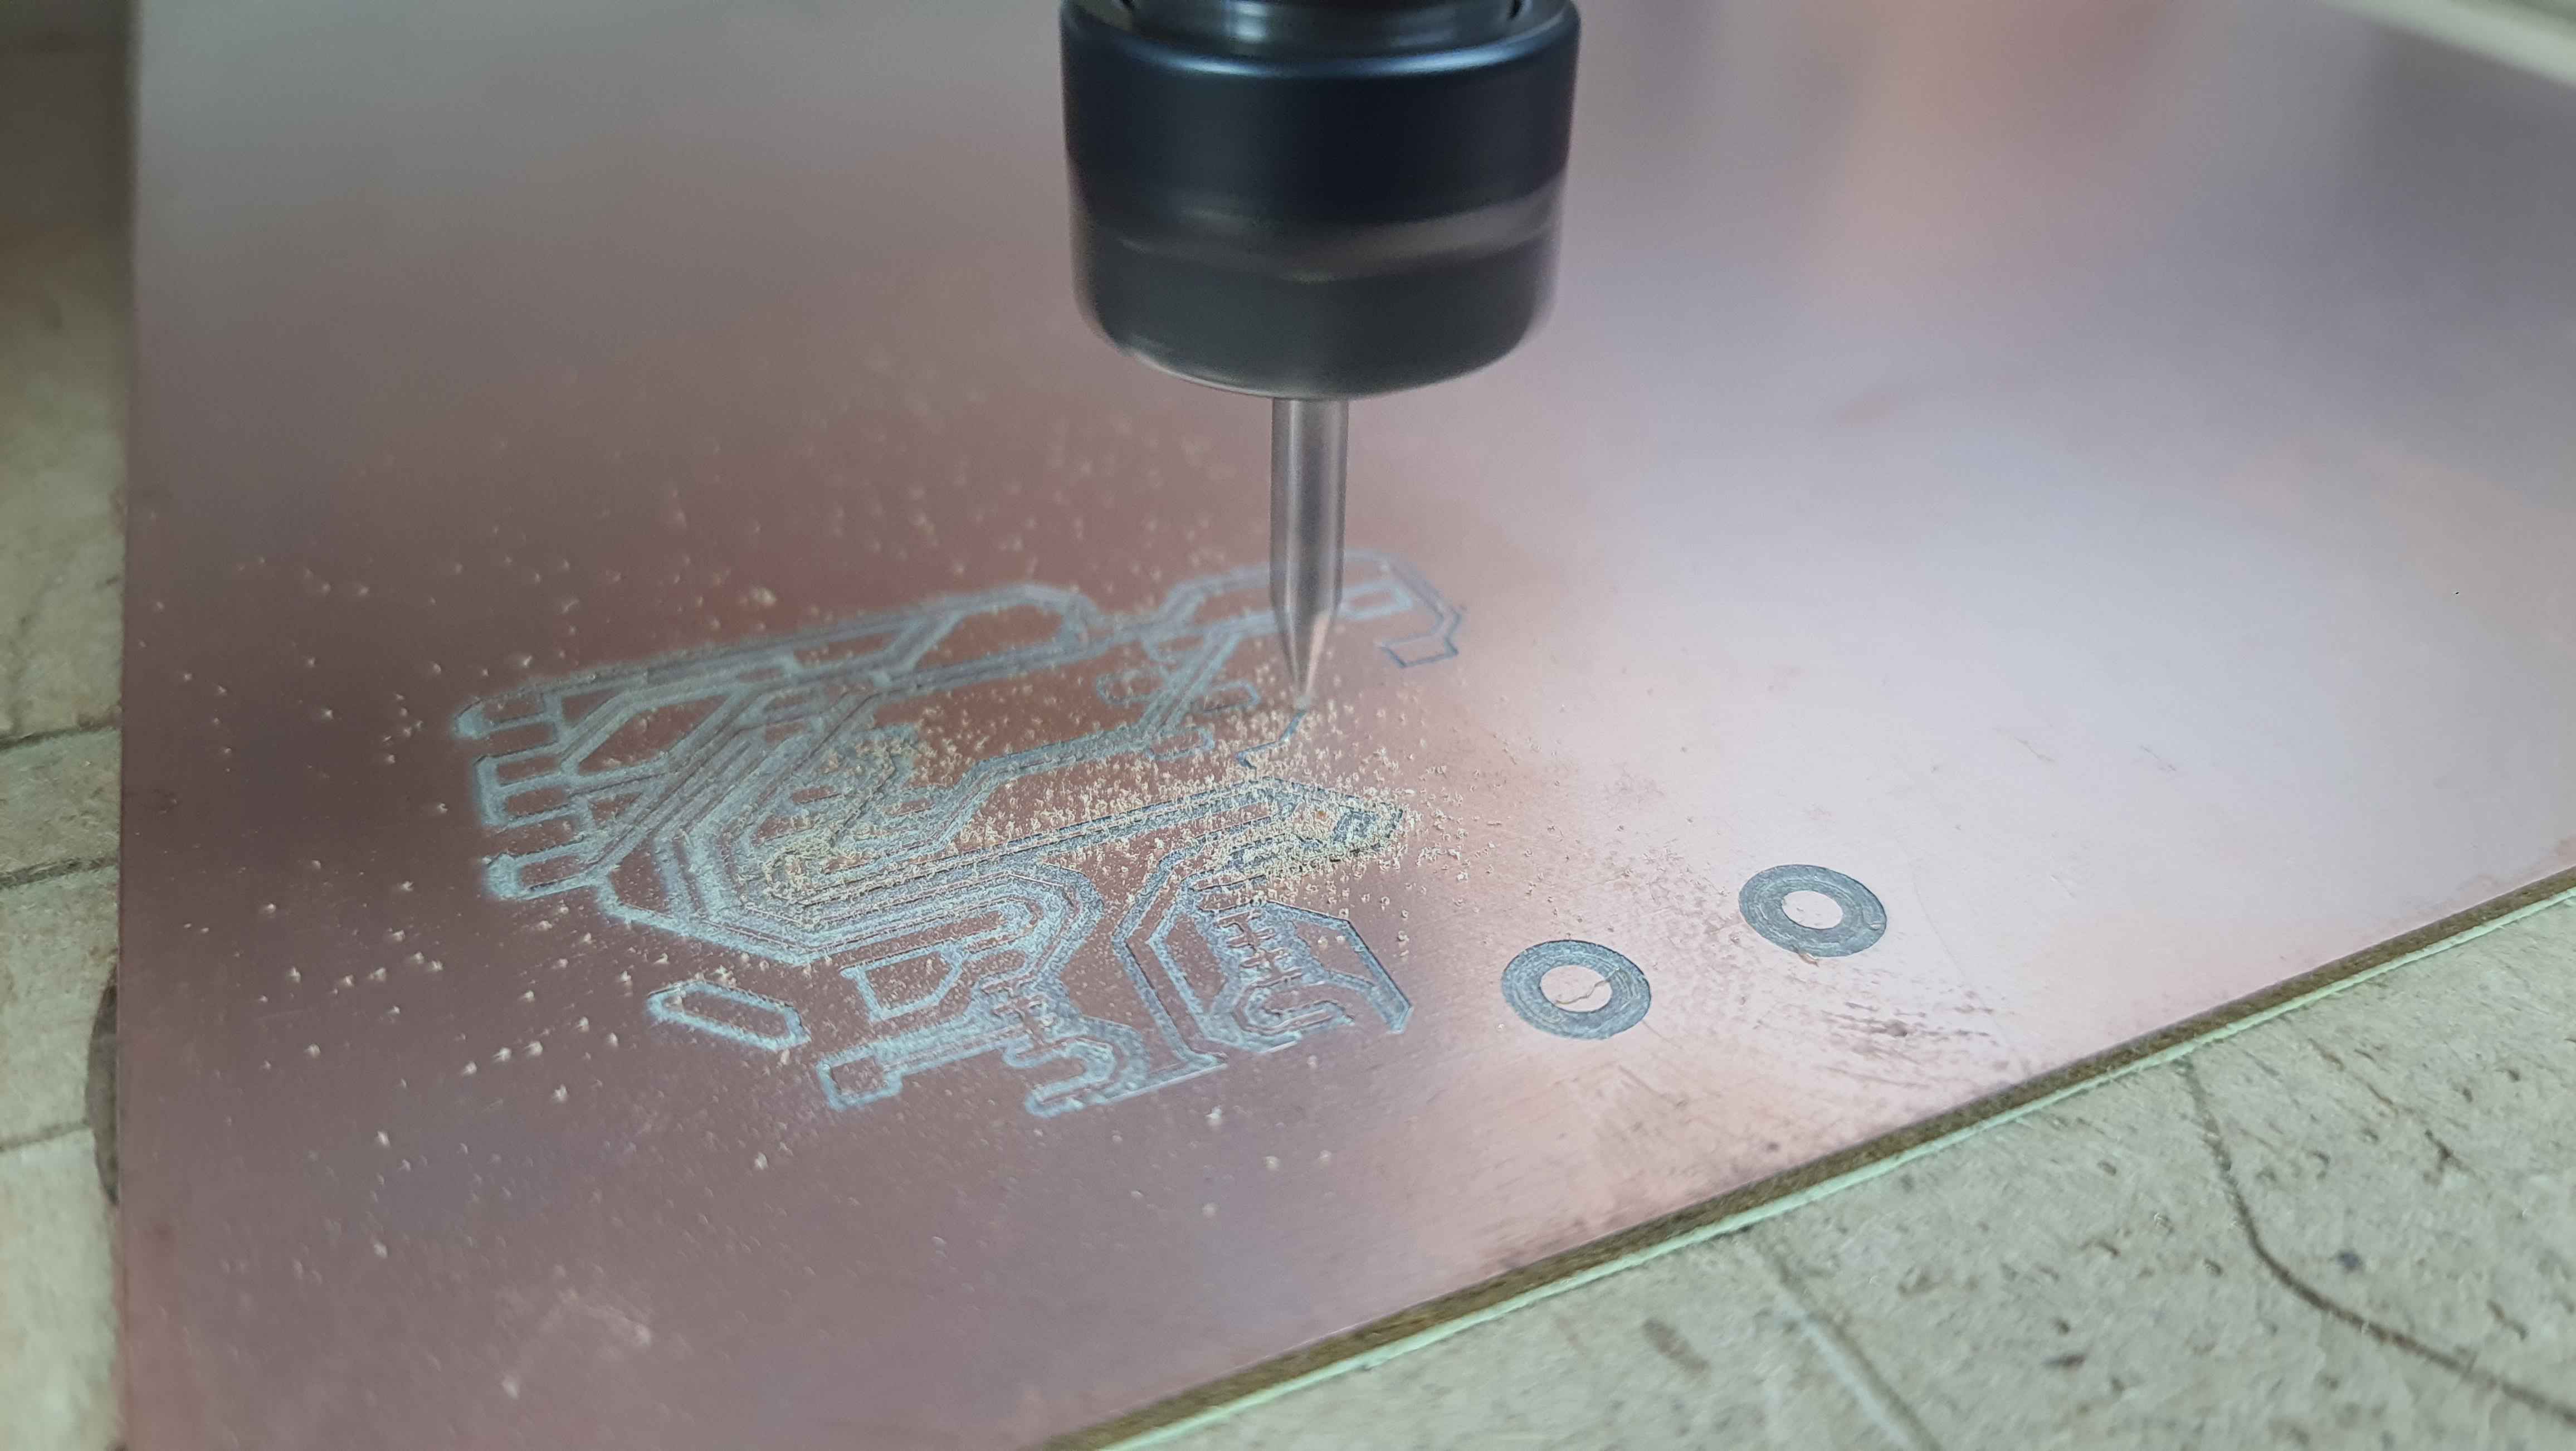
Design and fabricate PCBs. Test my PCBs with my other components. Code & CAD edits. 3D Printing & laser cut my parts. |
| 8 June to 11 June |
Assemble the project.
Final Code edits. Make the final presentation slide. Make the final presentation video. Documenting the final project page. |
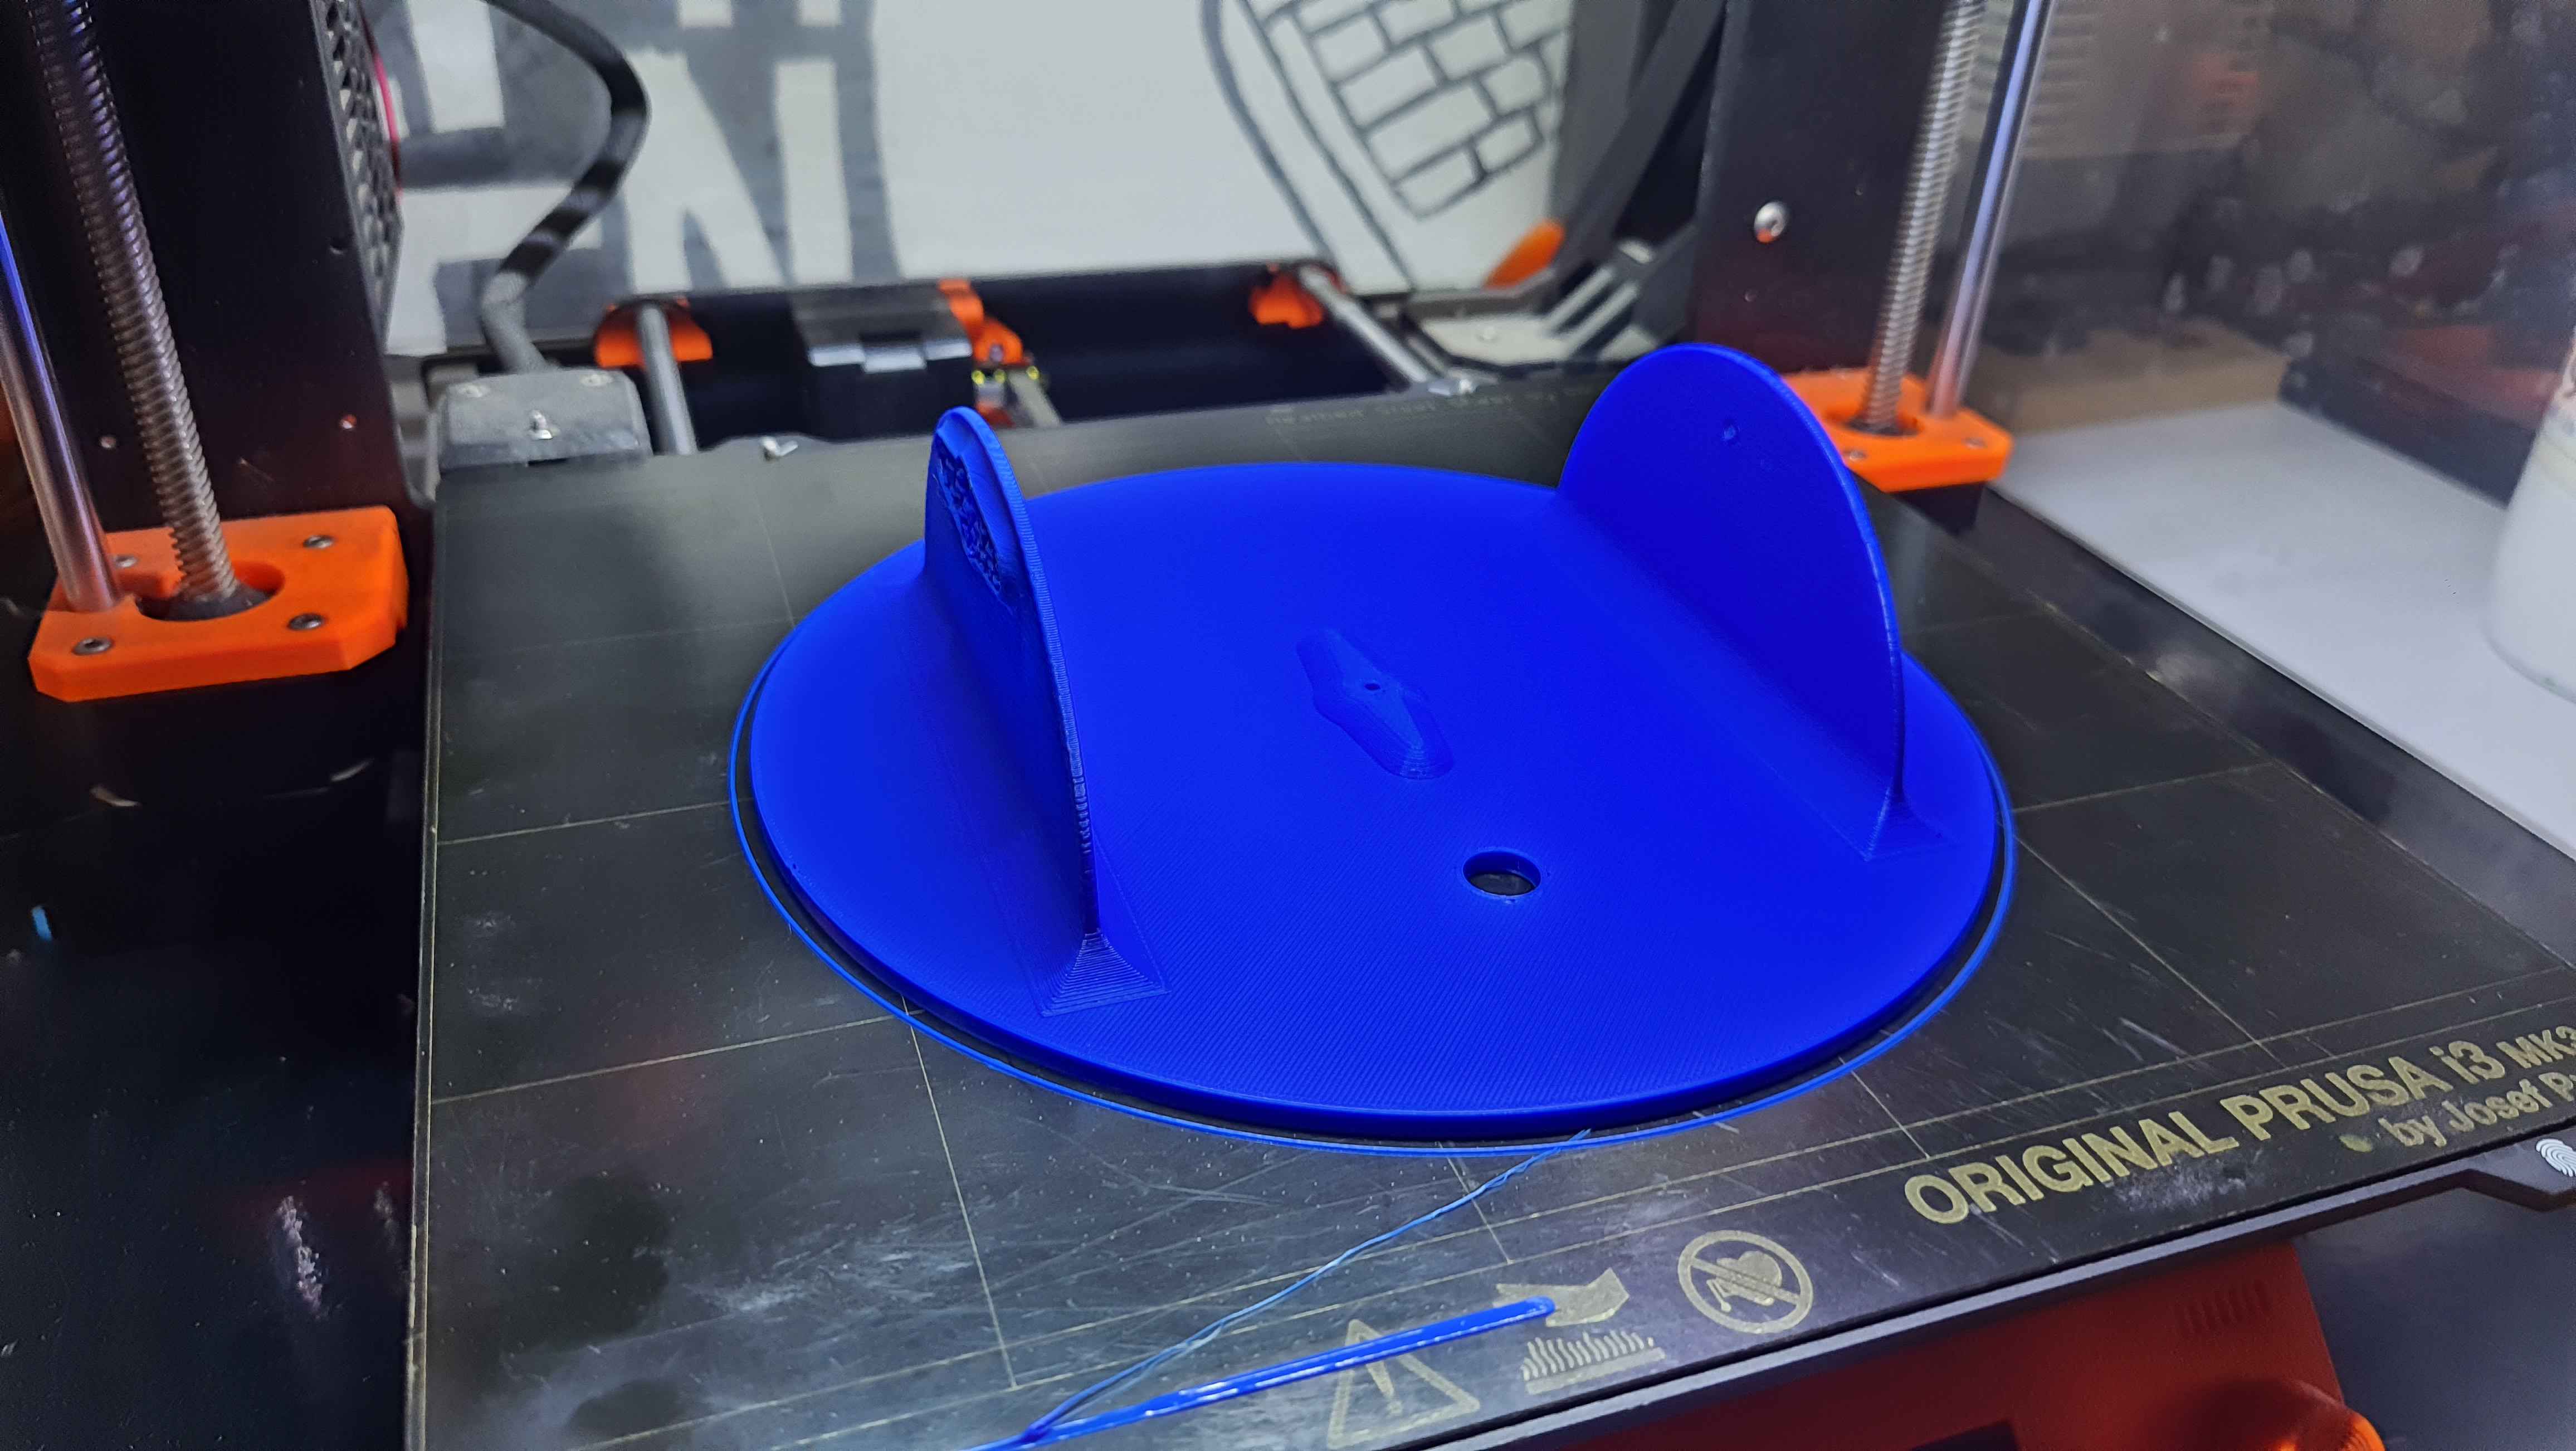
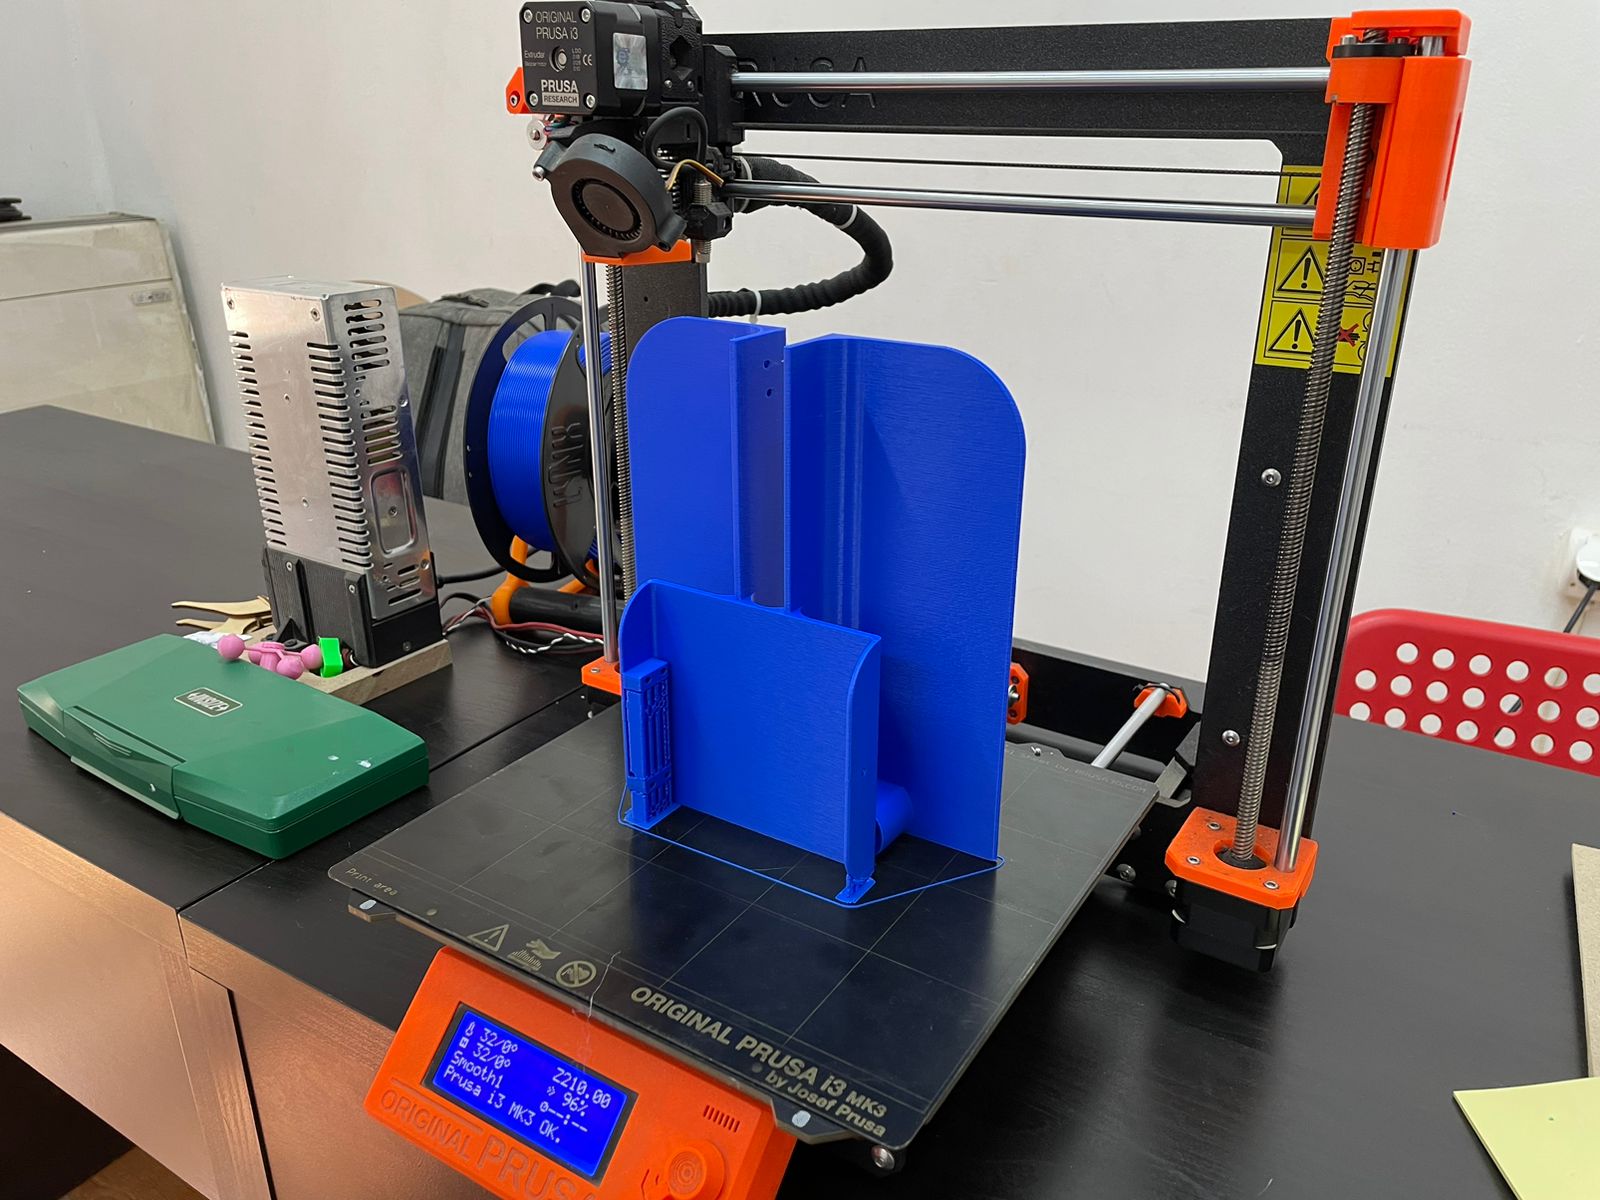
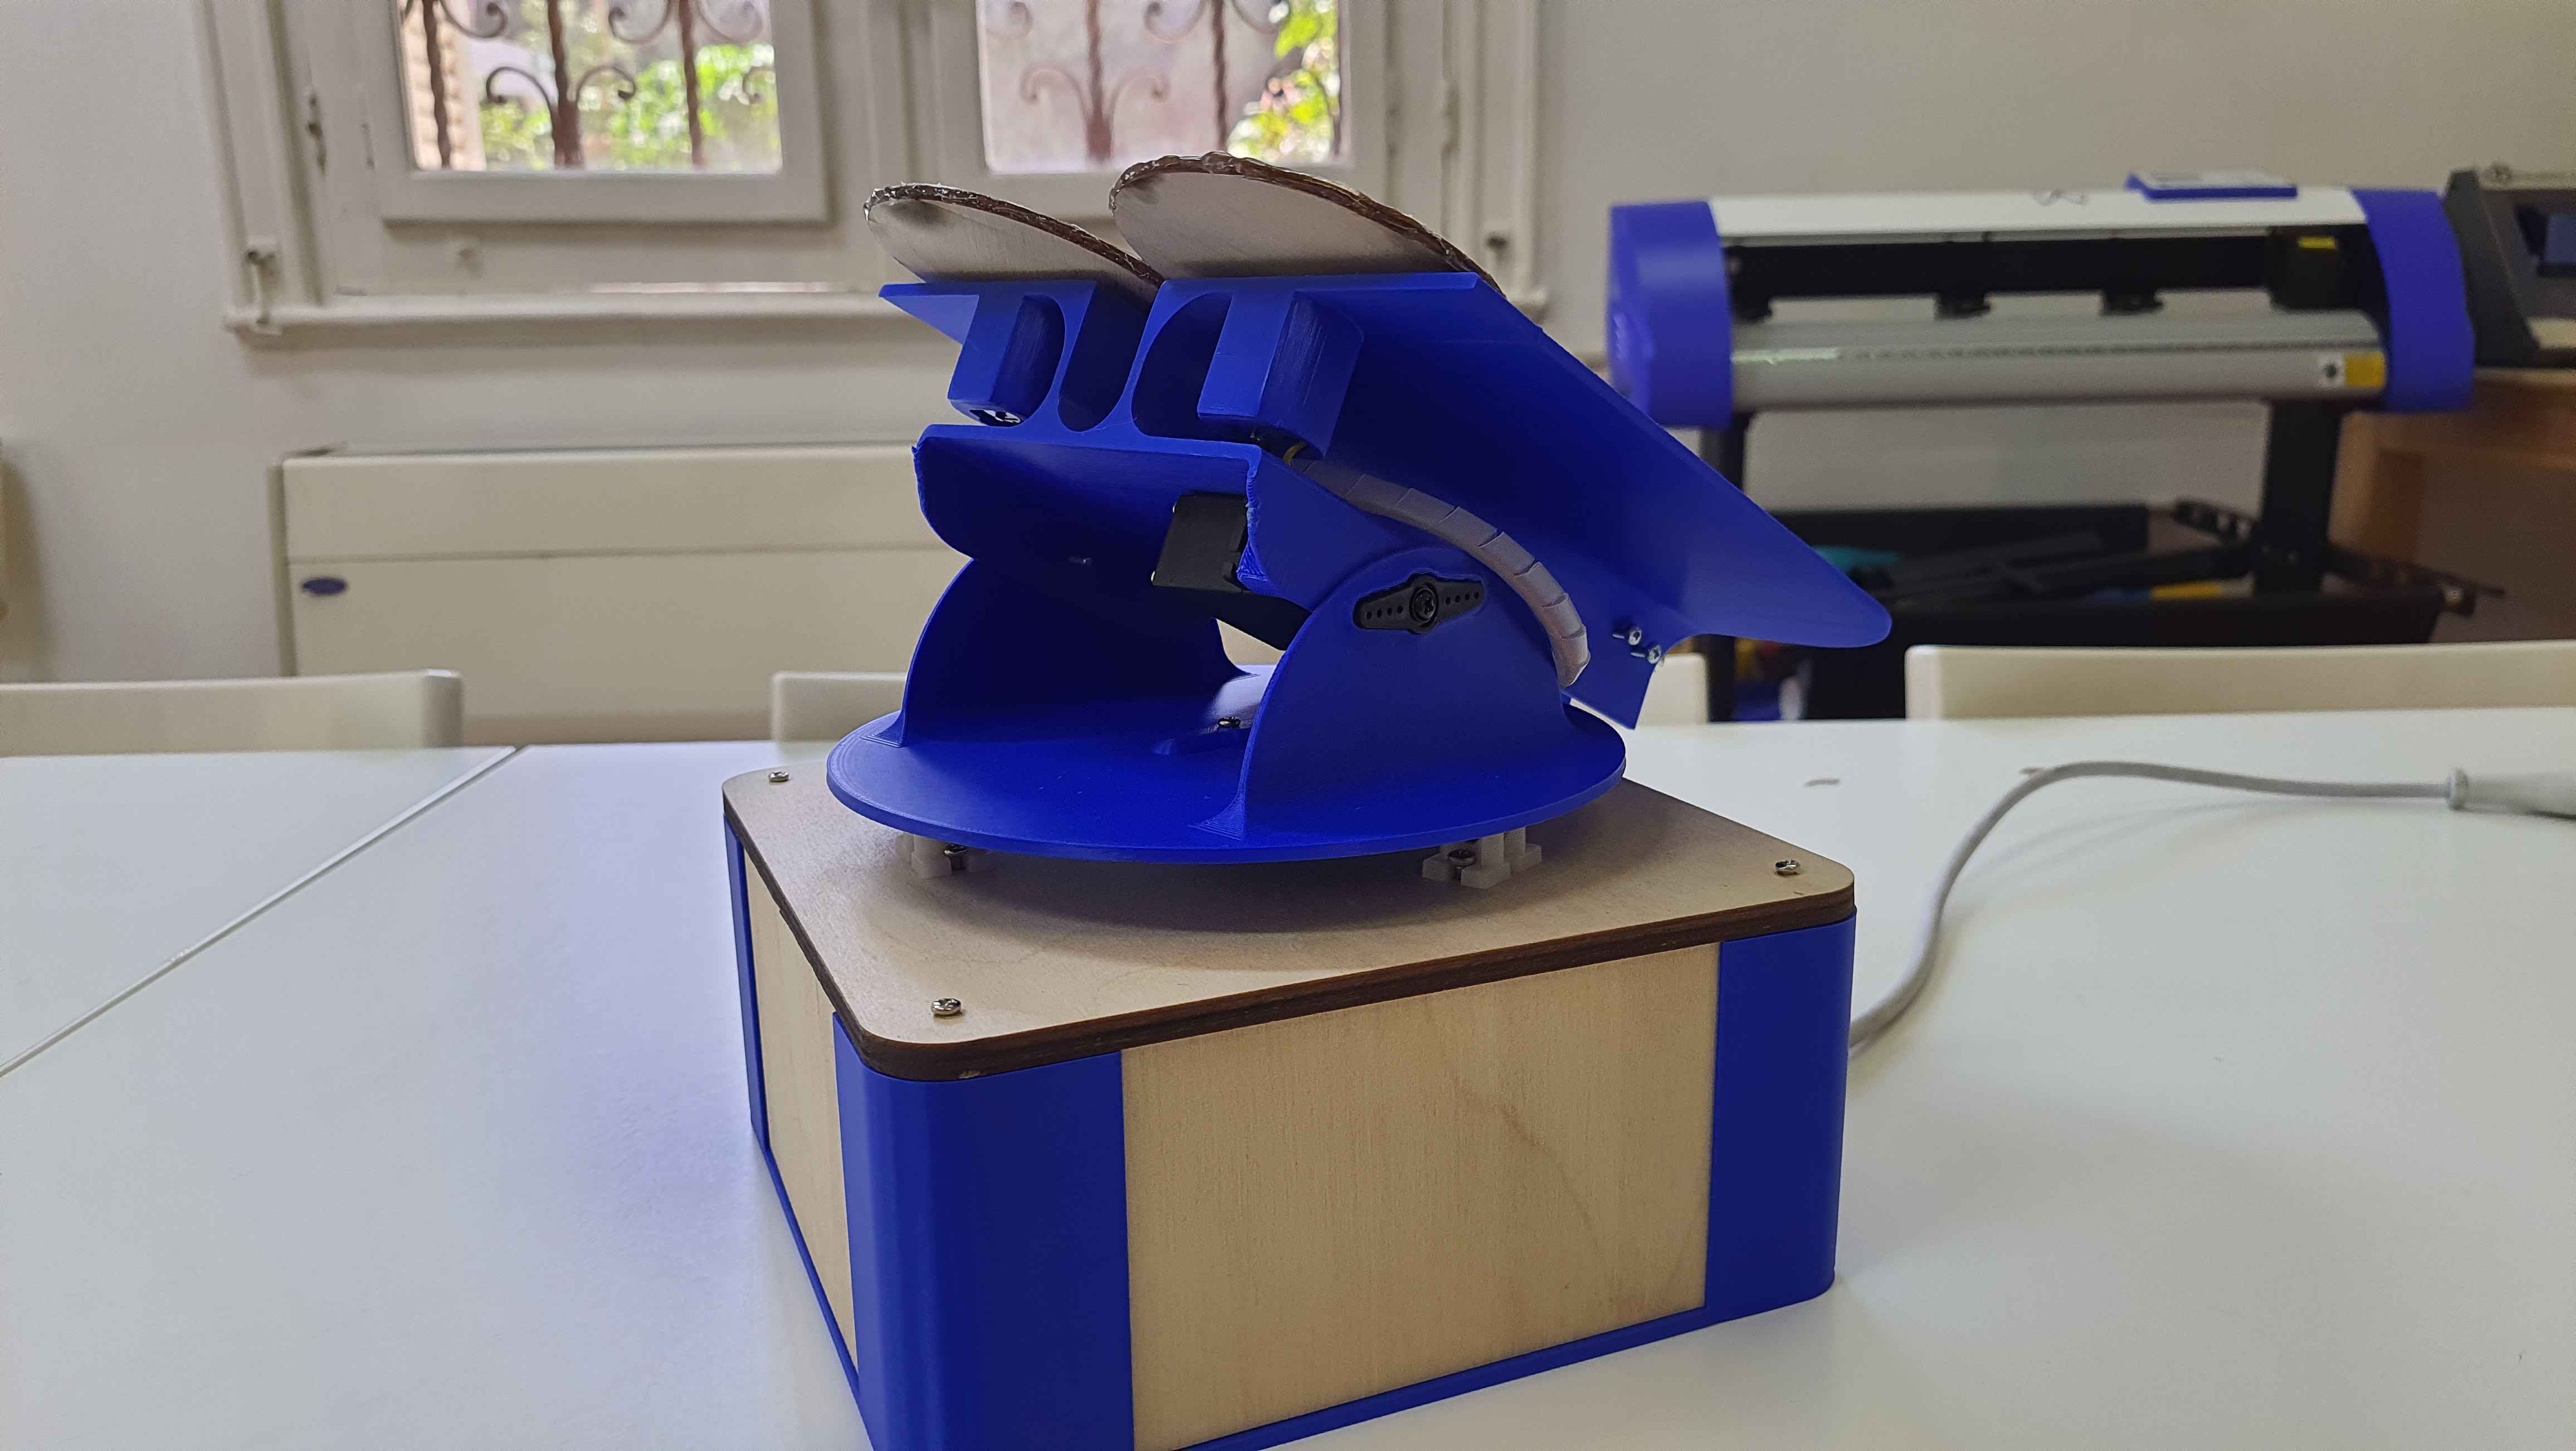
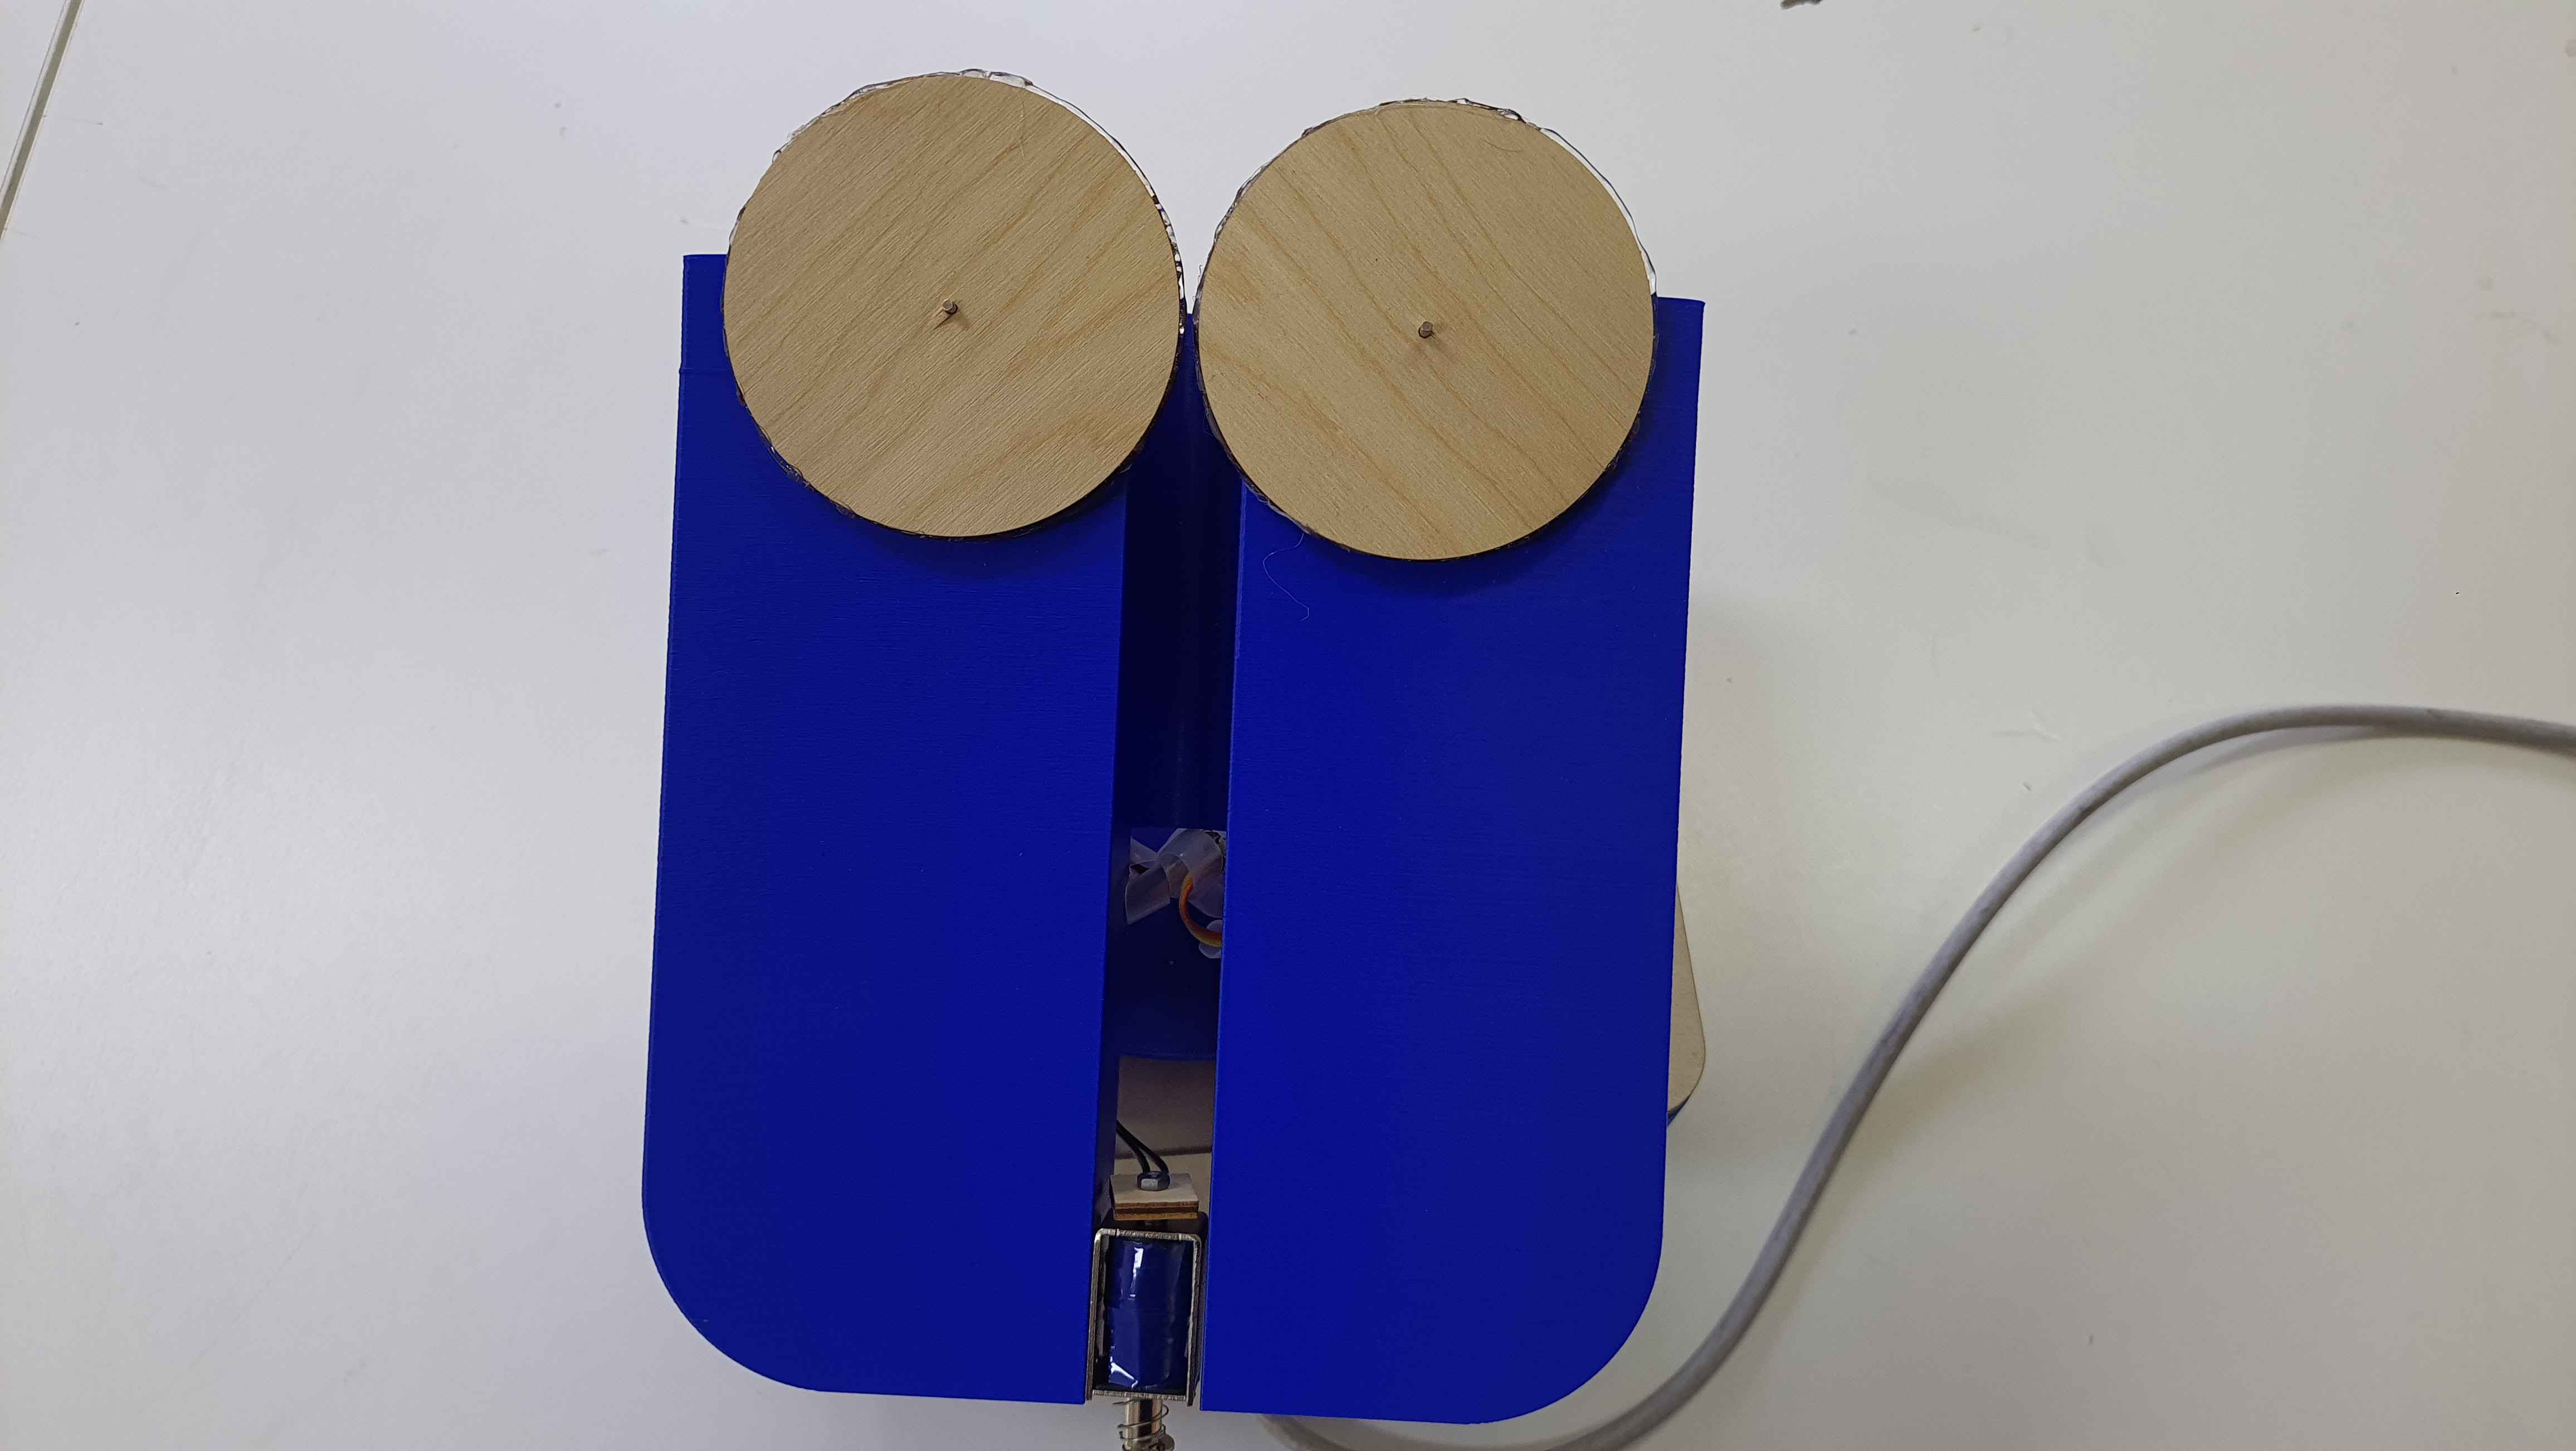
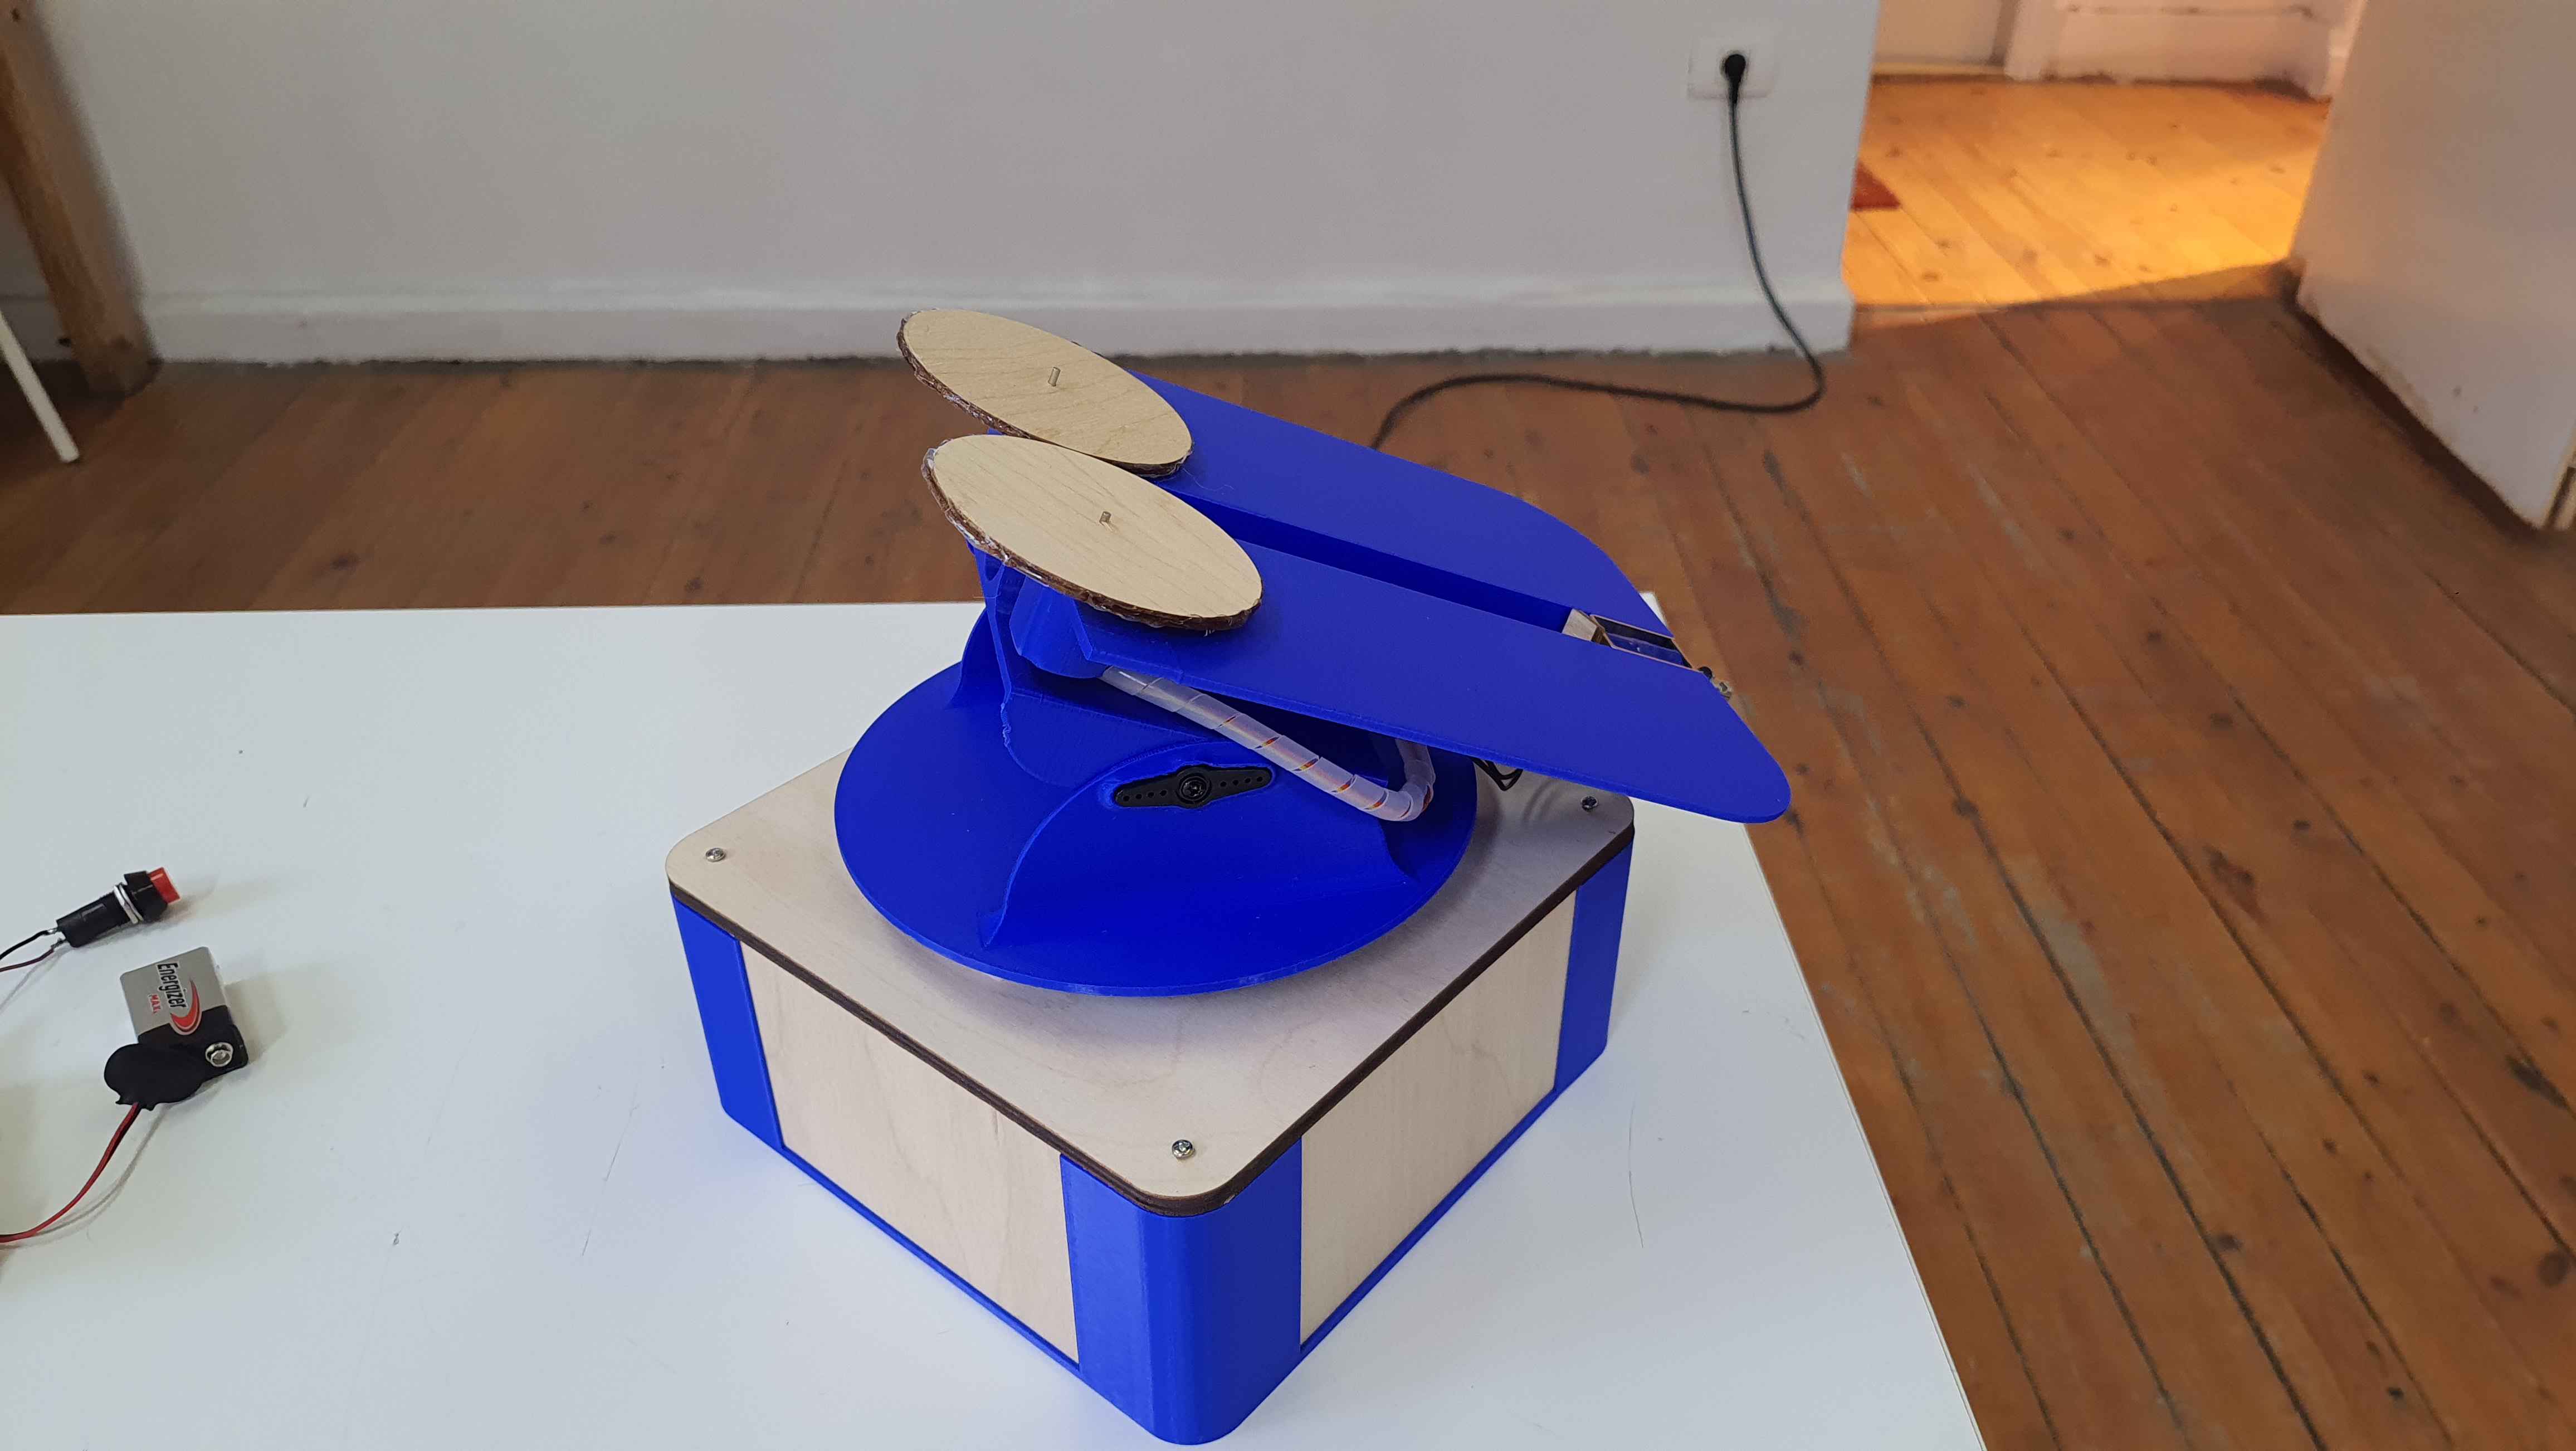
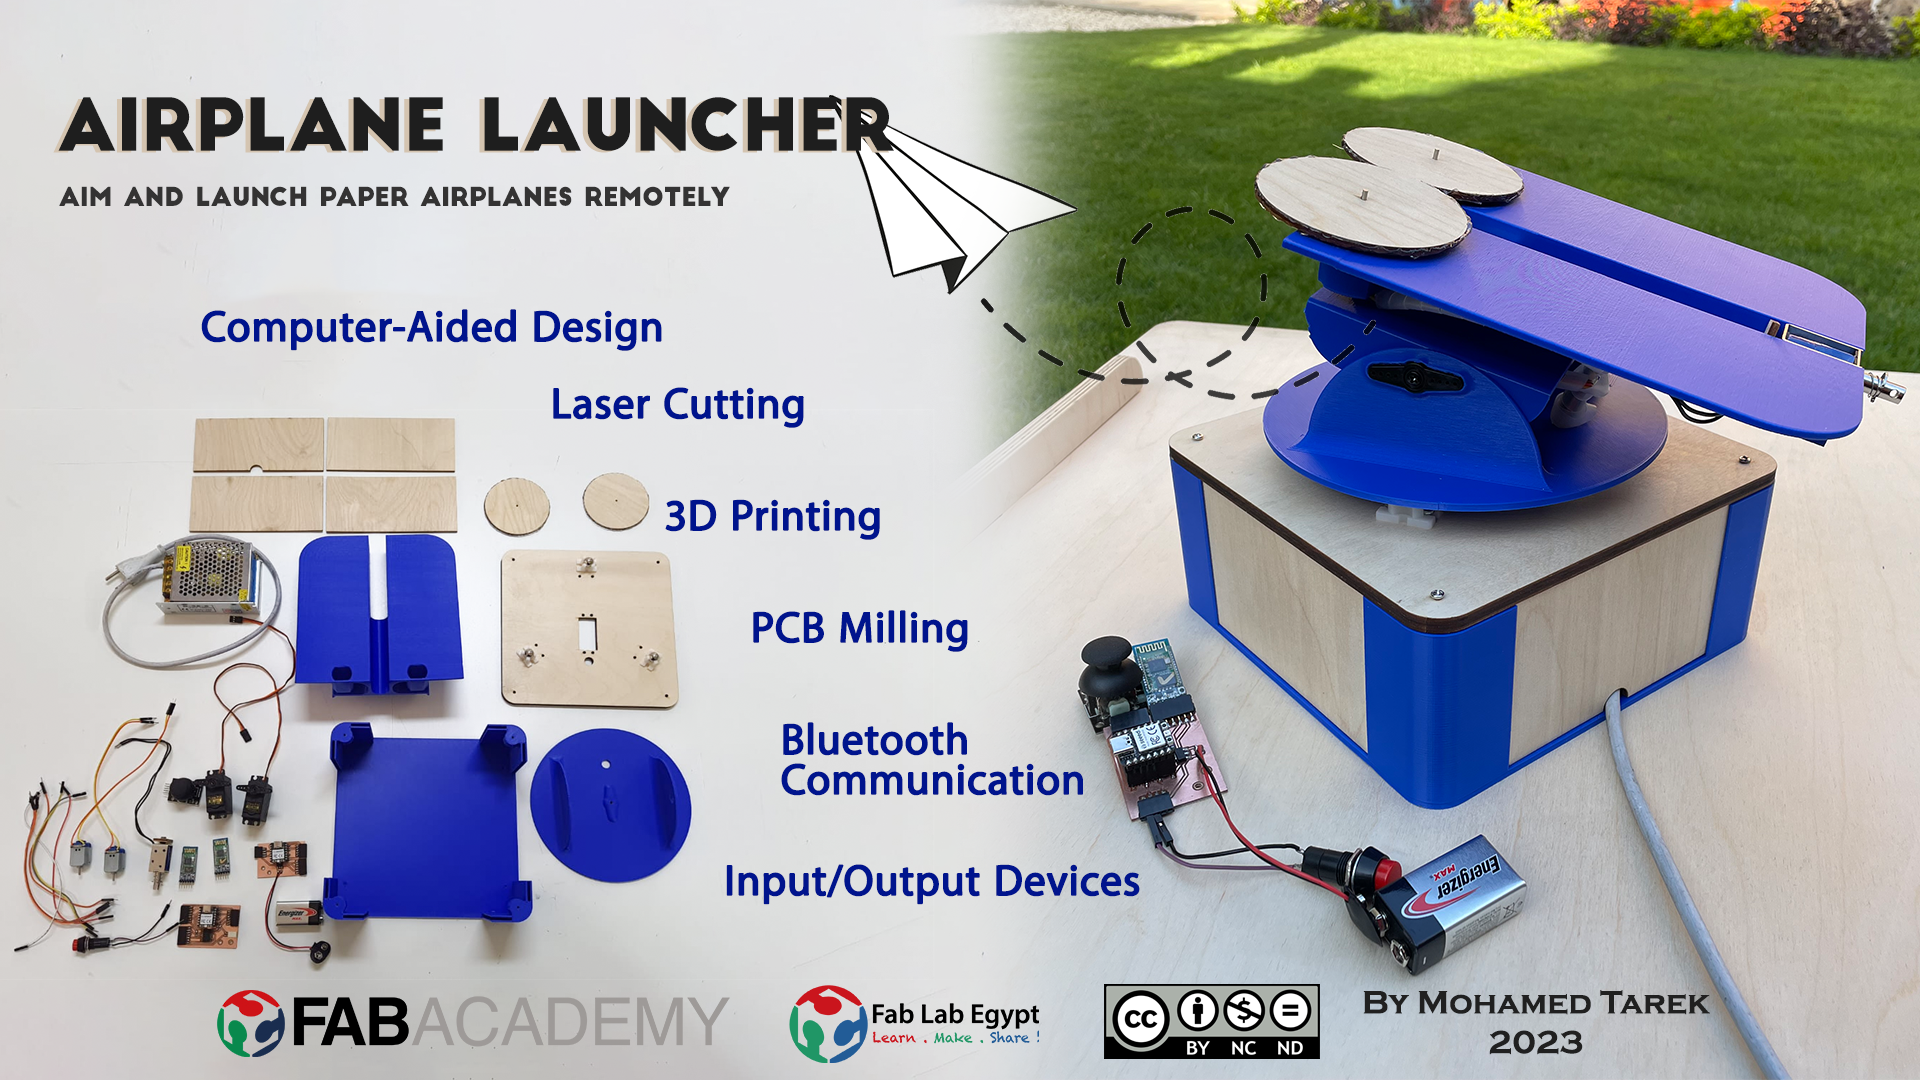
Construction
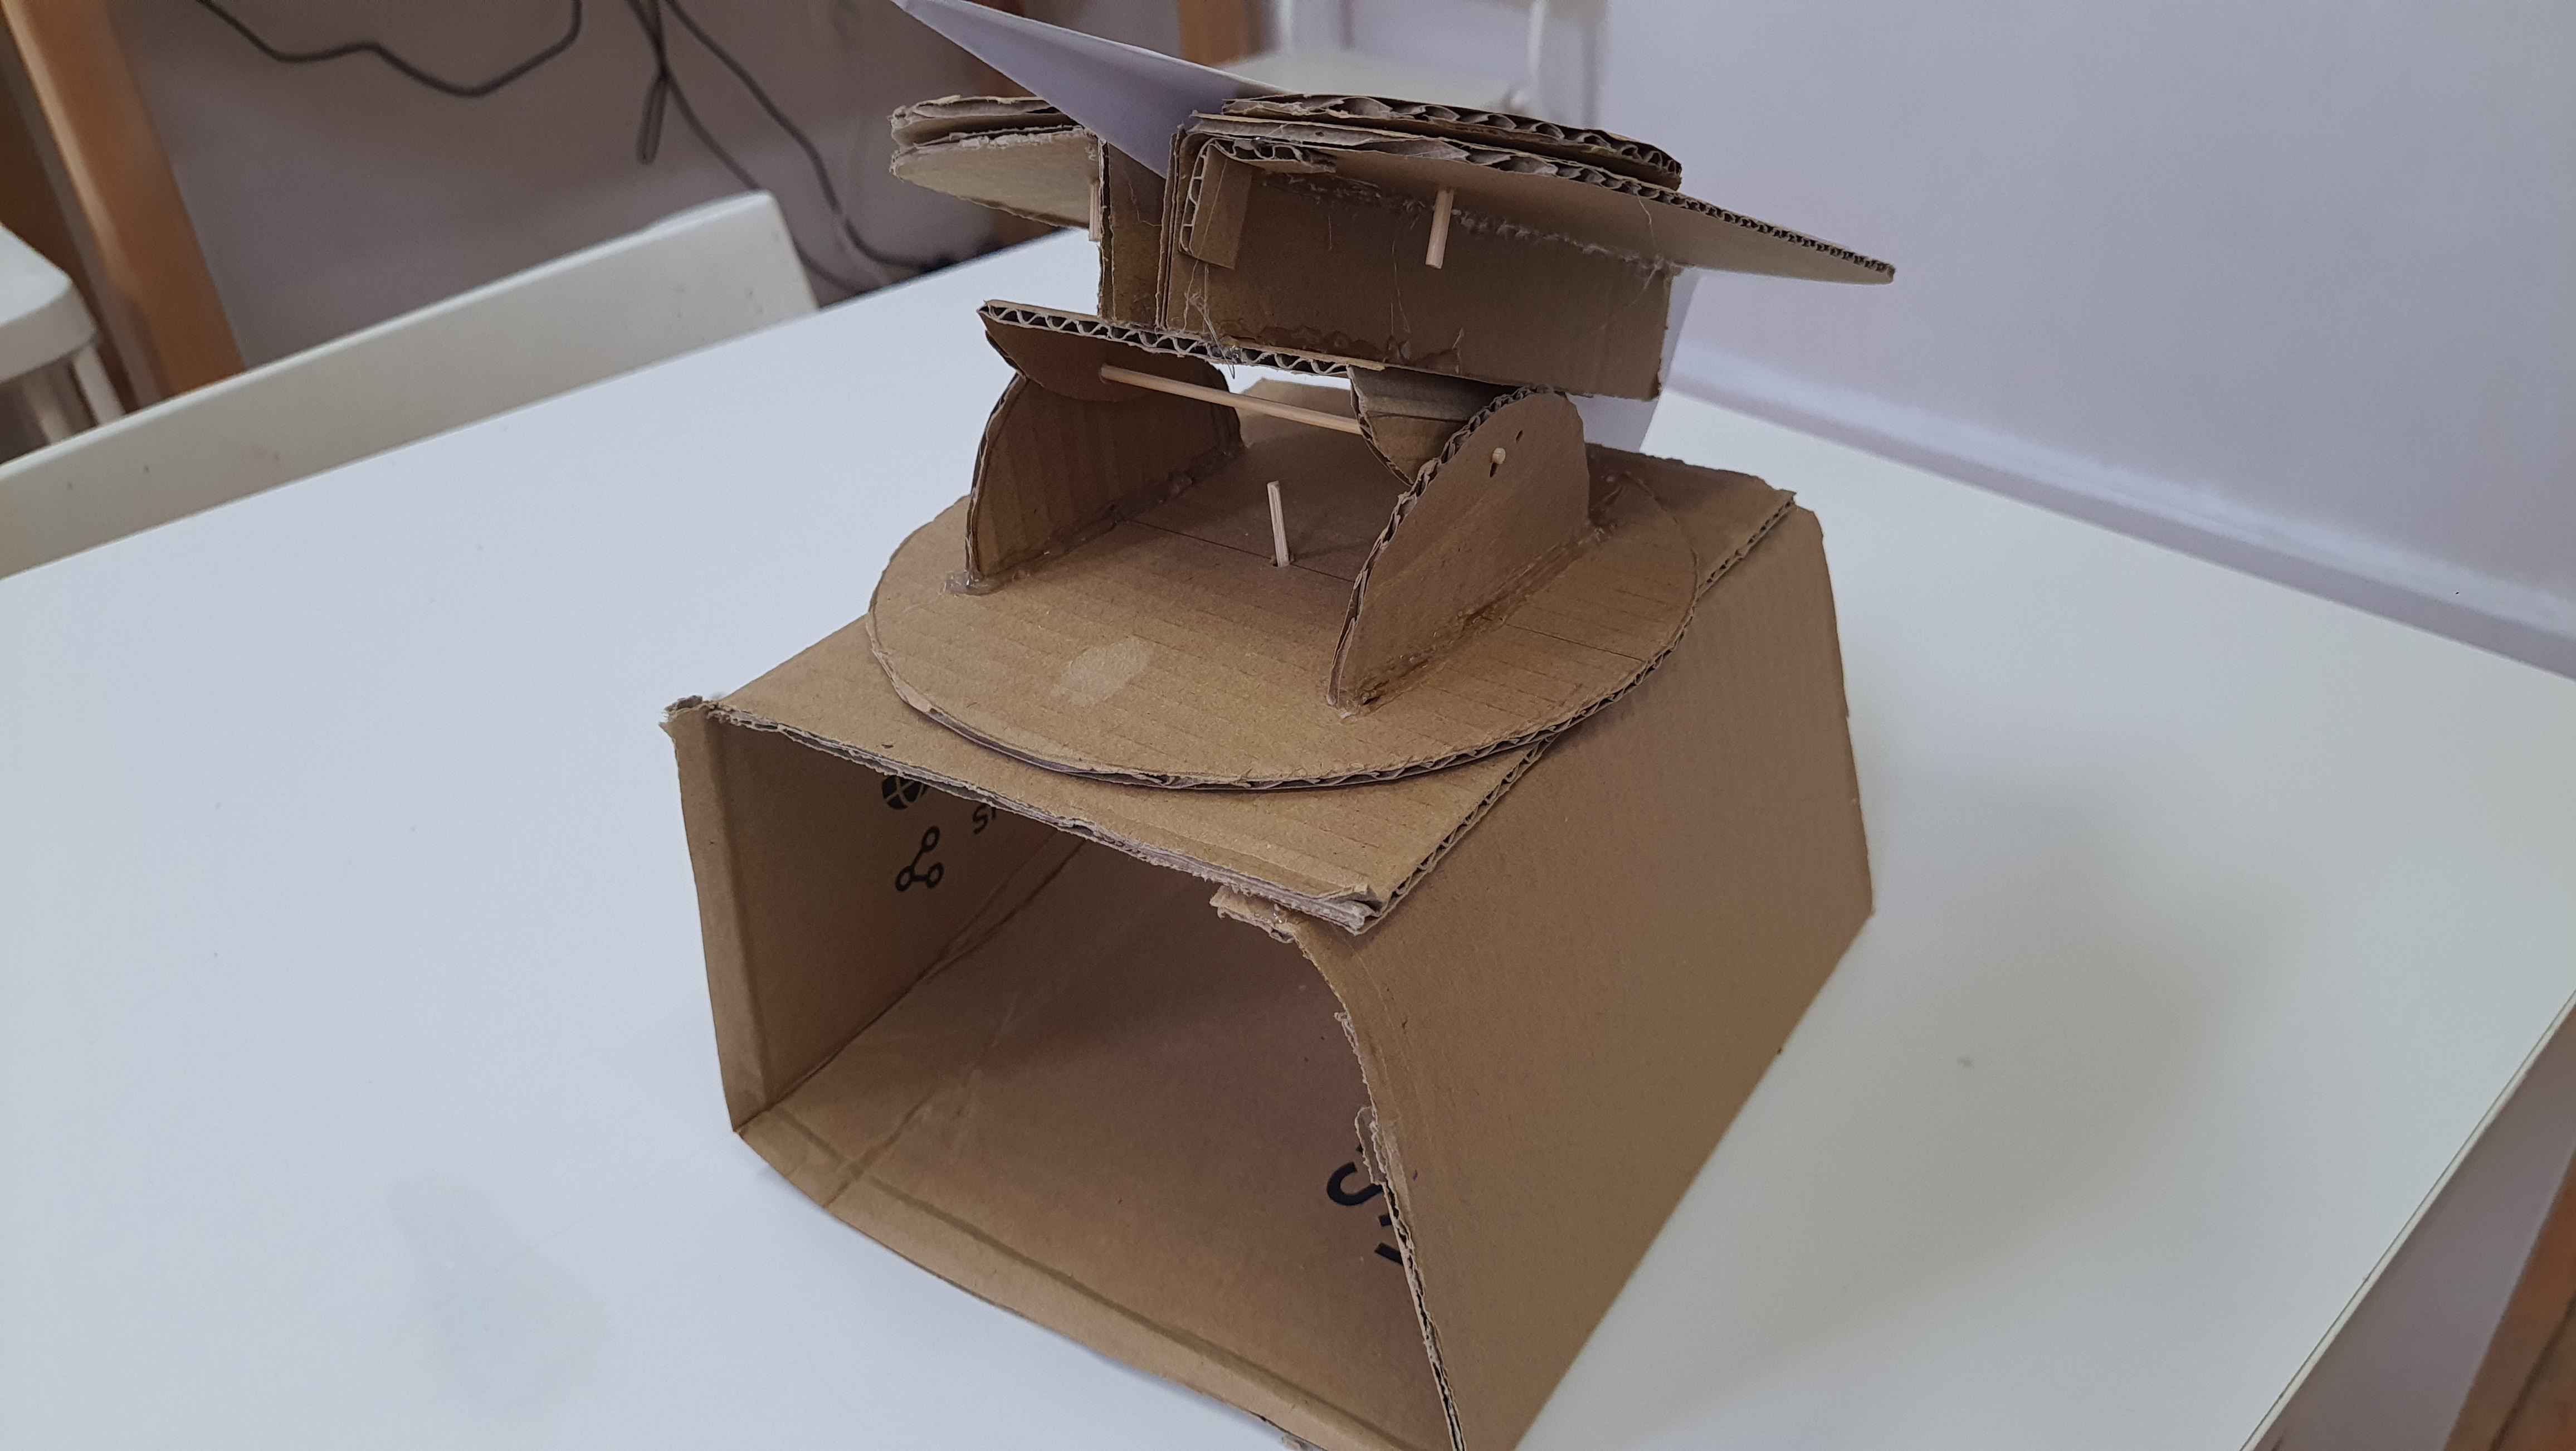
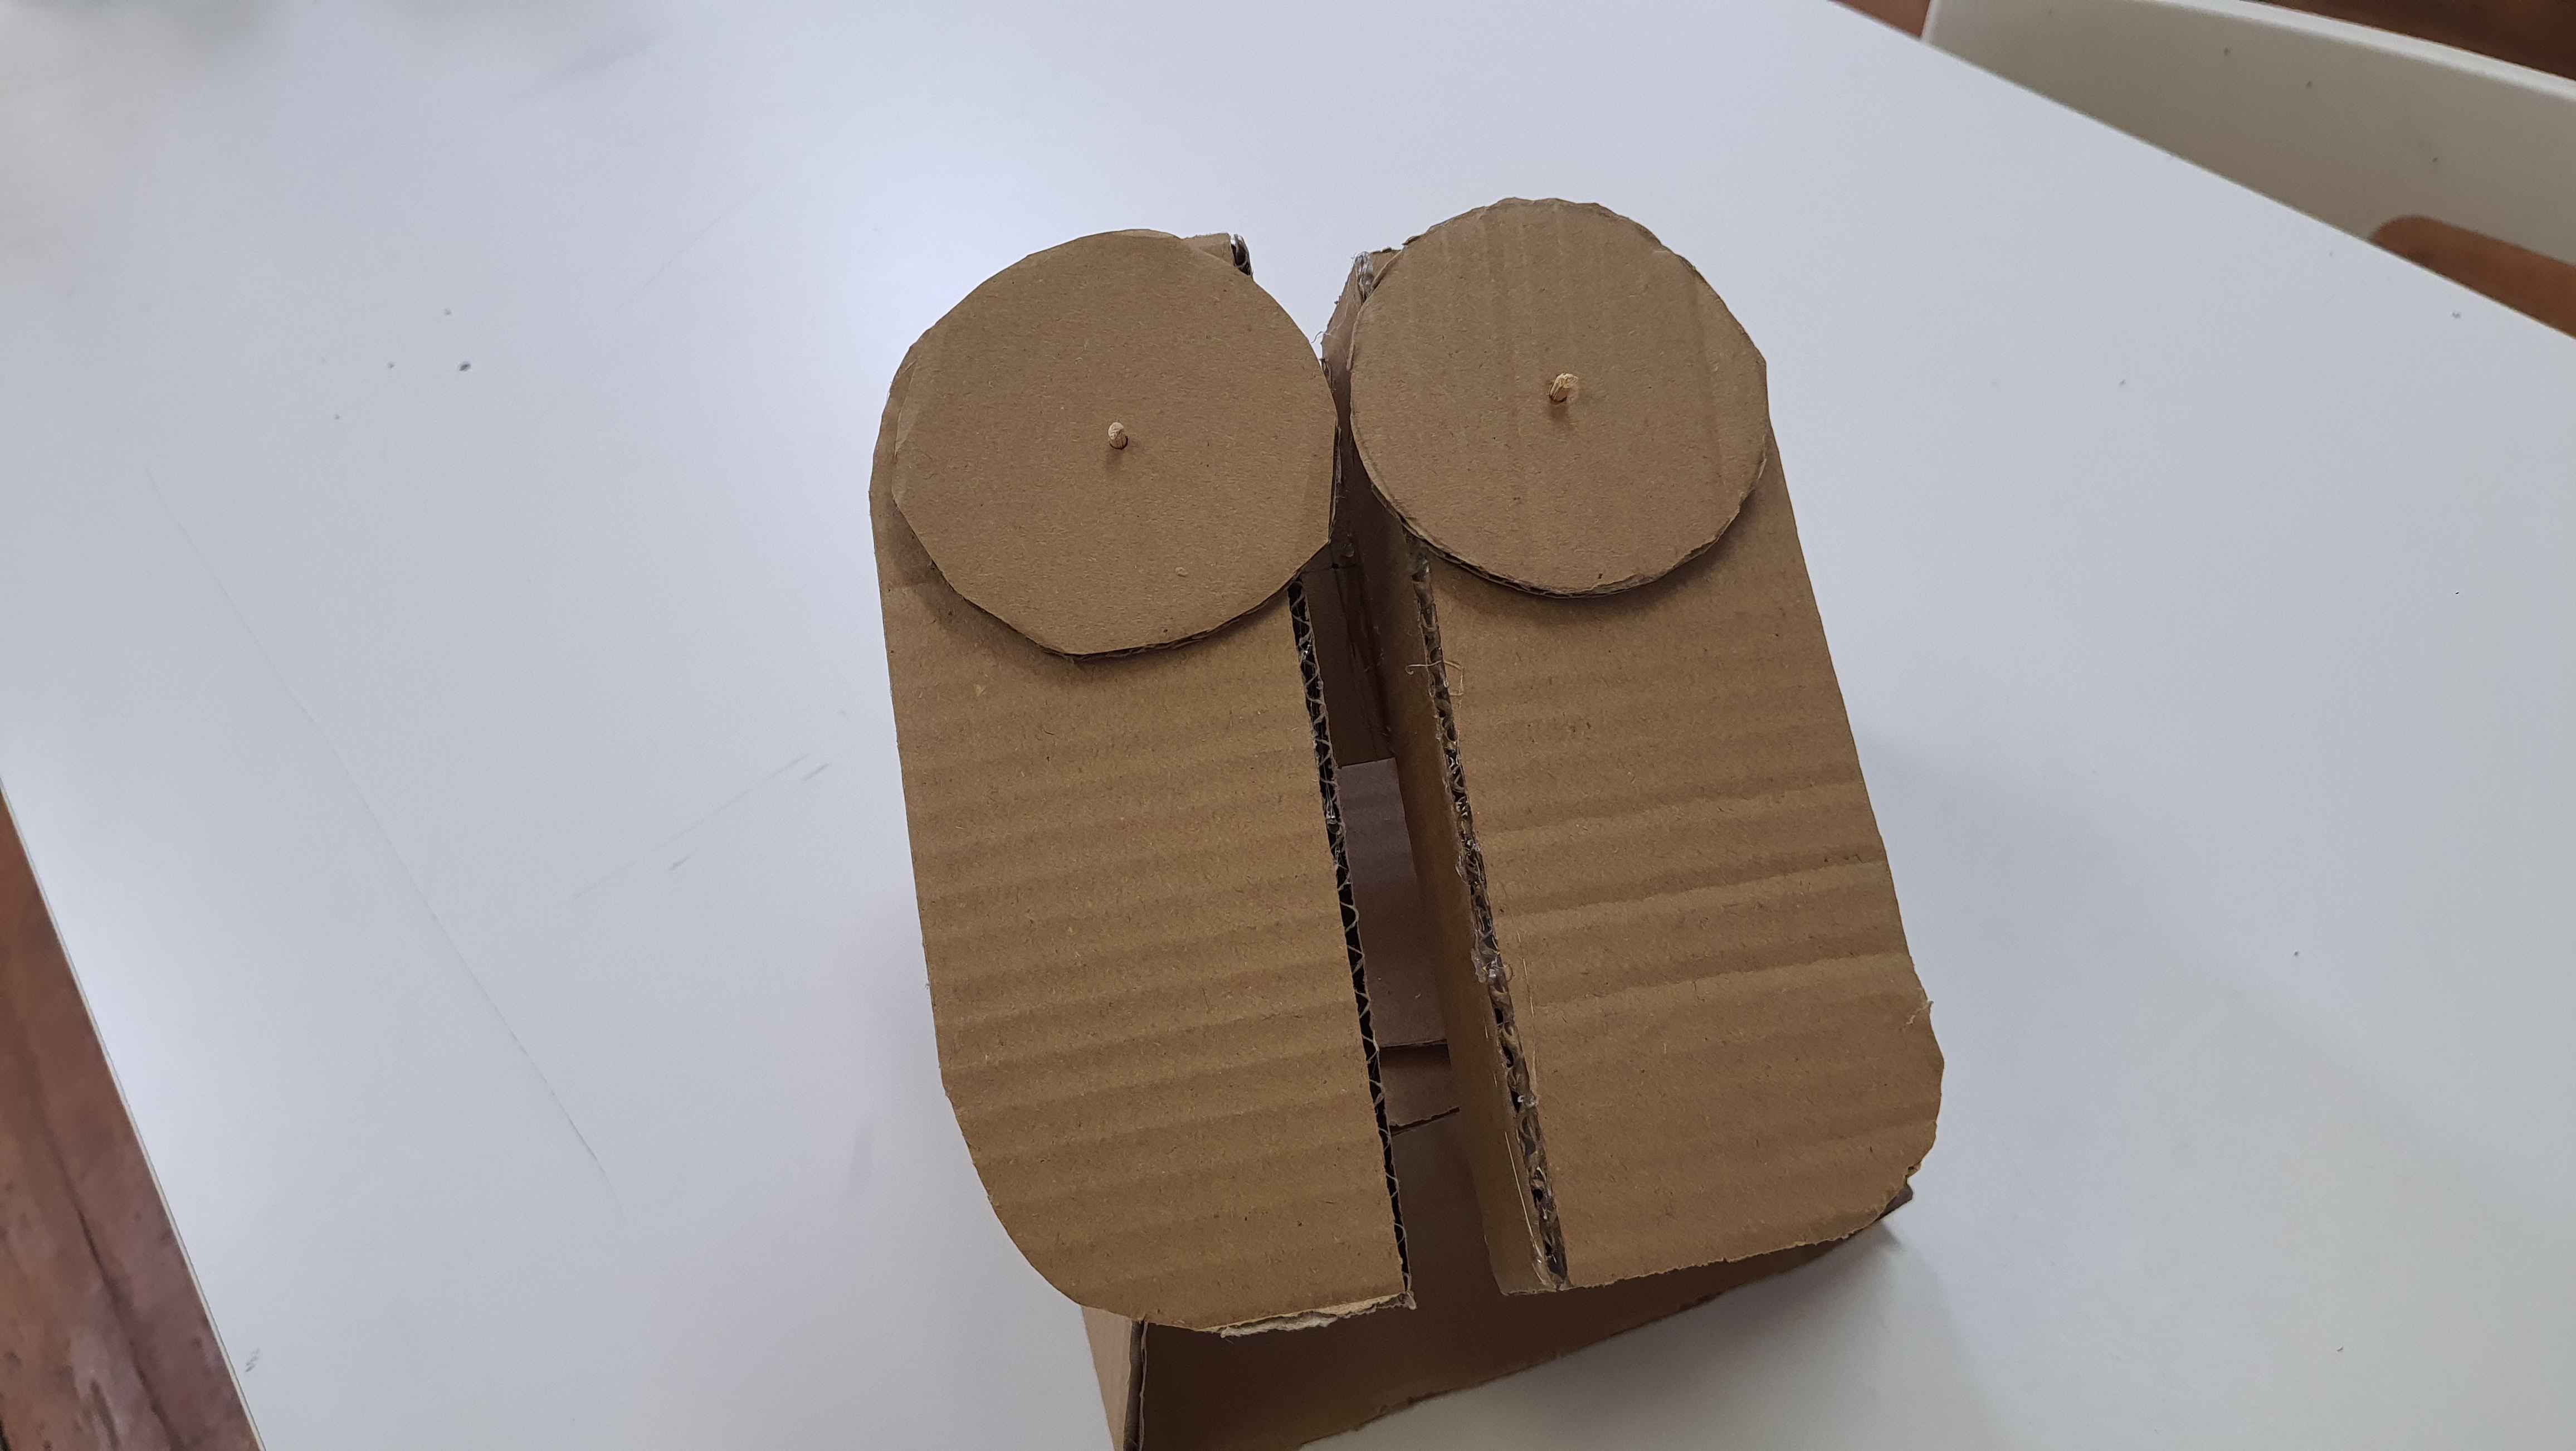
For the design, I started by making a low fidelity cardboard prototype to determine
proper dimensions of
the final project and to be able to visualize it more. Also it helped me determine
proper length of the
airplane.

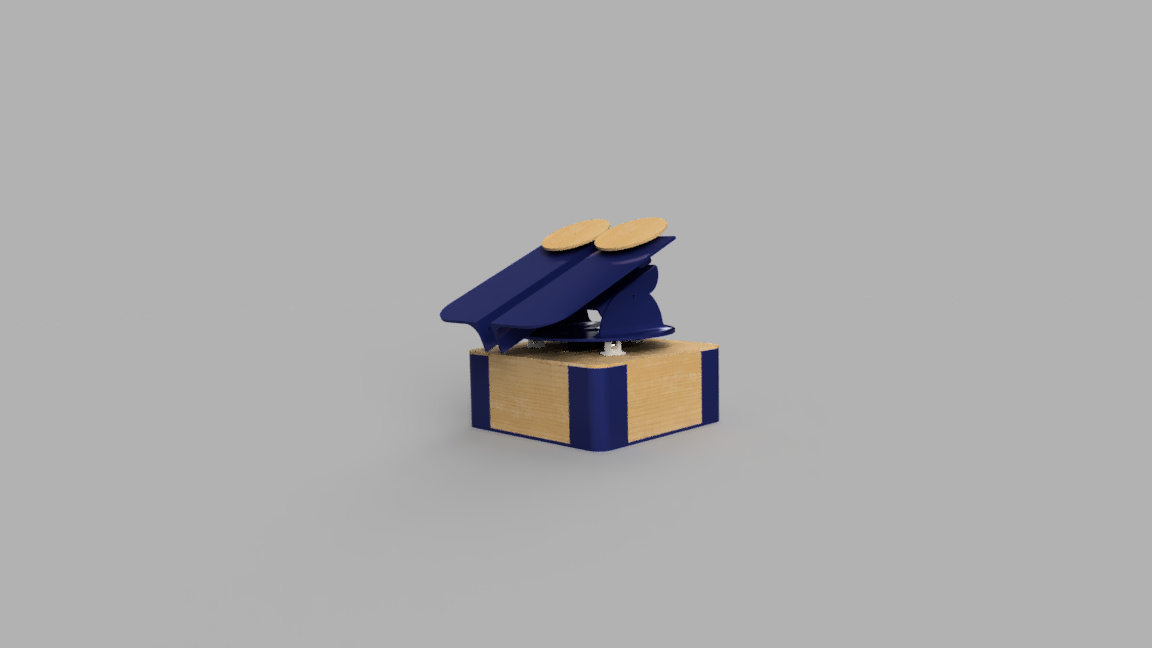
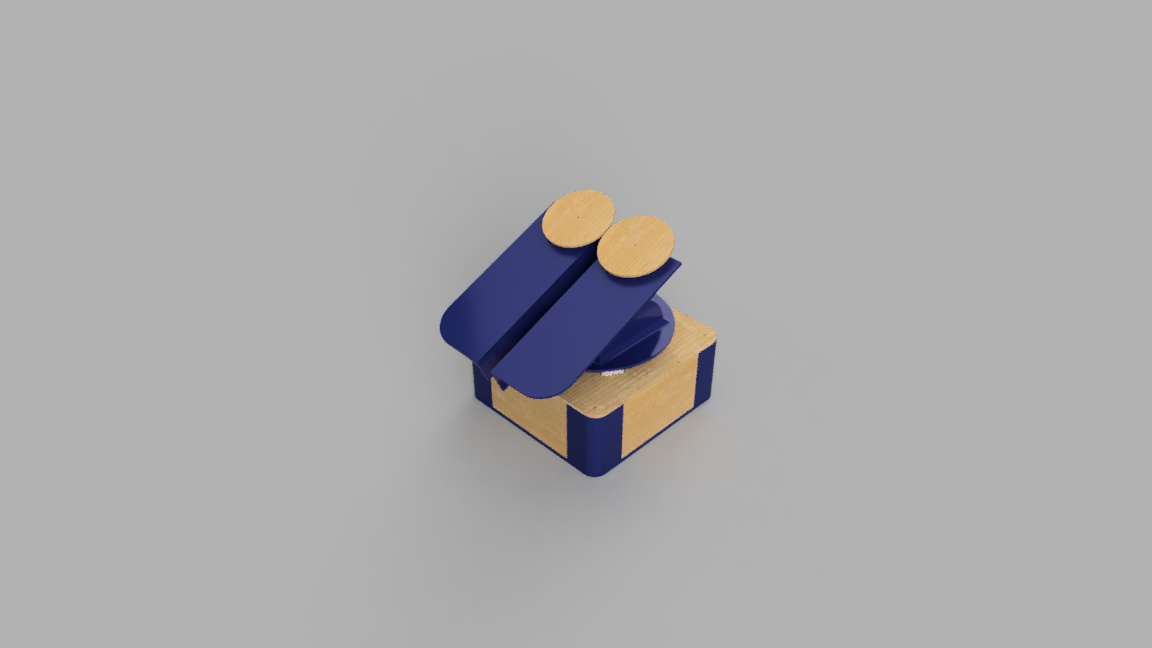
Then For the CAD design I used Autodesk Fusion 360.
- I imported some components from GrabCAD.
- The design consists of mainly of 3D Printed parts. with some wooden parts that are fabricated using laser cutter.

Electronics
- I used KiCAD for PCB design.
- I design 2 PCBs one for the launcher it self & one for the remote control.
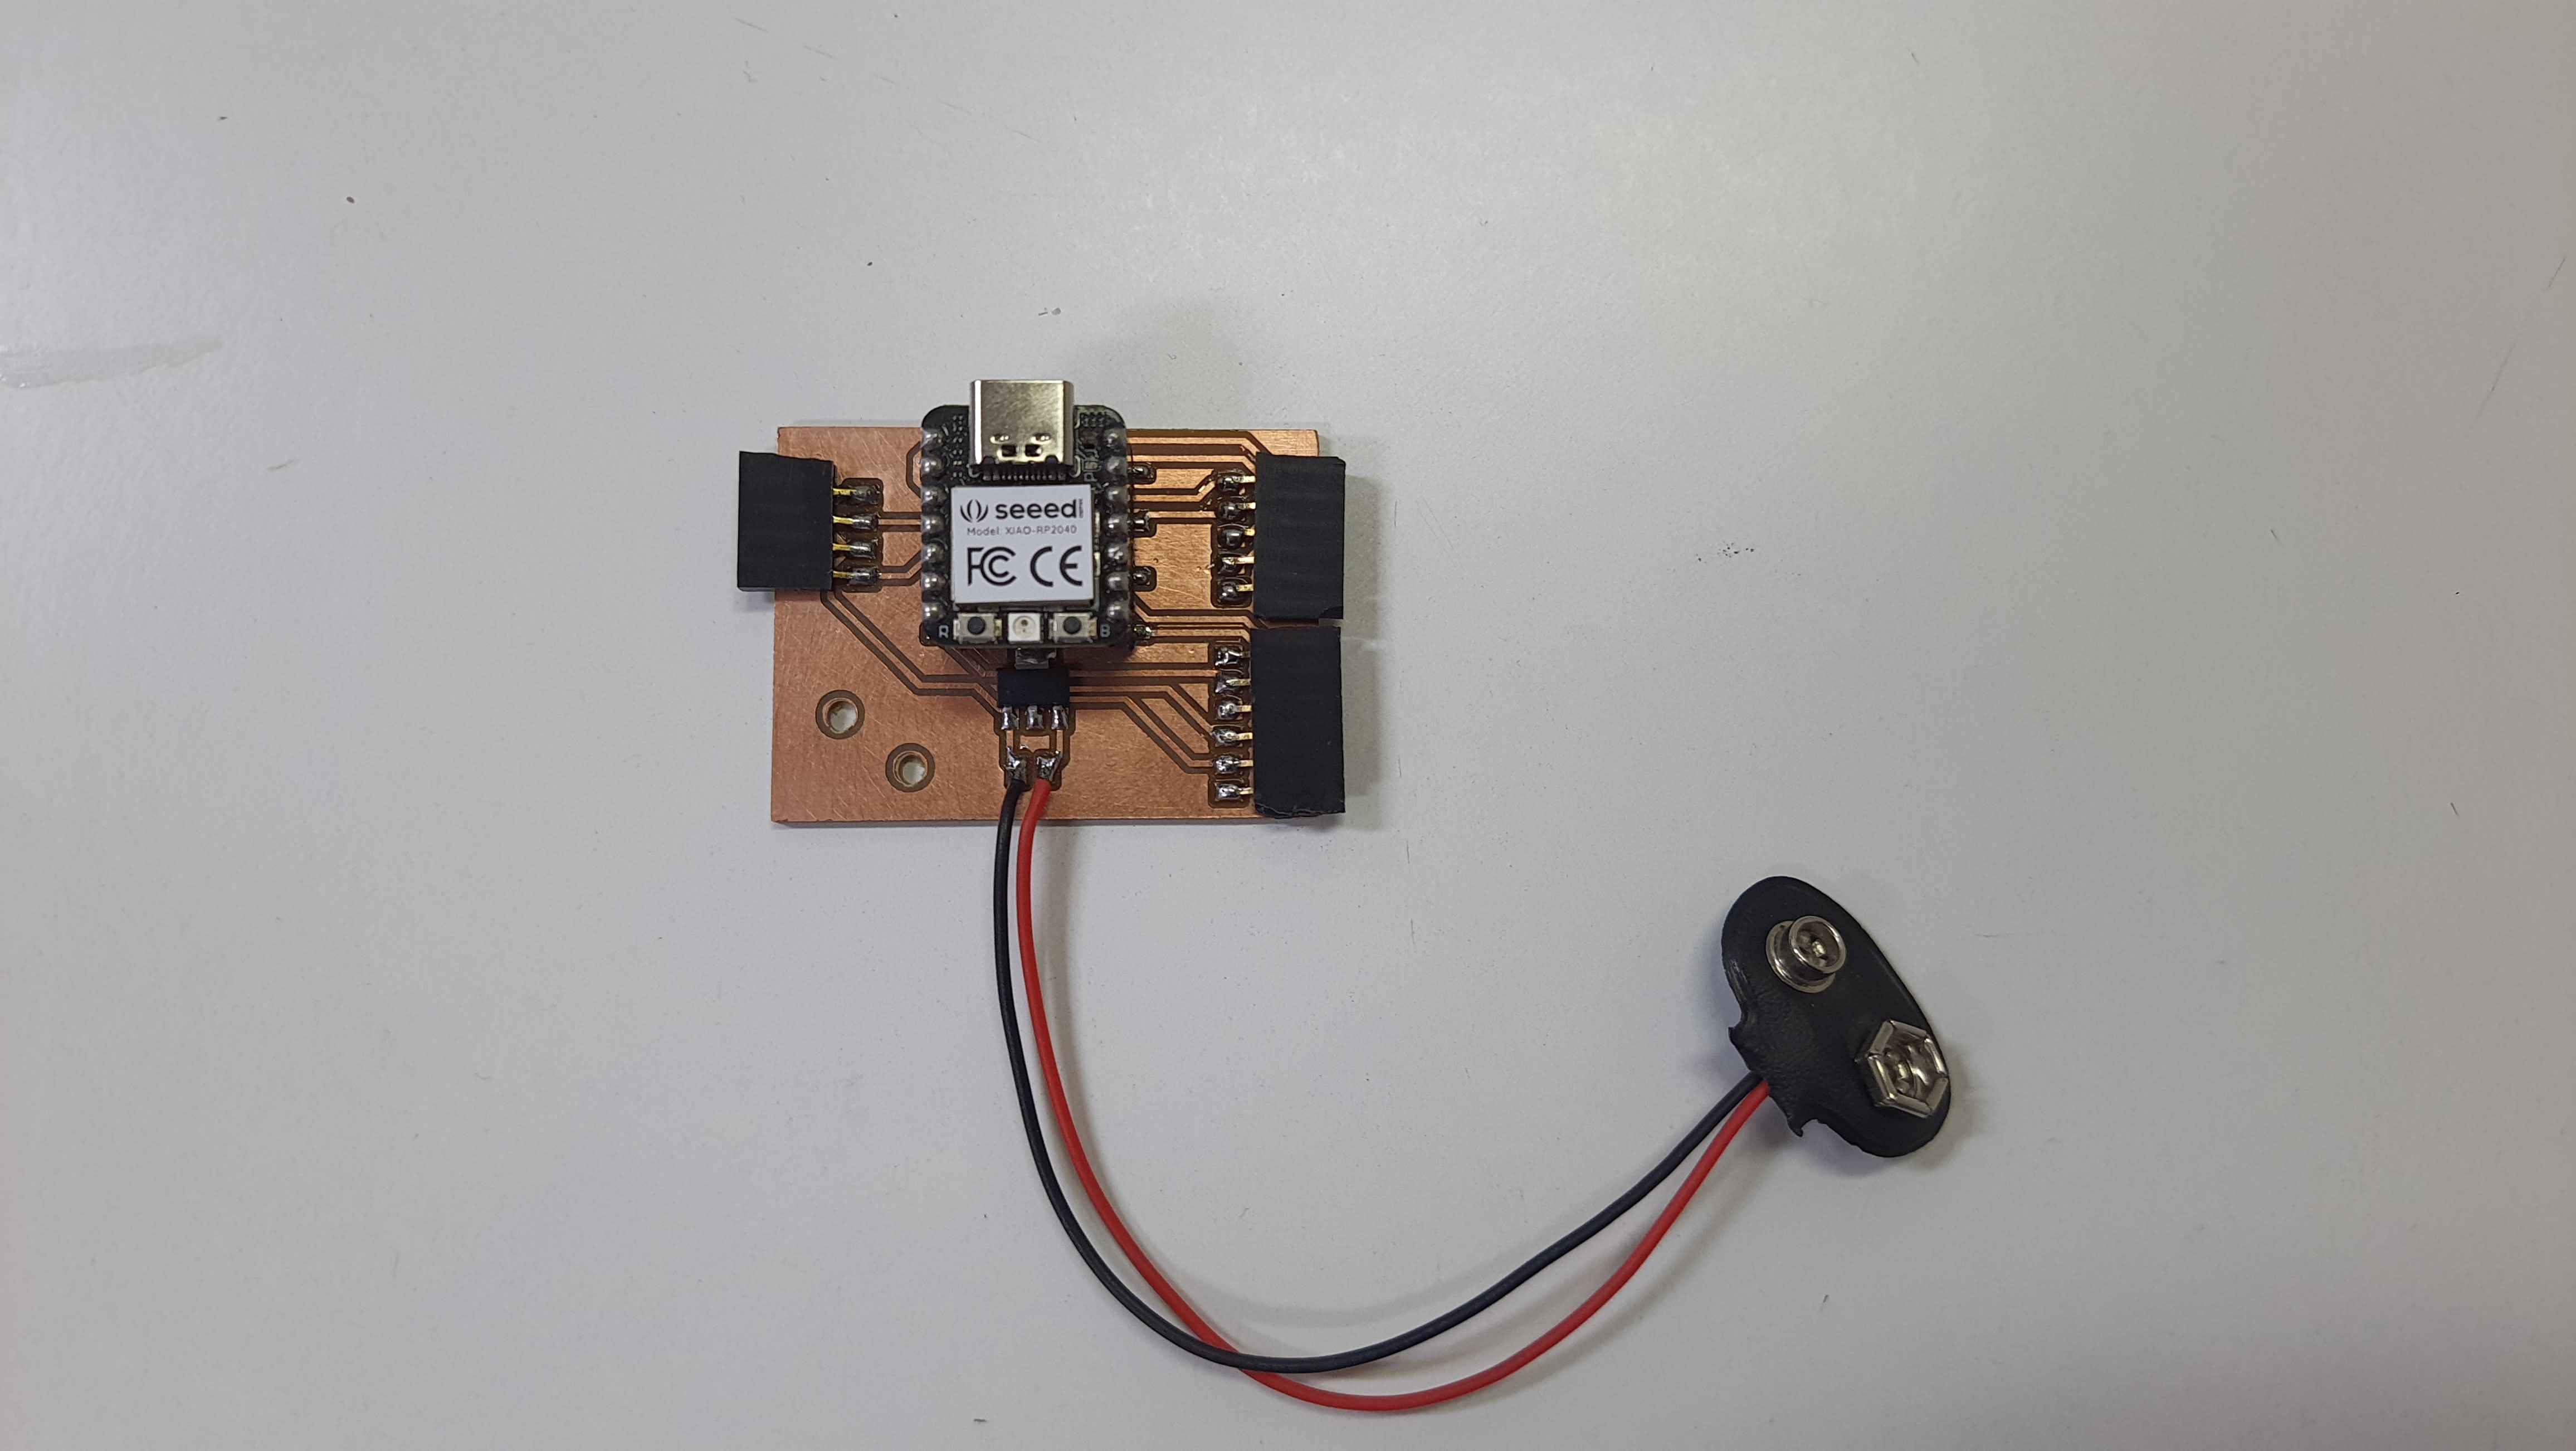
- Launcher PCB based on Xiao RP2040.(Output)
- In my launcher PCB I used L293DD Motor driver that drives the launcher motors & the linear solenoid as they are my output devices.
- The whole PCB work with 5V DC supplied by SMPS 5v 5A for motors and solenoid to work well.
- Also I used HC-5 Bluetooth Module for serial communicate.
-
Remote PCB based on Xiao RP2040.(Input)
- In my Remote PCB I used Joystick & push button as input devices.
- The whole PCB is powerd by 9V battery so I used NCP1117 5V regulator to as all my components works with 5V.
- Also I used HC-5 Bluetooth Module for serial communicate.
- Launcher PCB based on Xiao RP2040.(Output)
Launcher PCB


Remote PCB
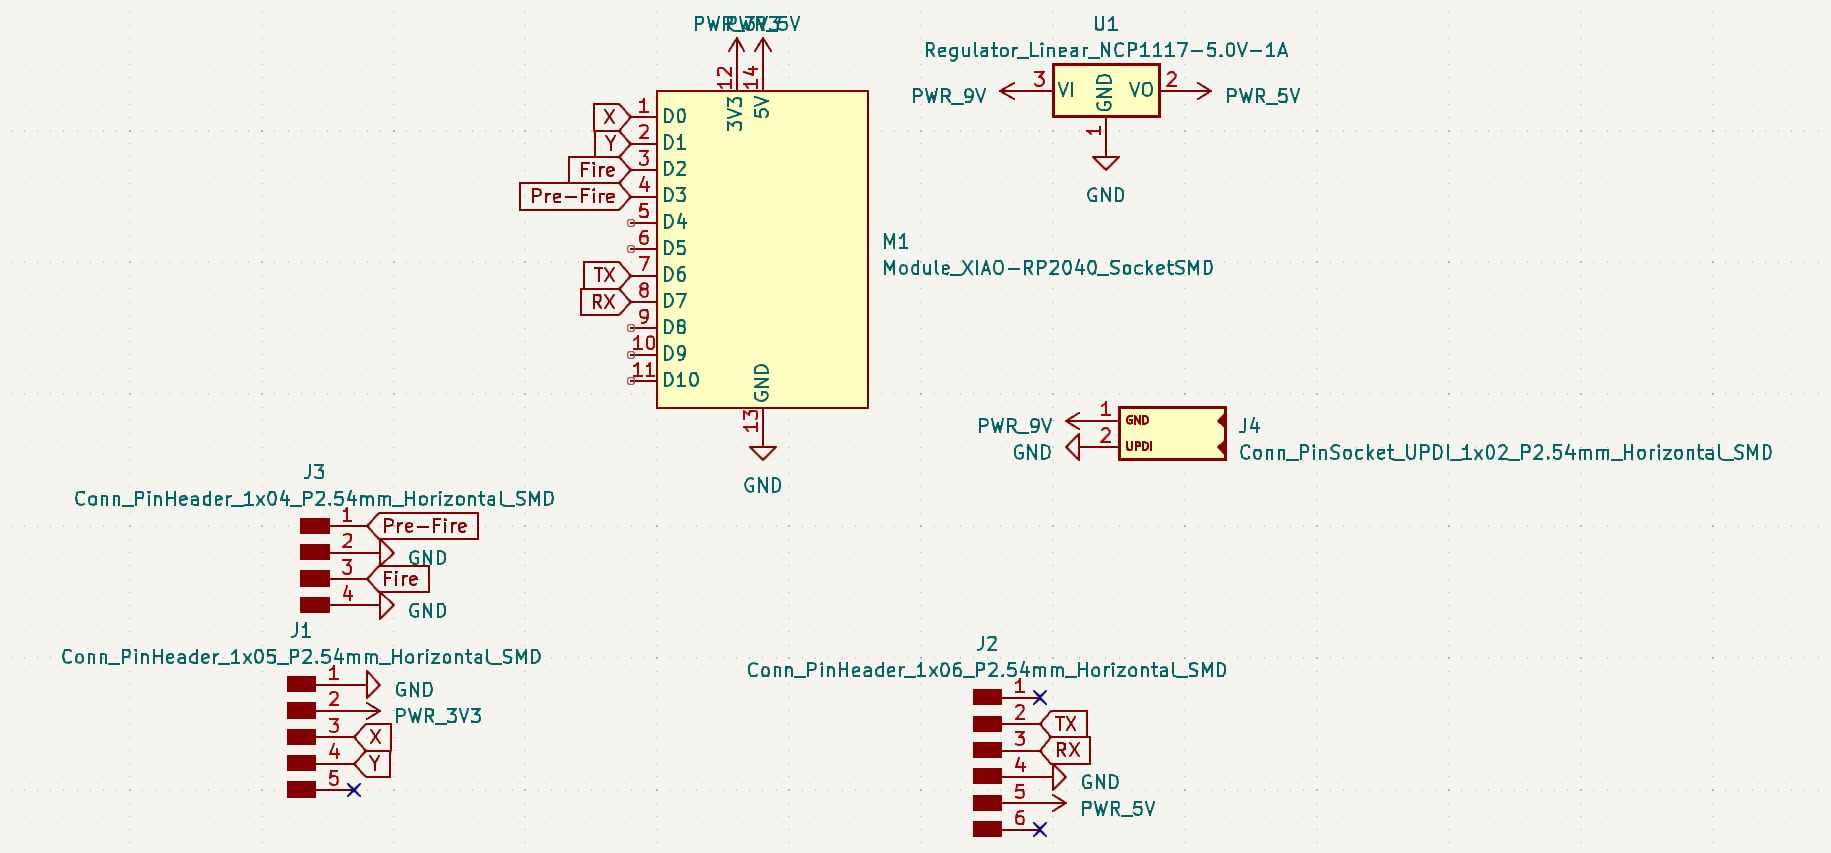
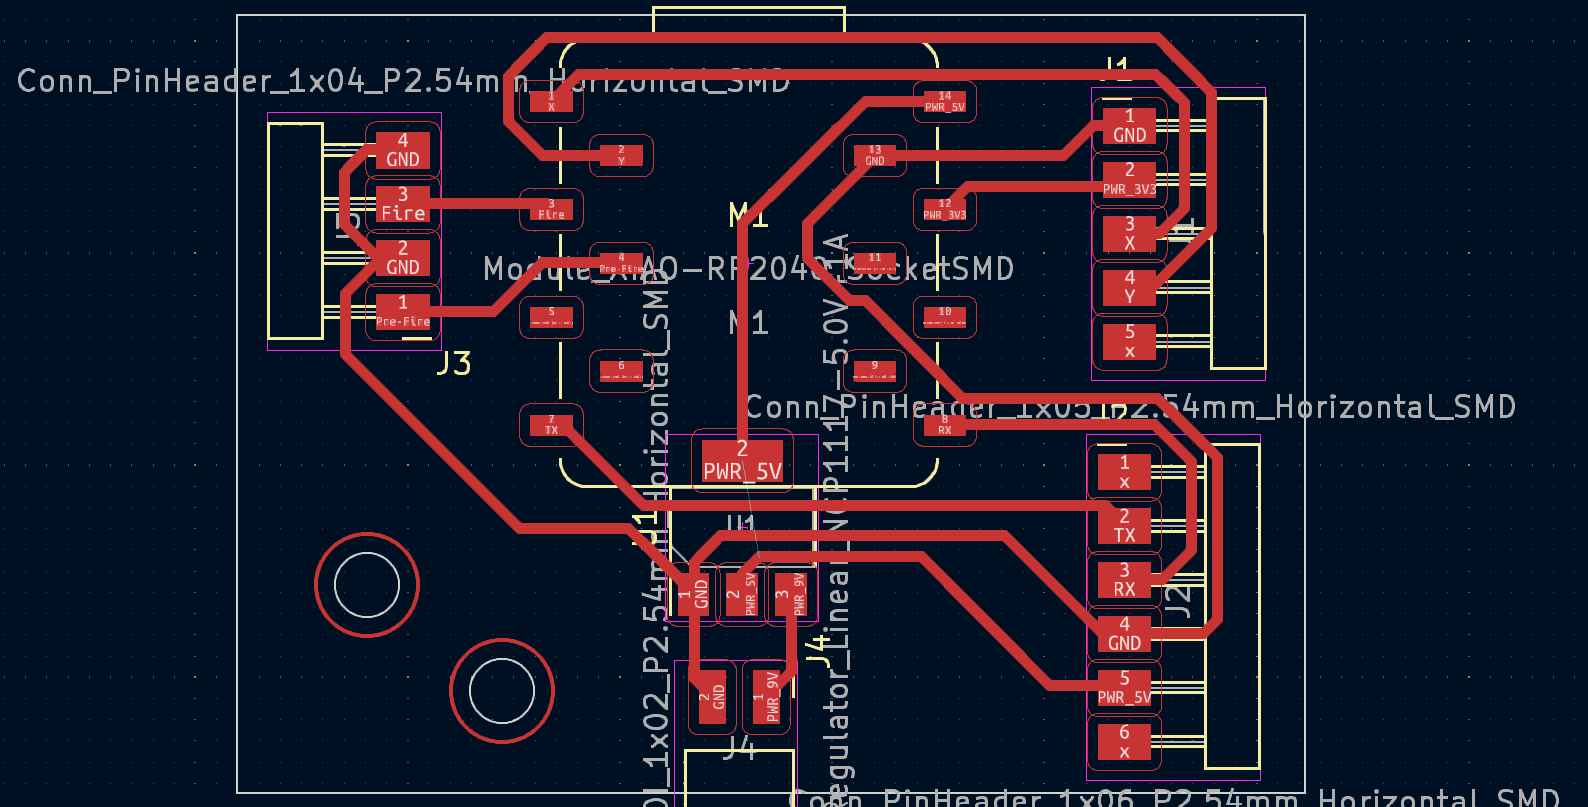
Launcher PCB

Remote PCB
Programming
- I had 2 PCBs so I write 2 Arduino sketchs Master (Remote) & Slave (Launcher).
- Master (Remote):
- I write a code that reads the Joystick values and map it to just 3 values on each axis and reads if the push button and send it over serial in one line just separated by commas so that the slave could process it.
- Slave (Launcher):
- I write a code that reads the values the comes through serial and uses CSV Parser for Arduino so I could read the comma separated values form serial and check on each value individually.
-
HC-5 Bluetooth Modules:
- I followed this amazing How to Mechatronics Tutorial that shows how to use AT commands to configure and pair two HC-05 Bluetooth Modules as Master and Slave.
Remote
(Master)
    #include <Chrono.h>

    #define x 26
    #define y 27
    #define btn 28


    Chrono btnChrono;
    int previousButtonState;

    int fire(int newButtonState) {
      if (previousButtonState != newButtonState) {
        previousButtonState = newButtonState;

        if (newButtonState == LOW && btnChrono.hasPassed(10)) {
          return 9;
        }
        btnChrono.restart();
      }
      return 0;
    }

    void setup() {
      pinMode(x, INPUT);
      pinMode(y, INPUT);
      pinMode(btn, INPUT_PULLUP);
      previousButtonState = digitalRead(btn);

      Serial.begin(115200);
      Serial1.begin(115200);
    }

    void loop() {
      Serial1.print(map(analogRead(x), 0, 1023, 0, 3));
      Serial1.print(',');
      Serial1.print(map(analogRead(y), 0, 1023, 0, 3));
      Serial1.print(',');
      Serial1.println(fire(digitalRead(btn)));

      Serial.print(map(analogRead(x), 0, 1023, 0, 3));
      Serial.print(',');
      Serial.print(map(analogRead(y), 0, 1023, 0, 3));
      Serial.print(',');
      Serial.println(fire(digitalRead(btn)));

      delay(150);

    }
Launcher
(Slave)
    #include <Servo.h>
    #include <CSV_Parser.h>

    #define panPin 26
    #define tiltPin 27
    #define dcMotors 28
    #define solenoid 29

    Servo pan;
    Servo tilt;

    char *incomingData;
    int panAngle = 90;
    int tiltAngle = 90;


    void setup() {
      pan.attach(panPin);
      tilt.attach(tiltPin);
      pan.write(panAngle);
      tilt.write(tiltAngle);
      Serial1.begin(115200);
      Serial.begin(115200);
      pinMode(dcMotors, OUTPUT);
      digitalWrite(dcMotors, HIGH);
      pinMode(solenoid, OUTPUT);
      Serial1.flush();
      Serial.flush();
    }
    void loop() {

      CSV_Parser cp(Serial1.readStringUntil('\n').c_str(), /*format*/ "c", false);
      incomingData = (char *)cp[0];
      Serial.print("X = ");
      Serial.println(int(incomingData[0]));
      Serial.print("Y = ");
      Serial.println(incomingData[1], DEC);
      Serial.print("Fire = ");
      Serial.println(incomingData[2], DEC);

      if (int(incomingData[0]) == 2 && panAngle > 0) {
        panAngle -= 10;
        pan.write(panAngle);
      }
      if (int(incomingData[0]) == 0 && panAngle < 180) {
        panAngle += 10;
        pan.write(panAngle);
      }

      if (int(incomingData[1]) == 2 && tiltAngle < 149) {
        tiltAngle += 10;
        tilt.write(tiltAngle);
      }
      if (int(incomingData[1]) == 0 && tiltAngle > 30) {
        tiltAngle -= 10;
        tilt.write(tiltAngle);
      }
    }
Output

Airplane Launcher By Mohahmed Tarek is licensed under a Creative Commons
Attribution-NonCommercial-NoDerivatives 4.0 International License.
Challanges
while trying my Airplane launcher the launcher wheels didn't have enough fraction with the paper airplane so I add a little bit of the hot glue on the slides of the wheels to increase the fraction and it works
Future Work
- Add more features like live cam feed.
- Design paper airplane magazine that holds multiple airplane and feed them one by one to the launcher.
BOM
| # | Item | Qty | Price/Item | Supplier Link |
|---|---|---|---|---|
| 1 | Seeed Xiao RP2040 | 2 | - | Fab Inventory |
| 2 | Linear Solenoid | 1 | - | Fab Inventory |
| 3 | Resistors, Pin-Headers, Voltage regulator | - | - | Fab Inventory |
| 4 | Plywood 3mm | - | - | Fab Lab Egypt |
| 5 | PLA Filament | 500g | - | Fab Lab Egypt |
| 6 | L293DD Motor driver SO20W | 1 | $0.97 | UGE Electronics |
| 7 | Servo Motor Metal Gears "MG995" | 2 | $6.49 | Ram Electronics |
| 8 | Small DC Motor | 2 | $0.81 | Ram Electronics |
| 9 | Push Button | 1 | $0.21 | Ram Electronics |
| 10 | Bluetooth Module HC-05 | 2 | $6.49 | Ram Electronics |
| 11 | Joystick 2 Axis | 1 | $1.46 | Ram Electronics |
| 12 | SMPS Output +5VDC/5A | 1 | $7.30 | Ram Electronics |
| 13 | N20 Caster Ball Wheel | 3 | $0.81 | Maker Electronics |