WEEK 5: 3D Scanning and printing
INDIVIDUAL ASSIGNMENTS
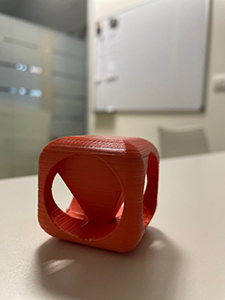
This week we will be dedicated to 3D printing. We previously made a 3D design and then sent it to printers. I have to create a piece that no other technology on the FabLab can’t do. A part in which it cannot be subtractively realized.
3D printers are high quality and easy to use that allows users to print objects with great accuracy and quality. The printers we have in the FabLab are Ultimaker and BCN among others. They use molten deposition (FDM) technology, which involves extruding a molten plastic filament through a nozzle, which moves in three axes (X, Y, Z) to create a 3D object layer by layer.
3D printing, also known as additive manufacturing, offers a number of advantages and limitations. Notable advantages include the ability to create highly customized and complex objects, cost reductions in the production of prototypes and custom parts, as well as the flexibility to manufacture objects on demand and close to the point of use. In addition, 3D printing enables design optimization and the exploration of new geometries, which can lead to greater efficiency and material savings. However, it also has limitations, such as printing speed, which can be slow compared to other manufacturing methods, and finish quality, which may not be as high as that obtained with traditional techniques. In addition, the materials available for 3D printing are still limited compared to those used in conventional manufacturing, which restricts certain applications. As technology advances, many of these limitations are expected to be overcome, further expanding the possibilities of 3D printing in various fields.

I’ve used Solidworks to create my piece. Creating sketches with shapes considering that only this technology can do it. Then save it in. STL format so you can take it to the BCN 3D Cure printer. You have to keep many things in mind and put the right parameters for a good impression.
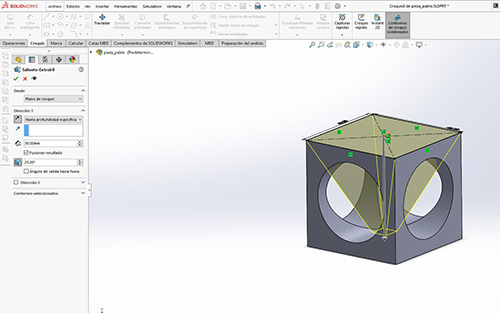
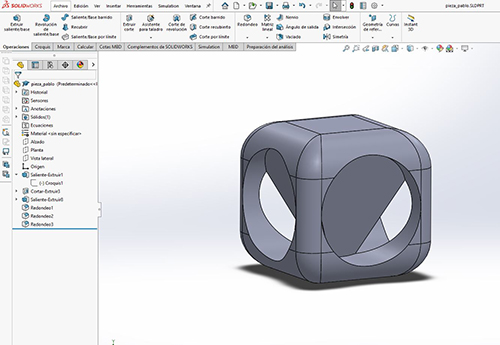
Then save it in. STL format so you can take it to the 3D printer. You have to take a lot of things into account.
Download
Another piece
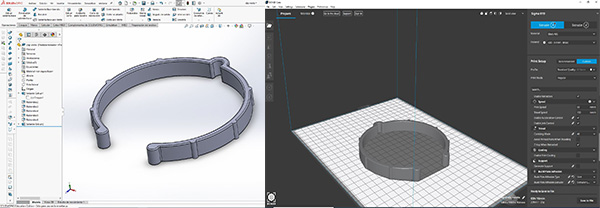
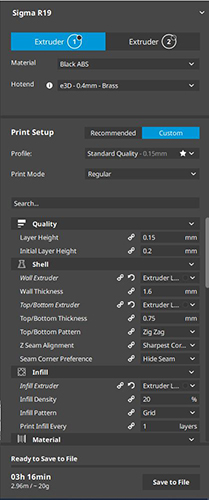
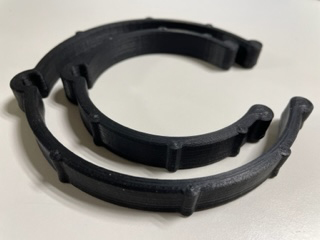
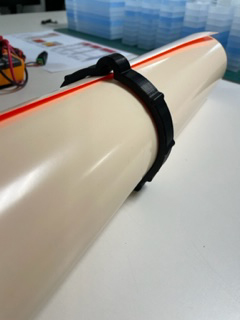
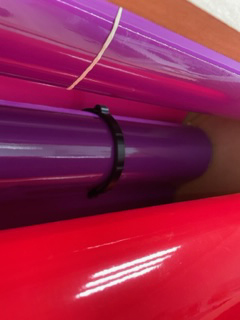
I was inspired to make a "clip" to tie the vinyl rolls. We have them tied by a rubber, but eventually they break. So I have made the next piece and then I will print it in the BCN with ABS material to be able to open it a little when entering the roll. Adjusting the 3D printer configuration is required for good results.
I will also make several prints with different torque sizes that best suit the diameter of the roll.
Download

3D SCANNING
3D scanning is a process by which three-dimensional information is captured from an object or surface, often using a specialized device such as a 3D scanner or a camera equipped with 3D scanning software. During the scanning process, the device measures the geometry of the object or surface and creates an accurate digital representation in three dimensions. There are several types of 3D scanners, each with different data capture methods. Some scanners use structured light or laser to measure the distance between the object and the scanner, while others use photogrammetry to capture three-dimensional information across multiple images. 3D scanners can also be portable or stationary, depending on the specific application and the size of the object being scanned.
In short, 3D scanning is an important technique for creating precise digital models in three dimensions, allowing the creation of a wide range of applications in different fields.
I have installed in Meshroom software, but the drawback is that not all the photos I make to the object are recognized by the program and the object is not completely defined.
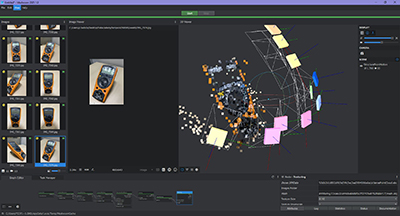
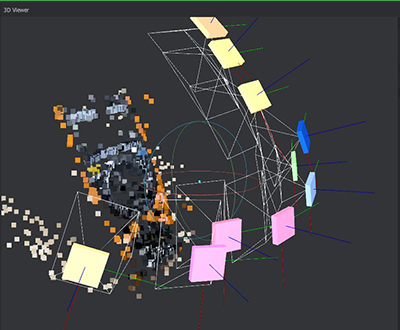
Meshromm is an excellent program for this type of work, but I have not been able to do it as I want and for this type of work maybe not the right one.
So I thought that in the small milling machine by placing a probe, I could slowly scan it and digitize it.
Download

Below, I show the steps to scan a part with the ROLAND MDX40A milling machine using the Dr. Picza3 program.
- We correctly place the probe.
- We turn on the milling machine.
- In Dr. Picza3 press "VIEW" so that the table comes closer and the piece can be placed comfortably.
- I will place the piece at one end of the table. To take advantage later, in the following weeks the placement of the motherboard.
- so I don’t have to scan the entire table area, I will define the parameters of the area where the part is. So the scanning will take less.
- Press "SCAN" to go to scan settings.
- Define the size of the Voxel "X" and "Y".
- Define the area that is not scanned, that is, the height where the probe does not reach, as it has a length less than the full height, in this case, 32.4mm.
- Press SCAN once all parameters are defined.
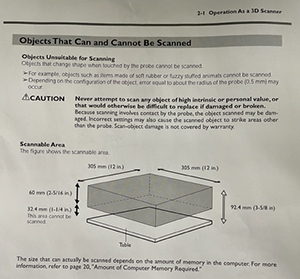
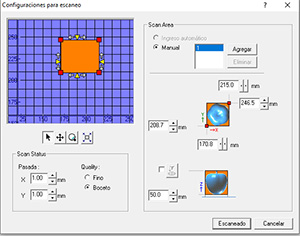
When you enter the 1cm values for the Voxel size, it will take about an hour to perform the entire scan.
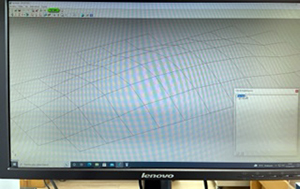
To mention that this first test the piece is not placed at the correct height, that is, it is not elevated those 32.4cm mentioned above and the probe will not reach the base of the piece.
In the second test, I will raise the piece to the corresponding cm and the entire piece can be scanned.
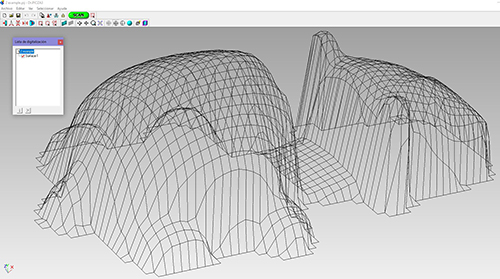
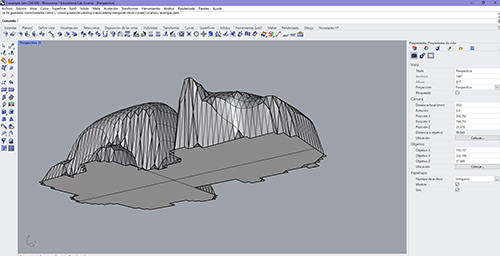
Once scanned we go to rhino7 to close the mesh and make it solid. This way you will be ready to send it to 3D printers
Download/Drive
GROUP ASSIGNMENTS

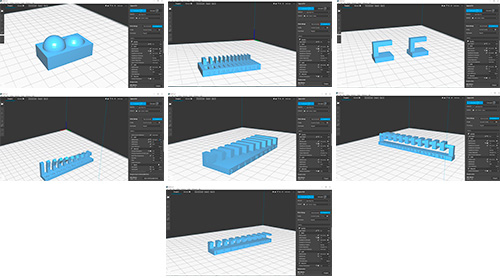
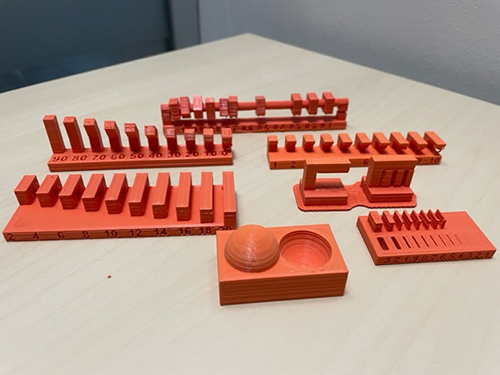
The group challenge is to perform tests and variables to make some checks with 3D printers to understand the operation. In this way it will be possible to know which finishes have and how the material behaves according to the geometry.
Printers consist of a number of elements, the most general being:
- Extruder: Takes the filament and pushes it to reach the head continuously. Some extruders have a pad to dip some filaments in oil so they slide better. It also has a pressure spring for each material.
- Head: It has a high temperature resistance where the filament is melted and then deposited on the printing platform. The temperature of the head can be regulated depending on the material being used.
- Printing platform or hot bed: When the filament melts, it is deposited on it, so that the piece rises on it. Some platforms can be heated to make the part stick better and avoid printing problems.
- Nozzle: It’s the bottom of the head that’s conical. From that tip comes the filament. The output diameter can be of different dimensions, in some machines, to achieve, for example, that the part has more or less rigidity.
- Fans: Keeps the head cool to prevent the filament from sticking before leaving the nozzle. The printer may have another rear fan to cool the part while printing as some materials take time to solidify.
There are many types of material for printing, such as:
- PLA (polylactic acid): PLA is one of the most popular materials used for 3D printing. It is a biodegradable and renewable material with which it is easy to work and produces high quality prints. It is also available in a wide range of colors.
- ABS (acrylonitrile butadiene styrene): ABS is a strong and durable plastic commonly used for LEGO bricks and other household items. It can be difficult to work with because of its tendency to deform during printing.
You have to keep many things in mind and put the right parameters for a good impression.
- Choose the extruder well, as it is a BCN with two extruders and I will only use one.
- Select the quality of the layers, the thickness of the layers and the filling
- Select the right temperature for material
- Choose the head speed when printing and when not printing
- The need for a support if the part will need it to not float in the air.
- The right temperature for the head and the plate. turn on the fan to cool the material and not melt
- Type of adhesion: skirt, brim or raft
Considering all of the above, I will send the. stl files well prepared to the BCN3D Cure Printer program to perform them. I show the process of each of them with videos. There are also the files to download them.
