
WEEK 18: Project Development
This week will be dedicated to implementing my project, applying time management techniques and summarizing and communicating the essence of my project development.
What tasks have been completed?
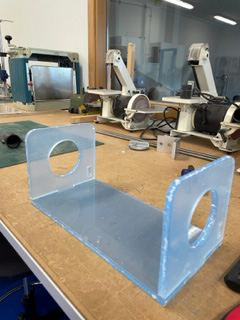
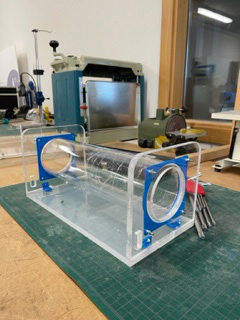
STRUCTURE
I have made in Solidworks all the parts of my project and then I have created an assembly. I have also made a render with Keyshoot.
I have taken into account the measures that I have to use for:

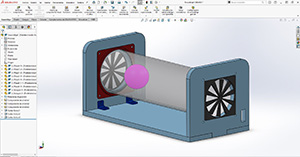
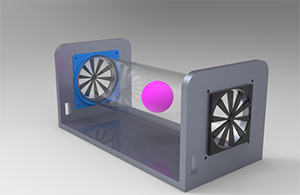
Once created, I will start to prepare the corresponding file to be able to manufacture it in the milling machine.
These are the steps I have done to make the structure, based on Computer-Controlled Machining week.
I have converted the parts I need to make into DXF so I can open a Vcarve file with those files and send it to the milling machine.
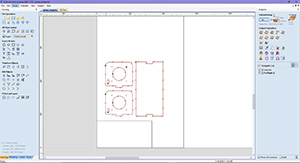
Once the file is created, we send it to the milling machine via USB.
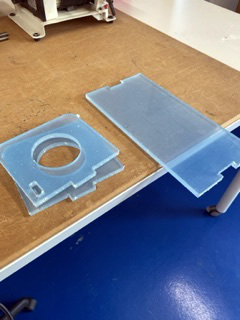
Here I show a video of how the pieces are made. I have followed the steps mentioned in week 7, Computer controller machining. The result has been very good.
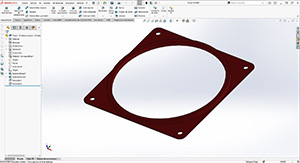
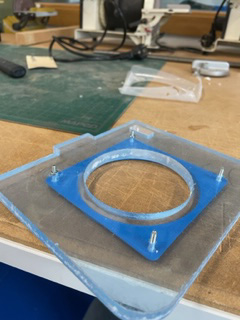
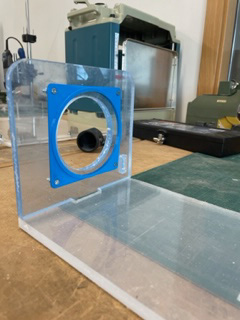
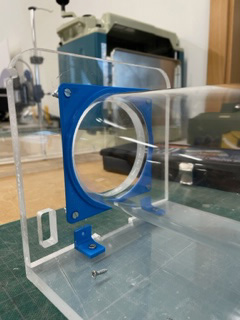
3D PART: CLAMPING
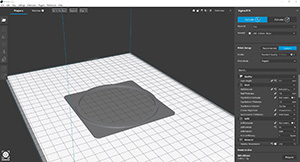
I have made a 3D part to hold the cylinder with the structure and I have taken into account the measurements so that the holes match. I have made it in Solidworks and then I have saved it in STL to be able to take it to the BCN printer.
I have set the right values in the BCN cura so that the part comes out very well. Indicating the temperature in the nozzle and in the plate, the speed, the corresponding extruder, the layer height, the filling... etc... I have taken into account the tolerances so that the methacrylate tube fits perfectly with the piece. It is very important.

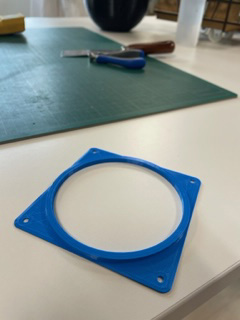
Once it is done, I will place it in the structure of my project and test that everything fits well and that the tube is well fastened.
3D PART: HINGE
I have made a 3D hinge to hold the base with the walls and to hold it well. Even though the pressfit has been perfectly done, I am going to place this piece so that the fastening is even better. I have made it in Solidworks and then I have saved it in STL to be able to take it to the BCN printer.
I have set the right values in the BCN cura so that the piece comes out very well. Indicating the temperature in the nozzle and in the plate, the speed, the corresponding extruder, the layer height, the filling... etc...
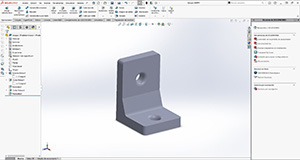
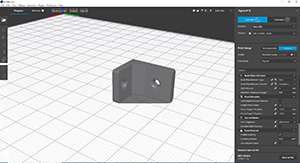
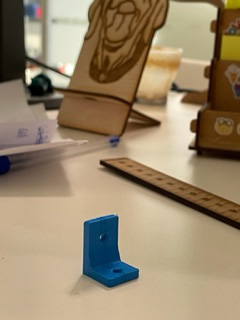
This is the final result for now.
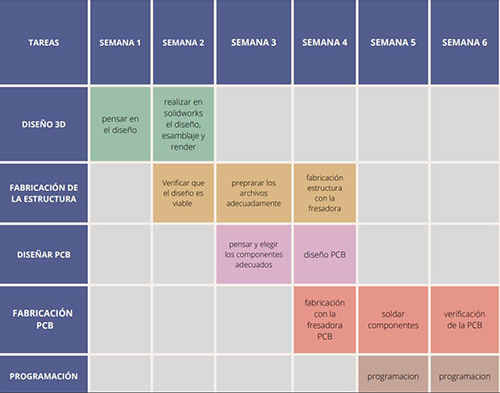
Gantt Diagram
Below I show the organization of how I will carry out the project.
What tasks are left?
I still have to get a Bluethoot and like to think about making the pcb, and the electronics part.
The tasks I have left are the following:
Make the PCB with all its components. Milling Soldering and programming and mount it on my project.What has worked and what hasn't?
At the moment everything I have done so far in terms of manufacturing the project has worked.
What questions need to be answered?
I must study how to place the sensor inside the tube or in some way so that it can detect the position of the ball.
What will happen when?
For now the project is satisfactory, in the future I would like to improve my knowledge of electronics and to know how to program better.
What have you learned?
I am learning how to better use FabLab technologies.