Clicked "Clone" and copied the url in "Clone with HTTPS"
Then in my terminal I navigated to the folder I wanted to store my repo in using the "cd" (change directory) command followed by the filepath.
I then entered the command "git clone " followed by the url copied from the "Clone with HTTPS" field.
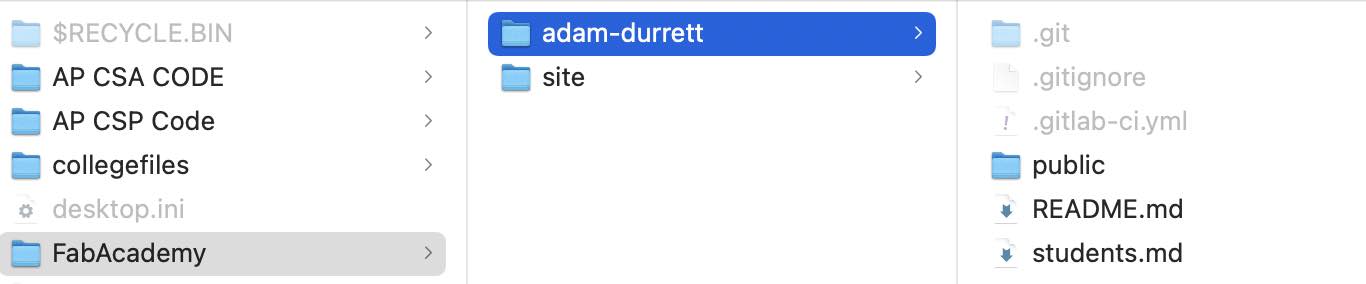
My repository then had a local clone (adam-durrett) on my computer:
I made a slight change to a random file by adding a random space, so I could have a change that I could commit.
I then followed the standard procedure of an Add, Commit, Push or "ACP- Arroz con Pollo" as my coworker, Barbara, likes to call it:
> git add --a note: the "--a" parameter stages all changed files for the commit.
> git commit -m "comment about the change"
> git push
After the "push" command, it prompted me for my username - to which I typed in, and then it asked for my password.
However, I did not put in my password here. Instead I generated an access token under my account preferences on gitlab. And pasted that in place of my password.
My git repository was then ready to use locally on my computer!
Project Planning
This week, I began working on my audio/analog signal based final project.
For my final project, I will be working on creating an electric guitar interface controlled by microcontrollers with an integrated screen, and controls.
The user will be able to plug in their guitar to the interface to control and manipulate the analog signal produced by guitar.
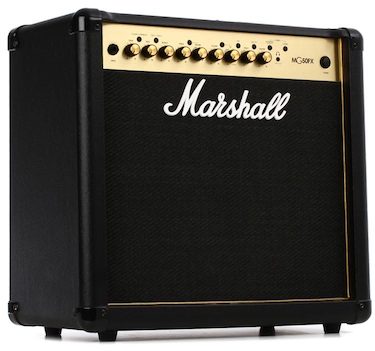
Typically guitarists will manipulate the timbre of their instrument via stomp-boxes or pedals, which each contain their own effect that is applied to the guitar's sound.
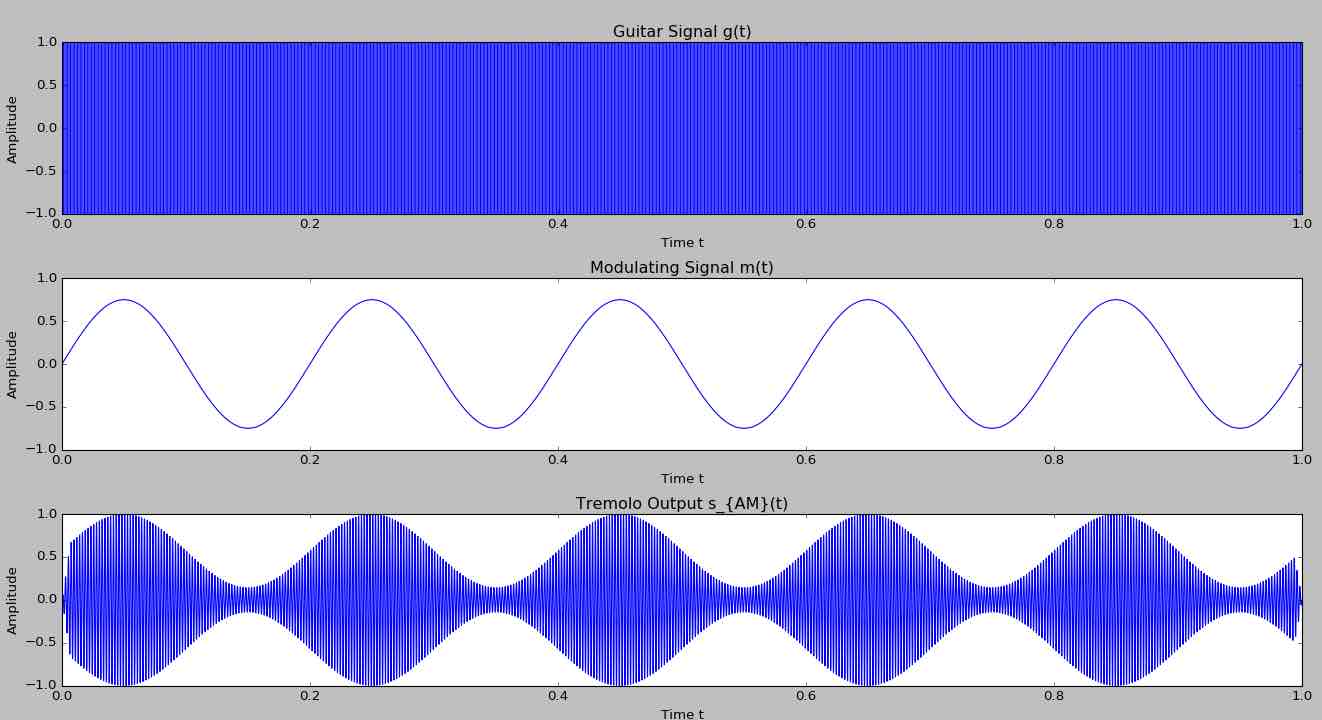
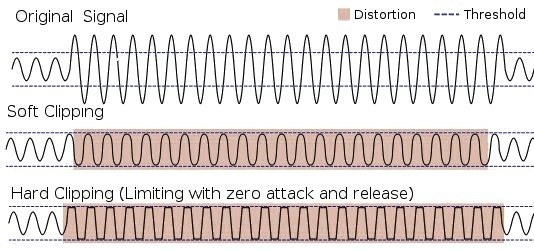
Some examples of these guitar effects are tremolo (multiplying the wave by a carrier sinusoidal signal), delay (adding echoes), and distortion (increasing the gain - sometimes resulting in clipping).
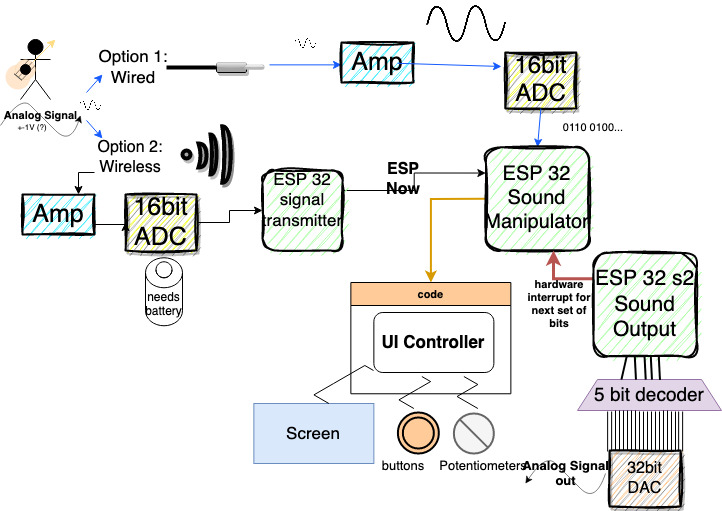
Below, you can view my flowchart for the project encomposing major components required for making the interface.
The circuit consists of three stages:
Signal Transmission
Signal Modulation
Signal Output
Early System Flowchart for Guitar Interface -- drawn using diagrams.net
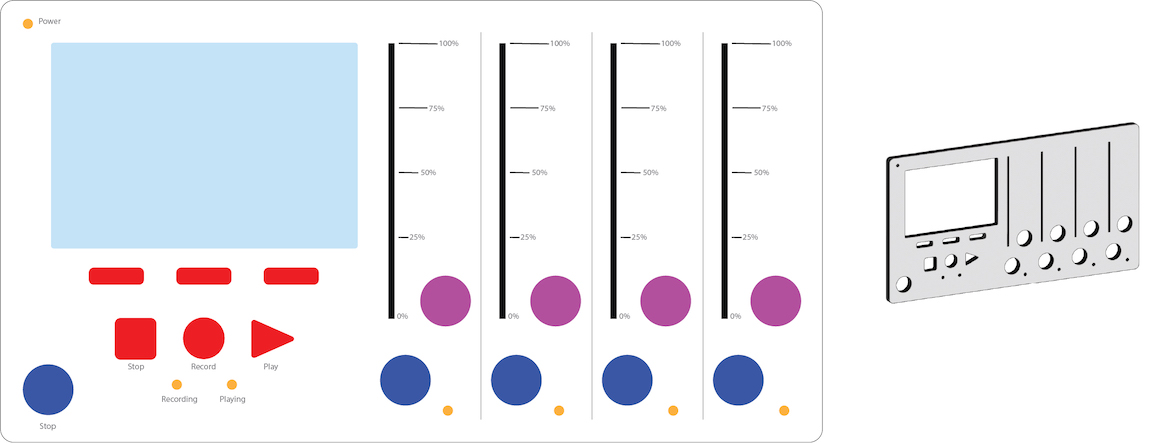
Preliminary Design of Guitar Interface -- drawn using Adobe Illustrator
Research Phase
Signal Transmission
This first transmission phase involves taking the analog signal produced by the strumming
of a guitar, and sending it to the sound manipulator. My initial assumption is that the signal will need to amplified to a +-5v peak-to-peak voltage.
However, this will need to be further researched in the future when working with the Analog to Digital Converter (ADC), as the required voltage it works with will depend on the ADC I choose in the future.
Research for specifics on this level will not be conducted right now, but it is important to keep in mind the potential limitations and restrictions components will have.
The ADC will then be connected to the ESP32-based sound manipulator board using I2S for realtime (low latency) sound sampling, since I2S has a direct pipeline to program memory.
Ideally, I would like the ADC to output 16 bits of data per reading (16 bit-depth), since this is considered "pretty good" quality comparative to a CD.
(Source: Micro Pyramid: Understanding Audio Quality: Bit Rate, Sample Rate )
For connecting the transmitter circuit to the ESP32-based sound manipulator board, we have two options:
This would basically consist of connecting a guitar cable directly to the ADC (after amplification if needed). The ADC then passes that data to the ESP32.
Option 2: Wireless
This setup would require an extra ESP32 to act as a wireless transmitter via ESPnow protocol.
Currently, I am not sure of the latency, but I am concerned that using a wireless protocol would add too much of a delay;
thus, making it a terrible playing experience as the sound would play "seconds" (actual time depends on latency) after the guitar was played.
Further research on the latency of wireless communication protocols will need to be made to determine the best choice for this application.
A major component required for this project is the hardware and software used to manipulate and modulate the input signal from the guitar.
When the main ESP 32 controller receives the signal, it needs to go through a number of processes before being sent to the output controller.
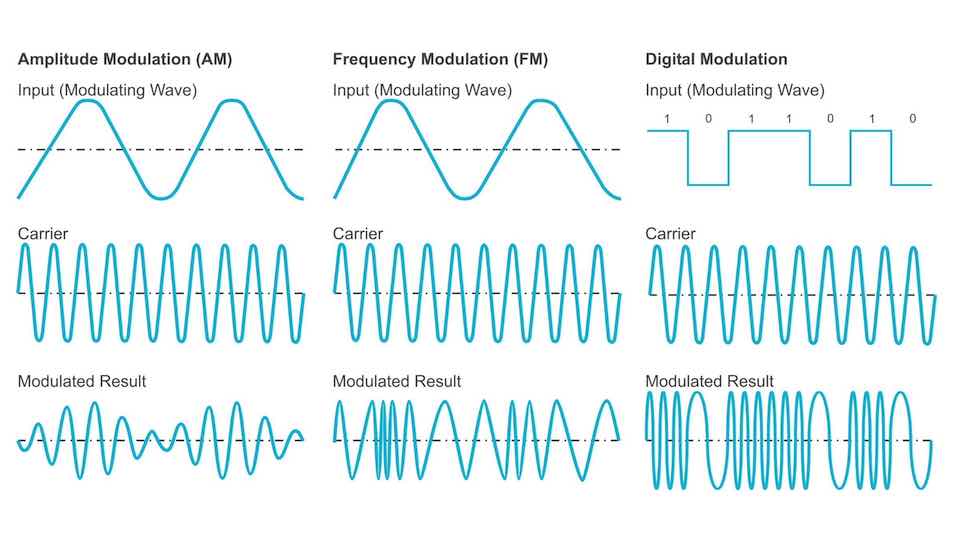
To modulate the signal, the input is multiplied, divided by or added to another signal, which imparts its own sound characteristics to the original waveform.
Other methods of signal editing will be implemented as well such as clipping, dampening and amplitude control.
Timing is key when working with signals, thus a software interupt will control when the modulating signal needs to adjust its value.
The device will need to support at least 3 software interupts, 1 for each pedal effect. The delay of the interupt will need to be determined by the frequency of the modulation signal.
Signal Output
For the output, it needs to go to a variety of destinations.
This would include an aux out, one for 1/4" (guitar standard) and one for 1/16" (aux standard).
It also needs to output the signal digitally via USB, that way a computer can receive the signal and use it for recording purposes.