16. Wildcard Week
assignment
   Design and produce something with a digital fabrication process
   (incorporating computer-aided design and manufacturing) not covered
   in another assignment, documenting the requirements that your
   assignment meets, and including everything necessary to reproduce
   it. Possibilities include (but are not limited to):
In this week I used the embroidery machine of my Fablab, a Brother PR670E.
Requirements that meets my assignment:
- embroidery machine
- special embroidery machine yarn in the wished colours
- a vector graphic to stitch
- Inkscape and Inkstitch
- a fabric to stitch on and embroidery fleece
I stitched a picture of a friend who is an avid and gifted sewer and has her own little shop and an Instagram account:
https://www.etsy.com/de/shop/makingmim
https://www.instagram.com/makingmim/?hl=de

I adjusted the comic image of her above to use for embroidery. Therefor, I vectorized the image using Gimp and Inkscape. reduced the colours and removed some details. Here you see the final image:

To compile an embroidery file for the Brother machine I used the plugin Inkstitch.
Therefor, I followed the following tutorial:
https://www.youtube.com/watch?v=mPaGwjwpzWc&t=755s
For the Brother machine you have to save a .pes file.
At the machine you have to thread in yarns of the wished colours.
The machine has only six places for yarn, so I had to change yarn during the stitching process.
Then you have to refer the places of the yarns to the right colours and to arrange the order of stitching for the different yarns.
The black contour has to be stitched at the end.
Then the fabric has to be mounted in a frame with an embroidery fleece beneath it.
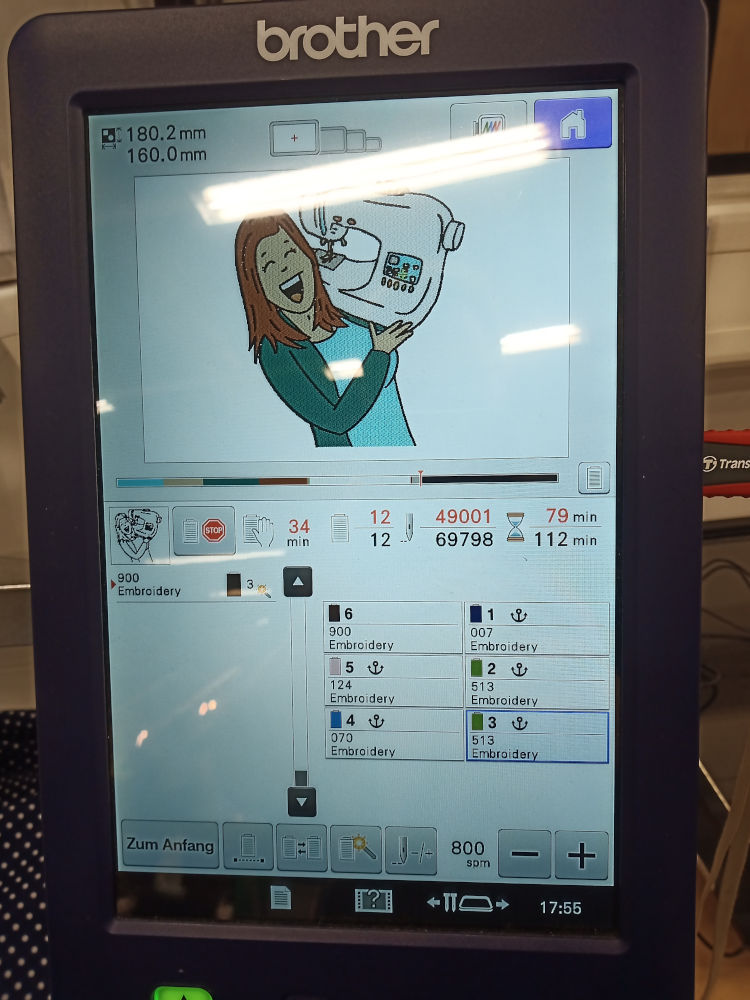
The machine during stitching:

In the display of the embroidery machine you can see how many stitches are needed (69798) and how many stitches were made so far (49.001).
You can also see the duration of the whole stitching process (112 min) and the speed of the machine (800 stitches per minute) and several further information.
Here you see the final result:
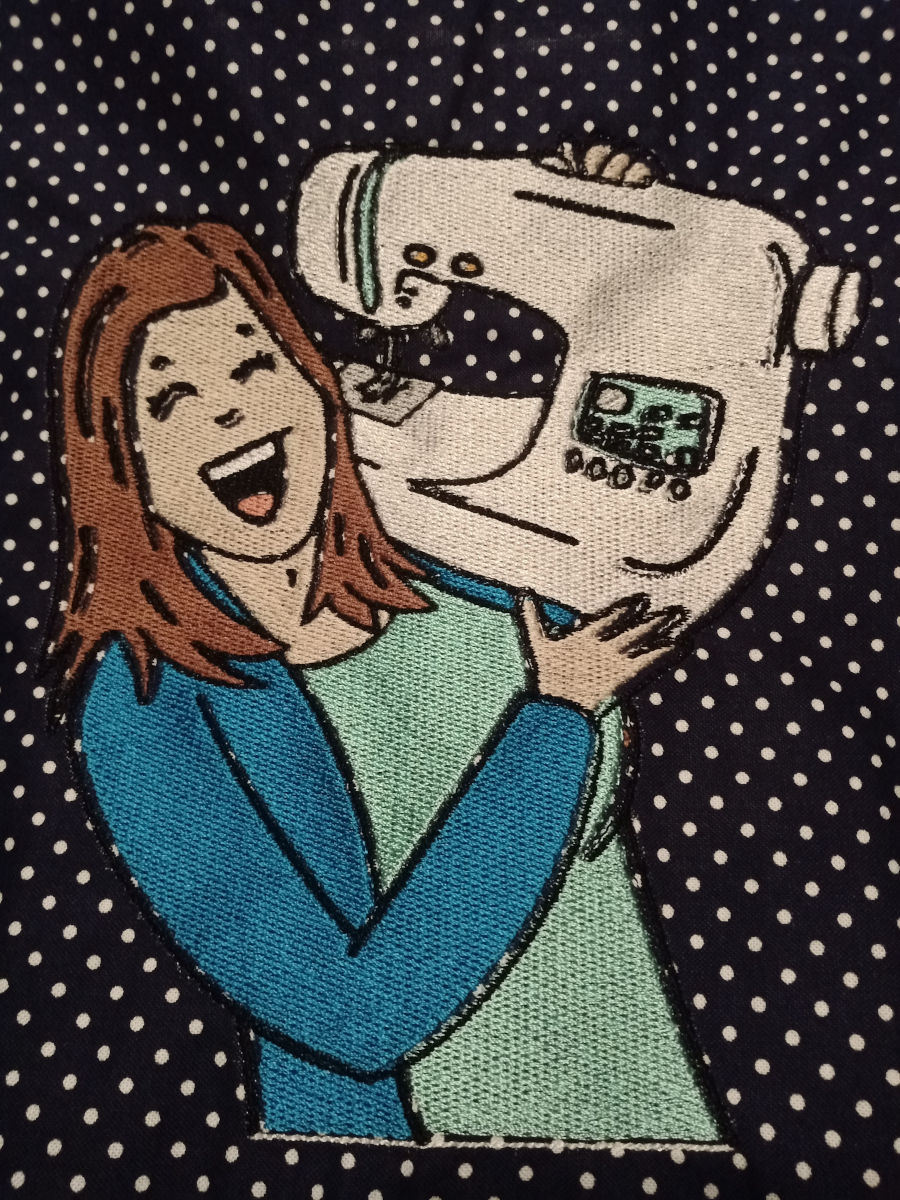
Unfortunately, the contour does not fit perfect to the filling.
The misalignment is larger to the sides of the image.
Presumably, the fabric stretched during the stitching process.
So it is advisable to use a non stretchy tough fabric.
Due to copyright I cannot make the .pes file available here.