13. Molding and Casting
assignment
   group assignment:
      review the safety data sheets for each of your molding and casting 	materials, then make and compare test casts with each of them
      extra credit: try other molding and casting processes
   individual assignment:
      design a mold around the stock and tooling that you'll be using,
      mill it (rough cut + three-axis finish cut),
      and use it to cast parts
      extra credit: use more then two mold parts
individual assignment:
This week I designed a positive hirth joint mould with fusion, milled it out of wax with a Stepcraft milling machine and made a negative mould using the silicone Silglas25. Then I poured PCL into the mould using a 3D printing pen.
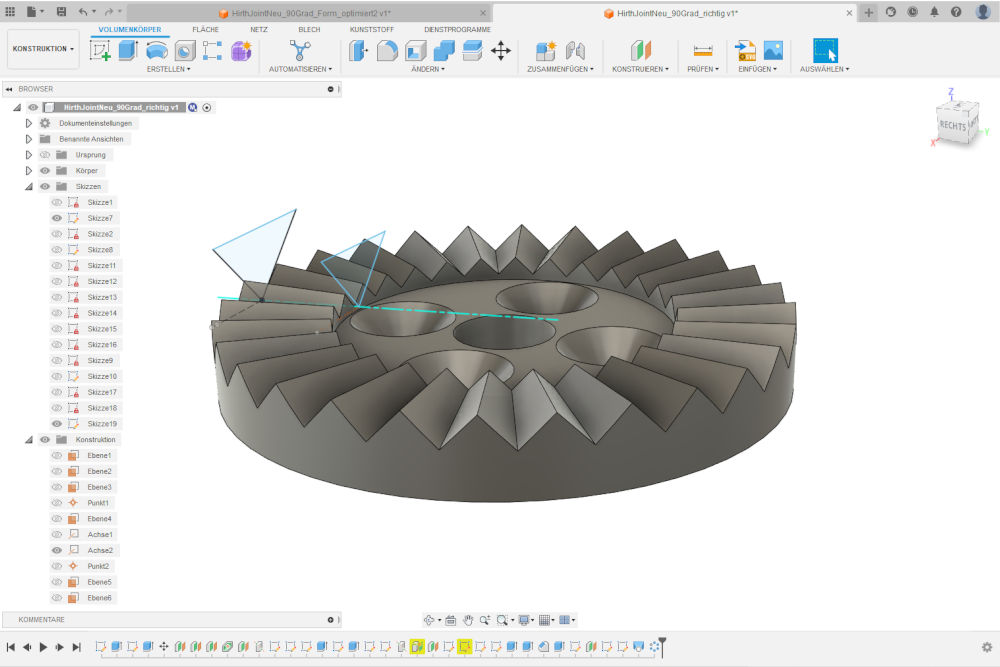
A hirth joint can be used to adjust the angle of two parts of a retention arm for example. To design the teeth I draw two triangles with 90° angles at their angles pointing towards the bottom. The lower points of the two triangles have to be placed on a line connecting the lower point of the outer triangle and a point in the centre of the hirth joint. This point in the centre of the hirth joint has to be in the half height of the height of the teeth at their outer corner of the hirth joint. With the function “Erhebung” in Fusion you can connect the two triangles and delete this geometry from a ring having a witness a bit less than the distance between the two triangles.
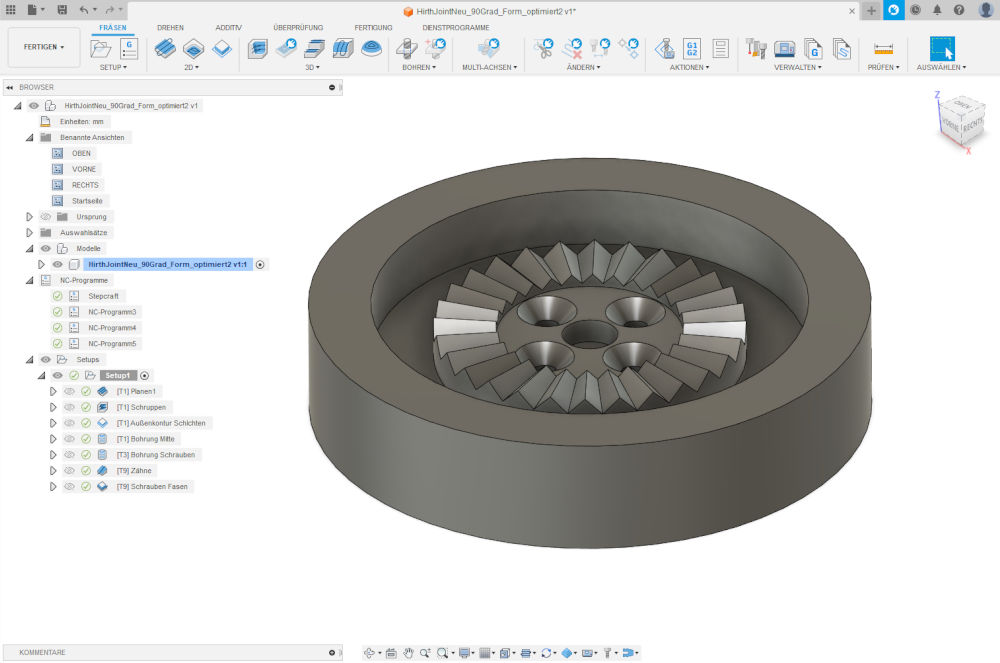
To make a mould I added a bottom plate and a ring around the hirth joint. To mill the teeth I used a mill with a 90° angled tip. In Fusion you can use the function “2D – Projektion”, so that the mill follows the line in the grooves between the teeth. This path is not parallel to the bottom, but slightly angled – so its a 3D CNC movement.
Here you can download the stl file of the mould:
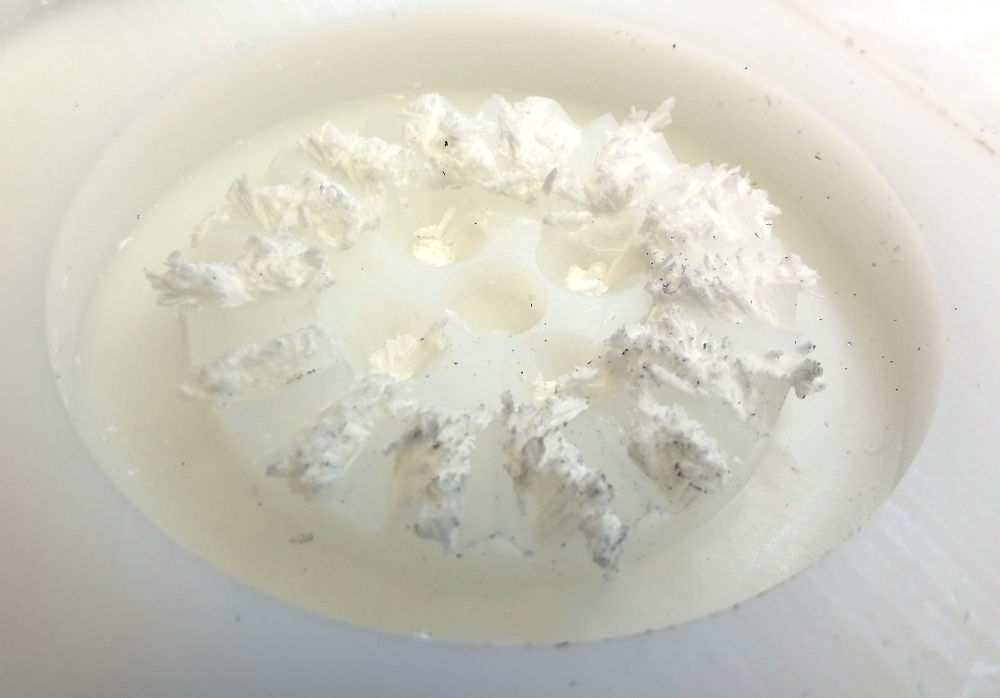
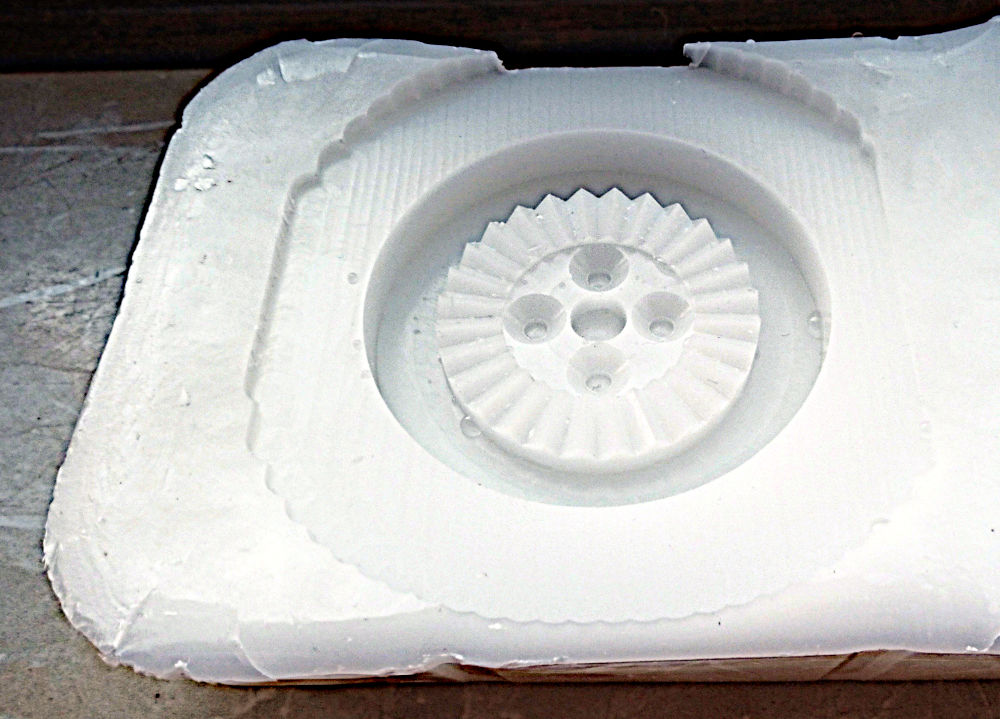
After the first milling the teeth looked quite bad, because wax cuttings melted during the milling. But then I performed the cutting process of the teeth a few times more with lower cutting speeds and then the mould looked great. The round items in the image below are only water droplets. I poured water into the mould to measure how much Silgas25 I will need. After that I let the mould dry over night.
Beside from moulding and casting the hirth joint I wanted to try to couple light of leds into PMMA optical fibres. Therefor, I filled out tips with Silglas25 in which I placed different PMMA optical fibres. After pouring Silglas25 into the tips I put different leds in the tips. I used Silgas25 because it is complete transparent and can be used to encapsulate leds and electronics. For the moulding of the hirth joint there are more suitable moulding materials, which have better mechanical stability. But for the moulding process a transparent material is also beneficial, because you see air bubbles in the material and can (try to) remove them with a toothpick.
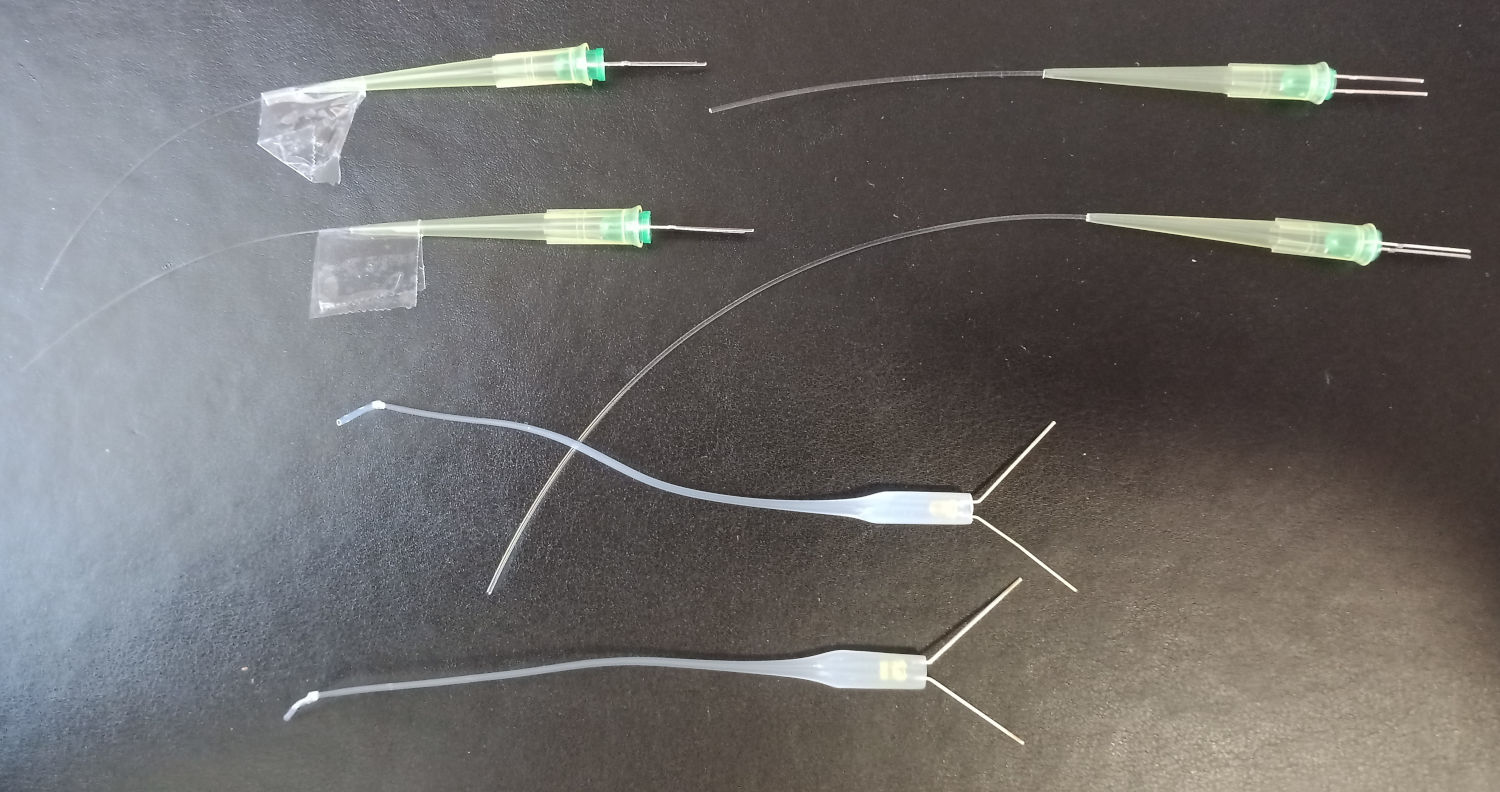
Tips with optical fibres and leds.
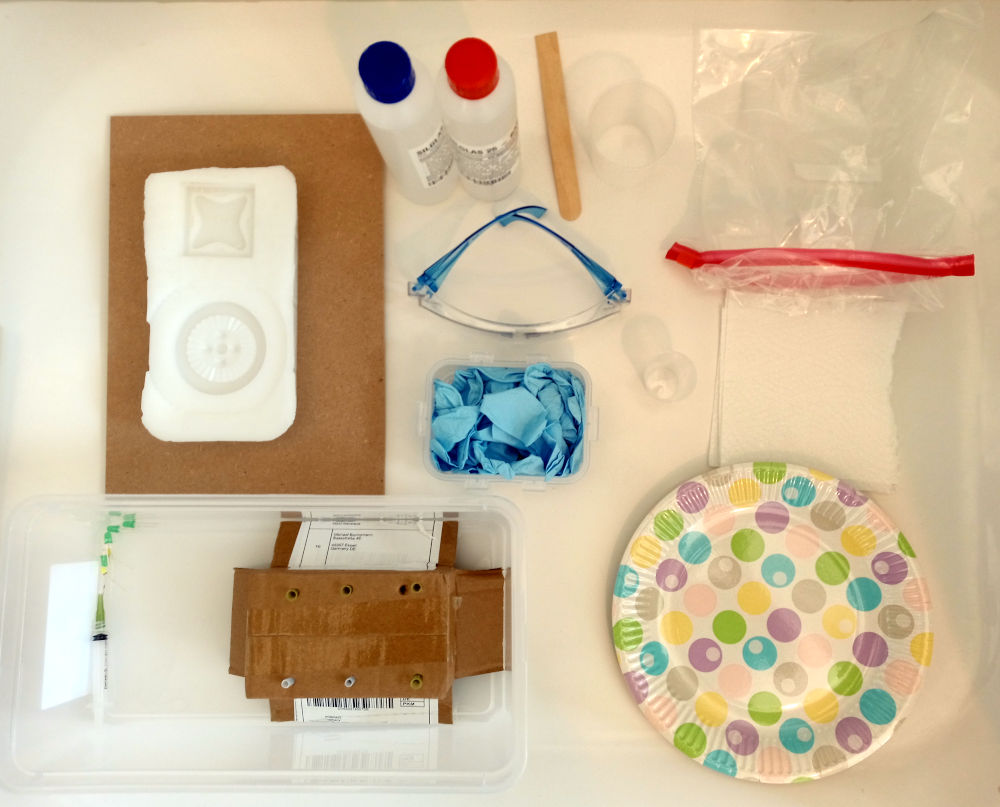
In the image below you can see all the materials I used for the moulding process:
wax mould
Silglas25
urine cup with fat inner bottom
wooden mouth spatula (cut rectangular at one end to reach in the corners of the urine cup)
glasses
nitrile gloves
shot glasses with units for measuring of the two components
bag for disposals
tissues to wipe of the bottles of the Silgas25 after pouring
one-time plate as underlay for the mixing processes
the tips mounted upright and a syringe to fill the Silglas25 into the tips
toothpick to get out air bubbles out of the silicone (not shown)
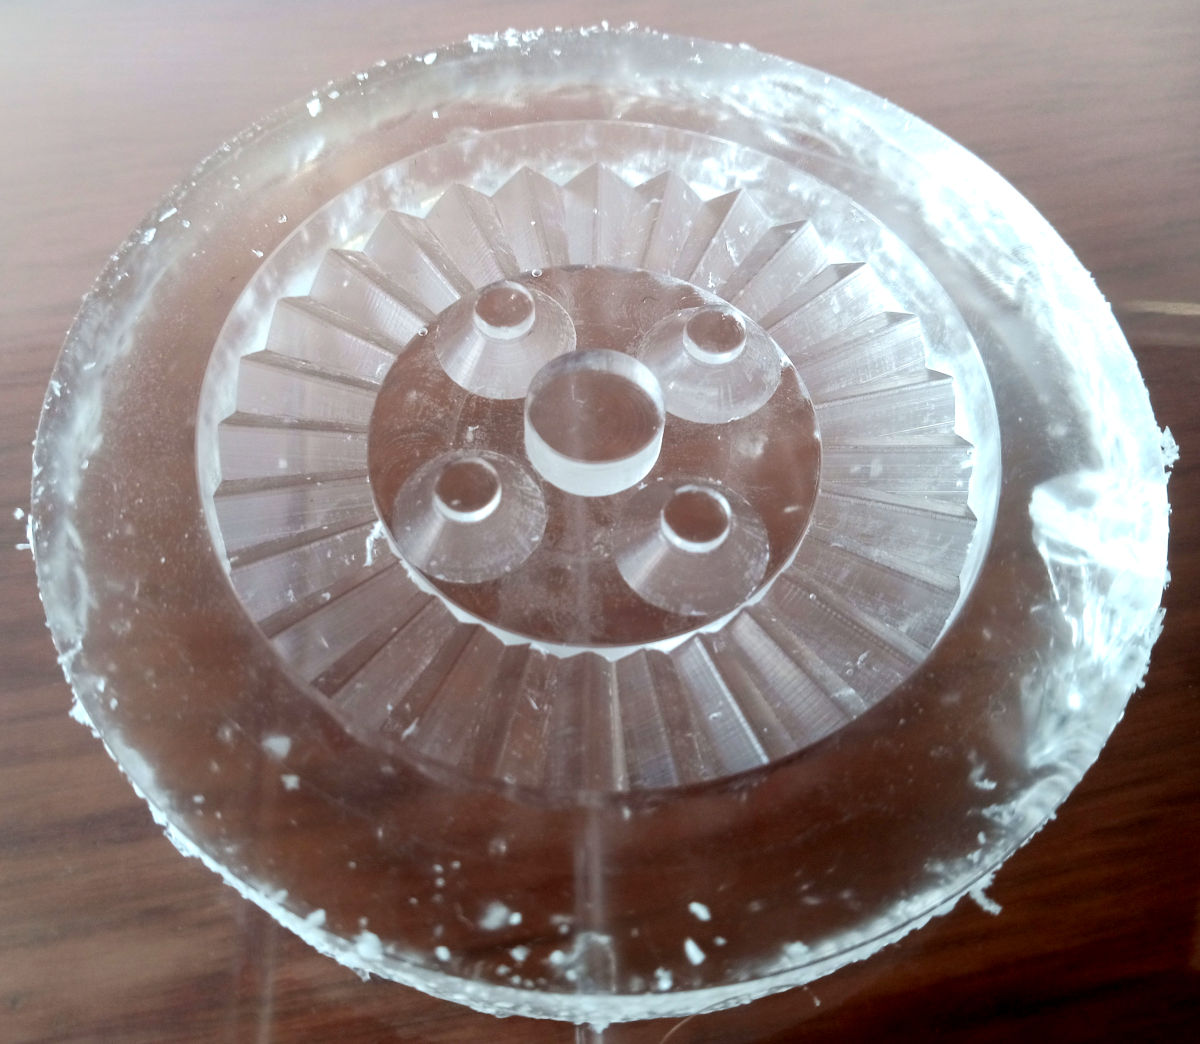
The final Silgas25 mould.
Initially I wanted to use the injection moulding machine of my Fablab, but this has to be repaired. Therefor, I tried to fill the mould using a 3D printing pen. The results so far are not perfect, but I think with a bit more practice you can get quite good results much faster than 3D printing. A hot glue gun also could work for not so delicate moulds.
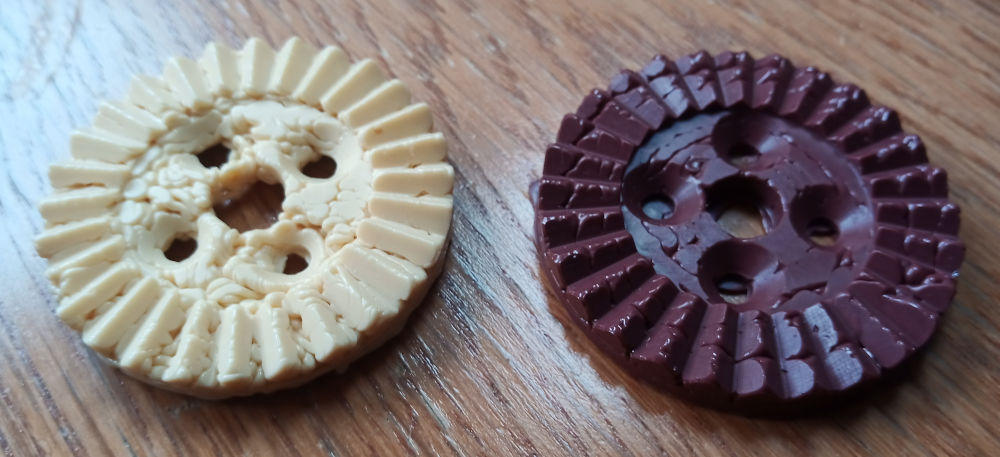
First (left) and second (right) attempt to fill out the mould with a 3D printing pen.
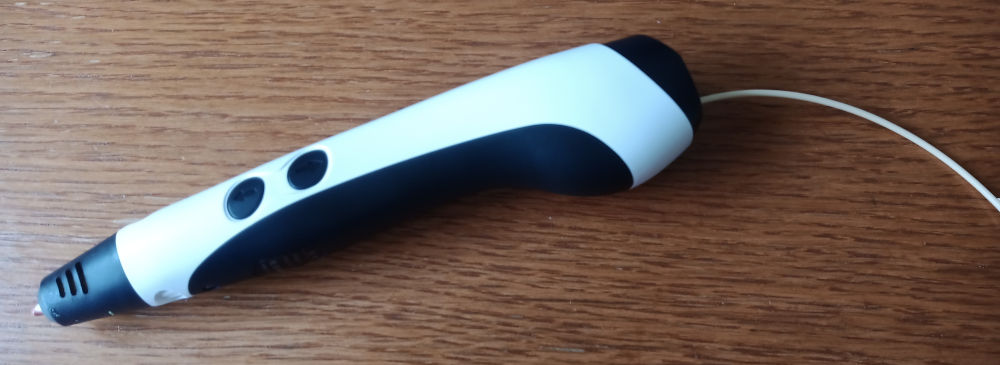
3D printing pen.
group assignment:
Initially I wanted to use the silicone Knetosil to cast the hirth joint. But because the wax mould was not that robust and the time you can process the silicone dough is only 90 seconds, I decided to use the silicone Silgas25, despite its not that robust. Thereby I also could use Silgas25 for the experiments to couple the light into optical fibres.
Review of the safety data sheets of the material Knetosil and SILGLAS
The following information is only a part of the safety data sheets. So read the whole data sheets before working with this material.
Product information "KNETOSIL 2-component kneading silicone"
KNETOSIL is boil-proof (resistant up to 200°C), non-sticky, physiologically harmless, has excellent mechanical properties and is ideally suited for impressions in the dental field.
Simply knead the two components (A white + B yellow) intensively and quickly in a ratio of 1:1 by weight for approx. 45 sec. until a streak-free homogeneous mixture with a uniform light yellow colour is obtained.
The object to be moulded can now be pressed into the mixture.
You have 90 seconds to press the silicone around your object.
The silicone can be removed after approx. 10 minutes.
When working with KNETOSIL kneading silicone, only use nitrile gloves, never latex gloves, as latex interferes with the cross-linking of the silicone.
When mixing by hand, the cross-linking time may be shortened because the silicone is heated by the hands, which accelerates the cross-linking.
It is essential to reseal the cans immediately, never interchange the lids and dosing spoon!
The processing time is 1.5 minutes at room temperature.
Processing of KNETOSIL
After skin
contact: Remove product mechanically with cloth or paper. Wash
off with plenty of soap and water. In case of visible skin changes or
discomfort seek medical advice (show label or MSDS if possible).
After eye
contact: Immediately flush opened eye with running water for 15
minutes. Consult an ophthalmologist.
The mixture is not classified as hazardous, but:
One component is quartz.
For this material you have to consider:
48/20 Harmful: danger of serious damage to health by prolonged exposure through inhalation.
H372 Causes damage to organs through prolonged or repeated exposure.
One component is paraffinum perliquidum.
For this material you have to consider:
H304: May be fatal if swallowed and enters airways.
SILGLAS 25 - RTV 2
The components do not have to show hazard pictograms.
One substance in the components is: Platinum, 1,3-diethenyl-1,1,3,3-tetramethyldisiloxane. For this substance you have to consider H361: “Suspected of damaging fertility or harming the unborn child (state specific effect if known) (state route of exposure if there is conclusive evidence that no other route of exposure presents a hazard)”. Of this substance only 0.1% is contained in the components, but still take appropriate safety precautions.
“Wash your hands, forearms and face after transport and use before eating, smoking and using the toilet and at the end of the working period.”
Application
1.
place part A and part B in a container and stir evenly until
components A and B are mixed together.
2. mixing ratio by weight
or volume is 1:1.
3. for ideal results, deaerate the mixture
below 0.08 MPa for 3 minutes. However, this is not absolutely
necessary.
4. vulcanisation is accelerated at higher
temperatures and slowed down at lower temperatures.
Mixing
ratio 1:1
Workability (min) 30~60
Curing time (hours, 25℃)
4~5
Silglas25 does not belong to dangerous goods, nevertheless keep away from mouth and eyes.