When we talk about mechanical design and machine design we talk about motors too (dc, stepper, brushless, servo motors). It is also important to refer to the concept of degrees of freedom, which has to do with how many rotation axes a mechanical system can have and therefore determine the movement(s) it can do.
Group assignment
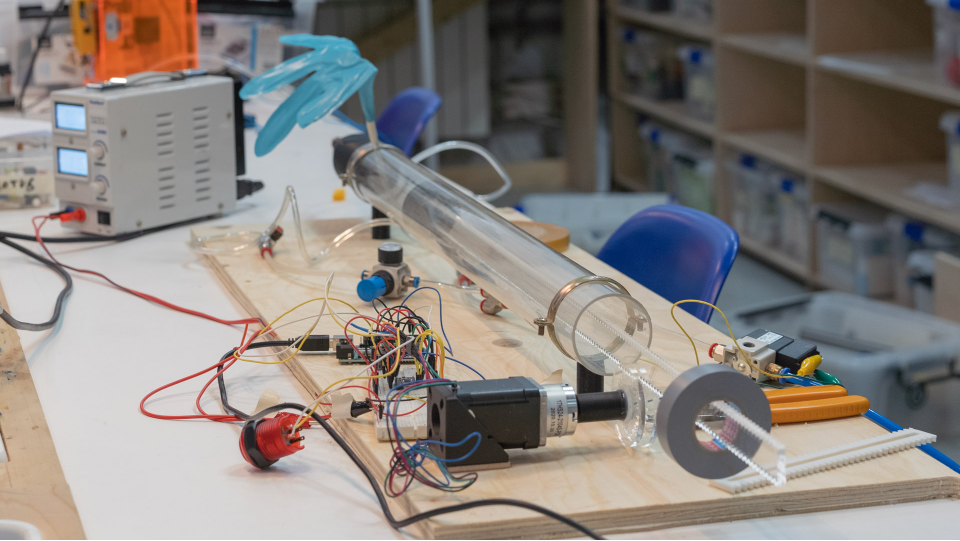
The echo garden machine
Our machine aims to be an immersive garden fuelled by air, with inflatable flowers that echo sounds through a giant flute. To accomplish that we used an air pump (the input), a mechanism moved by a stepper motor to move the air inside the flute according to a code and inflatables that fill in with air as the mechanism moves. All this generates sound as an output.
We decided to contribute with our own expertise since we have different backgrounds and it would be faster to contribute with what we know and are faster at. I am a UX Designer and I am used to facilitating workshops so I initiated the brainstorming sessions and facilitate this initial discussion so we could focus on a direction. I also explored the inflatables and supported the mechanical part by cutting and 3D printing the final pieces. I also structured and organized the group page so that it's easier for everybody to go and talk more specifically about their part and with this explain the entire project.
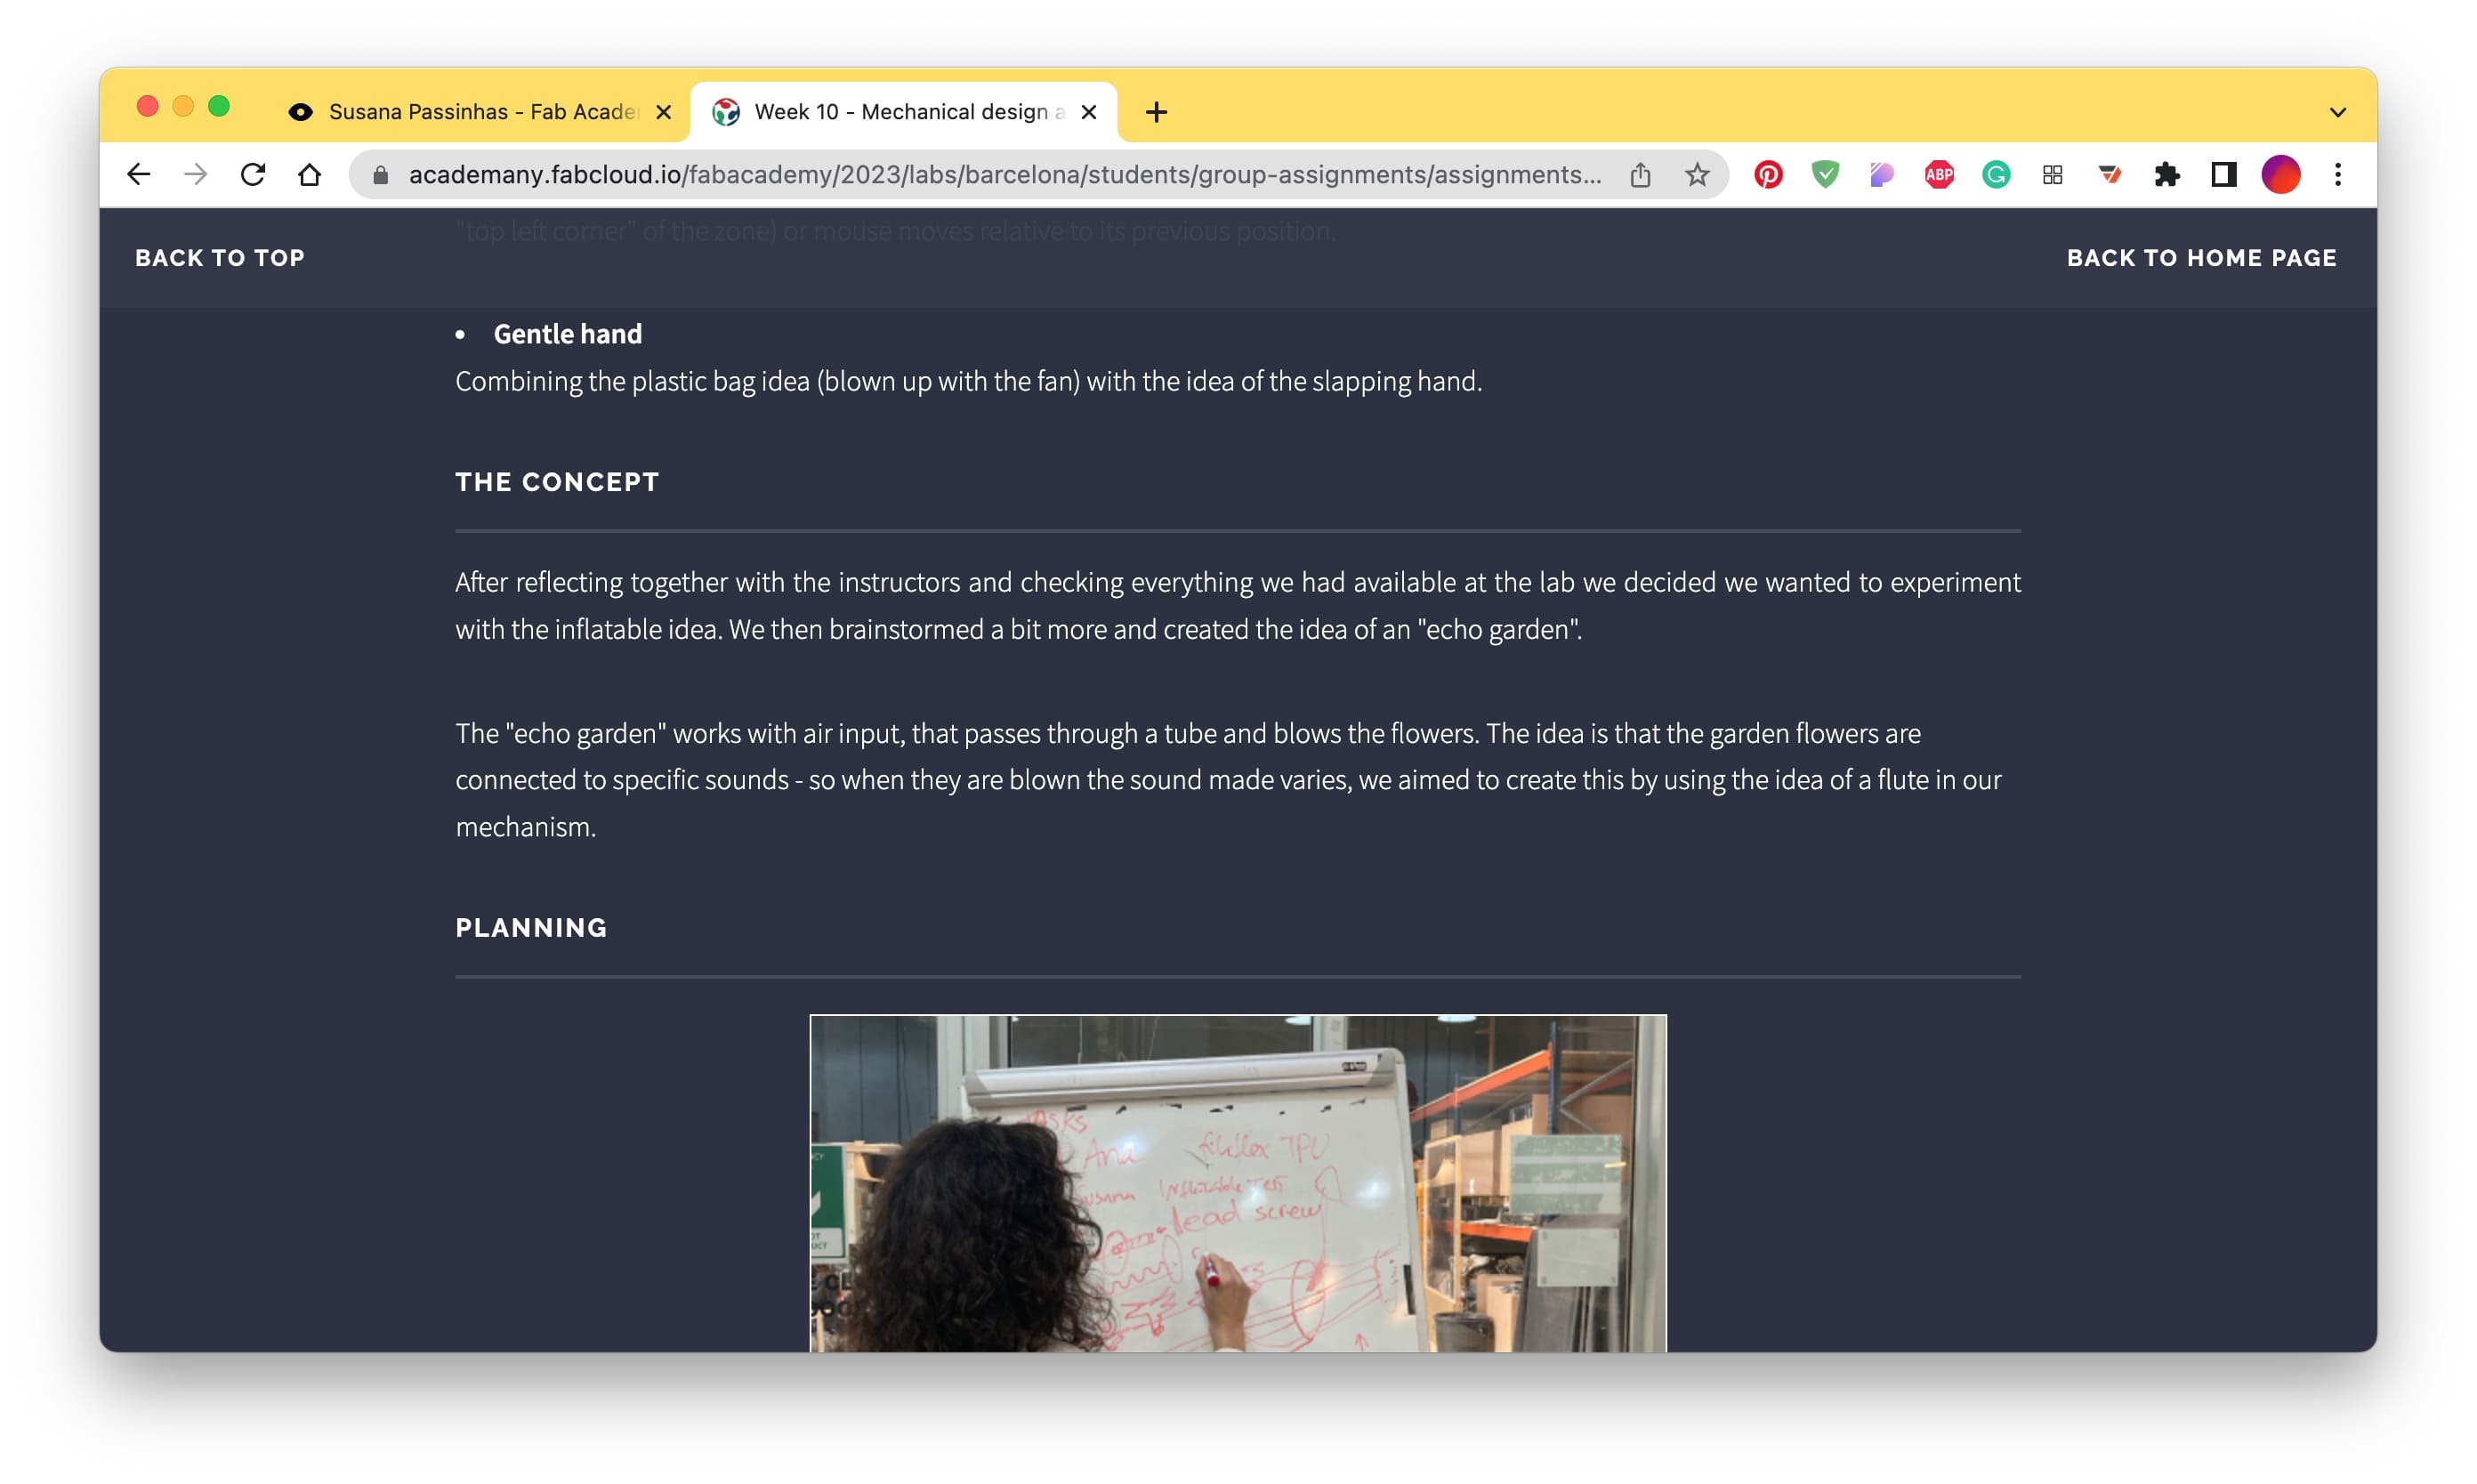
1. Brainstorming
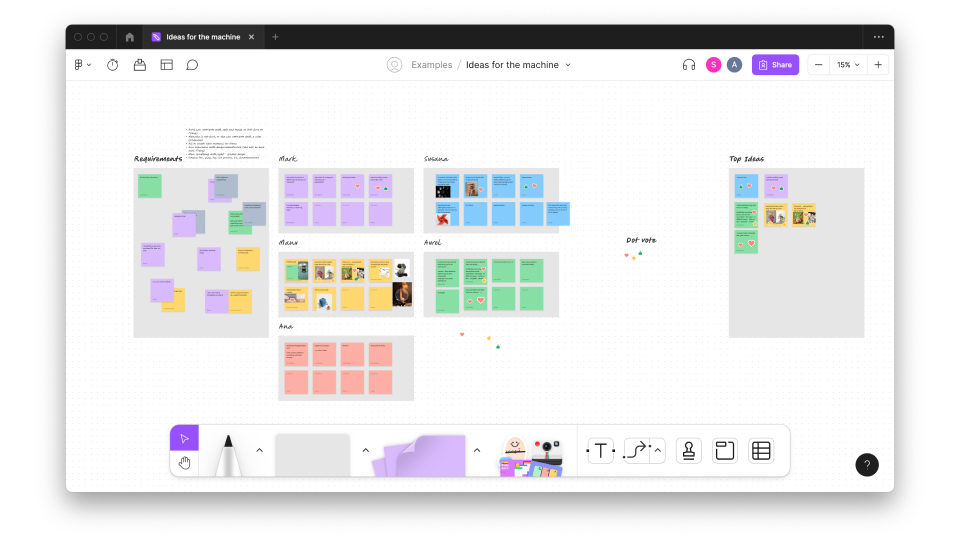
I organized the brainstorming session using Figma. We had 2 meetings as a group, one to kickstart with the first ideas and another one to decide on a direction(s).
Planning and facilitating the brainstorming
For the brainstorming session I created a FigJam file (a collaborative board by Figma). I organized the session by doing first the requirements (so that everybody could put their ideas on what they wanted the machine to be), then everybody added their ideas on post-its. After that, we all presented and explained our ideas to each other.
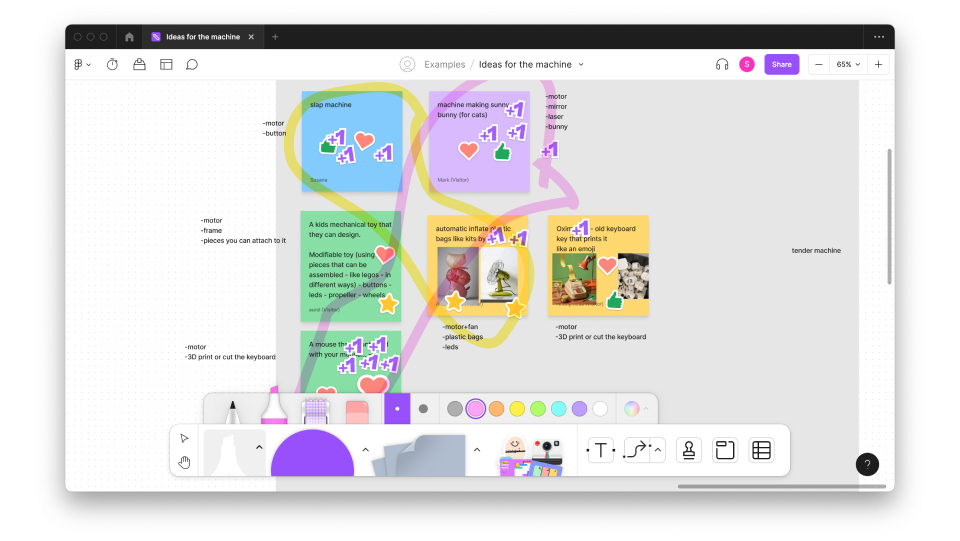
In the next session, we voted on what we liked the most and ended up trying to merge some ideas.
The ideas with more votes were: sunny bunny (a machine that would use light to reflect it indoors for cats to play with it), the idea of a slap machine - that we also thought about combining with the idea of using some sort of inflatables making it more of a gentle hand than a slapping hand. We also voted on the idea of using the movement of the mouse to mirror the movement of a mechanical mouse (also for cats). We also discussed joining this last one with the sunny bunny one.
In the end, we discussed these ideas with the instructors at the Fab Lab Barcelona and came up with the final idea that we explain on the group assignment page - The Echo Garden.
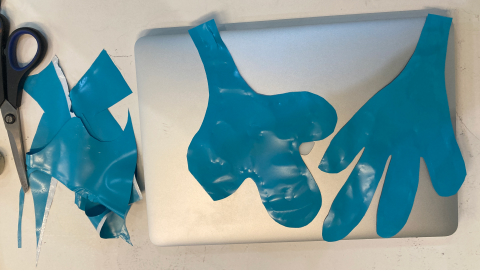
2. Doing the inflatables
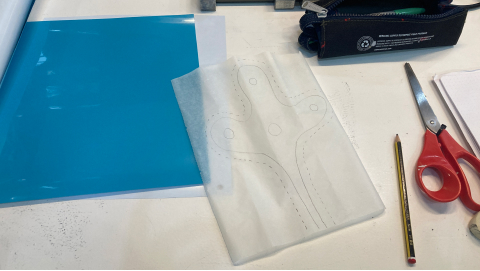
The inflatables were quite simple and fun to do, for the machine we were designing we only needed them to be filled in with air mechanically (the inflatables represent the flowers in the echo garden).
Cutting the vinyl
To do the inflatables I worked with heat transfer vinyl so that I could glue it with heat. We could use the laser cut machine to create a shape, but we really didn't need it for this project. I just draw some initial ideas in a notebook and then freehand draw them in the baker paper. The baker paper is crucial for the inflatables to work because wherever the baker paper is placed when in between the heat transfer vinyl, it doesn't allow that part to glue, that is the part we can put air and therefore create an inflatable.
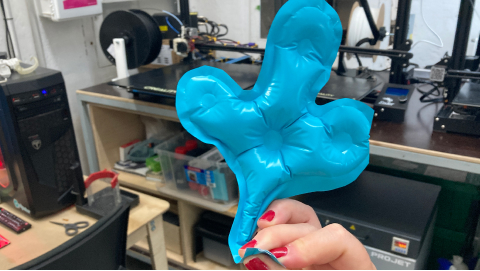
Using the heat presser
The heat presser is quite simple to use, in this case, it works like an iron (the one we use to iron our clothes). For the heat transfer vinyl, the temperature should be 255 celsius degrees. In the heat presser machine, I had to make sure the machine was at celsius degrees and also I left it to heat before actually putting the vinyl. It's also important to use baker's paper in between the vinyl and the machine in case the 2 pieces of vinyl are not perfectly matching so that the glue doesn't stick to the machine. I left the heat presser pressing for around 3 minutes.
Assembling the inflatables
Once the pressing was done I left them to cool off for about 1m. Then I cut with a scissor the extent vinyl. After that, I just blew air into them to see if it was working! Later on, I added a little rubber tube at the air entry point so that we could use it in the machine.
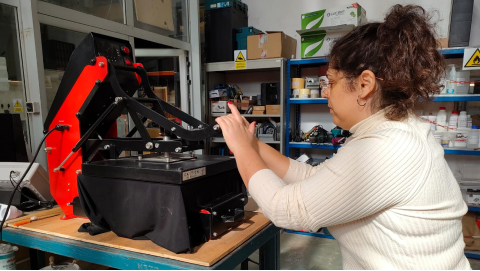
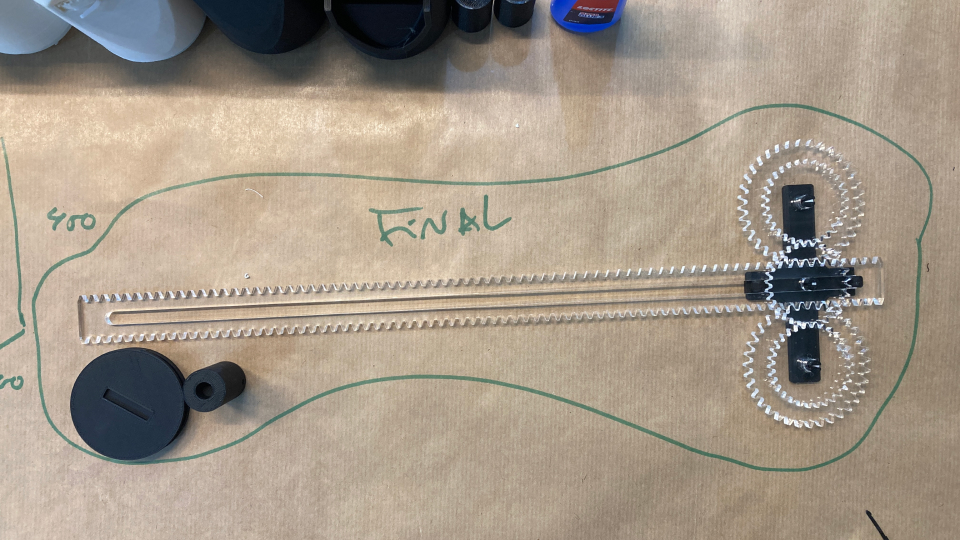
3. Laser cutting and 3D printing the final mechanical parts
My colleague designed the mechanical part of the project and I cut and 3D printed the final parts for the machine.
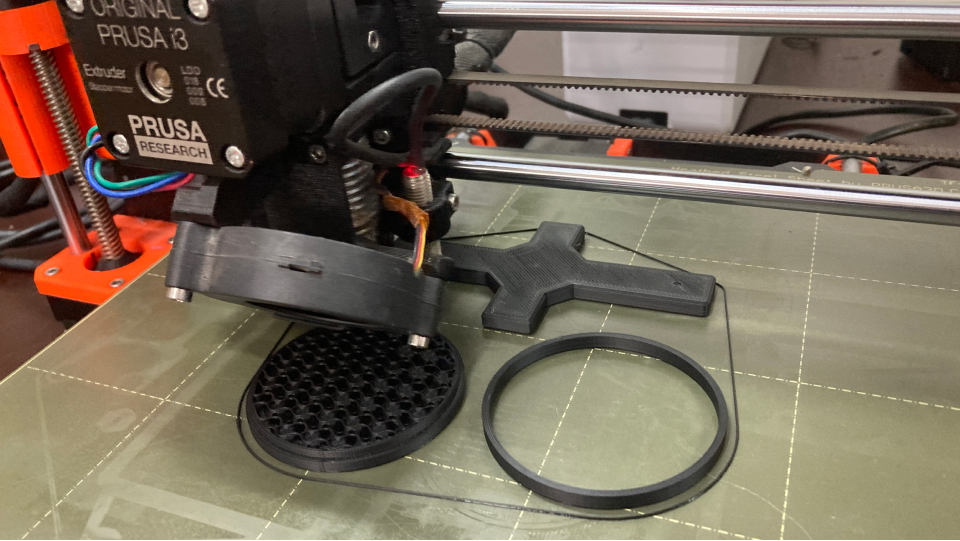
3D printing
The 3D printing was very straightforward. I had the files already prepared by my colleague so I just opened them in the 3D printer software of the PRUSA machine and send them to print. The material is PLA so the settings are bed 60 degrees and the filament 215 degrees. I used the standard quality and a 2mm height for the filling. The speed was 50.
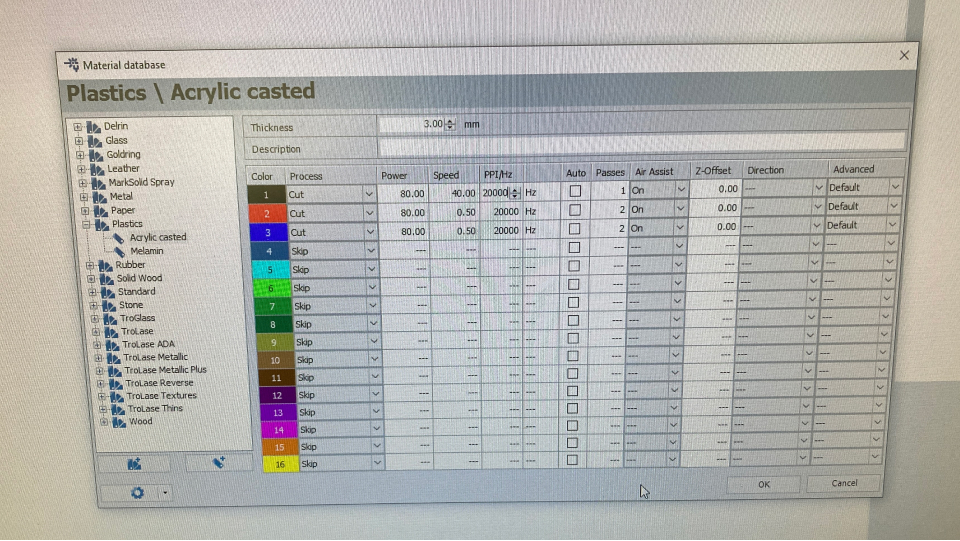
Laser cutting
For the laser cutting, I also had the pieces already created by my colleague. So I open the files in Rhino and made sure they were not duplicated lines and set up the colors for the laser cut machine. Black is used for rastering, red for cutting first, and blue for cutting second. For the final pieces we used acrylic 5mm (we used 3mm before for the initial test).
Once the file was ready from Rhino I used the command "print", I updated the material type for plastics/acrylic. Then I opened the laser cut software and added the job to the laser cut area. I made sure the power speed and hertz were well set up (I guided myself with the board we have at the lab with the values we should use). I also set up the passes to 2 to make sure the machine would cut through nicely (the Fab Lab instructor recommended me).
Laser cut settings for acrylic 5mm
Once everything was ready I calibrated the machine and put on the air extraction. I loaded the bed with the 5mm acrylic and made sure it was tapped to the corners. I sent the job to the machine and just waited.
4. Setting up the documentation
Another contribution I did was to set up the group page structure by adding the photos up until the first tests and adding already some content regarding the concept and the parts I collaborated on.
Adding structure
I used the terminal as usual to, first pull the group assignment repository (to make sure I was up to date). To do this I first needed to make sure I was in the folder I needed to be on my computer. I do this by using the command "pwd" to see where I am and then I use the command "cd" and drag the folder of the group repository there so that I can use git updating first locally and then push it into the online repository.
Before adding the pictures I made sure they were small and put them all in the same resolution. I did this using Figma. In Figma I create a mask and exported the images at 0,25 or 0,50 % in jpg. After the images were created I added a new folder for the images in the repository and started to add them to the newly created group page. I also made sure I was already structuring the process we were doing so it would be easier for everybody to add their contribution later.
Reflection
This project was fun to do as it was sort of a culmination of everything we have been learning so far. It was quite nice to feel comfortable using the machines and being in an exploratory mindset. I also think we organize ourselves well by contributing with our expertise so things would move faster. I tried to be curious here and there with other moving parts of the project like the electronics that in the beginning, I was trying to support while connecting the motor.
The biggest struggle on this project was that we have all different schedules and it was hard for everybody to be together all the time, but since we all work we are all quite flexible with that. I also felt quite exhausted during this week, which can be the culmination of this really fast pace of the previous 10 weeks. I say this because when I was cutting in the laser machine I had to load the machine 3 times, once I forgot to cut a piece, and the other time because I ended up gluing the acrylic with the plastic on. So I guess a break now is well deserved so I can recharge :)