"An embedded system is a computer system — a combination of a computer processor, computer memory, and input/output peripheral devices — that has a dedicated function within a larger mechanical or electronic system... Modern embedded systems are often based on microcontrollers" ¹
Microcontrollers are made of transistors, they have memory and they are made to process information - to compute. We can then control inputs and outputs using a microcontroller. Microcontrollers vary depending on the purpose and they have different architectures. The architecture of a microcontroller refers to the way it is designed and the way it works. Microcontrollers also communicate using different protocols (agreements on how to understand them).
Group assignment
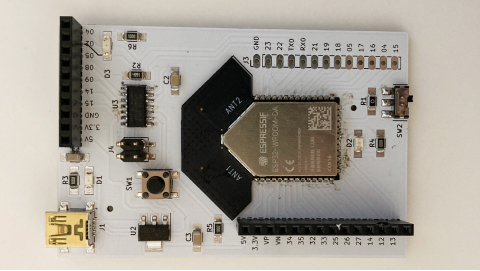
Barduino is the board we use at FabLab Barcelona, it is compatible with ESP32. We use 2 microcontrollers in it, the ESP32-WROOM-DA and SAMD 11. We can use the Barduino board with Arduino IDE, we just need to configure it.
The ESP32 is a microcontroller that allows Wi-fi and Bluetooth connectivity and it has lower power consumption, it has a series of functionalities including, a touch sensor, radio frequency, flash memory, and RAM memory. In the Barduino board, we use the ESP32-WROOM-DA which is compatible with ESP32. The ESP32 can't communicate directly with the computer so we also use the SAMD 11 microcontroller to serve as an intermediary.
SAMD 11 is a low-power microcontroller that has among other things, one full-speed crystal-less USB 2.0 device interface (one of the reasons why we use SAMD 11).
The Arduino board uses an Atmel AVR microcontroller. Arduino has the limited processing power and limited connectivity options (no Wi-fi and Bluetooth for example).
The Maker UNO board is specially designed for education, it has exactly the same components as Arduino (Arduino is an open-source project, which means it's legal to replicate it). It's very similar to the Arduino board but it has a few additional components that allow, for example, to use of a joystick, keyboard, or soundcard through the CH340g chip.
I learned that using the same architecture allows more integrations between microcontrollers. Microcontrollers vary in functionalities but they seem to have the same core functionalities such as power, clock, input, and output pins. Even though usually the coding language of microcontrollers is C or C++ we can use Arduino IDE and apply the functions that already exist (at least to start with) using a different board (like for example the Barduino board). Mainly the difference between the boards we checked and the microcontrollers used is how simple or complex they can be depending on their purpose. It is also important to mention that all the microcontrollers we reviewed are Harvard architecture.
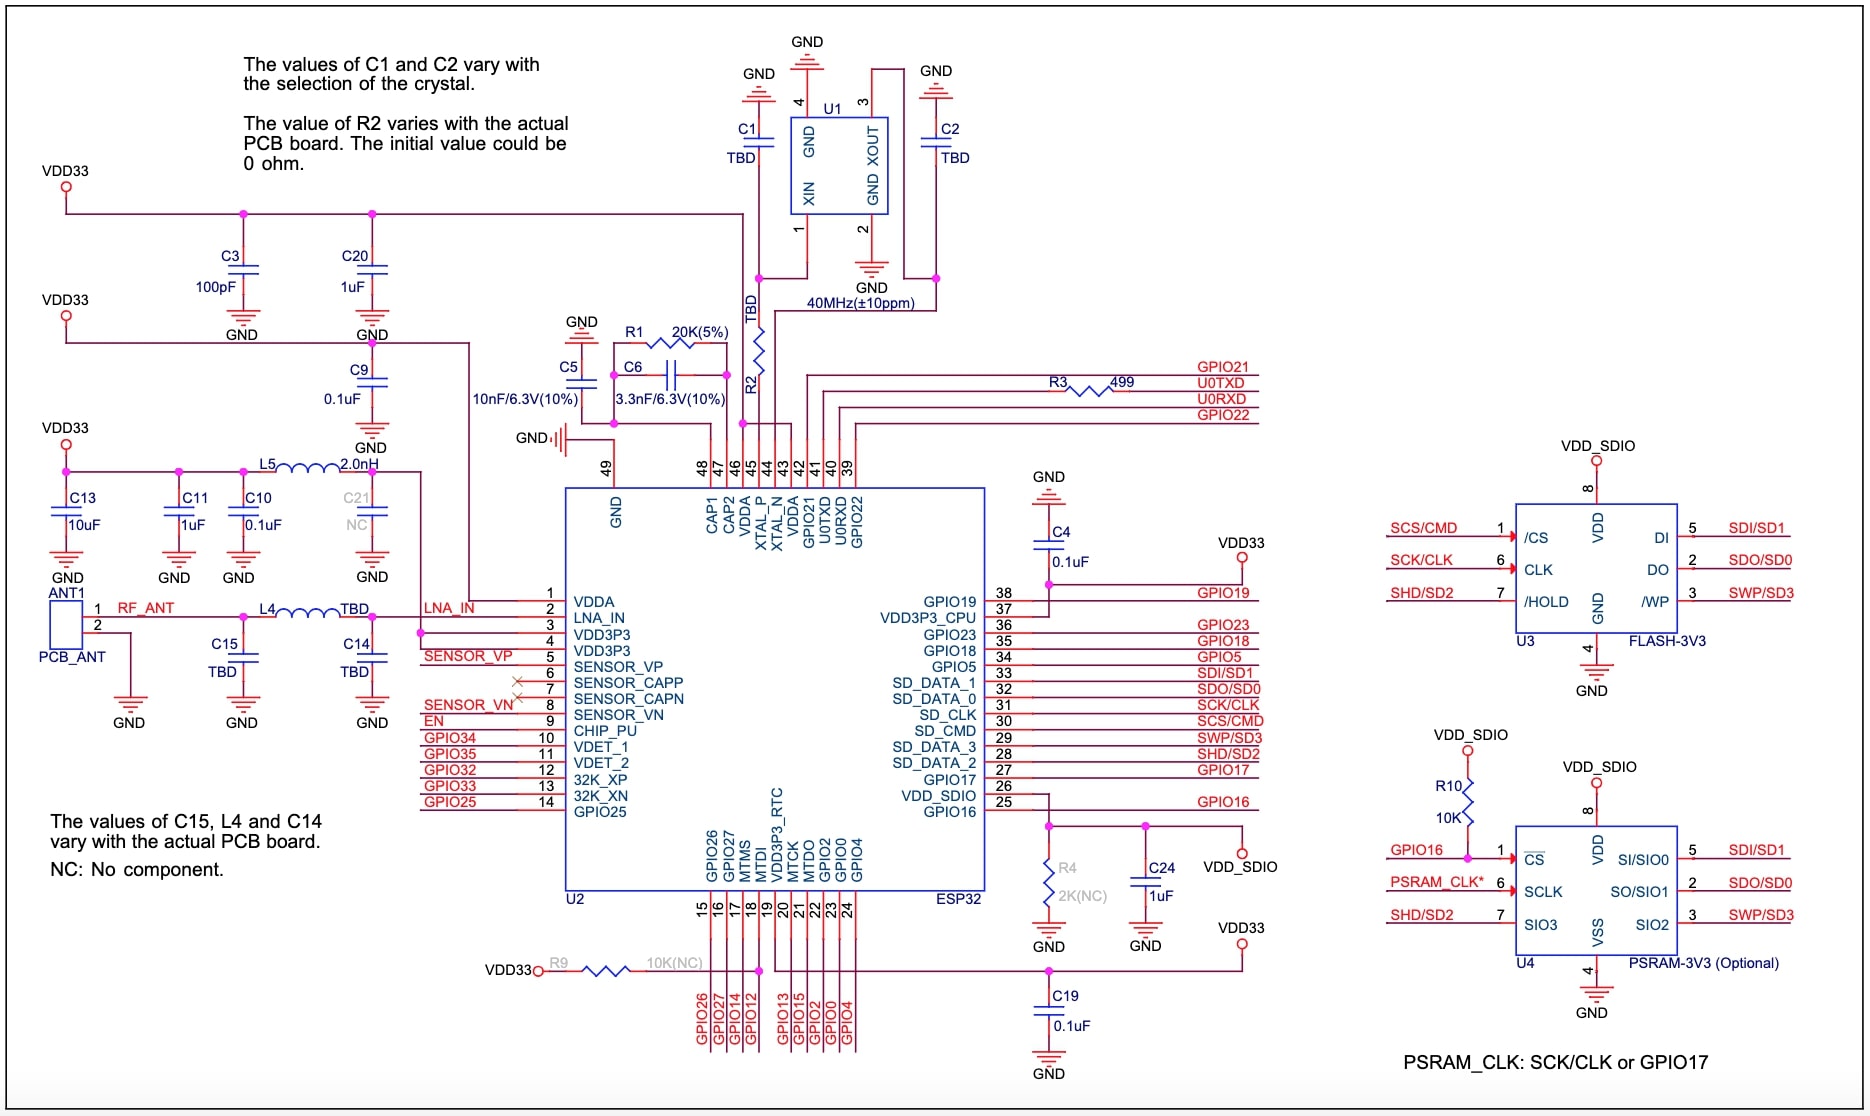
Browsing through the datasheet of the ESP32 microcontroller
The ESP32 is a microcontroller with integrated Wi-Fi and Bluetooth connectivity. It can operate with a temperature ranging from –40°C to +125°C. It also has a low power consumption. It has antenna switches, an RF balun, a power amplifier, a low-noise receiver amplifier, filters, and power management modules. It requires a minimal printed circuit board (PCB). ESP32 can perform as a standalone system or work with other microcontrollers (in Barduino we have it working with SAMD 11).
ESP32 Schematics
Any basic ESP32 circuit design may be broken down into 10 major sections:
Power supply
Digital power supply
Pin37 VDD3P3_CPU (that supplies power for CPU IO, in a voltage range of 1.8 V~3.6 V).
Pin26 VDD_SDIO (can serve as the power sullpy for the external device at either 1.8 V if GPIO12 is pulled highduring boot, or at 3.3 V if GPIO12 is pulled low during boot. By default, GPIO12 is pulled low).
Analogue power supply
Pin1 VDDA, pin3 VDD3P3, pin4 VDD3P3, pin43 VDDA and pin46 VDDA are the analog power supply pins, workingat 2.3 V~3.6 V.
RTC (real time clock) power supply
Pin19 VDD3P3_RTC of ESP32 is RTC and analog power pin.
Power-on sequence and system reset
ESP32 uses a 3.3 V system power supply.
CHIP_PU serves as the reset pin of ESP32.
Flash (compulsory) and SRAM (optional)
ESP32 requires SiP flash or external flash to store application firmware and data. SiP PSRAM or external RAM is optional.
ESP32 can support up to 16 MB external flash and 8 MB external RAM (we need to select appropriate externalflash and RAM according to the power voltage on VDD_SDIO).
Clock sources
There are two clock sources for the ESP32, that is, an external 40 MHz crystal clock source oscillator ( capacitors C1 and C2 which connect to the ground are added to the input and output terminals of the crystal oscillator respectively) and an RTC clocksource (ESP32 supports an external 32.768 kHz crystal or an external 32.768 kHz signal (e.g., an oscillator) to act as the RTC sleep clock).
RF (radio frequency)
The effective resistence/alternating current of the RF in ESP32 are SP32 (QFN 6*6) 30+j10)Ω and SP32 (QFN 5*5) 35+j10)Ω.
ADC (analogue to digital converter)
An ADC is used to convert an analog signal such as voltage to a digital form so that it can be read and processed by a microcontroller. Pins SENSOR_VP or SENSOR_VN is recommended for use as ADC. The recommended input voltage of the ADC is below 2450 mV, and preferably within the range of 100 to950 mV for higher calibration accuracy.
External capacitors
RC circuit between CAP1 and CAP2 pins (may be omitted under certain conditions) is used when entering Deep-sleepmode. During this process, to minimize power consumption, the voltage to power ESP32 internals is dropped from 1.1 V to around 0.7 V. The RC circuit is used to minimize the period of the voltage drop.
UART allows asynchronous serial communication in which the data format and transmission speeds are configurable (users need to connect a 499Ω resistor to the U0TXD line in order to suppress the 80 MHz harmonic).
SDIO (secure digital input output)
SDIO is a type of secure digital card interface. It can be used as an interface for input or output devices. There are two sets of GPIOs (slot0 and slot1) that can be assigned to SDIO on ESP32.
Touch Sensor
A touch sensor is a type of device that captures and records physical touch or embrace on a device and/or object. ESP32 offers up to 10 capacitive IOs that detect changes in capacitance on touch sensors due to finger contact or proximity. The chip’s internal capacitance detection circuit features low noise and high sensitivity. It allows users touse touch pads with smaller area to implement the touch detection function. Users can also use the touch panelarray to detect a larger area or more test points.
At FabLab Barcelona we use the ESP32-WROOM-DA in our Barduino board. ESP32-WROOM-DA is compatible with the ESP32 (ESP32-WROOM-32) and because if it's unique antenna it has excellent wireless communication which can come quite handy for all our projects.
Programing SAMD 11 and ESP32 microcontrollers
Barduino
At FabLab Barcelona we have our own board - Barduino 3.0. It's a development board (it is like Arduino, it has the pins of the microcontrollers exposed). It has 2 microcontrollers that we can start to program almost immediately:
SAMD 11: it has USB communication, it has micro connections, power, ground, and 2 pins for information (those pins are for serial transmitter and receiver).
ESP32: it has a lot of memory, wifi, and Bluetooth embedded, but it doesn't know how to talk to the USB.
Setting up Barduino in Arduino IDE
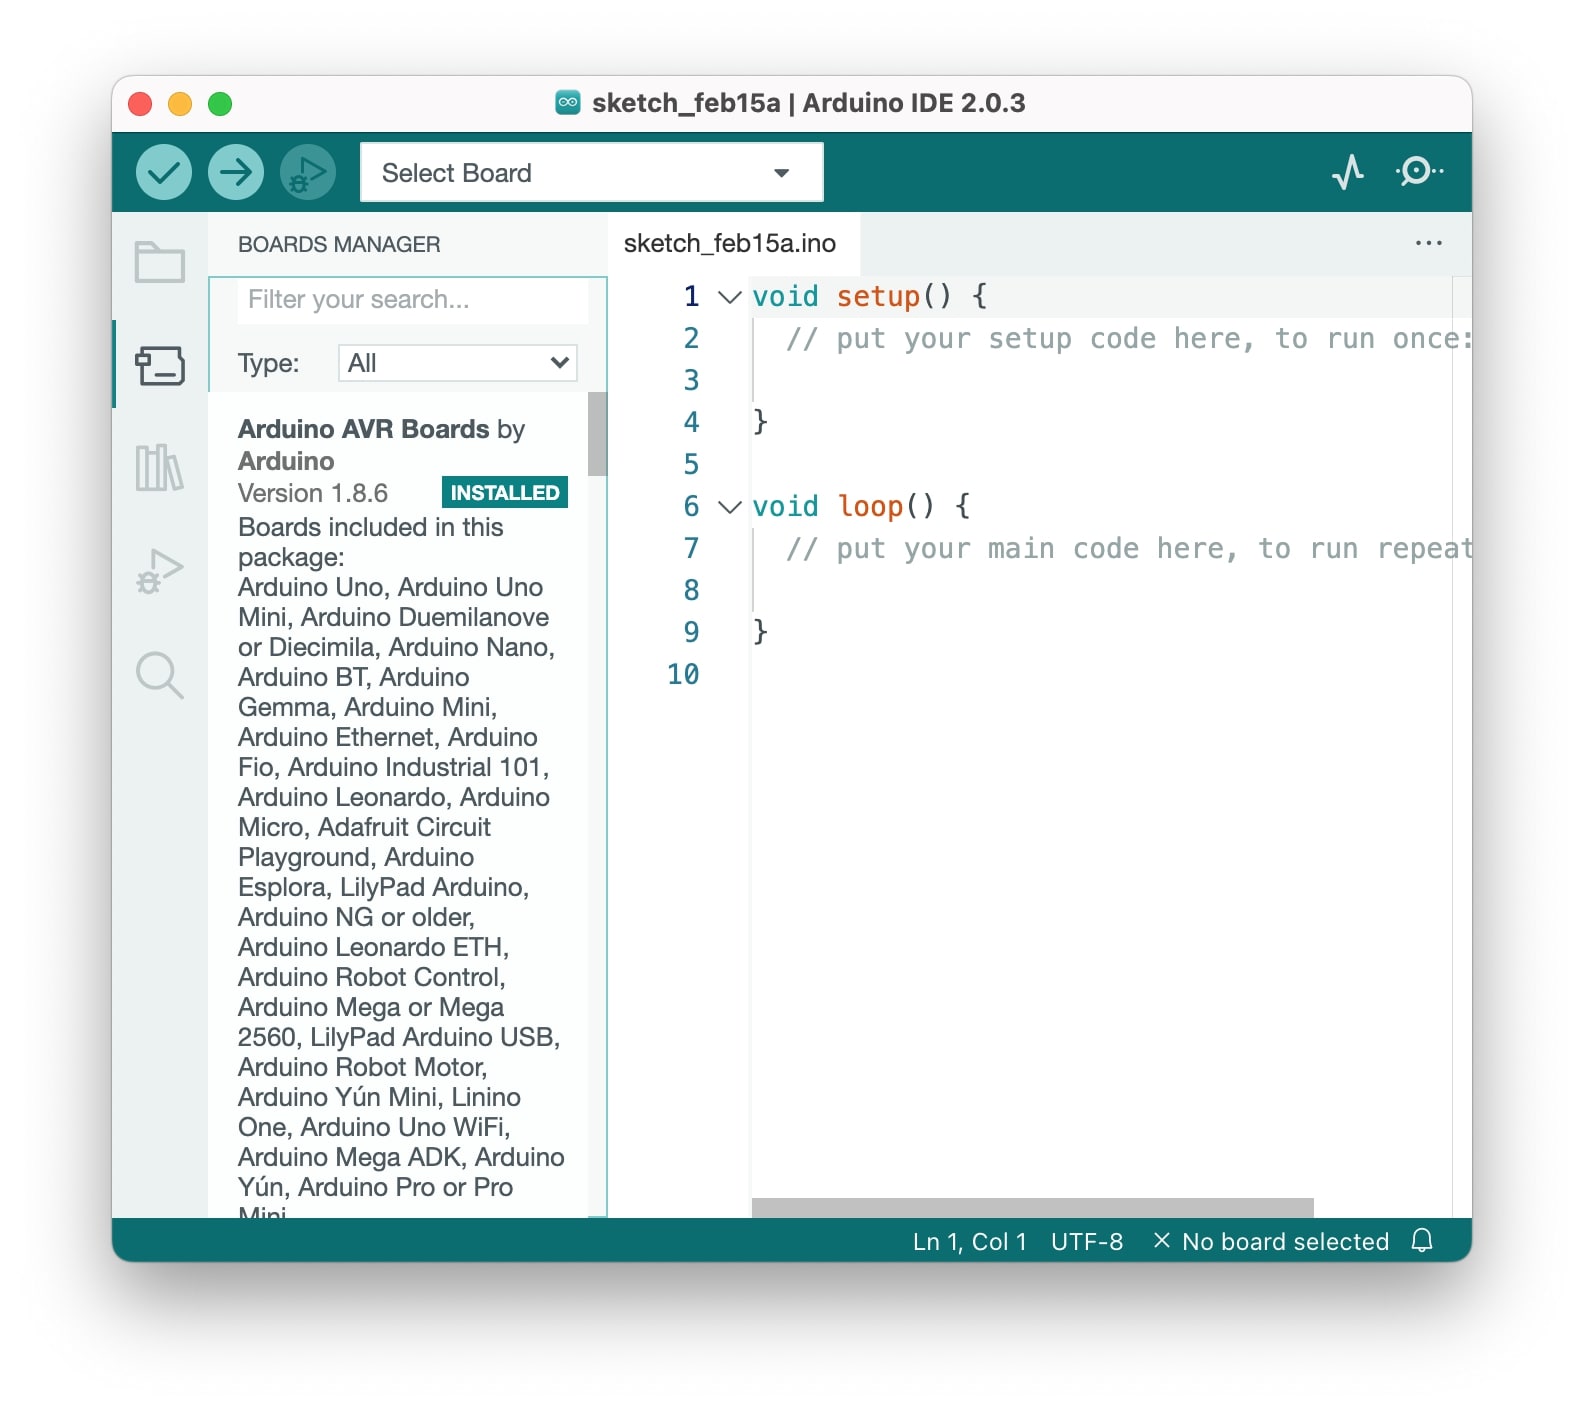
Before start using the Barduino I needed to set up the Barduino board in Arduino IDE. To do that I went to preferences and add an additional board. We do have a Barduino repository in GIT, so I copy/pasted the URL of it along with the Boards Manager URLs and installed both microcontroller managers in Arduino IDE.
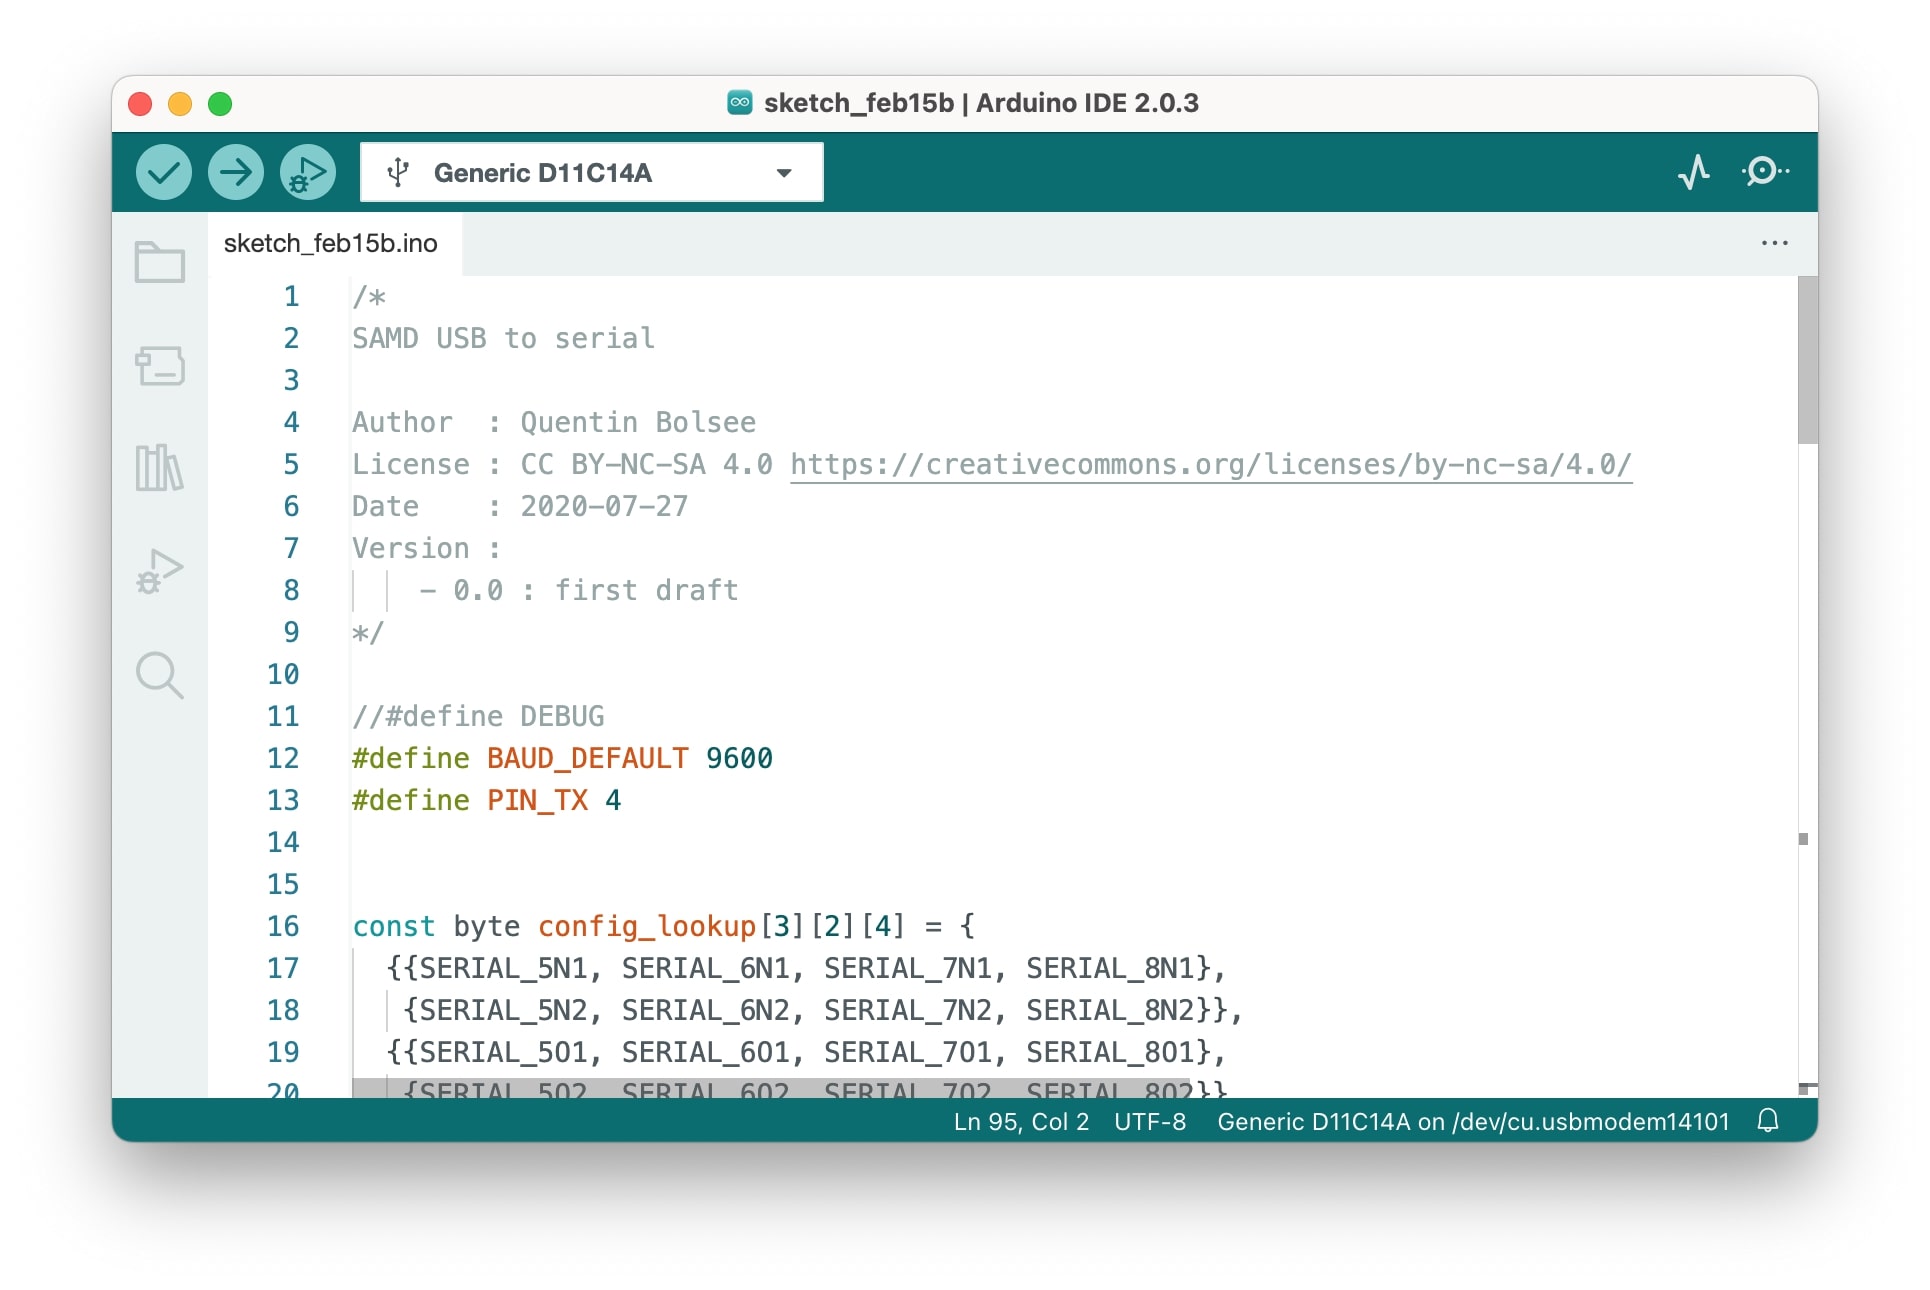
Note: When we have new boards we need to pre-program them because the boards don't know how to talk with the computer. With Barduino, SAMD 11 doesn't know how to talk to the USB, so we define a boot loader that sets up the initial configuration of the microcontroller so that SAMD 11 can understand what is a USB and communicate with the computer.
Setting up the serial port
In order for the computer to know how to communicate with Arduino I needed to tell it that it should be using a serial port - Generic D11C14A (SAMD11 USB port).
Making SAMD 11 blink
By using one of the Arduino's examples I could easily control a led blinking. I simply updated the code to map the pin to the correct one on my board. In SAMD 11 the led pin is the number 2.
In this code, we have 2 functions (that are simplified but usually based in C++/C):
The void setup() says that whatever is inside of it runs once, in this case, we are saying that the PIN 2 is the OUTPUT with the function "pinMode(2, OUTPUT);", and this information stays forever (until we have a different code sent to SAMD 11), it's not checked again.
The pinMode() function is used to configure a specific pin to behave either as an input or an output.
Then we have another function (functions are a set of procedures we can call with a simple line) the void loop(), as the name says it is doing a loop, so it's continuously running, a function we need to be able to see status changes through time.
In this case, we have a digitalWrite() function that is used to write a HIGH or a LOW value to a digital pin. In this case to light on or off the LED.
The other function we have is the delay() which simply states how long it waits until it reads the next line of code.
We this code we are simply saying that the digital pin number 2 is going to be an output and then we say that the same pin is going to be on for 1 second and then off for another second, making the effect of blinking!
Making ESP32 and SAMD 11 speak the same language
To make the ESP32 blink we needed first to upload a code to SAMD11 so that they can understand each other (serial protocol). Basically, we need booth microcontrollers to speak the same language when they read and receive data. We need to do this because SAMD 11 can talk to the USB but ESP32 can't, so SAMD 11 makes the bridge and we can use ESP32.
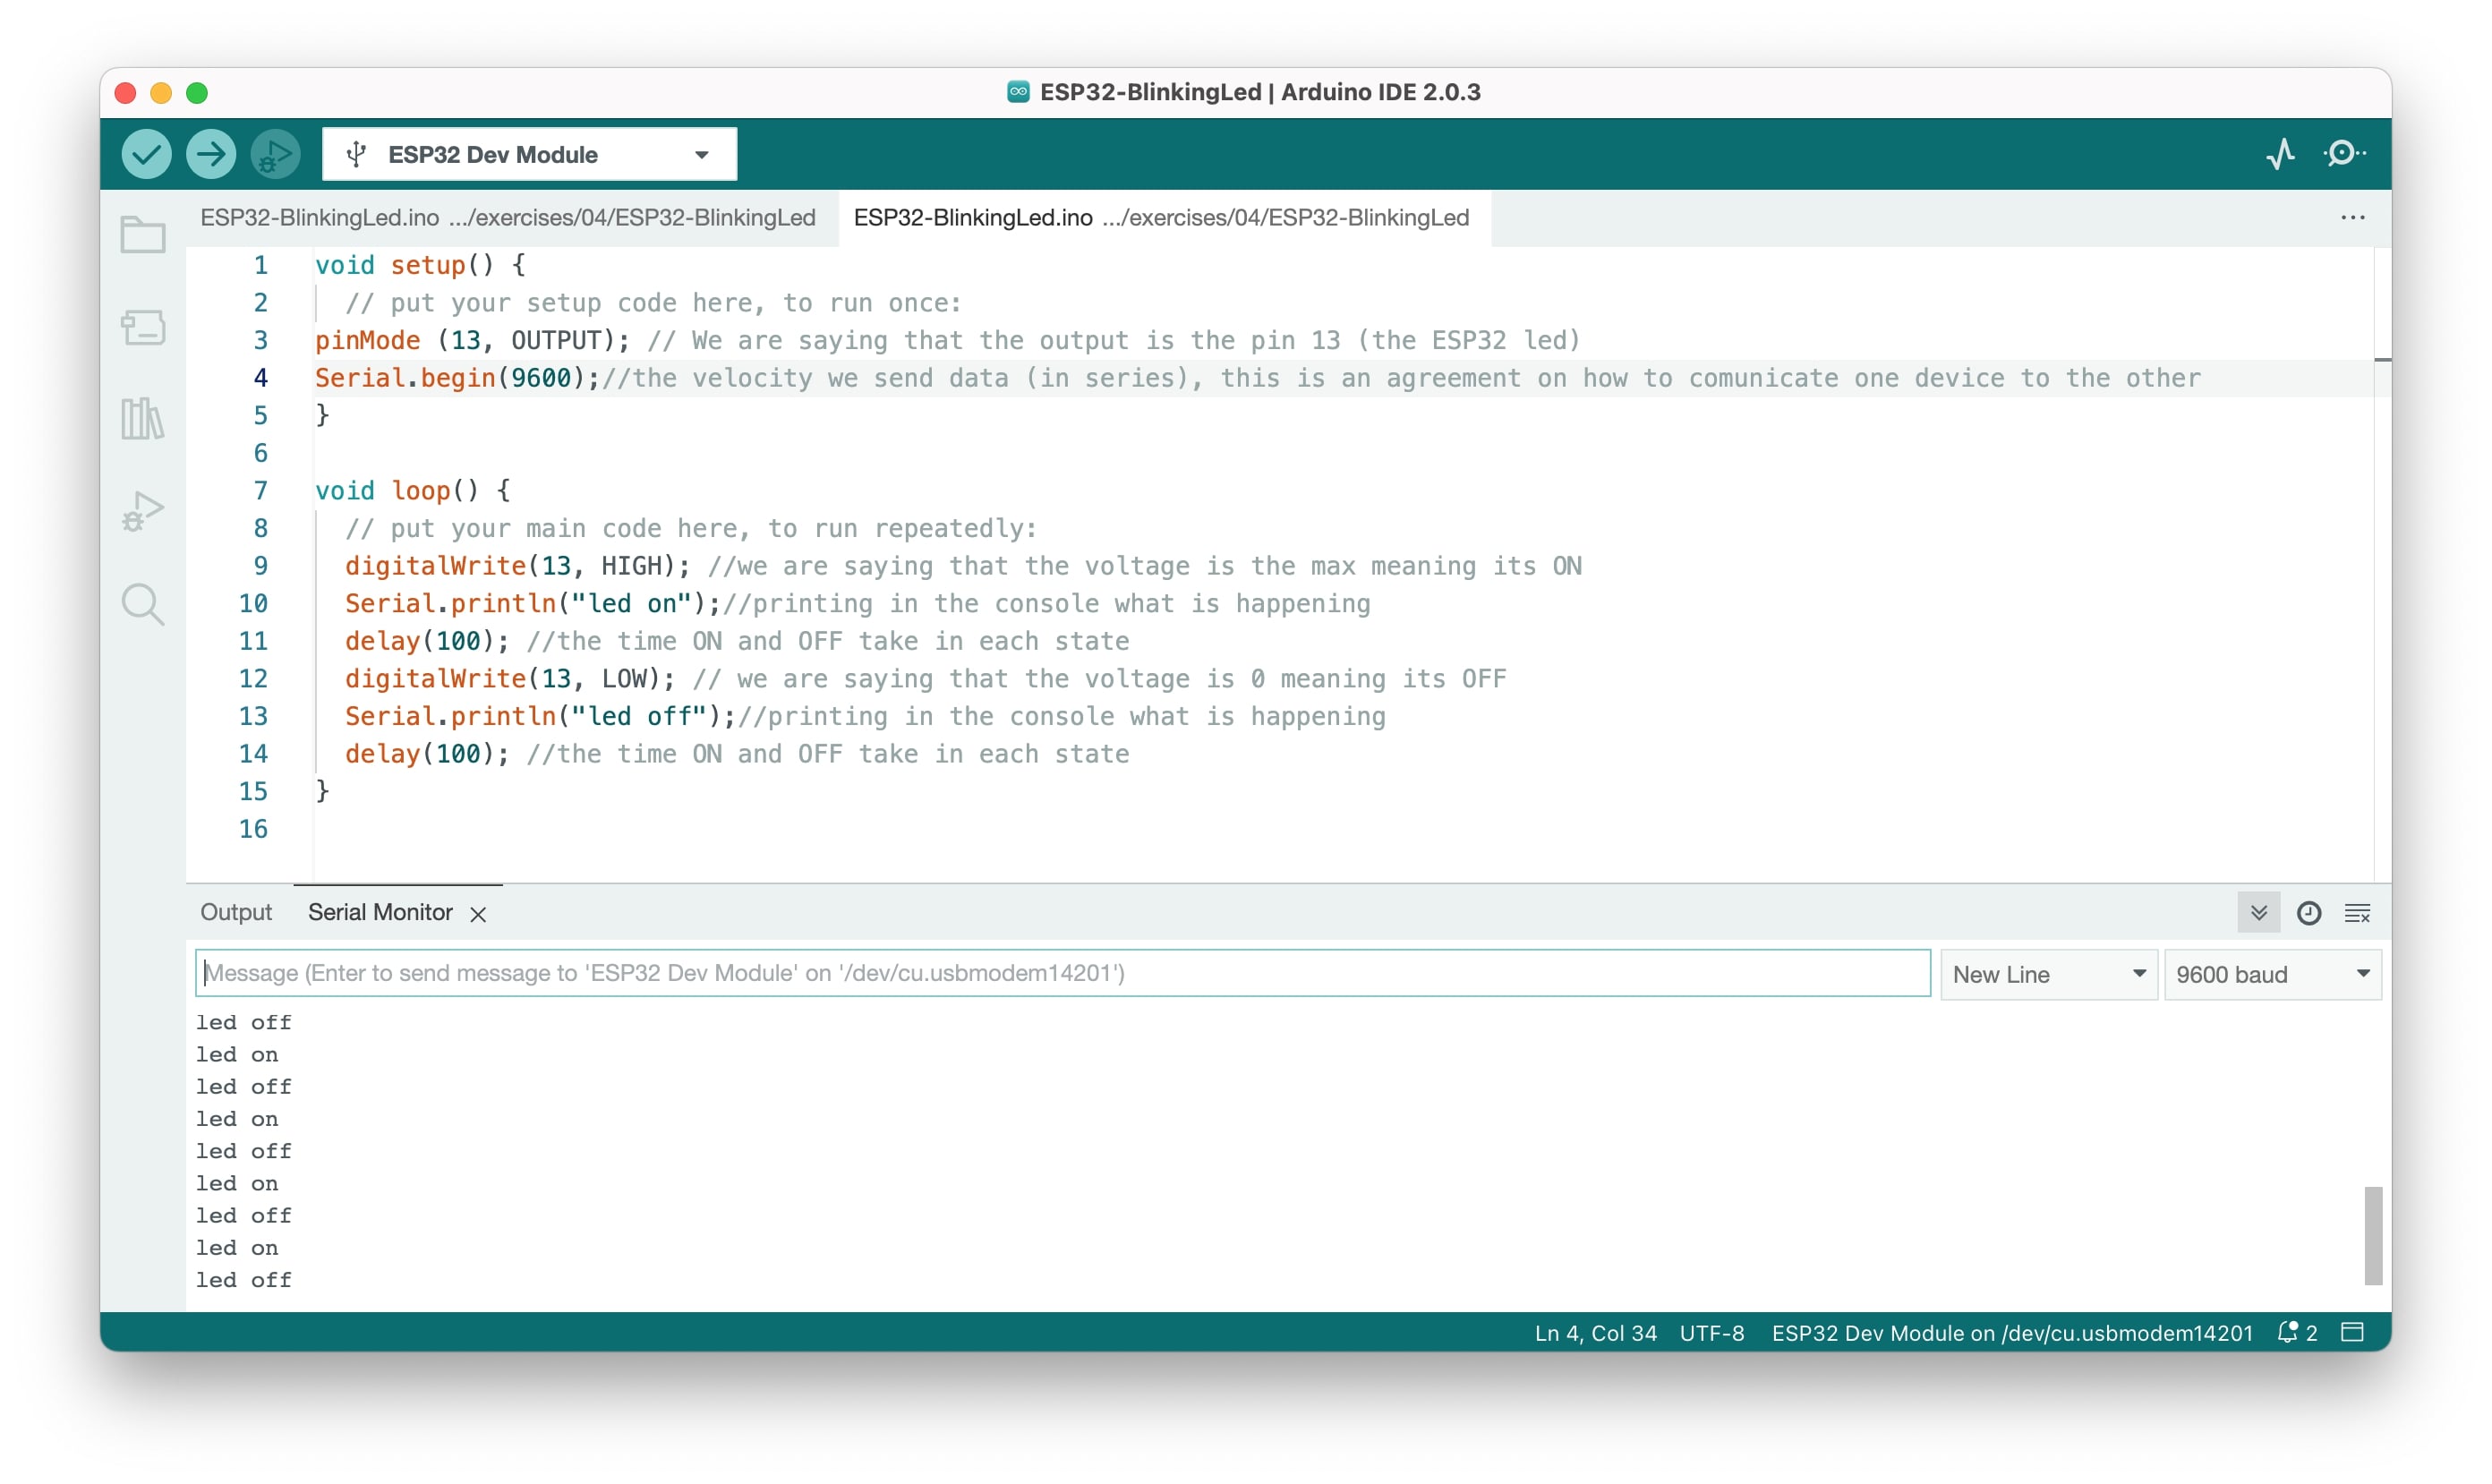
Making ESP32 blink
Once SAMD 11 was ready I changed the board (under tools) to the ESP32 one and made sure the serial port communication was correct and on. I then used the same example of the blink again, but this time used a faster blink (100ms) and updated the pin to the 13 - the led in the ESP32. In this case, I also added the function Serial.println() which allows me to see in the serial monitor what happening.
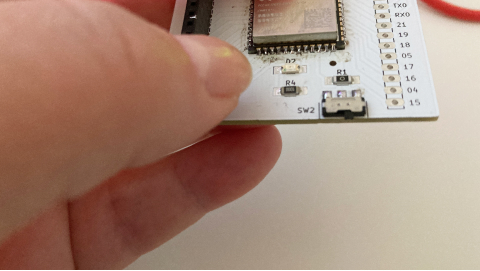
ESP32 programing mode
One important thing to know about the ESP 32 is that to send code the microcontroller needs to be in programming mode. We can do this by changing the switch at the bottom of the board. When it is on the left side it means it is in programming mode, so it is ready to receive the code, if we turn it to the right it is just playing the code. We also need to press the reset button so that the microcontroller realizes there is a new code inside.
Testing assumptions
I wanted to see if it was possible to blink both LEDs at the same time, so after I have the blinking working for the ESP32 I changed the board to use the SAMD 11 again, added the initial code, and send it to the board (in this example in the ESP32 and SAMD 11 blinking delay was 0,5 seconds).
ESP32 was running the previously sent code while I was adding the code to SAMD 11. Once the code was sent, both LEDs were blinking. What happens is that if I wanted to send code again to the ESP32 I needed to delete the current one in SAMD 11 and add back the code that allows ESP32 to communicate to the computer through SAMD 11.
So we can indeed have 2 codes running at the same time if the ESP32 doesn't need to be updated with new code, this might come useful as we can use the capacity of both microcontrollers.
The biggest learning in the group work is that using the same architecture allows us to have a really vast range of microcontrollers to choose from depending on which functionalities we need. Also, microcontrollers can be simple or complex, that will depend on the user expertise and the purpose of the project.
In regards to the architecture of ESP32 it's important to mention that there is a big variety of ESP32 microcontrollers and it's important to check the manufacturer's recommendations when it comes to handling voltage and so on for the different pin sections and functionalities.
There were a few acronymous I didn't know what they meant so I went to check the meaning and that really helped me to understand the potential of ESP32. It seems there are a lot of functionalities that I can use in my final project, such as RF, and the touch sensor, of course, I will need also to convert analog to digital - ADC and will be using memory and so on. So I am quite excited to explore electronics further!
When it comes to setting up the Barduino board and trying out the led pins, it seemed quite straightforward forward but I got to understand better the microcontroller ESP32 after reading the documentation. I feel I need some more information about the concepts of electricity and voltage and so on, but I am sure we will learn this later on!