What is CAD (computer-aided design)?
Computer-aided design is the usage of computers to help design objects in a more efficient and optimized way. Meaning we can reduce errors in the object design and so on (for example weak junctions). CAD is done in software for modeling such as Rhino, Fusion 360, and Blender among others. For CAM (computer-aided manufacturing) we will always need CAD..
Evaluating 2D Software
2D software works in 2 dimensions: width and height. 2D software can create and manipulate both, vectors and pixels. Some software is more powerful for vectors (Illustrator), others for pixels (Photoshop). Nowadays some software allows manipulating both in a comfortable way (Figma). It's important to mention that there are different color models to work with in the 2D software. When working for digital the most common are RGB, and HEX and for printing CMYK is the more common.
Inkscape
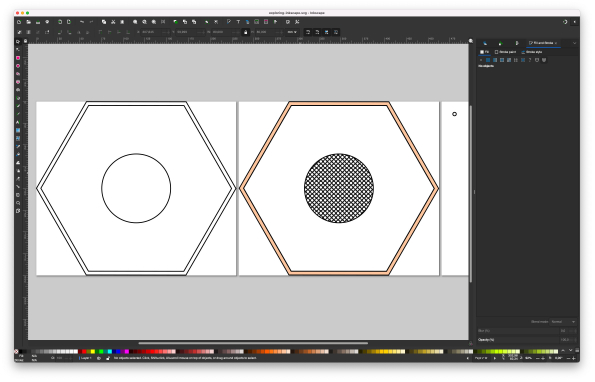
Inkscape is a free, open-source graphic editor (vectorial software). My first impression is that the interface is very similar to Illustrator so I assumed everything worked more or less the same. To try out the software I wanted to design my initial idea for my final project.
I was happily surprised I could add multiple pages to Inkscape working area. I followed a tutorial to do it. Even thoughtt I expected things to work as in Illustrator, it is not Illustrator so I was happy that when I hovered over the icons I could see the tooltips explaining what each thing does. I found that the placement of color swatches on the bottom was not intuitive.
I used a video tutorial to learn patterns and a tutorial for boolean operations. It was quite simple. It was also quite easy to find video tutorials and the manual, which also seems quite clear.
I had a big frustration thoughtt: the dimensions of my objects and elements kept changing, so for example, I set the stroke to 1mm and if I changed the size of the object it changed as well. This was quite challenging...
The vectorial file formats Inkscape exports are SVG and PDF. Those formats work quite well for digital fabrication machines. It seems like it actually has a very nice potential to work graphics!
Figma
Figma is a collaborative interface design tool. It has been growing a lot in the past few years and its development is based on the user's feedback (at least until very recently until Adobe bought it), it has a really strong community. Also, there are many templates to use for free that members of the community share. It is free for education and for individuals (up to 3 projects).
It has a very simple interface (it's familiar). Figma is a software focused on interface design, so it's not suitable for print if we are looking for professional art direction. It has been developing some features that allow adding filters to photography and so on but very far away from Photoshop (it is also not Figam's purpose). I have been working with it for around 3 years, so I assumed I was fast and knew my way around...
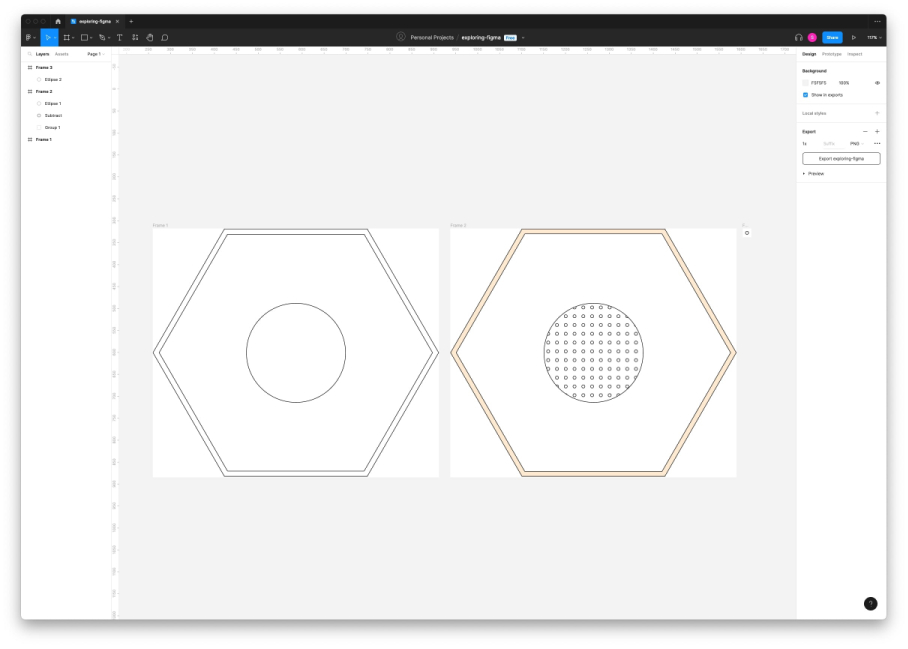
So I went ahead and did the exact same exercise that I did in Inkscape. All the layers are on the left side and the commands to work with are on the right side. I am using it in pixels so I wanted to change to mm and I realized that Figma doesn't have this option! The good thing is that there are a ton of plugins so I went to get one that allowed me to work in mm.
Then I wanted to create a hexagon so I grabbed a polygon and updated the sides (also needed to check how it was done, was not immediate). Once I got it, it was time to create a pattern and again I needed to check a tutorial. Figma also exports in SVG and PDF.
Even thought I work with Figma a lot, I actually don't know things as well as I assumed. I also got really frustrated by Figma not having cm/mm unit (something I never noticed before because I usually work only in pixels). I guess my biggest learning here is that by on one hand, software specialize in doing something really well, so it will always more powerful if used for what it is intended. Another learning is that we never know everything. In the end we need to always adapt, meaning choosing the right software for what we want to to.
Evaluating 3D Software
3D software works with points located in space: x, y, z (width, height and depth). In 3D software we can work with MESHES and NURBS.
A MESH is created with vertices, edges, faces, polygons and surfaces - these compose the object, it means all the object is defined by points, therefore easy for a machine to have the information it needs when for example printing an object in 3D. We can subdivide MESHES to have more points or simplify them to have less points.
A NURB is a line created by the interpolation of points, its a smooth line. Its hard to control the points, therefore hard to fabricate.
In 3D software we can have 2 types of files: STLwhich is a MESH file format that can only do triangular faces, it's lightweight and it was one of the first formats and a OBJ which allows to save textures too.
In 3D software we can work with parameters - parametric design, meaning we can define a set of parameters (numbers) that belong to objects. With parametric design we can create relationships between objects, sizes, measures and so on, so when we need to update measurements its much easier because everything is connected. Not all 3D software have this capability. It is possible to do parametric design in Rhino (using grasshopper), Fusion 360 and Blender.
Rhino
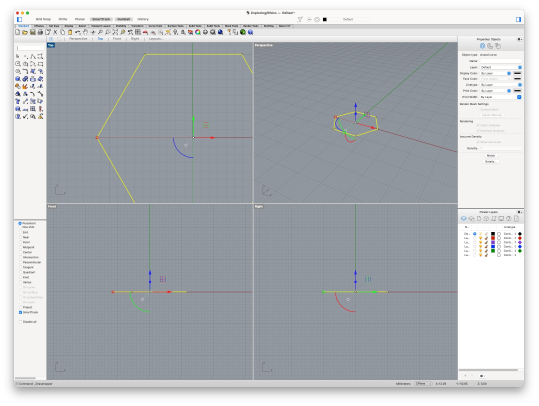
In Rhino we can use NURBS for modeling. Rhino uses grasshopper to do parametric design. My first idea was to model the same 2D object in Rhino but I got really frustrated. I did enjoy having the windows to start with the top, right, perspective and front view. I did manage to add a hexagon to the space but then I wanted to try with grasshopper and I started to lose motivation when I simply couldn't undo an action.
I do understand the principle of using grasshopper for parametric design, it seems to be really powerful for complex structures.
Some positive things are the "command" input to type, the tabs on top that give us an overview of everything. There is also the gumball that helps us rotate our object(s) in the axis. We can control faces or edges individually.
My conclusion is that is one day I want to do something very complex in terms of structure, this is probably the software to go. At the moment I envision a very simple object so I don't think is wise to invest my time in Rhino. Besides its a commercial software (paid).
Fusion 360
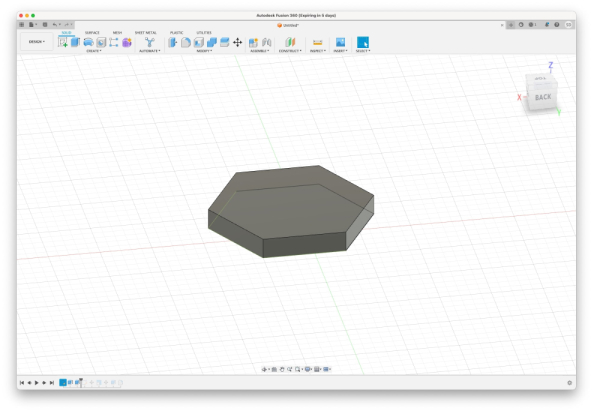
In Fusion 360 I started to design using the sketch function in "solid" item. First I worked in 2D and only when the sketch was ready I moved to 3D. In Fusion we can use parametric design by using components and constraining them to each other or to measurements. One good thing of Fusion 360 is that is has a "history" feature that allows you to go back in time.
One con of Fusion 360 is that we can only work with 10 files open at the time, depending on the project, that can be quite limiting. It is also a commercial software (paid), thought it works well with the machines.
To explore Fusion 360 I decided to continue with the same initial thought, to create a 3D hexagon.
My first impression is that the interface looks super spacious and clean. It was very intuitive to use the interface and I quickly did a hexagon and extruded it. I also made the components parametric in the hexagon face, making all sides depend on each other - meaning that if I change a side, all the other will change too. I really liked the possibility to go back in time and I definitely would use this software for simple things.
Blender
Blender is an open-source software that has developed incredibly since it started (the first time I used it it was 20 years go). It is a very powerful tool for modeling and especially animation. It is used by many professionals and studios. Everybody is free to use it, distribute it and improve it by contributing to the code (phyton). The interface might seem overwhelming at first but it can actually be optimized for each individual's projects and/or preferences.
Blender works with modes, so for example in "edit mode" you have access to the vertices, edges and faces of an object and you can manipulate it. Blender parametric design works with using "modifiers". Modifiers, as the name says allows us to modify our objects using values, we can also have more than one modifier in an object and link objects to each others.
Blender has been pushing NODES a lot (geometry NODES, a little bit like grasshopper for Rhino). At some point everything in Blender can be controlled by NODES. Blender is also very powerful when it comes to render, it can even allow real time renders using EEVE (render engine).
I wanted to explore Blender the same way I explored the others. It has been 20 years since I used it and it seems a bit different in terms on capabilities and how to actually do 3D.
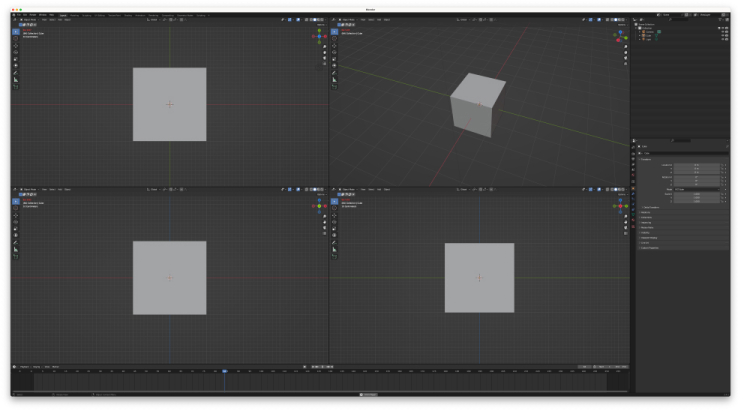
I wanted to build a hexagon like I did in the other software and I started by dividing my screen like I used to do, soon I realized this setting was already created in the "layout" tab. I then couldn't find any mesh that was a hexagon, so I searched for a tutorial - and this is when I realized all tutorials are using the geometric NODES. I quickly understood even thought I had learned Blender before this would be a whole new journey, so I decided to go with Blender as a software to work with!
Modeling with 2D and 3D
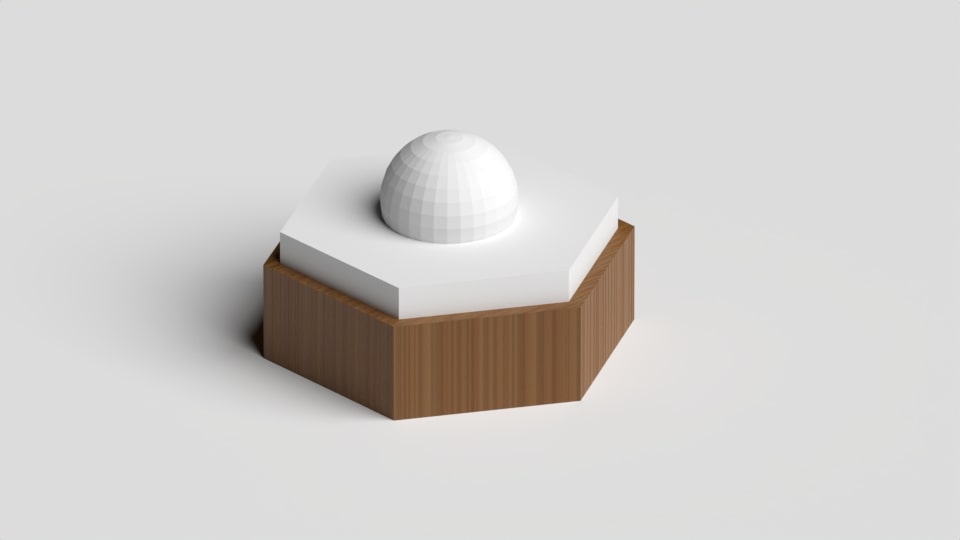
To work 2D I choose Figma (read the process explained above here), even thought it doesn't have units in centimeters, it does have plugins. For 3D I wanted to model my final project object which is an hexagon shaped objects with a wooden bottom and a white plastic top, it works as a box where inside I will put the sensors. In the middle it also has a speaker, so I needed to make sure the objects is built for that.
Creating a hexagon shape
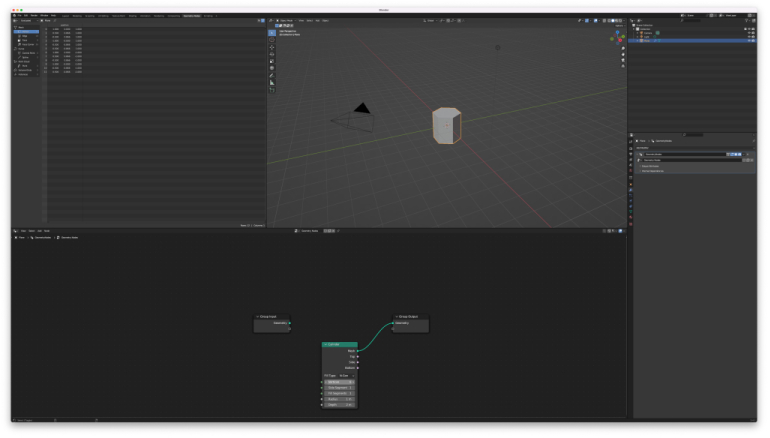
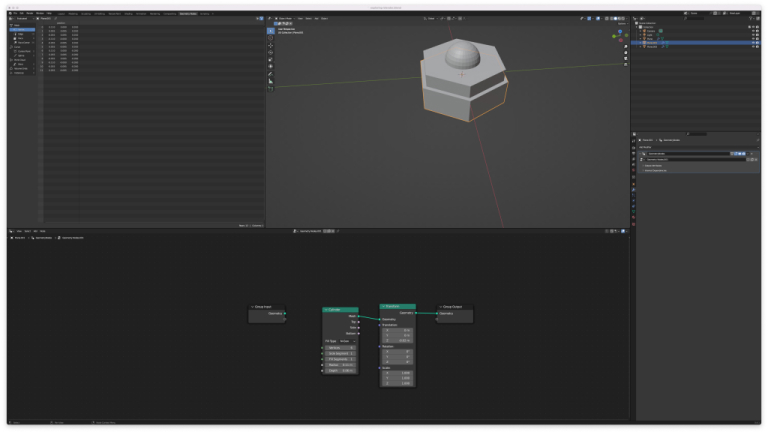
To create my object I started to work on the tab of "geometric NODES" that has the perspective view on the top- right, the vectors coordinates on the left and on the bottom the NODES area. In the perspective view I added a MESH place to start with, then in the NODES window I added a cylinder and changed the number of vertices so they were 6.
Adding the correct measurements
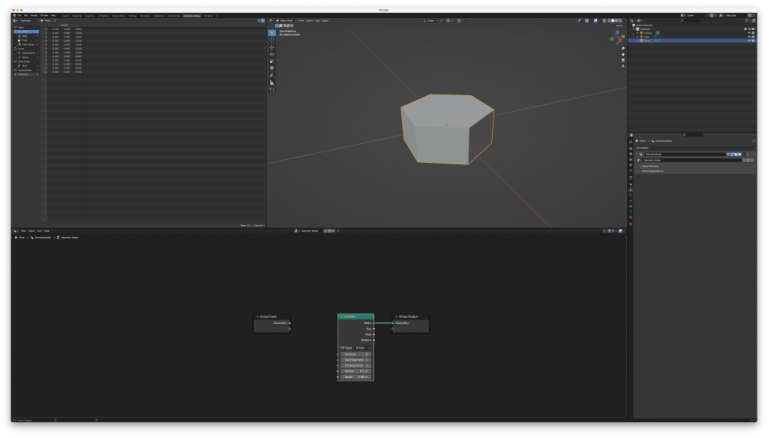
Based on my initial sketches I wanted to add specific measurements to the object so I added a transform NODE (tutorial) and update those. I then struggle a but to understand how to add another object, I was confused if I would duplicate the nodes (which didn't seem to work), I then realized I had to do the same process again, so in the perspective view, added a plane and then a cylinder in the NODES view. I quickly understood that this is more or less the foundation of working with geometric NODES - we start an object in the perspective and then only work in the NODES panel. I then updated all the measurements.
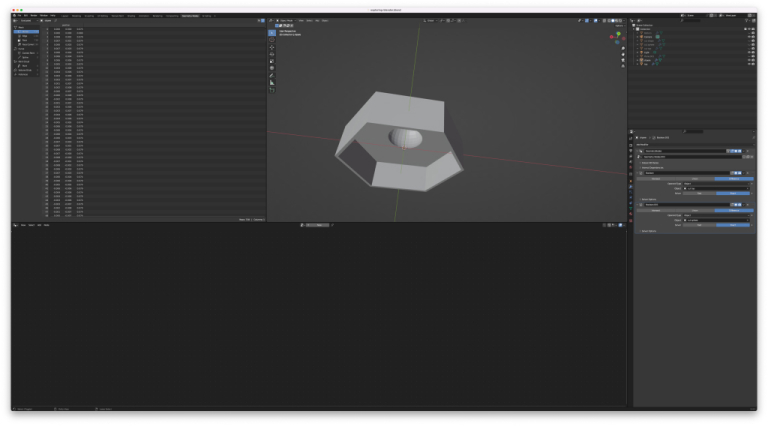
Adding the speaker sphere
I continued to work my object and wanted to had a sphere on the center of the object so that it acted as a the speaker part of my object, I did the same process exactly as the previous objects, except this time I used an UV sphere instead of a cylinder.
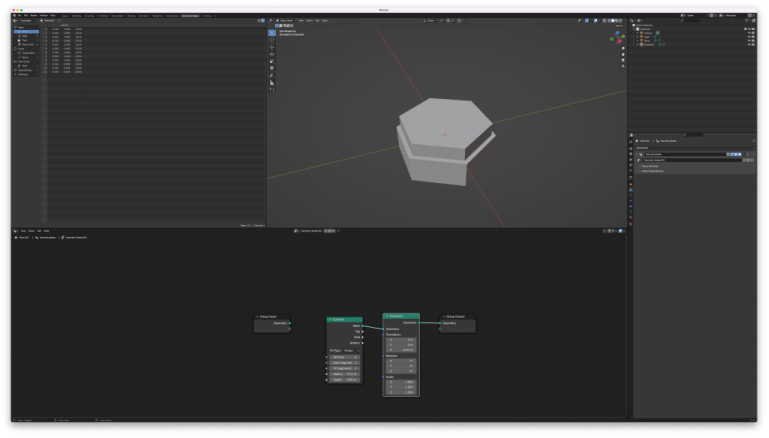
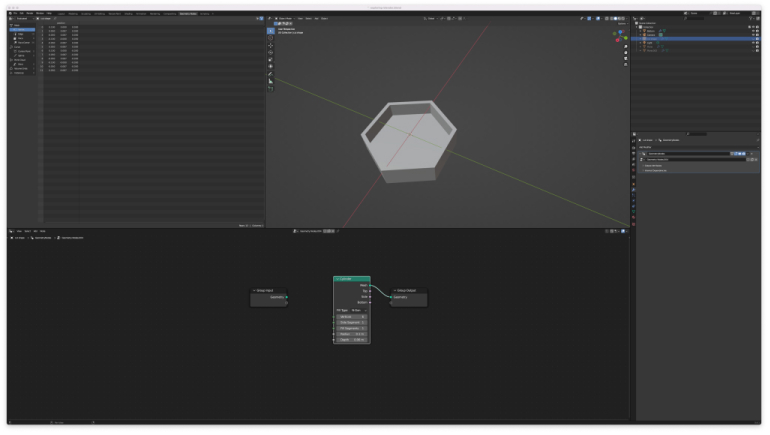
boolean operations - Bottom
To do the boolean operation (difference between 2 objects) I checked a (tutorial). I went ahead and added other hexagon, but this time smaller. By using the modifier window on the right side and adding a new modifier: bollearn we can then intersect, unify of make the difference between 2 objects.
boolean operations - Top
To cut the top shape I did the same process as mentioned above. I found out that renaming the objects is really usefulto understand what object I am applying the boolean operation.
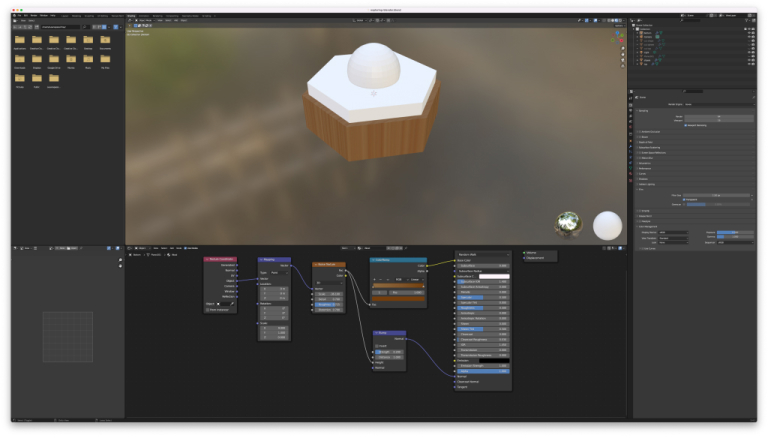
Adding textures
To add wood texture to the bottom of my object I followed a tutorial that teaches how to apply wood using NODES. I started by creating a "Set Material" NODE, and giving a new name to the new material. Then I moved to the tab "Shading" to play with the parameters that make the object to look like it's wood.
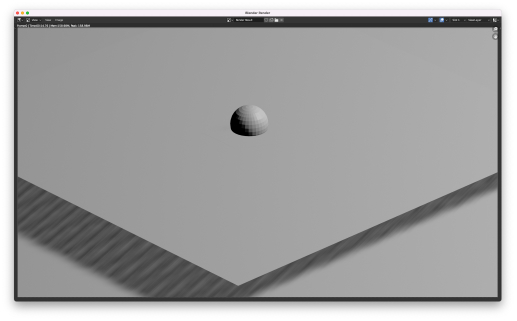
Rendering
Rendering was a bit more challenging that I expected, I struggled to understand why my first renders were not showing my object completely. After a while I understood what I was showing were the planes I used for boolean operations, so I went to the layers and disabled them for the camera. Then it worked out well! I saw a tutorial to help me rendering, I used the "cycle" engine to render because it gives a nicer feel with the shadows and materials. I also played a bit with the position of the camera and light so it made a nice hero shoot.
Animation
To animate my model, I did a very simple animation of the top of my object moving up and rotating a little to see inside. I just used the timeline to add keyframes by selecting "i" in the view area and then selecting "add keyframe". I did thoughtt not checked the output and ended up exporting 60 PNG frames that took me 3h to render... At the end I changed to MPg4. It exported a MKV file, so I used an online converter from mkv to MPG4.
While using both Inkscape and Figma I kept reminding of Illustrator and how powerful that software is for working vectors in mm, cm and pixels. It's also expensive for the usage I would give it. So even thoughtt Inkscape seems promissing I prefer to explore the capabilities of Figma to work in 2D. I have also learned that the best format for vectors will be and SVG and/or PDF (so that is what I will work with if needed).
Regarding 3D initially I thoughtt I would be super comfortable in Blender, but actually it has changed a lot, so it's a very interesting challenge for me to get back to it and work with parametric design in it. From all the 3D software I tried, it still feels the most intuitive to me.
The biggest lesson from this week is that we can't know everything of a software even if we work a lot with it and that software evolve a lot and fast!